
The other day, as I was checking my Twitter feed while having my coffee (what, you don’t do that?), I came across a tweet from a friend that caught my eye.
This friend was highly recommending a post that sounded really interesting. I was happy to read it quietly before starting my work day… Except that when I followed the link, all I found instead of this nice article was a blank page with an error message: “404, page not found”.
I can’t tell you how disappointed I was.

How frustrating to get an error message or a blank page when you’re surfing on the Internet, don’t you think?
I’m sure that you too, in your life as an Internet user, have already crossed the path of a 404 error, which often materializes as the message “404 not found” or “page not found”.
These errors are a real pain for the Internet user, but also for us who create or manage WordPress websites.
The good news is that there are solutions to correct them! And because we’re nice, we’ve put together a complete guide to learn how to fix a WordPress 404 error.
Let’s hava look at what this post will be about:
Overview
Create a professional WordPress website with the help of our dedicated guide on the subject.

What is a 404 error?
A 404 error is the HTTP code returned by the server when you try to access a web page that no longer exists. It often occurs when you click on a link to a page that has been deleted, renamed, or moved. The URL is therefore no longer valid.
404 is a classic of the Internet: it has given rise to a number of memes and animated gifs.

If you want to know more about WordPress errors, read our complete guide about how to solve them easily.
Getting a WordPress 404 error is common after a website redesign because old pages may no longer exist but are still listed on search engines or other websites.
They will also appear if you change the slug of a post as this will change the permalink (the URL).
This will also be the case if you change the permalink structure on your website: for example, if your post URLs look like my-website.com/category/my-post-title and you want to replace them by my-website.com/my-post-title.
Finally, a WordPress 404 error often appear due to simple typing errors: if a user types in mywebsite.com/blob instead of mywebsite.com/blog, BANG! 404 error!
As you can see, 404 errors are an integral part of Internet life, and can hardly be avoided.
The problem, for webmasters, is that 404 errors have a negative impact:
- On your users’ experience: nothing is more frustrating than clicking on a link and landing on an error message!
- On your SEO: when search engine robots crawl the links to your website, they will detect each of these 404 errors. If a website generates many errors of this type, its SEO will be penalized, especially if there are backlinks to a page that cannot be found.
To learn more about the impact of 404 errors on your SEO, you can watch this video of Matt Cutts, a very influential expert in the world of SEO.
How to detect a WordPress 404 error on your website?
How can you tell if your website is suffering from a WordPress 404 error? Here are several complementary methods.
With Google Search Console
You can use Google Search Console to view the pages that Google has found on your website that cannot be found.
Google Search Console is a very useful tool that allows, among other things, to monitor the ranking of your website in the Google index and the errors encountered.
In your Search Console, go to the “Coverage” report, and click on the “Excluded” tab. In the list below the graph, click on the line “Not found (404)” to access the details of the not found pages detected by Google.
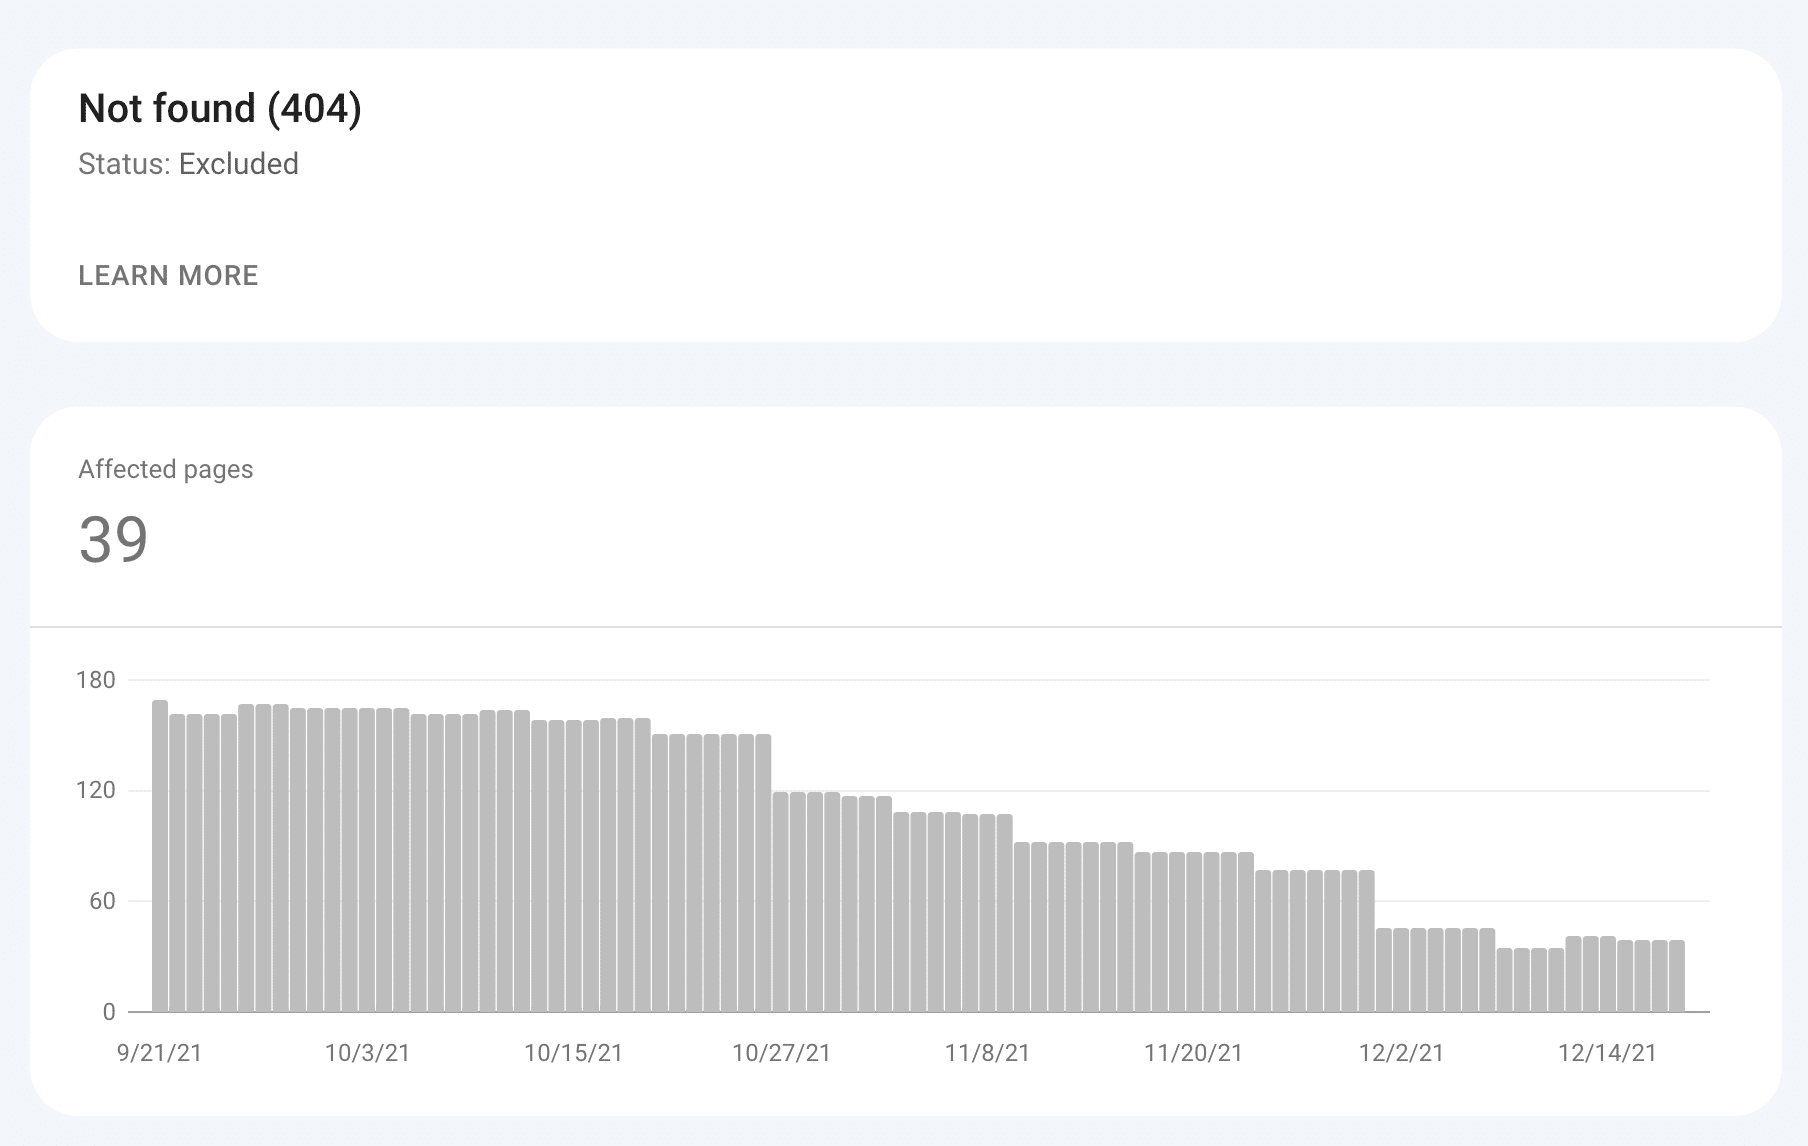
You will be able to see in detail all the pages of your website that are known to Google but are not found. In the example above, there is work to do!
Check out Google Search Console:

With the Broken Link Checker plugin
The Broken Link Checker plugin will scan your website and detect “broken” links. Useful if you have a lot of pages or posts and internal links.
After installing this plugin, go to Tools > Broken Links.
You will immediately see if your website has links to pages or images that cannot be found, whether they are links to your own website or to third-party websites.
Then, the plugin will regularly scan your website, and warn you as soon as a link to a page that cannot be found is detected!

However, beware of this plugin because it is quite resource intensive. If you notice any slowdowns on your website, deactivate it once you have finished tracking 404 errors.
Download the Broken Link Checker plugin:
With the Redirection plugin

We’ll talk about it again, but the Redirection plugin is the number one ally in your fight against WordPress 404 errors.
Here is our dedicated post about redirects where we go deeper into the settings of the Redirection plugin.
This plugin allows you to keep a history of all 404 errors encountered on your website, by “real” users, but also (and especially!) by the robots that scan your website regularly (including Google’s robots).
If you have just installed it, it will not have any history yet. But if you visit the Tools > Redirection page after 24 hours, you will probably see errors in the “404s” tab.
The list displays the following elements for each error:
- The date of detection.
- The Source URL i.e. the URL not found which is the error
- The User Agent being the person or the robot that detected the error (in the example below, they are robots).
- The IP address.

This tool is therefore very useful to detect all the pages that cannot be found generated by your WordPress website.
Please note that many of the errors listed by Redirection are not “real” 404 errors, and therefore do not need to be corrected. For example, if bots are trying to access protected files in your theme or installed plugins (even if they don’t exist), it will appear here in the list: it’s up to you to sort them out.
Download the Redirection plugin:
Which method to choose to detect a WordPress 404 error?
You may wonder which of these 3 methods you should choose to monitor every WordPress 404 error on your website?
In my opinion, if you have to use only one, it is Google Search Console.
Because anyway, it is necessary to use this tool to monitor the indexation and the positioning of your website in the Google index.
Google Search Console compiles in one place all the “flaws” of your website: 404 errors, pages poorly optimized for mobile devices, pages too slow to load…
But the ideal is to combine Google Search Console and the Redirection plugin.
Indeed, the latter will allow you to know if certain errors are frequently encountered by “real” Internet users. It can also provide interesting information on the behavior of users of your website (input errors…).
How to set up a customized 404 page?
Now that you have detected which pages are causing a WordPress 404 error on your website, what should you do?
If it is not already the case, the first thing to do for any self-respecting website owner is to create a customized 404 page, in order to avoid users being confronted with an ugly error page.
The goal is to keep the user on your website, even if he didn’t find the page he was looking for.
Most WordPress themes allow you to create a custom 404 page (some page builders like Elementor also allow it in pro version) and if you can’t do it, you can find many free plugins to do it, like 404page.
With the 404page plugin
Once installed, the 404page plugin will allow you to choose which page of your website will serve as a custom 404 page.
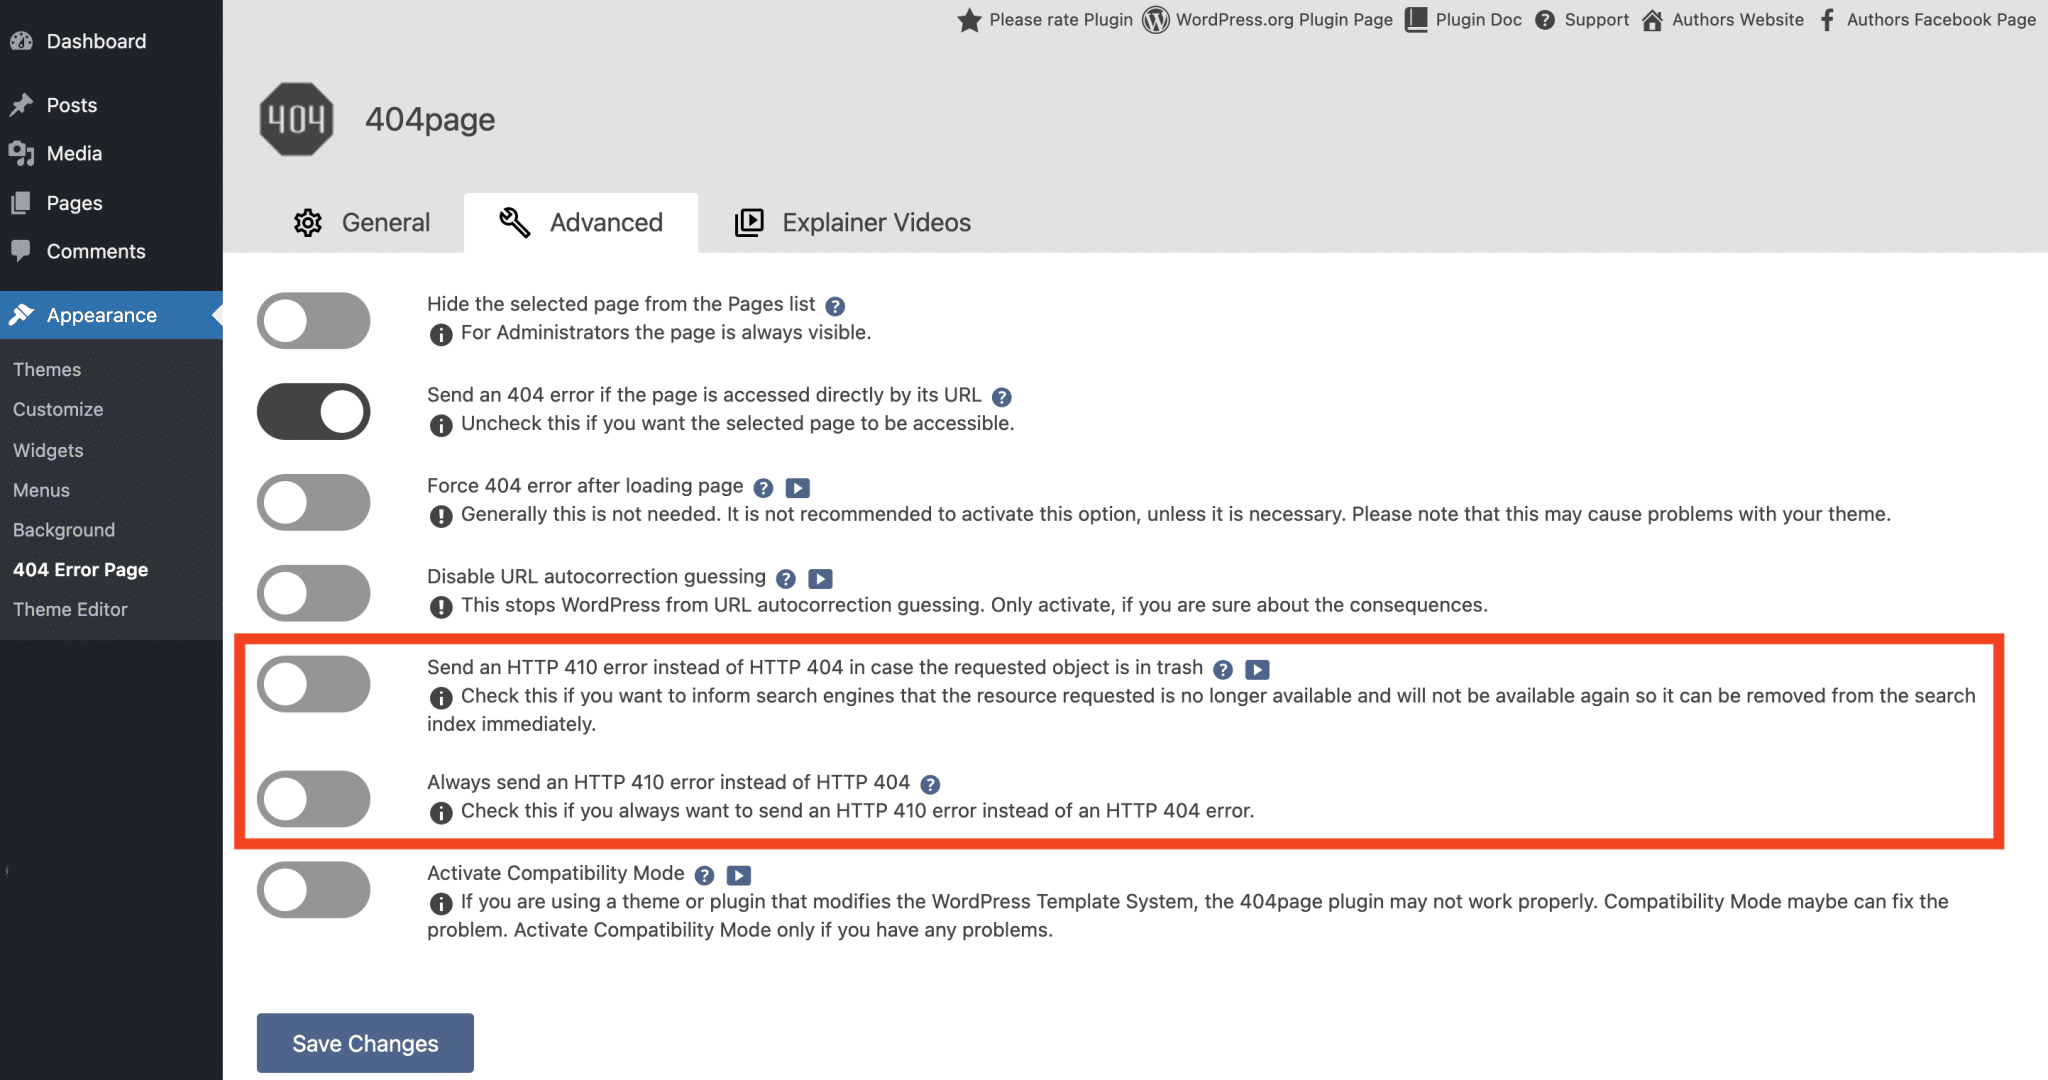
You can also configure a few more technical options, one of which caught my attention in particular: it is to send a 410 error instead of a 404 error when the page you are looking for is in the trash.
The 410 code indicates that the resource is temporarily unavailable but that it has been permanently deleted. This way Google bots will understand that they can deindex this page.
When you create your 404 page, don’t hesitate to integrate some really personalized content: a nice little message, an animated gif, a search engine, a list of the most frequently visited pages… In short, help the user to find the content he is looking for!
Download the 404page plugin:

To see a concrete example, type anything after the WPMarmite URL and validate. You will discover our beautiful 404 page (we are quite proud of it!).
Fix WordPress 404 errors permanently with redirects
Now that you know how to set up a customized 404 page, the work is not finished.
You will now have to roll up your sleeves and remove for good these 404 errors! To do this, you will have to set up redirects.
Indeed, the customized 404 page, if it improves the user experience, does not solve the problem of SEO.
When a web page has been deleted or renamed, Google will continue to try to access it, and the only way to make Google understand that this page no longer exists is to redirect it to a valid page on your site.
For this too, we suggest several solutions.
With the plugin All 404 Redirect to Homepage
If your site is a victim of frequent 404 errors, a radical solution is to opt for this simple plugin: All 404 Redirect to Homepage.
It will allow you to automatically redirect all obsolete or incorrect URLs to a page on your website (usually the homepage).
After installing and activating the plugin, go to the plugin settings.
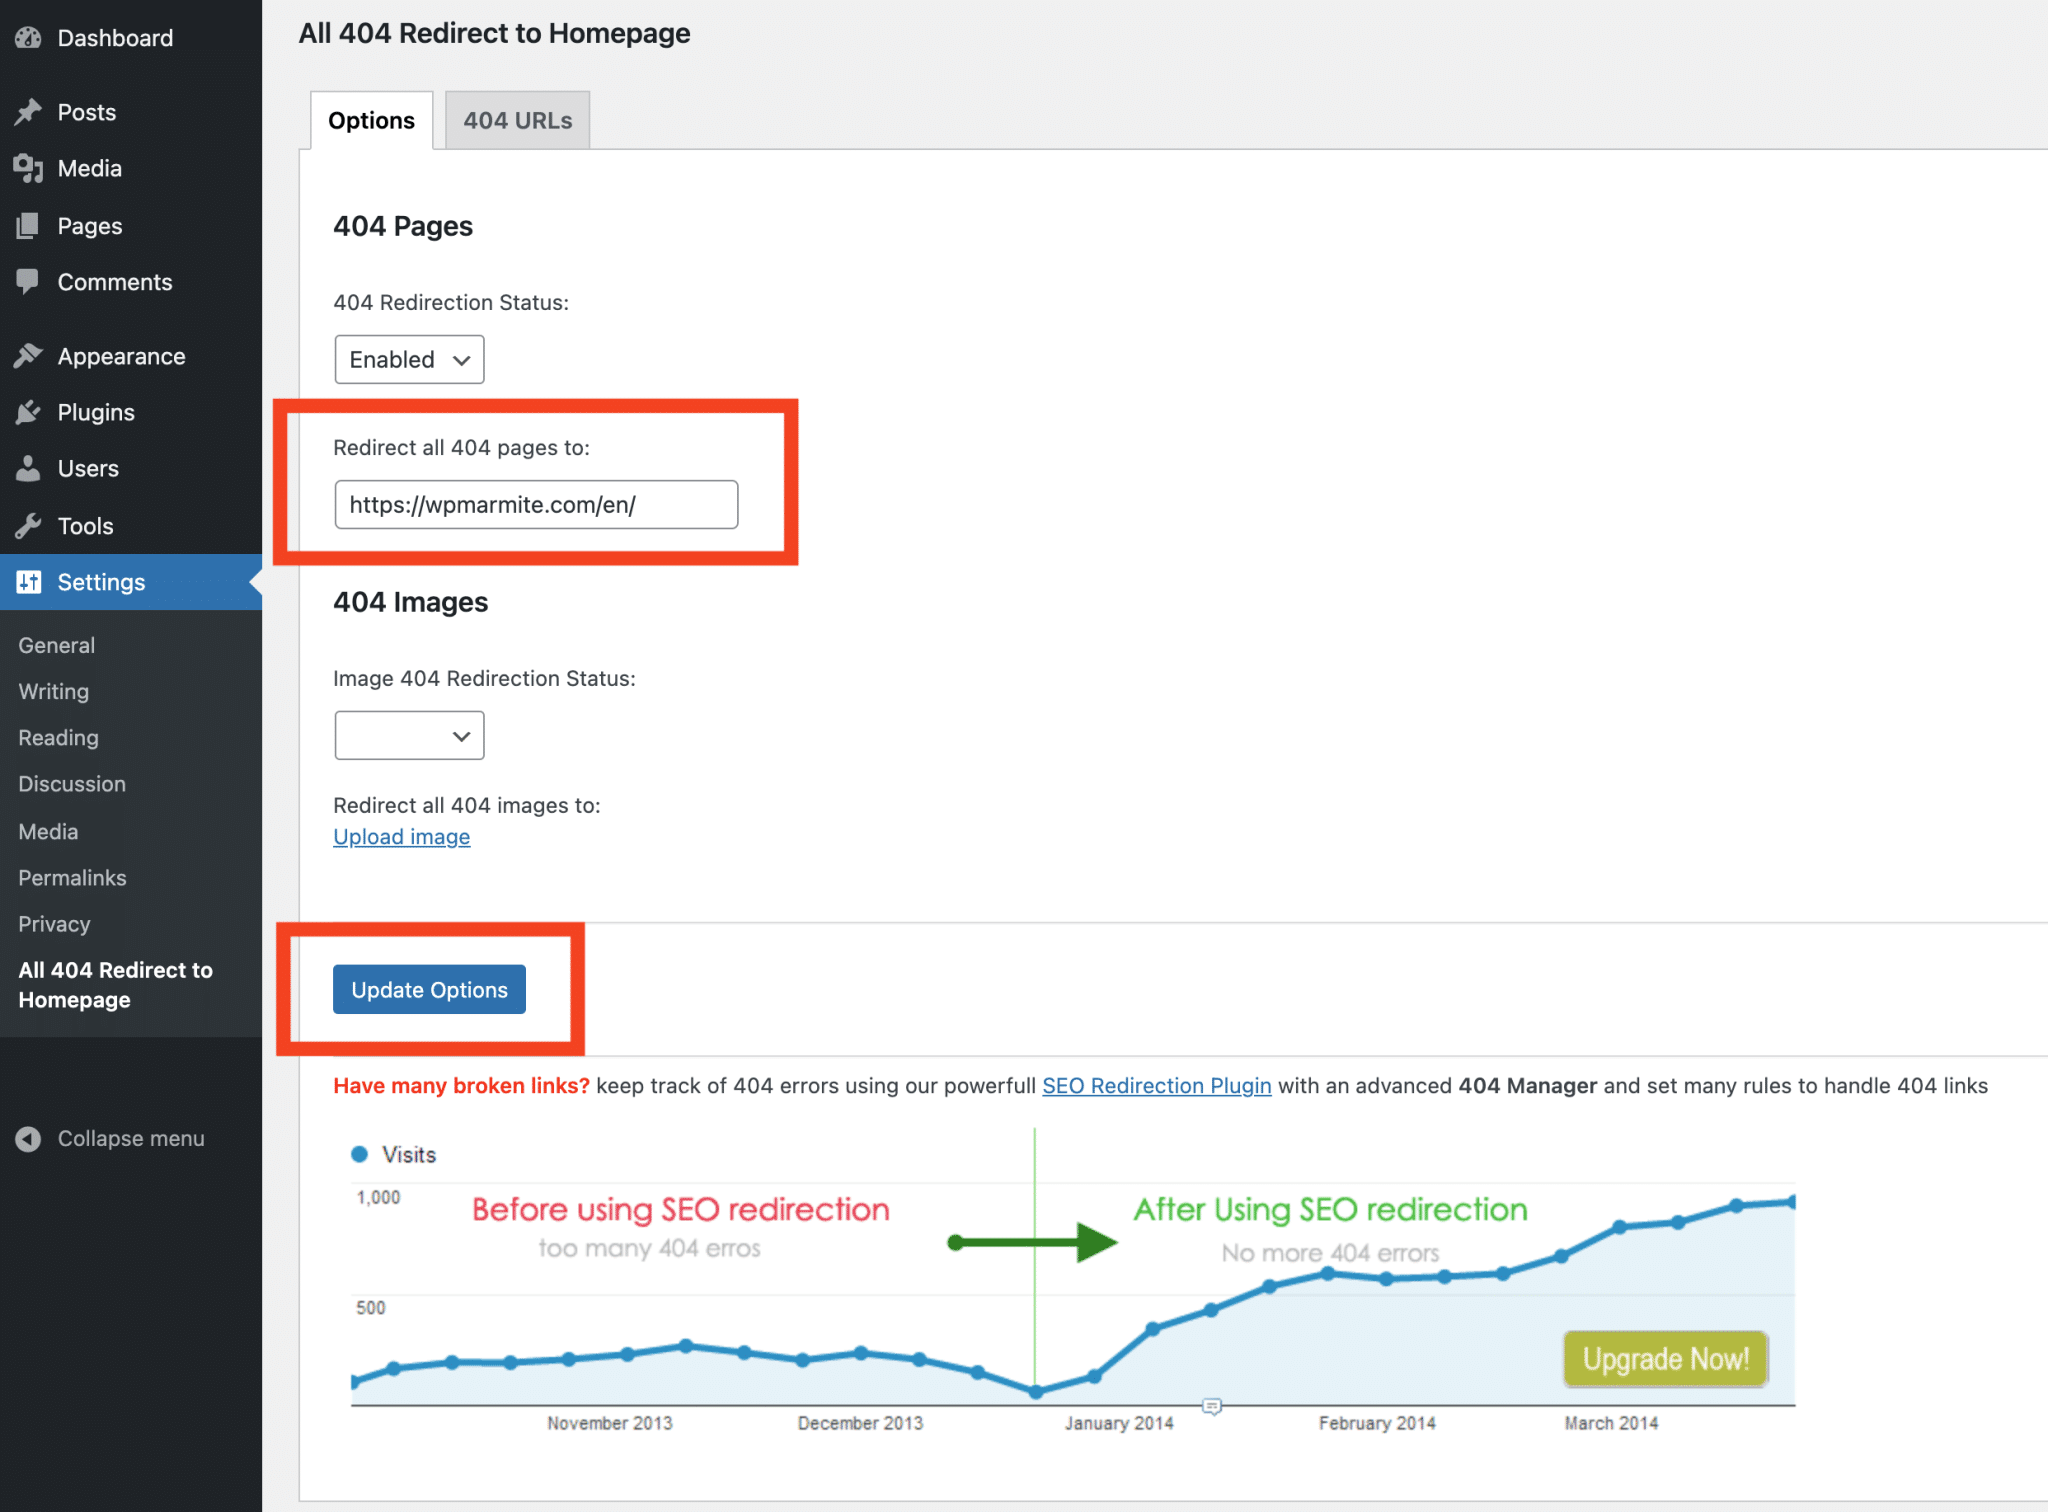
It couldn’t be easier, see below the available options:
- 404 Redirection Status: enable or disable the redirection.
- Redirect all 404 pages to: choose the page to which you will redirect 404 errors (it can be the homepage, or another page of your website).
- Image 404 Redirection Status: enable or disable.
- Redirect all 404 images to: upload the image to which you will redirect the 404 images (if you want to enable it).
Click on the “Update Options” button to save the settings, and you’re done!
To test the effectiveness of the plugin, type the URL of your website in your browser followed by a test text, for example: mywebsite.com/xyz. Normally, you should be redirected to the page chosen previously.
When should you use this plugin?
As you can see, this plugin is efficient, but it is not really a subtle solution.
It will be interesting in some cases:
- If your website generates too many 404 errors and you don’t have time to create redirects for all the obsolete pages.
- If you have completely changed the content of your website (example: change of theme, industry…), but you want to keep the same domain name.
In these situations, the All 404 Redirect to Homepage plugin will allow you not to lose traffic and not to penalize the ranking of your website on search engines.
Of course, if you choose to redirect all WordPress 404 errors to your homepage, it is no longer necessary to create a custom 404 page.
Download the All 404 Redirect to Homepage plugin:
With the Redirection plugin
Redirecting your WordPress 404 errors to the homepage of your website is useful, but it remains a basic solution.
For an Internet user, being “wildly” sent back to the homepage of a website, without explanation, when you thought you were accessing interesting content, is rather disappointing!
If you want to go further and pamper your website visitors, we advise you to set up customized redirects as much as possible.
After a redesign of your website, for example, try to redirect obsolete URLs to new pages dealing with the same subject. Your visitors will thank you, and you will minimize the bounce rate i.e. the proportion of visitors who leave your website from the first page.
For this, we advise you to use the plugin Redirection (we present it to you further up in the post).
As we have seen before, it allows you to trace the history of 404 errors on your website, but as its name indicates it is primarily used to set up… Redirects.
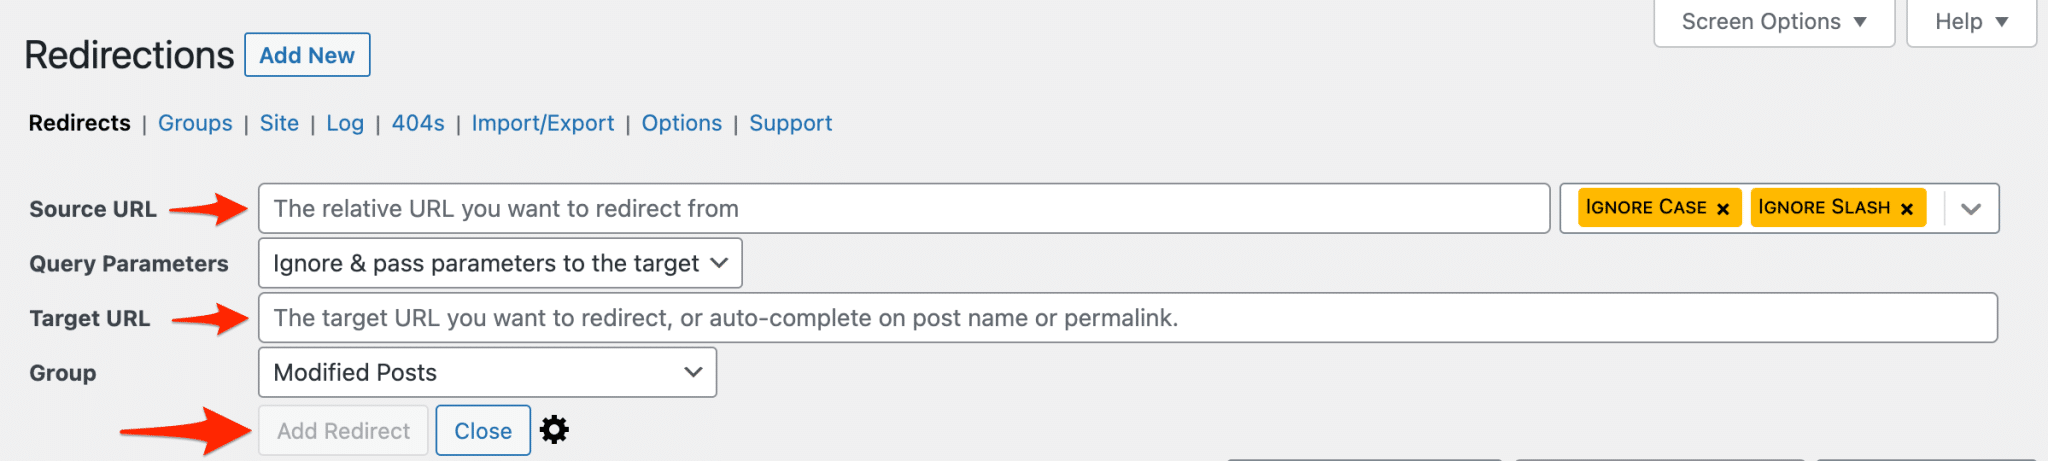
With this plugin, you will be able, for each URL that cannot be found, to define which valid URL the user should be redirected to.
Setting up a redirect has two consequences:
- People clicking on links to pages that can’t be found will be redirected automatically, transparently, to valid pages on the site: good thing for the user experience.
- When Google’s robots (and others) crawl the links to your website, for each redirected page they will receive a 301 code (the encrypted code of a redirect). This allows the search engine to know that this page is obsolete, and to remove it from its index in favor of the new page: good thing for SEO.
Download the Redirection plugin:
Conclusion
You’ve got it (I hope!) ..
Start by monitoring their appearance, especially with Google Search Console.
If you haven’t already done so, create a customized 404 page.
And above all, redirect obsolete URLs to real pages on your website, to improve the user experience and optimize your SEO. For this, the Redirection plugin is your best friend!
And you, are you often confronted with the 404 errors problem?
Do you have any other tips for fixing WordPress 404 errors?
Share your experience in the comments!

Receive the next posts for free and access exclusive resources. More than 20,000 people have done it, why not you?


Continue reading
Articles posted in WordPress TutorialscPanel: Features and how to use this interface for your WordPress site
Need to modify the PHP version of your website? That’s where it happens. Need to create an email address? That’s where it happens too. Need to install an SSL certificate on short notice? Here again. Where? On your WordPress site’s…
How to redesign a WordPress website: the ultimate checklist
Aaah, the redesign of a WordPress website… When you think about the different issues that this mission involves, you usually tend to stress a bit. Who doesn’t dream, in this key moment, of doing a simple Command + Option +…
How to enable two-factor authentication on your WordPress site
A login + a password. Connecting to the WordPress administration interface is very simple, as long as you remember these two elements. From the point of view of the malicious person or robot that wants to access your site, it’s…