

“No, not that. Not now.” That’s what I was telling myself a few days ago. The day was coming to an end, and I thought, “Hey, I could update one of my WordPress sites.”
One click, two clicks, three clicks, and bam, a mess of plugins bursts at me from the screen. Site inaccessible. A little panic attack and then the problem was resolved after about thirty minutes.


In the end, it worked out. But think, I could have avoided all these cold sweats if I had taken the trouble to do my updates locally.
There are a lot of tools for that, including the famous… Local. You may know it under its old name: Local by Flywheel.
The funny thing (or not) is that this software was installed on my computer at the time of the crime (that is, during the update that crashed)…
Acting tough doesn’t always pay off. Well, it serves as a lesson.
To avoid experiencing this at home — and for many other reasons, which you’ll discover in this article — read on. A little spoiler to lure you in: Local is a real nugget.
Overview


What is Local by Flywheel?

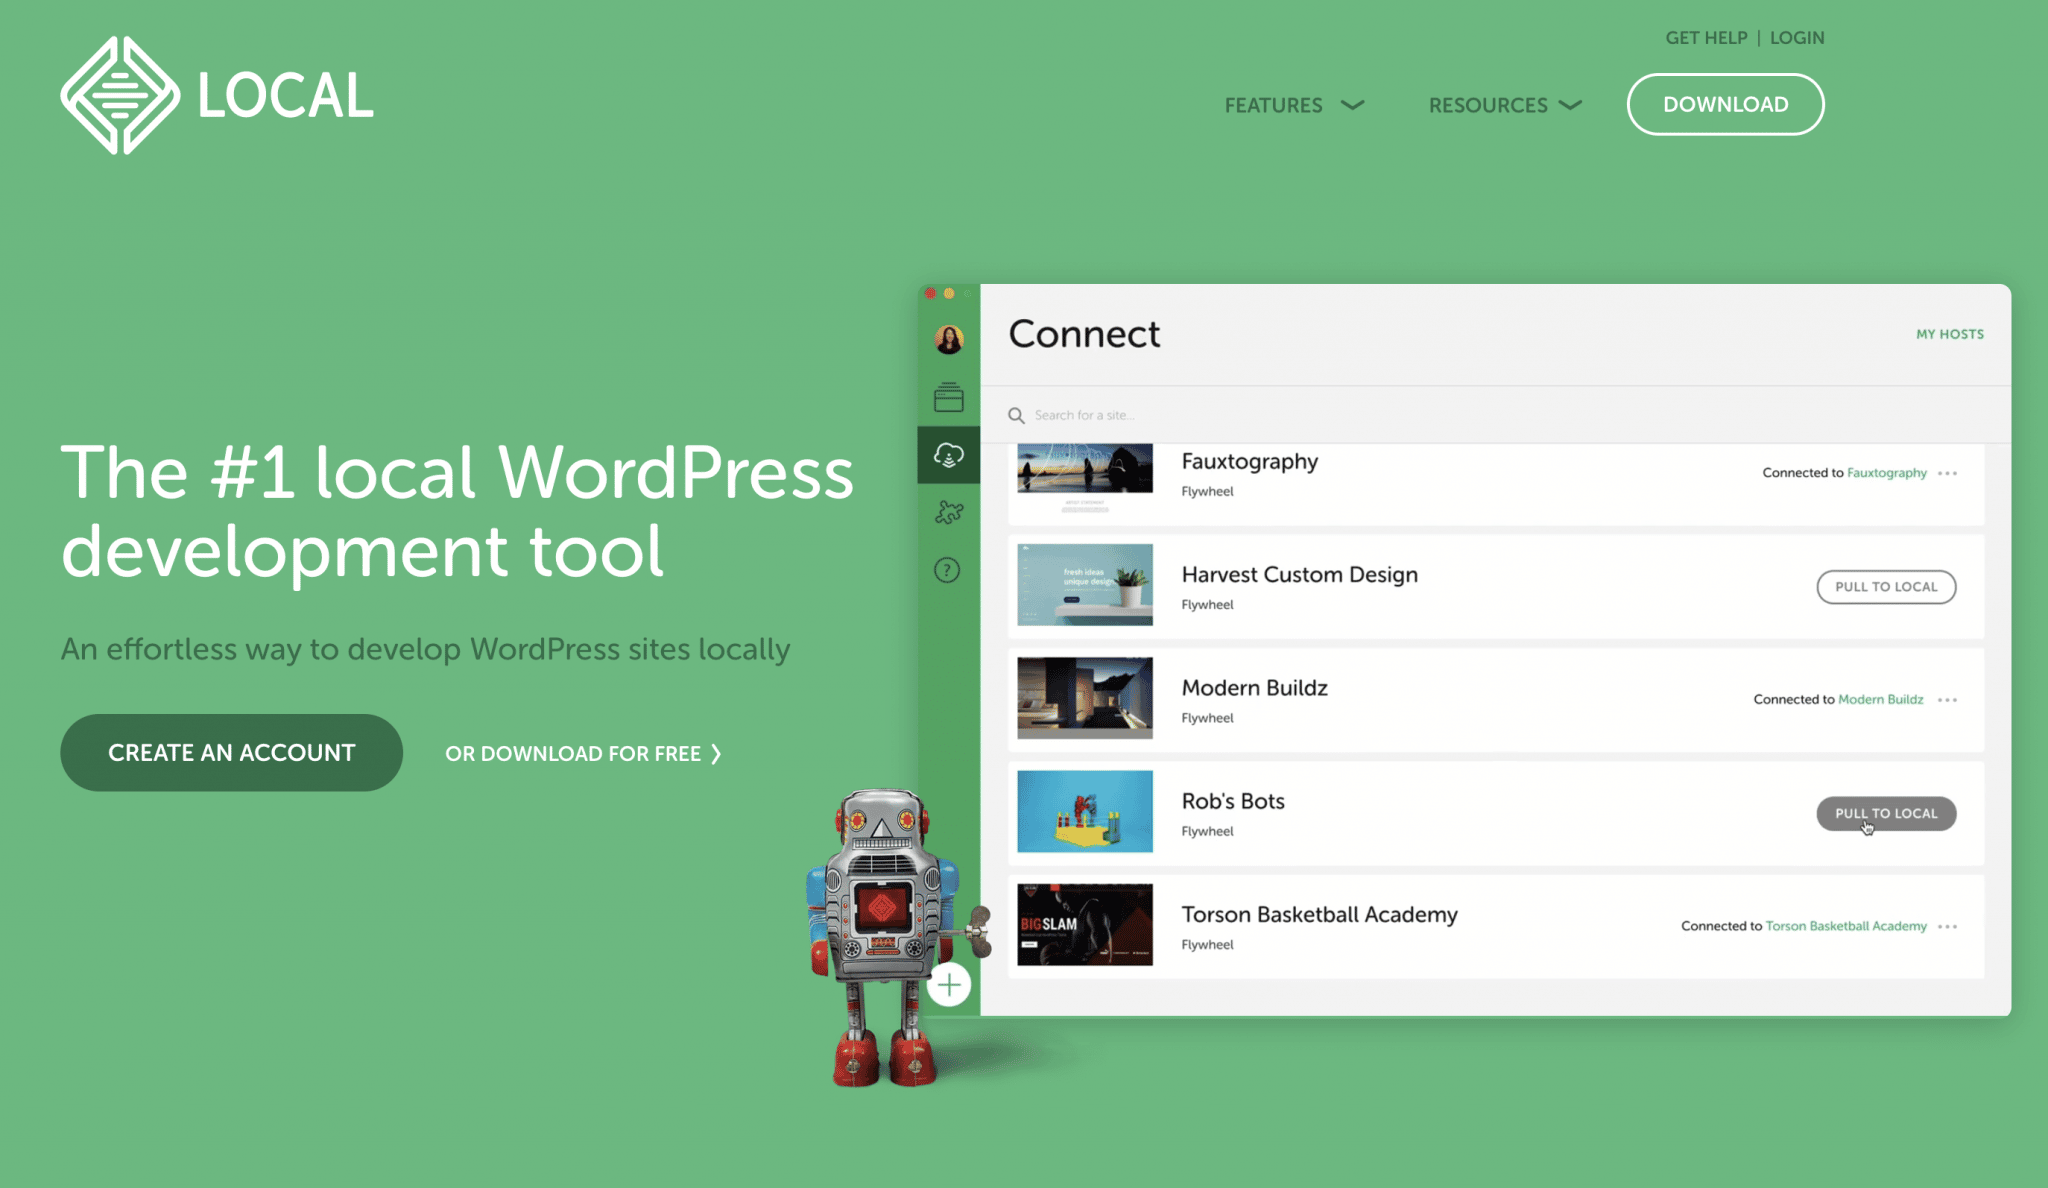
Local is a free local development tool, dedicated to WordPress. It allows you to deploy WordPress websites on your computer in a few clicks, without having to install them on an online hosting server.
Originally launched under the name Pressmatic, the software was acquired by hosting company Flywheel in 2016. The latter then gave it the name Local by Flywheel.
Flywheel was then acquired in June 2019 by WP Engine. In addition, the American web hosting giant has decided to shorten the name of the software by removing the annotation “by Flywheel.”
The tool is now called Local, but you can sometimes still find it under the name Local by Flywheel. All the features of this software have been free since June 2021.
What are the different advantages of Local?
If the free service is part of its success, Local also has many advantages that can seduce developers and webmasters:
- The tool is very easy to use. A few clicks, a few fields to fill in, and you’re done! You can have a functional local site in one minute.
- Its interface is very pleasant and clear.


- Local is very powerful and extensive. It offers advanced features dedicated to developers: SSH and WP-CLI, access to PHP, NGINX, and MySQL log files, the ability to test and debug the sending of emails generated by WordPress, etc.
- Your sites can be saved in the Cloud, via Dropbox or Google Drive.
- Local can be used on a multisite WordPress network.
- You can choose to customize your local environment with the PHP or MySQL version of your choice.
- With Live Links, it is possible to show your local site to your customers and other collaborators, without having to deploy your site online.
- Local is able to generate an SSL certificate to allow you to work in HTTPS.
- Finally, the local development software offers you the possibility to save the configuration of each deployed site (files, database, plugins, theme, pages, articles, settings, etc.) as a template, called Blueprint. This template can be reused each time a new local site is launched, saving a lot of time.
As you can see, there is a lot you can do! And remember: you can take advantage of all these features without paying a cent.
Before I show you how to install and configure Local, I’ll tell you the reasons why you might want to work locally.
Why work locally?
Using a local environment means that your site will be available on your machine only, and not on the Internet. As a result, no one but you will be able to view it.
If you’re wondering, note that WordPress works exactly the same whether it’s deployed locally or online. You won’t notice any difference when you use it.
So why keep your site “private” on your computer? There are several reasons why you might want to develop your site locally (rather than on an online hosting server):
- Create a WordPress site with peace of mind and without stress. A local site is not visible online, so if something goes wrong, there are no negative repercussions. When you are done customizing your site, you can of course migrate it online for people to view.
In addition, designing your site locally saves you some money. If you wish, you can subscribe to a hosting package only when you are ready to move your site online. - Test themes and plugins without risk. In case of conflicts and bugs, no worries, only you will see it. This is very useful when you need to upgrade to the latest major version of WordPress, for example.
- Have a copy of your site in case of hacking or online server crash.
- Correct errors on your online site (provided you have a local copy).
- The local site will often be faster than a site hosted online.
- A local site is accessible and editable without an Internet connection.
Does creating a local WordPress site sound like the right thing for you? Without further ado, find out how to get started with Local (formerly Local by Flywheel).
How to install a WordPress site with Local in five steps
Step 1: Download and install Local
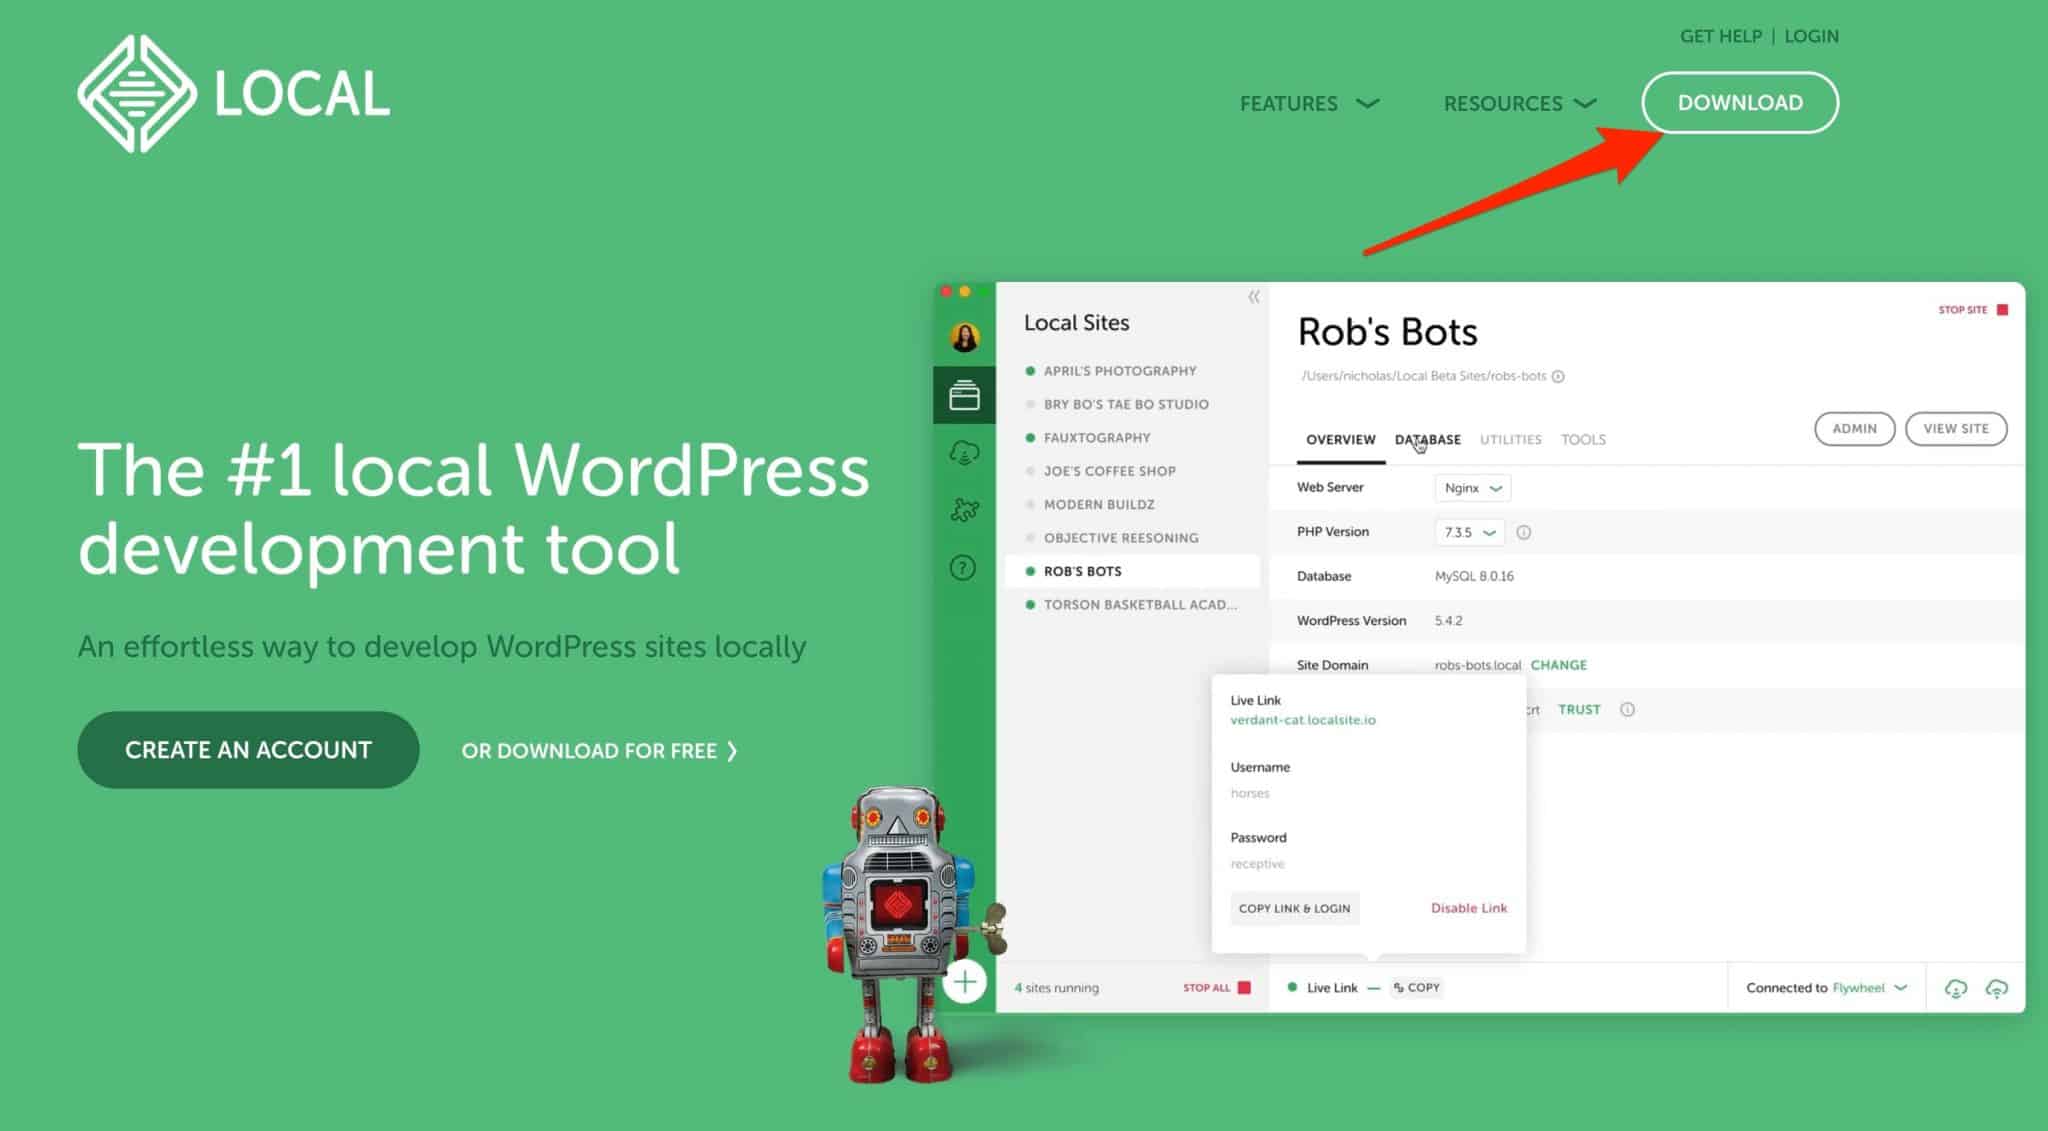
To work, Local must be installed on your computer. To do this, start by downloading the software from its official website. Click on the “Download” button at the top right of your screen.

Choose your operating system
A window will open and ask you to choose your operating system. You can choose from:
- Local for Mac
- Local for Windows
- Local for Linux
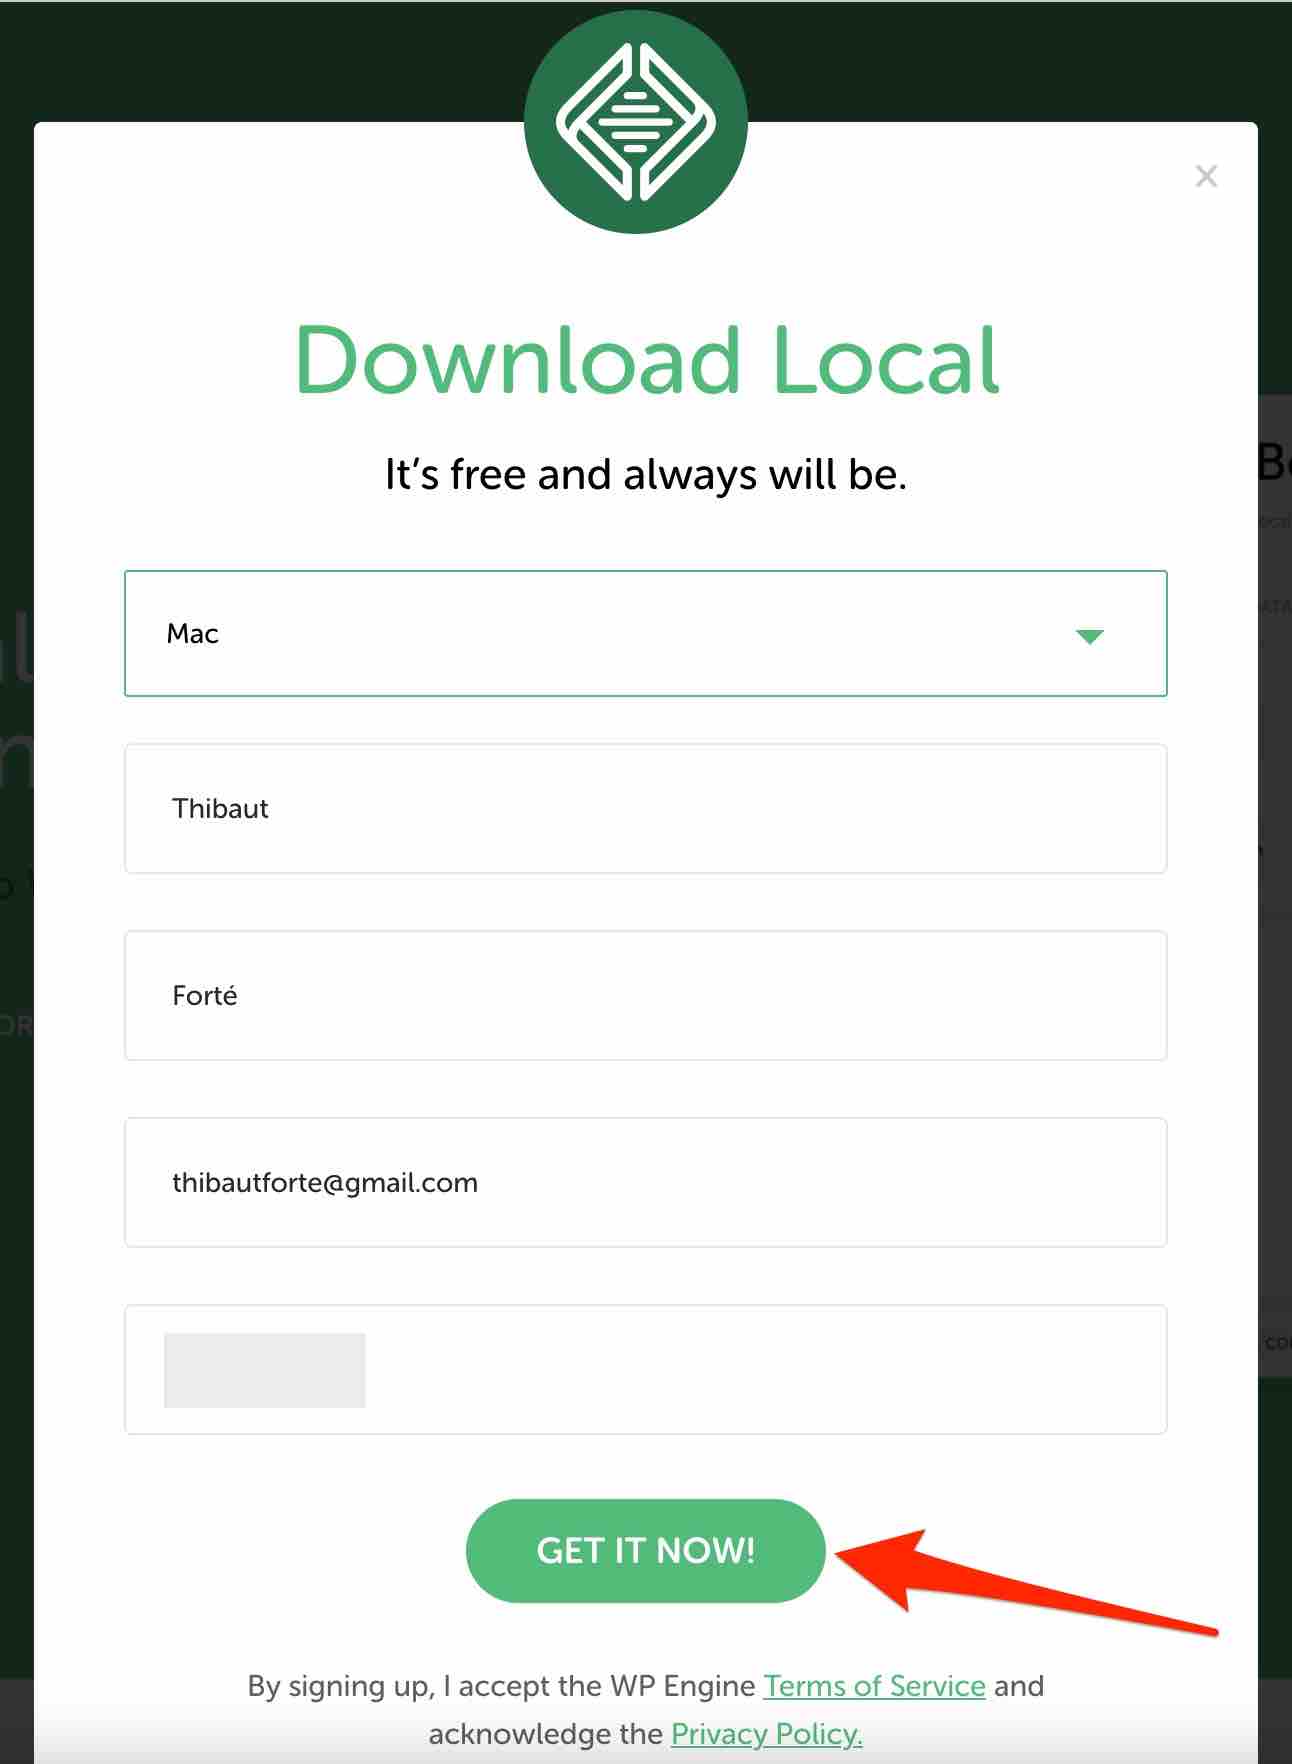
Fill out a short form
Next, Local prompts you to fill in four pieces of personal information:
- Your first name
- Your last name
- Work email
- Phone number
Finish by clicking “Get it now.”

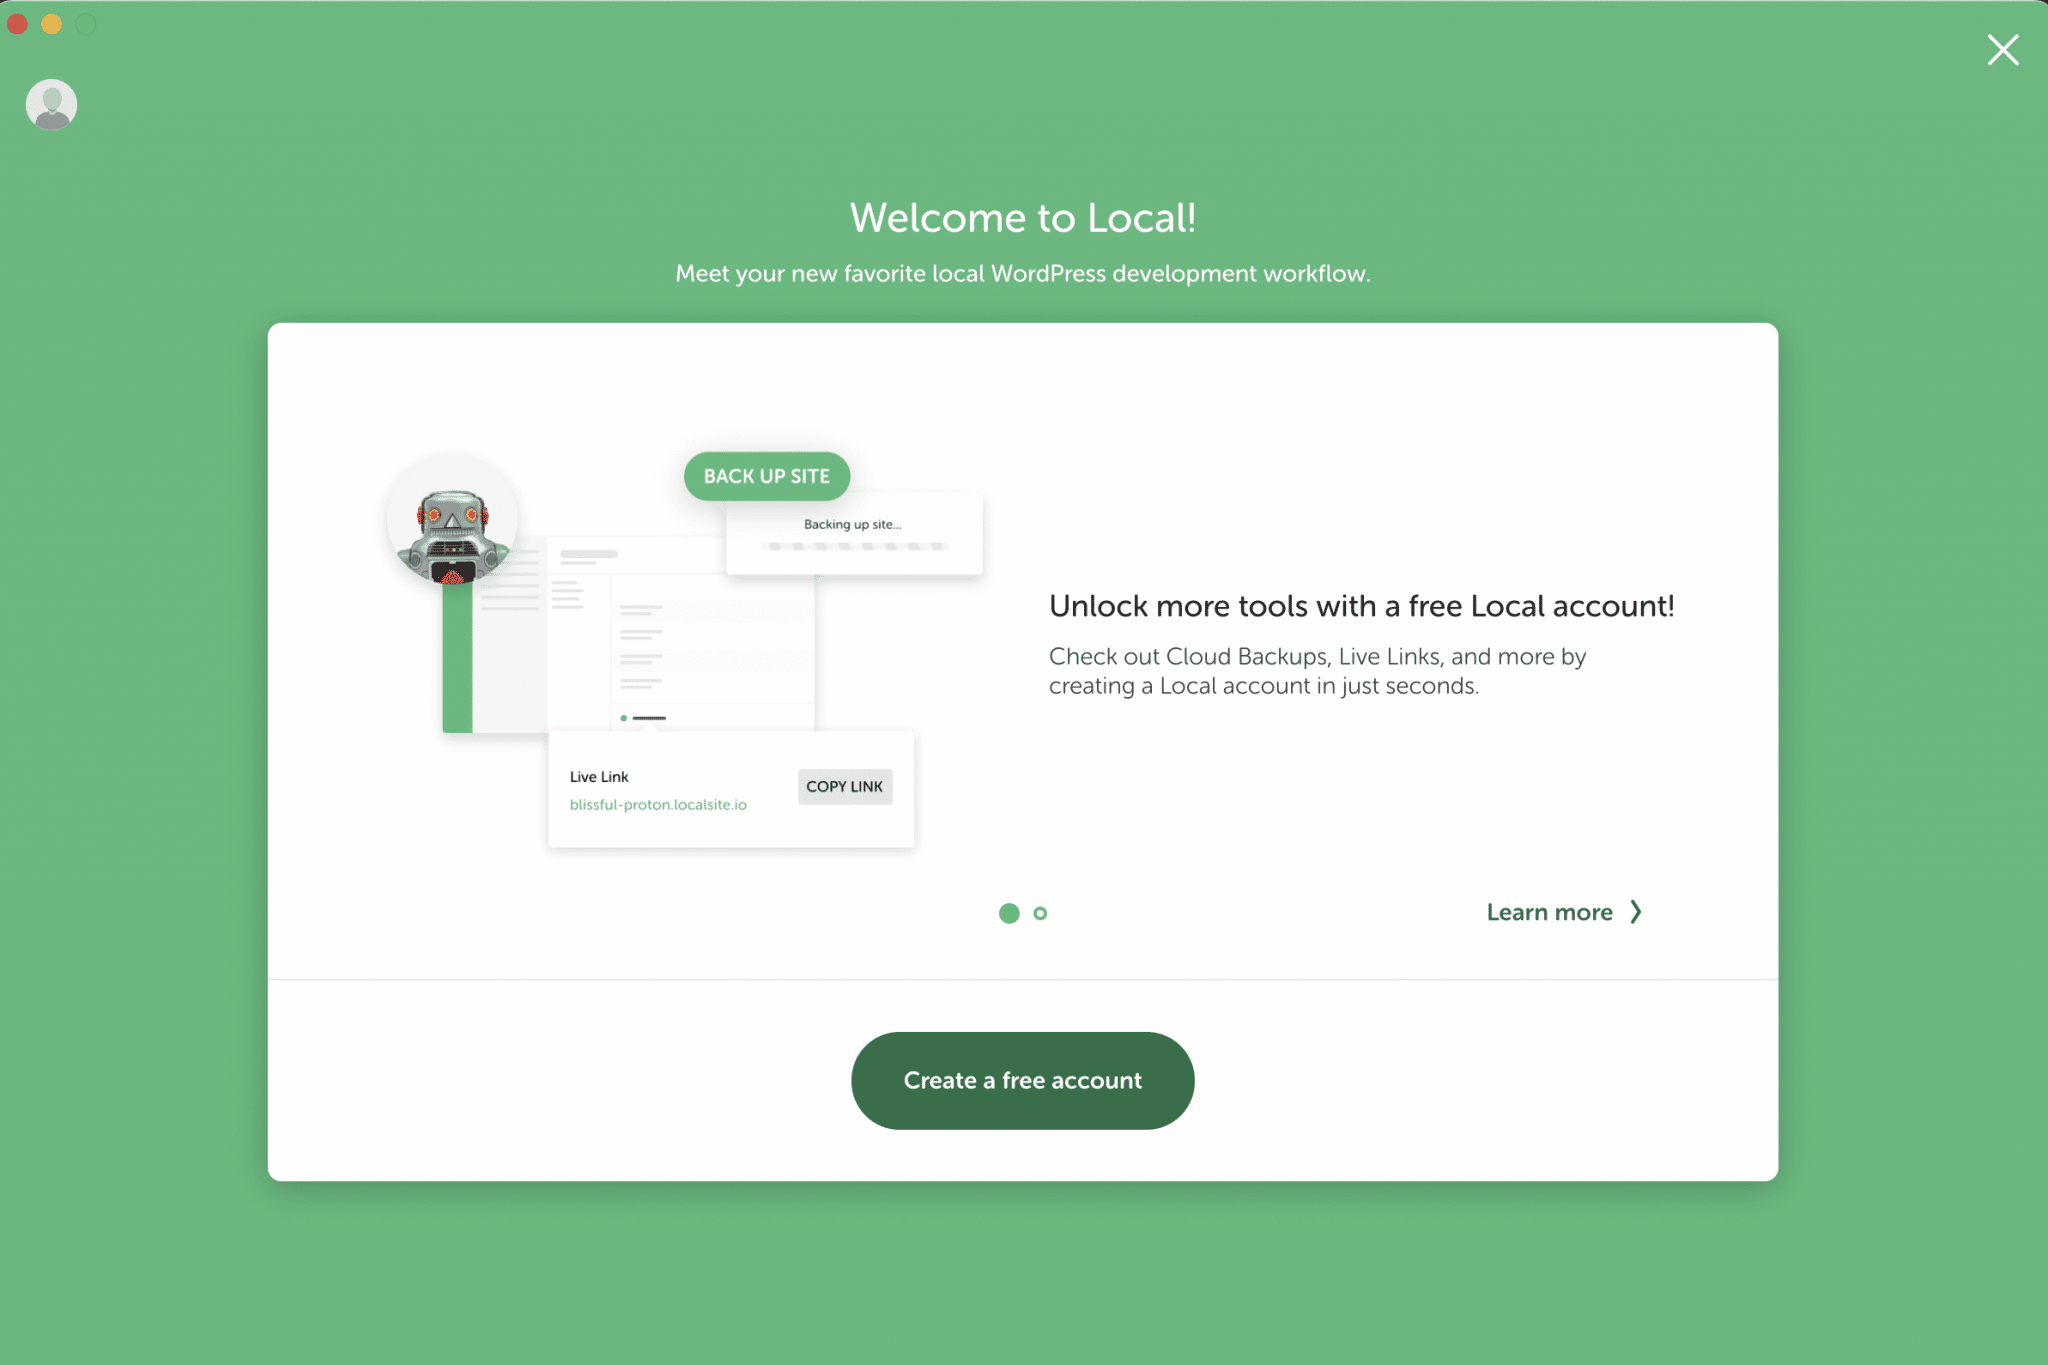
The Local software download, which is 260 MB, will begin. When the process is complete, install the software and run it. You will be presented with this window, which asks you to create a free account:

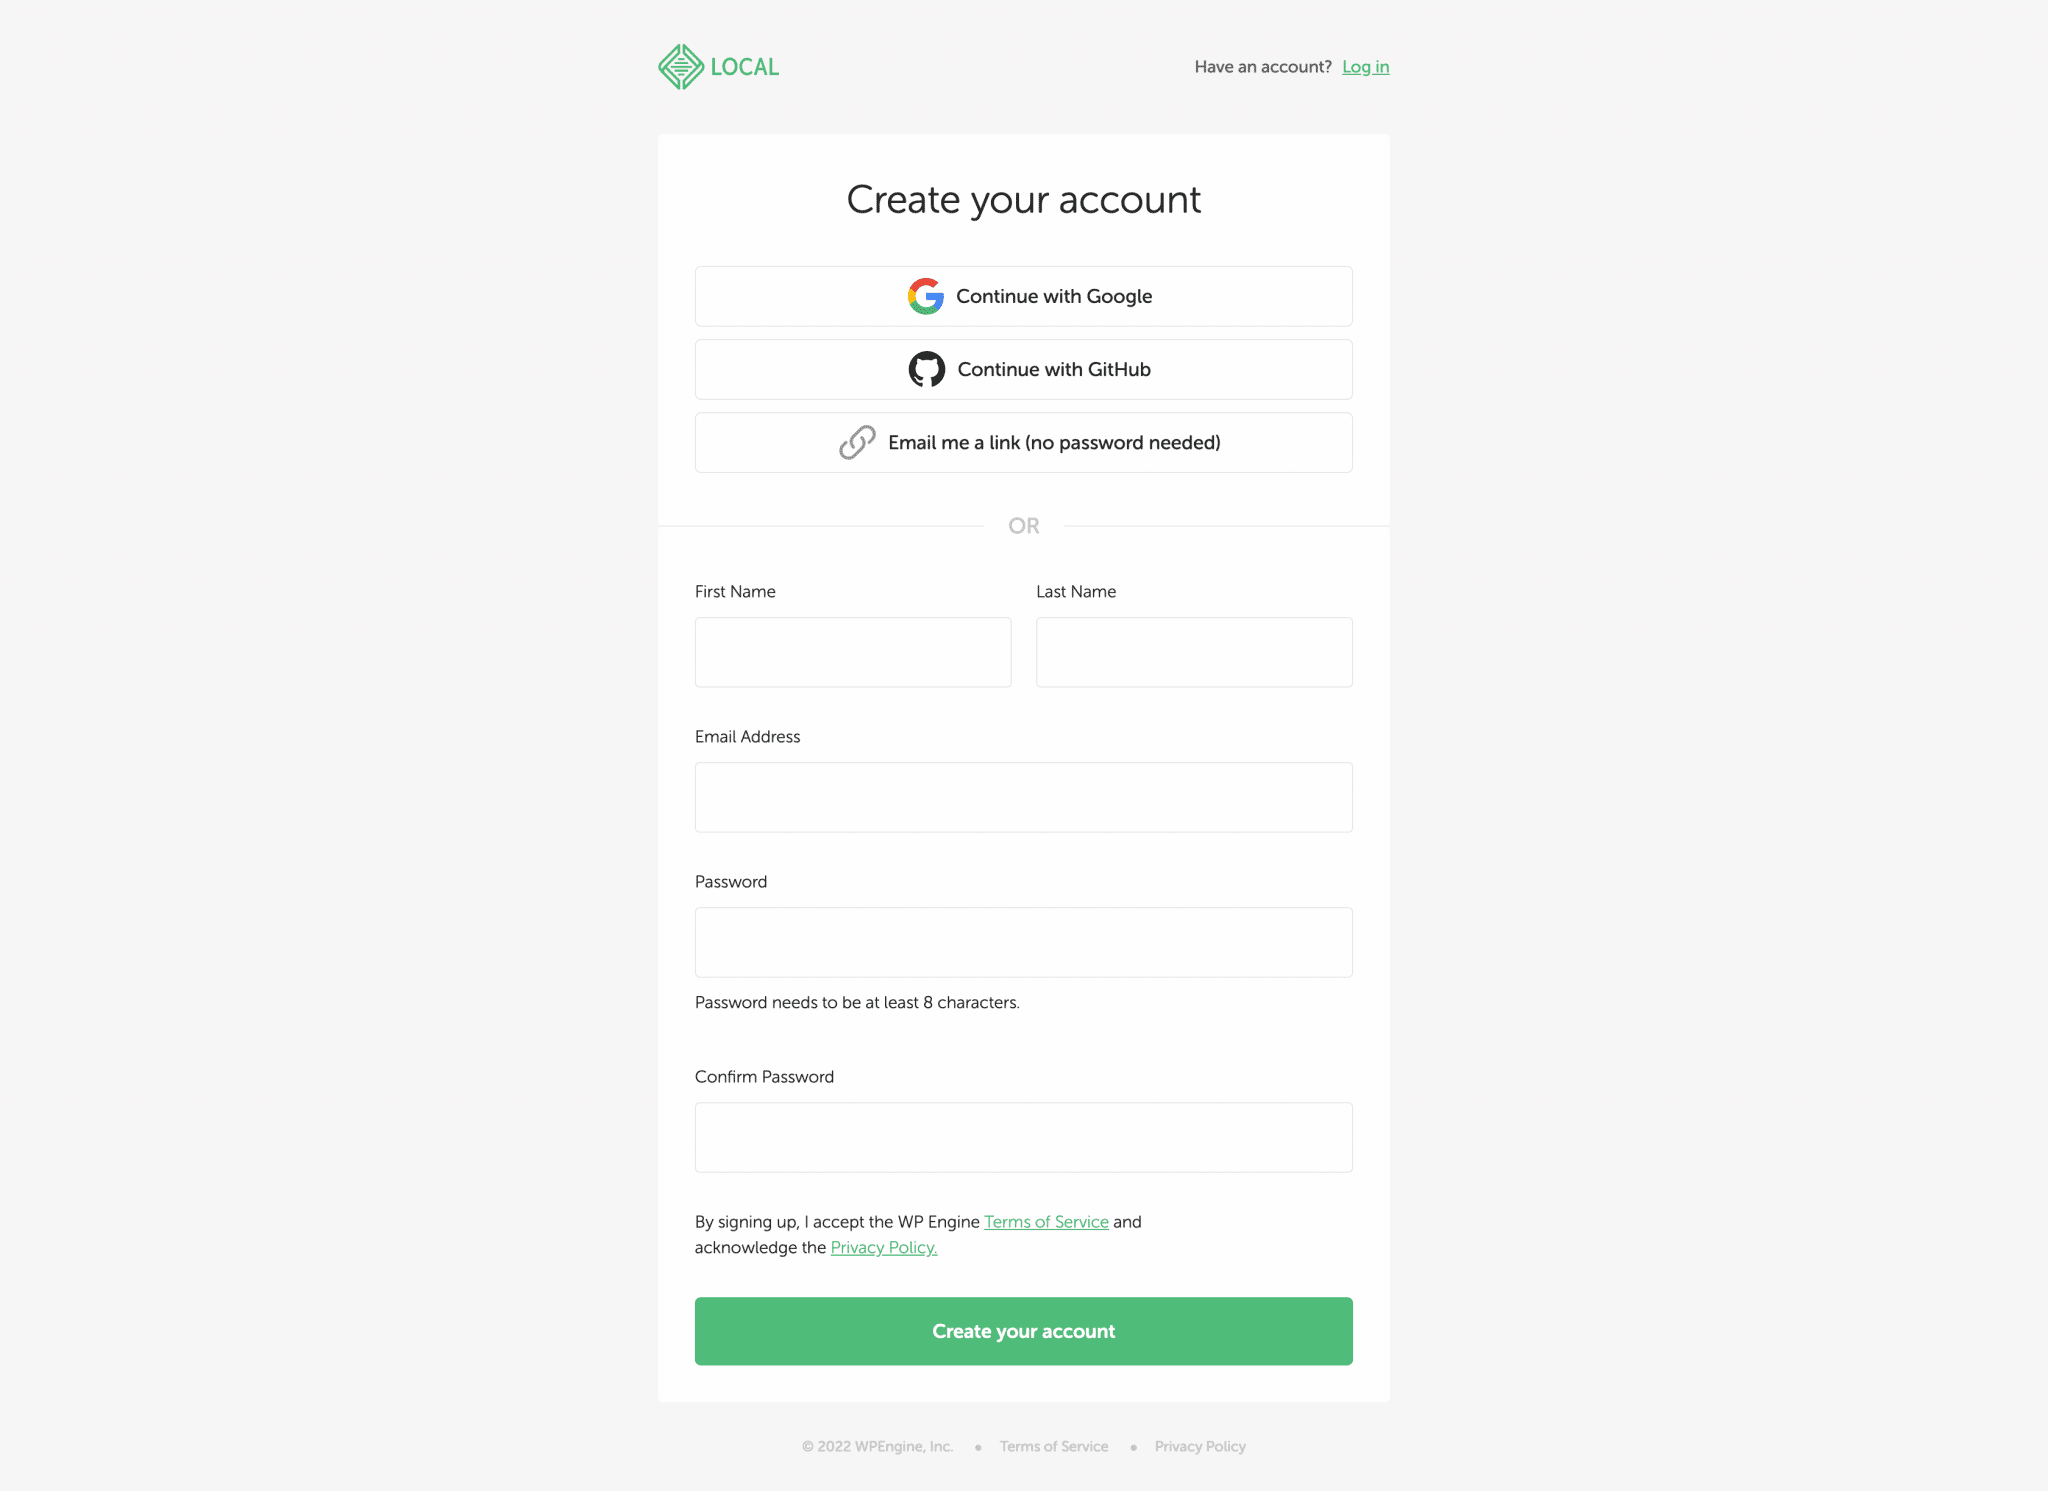
Click on it and enter the requested information, or log in with a Google or GitHub account:

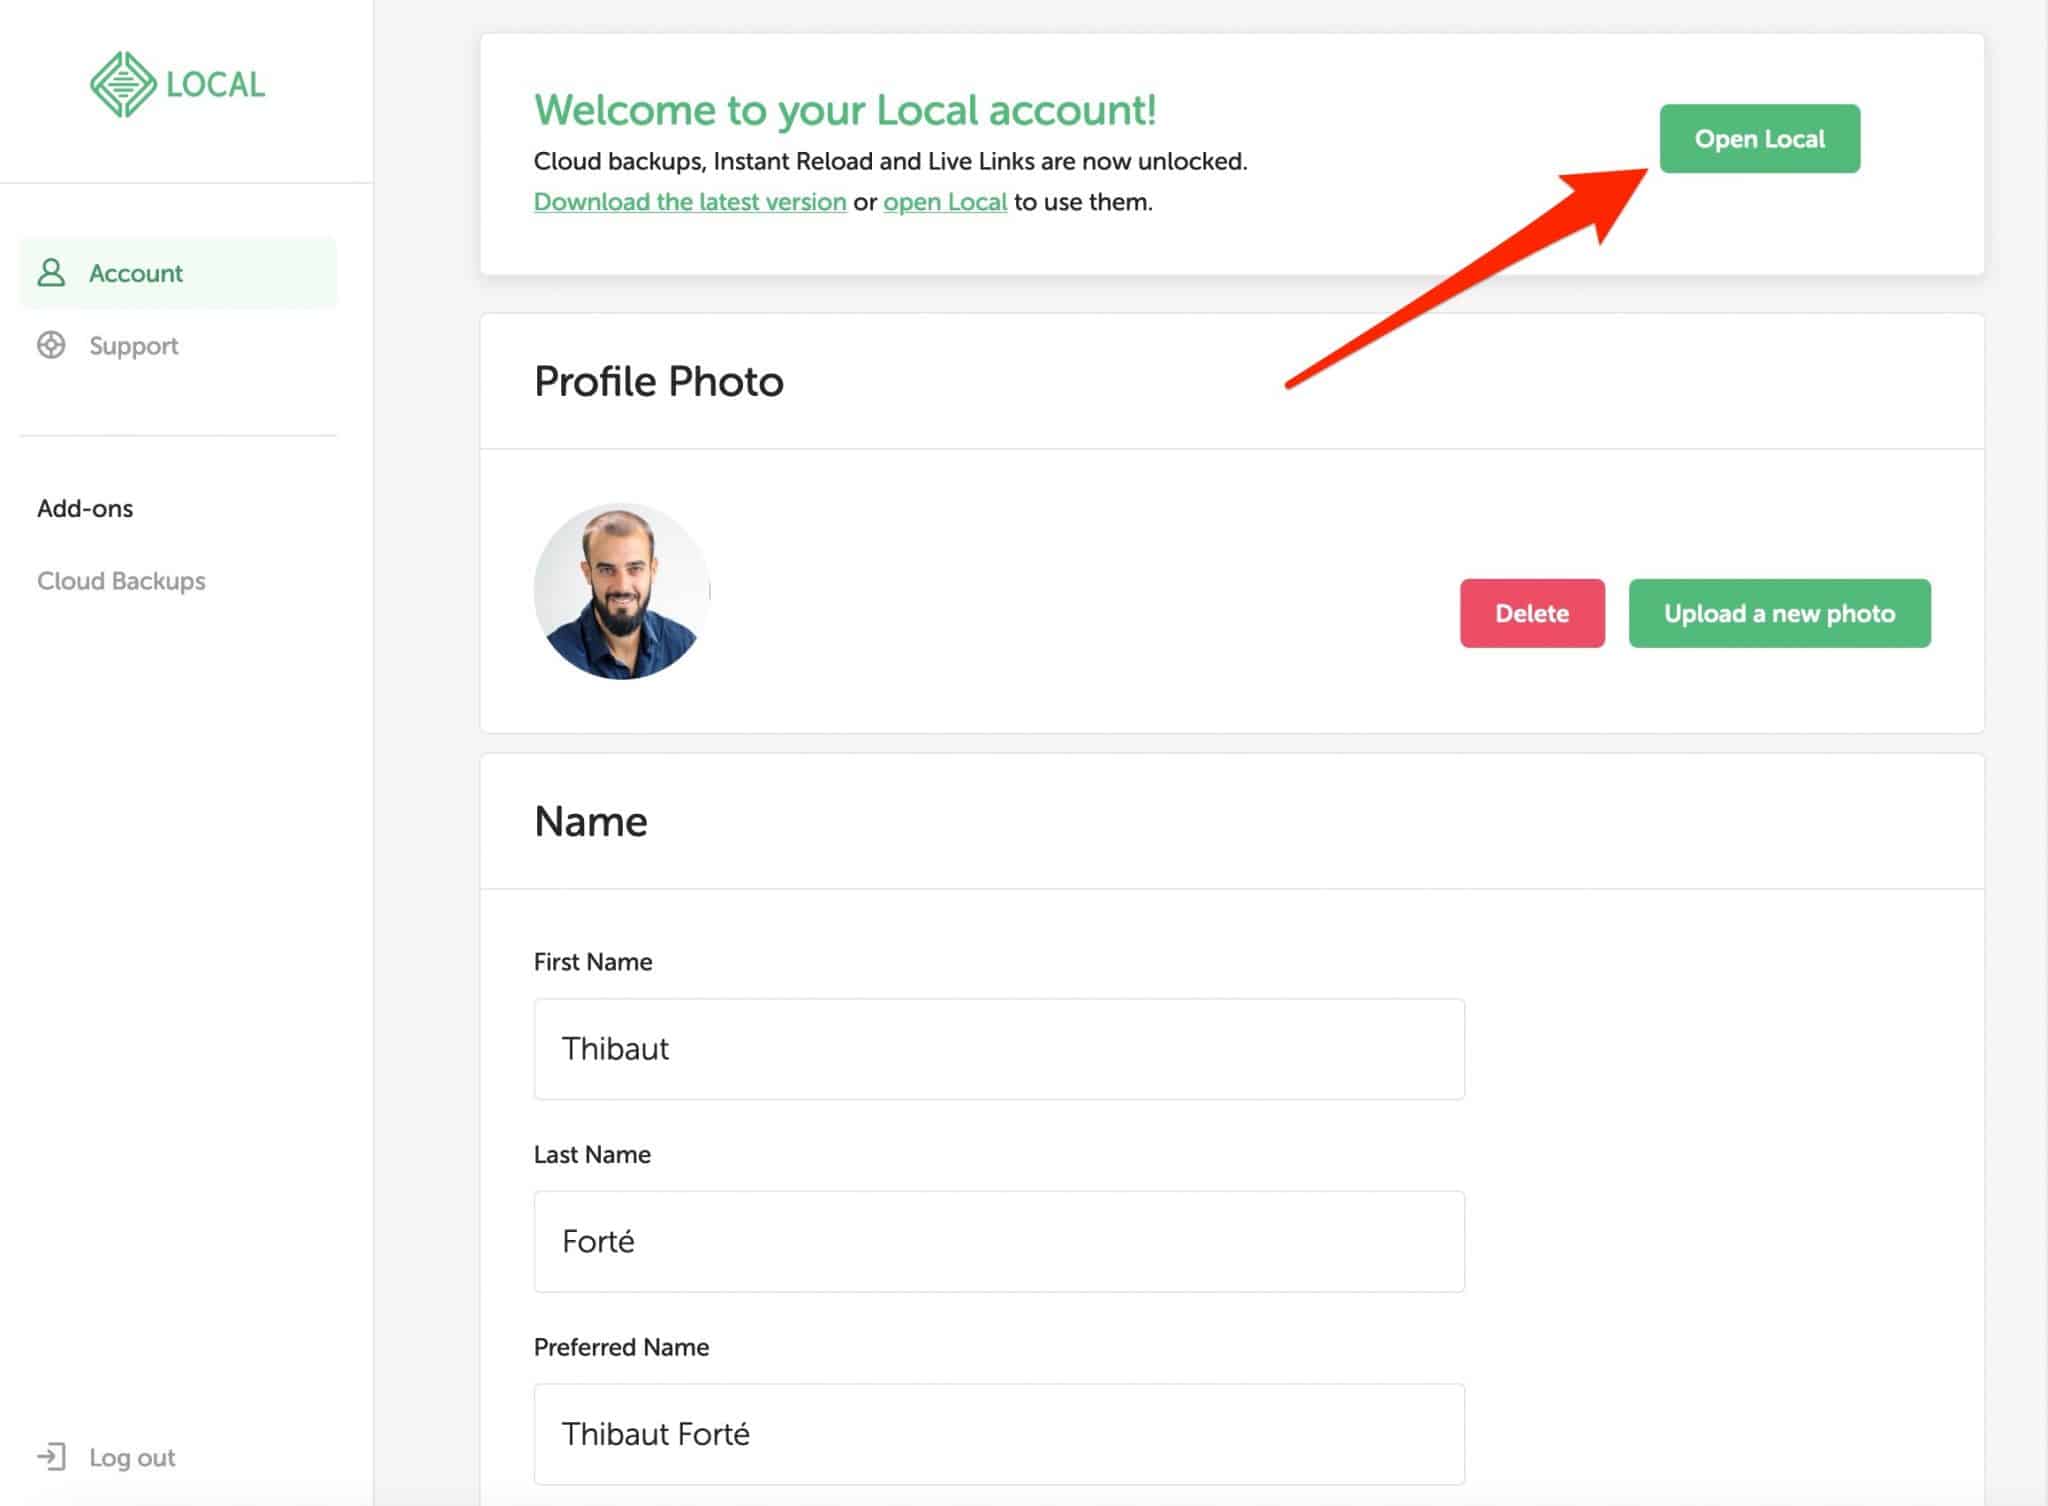
When done, you will be taken to your Local account’s online dashboard. All you have to do is click on “Open Local” to launch the tool on your computer.

Local requires two things to work properly. You must have at least 4 GB of RAM and 1.5 GB of disk space. Local indicates that you may need additional disk space if you are working on large sites.
Step 2: Start creating the site
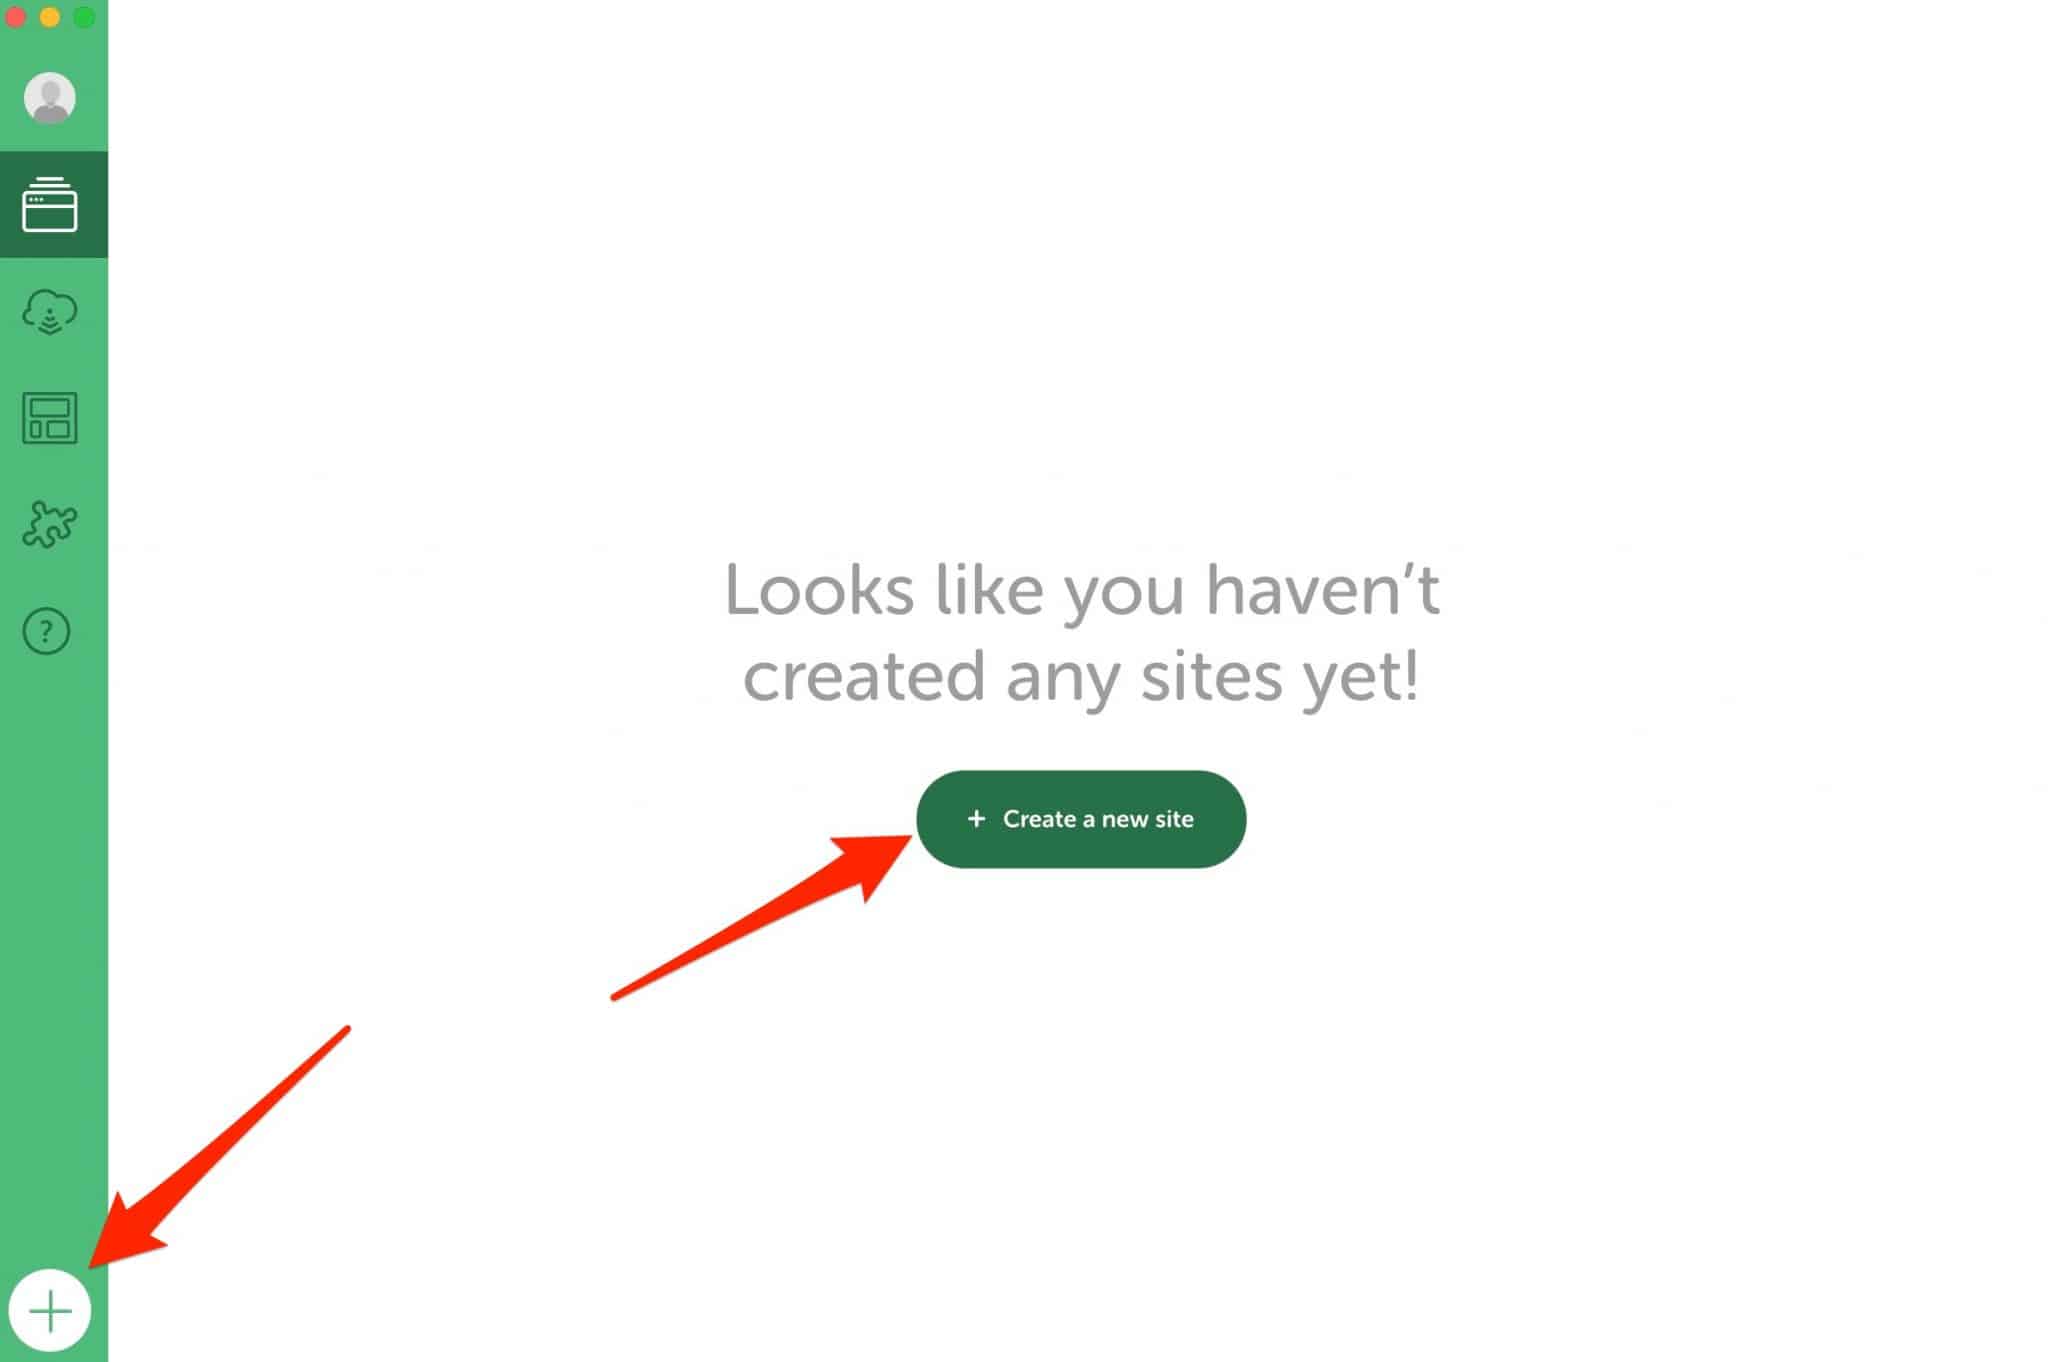
You will now start creating your first site by clicking on the green “Create a new site” button. If you prefer, you can also use the “+” button at the bottom left of your screen:

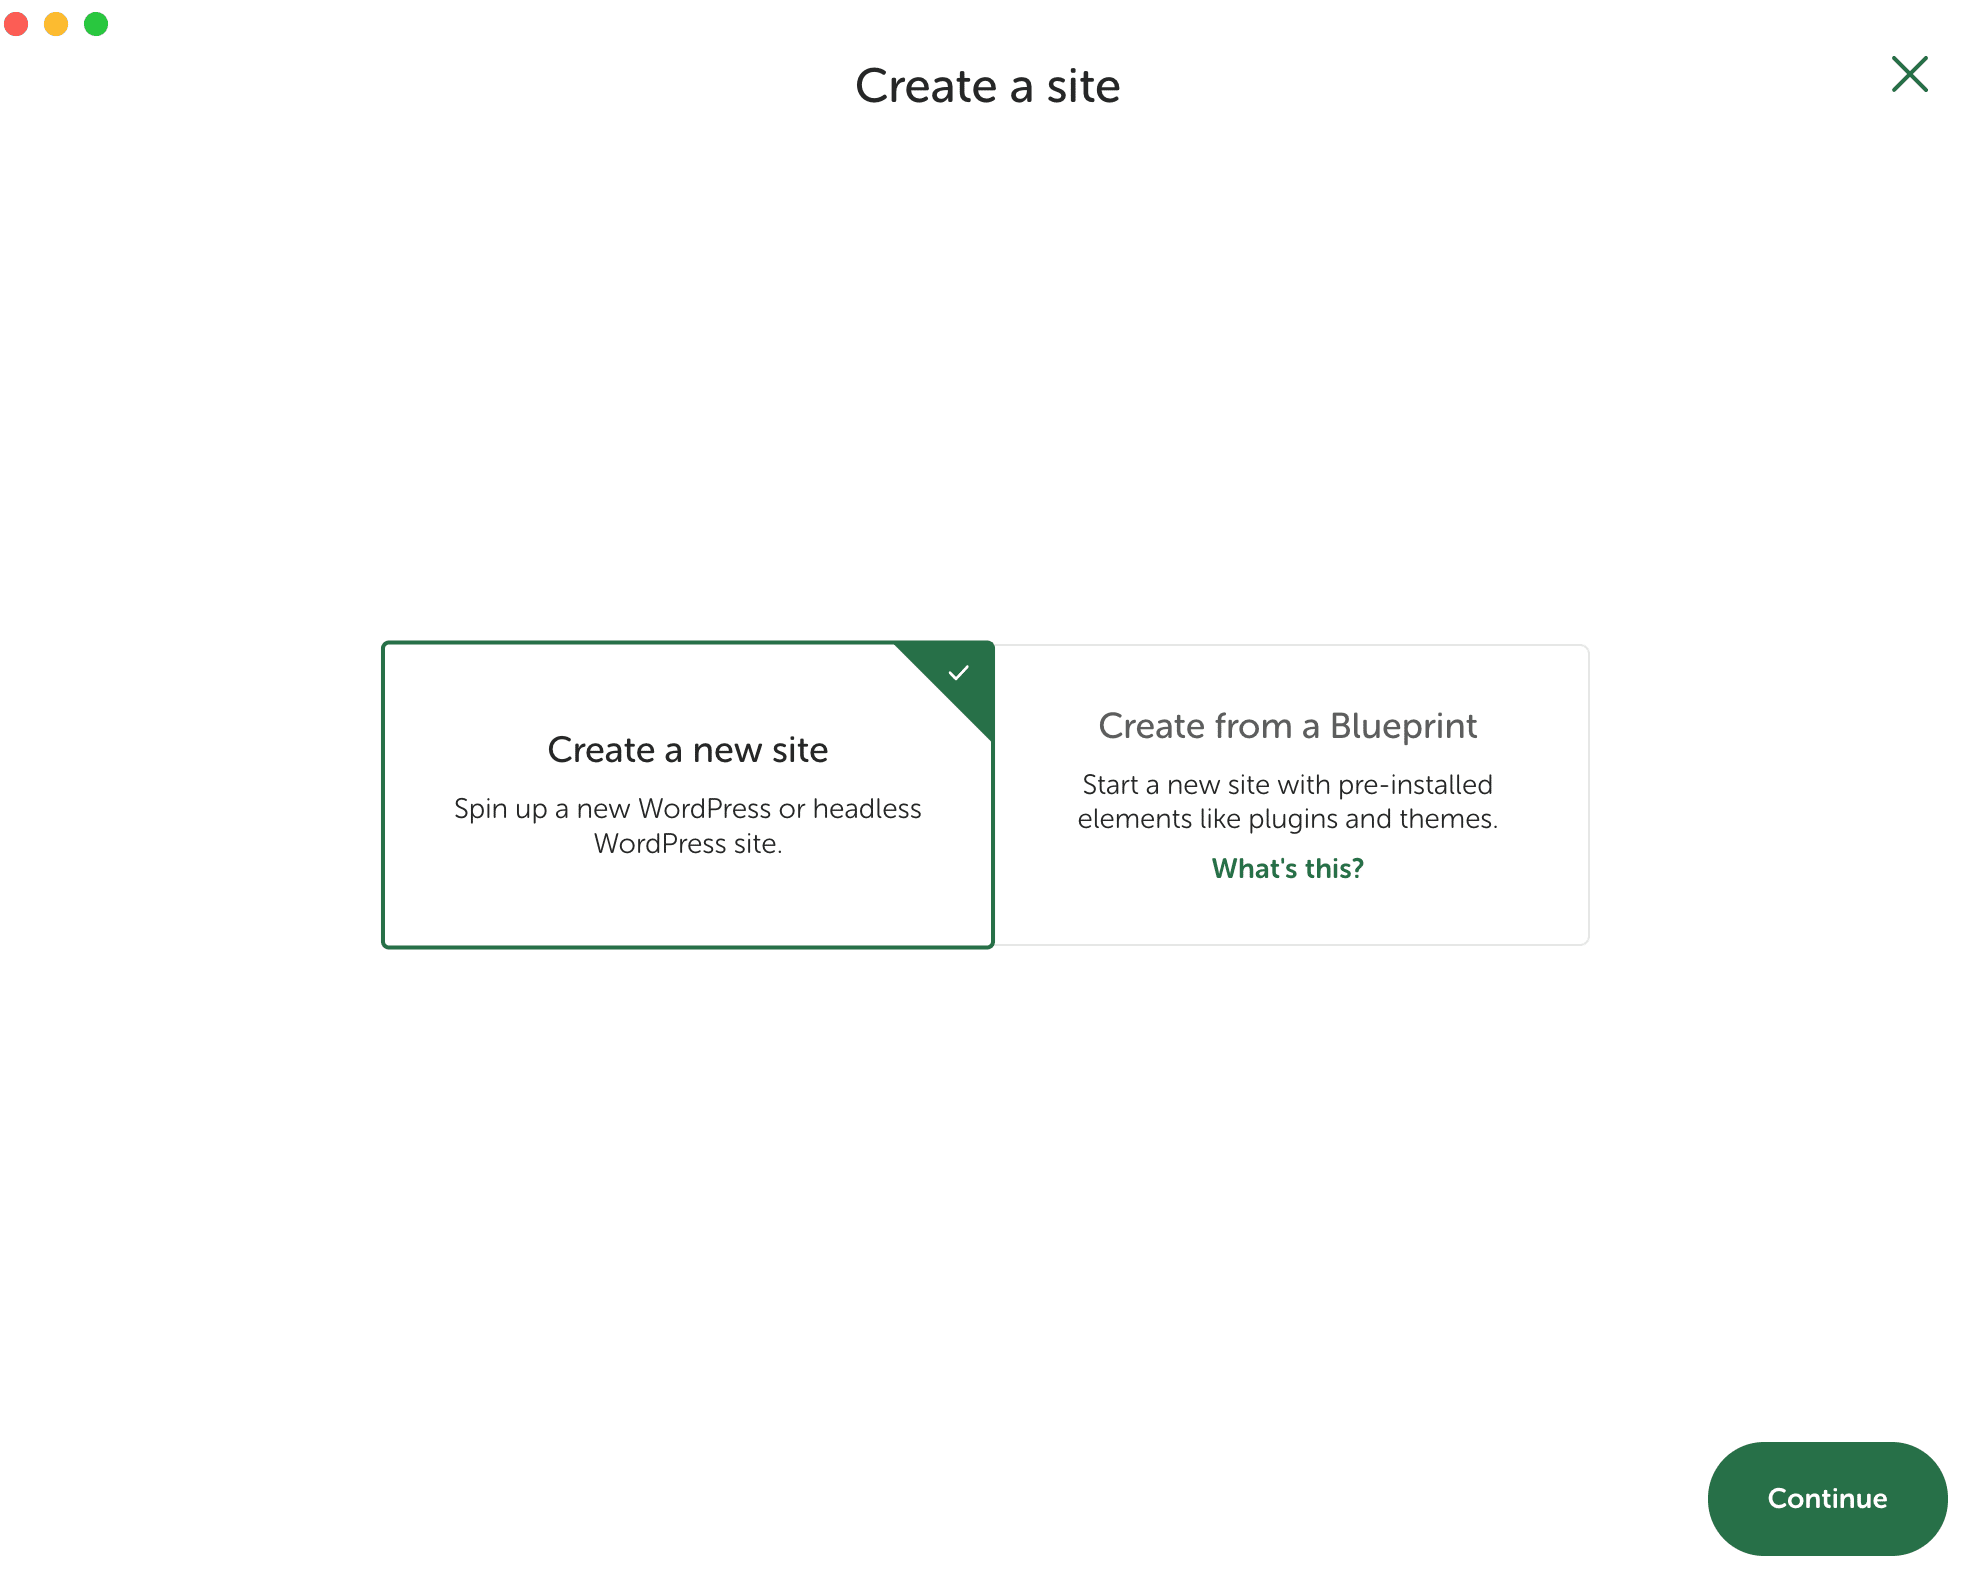
Local gives you two options for creating your site:
- Start from scratch with a “fresh” WordPress installation that you will then customize with the theme, plugins, and other settings of your choice. This is called “Create a new site.”
- Rely on a Blueprint, which is a site template that already contains the theme of your choice, plugins, etc.
Since you just launched Local, you don’t have a Blueprint yet. So choose option #1: “Create a new site,” then click the green “Continue” button:

Step 3: Give your site a name
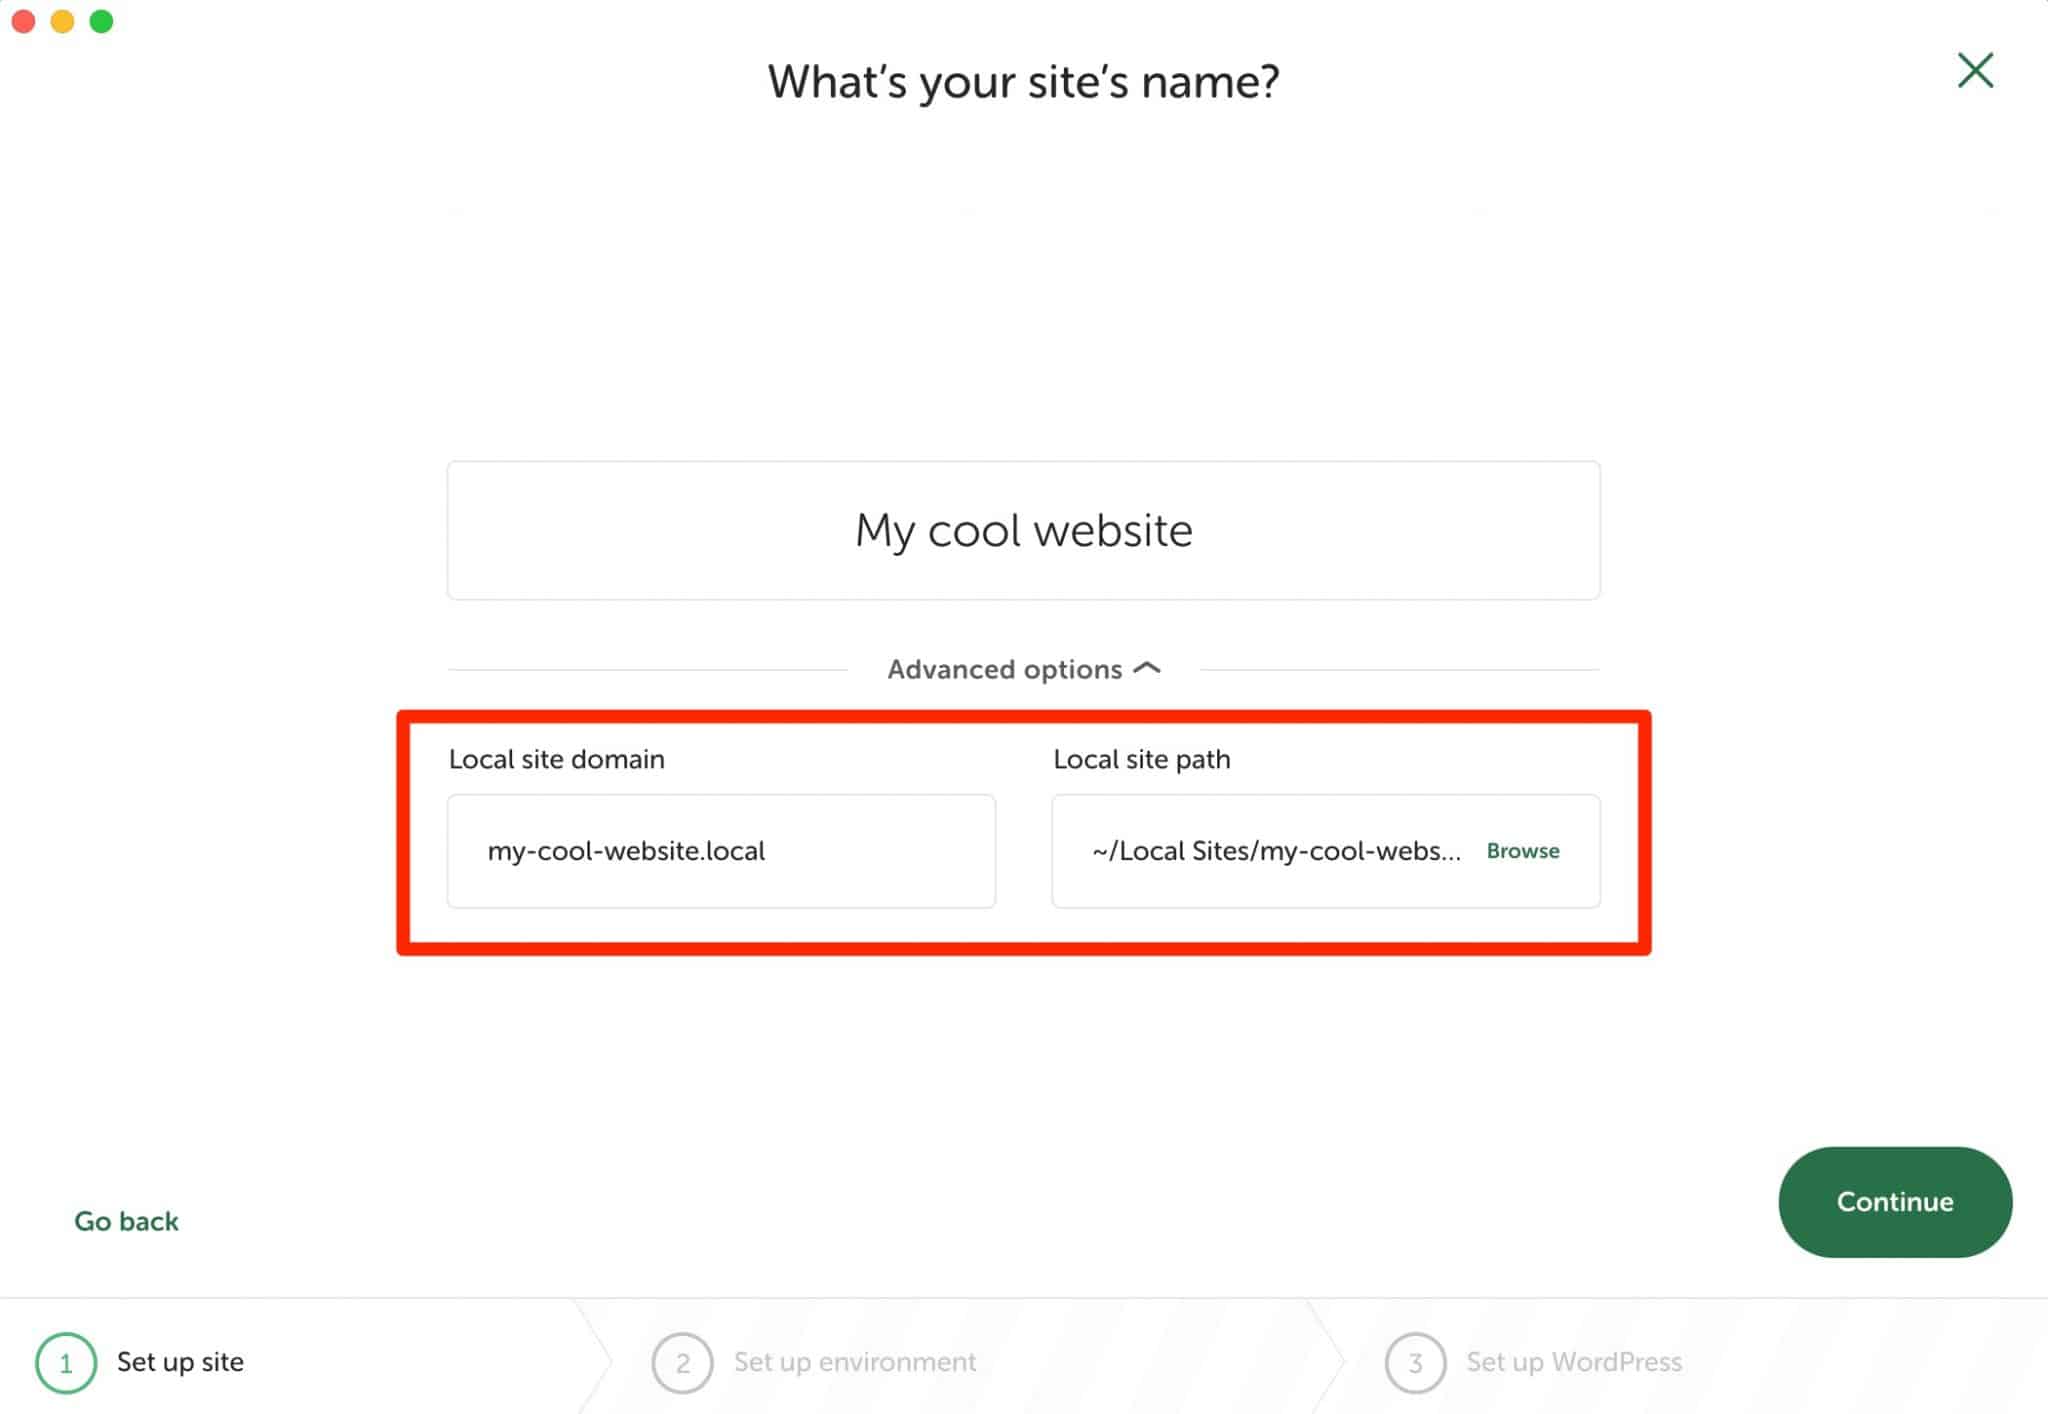
Let’s move on to step three of this tutorial for installing Local. In the rectangle provided for this purpose, give a name to your site. For example: “My local site.”
If you click on “Advanced options,” you will see that Local automatically generates two things:
- A domain name for your local site, containing the name of your site + the extension
.local. In my case, this gives:my-local-site.local. - The location where your site will be stored on your computer (Local site path).
You can leave it as is or change the domain name and location. When you are done, click on the green “Continue” button.
Step 4: Choose an environment for your local WordPress site
Now it’s time to set the environment for your future local WordPress site. To help you, Local offers you a pre-configured environment in the “Preferred” box.
If you prefer to choose a custom environment, click on “Custom.” You can then choose:
- Your PHP version, the software on which WordPress runs
- The type of web server (NGINX or Apache)
- Your version of MySQL, the management system for your database

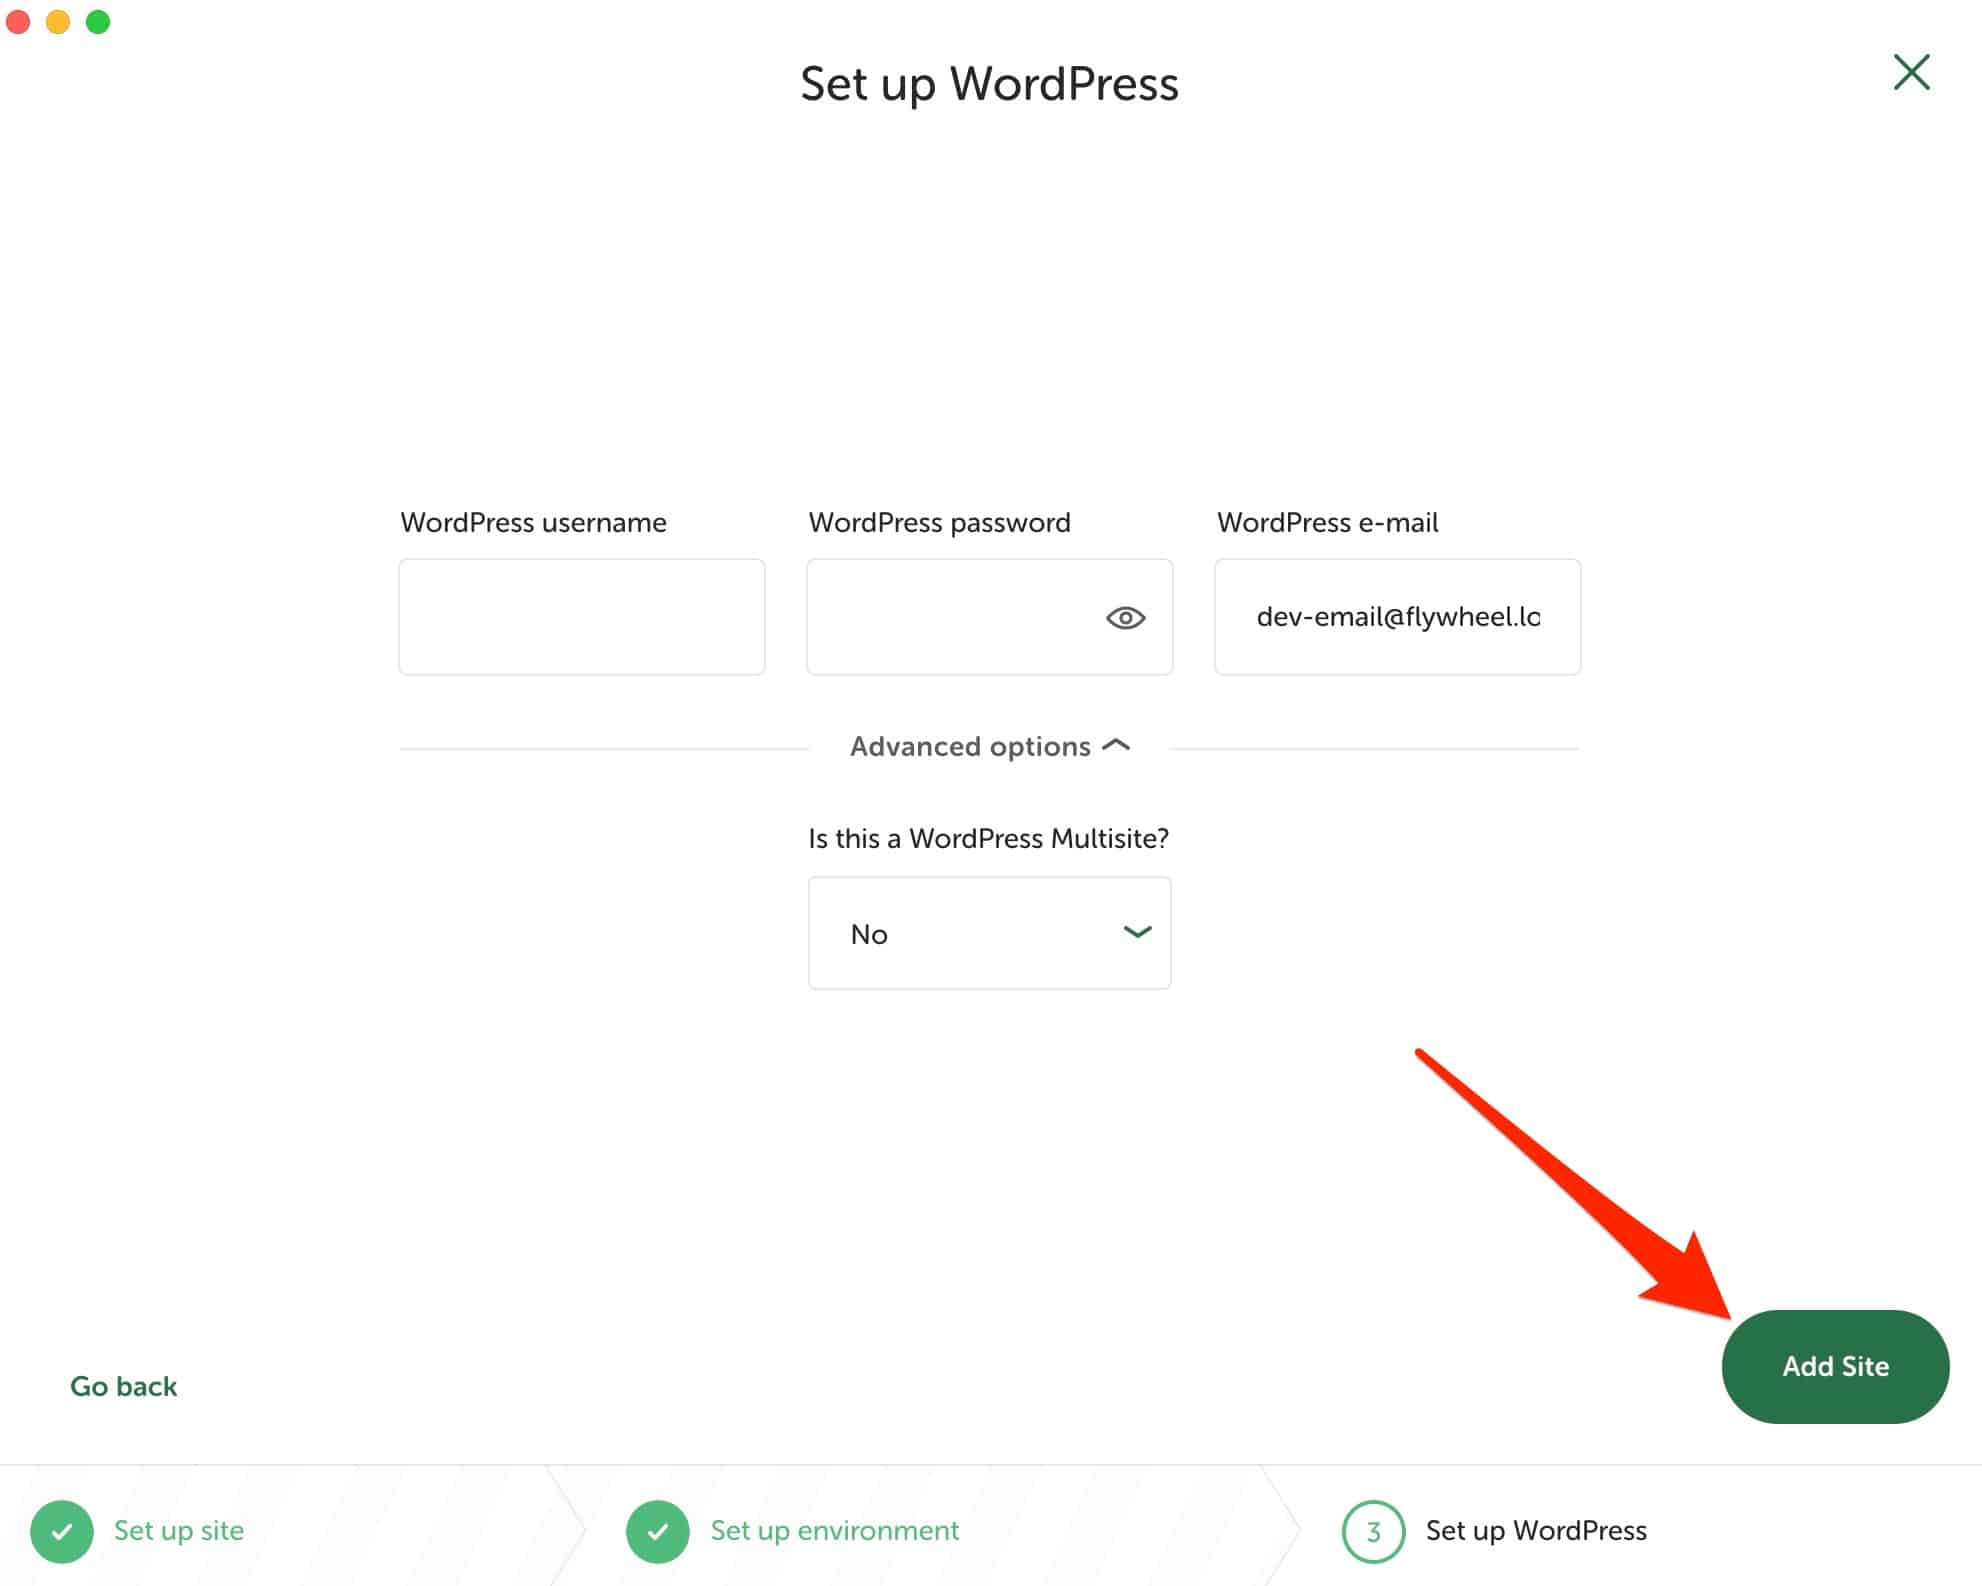
Step 5: Fill in your credentials
To complete the process of creating your site with Local, fill in the following items:
- A username
- A password
- An email address
- If you are creating a multi-site network
Finish by clicking the “Add Site” button.

And there you have it, congratulations! Your new local site is functional and available on your dashboard.
You’re going to learn how to put it to use it right away and to use some useful features.


How to configure Local
How do I access the administration interface of my WordPress site with Local?
Your site is up and running in the background, but you’re probably eager to get into it and start customizing it, I bet. Let’s take a look at it.
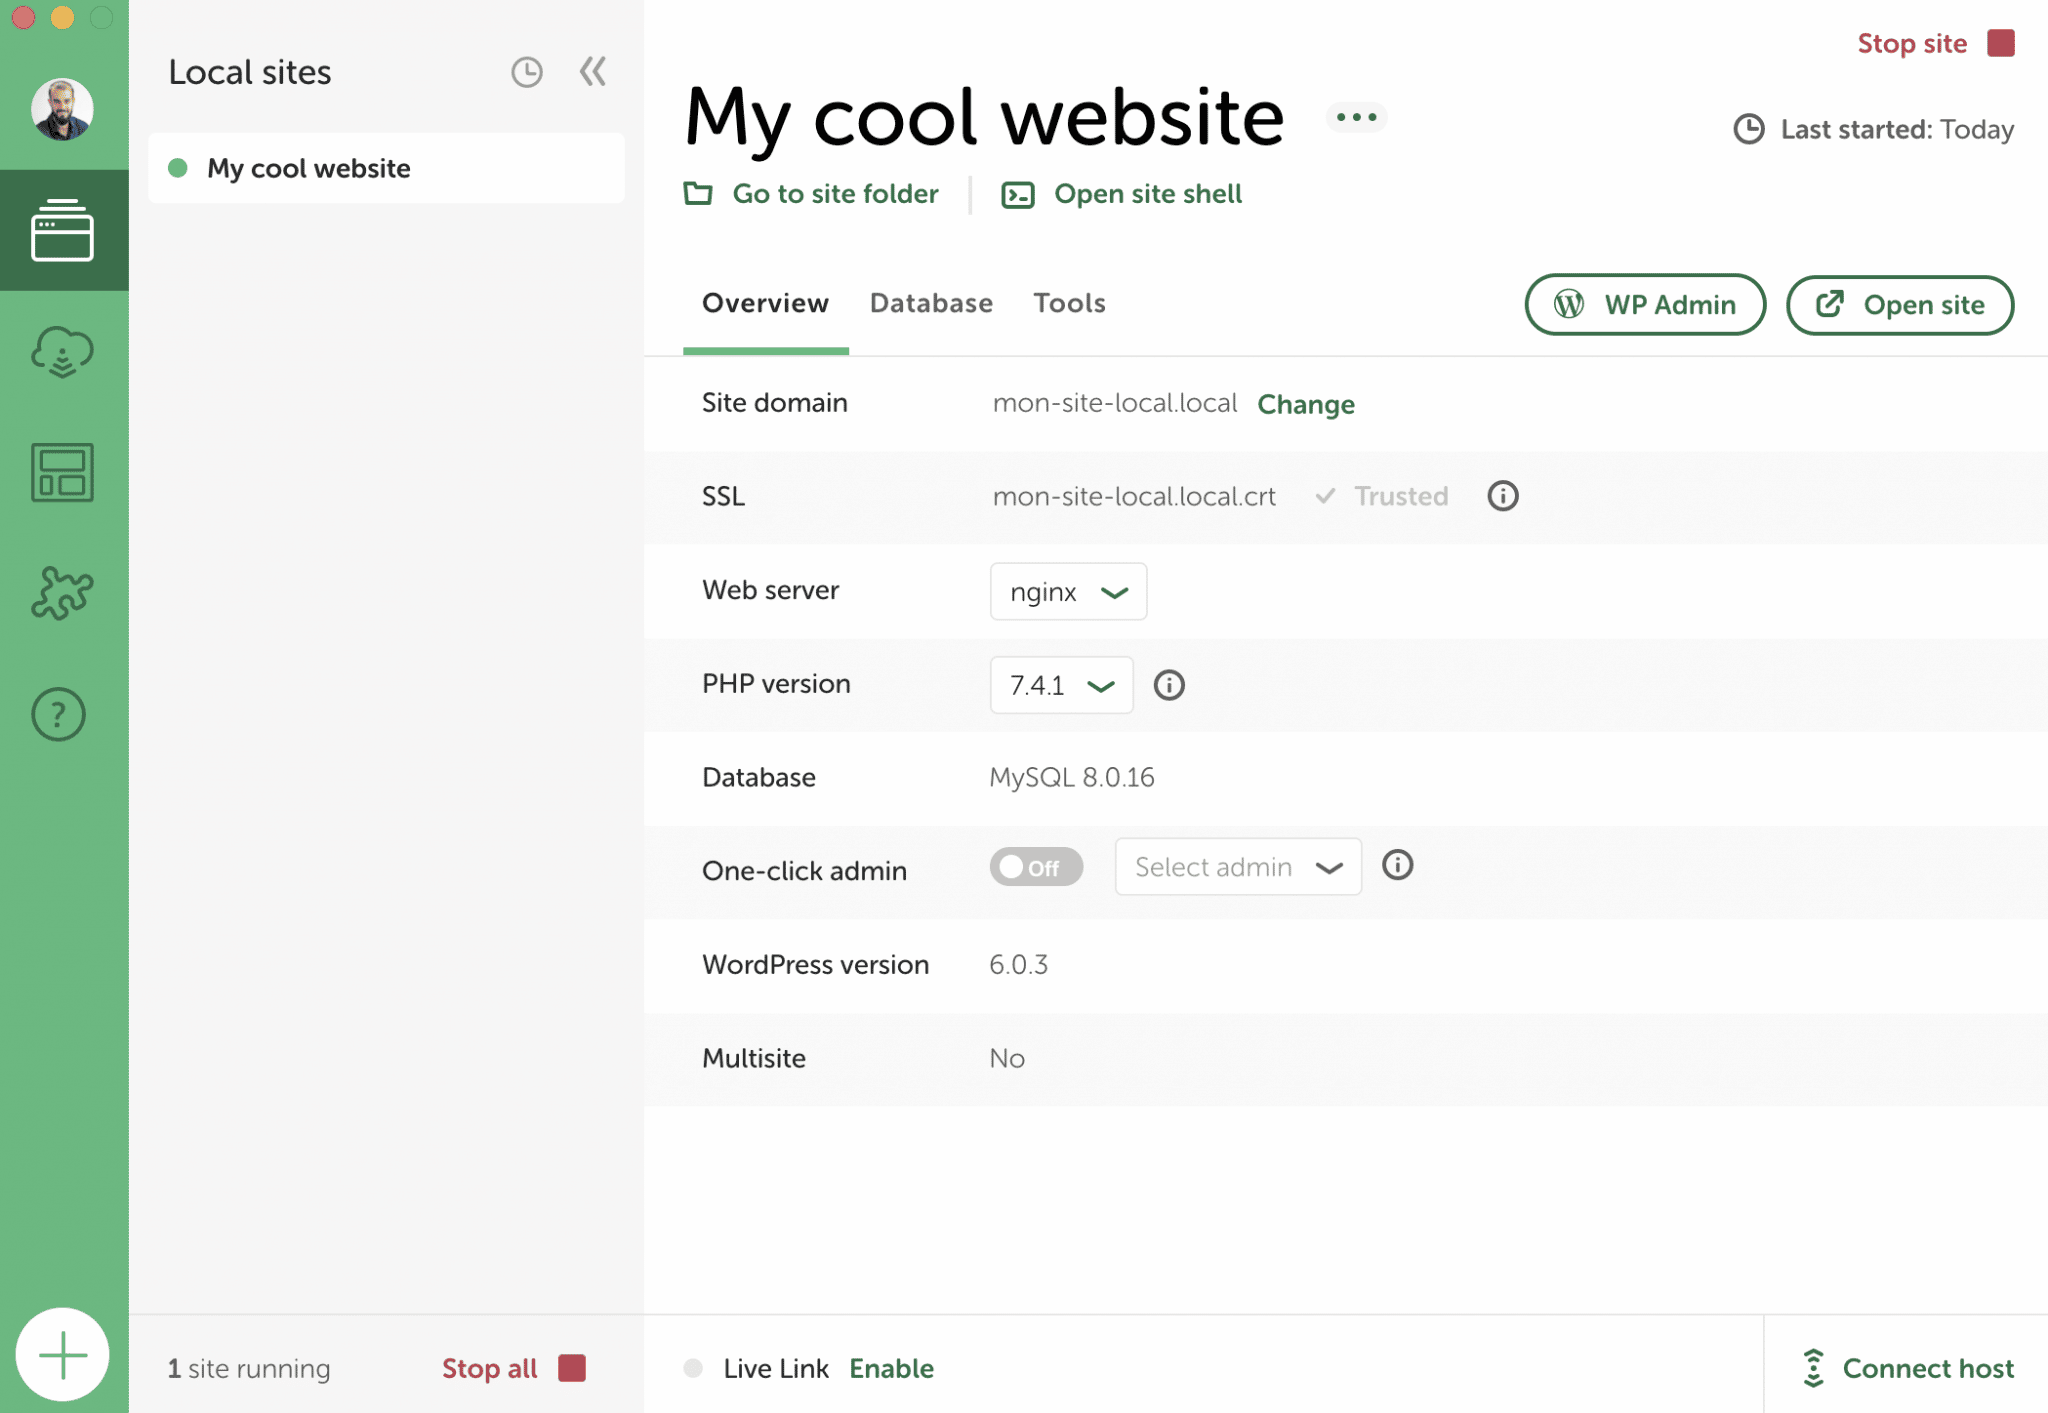
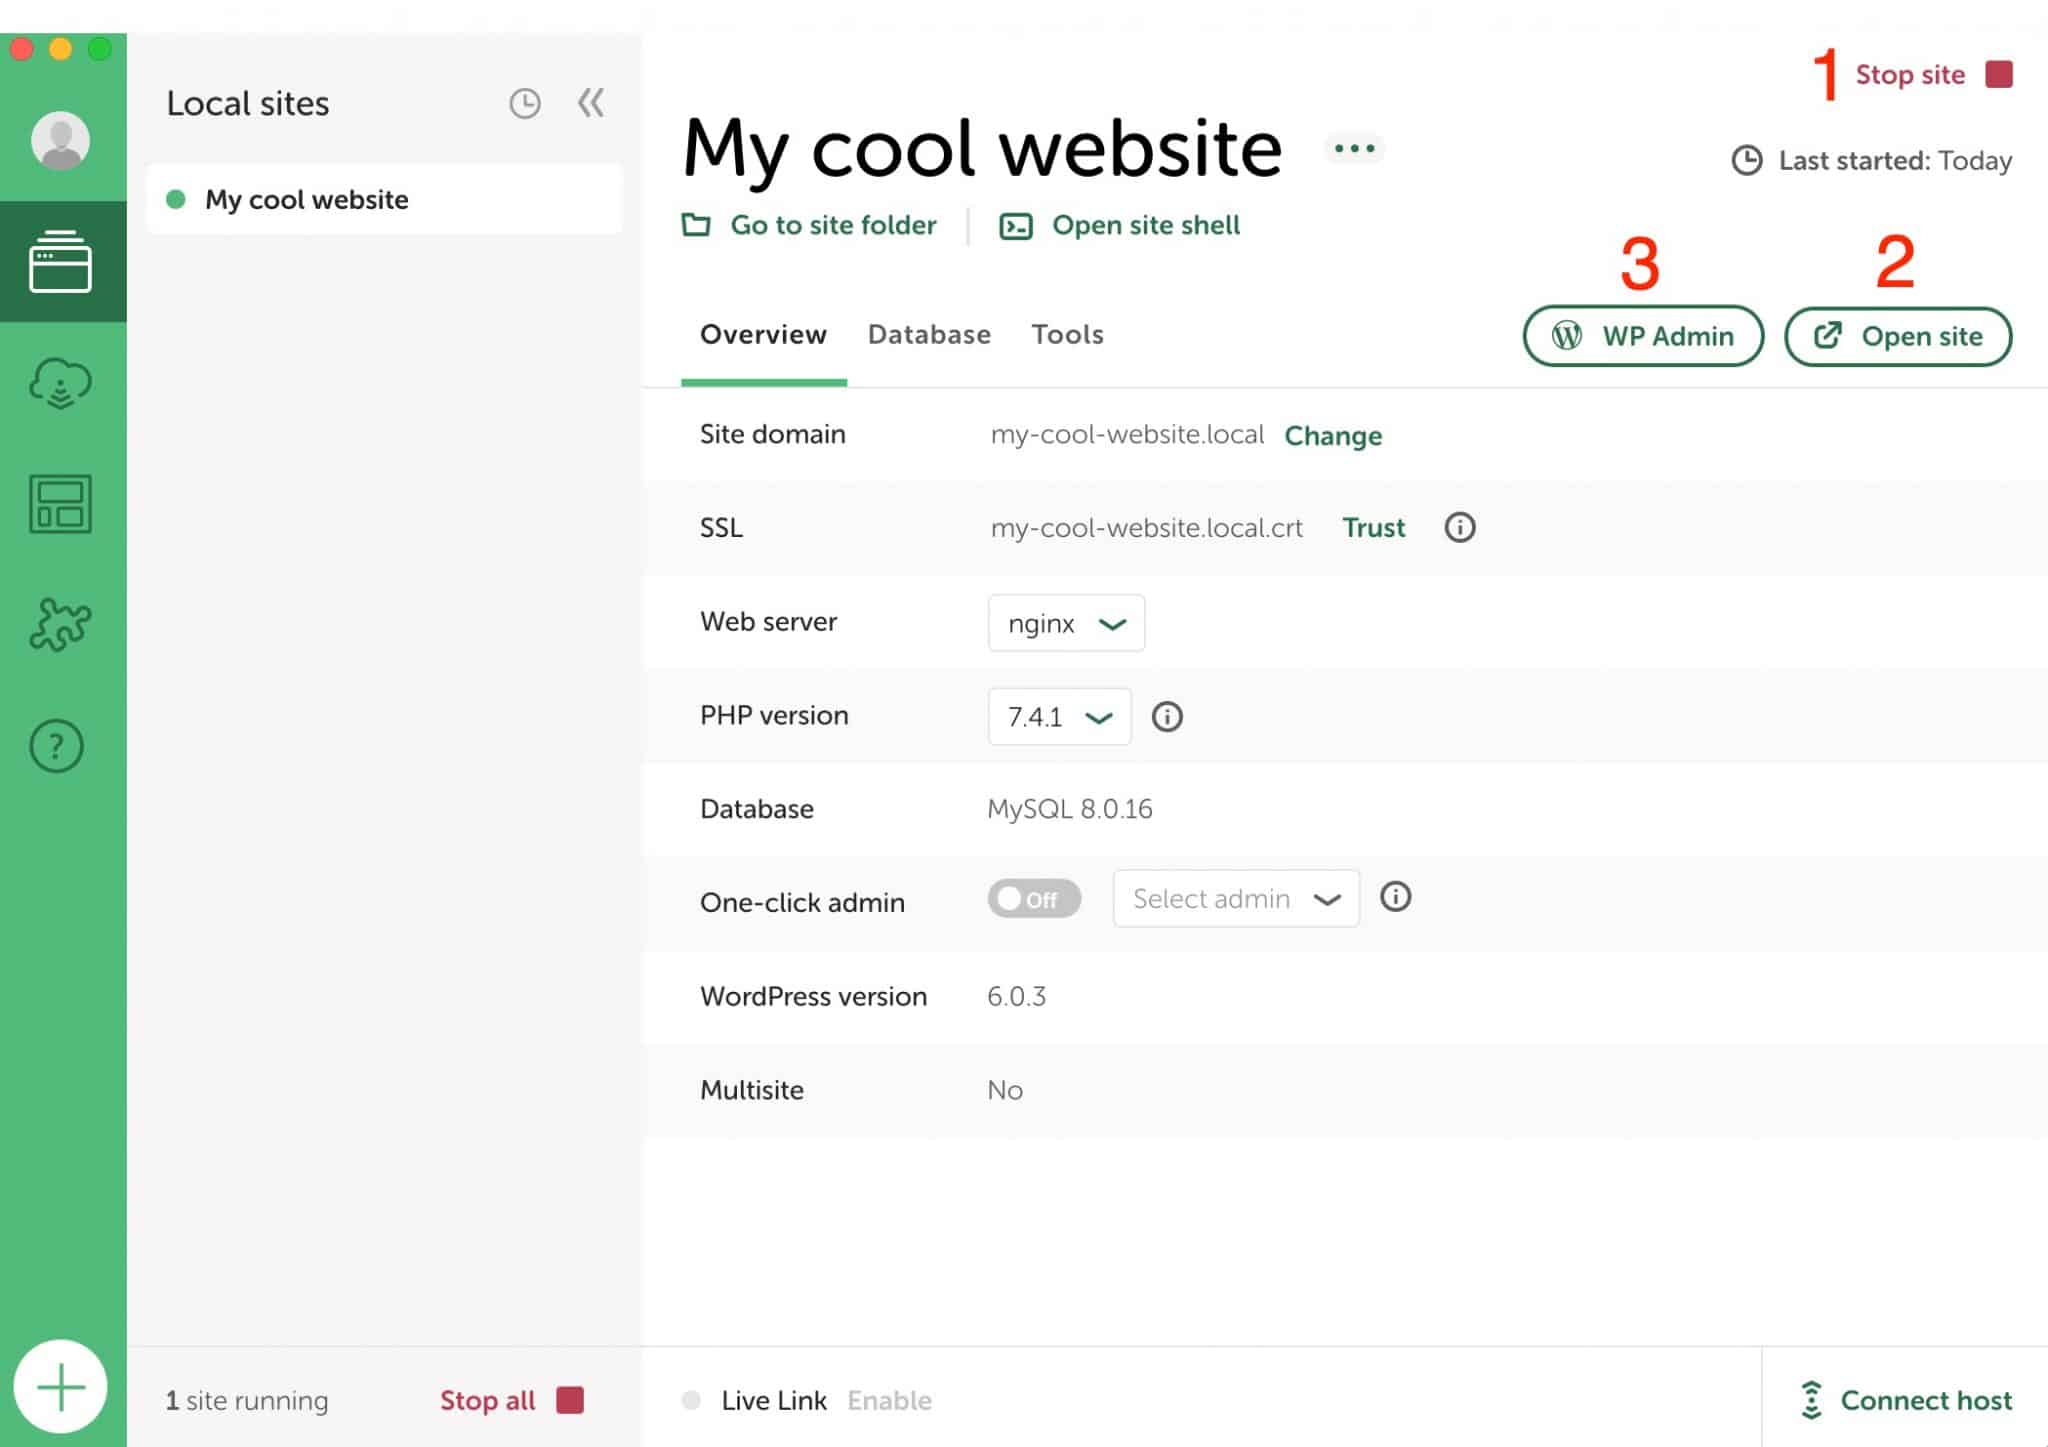
From your interface, Local allows you to do the following things:
- Start/Stop a site. When a site is running in the background, a little green dot will appear next to its name. This is a prerequisite for accessing its administration interface. To stop it, click on the small red square “Stop site” (number 1 on the picture).
- Open the site in a new tab of your browser, via the “Open site” button. You will then land on the front-end interface (the one visible to your visitors).
- Access the administration interface (back office), via the “WP Admin” button.

To connect to your site, the process is exactly the same as for an online WordPress site: enter your login and password on the login page to land on the dashboard.
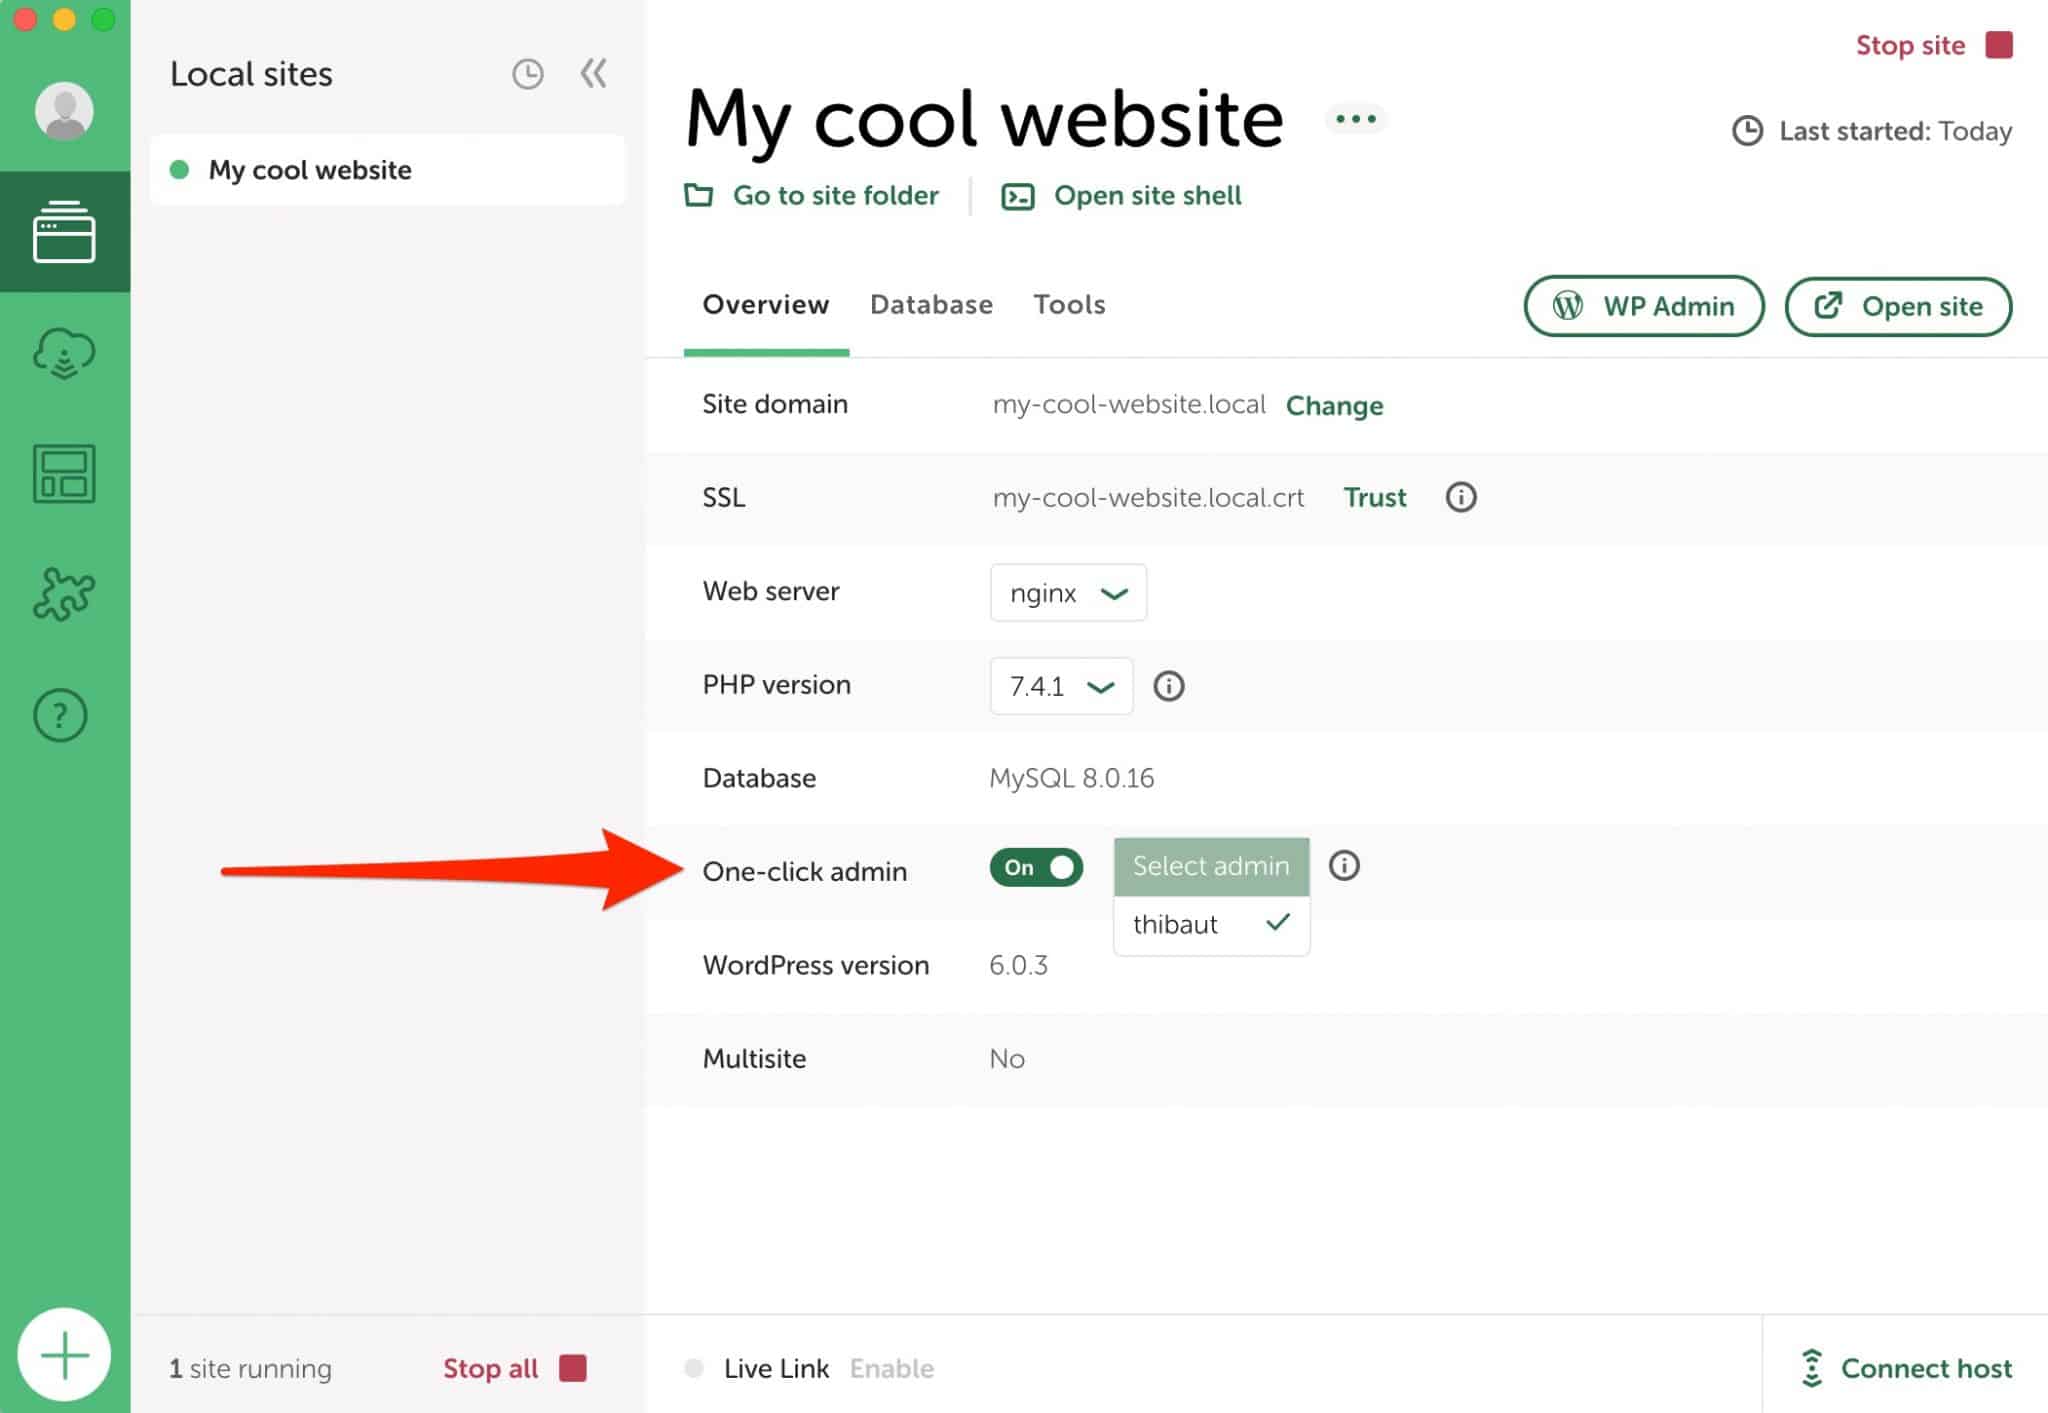
If you wish, you can also set up a one-click admin login, without having to enter your login and password. To do this, activate the One-click admin option and choose the relevant username.
Local by Flywheel has installed the latest major version of WordPress. In my case, it’s 6.0.3. All you have to do is customize it as you wish by adding the theme and plugins of your choice, as well as the content (pages + posts).
To do this, I recommend that you consult parts three through five of the WPMarmite guide to creating a professional WordPress site.
How to take advantage of Blueprints
How to create a Blueprint with Local
Thanks to the content in the previous part, you know how to create and customize a WordPress site designed with Local.
If you are used to creating sites on a recurring basis, for example for your clients, you are probably working with the same theme, the same plugins, or even the same key pages (e.g. Contact).
Setting up everything from scratch for each site takes time. With Local’s Blueprints, you can save any site AND all of its configuration (themes, plugins, pages, settings, etc.) so you can reuse it every time you start a new local site.
To create a Blueprint, start by configuring the site of your choice with all the elements you want.
Then click on the three small dots next to your site name, and select “Save as Blueprint.”

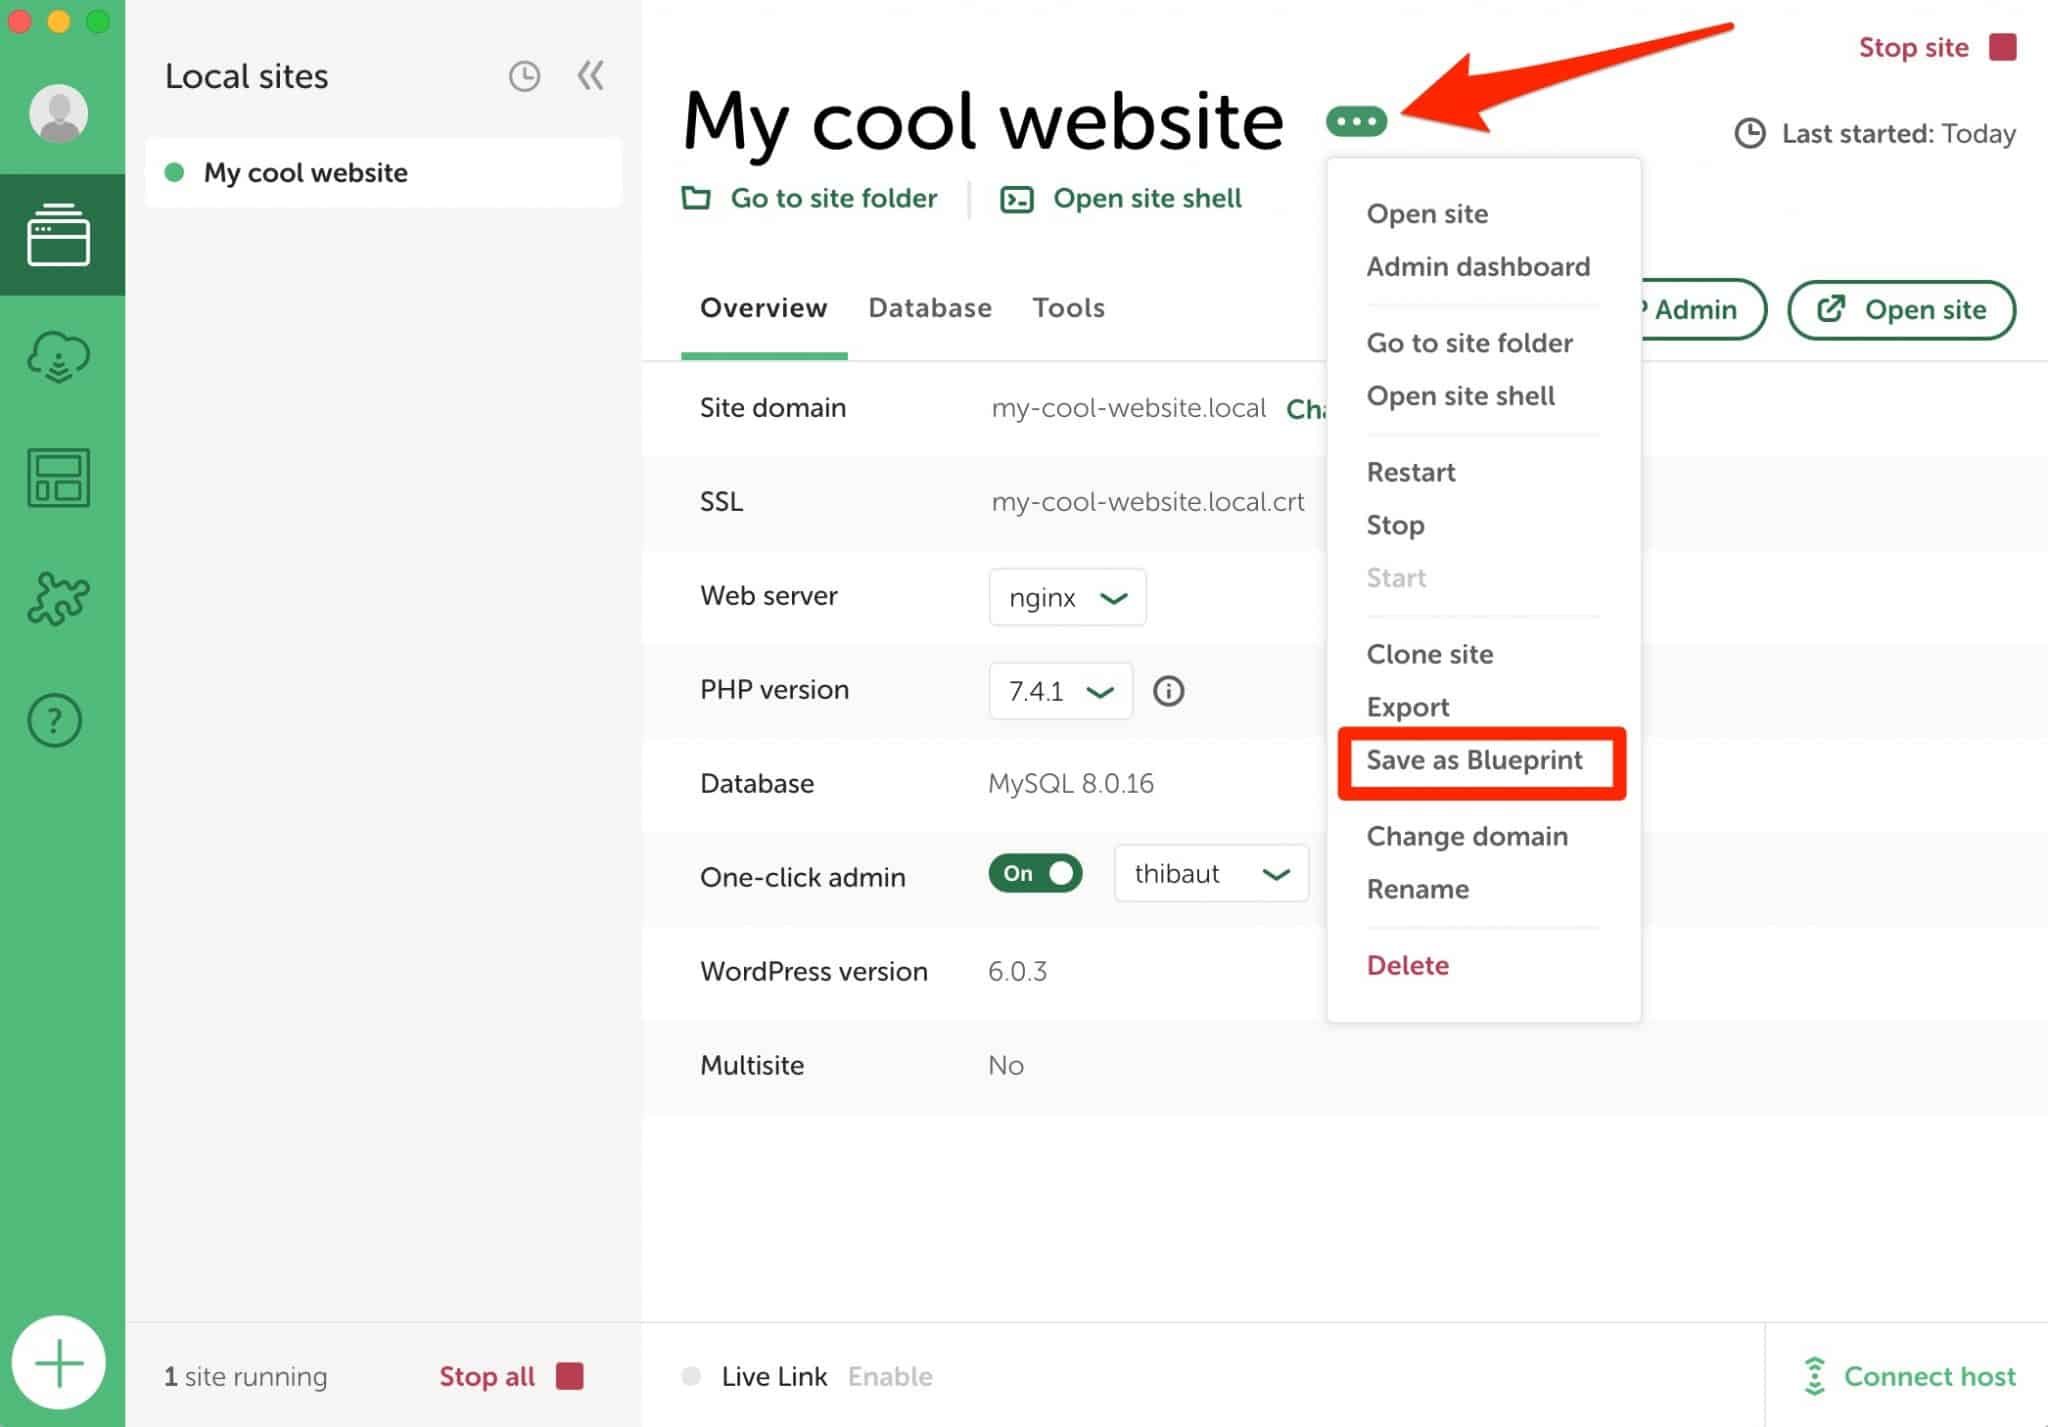
Give your Blueprint a name, choose the type of files to exclude (leave as is), and then click “Save Blueprint.”


How do I design a site from a Blueprint?
Launching a new local site from a Blueprint is very simple. Just choose the “Create from a Blueprint” option when you create the site (you know the steps from there).
If a Blueprint is available, you will be prompted to choose it, as below:


How to access (and edit) my Blueprints?
To view all your Blueprints, click on their corresponding menu icon in the left sidebar of your Local interface.
You will then have:
- An overview of your site’s details, with the “Show details” button.
- Shortcuts to rename or delete your Blueprint, by clicking on the three little dots.

How to show your site created with Local through a link?
Do you work in a team and/or for clients? Local has a great feature to satisfy them: Live Links. With these links, you can give direct access to your site to the person of your choice, so they can view it via an internet connection.
This is really convenient since you don’t have to send your site to the online server.
To get a Live Link on the site of your choice, you must first log into your Local account by clicking on the circular icon at the top of your dashboard:

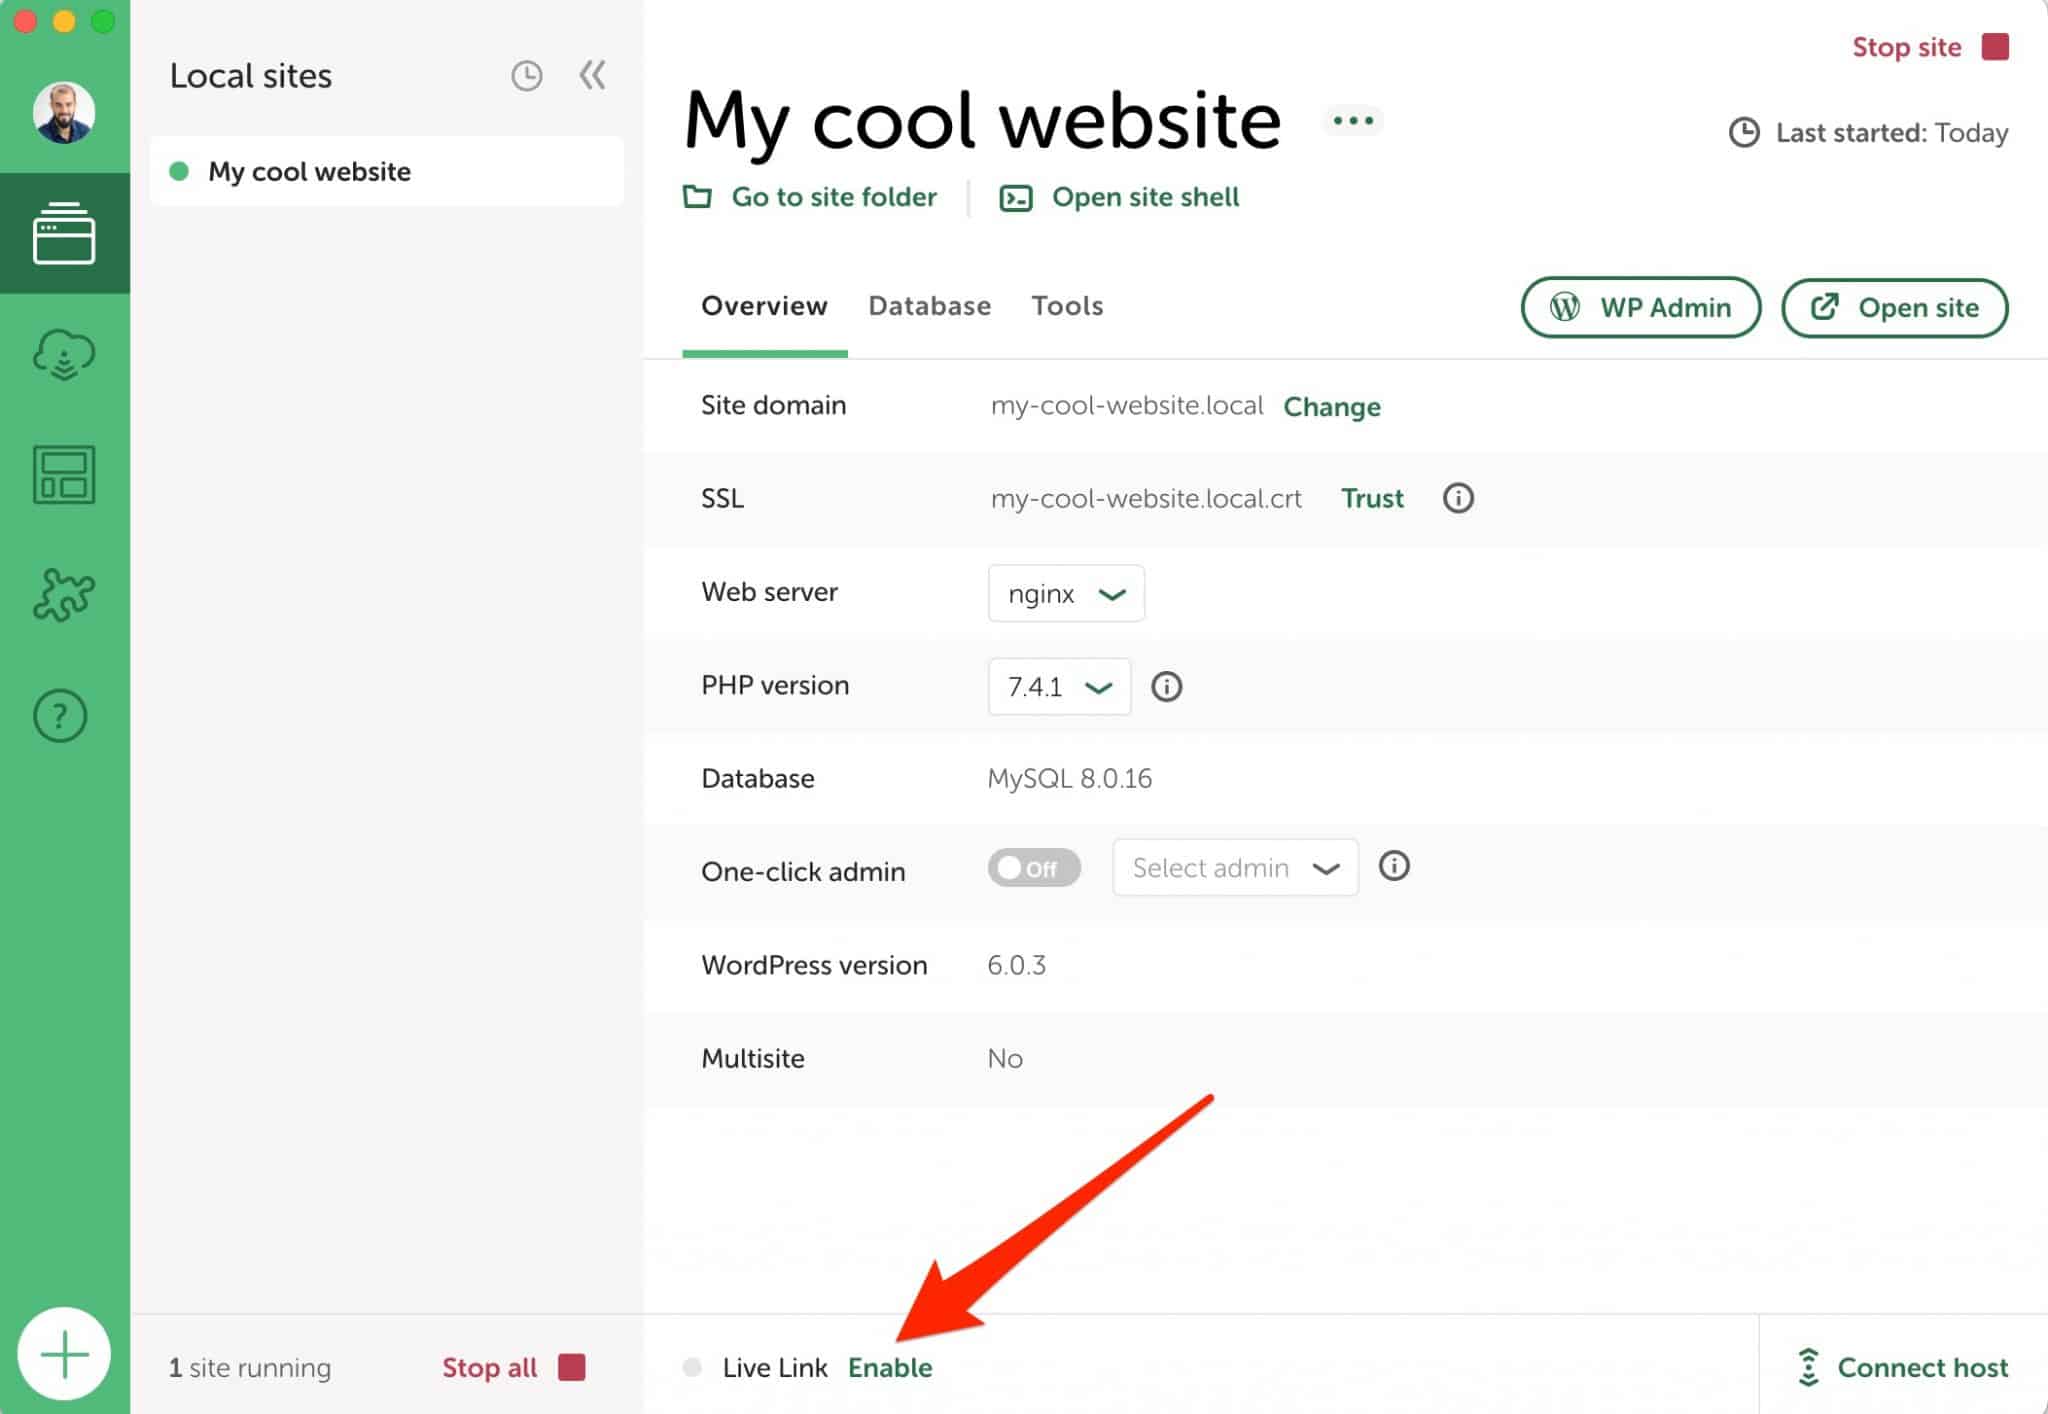
When you’ve got that straightened out, you can then generate a Live Link by clicking on “Enable”:
As soon as the Live Link is created, a green dot appears. You can view the information linked to it (link, user name, password) by clicking on the small arrow:
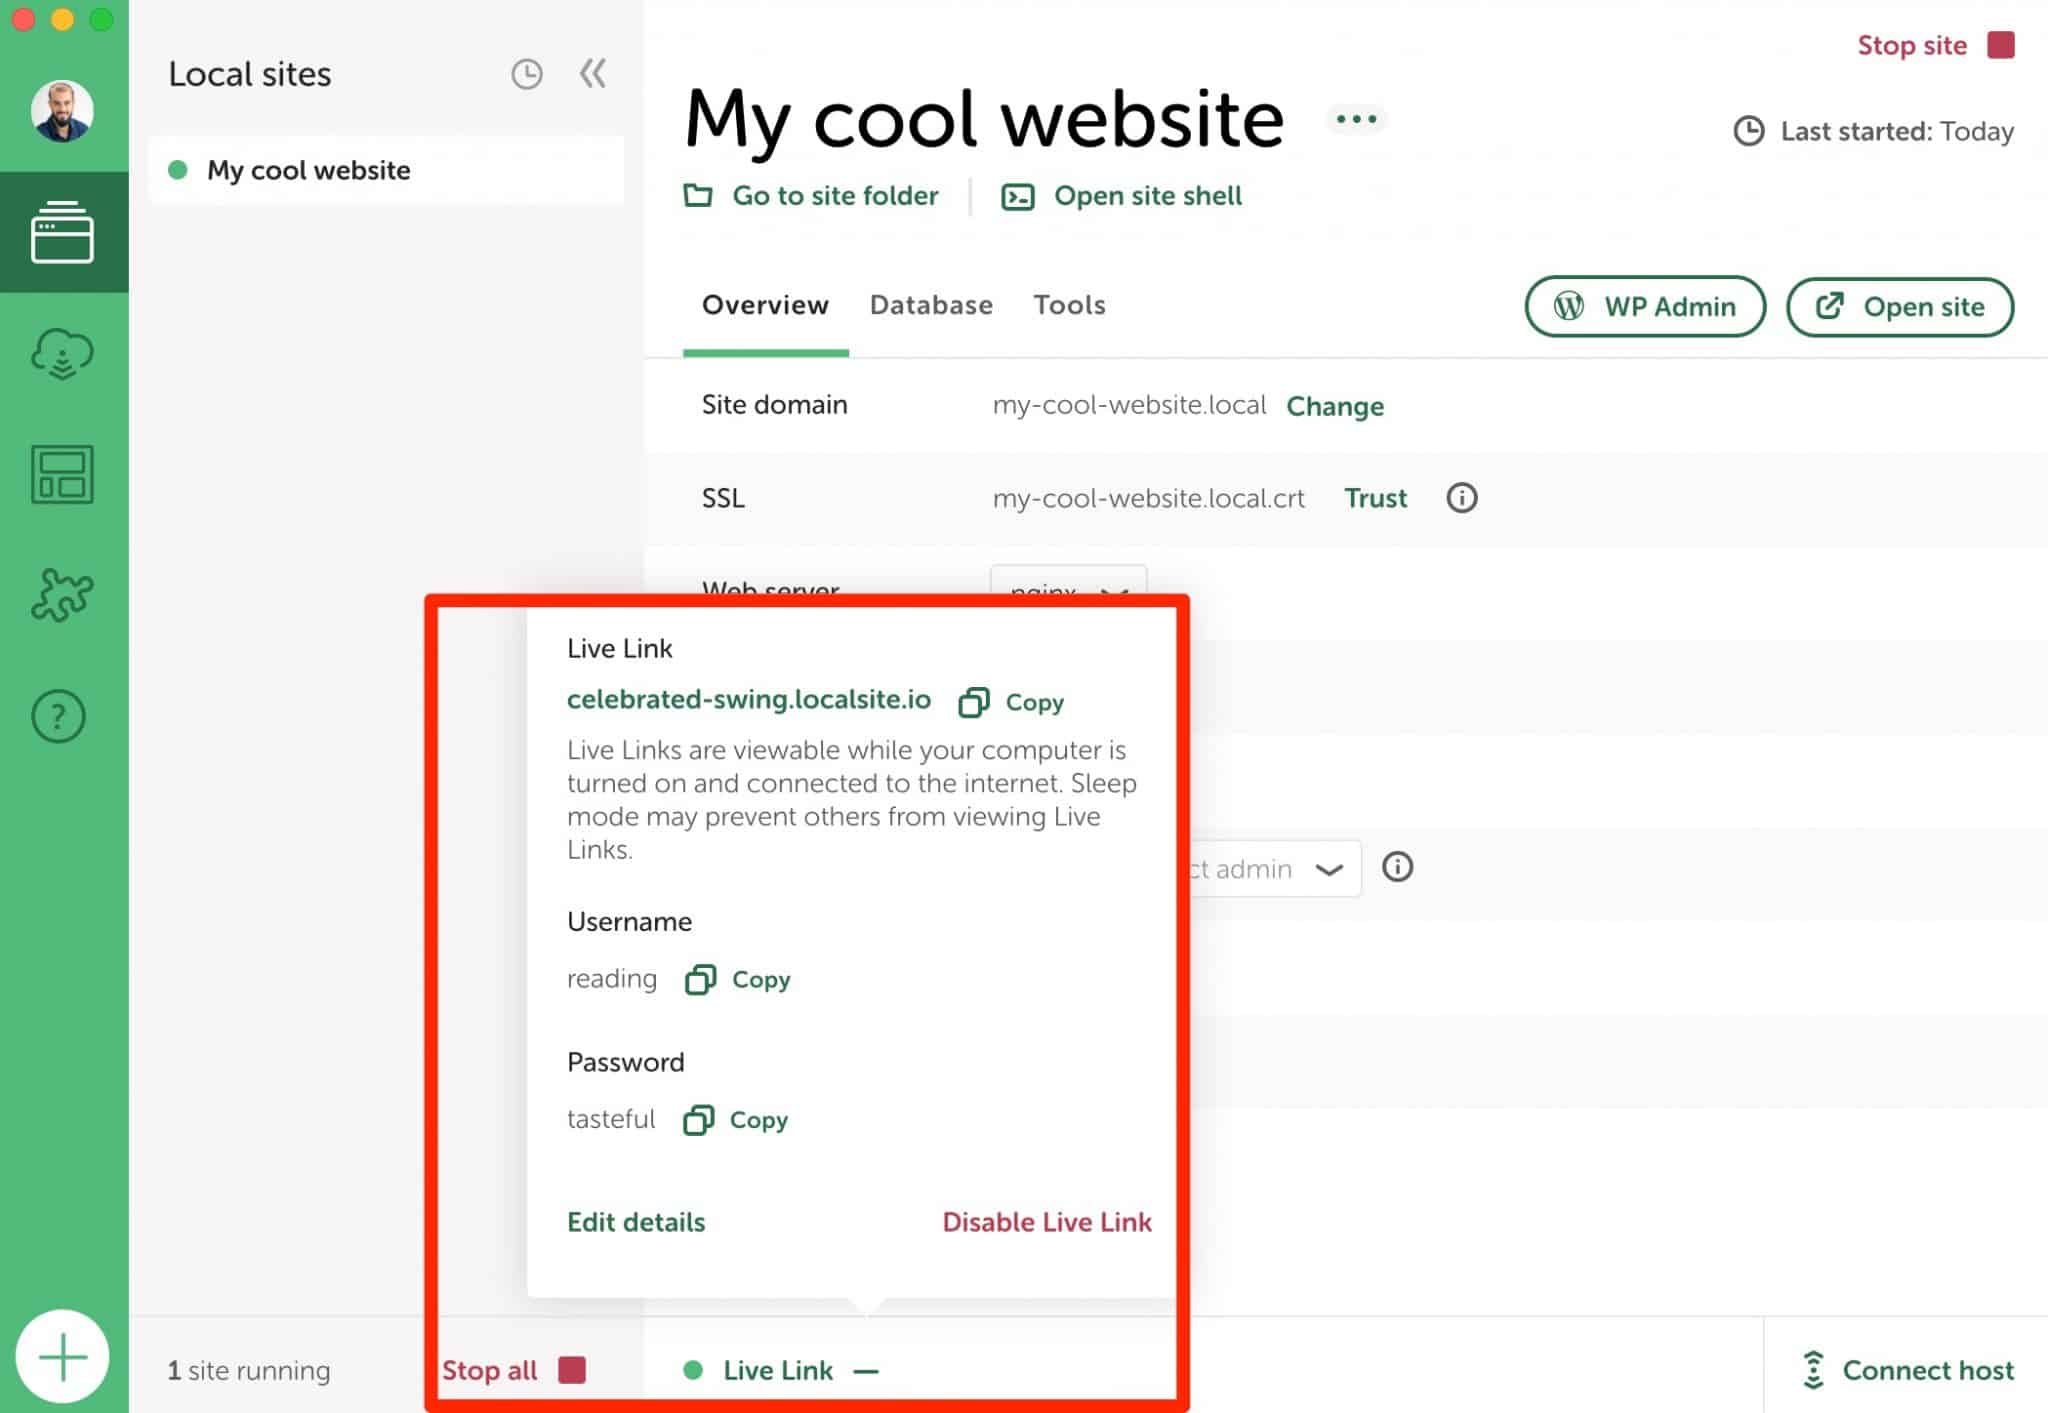
As you can see, the generated Live Link is rather impersonal. The username (reading) and password (tasteful) make you smile, but they’re not very professional and secure.
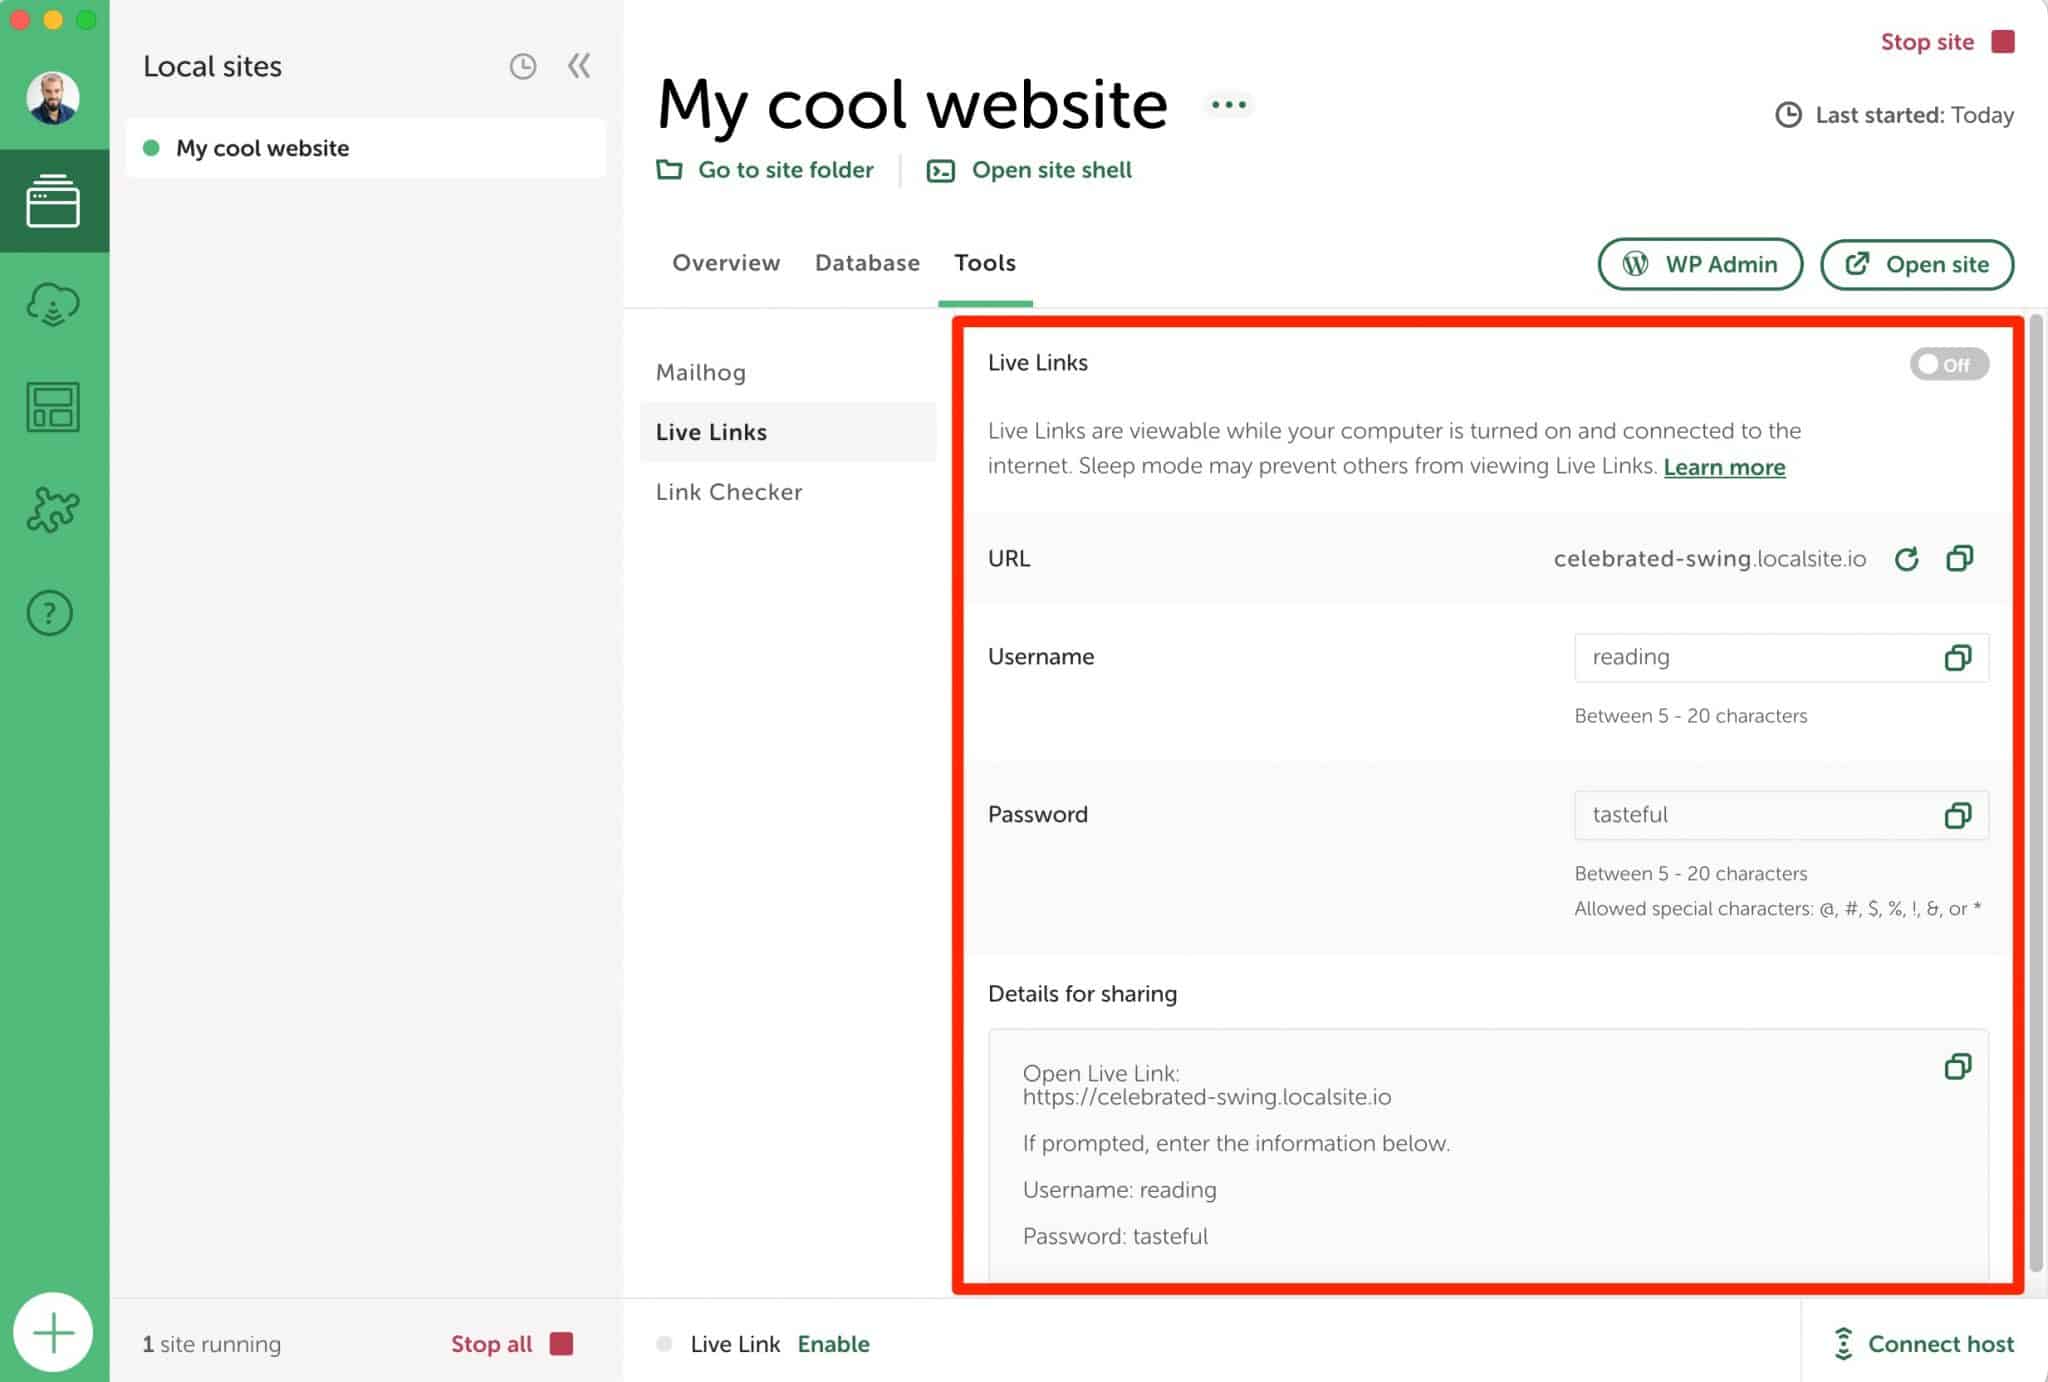
You can change the URL, username, and password for each Live Link by going to Tools > Live Links. Your Live Link must first be deactivated:

How to access your site’s database
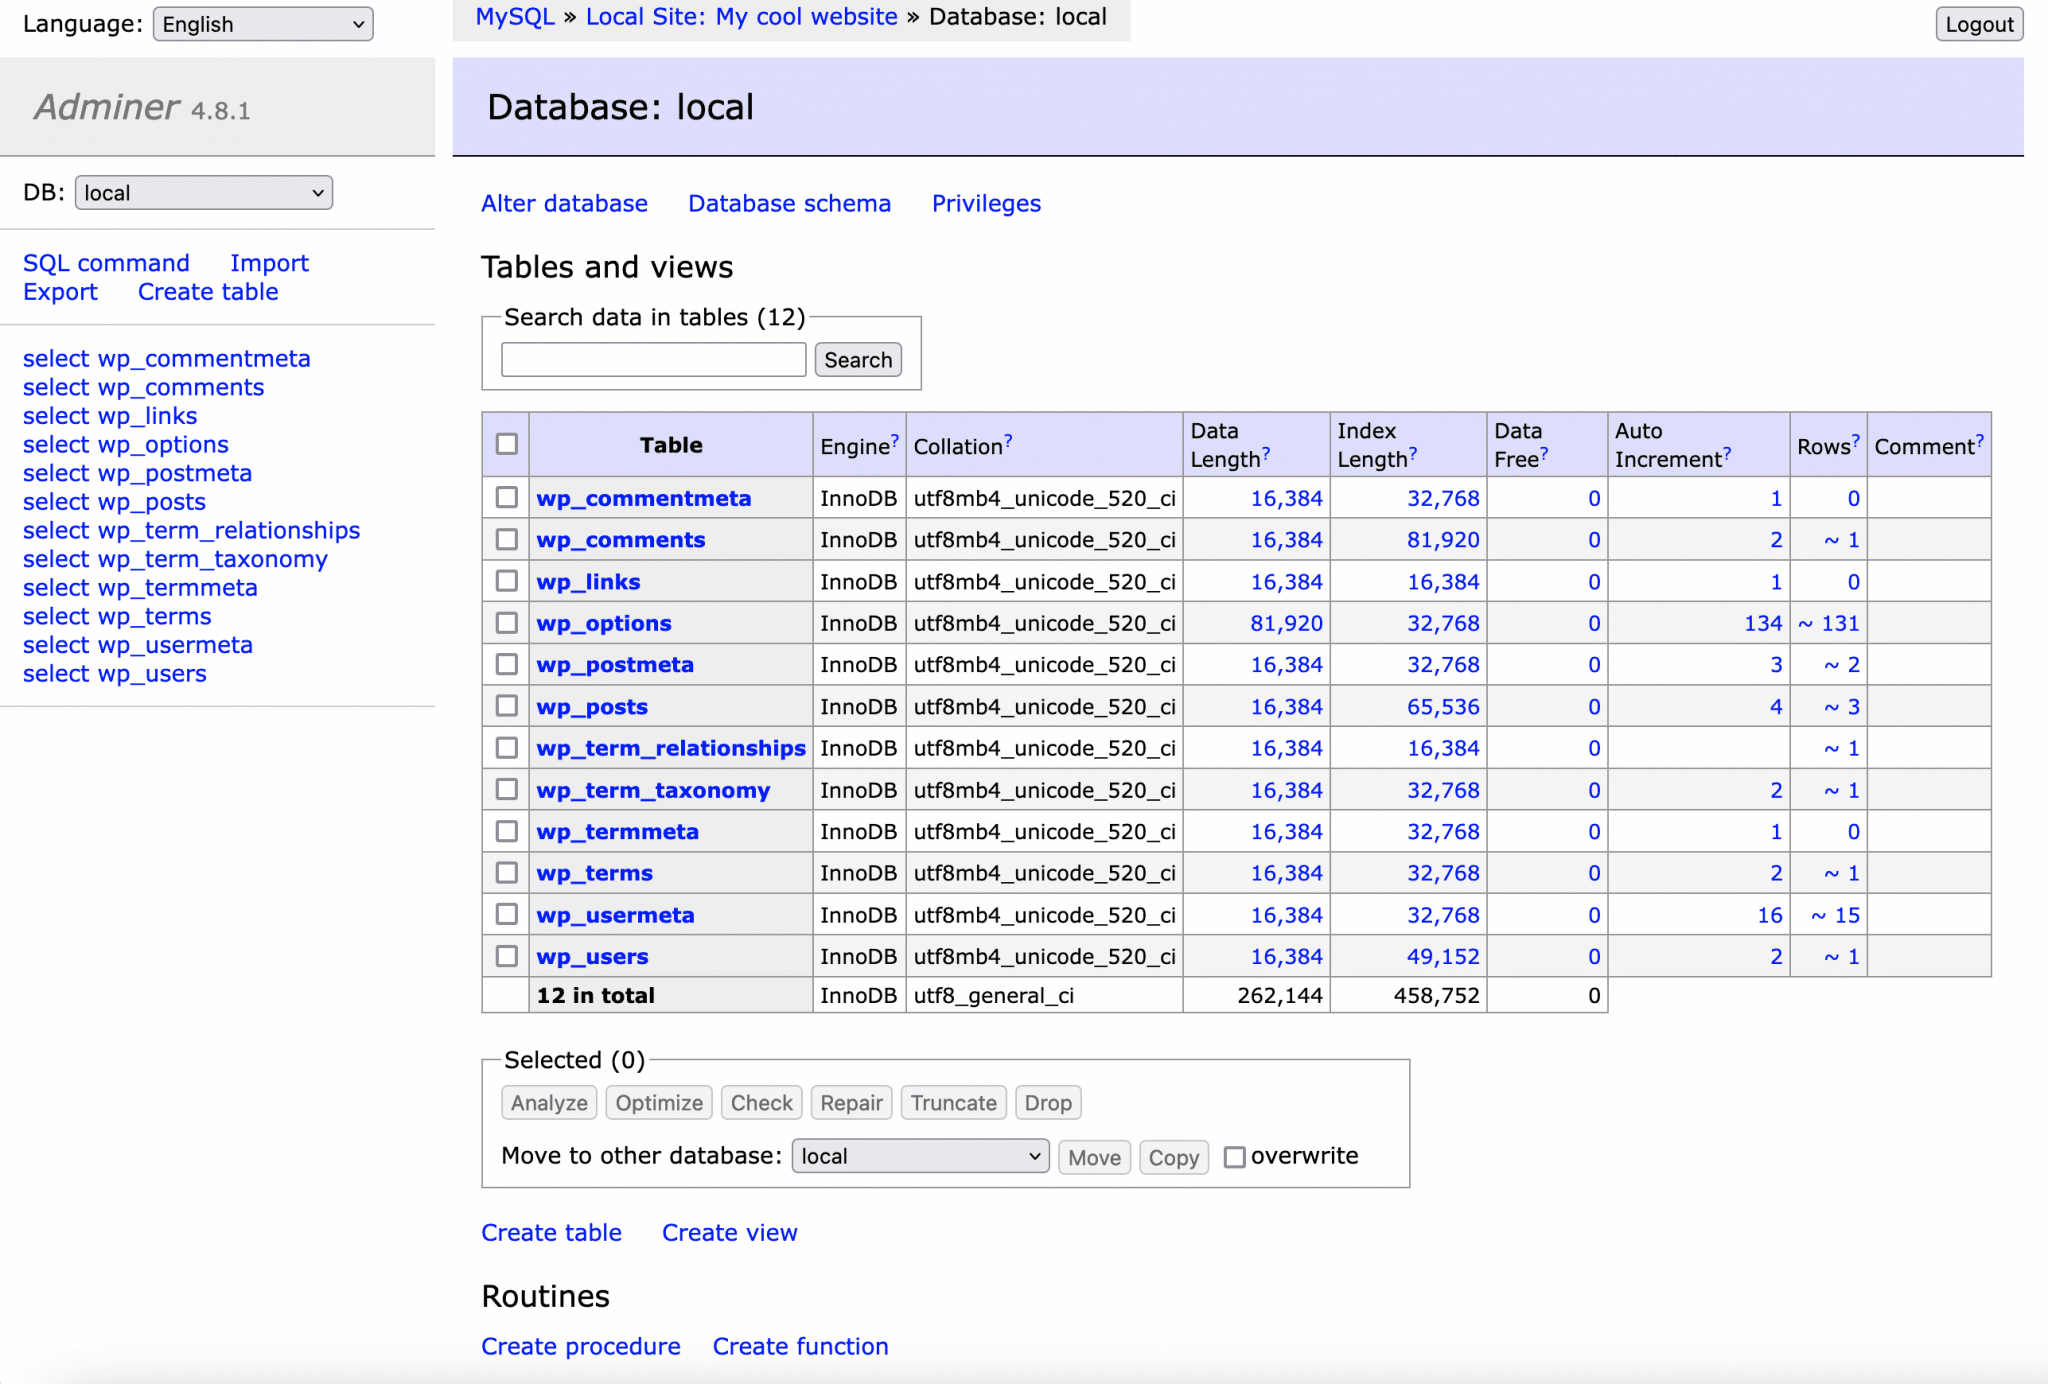
At some point, you may want to access the database of your WordPress site created with Local by Flywheel. You can do this by going to the “Database” tab, which lists your database information (host, name, user, password).
To do so, click on “Open Adminer.” Local will redirect you to Adminer, an interface to manage your database:

How to switch your local site to HTTPS
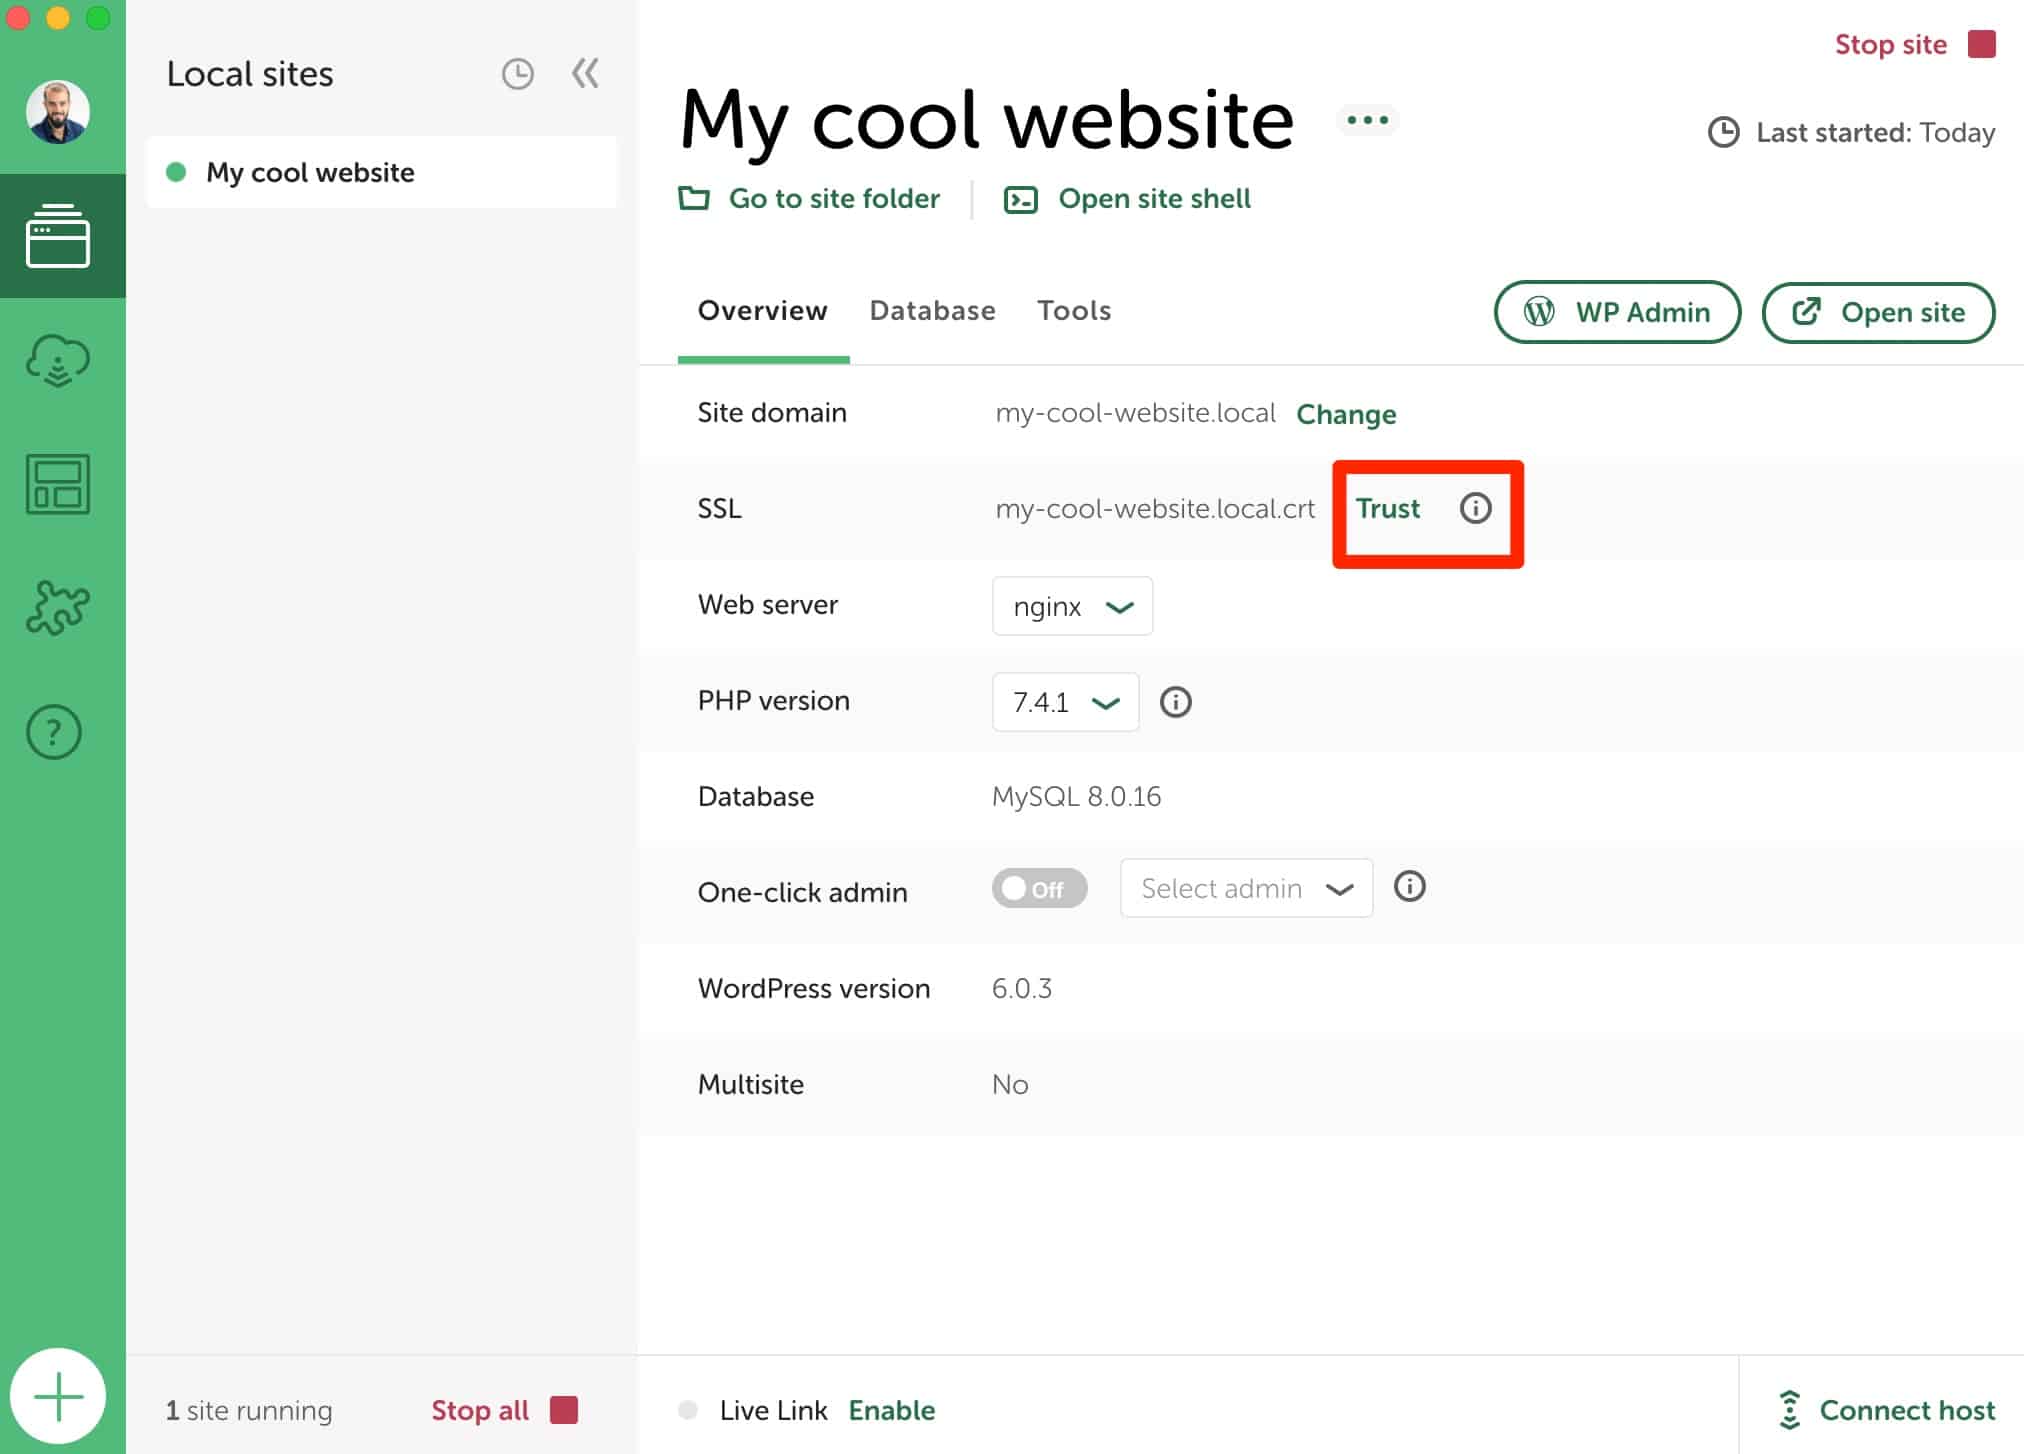
Another very practical option is the ability to activate HTTPS on your local environment. With one click, you can simulate the creation of an SSL certificate so that web browsers consider your connection to be secure.
To do this, in the “Overview” tab, click on the “Trust” button in the SSL line:

FYI, you may have trouble enabling this option on a Mac. If this is the case for you, check out this resource from Local.
How to check the emails sent locally from my site?
When you develop locally, you often run into a problem: how do you know if your emails are being sent and received?
I’m thinking for example of transactional emails that notify the submission of a new comment and the change of a user’s password, or the email sent to the administrator after a contact form is submitted.
To find out if all this is working, Local relies on MailHog, an email testing tool. You can access it, site by site, through Tools > MailHog > Open MailHog.
You’ll find on the tool’s interface all the emails that have been sent, like the one below, indicating the creation of a new WordPress site:

How to install Local by Flywheel add-ons
Beyond these nice options, Local also offers nine free add-ons that you can activate according to your needs. For example:
- Image Optimizer, to compress the weight of your images.
- Cloud Backups, to save your sites in the Cloud, via Google Drive or Dropbox.
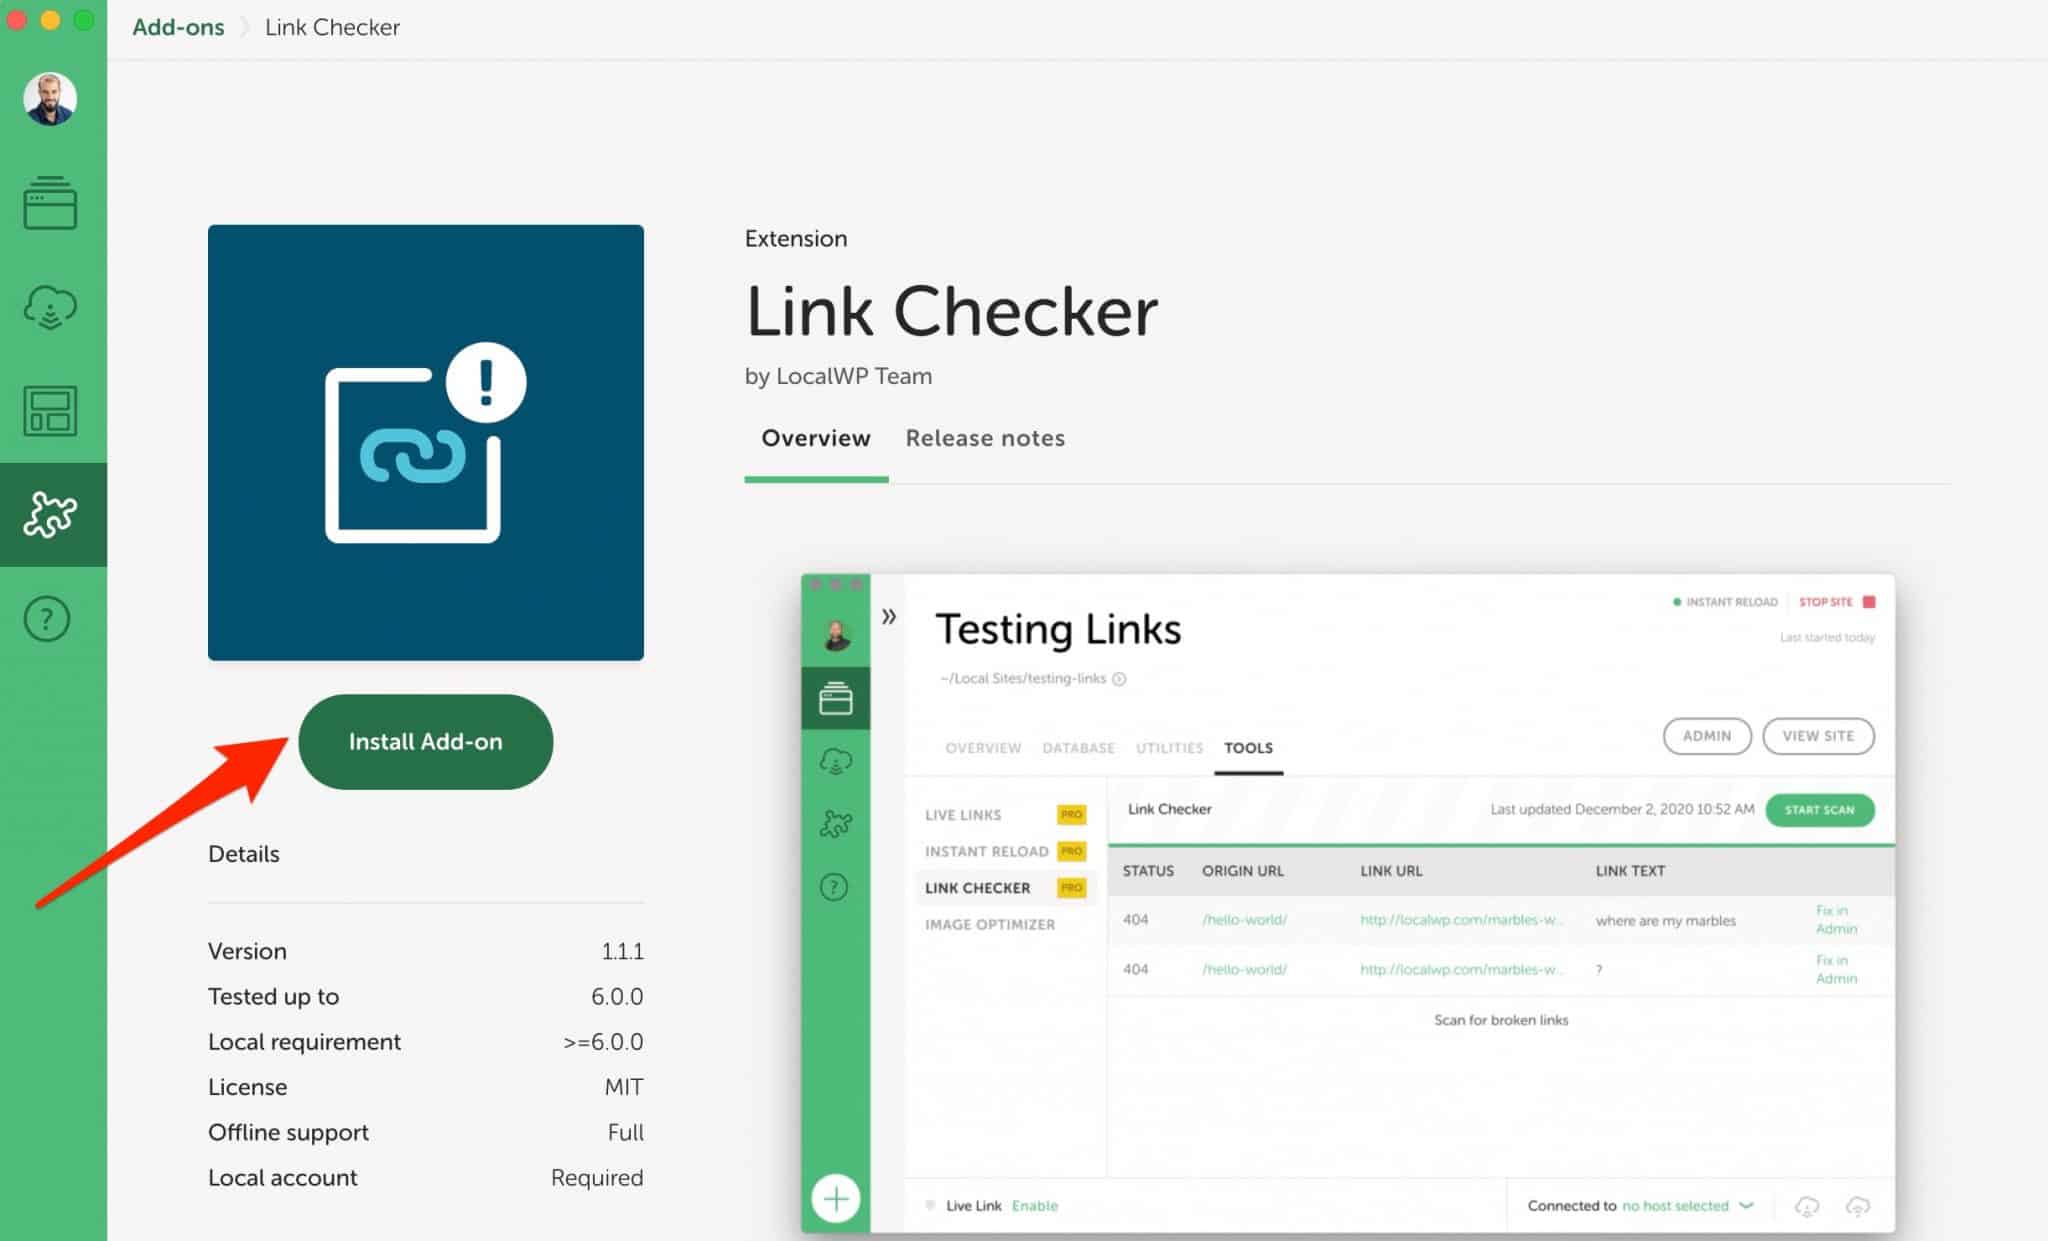
- Link Checker, to detect broken links (404 errors) on your local site.
- Instant Reload, to automatically refresh your browser whenever you edit a CSS file.
- Atlas: Headless WP, to create a headless WordPress site (a site where the back-office and the front-end are managed separately).
All these add-ons are accessible by clicking on the puzzle piece icon in the left sidebar of your Local interface:


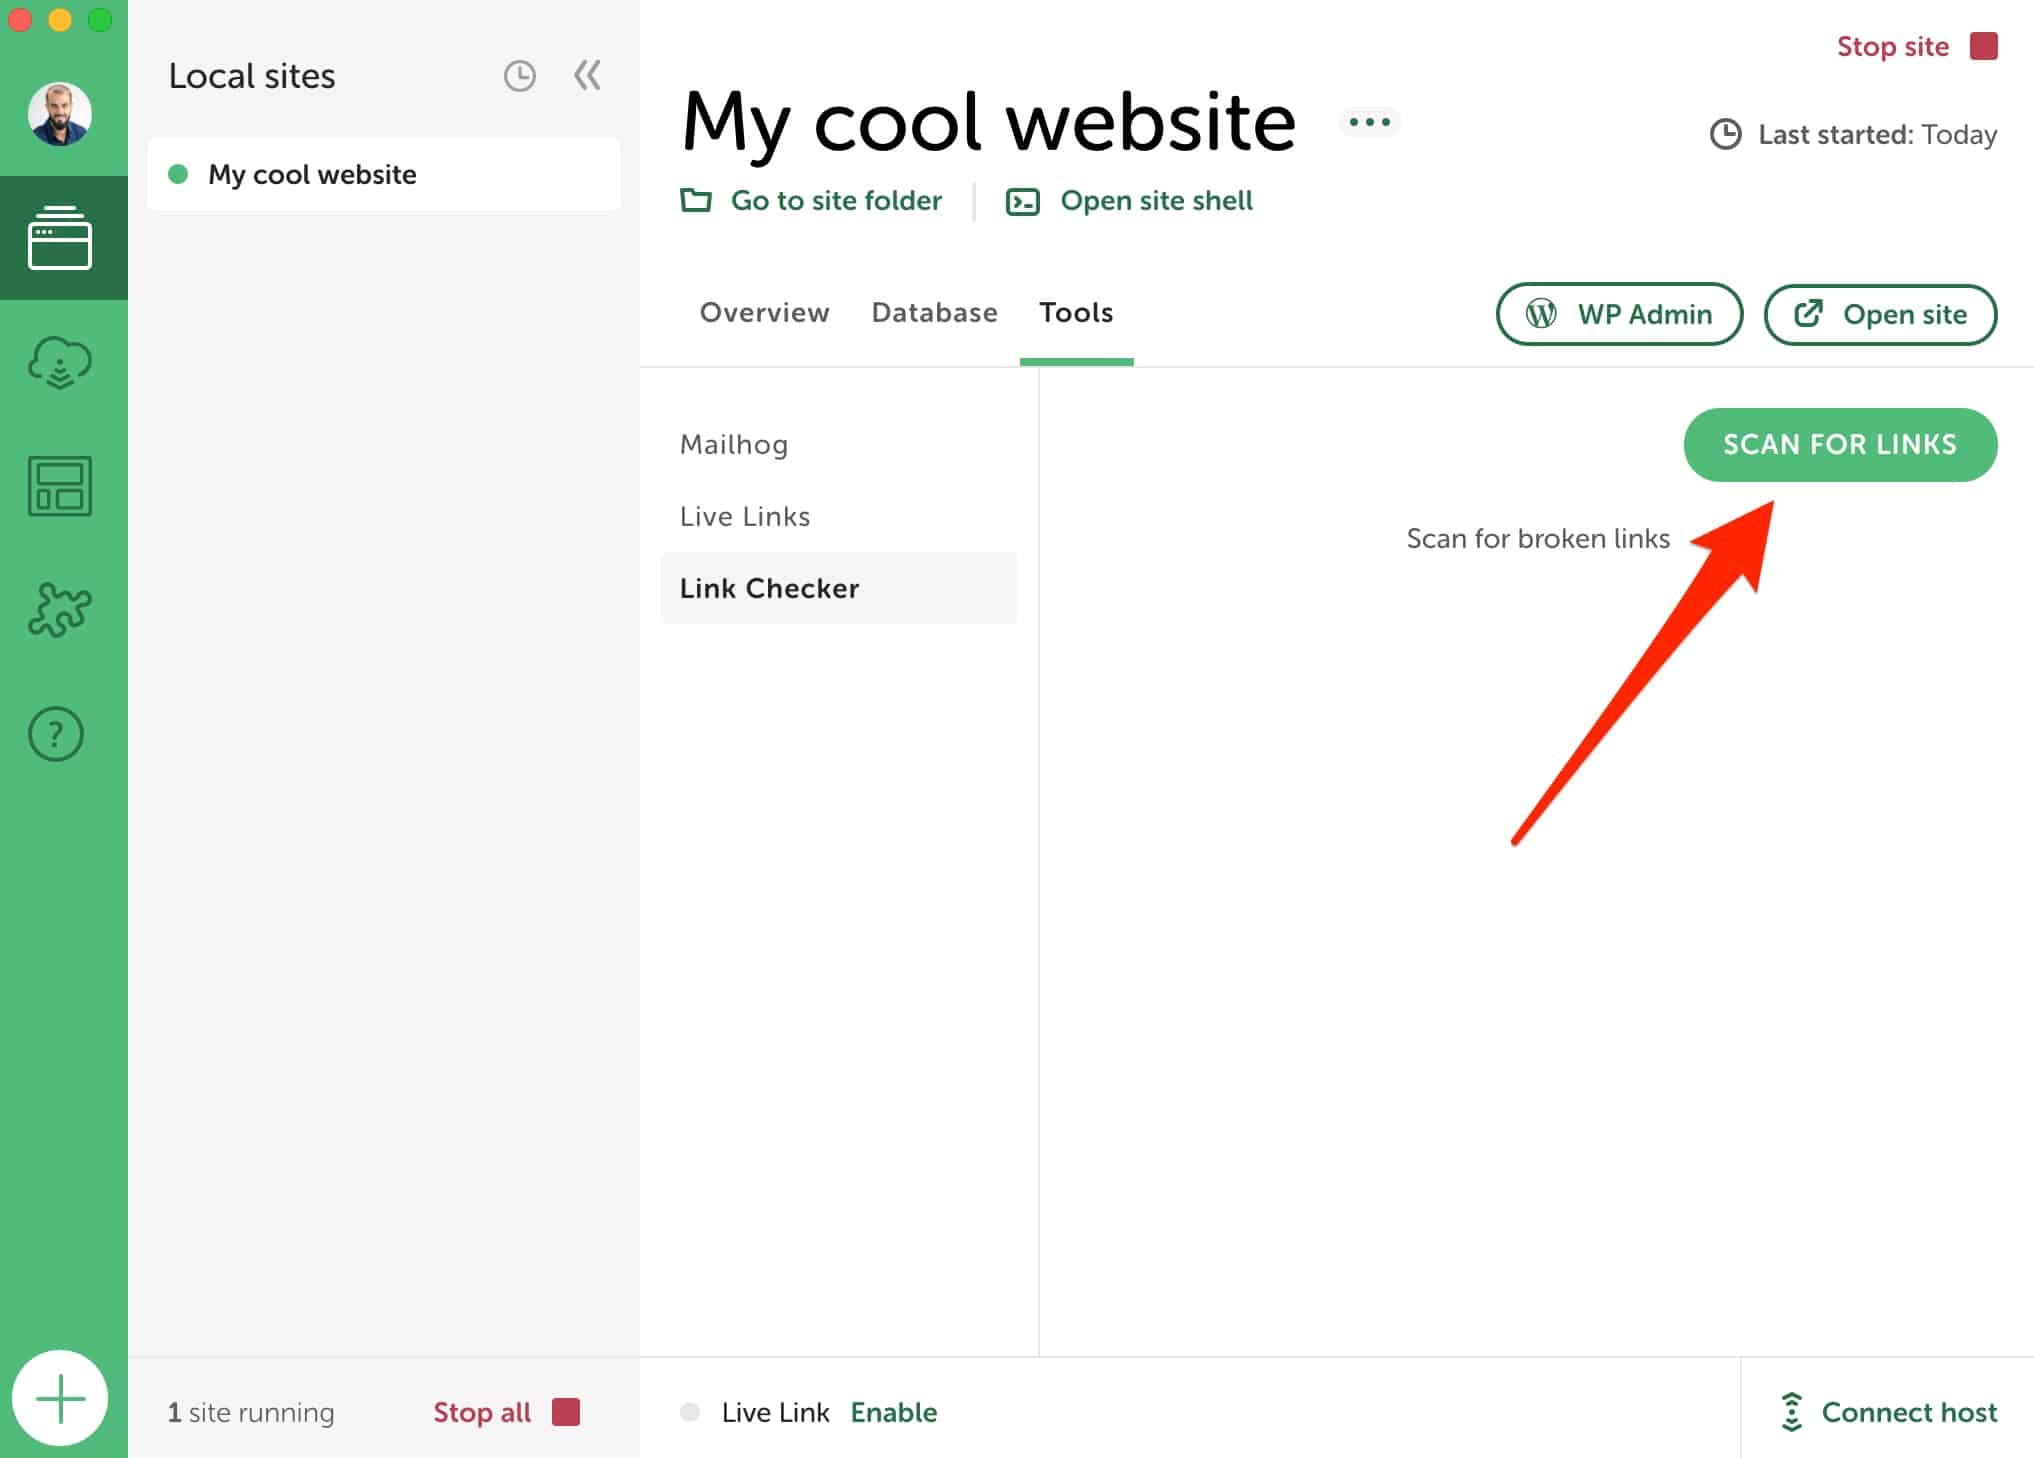
Click on the add-on of your choice, then on “Install Add-on,” as here with the Link Checker add-on:

You will then find the installed add-on in the “Tools” tab. All you have to do is put it into action as soon as you want:

How to change preferences on Local
Let’s finish this tour with the possible customization of certain settings in the Local preferences.
To access them, go to the “Preferences” menu of the tool:

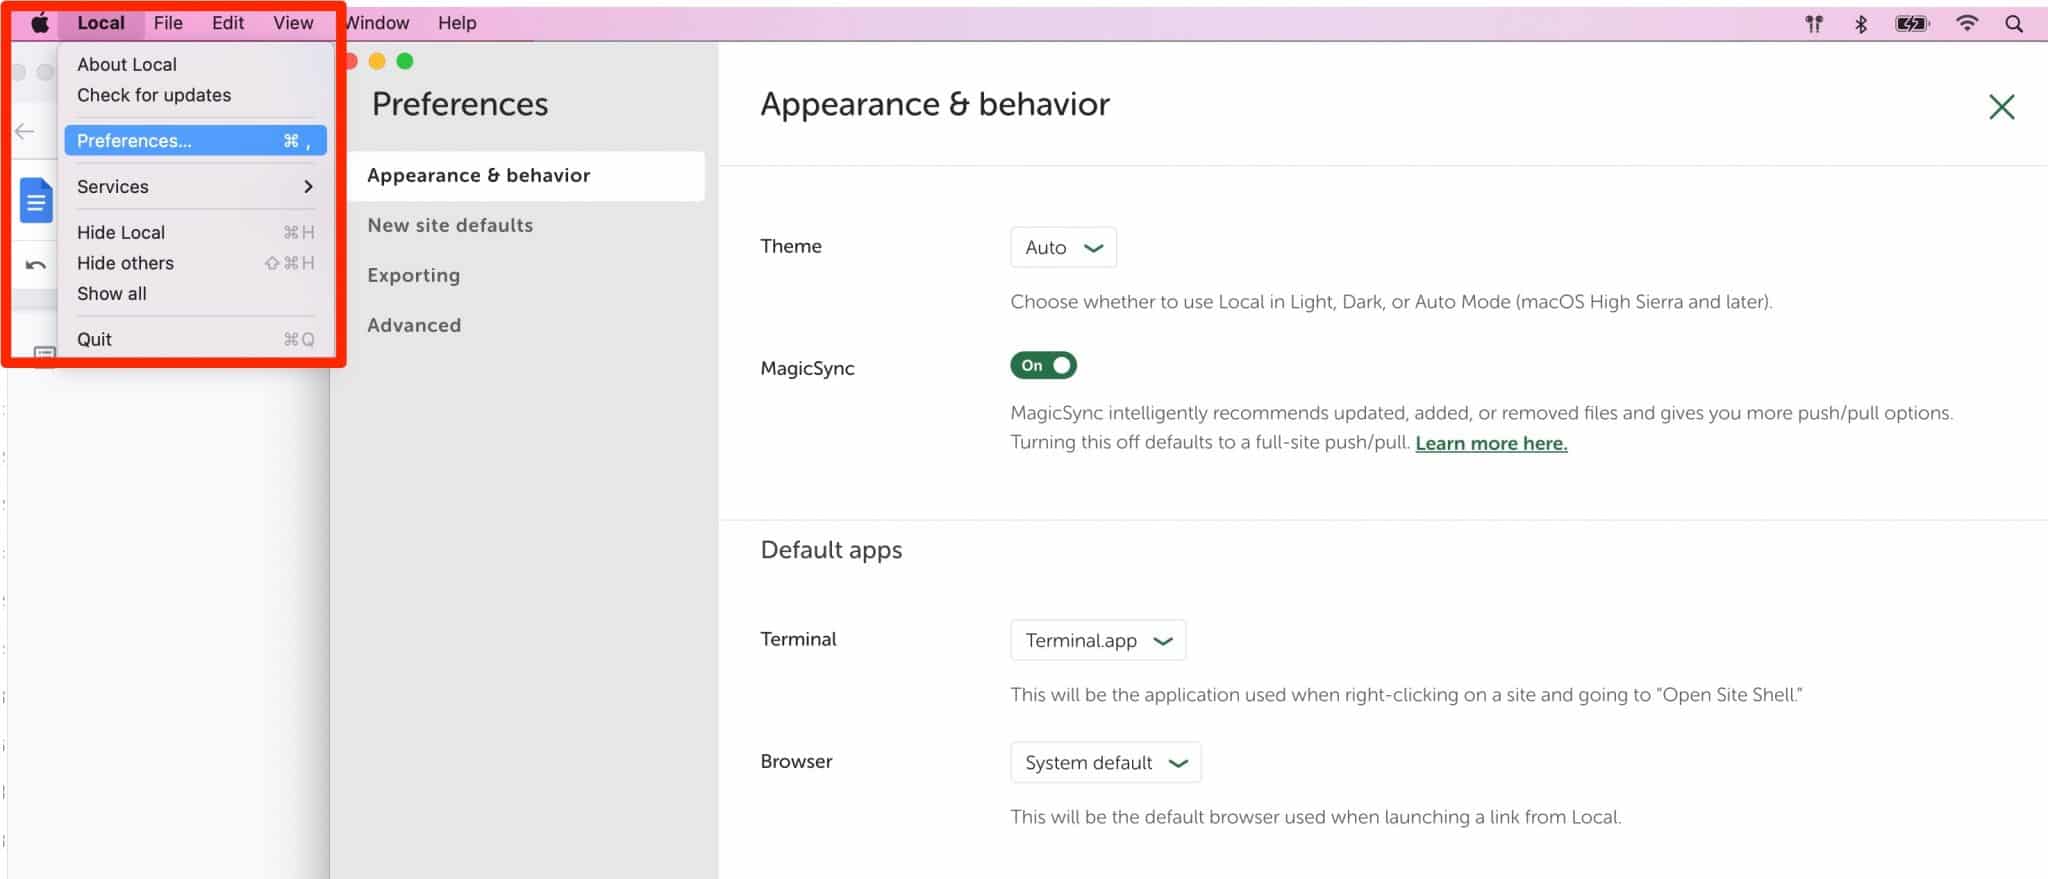
You will find four submenus of settings:
- Appearance & behavior allows you to change the tone of the interface (light by default, or dark).
- New site defaults. Here you can set the default suffix of each domain name (if you don’t like
.local), the administrator’s email, and the location of the site on your computer. - Exporting allows you to exclude certain file extensions when exporting a local site.
- Advanced allows you to activate error and usage reports, among other things.
What are the alternatives to Local?
With all this information, you can set up Local like a boss. Over the years, it has become one of the most popular programs on the market for designing a local WordPress site.
If you are not convinced by it, you can turn to one of its competitors:
- MAMP (Mac and Windows) or WampServer (Windows). For your information, a tutorial on how to install MAMP is available on the WPMarmite blog in this article.
- DevKinsta, the solution created by the hosting company Kinsta
- Vagrant
- Docker
All these solutions are also free but they don’t have the same complexity. DevKinsta is certainly the easiest tool to use for a beginner. It’s the closest to what Local offers in terms of interface and options.
MAMP requires a little more technical knowledge to be used, because its installation is 100% manual. Finally, Vagrant and Docker are primarily dedicated to experienced developers and technicians.
Our final opinion on Local by Flywheel
Local is an excellent tool for creating local WordPress sites. To tell you the truth, I used to use MAMP before I discovered it. Well, MAMP ended up in the trash.
Local has a lot of assets that seduced me from the first moments. Easy to use, it’s a tool that can be used by beginners as well as by experienced developers.
Download Local by Flywheel on its official website:
Free, ergonomic, and equipped with super practical features (Live Links, Blueprints, etc.), Local is both pleasant to use and efficient. What more could you ask for?
Well, maybe that it be even more reliable than it is now. Personally, I have never encountered any major problems with this software. However, some people sometimes complain that it crashes or doesn’t want to start. This could be the case if you want to work on sites with a lot of files and content.
If you do have any problems with it, you should know that Local offers a public forum where you can find many answers. And most of the time, upgrading to the latest version of the tool solves a lot of problems.
Do you use Local? Are you a die-hard fan of this tool? Give me your opinion in the comments.