


Like every morning, you are browsing your favorite websites. And suddenly, you see it appear before your eyes.
Ladies and gentlemen, this is the famous push notification:
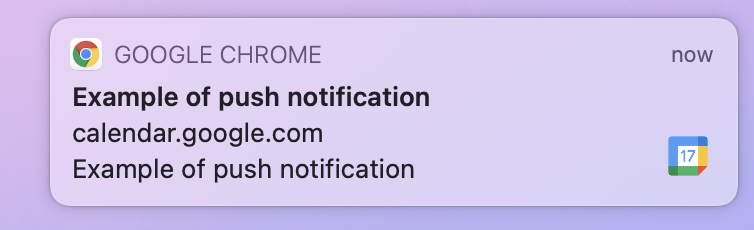
We see them blooming everywhere on the web.
If I tell you that this is a very powerful marketing tool, which can be up to 10 times more effective than an email campaign, I am sure you will open your eyes wide, right?
Today, I’m going to show you how to set up push notifications on your website or blog, via the OneSignal plugin for WordPress.
Through a step-by-step tutorial, I’ll guide you through the entire creation and setup process.
I’ll also reveal what benefits you can get from using push notifications and if it is useful for you to use them.
Overview
Originally published in June 2018, this article was updated in December 2020 to take into account the evolutions of the plugin and the OneSignal service.


Everything you need to know about push notifications
What is a push notification?
Push notifications were first introduced on smartphones and tablets.
Used by applications, they are small windows that automatically appear on your screen to display a message (e.g. a promotion, information, the publication of a new article, etc.).
They then spread to web browsers. In this case, we talk about web push notifications. As their name indicates, they are sent by websites.
You can only subscribe to them by giving your prior consent, so they also have the advantage of respecting the constraints related to the GDPR (General Data Protection Regulation), which came into force in May 2018.
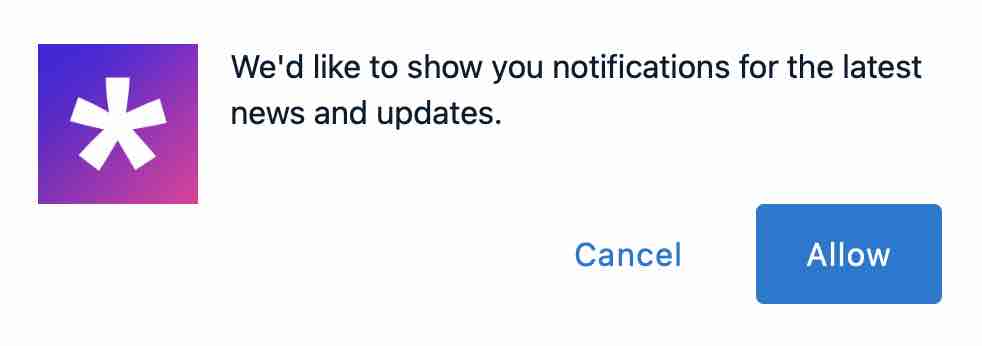
The sites that have implemented them usually warn you by displaying this type of message.
This is the case of Elegant Themes, the creator of the famous Divi theme.
Some sites, like Social Triggers, use this type of presentation:
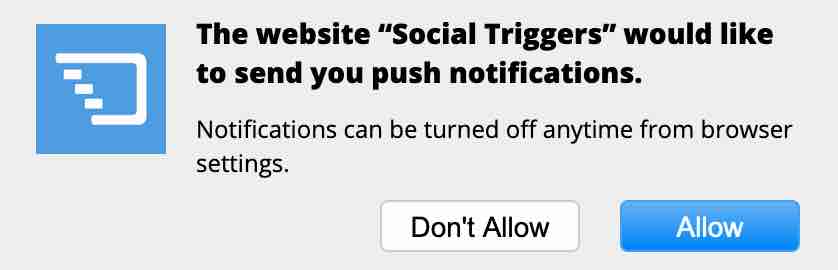

Then you just have to allow them or block them (Cancel or Don’t Allow). And that’s it. Simple as that.
In general, they consist of:
- A title;
- The address of the website sending it to you;
- A featured image representing the subject of the article;
- A few catchy words presenting the pitch of the article to encourage you to read it;
- Your browser icon (on Chrome at least);
- Call-to-action buttons (Close and Settings, in the example above).
Clicking on the notification triggers the opening of the article in your browser.
To finish with this overview of push notifications, you should know:
- You will receive them without even having to go to the site in question. Provided that you have previously authorized their sending.
- That they have nothing to do with classic popup windows, which sometimes appear without you having asked for anything.
Popups only appear on the site that uses them, whereas a push notification will be visible without you even being on the site that sends it.
You just need to have your browser open to receive it.
What are the benefits of using push notifications?
Among the channels used to deliver a message to your visitors, we naturally think of SEO (Search Engine Optimization), social networks, or emailing.
Push notifications are a very powerful marketing tool. They are a good complement to the above methods, and have several advantages:
- Inform your community of the publication of a new article, a promotion or a special offer.
- To know the behavior of your visitors: opening rate, click rate, etc.
- They are very easy to use (subscription only requires a small click) and to manage for your visitors.
- They would increase the percentage of visitors coming back to your site.
- They are not intrusive for your visitors, who do not have to give their email address or personal information to activate them. Tired of using them? Unsubscribe in one click, and that’s it.
- They allow you to display your message directly in front of your visitors, without them being on your site. In turn, this increases the click-through rate compared to a traditional email.
- You can build a subscriber base much faster than with a traditional contact form. Indeed, you only ask your visitors to make a simple choice: Allow or Block, as the OnCrawl site explains it well.
- And if you need to be convinced, here are 7 reasons on why push notifications are better than email.
Now that you know everything about push notifications, I still invite you to use them in moderation. Avoid sending an alert to your readers every 5 minutes.

Remember that we receive hundreds of messages every day via email, SMS, etc. The risk is to alter the user experience.
So make the effort to communicate only around information that is relevant to your target.
Should you use it on your site?
At this point, you should ask yourself if it’s worth using push notifications?
I think they are particularly useful if:
- You regularly publish content on your site/blog. This will allow you to notify your loyal readers of its release and improve engagement.
- You sell products on your site, with WooCommerce for example. A push notification will inform your visitors, in real time, of a promotion, flash sale, or other.
How to install the OneSignal plugin on WordPress?
Easy to use, ergonomic and free up to 30,000 subscribers, OneSignal is the most used WordPress plugin to send web push notifications.
At the time of writing this article, it had 100,000 active installations. So WPMarmite naturally turned to it for this tutorial.
Outside the WordPress ecosystem, it is also the most used tool, far ahead of its competitors, with 68% of market share.
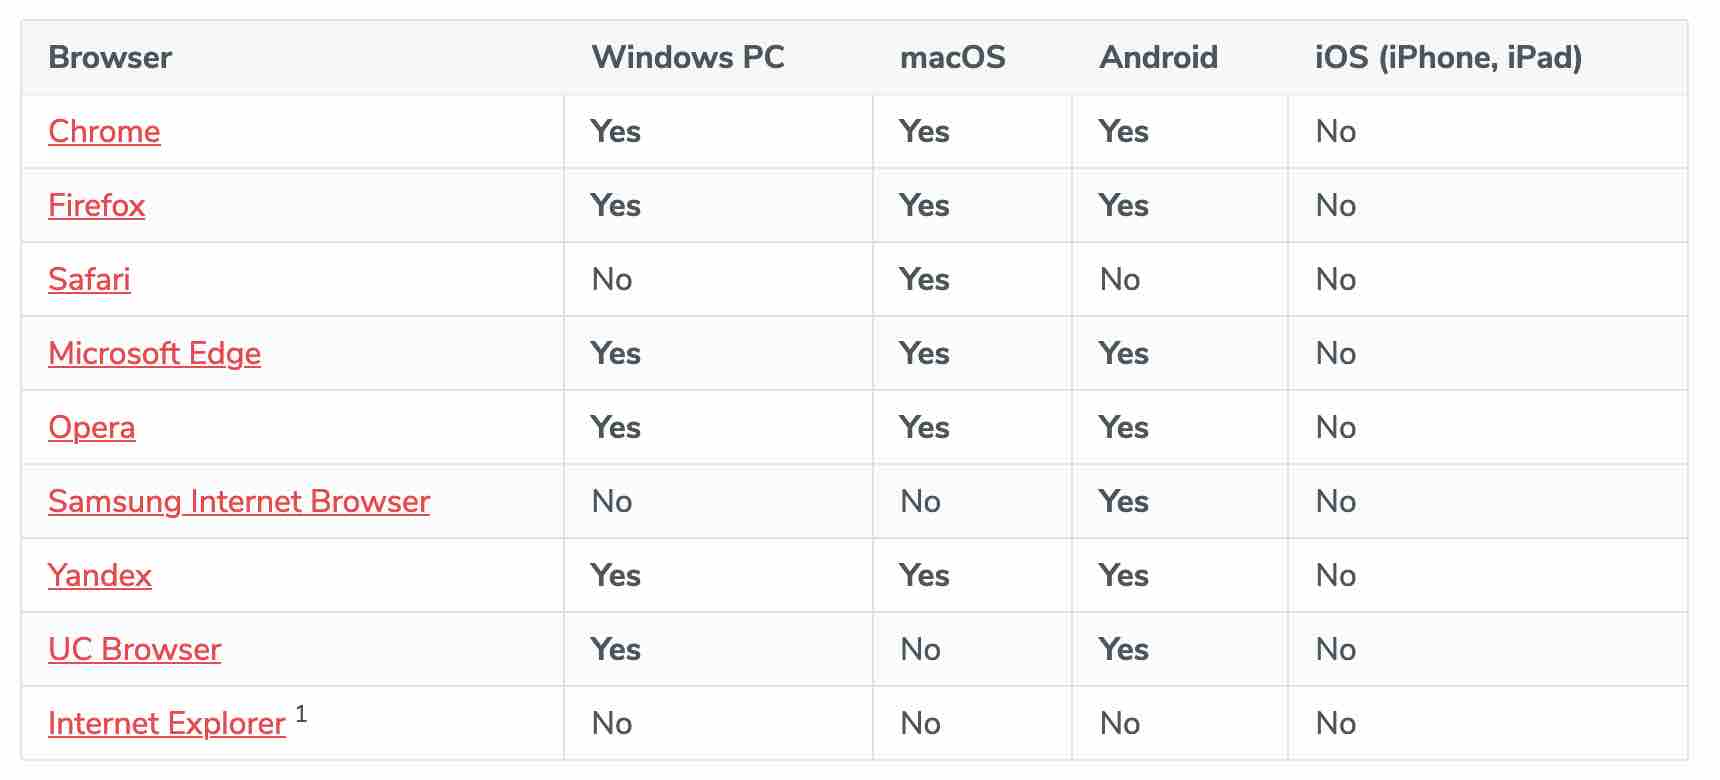
For example, it sends 6 billion notifications per day, and remains compatible with the most used browsers on the market, such as Chrome, Firefox and Safari.
However, the integration on iOS (iPhone, iPad) is not yet assured, at the time of writing.
Note that this was already the case when the first version of this article was written, so there has been no change at this level in two and a half years.
Thanks to OneSignal, you will no longer need a mobile application to send your push notifications. Whether your visitors are on their desktop, smartphone, or tablet, they will have access to your messages.
As long as they use a browser that is compatible with their operating system, of course.
Want to know the rest of the features of OneSignal? We’ll tell you all about it right after, I promise. But first, let’s start by installing the beast on your computer. A necessary prerequisite, right?
Let’s get started.
Step 1: Download and activate the plugin
On your WordPress back-office, go to Plugins > Add New. Type OneSignal in the search bar.
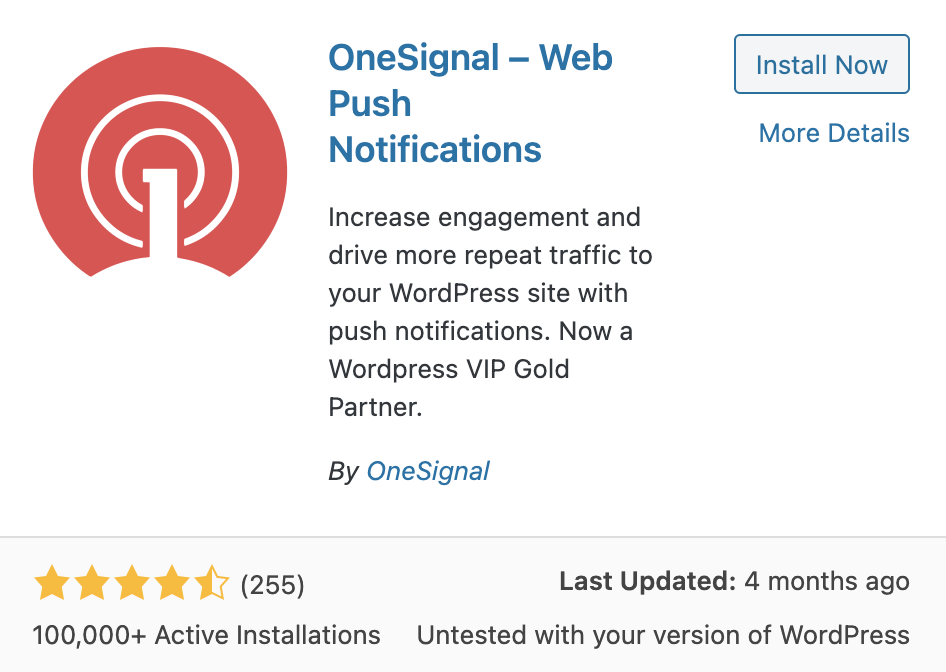
Click on Install and then Activate.
Step 2: Create a OneSignal account
In the left column of your WordPress site, the icon below should have appeared.
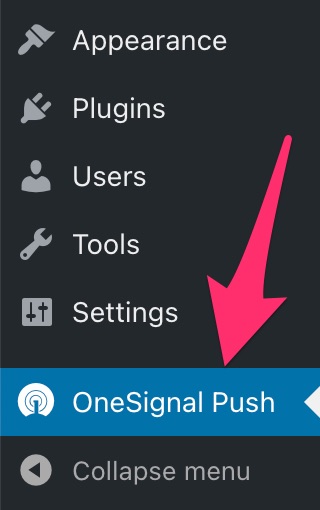
Click on it and then on the OneSignal link. It will redirect you to the official website to create your account.
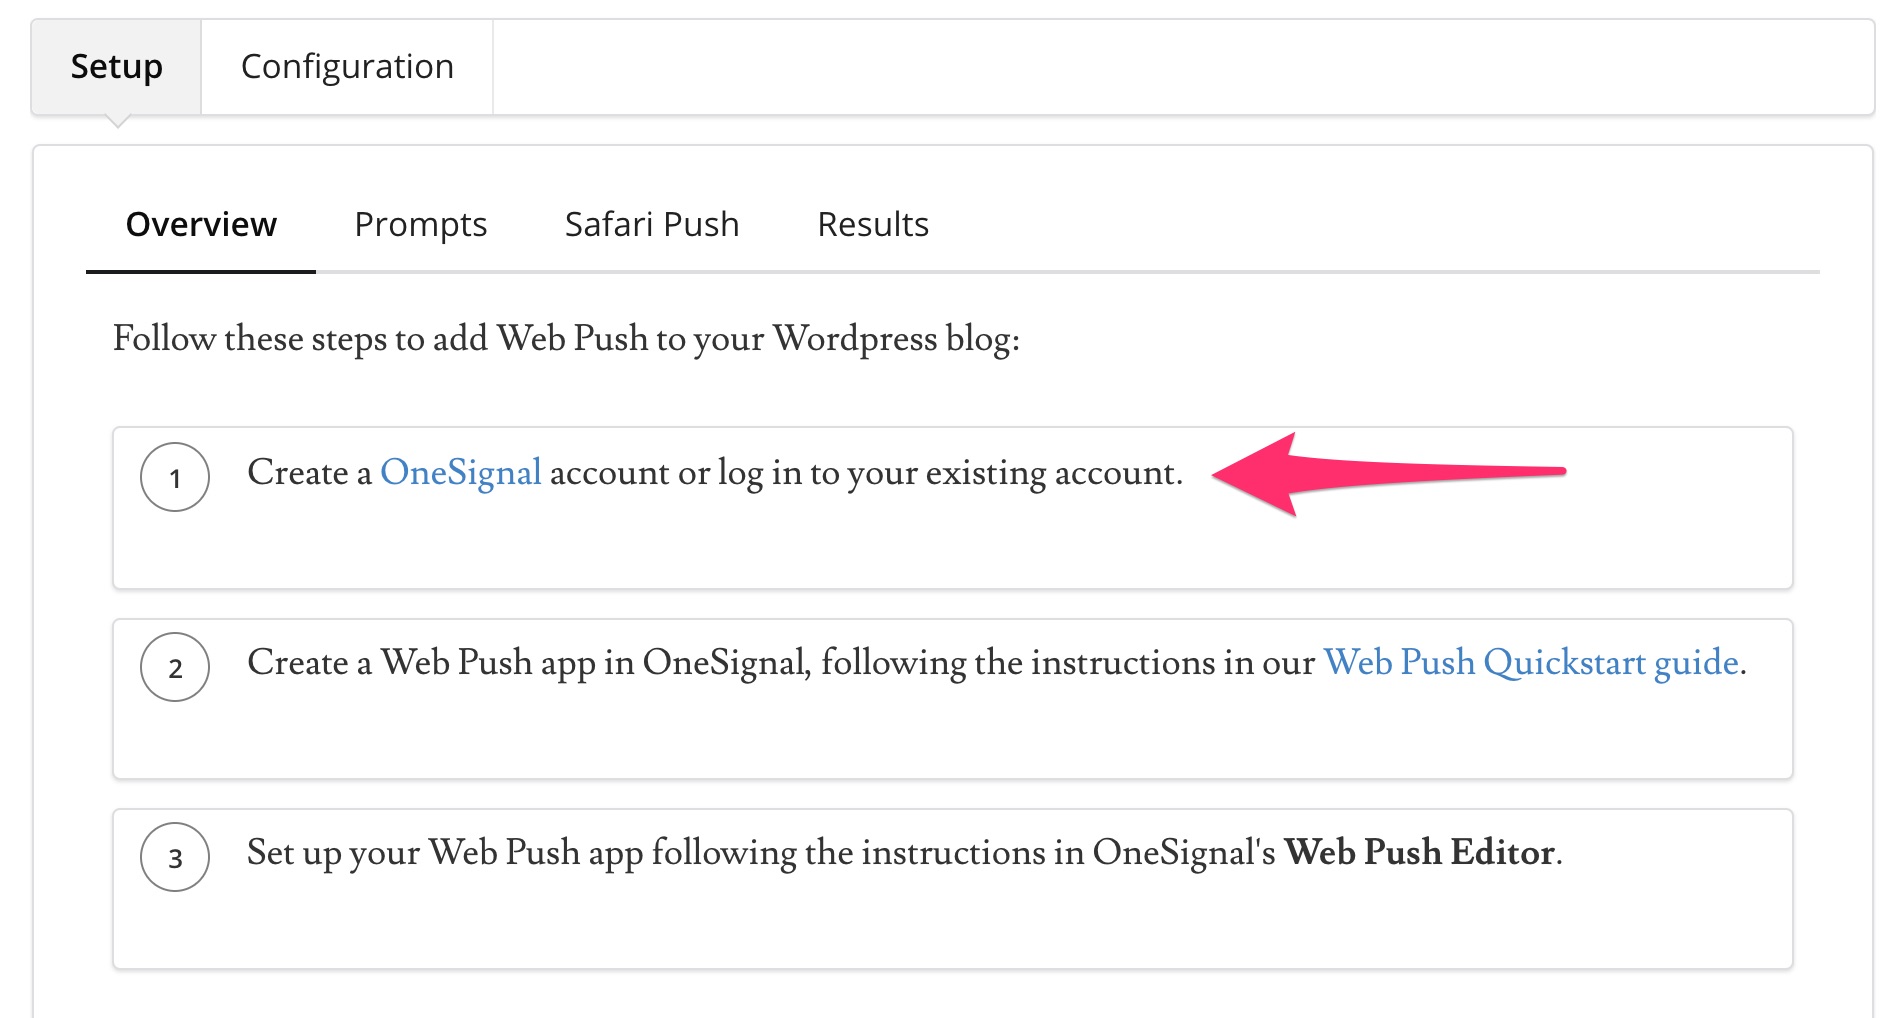
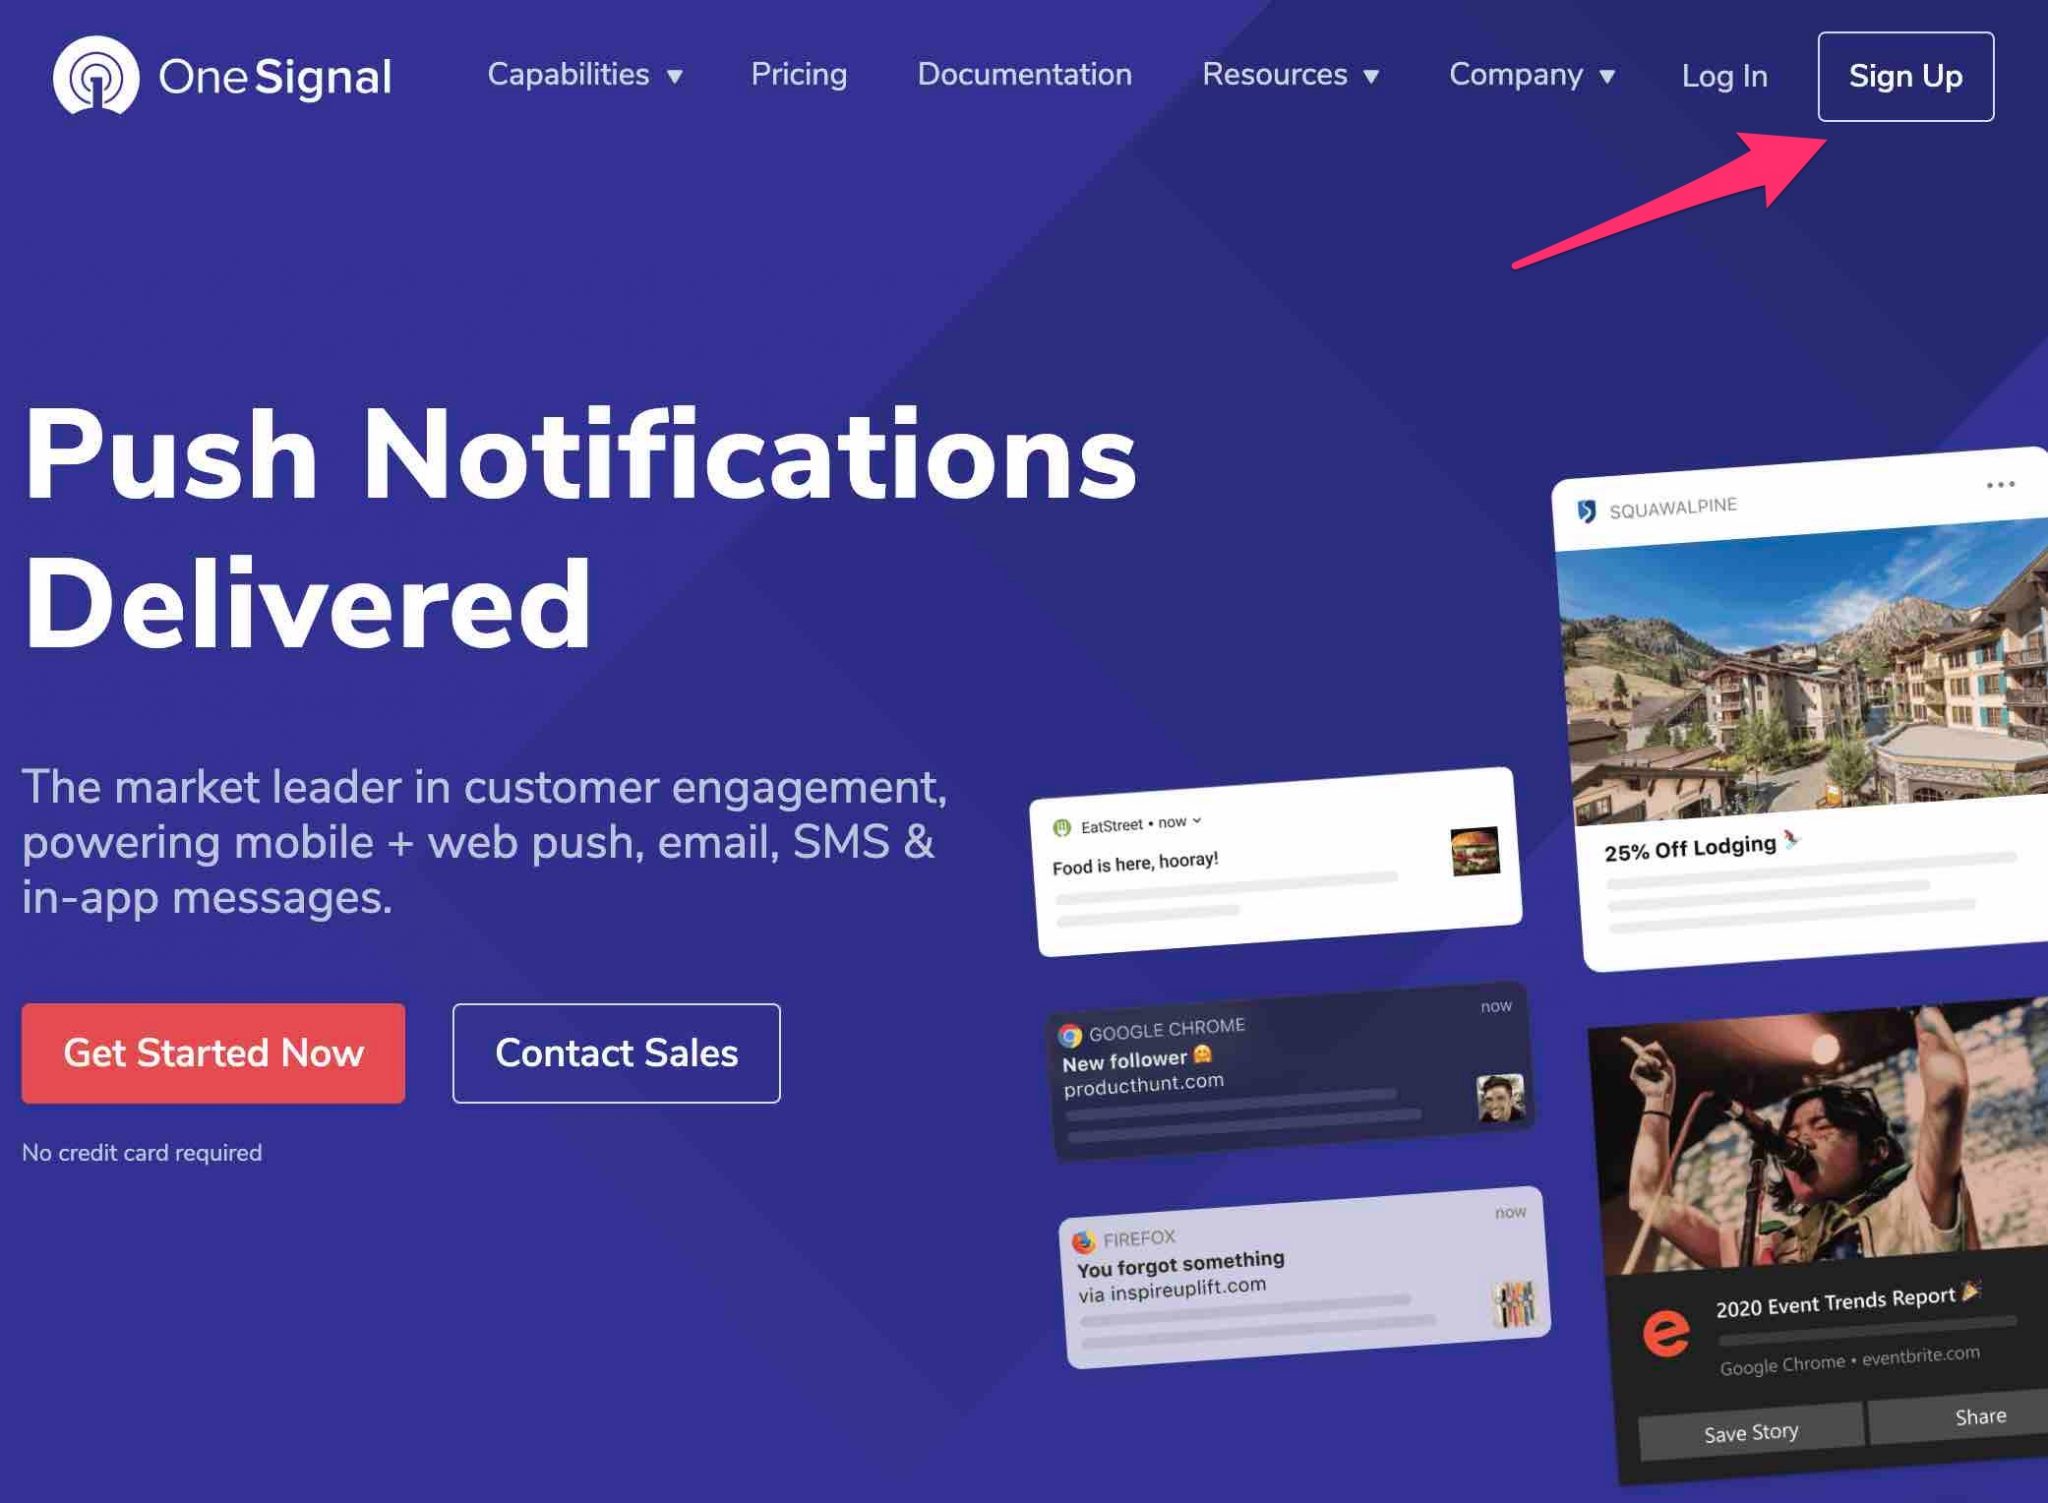
You will land on the homepage of the OneSignal website. Select Sign Up on the top right corner.
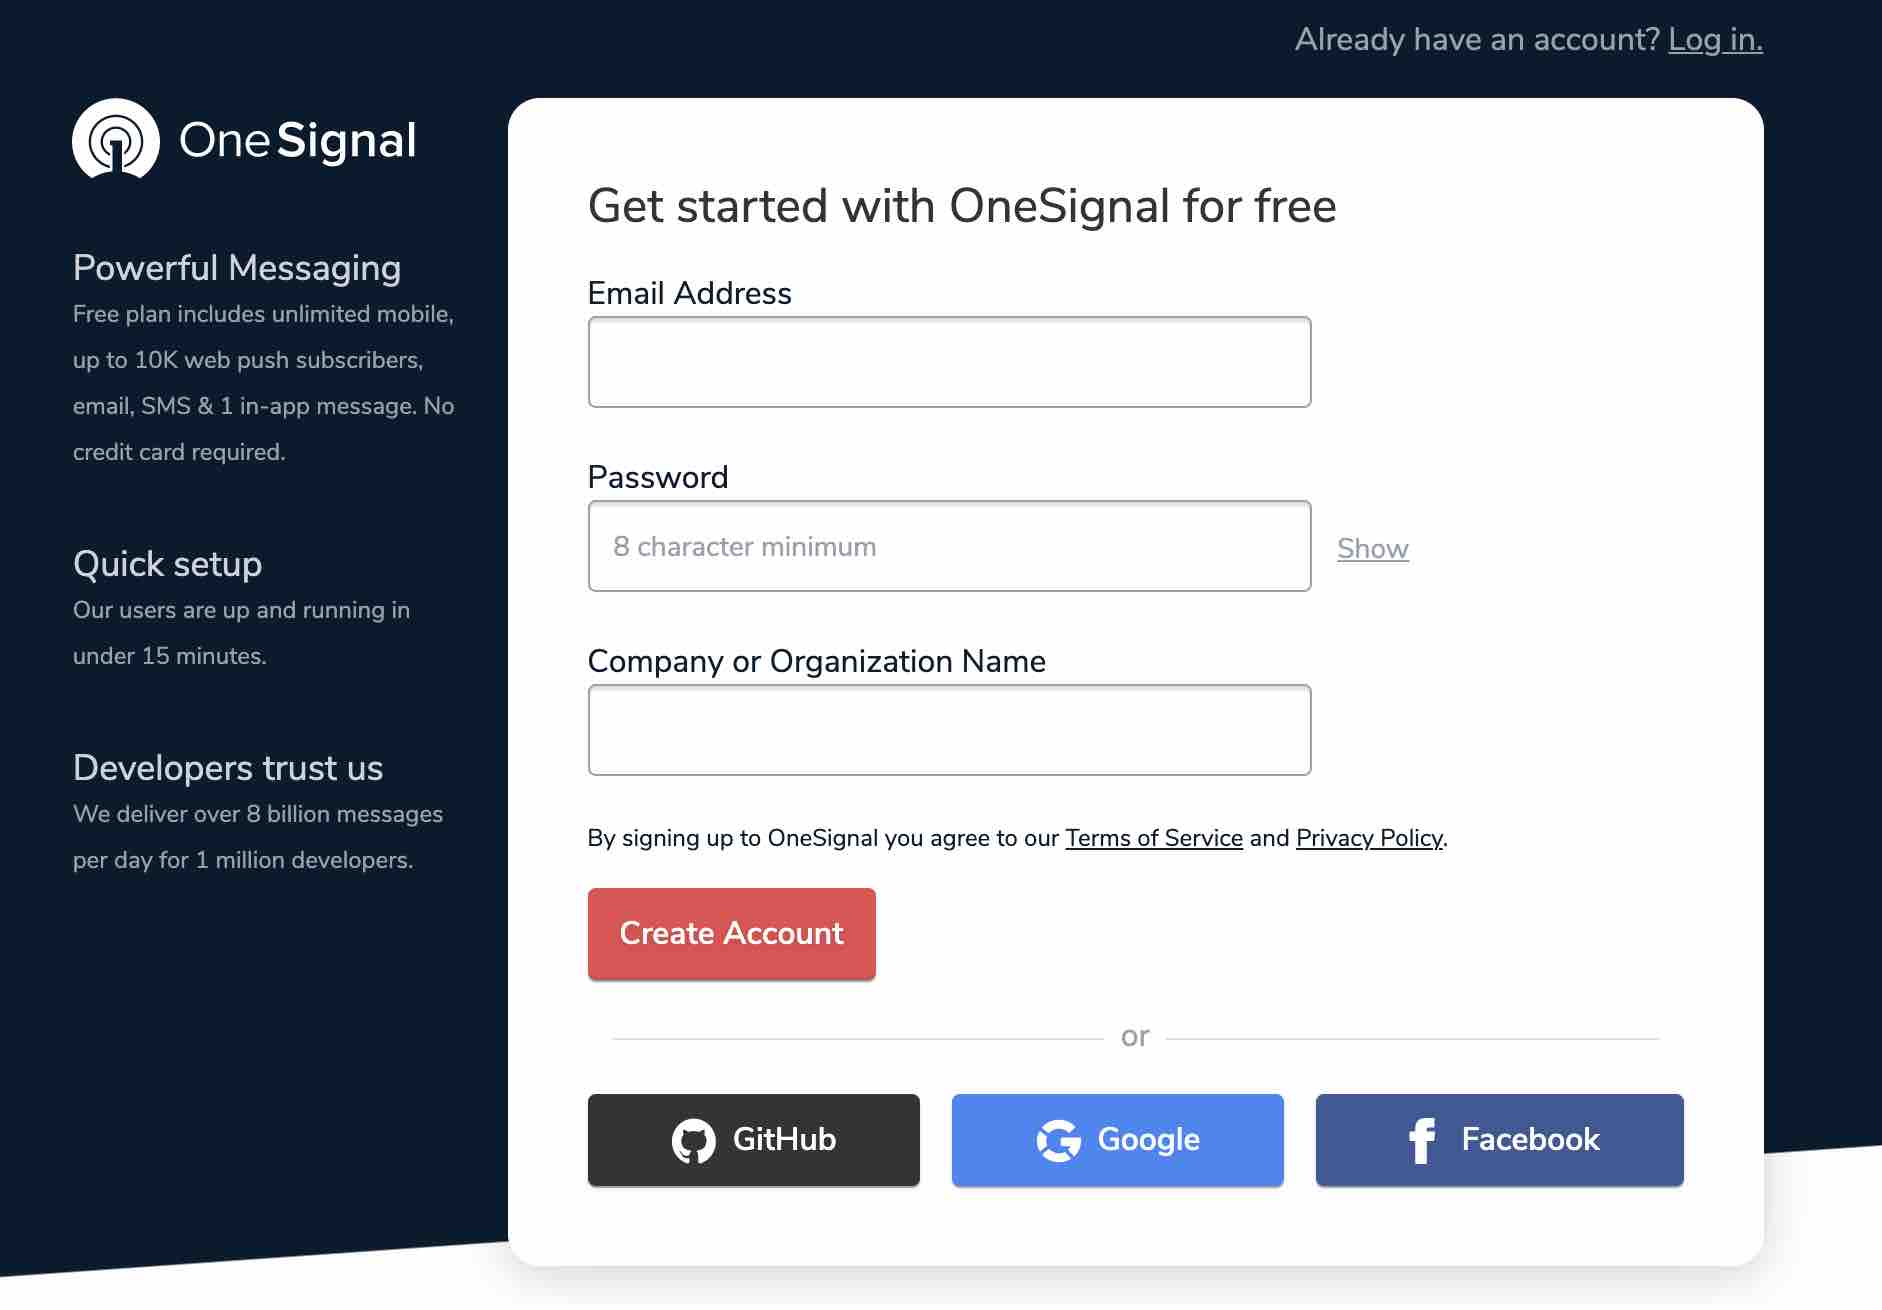
You will then be asked to enter:
- Your email address
- A password
- Your company name
A confirmation link has been sent to your email box. Click on it to be redirected to the following web page:
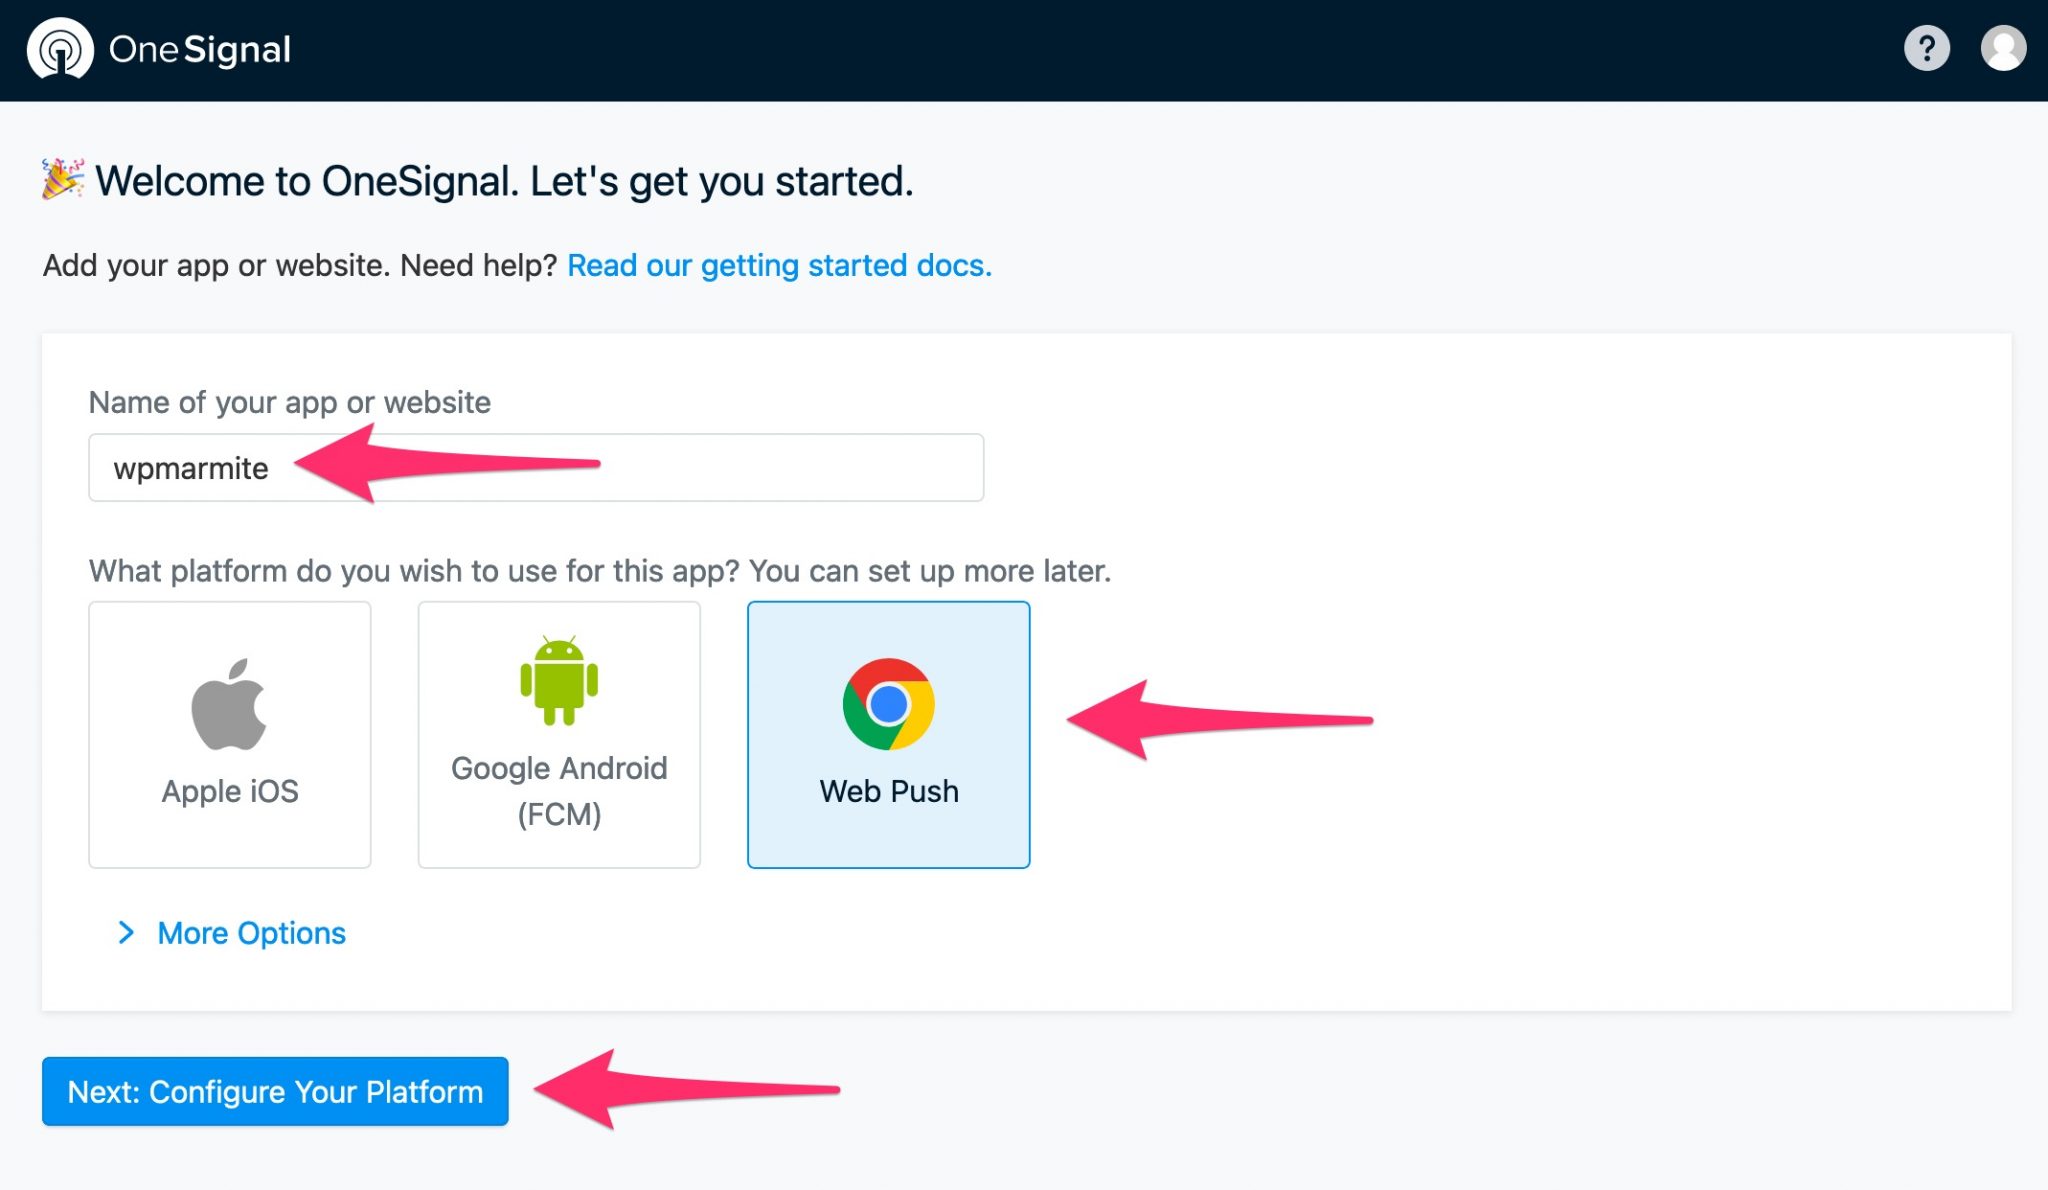
Enter the name of your site (e.g. wpmarmite), then select Web Push. Finish by clicking on the following blue button: “Next: Configure Your Platform”.
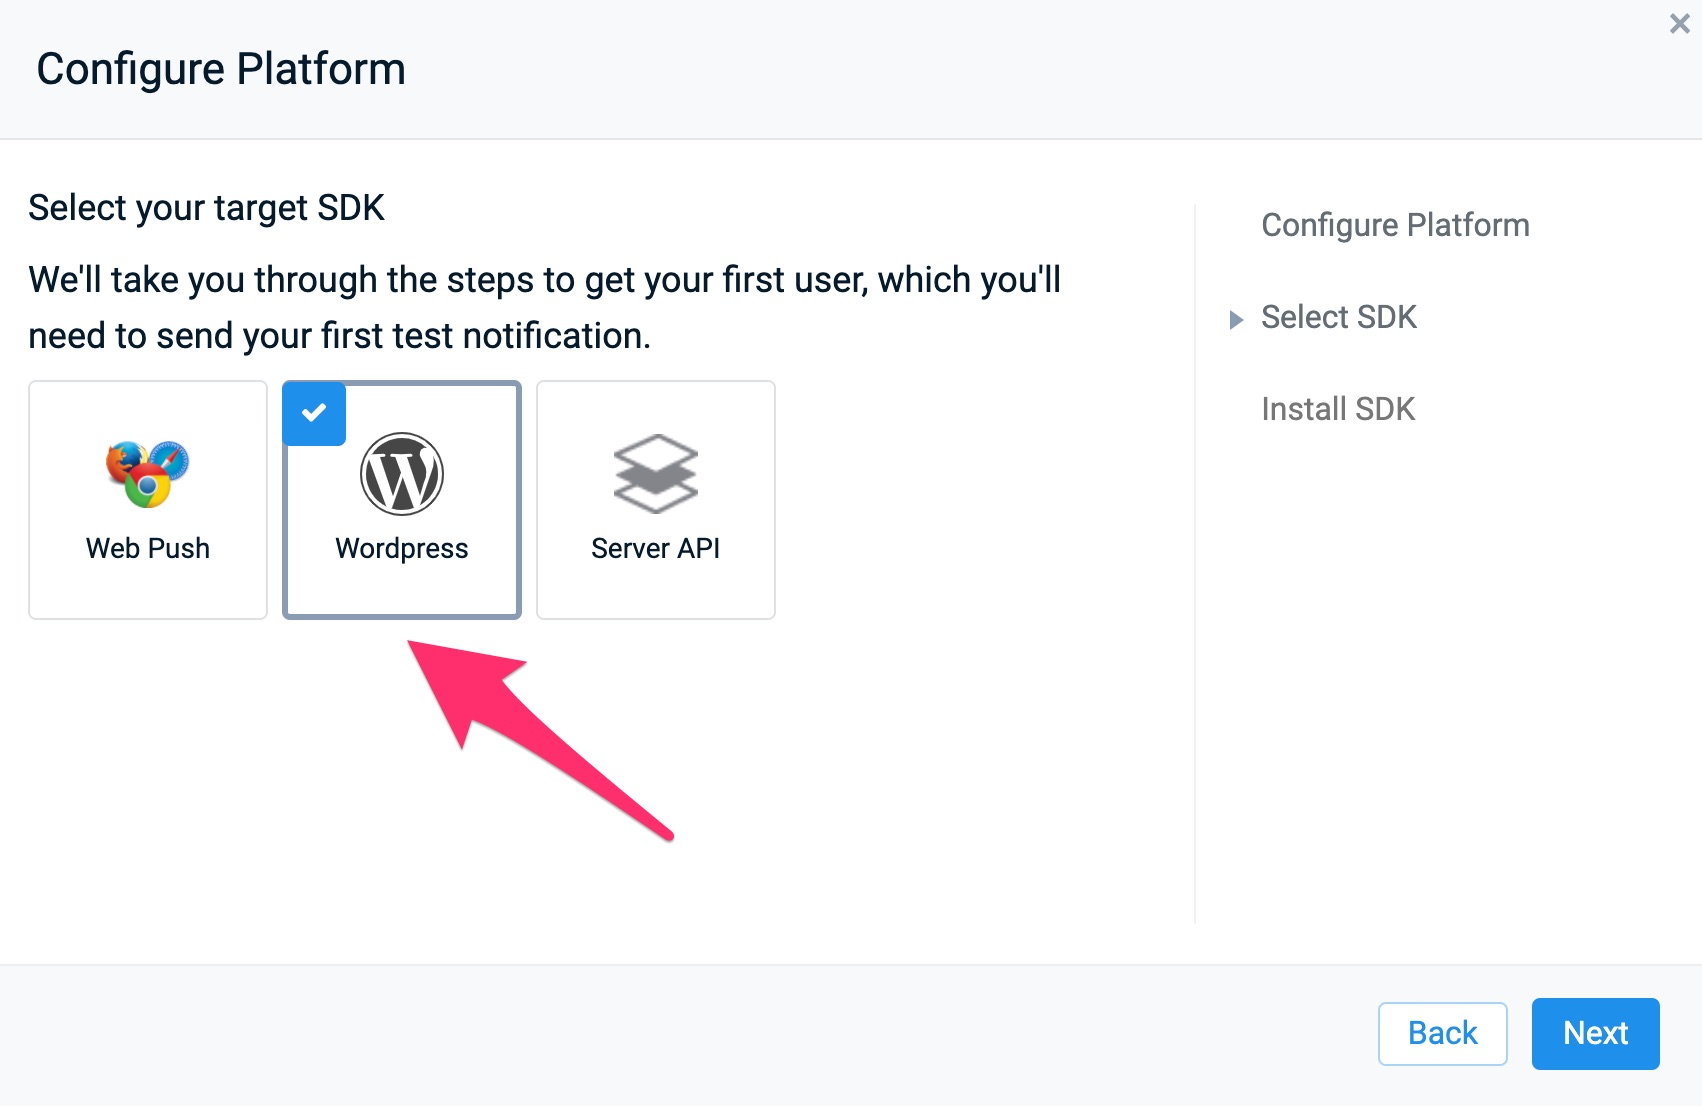
You will be directed to a settings page where you will have to fill in 2 tabs. Let’s start with the first one: Choose Integration.
Click once on WordPress Plugin or Website builder, then on the WordPress icon that appears just below.
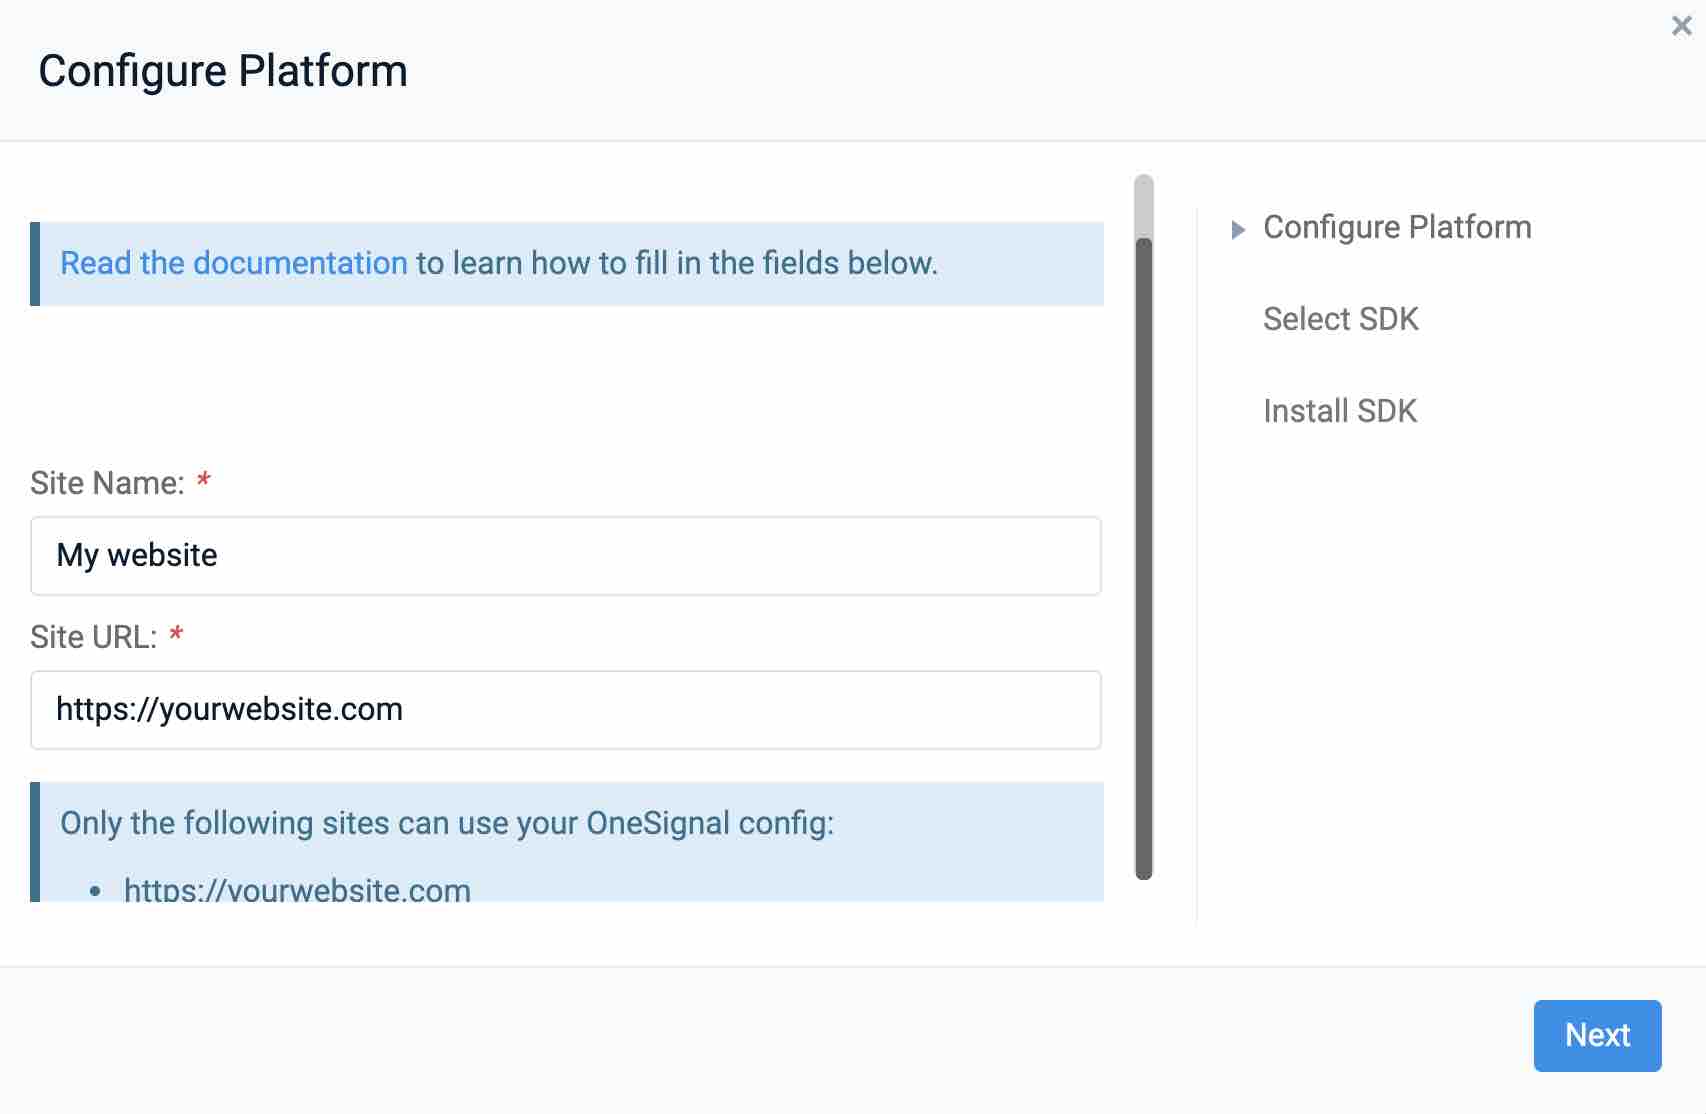
Let’s move on to the second and final tab: WordPress Site Setup.
You have to fill in 3 fields:
- The name of your site (Site name);
- The URL of your site (Site URL);
- The icon that will be displayed on your push notifications (Default Icon URL).
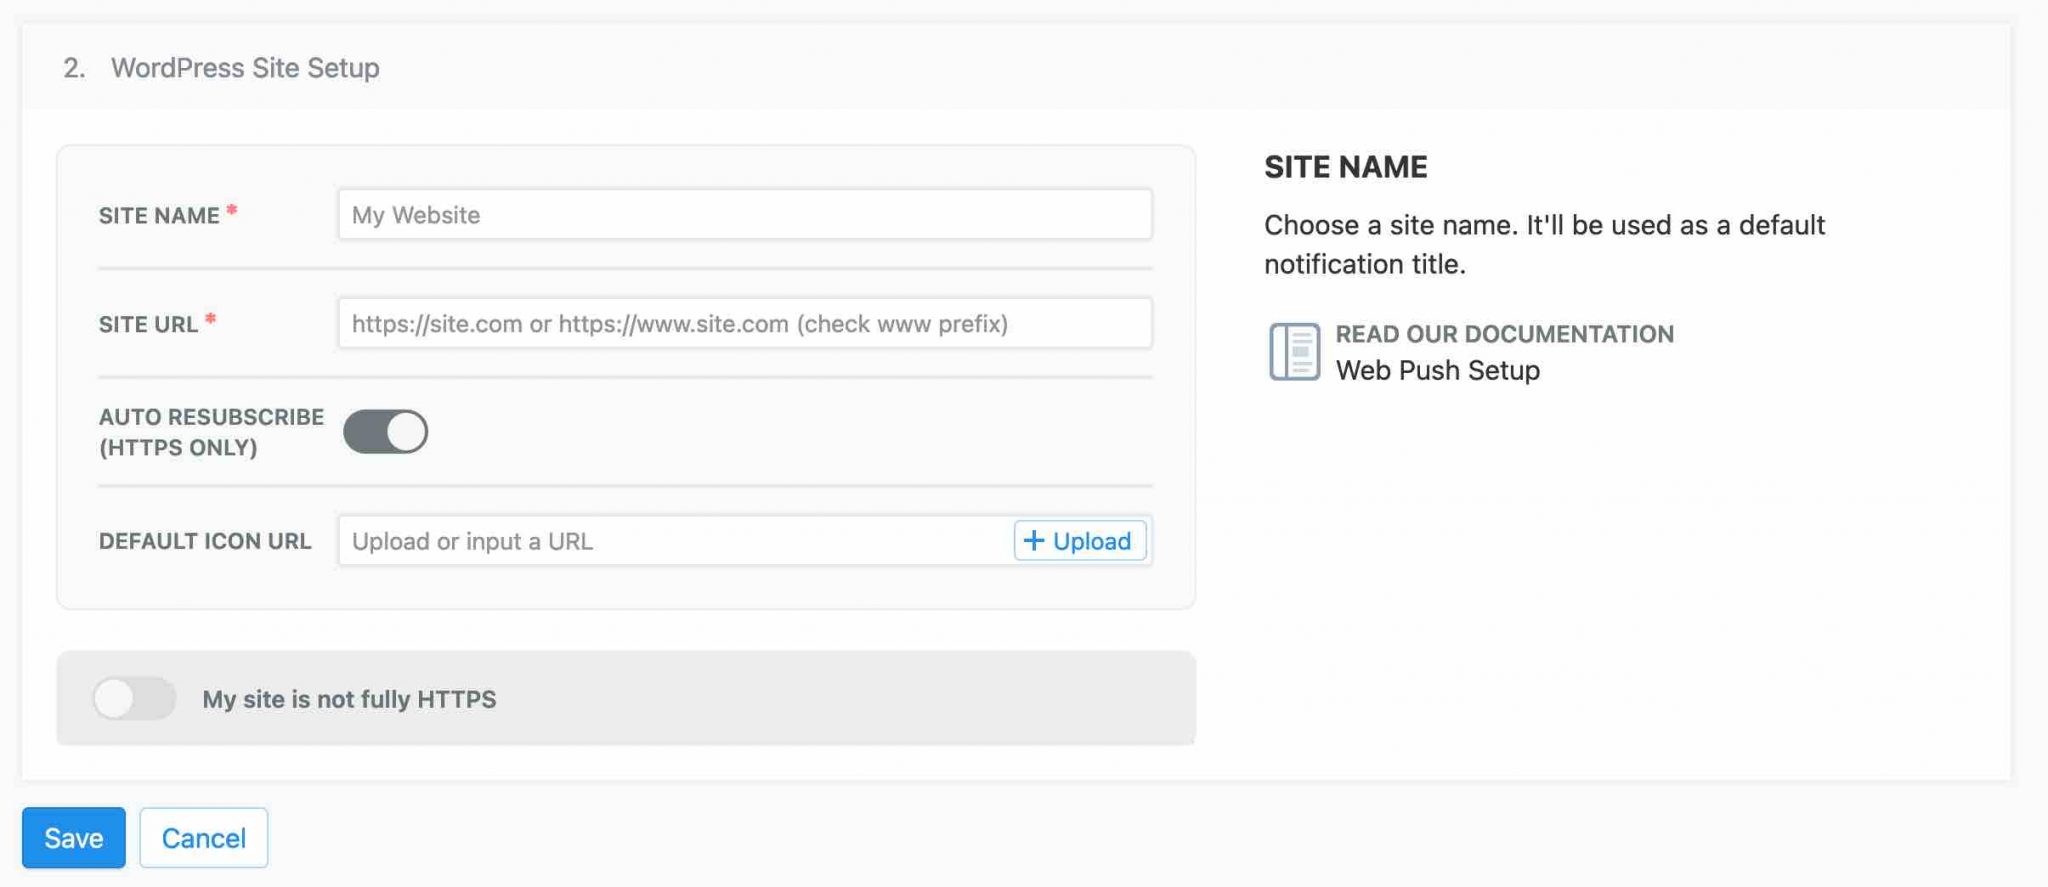
If your site is not in https, remember to enable the “My site is not fully HTTPS” button. OneSignal explains that push notifications will work better if you are in https. So consider enabling it on your site, if you haven’t.
To do this without fear or fuss, I refer you to this article by Alex: “How to switch your WordPress site from http to https“.
If all is well, click on the Save button.
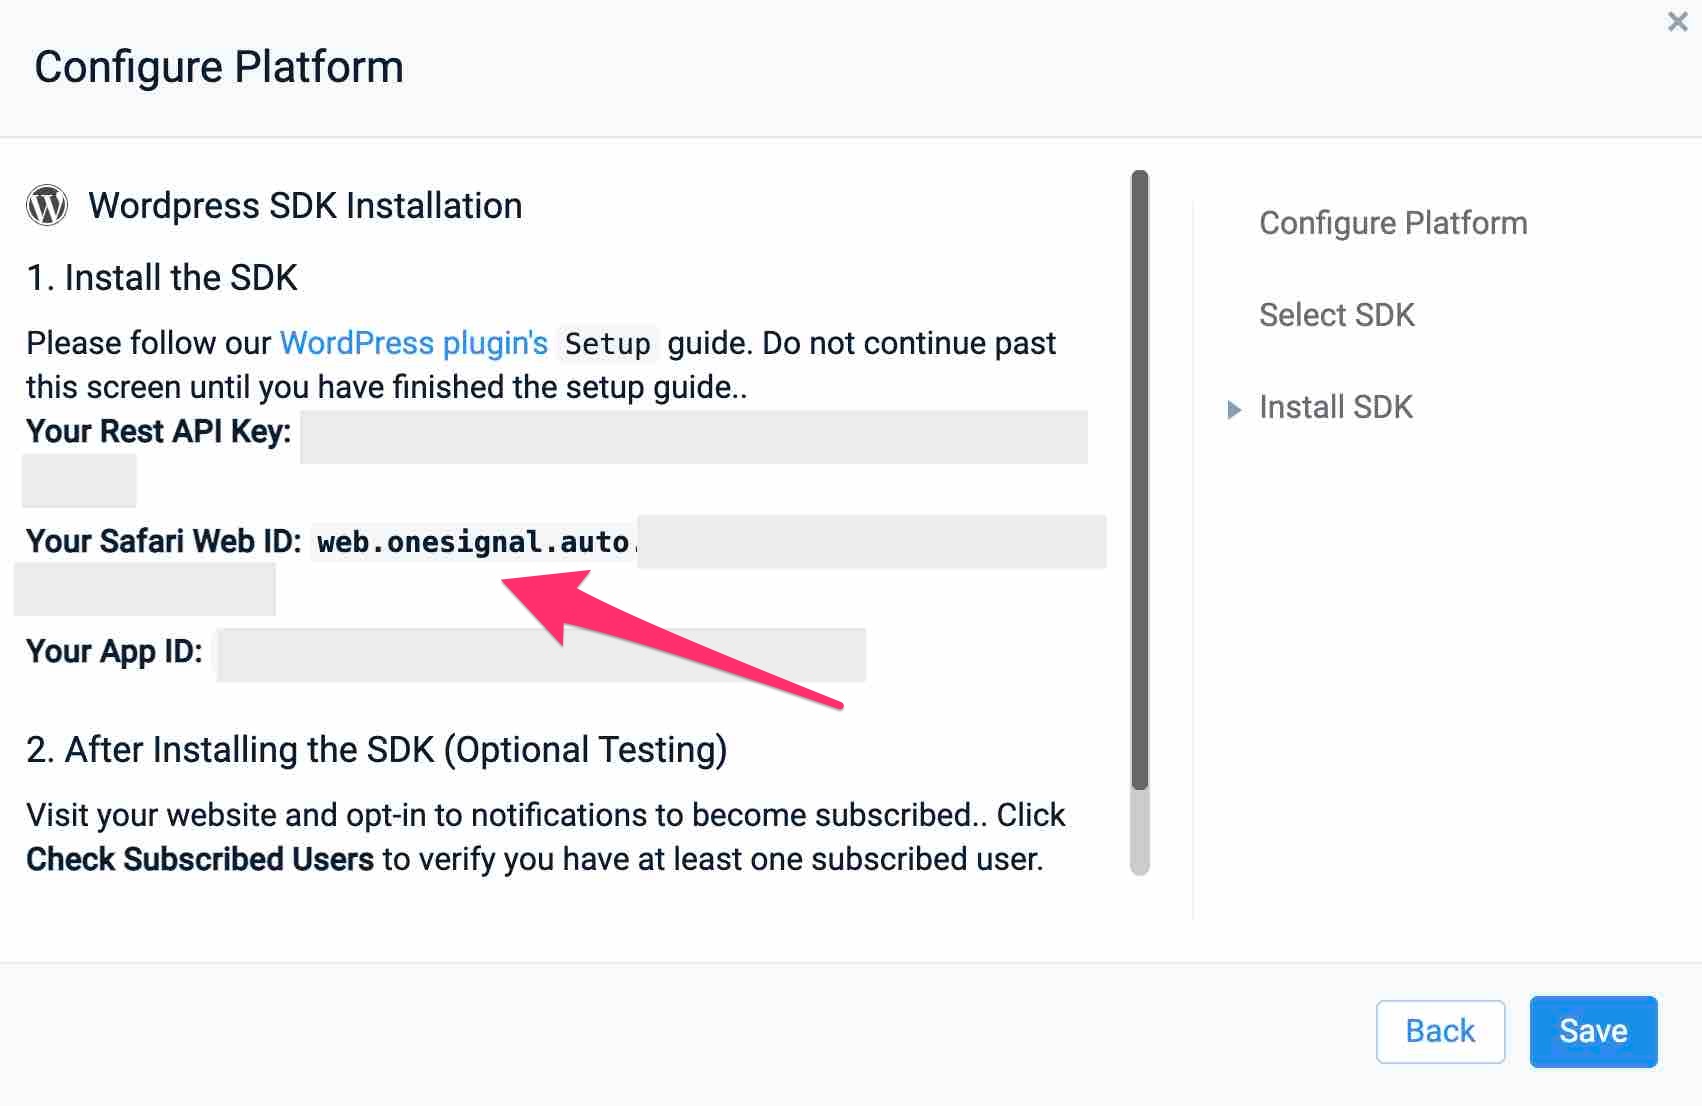
OneSignal has created 2 elements for you:
- An App ID: a kind of code that will identify your account.
- An API Key: FYI, an API is the part of a computer program that is freely available to all those who have a valid access, and that can be manipulated to create a new way to use an application.
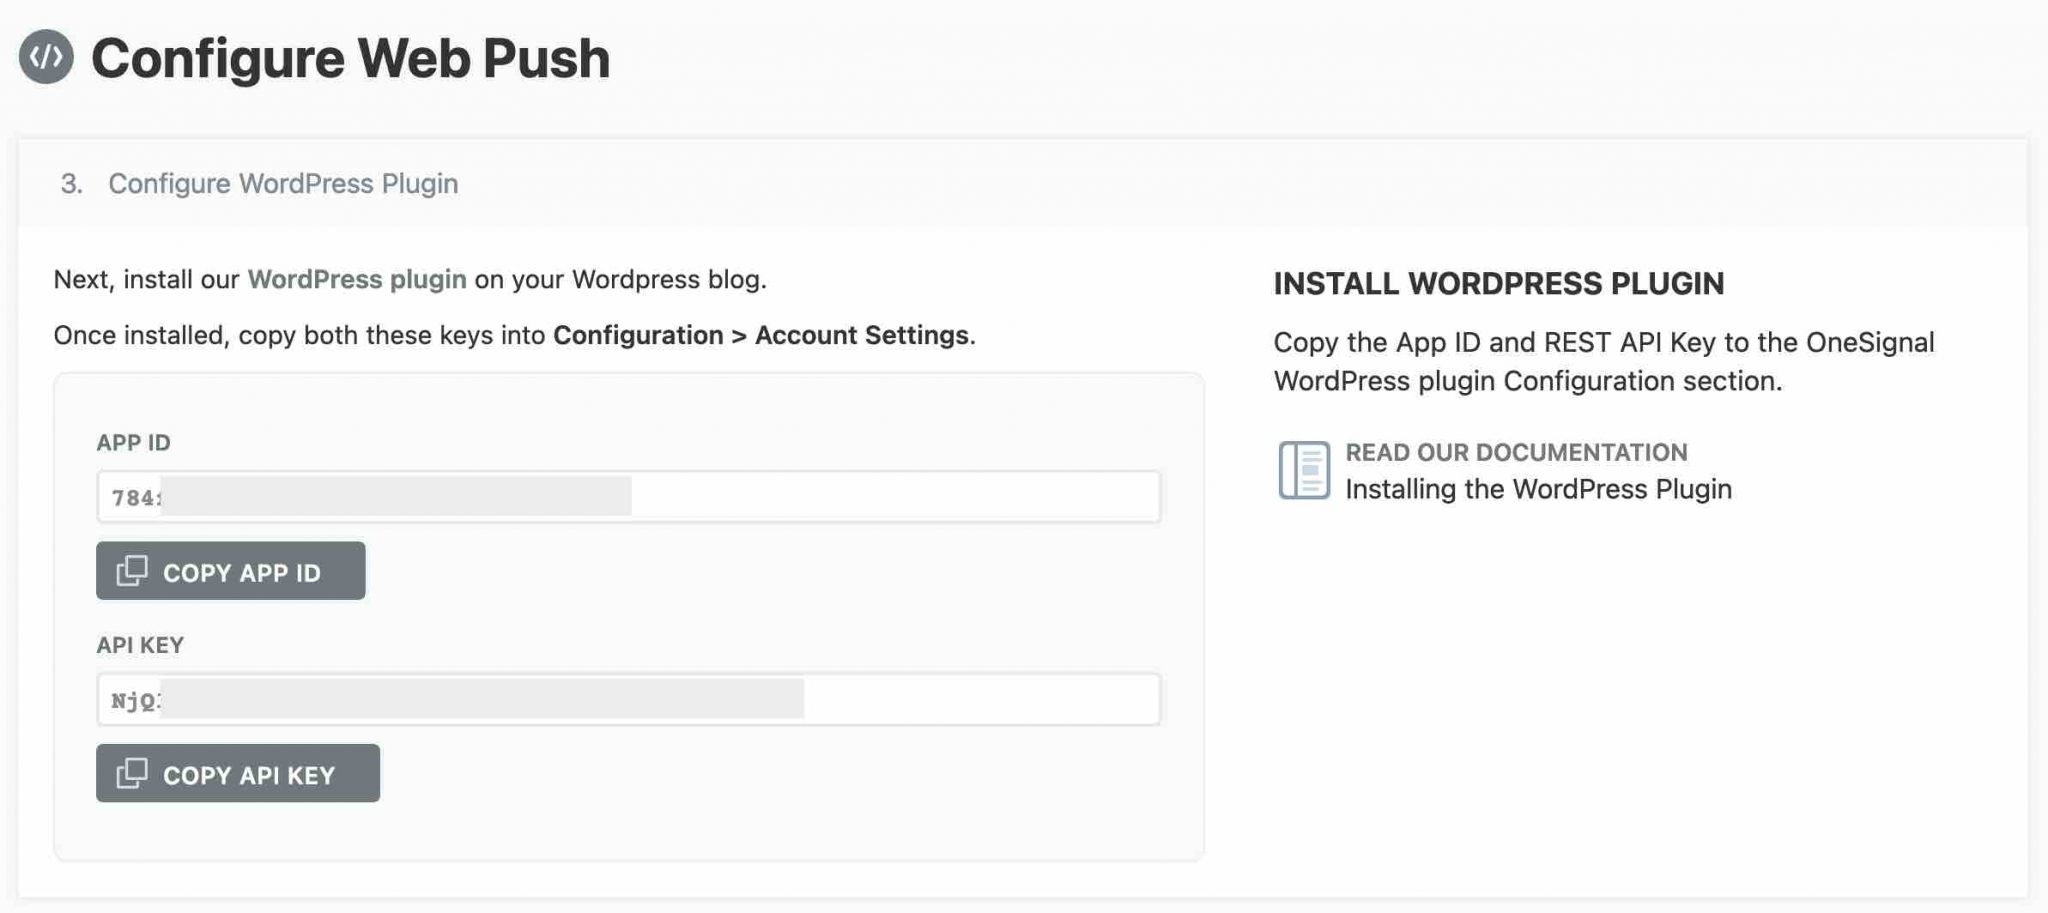
From now on, you’ll have to put them in the plugin settings, on WordPress. So keep them well.
Step 3: Configure OneSignal on WordPress
Click on the OneSignal Push icon, then on the Configuration tab. Enter your API key and App ID in the appropriate fields.
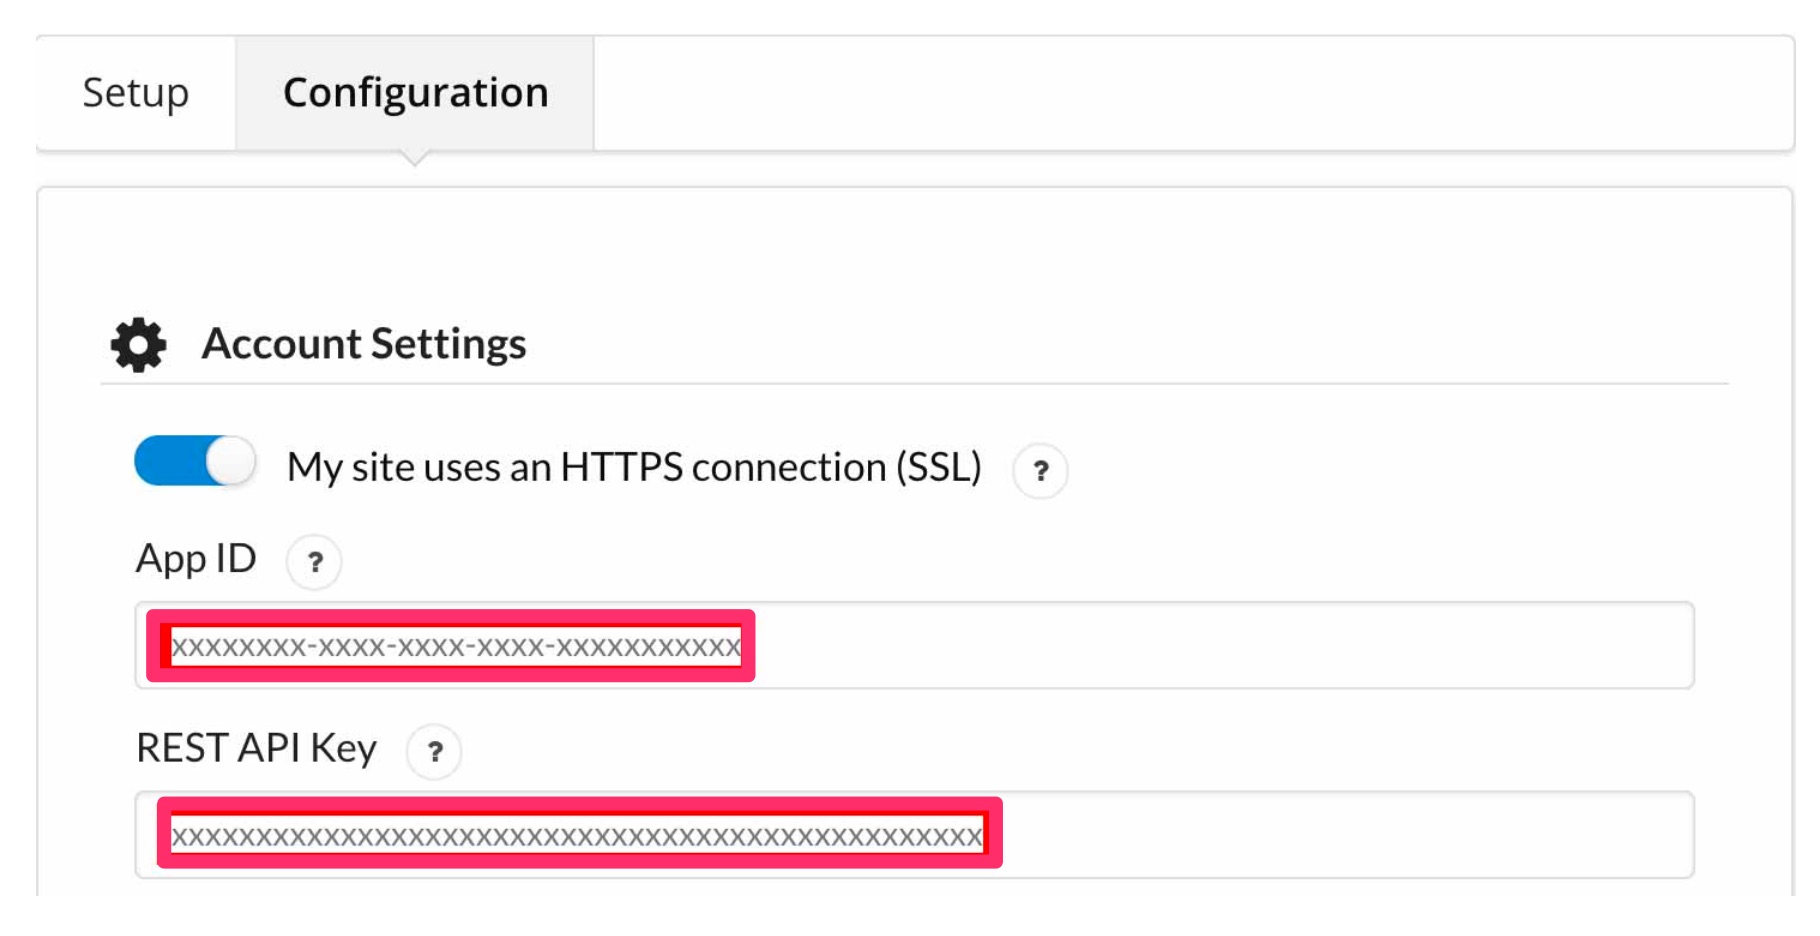
Remember to save by clicking on the Save button at the bottom of the page. You will see that there are still some settings to do. I’ll come to that right after. 😉
Step 4: Check that the plugin works on your site
To check that everything works, I invite you to go to your site. Click on the red bell at the bottom right.

A window should appear to ask you to allow notifications.
By choosing “Allow”, you should receive a push notification right after.
Well done, everything is running smoothly.
Congratulate yourself, but be careful, it’s not over yet. There’s more work to do.
Step 5: Configure OneSignal for Safari users
If you go to your OneSignal interface, you will notice that push notifications are enabled for all browsers except Safari.
As Safari is used by almost 20% of the Internet users in the world, I strongly advise you to fix this.
To do so, it’s very simple. Let me explain.
Go to Settings > Apple Safari.

Then enter the name and URL of your site. Check the box I’d like to upload my own notification icons, if you want to incorporate your logo. Click on Next.
On the next window, select WordPress and click Next.
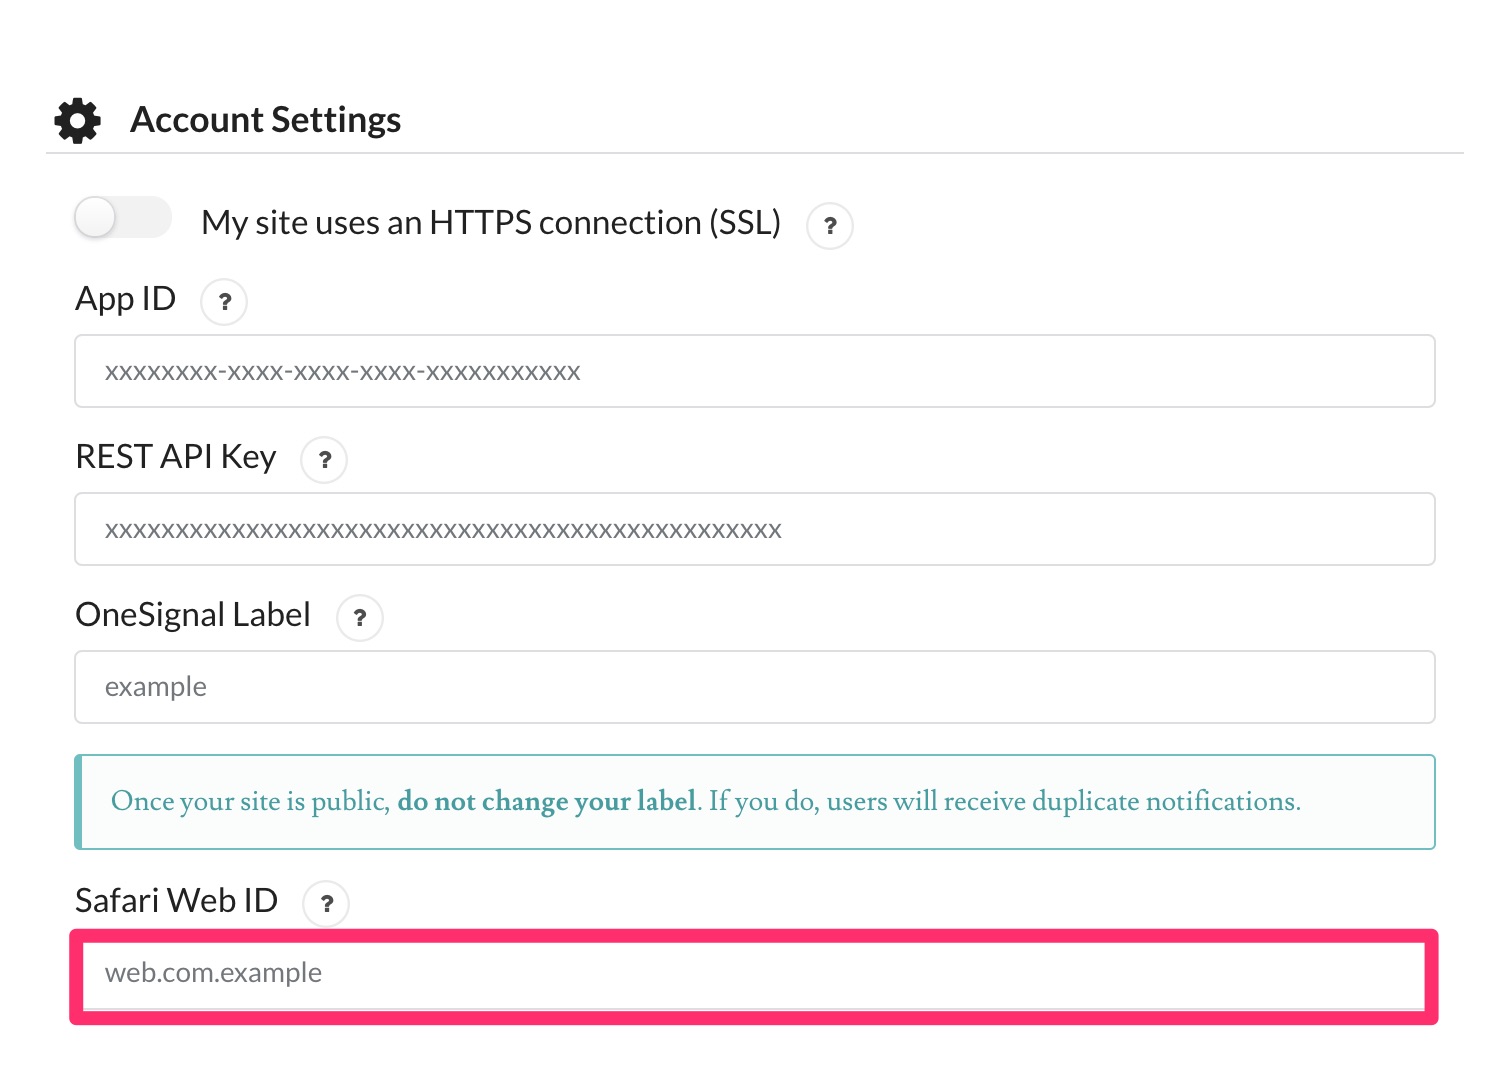
Your key is now available. It looks like this:
You know the rest. Go to WordPress and the Plugin Configuration tab. Copy and paste the key that has been assigned to you. Remember to save it at the bottom of the page. And you’re off the hook with Safari!


Overview of the settings
You’ve done most of the work, congratulations. But you can go much further in customizing the settings on the Dashboard.
Let’s take a closer look.
Sent Notification Settings
This menu allows you to:
- Use the featured image of an article as a notification icon;
- Hide or not hide notifications after a few seconds of display;
- Send notifications on iOS and Android (provided you have authorized these platforms in your settings, on the plugin’s website).
Prompt Settings & Subscription Bell
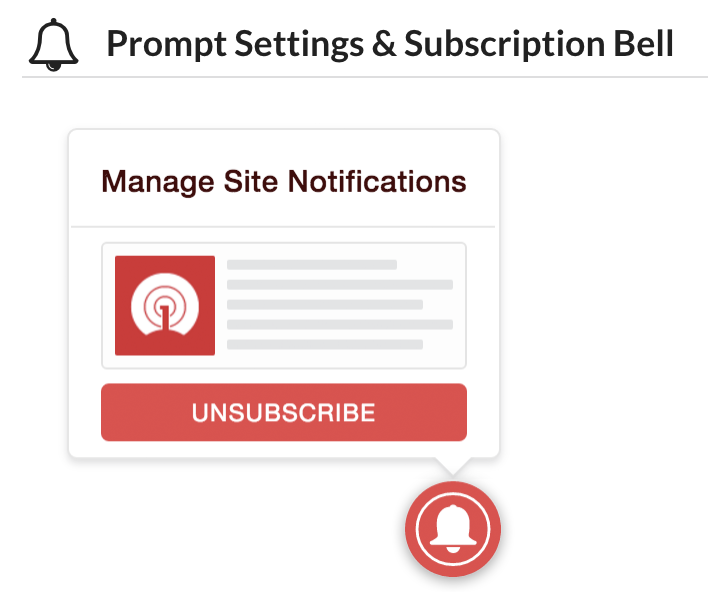
This menu is very important. It allows you to configure the way you will ask your visitors to subscribe to your push notifications.
I advise you to leave the default settings. Afterwards, nothing prevents you from making your own changes, according to your needs and expectations.
You will notice that you can change some settings of the Subscription bell, which allows your visitors to request to receive your notifications:
- Its size (small, medium or large);
- Its position (bottom right or bottom left);
- Its color (red or white).
By default, it will be positioned at the bottom right of your site. This is rather a good practice.
According to several eyetracking studies, we tend to read in a Z-shape, starting at the top left of a web page.
Placing an action button in our terminal viewing area (bottom, right) makes it easier for users to click a button, according to this article from the UXmovement site.
Conclusion: leave your bell on the right.
Prompt Customization
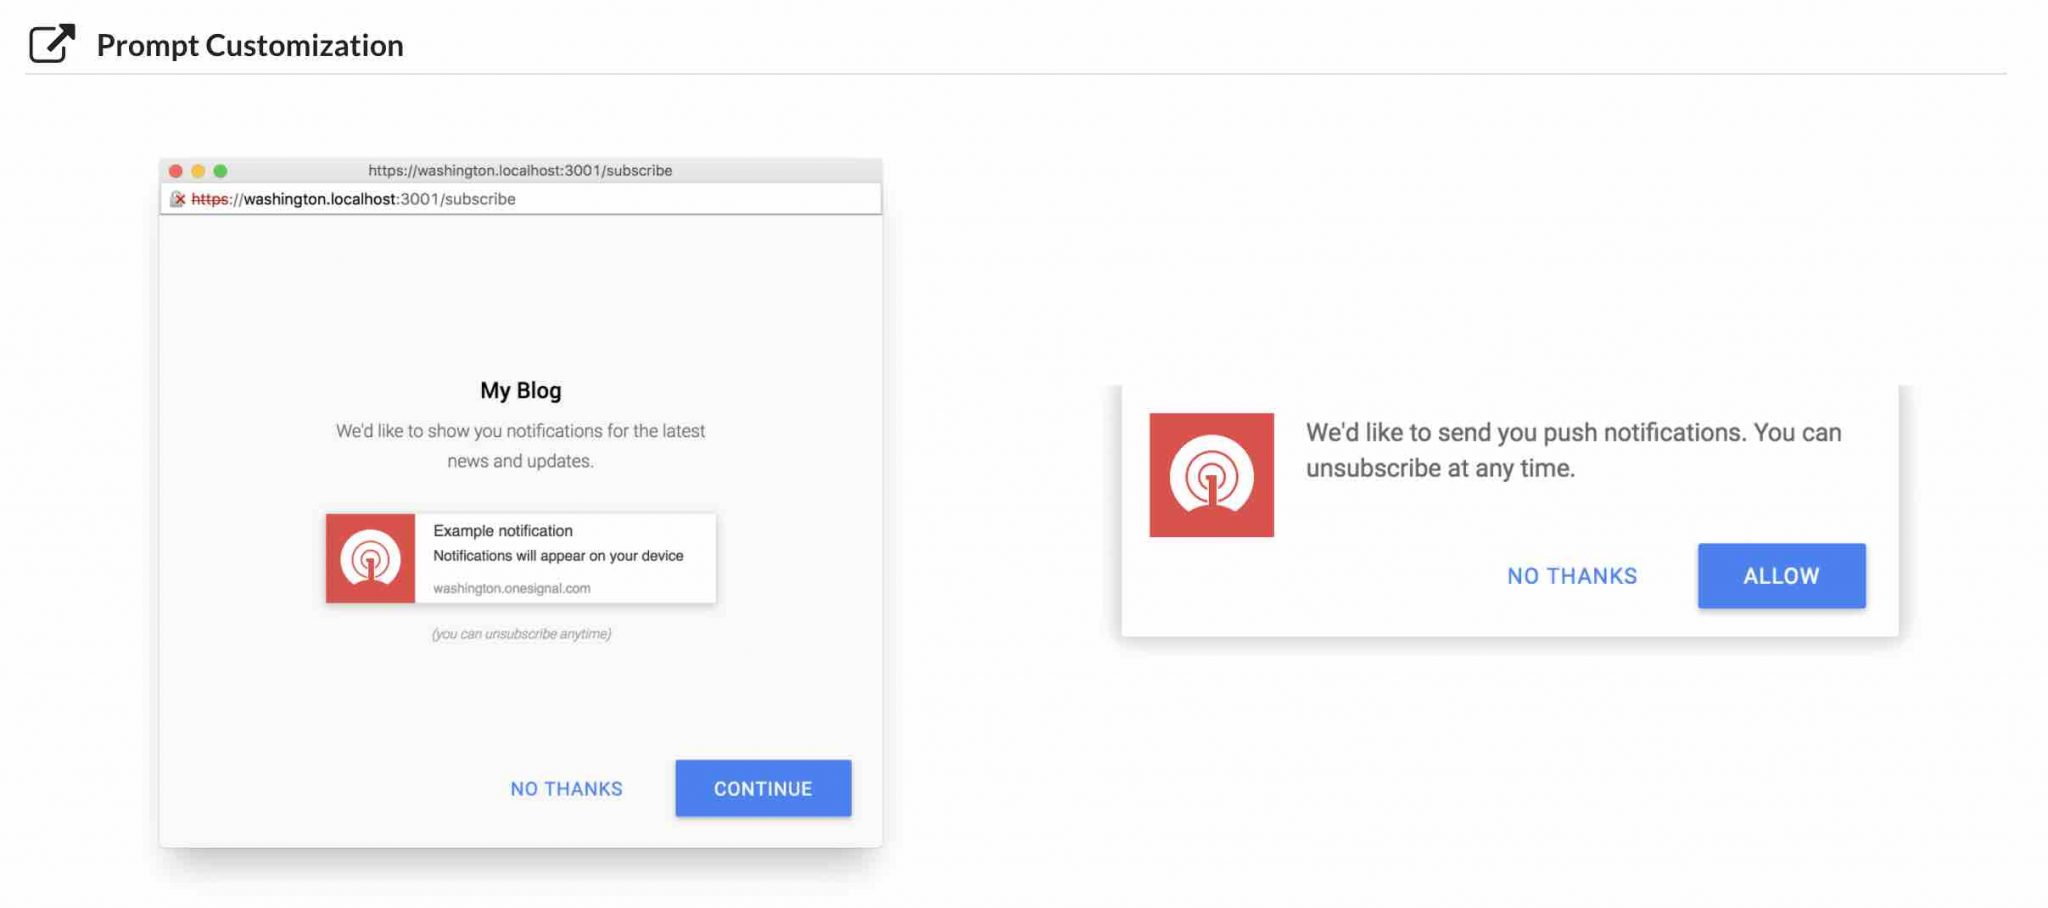
This section allows you to configure the messages appearing automatically in a popup window for HTTP sites, and in a slide for HTTPS sites.
You can modify the content of the texts appearing on the screen of your visitors, such as:
- The Action Message. For example: “We would like to send you push notifications. You can unsubscribe at any time “;
- The call to action buttons (Allow and No thanks);
- The URL associated with your site, etc.
Welcome notification settings
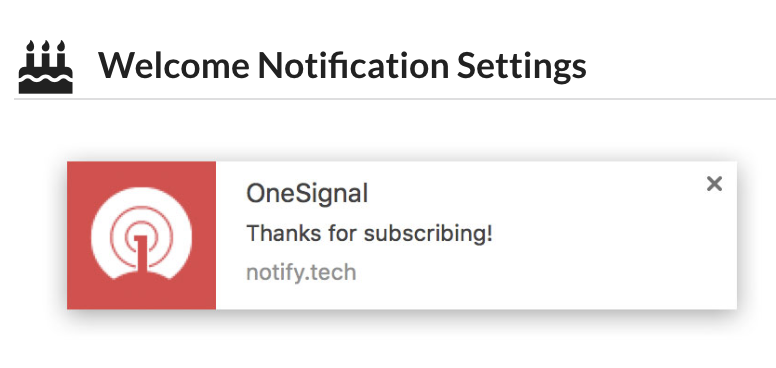
Here you can choose to send a welcome notification after your visitors have subscribed. It is possible to customize the texts.
UTM Tracking Settings
Now we enter something more technical, but which can be very useful.
I call it UTM tracking. A barbaric name, at first sight. UTM stands for Urching Tracking Module.
“UTM parameters are pre-defined text codes added to a URL to track important data about website visitors and traffic sources.”, according to this article.
Without going into detail, this tracking allows you to know, for example, the number of clicks on your notifications.
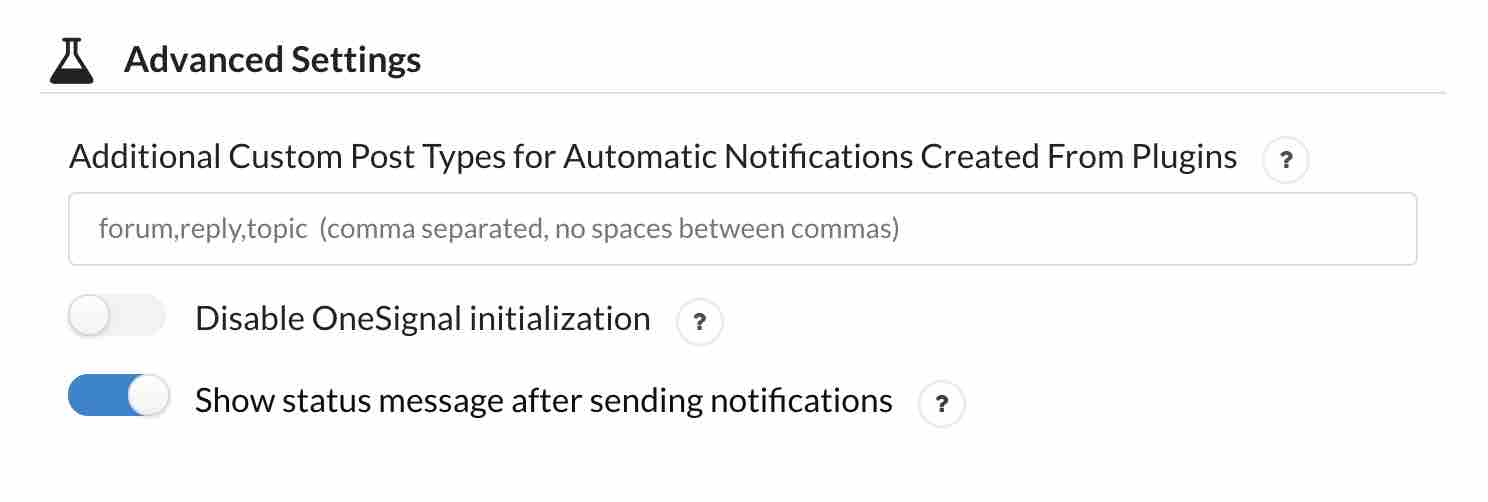
Advanced Settings
To finish, check out the Advanced Settings section.
I advise you to leave the default settings. The purpose of this section? The possibility to insert your own custom post types created from third party applications.
By default, no push notifications will be sent in this case. If you want to activate them, you will have to add your custom post type to allow the plugin to send a notification.
How to send a push notification?
Now that all your settings are set, I’m sure you want to send your first notifications, right?
It would be a shame to have done all this for nothing.
Let’s take a classic case: sending a notification to warn your readers of the release of a new article.
The method from WordPress
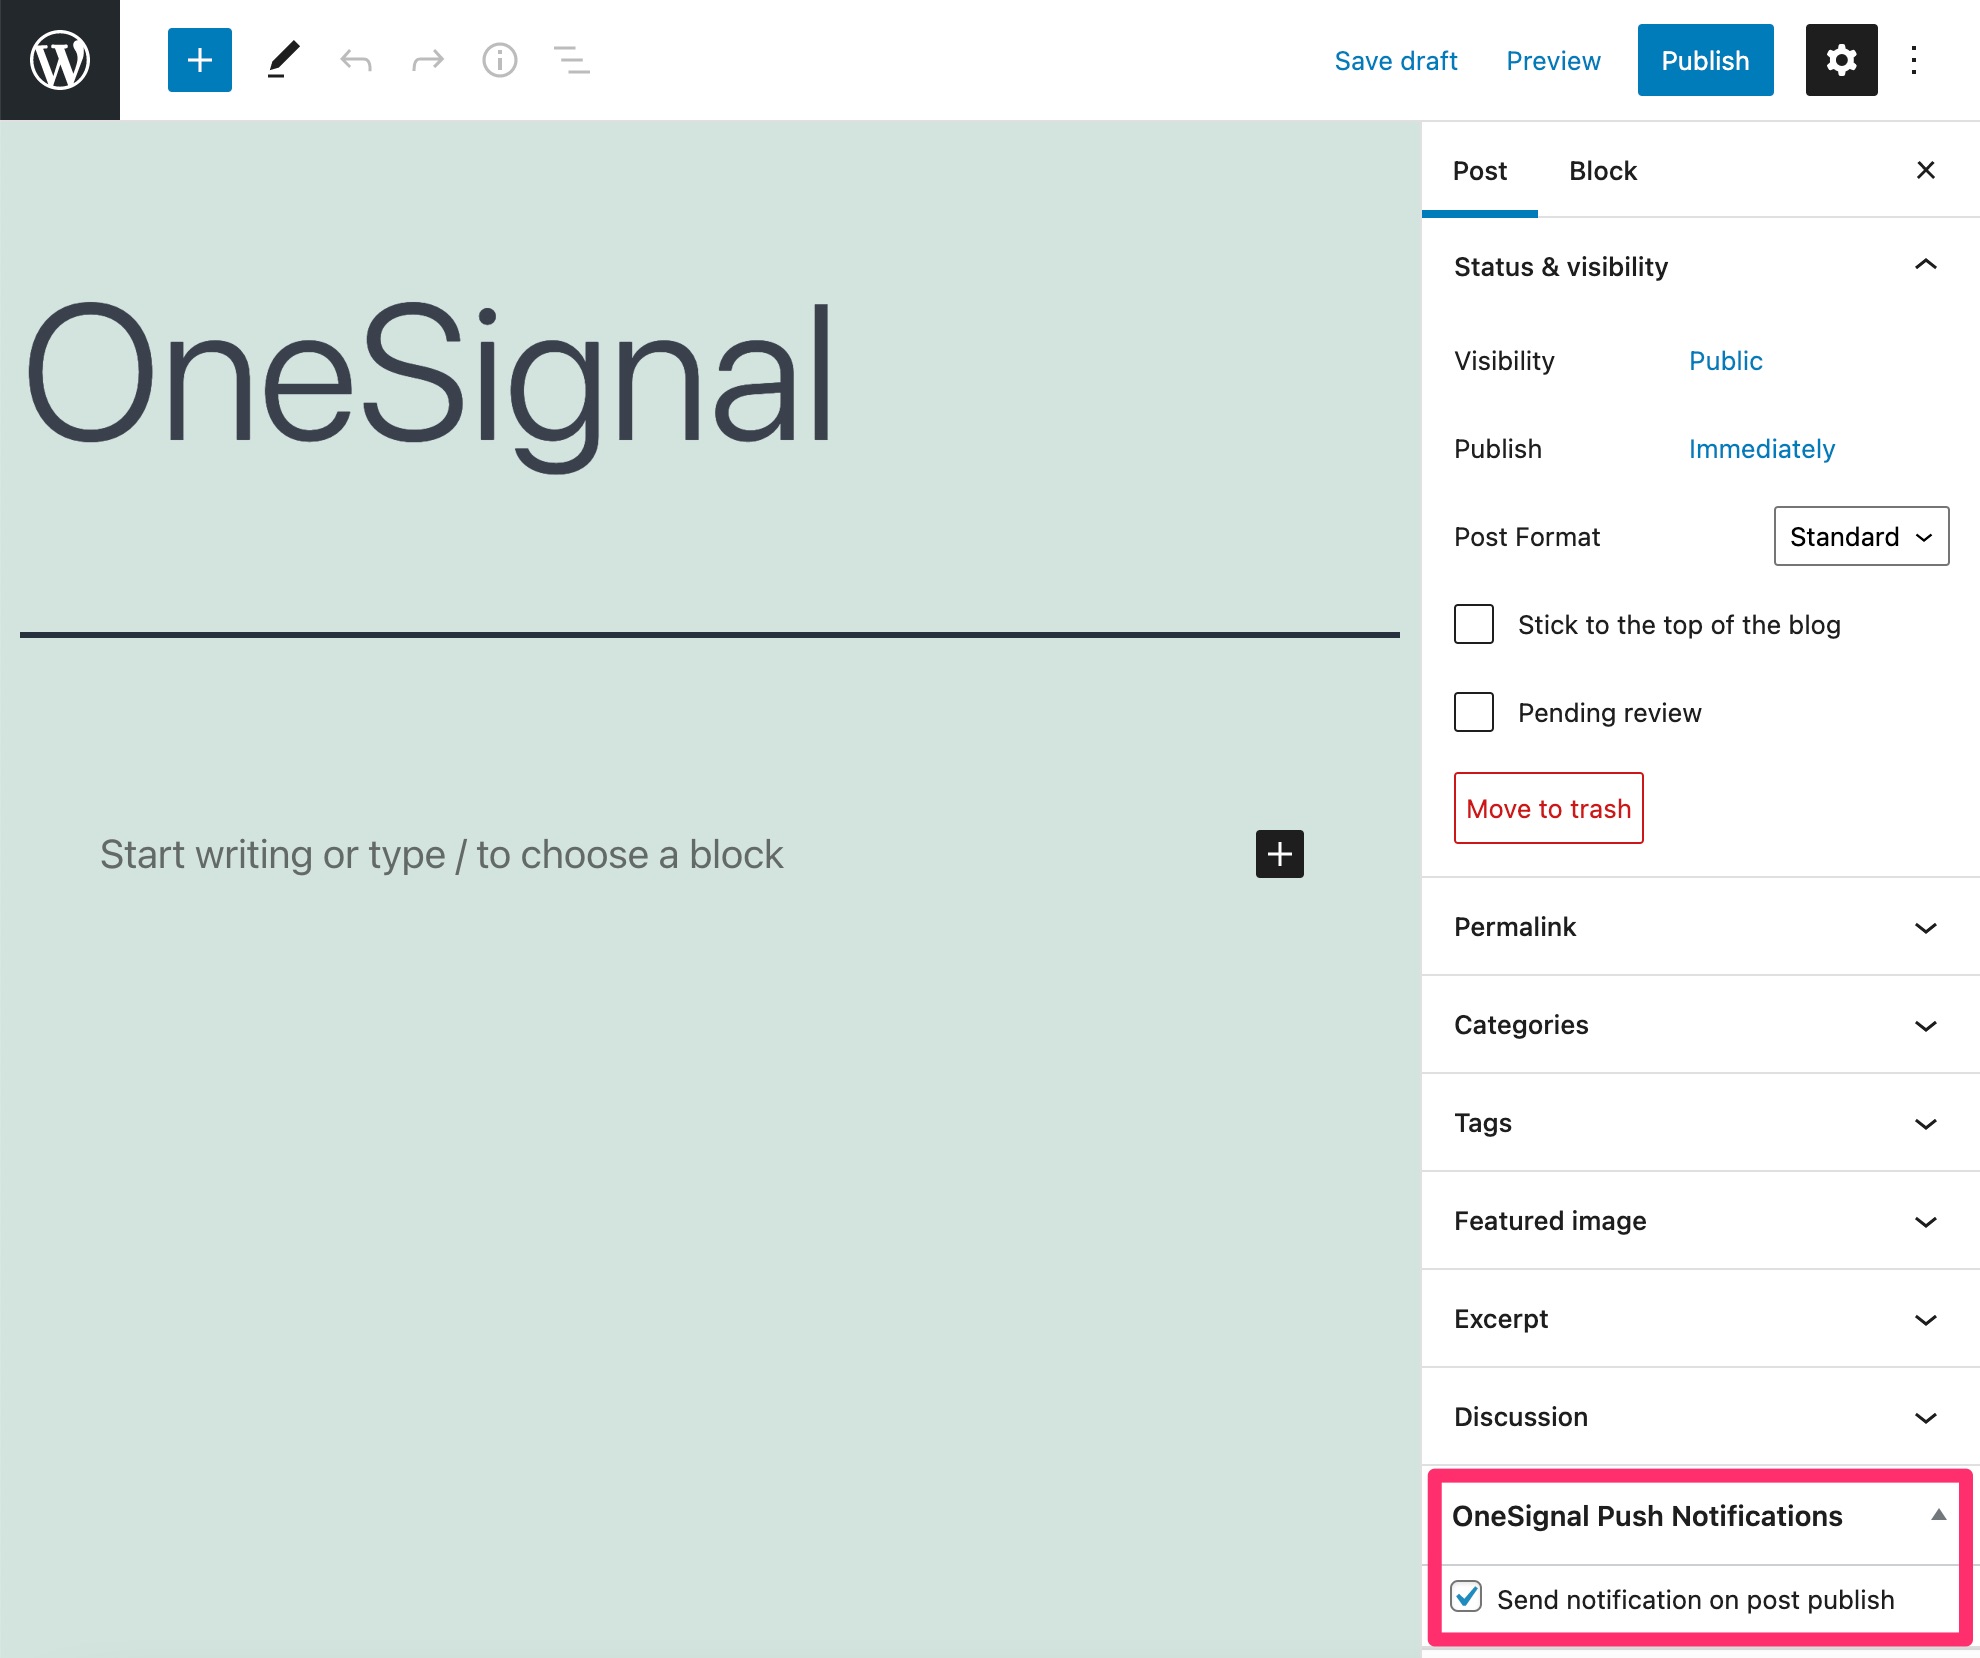
By default, the plugin is programmed to automatically send a push notification every time you publish an article.
If you want to disable this option on a particular post, simply uncheck the corresponding box in your text editor.
To disable it completely, go to the settings, in the Automatic Notification Settings section. Uncheck the button.
Also in this section, note that you can allow or disallow push notifications if you use a third party application to write your articles.

The method from the OneSignal website
By going directly through the OneSignal interface, you will have more possibilities to refine your settings. But it will take a little more time and involvement.
Log in to your OneSignal account and select your app. Remember, I used “wpmarmite”.
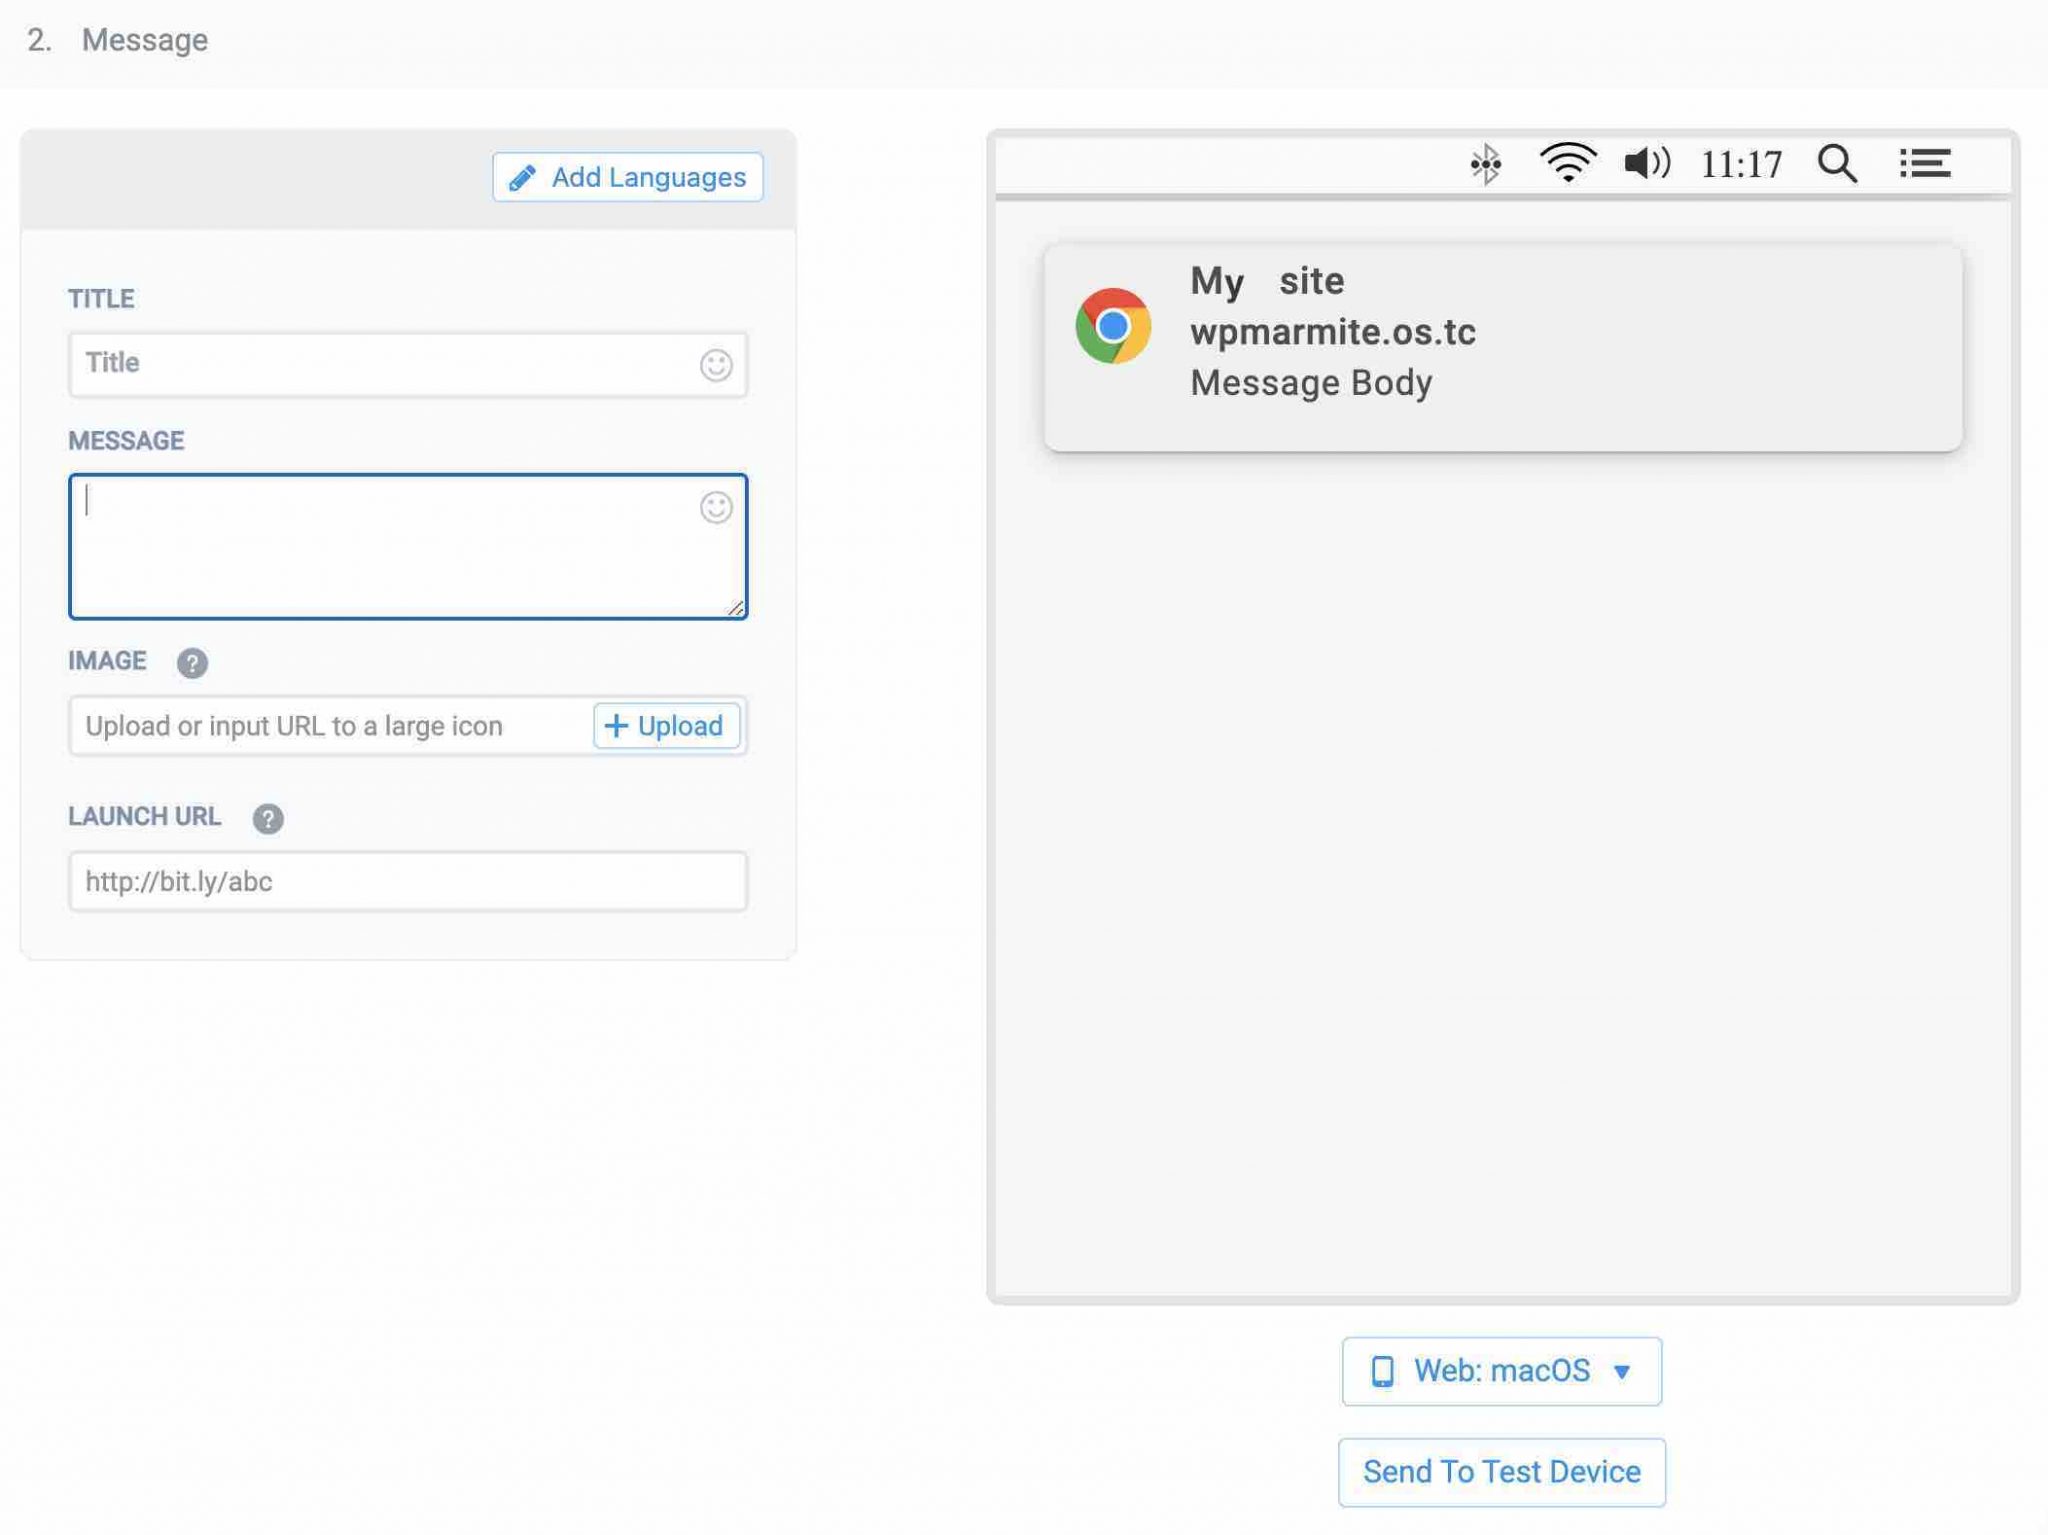
Click on the New Push button at the top right of the page.

Among the options, you will be able to:
- Segment your pushes, i.e. choose to send them to a certain type of people (depending on your subscribers);
- Customize your message;
- Set the date the notification is sent.
This type of usage can be useful when you are not publishing an article.
For example, if you have an ecommerce site and you want to communicate about a flash sale or a promotional offer.
Alternatives to OneSignal
In our opinion, OneSignal has many advantages and remains the right solution to send your push notifications.
But if it does not suit you or if you want to see what is done elsewhere, here are some of its competitors. I warn you, they are not all 100% free:
- VWO Engage (formerly Push Crew)
- AimTell
- WebEngage
- Pushprime
- iZooTo
In terms of plugins present on the official WordPress directory, we can also mention:
- Webpushr (5,000+ active installations)
- PushEngage (3,000+ active installations)
The good points of the plugin
A simple to understand dashboard
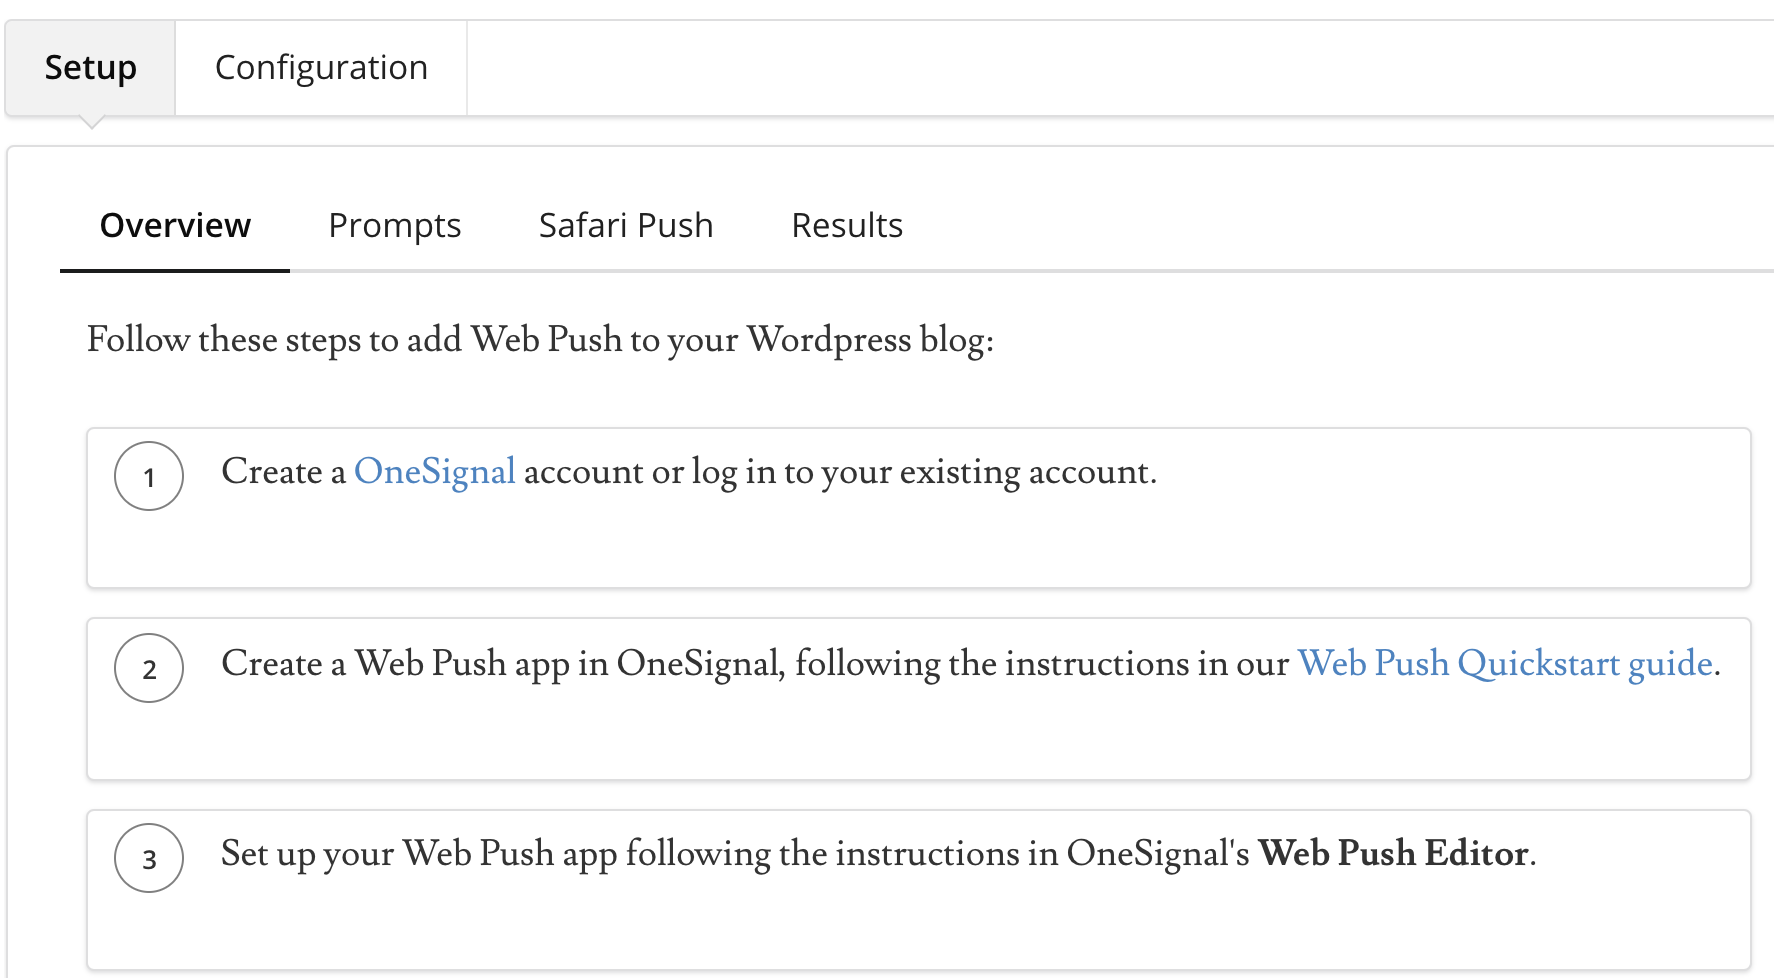
With the OneSignal plugin on WordPress, it’s impossible to get lost in a catch-all menu, or an incomprehensible Rube Goldberg machine. Everything is condensed in two places:
- The Setup tab
- The Configure tab
You will find your way around very easily. Navigation within these two menus is pleasant.
I liked the icons to materialize the different sections and the big buttons to activate or deactivate certain features.
You will also notice that the developers of this tool have thought of making your life easier.
You are a little bit lost at the time of the installation? OneSignal takes you step by step through the installation process.
A free tool but…
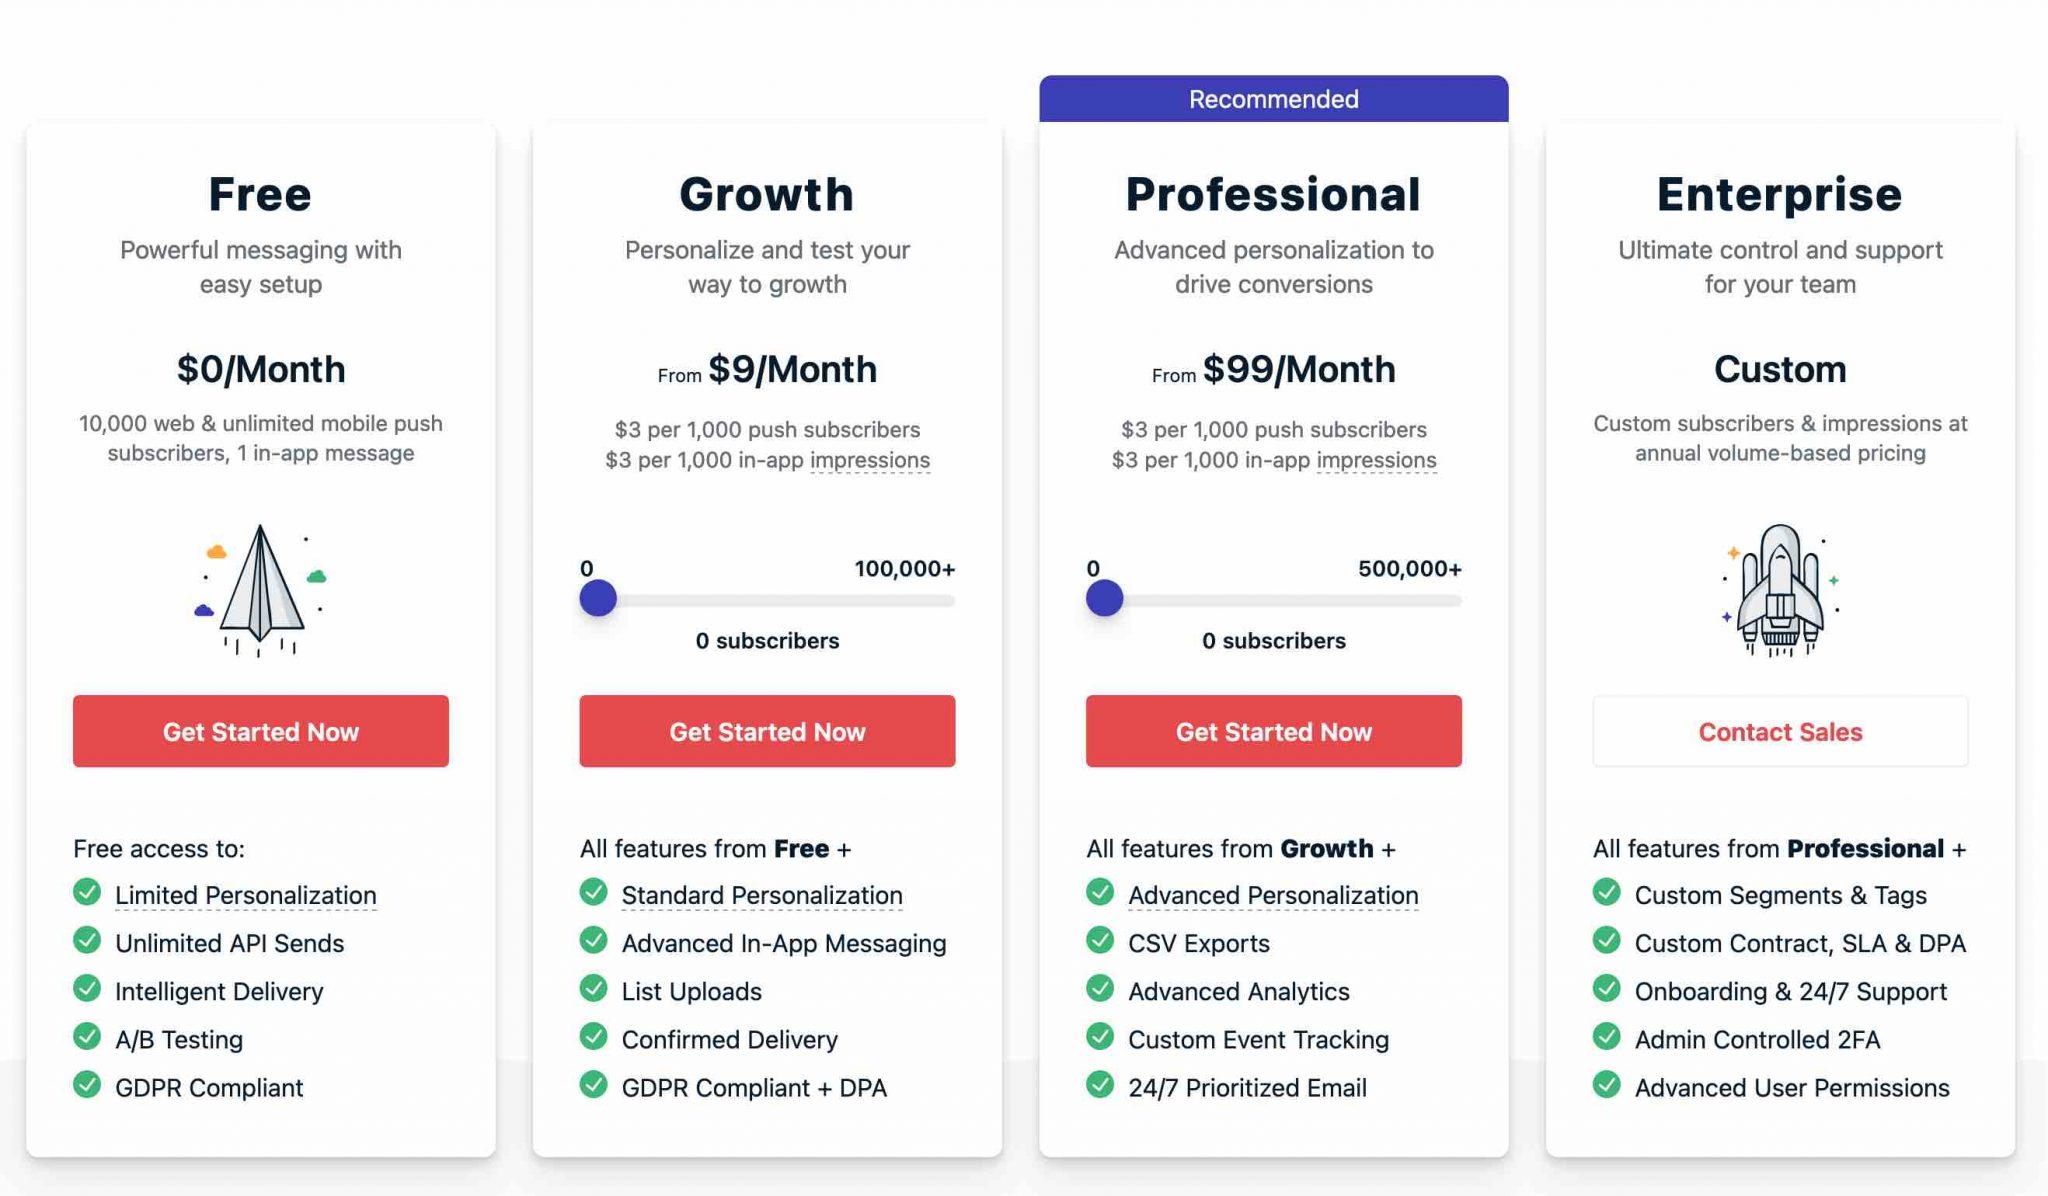
On its official website, it says that the free offer, which you can use in conjunction with the WordPress plugin, allows you to go up to 10,000 web and mobile subscribers for your push notifications. That’s enough to see you through.
If you exceed this limit, you can switch to one of their 3 Premium offers, available from $9/month.
When I wrote the first version of this article, I explained that OneSignal made its money by selling data (those of its users?) for advertising purposes and to companies specialized in research.
They didn’t even hide it on their website. And they specified that if you wanted to keep your data confidential, you had to switch to their premium offer.
A possibility invisible on their site, unless you took the chance to contact their customer service. For the record, OneSignal has indicated that they ended this nebulous practice in July 2019, via a statement published on their site.
Many features
The great thing about OneSignal is that you can really do a lot of things.
You can already set up properly via the plugin’s menu, on the WordPress administration.
But the most interesting is on your user account, directly on the online interface of OneSignal. Especially when it comes to tracking.
At the risk of repeating myself, you will be able to:
- Track your push notifications in real time: how many users do you have? On which browser did they subscribe? Who clicked on your notification, etc.
- Segment your audience to send customized notifications to a specific target.
- Send push notifications from the tool’s interface.
- Edit your own push notification templates so that they are all ready to be sent.
- Do A/B testing, i.e. you will be able to send 2 different messages to see which one works best, and definitely adopt it.
A very complete documentation
The tool is not always easy to understand. To make up for this, OneSignal provides you with a very complete and didactic documentation.
They have made the effort to include a lot of screenshots that make the process understandable.
And for the record, this documentation covers all the topics, even the most complex ones.
How can it be adapted for multisite?
Although it is free, OneSignal is not limited to use on a single site. You can run it on as many WordPress installations as you want.
I see 2 major advantages:
- If you are a webmaster and you manage sites for several clients, you will be able to create an account for each of them and access a customized follow-up for each of them.
- If you manage a multisite network, it will also be very useful.
Minimal impact on performance
Tweaks here, tweaks there. That’s all well and good. But you also have to worry about the performance of your site, right?
The OneSignal plugin is known to be lightweight, but you can legitimately wonder if it will impact your site’s loading time.
I tested it and the answer is no. Judge for yourself (test done with Pingdom tool).
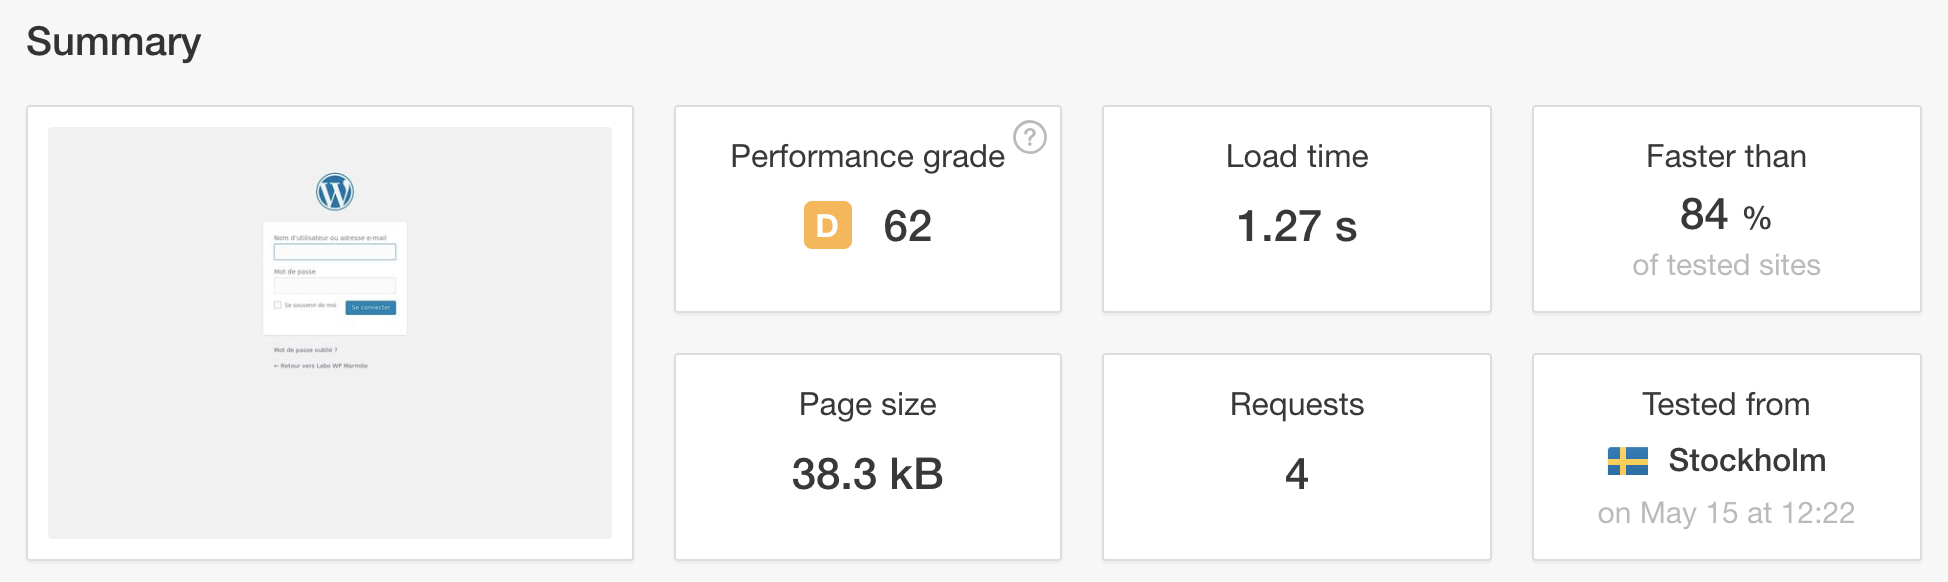
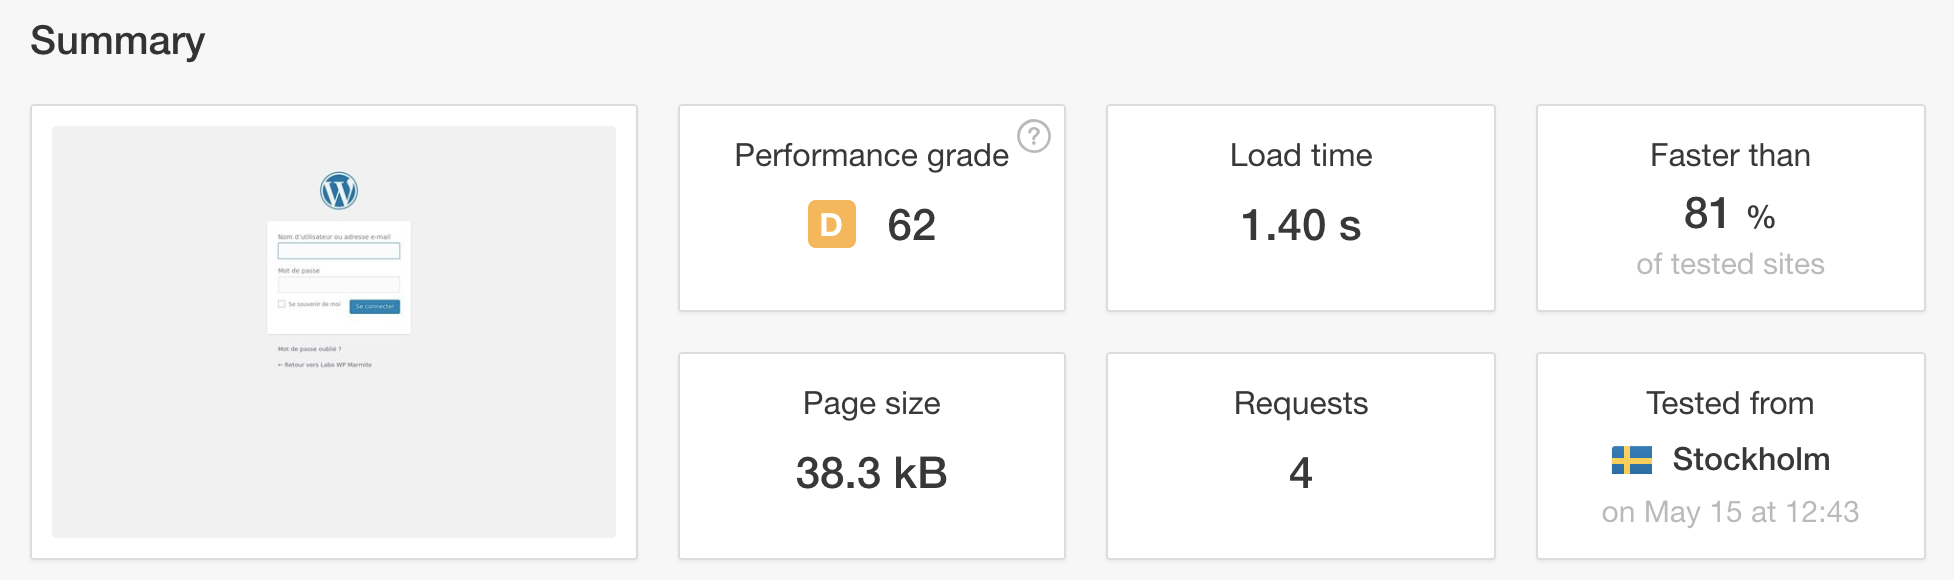
The loading time has slightly increased but not significantly. Another good point for OneSignal.
After having reviewed the advantages of the plugin, let’s dive into its small negative aspects.
Areas of improvement for OneSignal
An “app-dependent” plugin
I explained above: the plugin is set to automatically send a push notification when an article is published.
But if you want to create one yourself at a given moment, from your WordPress interface, you’ll face an obstacle.
Unfortunately, there is no dedicated section to send your notifications from your back-end. Too bad.
To do this, you’ll have to go through the OneSignal online interface, by logging into your account.
A slightly technical setup… but well explained
On its homepage, OneSignal warns us: the installation of their tool takes 15 minutes, according to feedback from its customers.
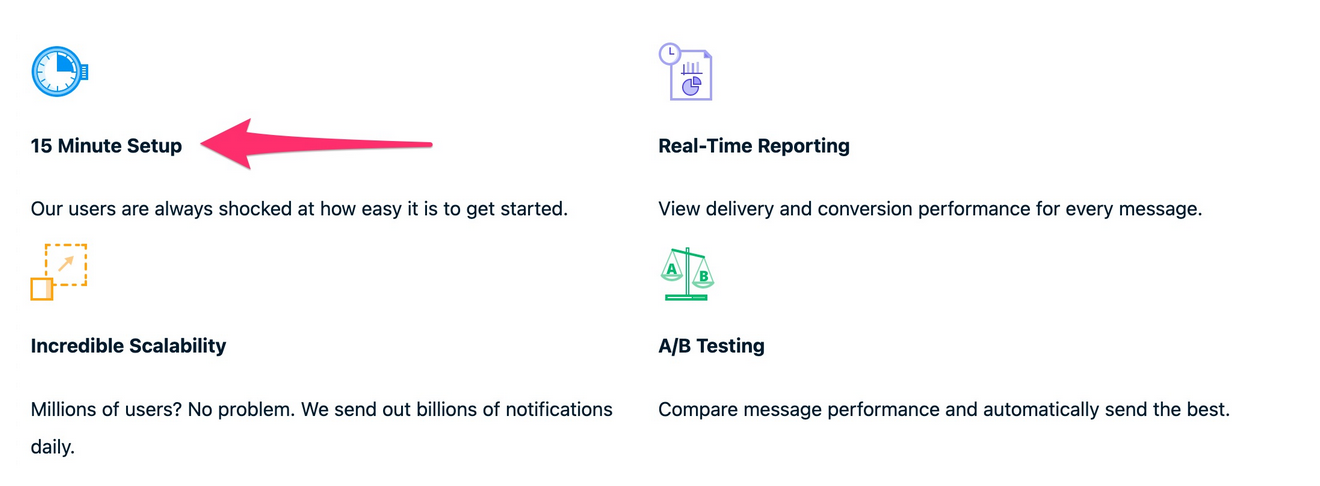
In retrospect, I tend to agree. I’ll admit that I didn’t go so far as to take out my timer, but we’re clearly in that range.
The installation is not complex, but I wouldn’t say it’s extremely easy either.
Let’s just say that the process is made easier by the excellent documentation and visual guidance provided via the plugin’s interface on WordPress.
Finally, the least obvious part to set up is perhaps the notification settings on your site. But with my explanations, I hope you’ll get through it. 🙂
Now, I’m waiting for your notifications
You have just finished reading this article presenting the OneSignal plugin.
In short: it allows you to send push notifications to your visitors. These notifications will be useful to keep in touch with your audience and even generate additional traffic.

They are particularly suitable if you frequently publish content and/or want to let your audience know about promotions and other offers (especially for ecommerce).
Now it’s up to you to use OneSignal, if you haven’t already.
Start by telling me, in the comments, if you are going to do it.
Do you have any comments to add or questions to ask me? If so, let me know right below, in the comments.
And if you think this article could be useful to others, feel free to share it on social networks.