Leaving the native WordPress interface? Never. Drowning you in a slew of widgets? He wouldn’t dream of it. With this guy, blocks are the guiding light. Create your next WordPress site without leaving the default editor (Gutenberg), without coding, and…
Selling online with WordPress?
Of course, it’s possible!
And here, I’m not talking about inserting Paypal purchase buttons.
It is also possible to build quality eshops thanks to WooCommerce.
In this tutorial, I will teach you how to install and launch the world’s most popular ecommerce solution.
I will also give you tips and advice to choose the right theme, the right plugins, and how to optimize your online store.
Overview
- What is WooCommerce?
- Why choose WooCommerce?
- How to install WooCommerce on your site?
- How to configure your WooCommerce store?
- Starting up your online store
- Which WooCommerce plugins to install to go further?
- Which theme to choose for your WooCommerce website?
- How much does WooCommerce cost?
- Our opinion on WooCommerce
This tutorial was updated in May 2021. It applies to WooCommerce version 5.2.
This post contains affiliate links. This means that WPMarmite will receive a commission if you buy the products or services presented through them. No change on the price for you though, but that’s just a way for us to be able to reward our blog’s writers.
What is WooCommerce?
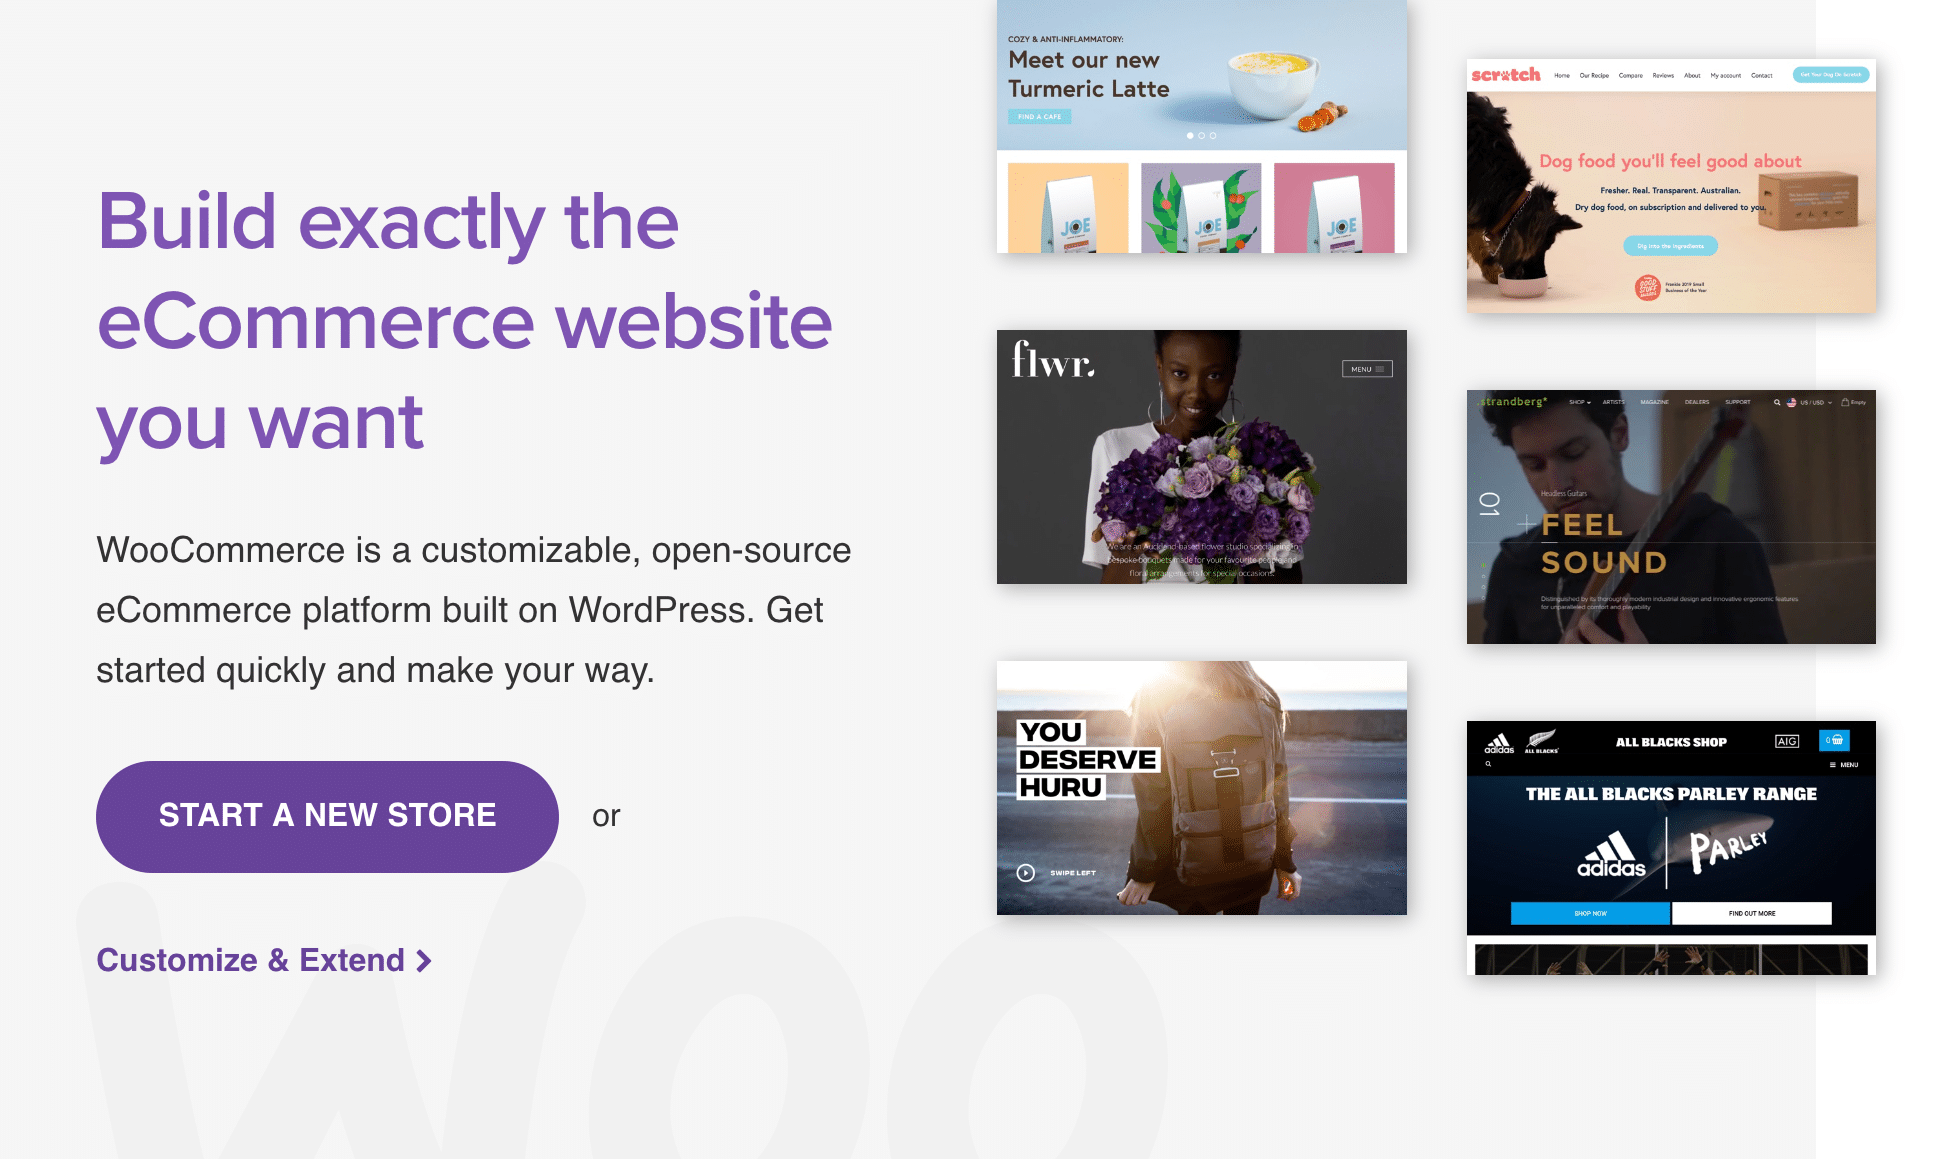
WooCommerce is a plugin that enables you to transform your WordPress website into an online store.
As its prefix “Woo” suggests, it was developed and launched by the WooThemes store in 2011, before being acquired in 2015 by Automattic, the company that mostly contributes to WordPress.
With more than 5 million active installations, WooCommerce is the most popular ecommerce plugin on WordPress. It is used on 93.7% of WordPress ecommerce sites, where it has left the competition behind (*).
But its dominance doesn’t stop there. It is also the most used ecommerce solution on the million most visited websites in the world.
With the Covid-19 pandemic, the digitalization of businesses has accelerated: online sales have grown significantly in the U.S. (in May 2020, 52% of surveyed U.S. adults shopped more online).
And Automattic’s in-house plugin has also “taken advantage” of this to experience strong growth. For example, the search for the keyword “WooCommerce” jumped by 44.30% between 2019 and 2020.
These excellent numbers have also helped the development of WordPress, which now powers more than 40% of the world’s web.
(*) This post is dedicated to WooCommerce, but be aware that it is not the only plugin to do ecommerce on WordPress. For example, I could mention WP eCommerce, BigCommerce, or Easy Digital Downloads (to sell digital products).
Why choose WooCommerce?
But let’s get back to WooCommerce. This flexible plugin has quite a few advantages:
- It will allow you to sell any type of product, whether physical, digital, with subscriptions etc. And this, in the US and abroad.
- WooCommerce is free and you can customize it by adding Premium plugins – I will come back to this later – in a whole bunch of domains (delivery, payment, invoice, marketing, social networks, etc.).
- WooCommerce is accessible to beginners, even if you start from scratch. You don’t need to know how to code to make it work. But getting started will require a minimum time investment.
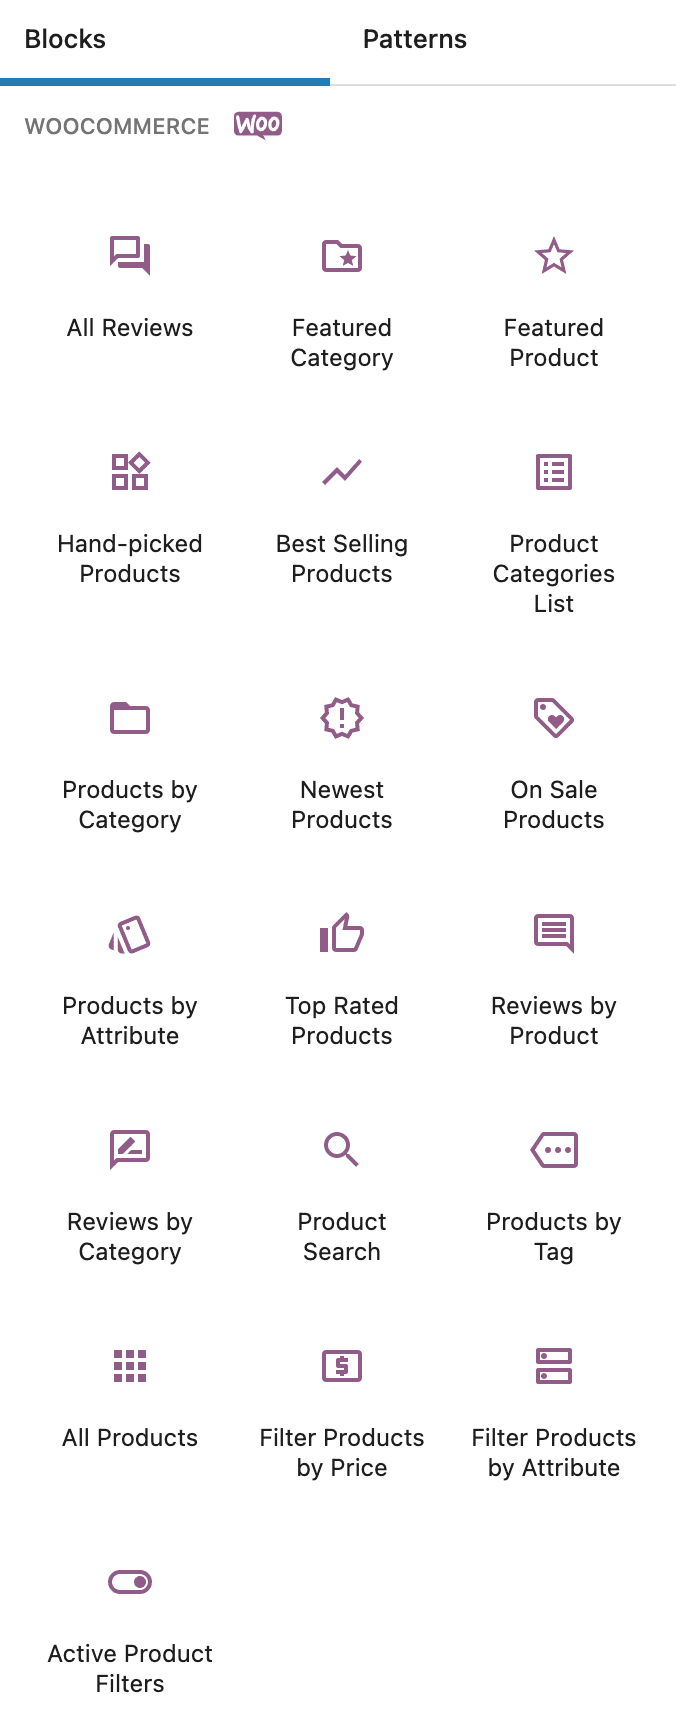
- Almost all themes and page builders are compatible with it, so you don’t necessarily have to change your design if you enable it. In addition, it offers 19 Gutenberg blocks so that you can easily integrate certain data into your content (e. g. best-selling products, on sale products, top rated products, etc.).
- It natively integrates certain payment options (PayPal, checks, bank transfers) and delivery options.
- You have full control over all your site parameters, which is not always the case with paid online ecommerce platforms such as Wix.
Now that you have an overview of WooCommerce, find out how to set up your store.
How to install WooCommerce on your site?
If you have been paying attention and concentrating since the beginning of this article, you should remember that WooCommerce is a plugin that you add to WordPress.
Therefore, in order to activate it, you must have a working WP site. If you haven’t already done so, you can check our complete guide.
I don’t know if you’ve already tried to install it, but you should know that it offers many options.
So it won’t be possible to make a step by step tutorial to explain the role of each parameter, like for the Yoast SEO plugin. That would require a whole training course, because there is so much to say.
However, I’ll give you a tour to help you understand:
- How it works.
- Where to find the answers to your questions (you’ll see that the help integrated into the plugin is of good quality).
Once you’ve installed and activated WooCommerce, you’ll be pleasantly surprised to be presented with a wizard to help you with the initial settings.
You don’t have to do it right away and can come back to it later, but if you already know what to do with your store, I advise you to take action right away. It’s done in a few quick steps, just take a look.
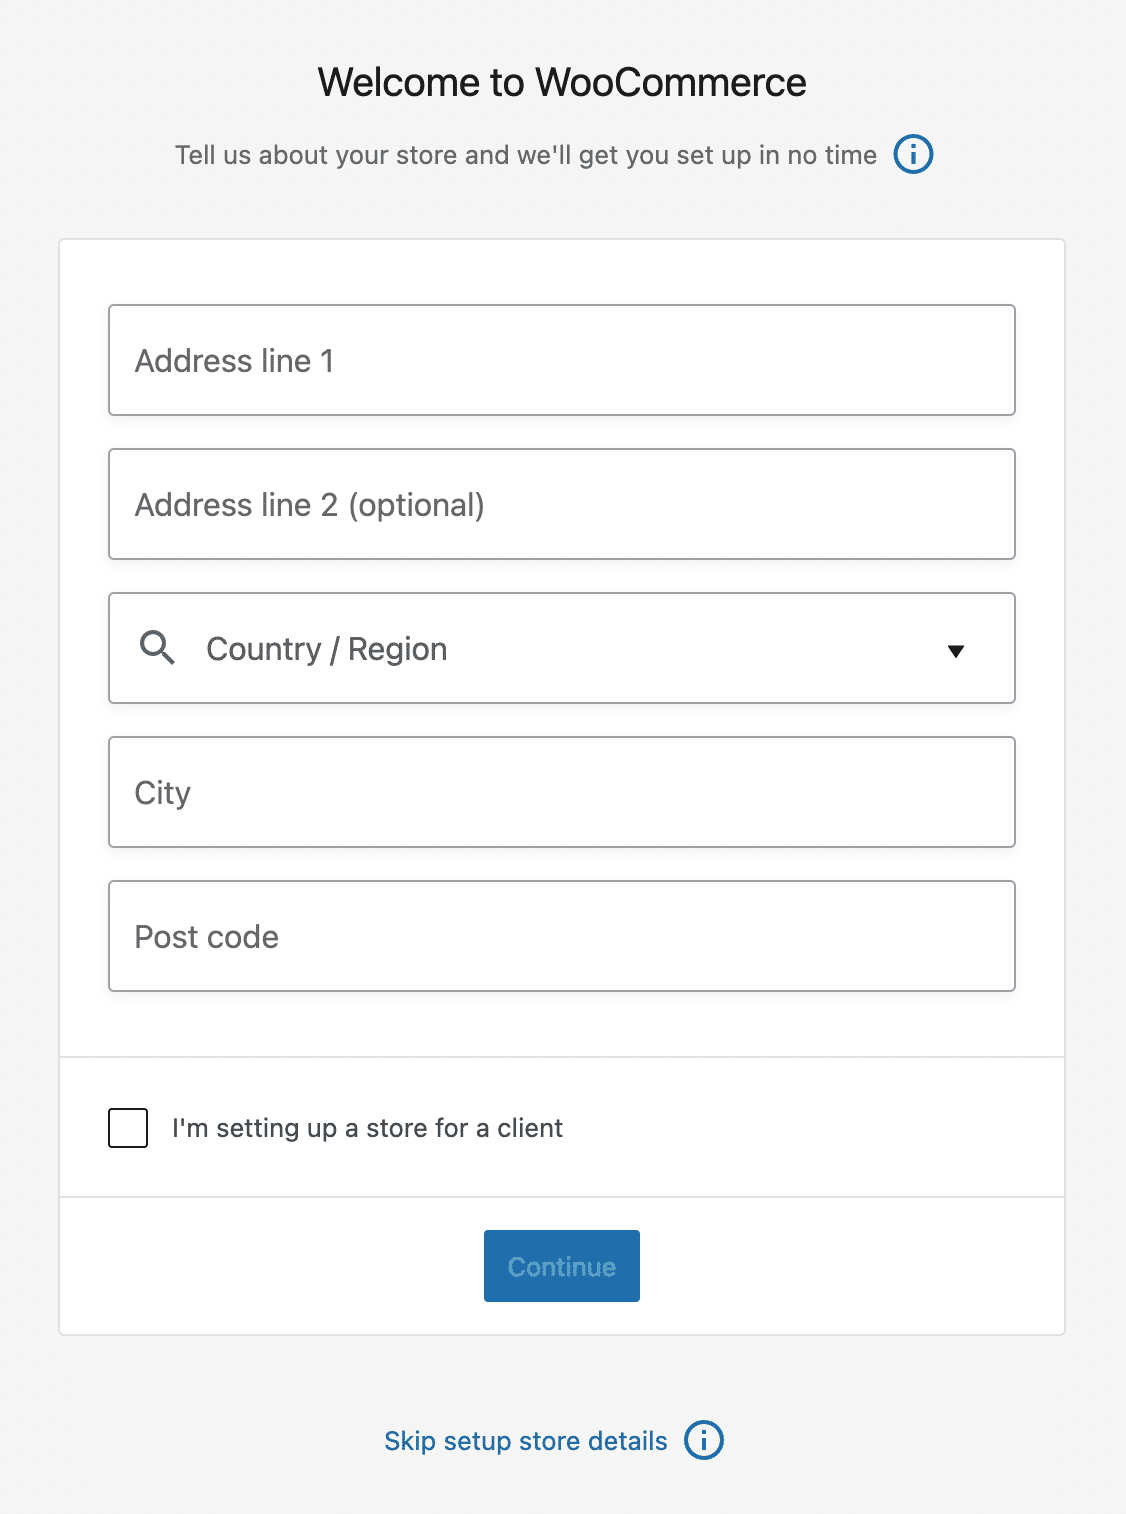
Step 1: Set up your store details
To start, you’re asked to fill in some basic information about your store, specifically its address.
WooCommerce says that this will “allow to set up currency options and shipping rules automatically”.
Step 2: Choose the industry of your store
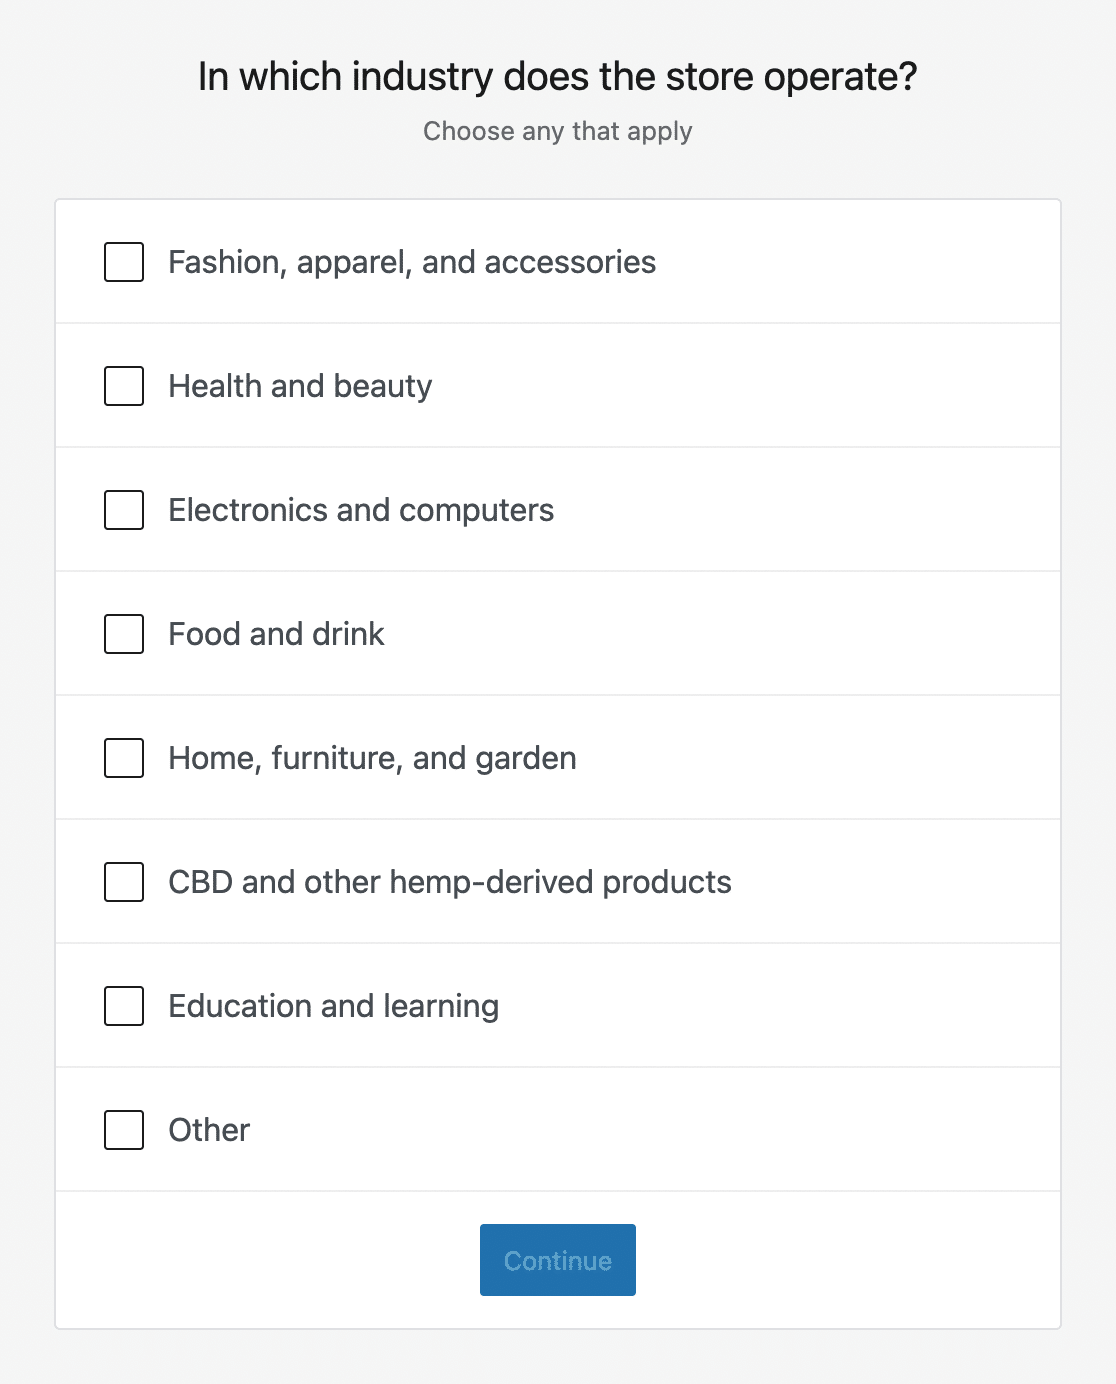
Next, you have the choice between several industries. Choose the one that best suits your online business.
Step 3: Define the products to be sold
In step 3, choose the type of products you will sell. Two “classic” categories are first proposed: physical products and downloadable products.
If you want to sell them on your WooCommerce store, they will be available by default. For other products such as subscriptions, memberships, bookings, bundles or customizable products, WooCommerce recommends each time one of its in-house paid extensions.
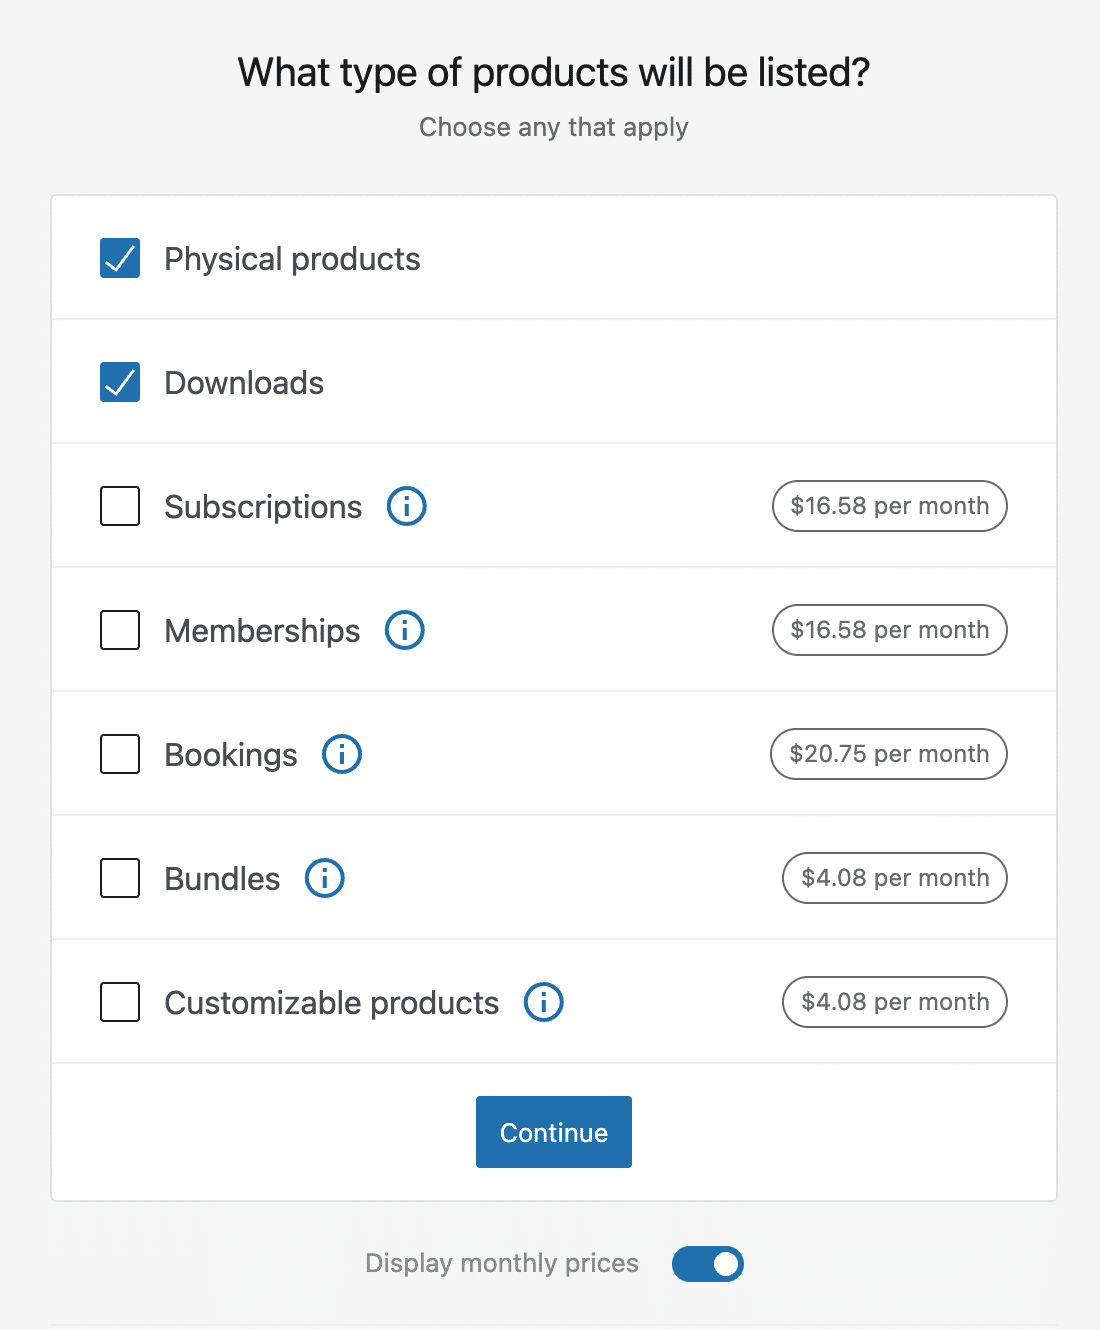
This is the reason why you can see the monthly rates on the above screenshot, even if the billing of the extension is annual.
For example, if you want to sell subscriptions, WooCommerce redirects you to its WooCommerce Subscriptions plugin.
To understand what we are talking about, let’s detail what each type of product corresponds to:
- A physical product is a piece of clothing, a piece of furniture or food: in short, anything that cannot be downloaded and is not virtual.
- A downloadable product (“Downloads”) is accessible after a download (e.g.: ebook) that you can pay for;
- “Subscriptions” is a product that you pay for weekly, monthly or yearly.
- “Memberships” allows you to restrict access to a content or a product for free or for a fee.
- “Bookings” allows your customers to reserve a time slot or an item (e.g. a vehicle).
- “Bundles” allows you to offer different products in a global package, with or without discounts.
- “Customizable products” offers additional options to your customers on the products they will buy (e.g. adding a customized message, special packaging, etc.
Step 4: Provide details about your business
How many products do you expect to display? Do you sell on a platform other than WooCommerce? These are the two questions you can answer in this fourth step.
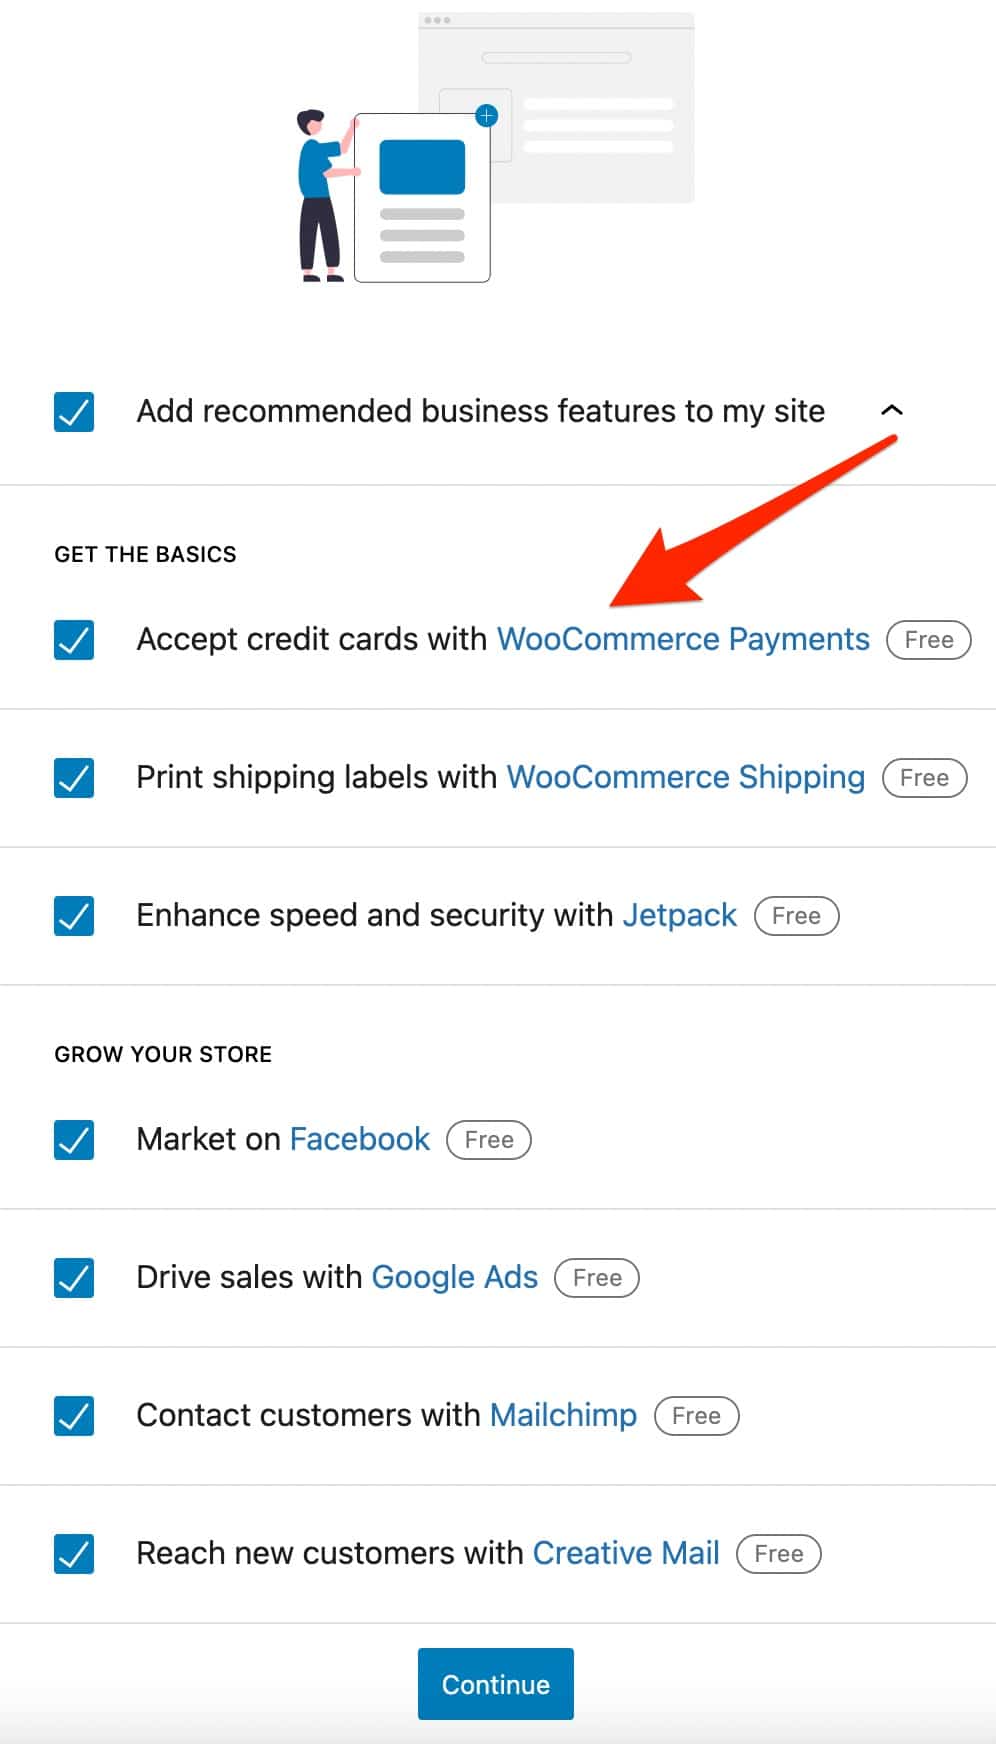
WooCommerce will also offer to automatically activate several extensions. Four to do marketing on your store:
- Facebook for WooCommerce: to connect your WooCommerce store to your Facebook page and sell on it, while advertising.
- Mailchimp for WooCommerce: to integrate WooCommerce with Mailchimp and send email campaigns (among others) through this tool.
- Creative Mail for WooCommerce: to send emails and customize the default WooCommerce emails. However, note that WooCommerce has taken over MailPoet, in December 2020. We can imagine that it will recommend its homegrown emailing solution in the future ;-).
- Google Ads & Marketing by Kliken: to promote your products on Google Shopping.
And let’s not forget two in-house solutions: WooCommerce Shipping (to print shipping labels) and Jetpack, to manage the security and performance of your site.
You can activate them later manually, so if you are not sure if you need them at the moment, just uncheck the box associated with them:
Step 5: Choose a theme for your WooCommerce store
The last step proposed by the configuration wizard: choosing a theme.
To simplify, the theme will affect the visual appearance of your store. WooCommerce offers about twenty paid themes and three free themes.
If you don’t know which direction to take at the moment, go for the free Storefront theme (or one of its child themes). Storefront is the flagship theme for WooCommerce, perfectly optimized to work hand in hand with the ecommerce plugin.
If you don’t like Storefront after discovering it, you can always change your mind whenever you want, with a few clicks. By the way, I’ll introduce you to some interesting ones later on. Stay focused.
If all goes well, WooCommerce will then redirect you to your online store dashboard. As WooCommerce details, there you’ll “find configuration suggestions, tips and tools, and key data on your store’s performance and profits”.
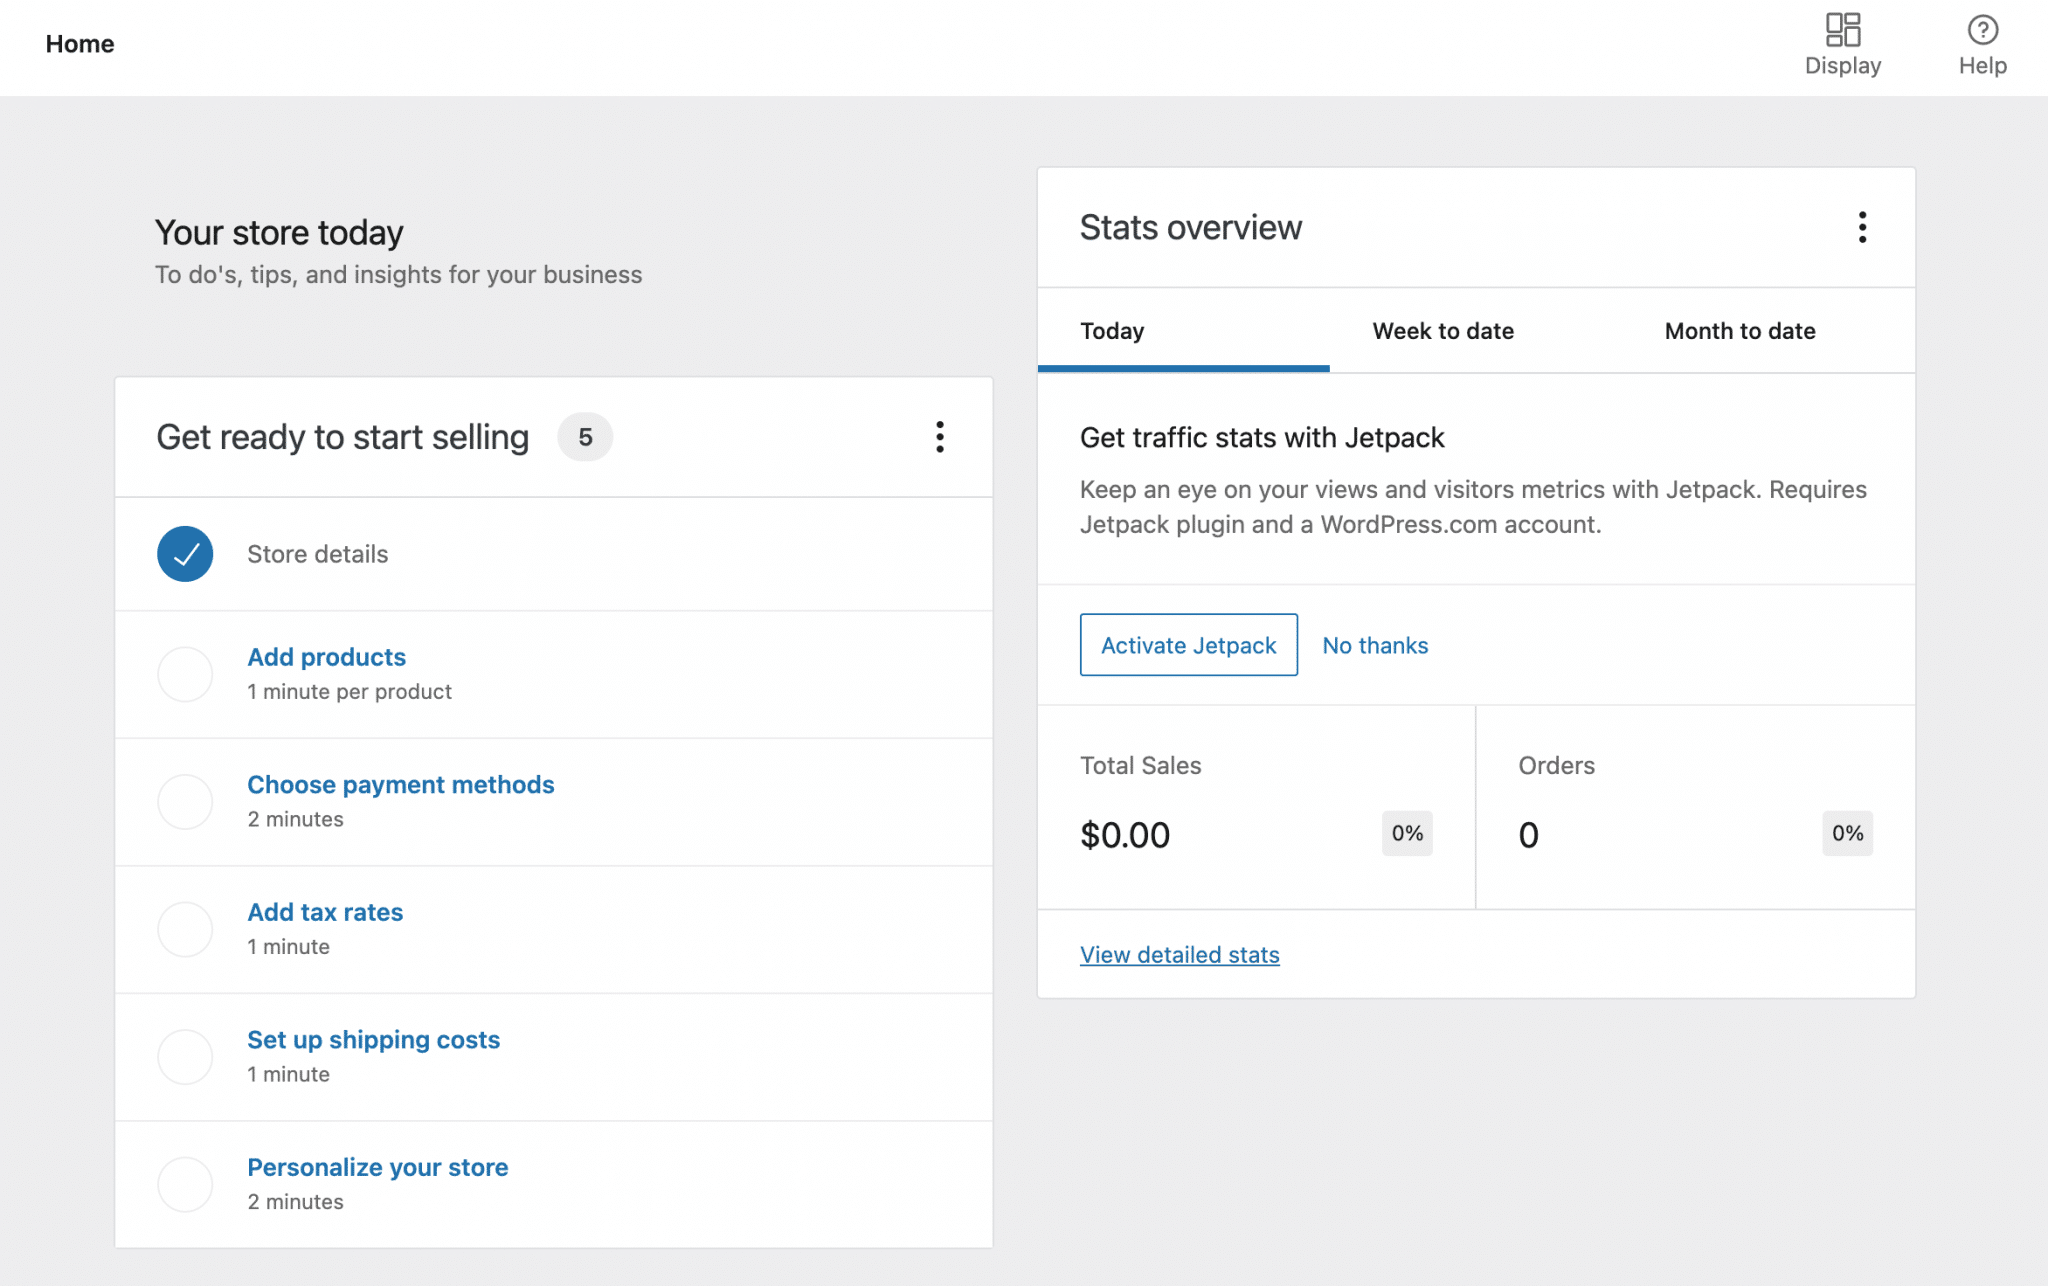
If you wish, you can quickly perform basic actions to complete your store setup by:
- Adding products.
- Setting up payments, tax and shipping.
- Customizing your store.
For the purposes of this tutorial, we’re going to see all of this in detail later, so I won’t go into it here.
Well there you go, congratulations: you’ve just made the first basic settings on your WooCommerce store. It’s a good starting point, but you can imagine that in order to make it operational and attractive, you’ll have to go much further than these simple little adjustments.
Let’s take a look at how to configure your store in more depth.
How to configure your WooCommerce store?
When you activate WooCommerce, you’ll see 4 main menus appear in the left sidebar of your admin interface:
- WooCommerce
- Products
- Analytics
- Marketing

Almost all of the settings for your online store are done using the WooCommerce menu, which we’ll dive into below.
WooCommerce menu settings
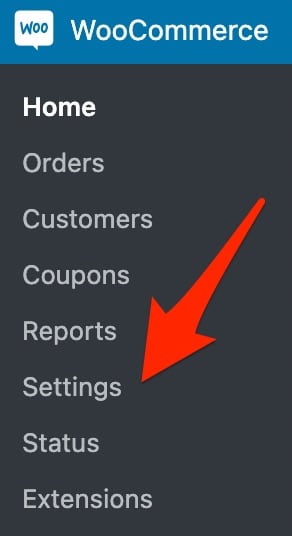
The “Settings” submenu of the WooCommerce menu can be considered as the nerve center of your online store. This is where you will be able to configure the plugin as it should be, thanks to the 8 tabs present.

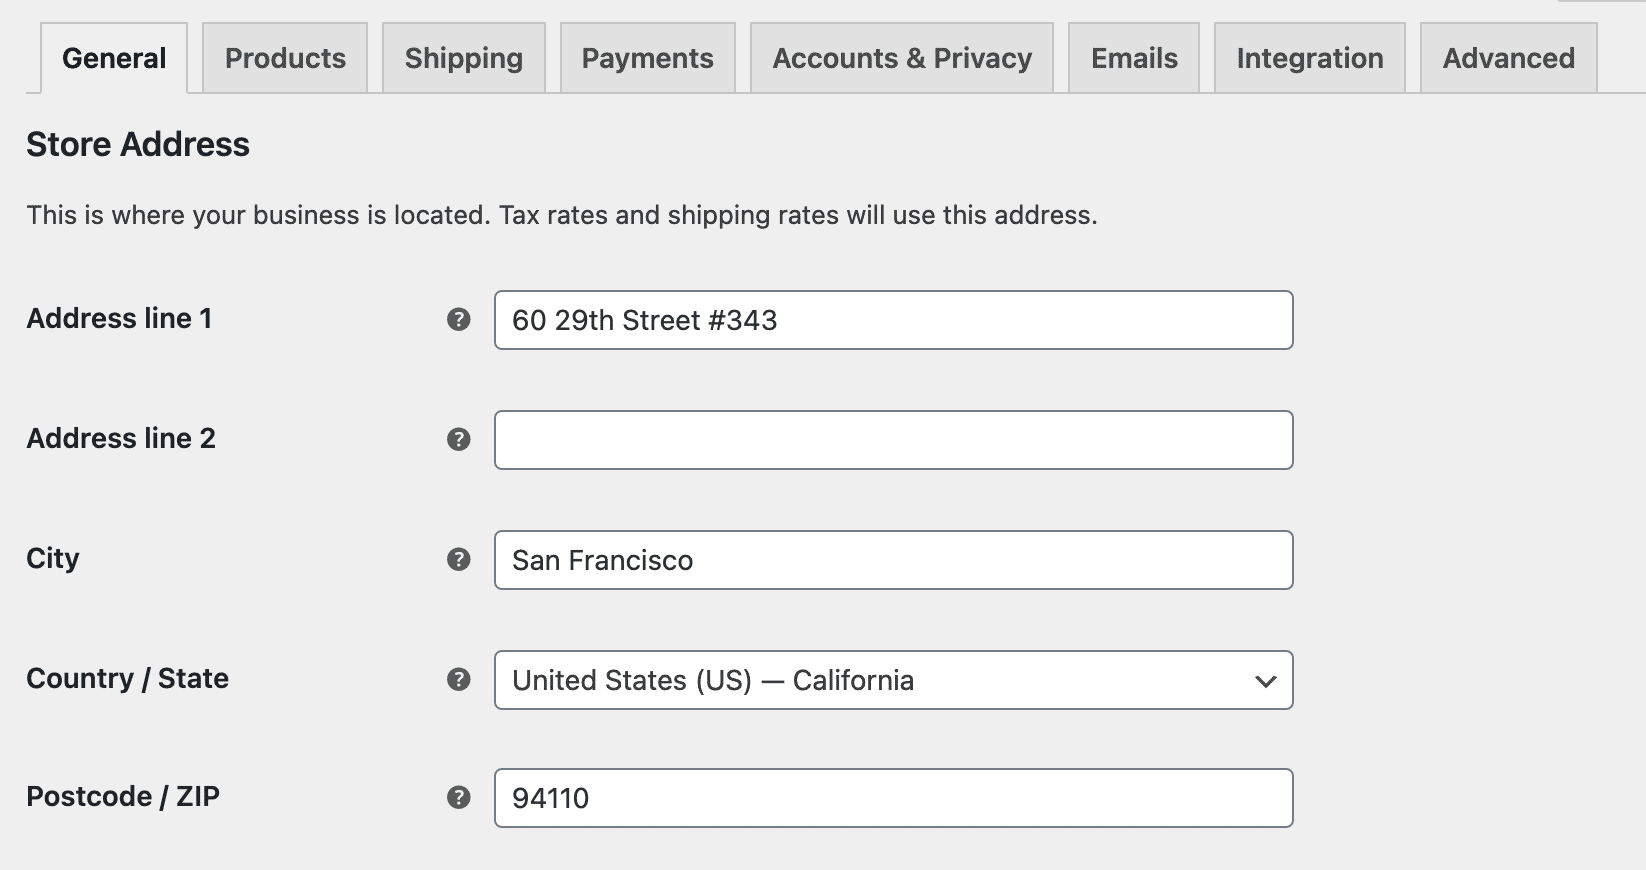
The General tab
In this first tab, you will be able to set everything related to the address of your store, the activation of VAT and promo codes, or the currency to use.
The Products tab
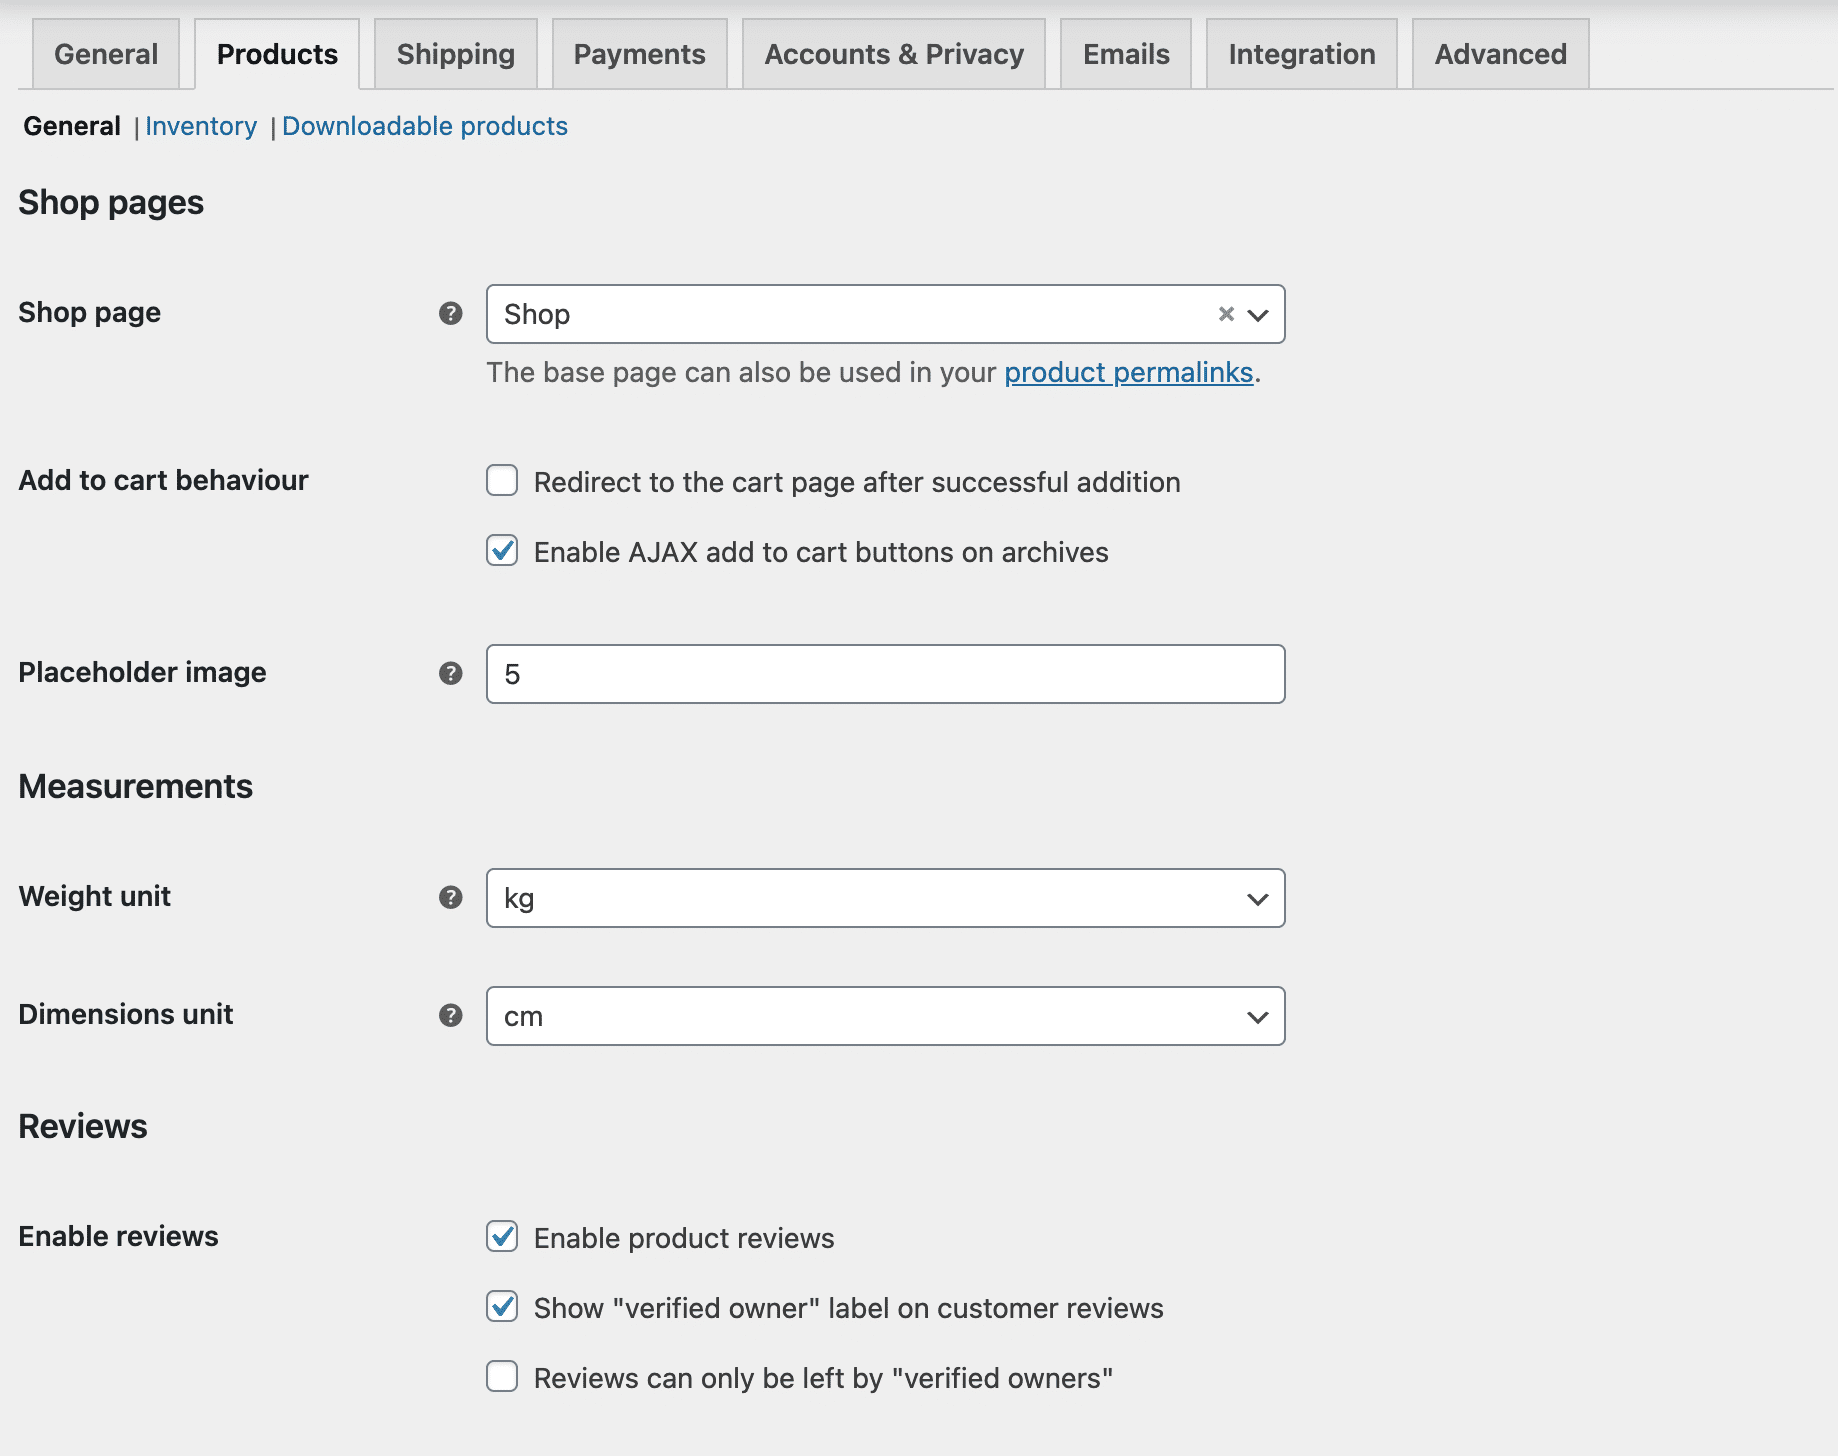
This tab will allow you to configure the base page of your store (the one where your products will be displayed), to define the units of weight and dimensions of your products, to activate certain features such as ratings on customer reviews or product reviews.
In addition, it will be possible to make adjustments to your stock, such as being able to hide out-of-stock products from your visitors.
Finally, you can set options related to downloadable products (e.g. allow access only after payment).
The Shipping tab
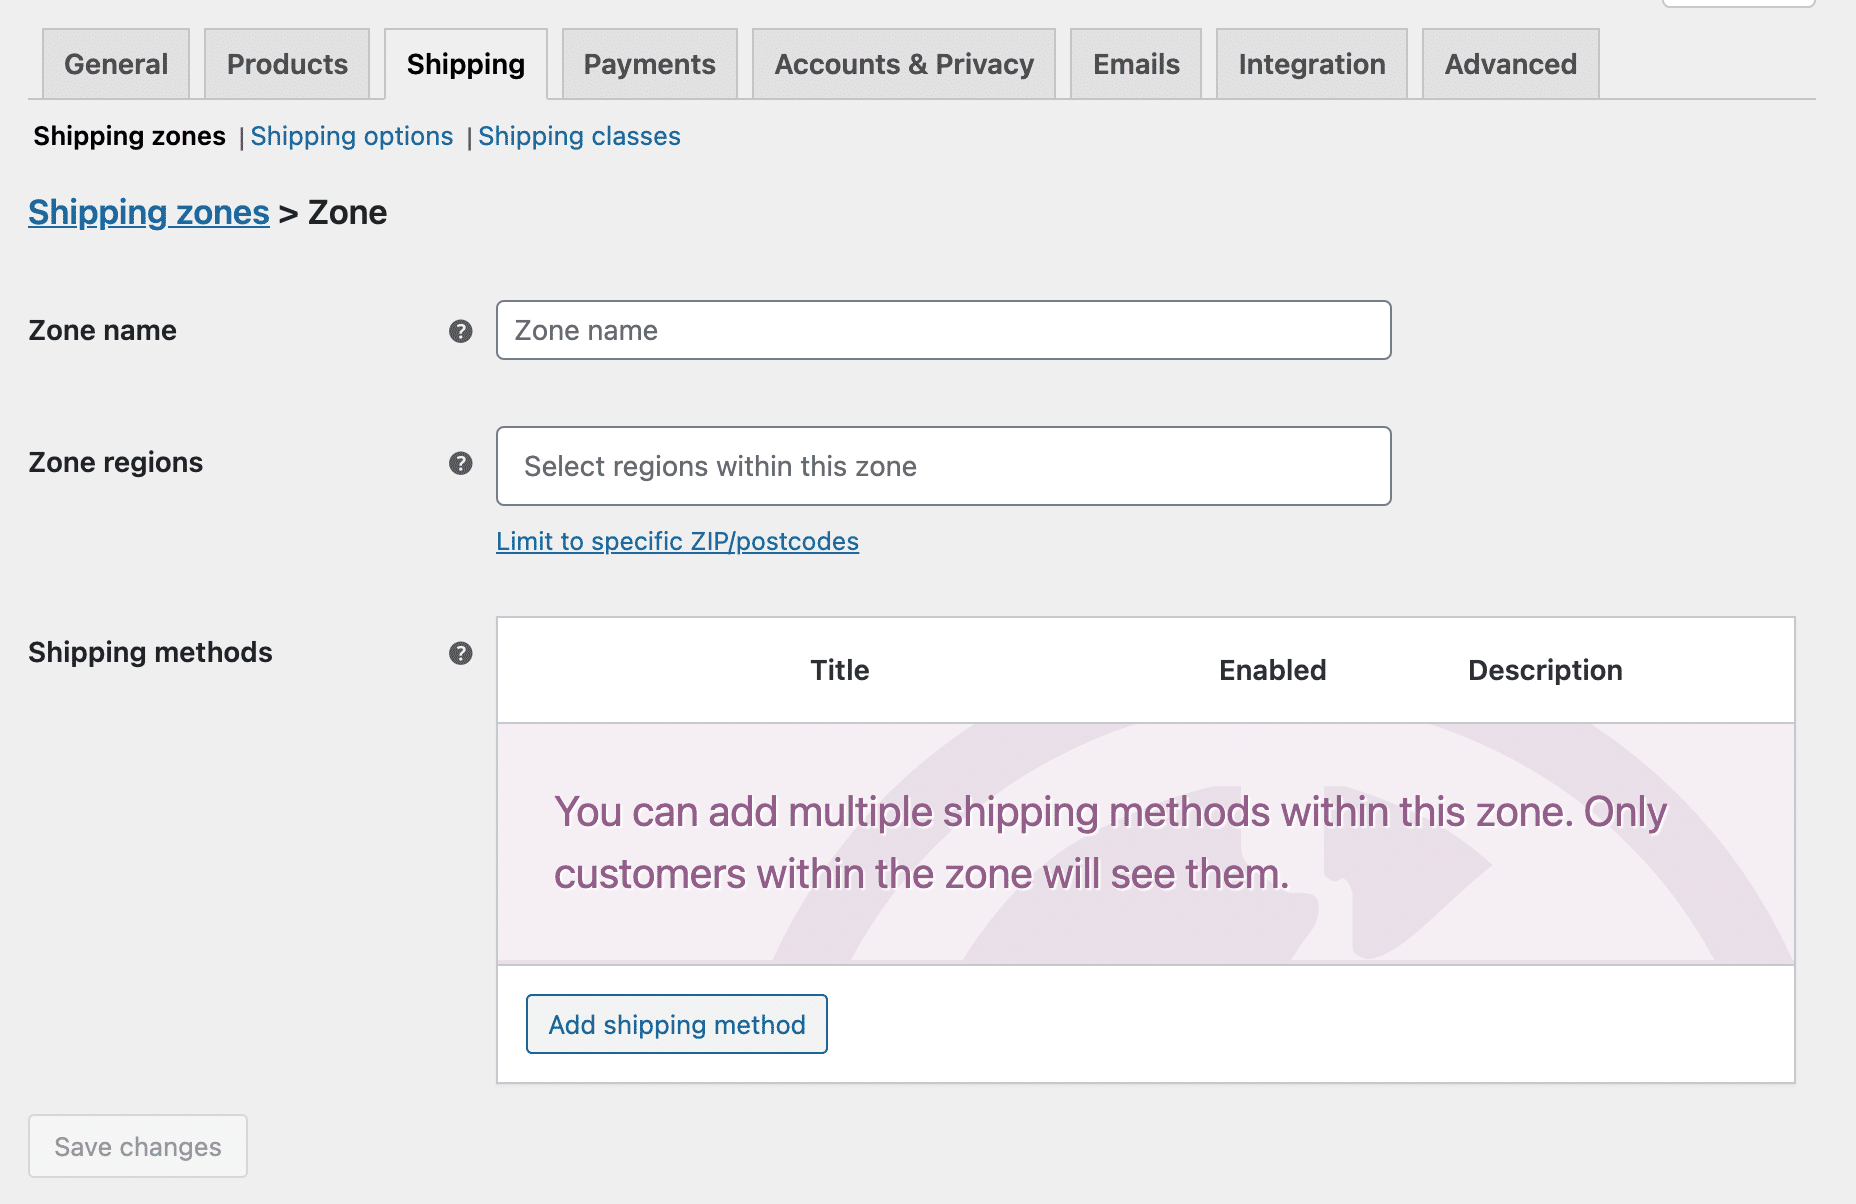
To satisfy your customers, you need to configure the delivery of products (otherwise, I do not give much of your reputation). Here you can specify the shipping zones and methods, as well as the shipping options (fees).
The Payments tab
Now you can configure the payment methods used on your store. By default, you are offered four:
- Bank transfer
- Check payments
- Cash on delivery
- PayPal Standard
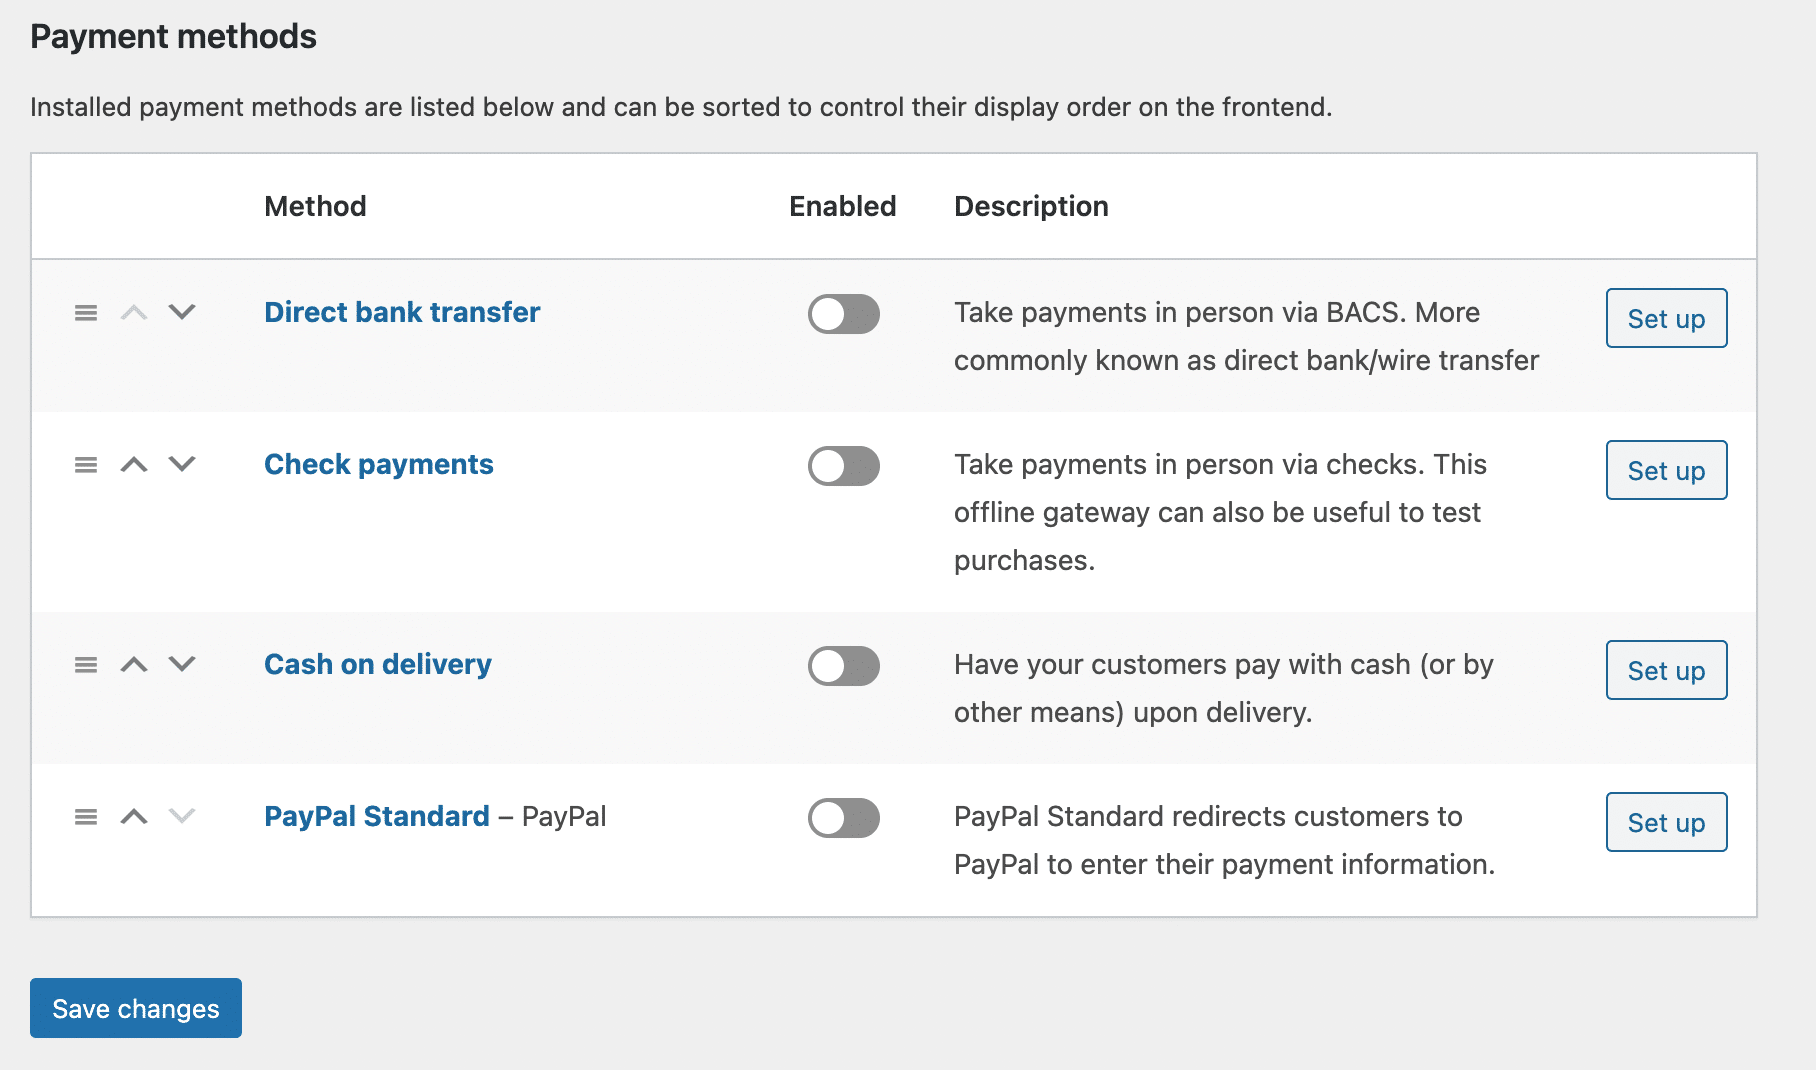
You can activate others later, such as Stripe, using dedicated plugins. We’ll come back to this later.
Note that it is also possible to sort these payment methods to define their display order on the site, using a simple drag and drop.
The Account & Privacy tab
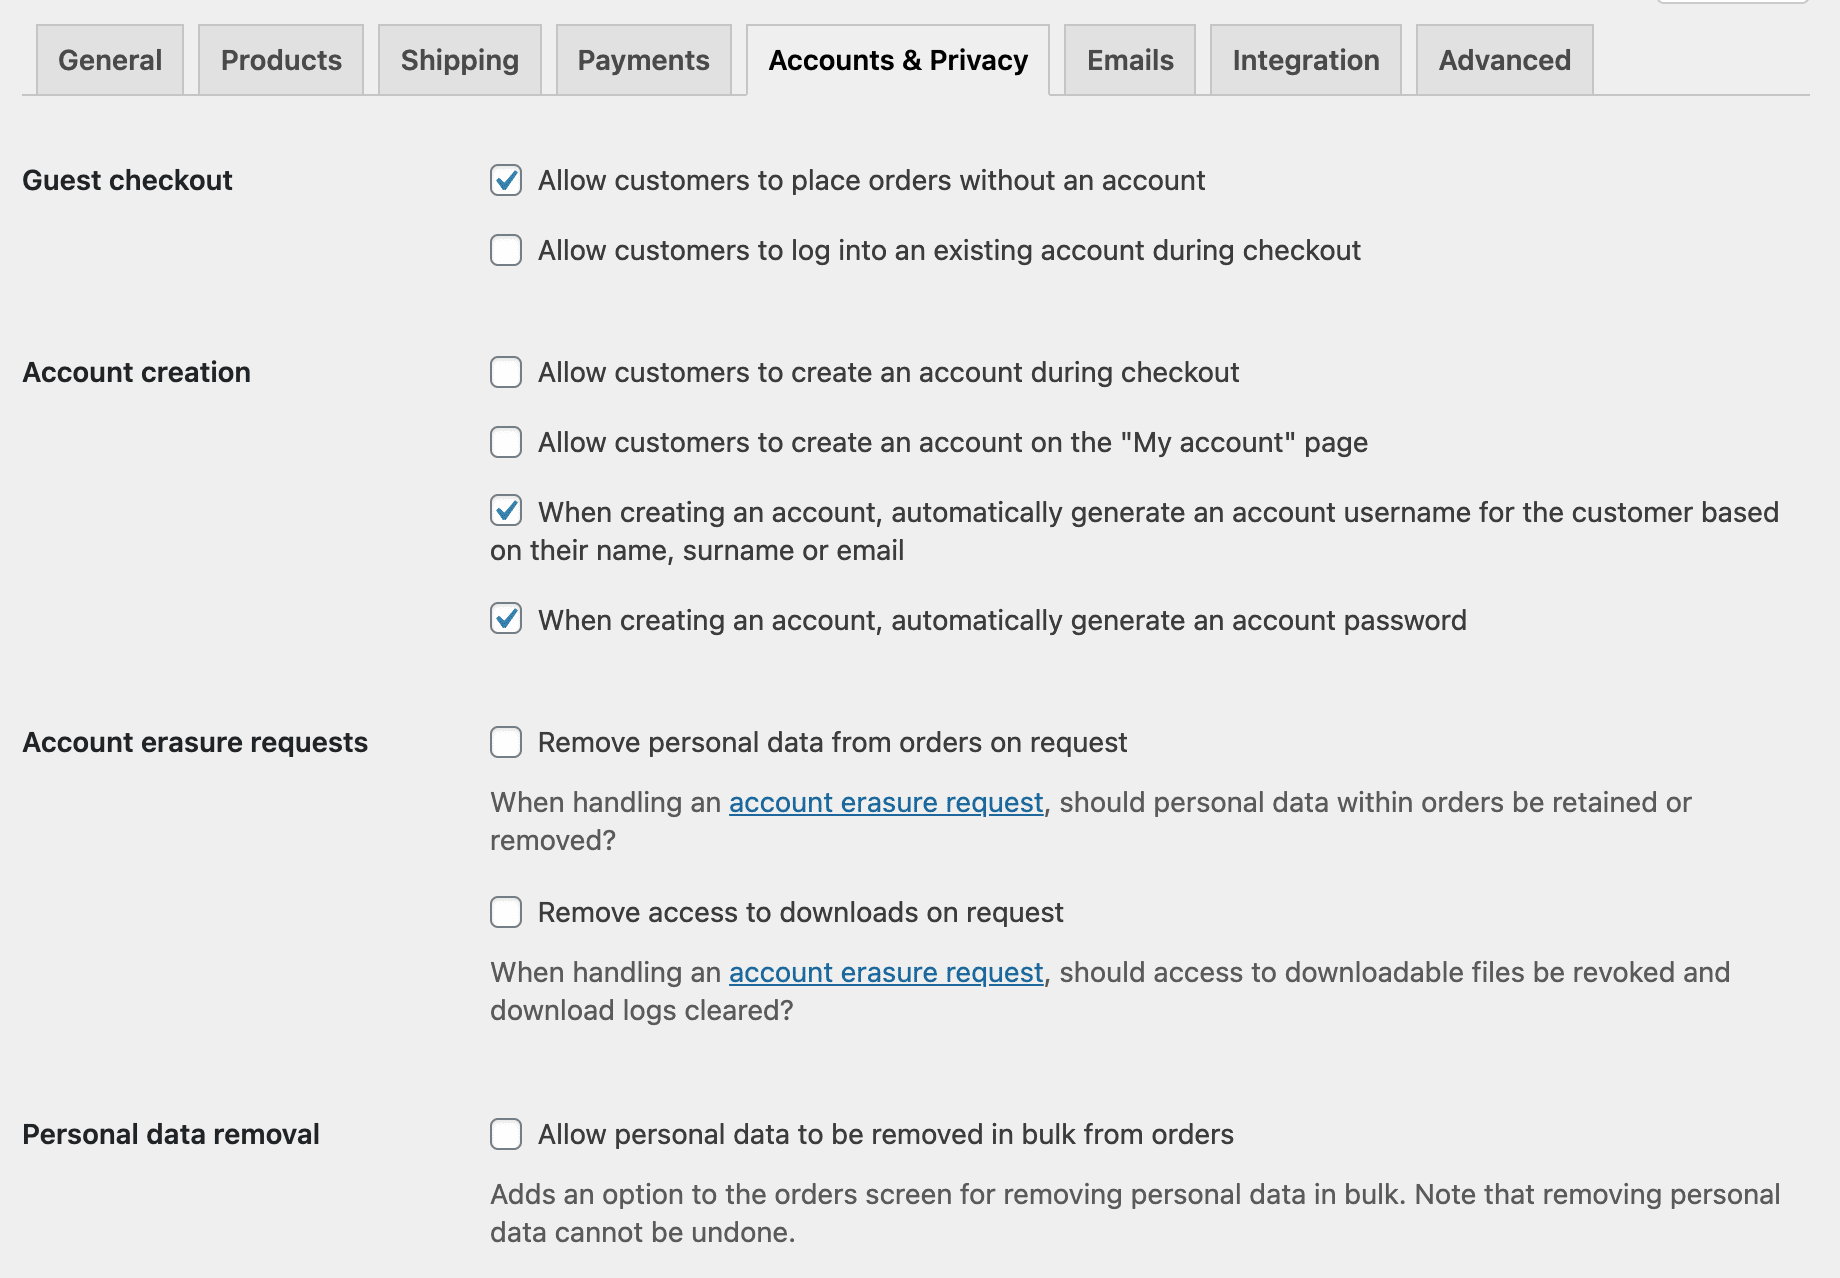
The Accounts and Privacy tab
This tab allows you to set the creation of customer accounts but also – and especially – the privacy policy and retention of personal data, to be in compliance with the GDPR (General Data Protection Regulation).
By the way, WooCommerce also offers many resources to guide you.
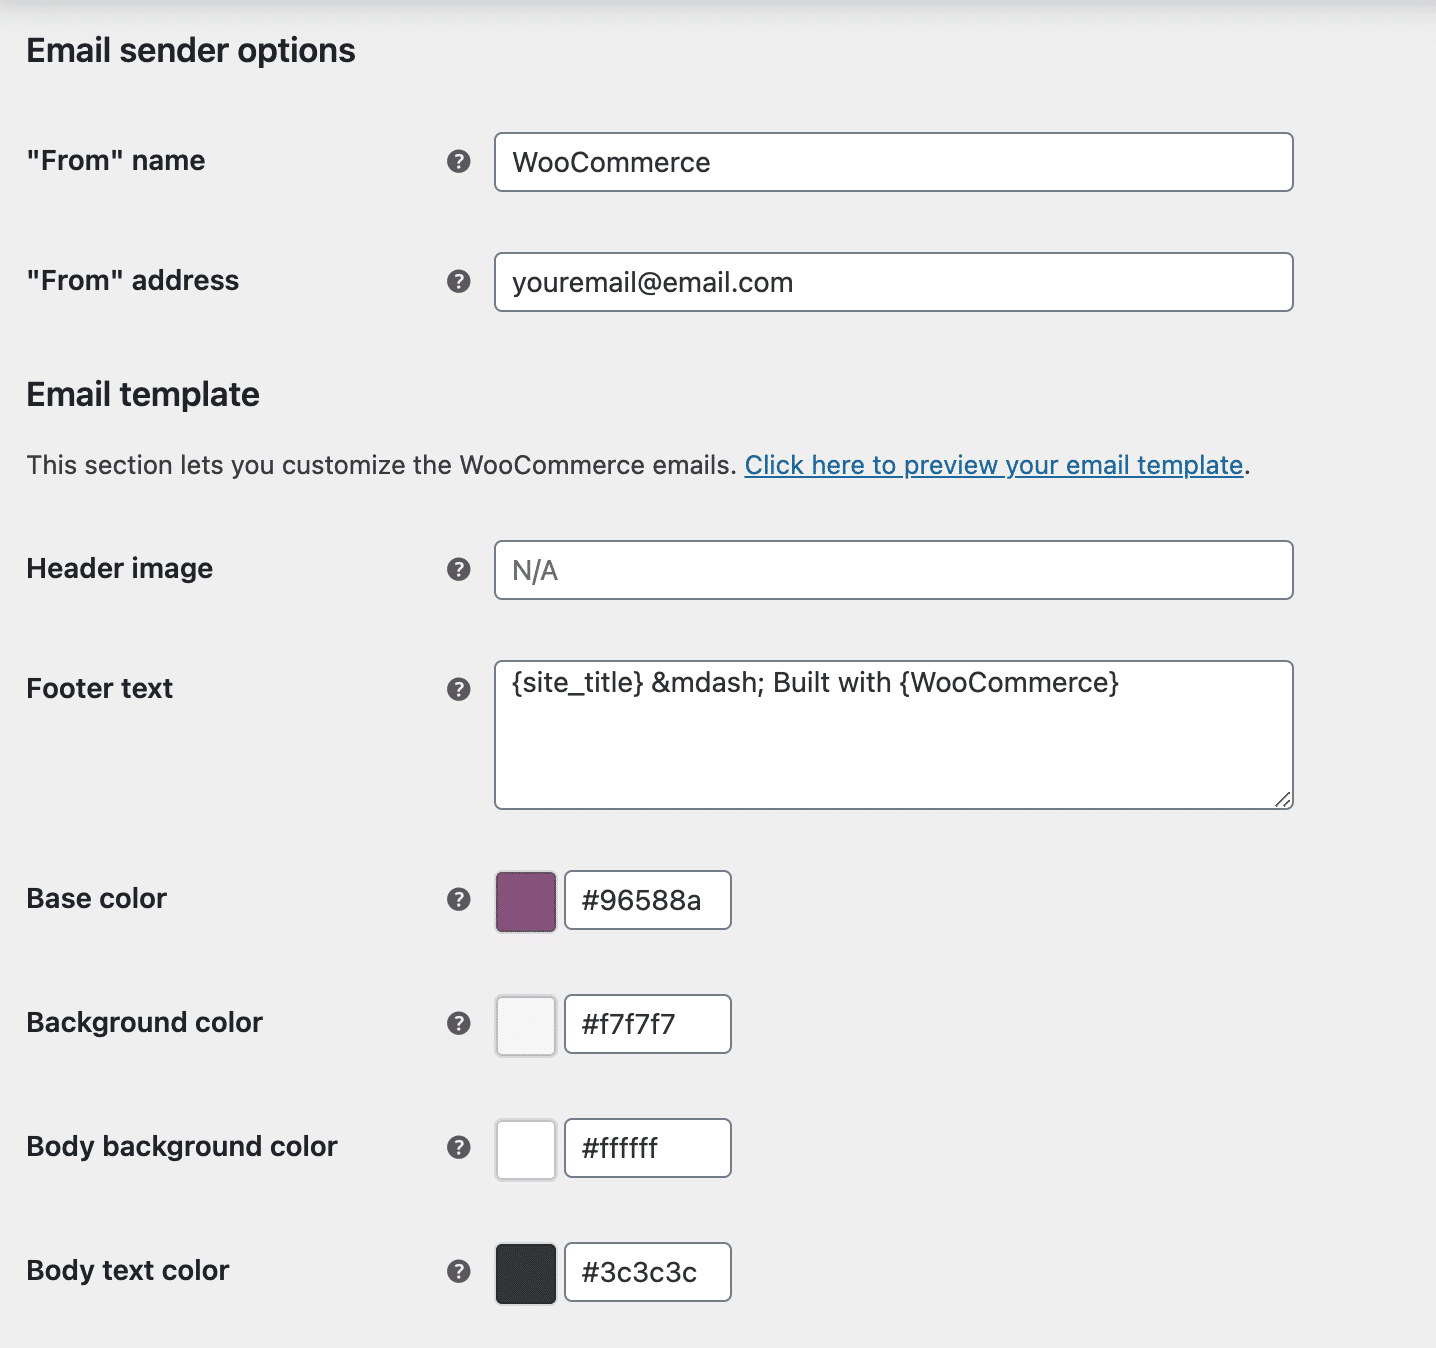
The Emails tab
Following an order, your customer and you will receive emails. It is possible to disable some of them and customize them. However, this is limited to the subject, header, footer and colors.
You’ll have to go into the code to change their content, or use a dedicated extension like Kadence WooCommerce Email Designer or MailPoet, if you don’t want to get your hands dirty.
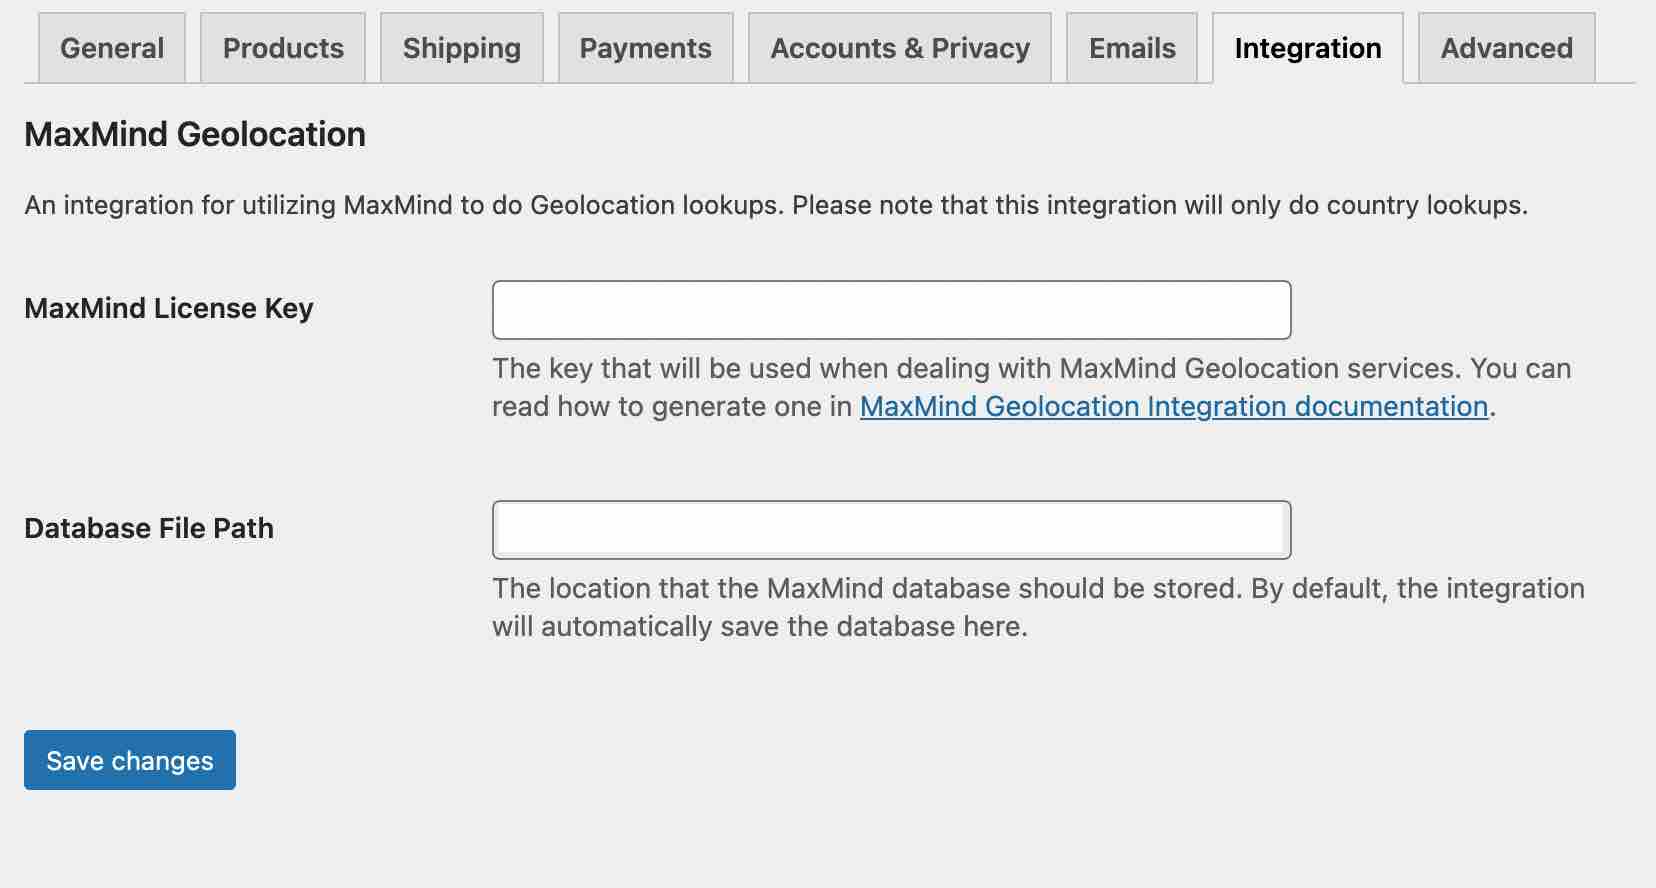
The Integration tab
The “Integration” tab allows you to use “MaxMind to do geolocation lookups”.
MaxMind is a service that automatically geolocates your customers. Thanks to this, your WooCommerce store is able to offer them VAT rates and shipping methods specific to their geographical location.
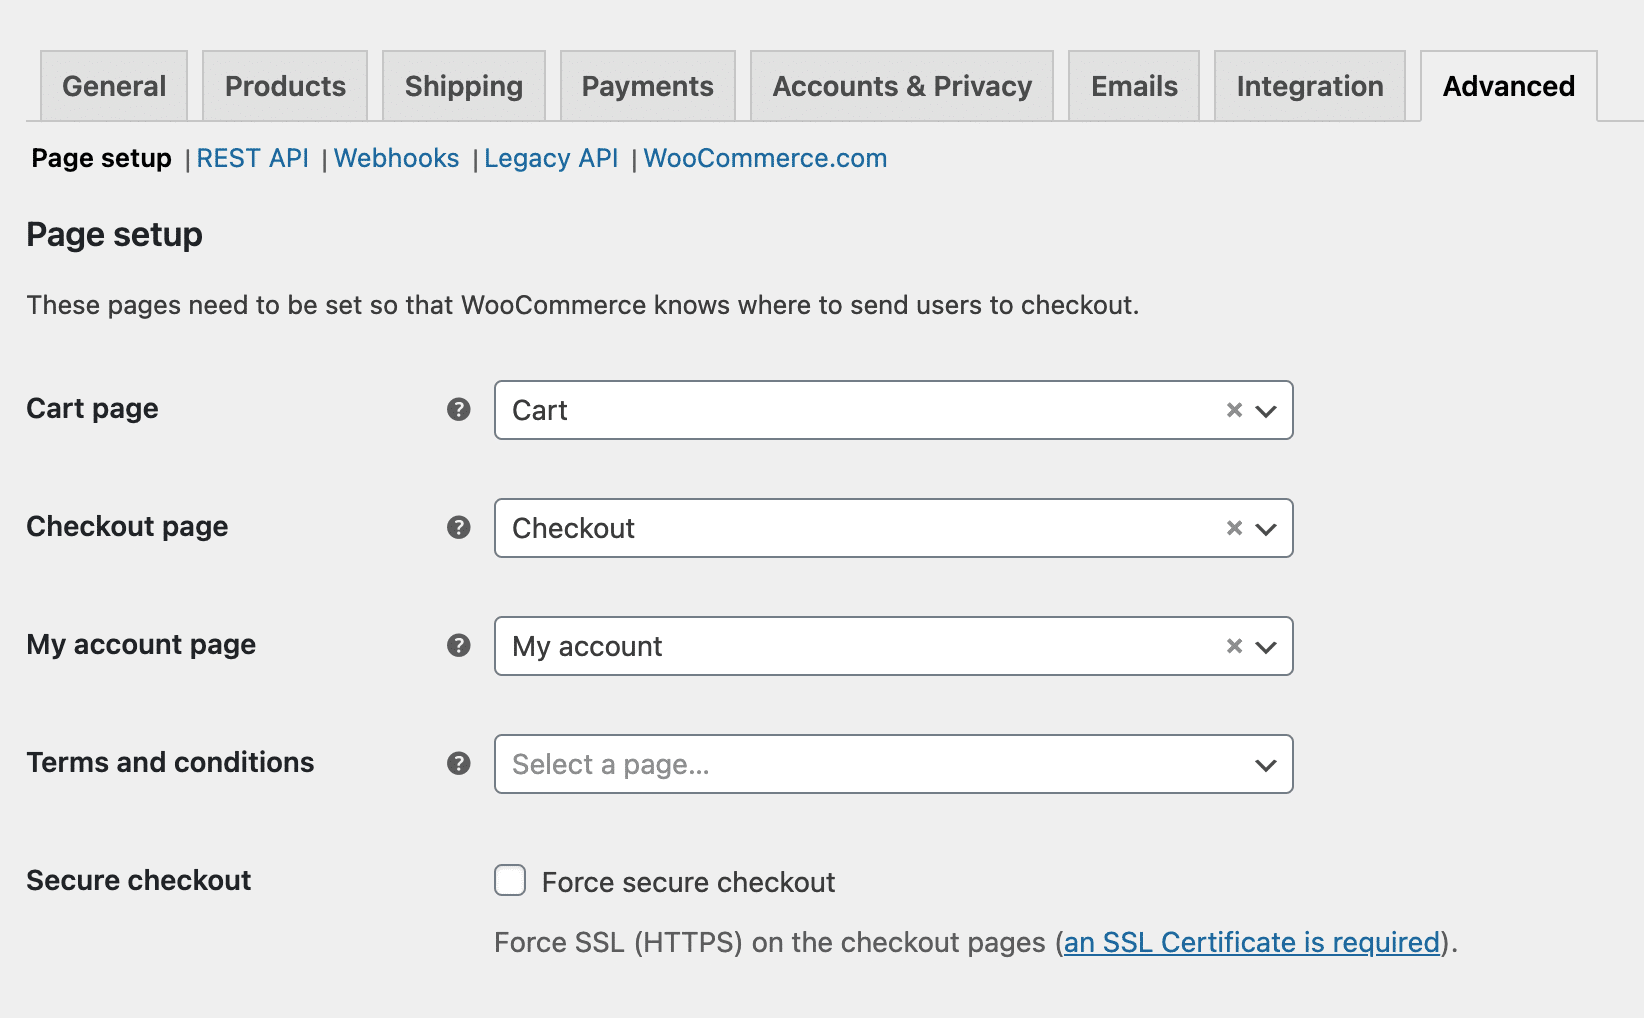
The Advanced tab
This last tab allows you to define the pages associated with the Cart, orders, user accounts, etc.
You can (and should) also secure the payment, provided you have an SSL certificate.
Finally, it is possible to activate some features useful for developers. Last thing: depending on your desired language, remember to translate the endings added to your page URLs, which are in English.
Now, the WooCommerce menu settings have no secrets for you. For the sake of completeness, I’ll now show you what the other options of this menu have in store for you.
Other WooCommerce menu options
Orders
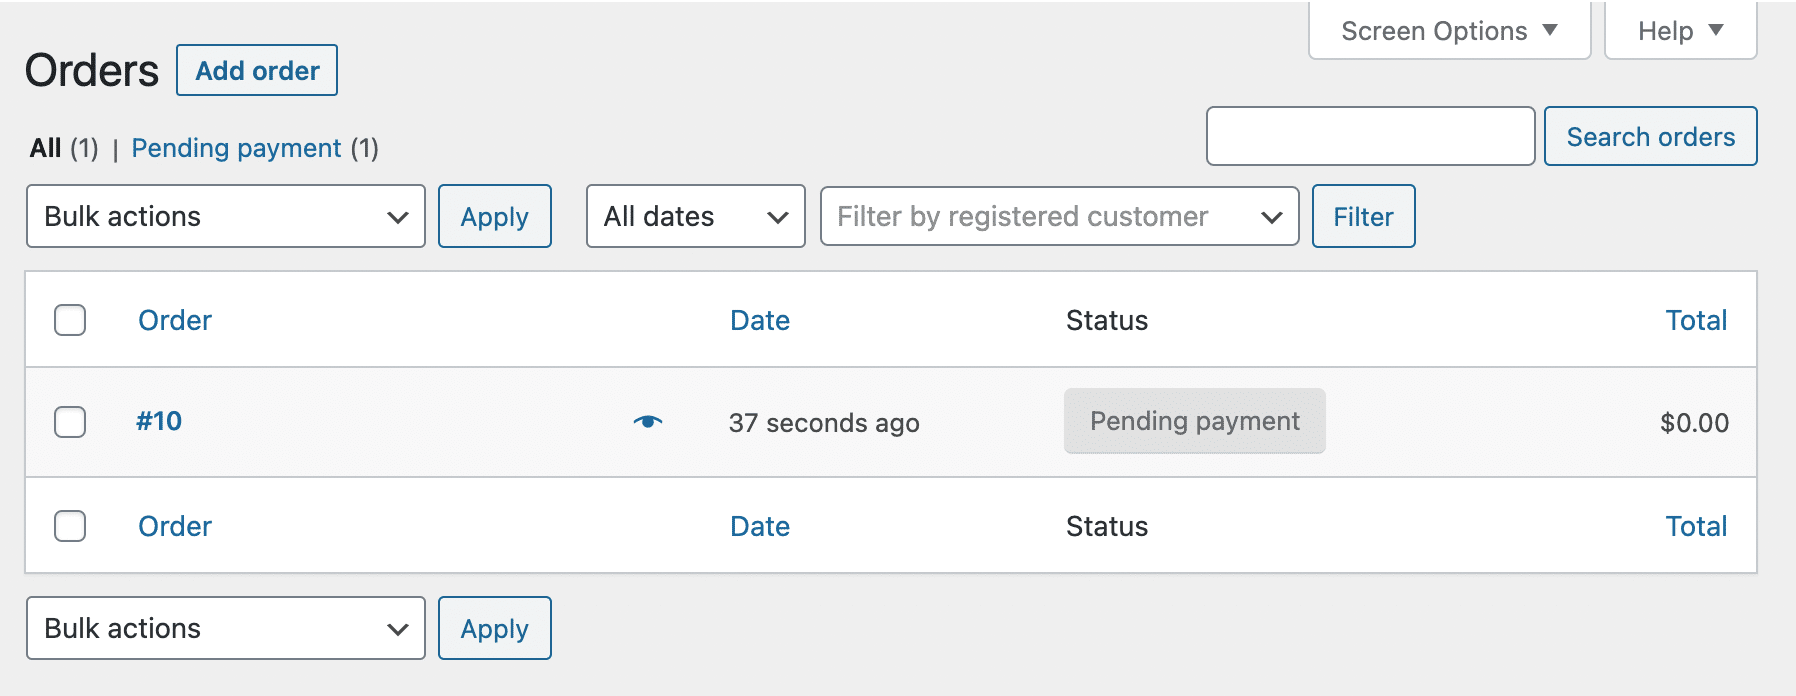
This page lists all orders placed on your store. You can also add an order manually (for example in the case of a purchase made offline).
You have for example access to its status (pending payment, in progress, canceled, refunded etc..), the date of order or the amount of the product purchased.
Customers
The Customers submenu offers you detailed information about your customers:
- Name
- ID
- Orders placed
- Total spend on your store
- Location.
You can sort this information by customer, or even filter it by certain criteria (name, email, number of orders, total spend, etc.).

Coupon codes
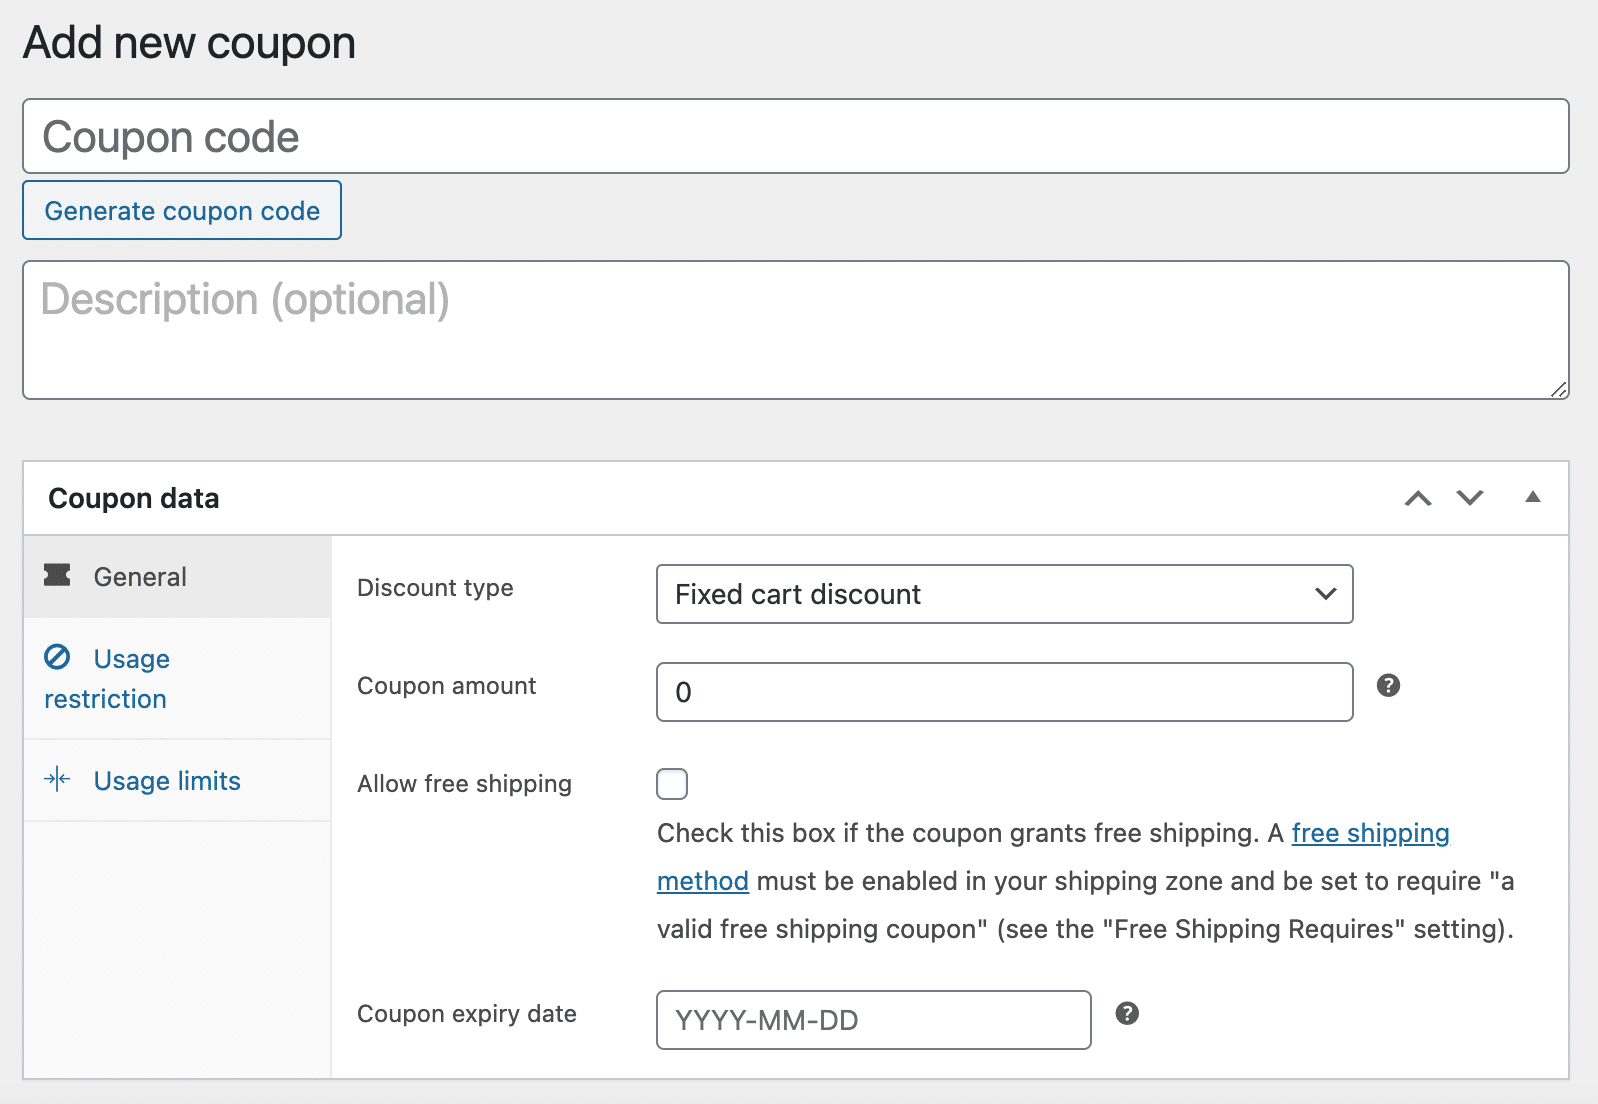
Find here all the coupon codes published on your site. It is possible to create other coupon codes by clicking on the “Generate a coupon code” button.
Warning: this submenu will be displayed as is by default from version 5.0.0 of WooCommerce. However, the management of coupon codes takes place in the Marketing > Coupon Codes menu.
Reports
With this submenu, you will be able to follow the evolution of your store. Whether it is sales, customers, stocks, VAT or the effectiveness of your coupon codes.
If it is still accessible from the general menu WooCommerce, the plugin says that since the release of its version 4.0, these reports are replaced by the new menu Analytics, much more comprehensive.
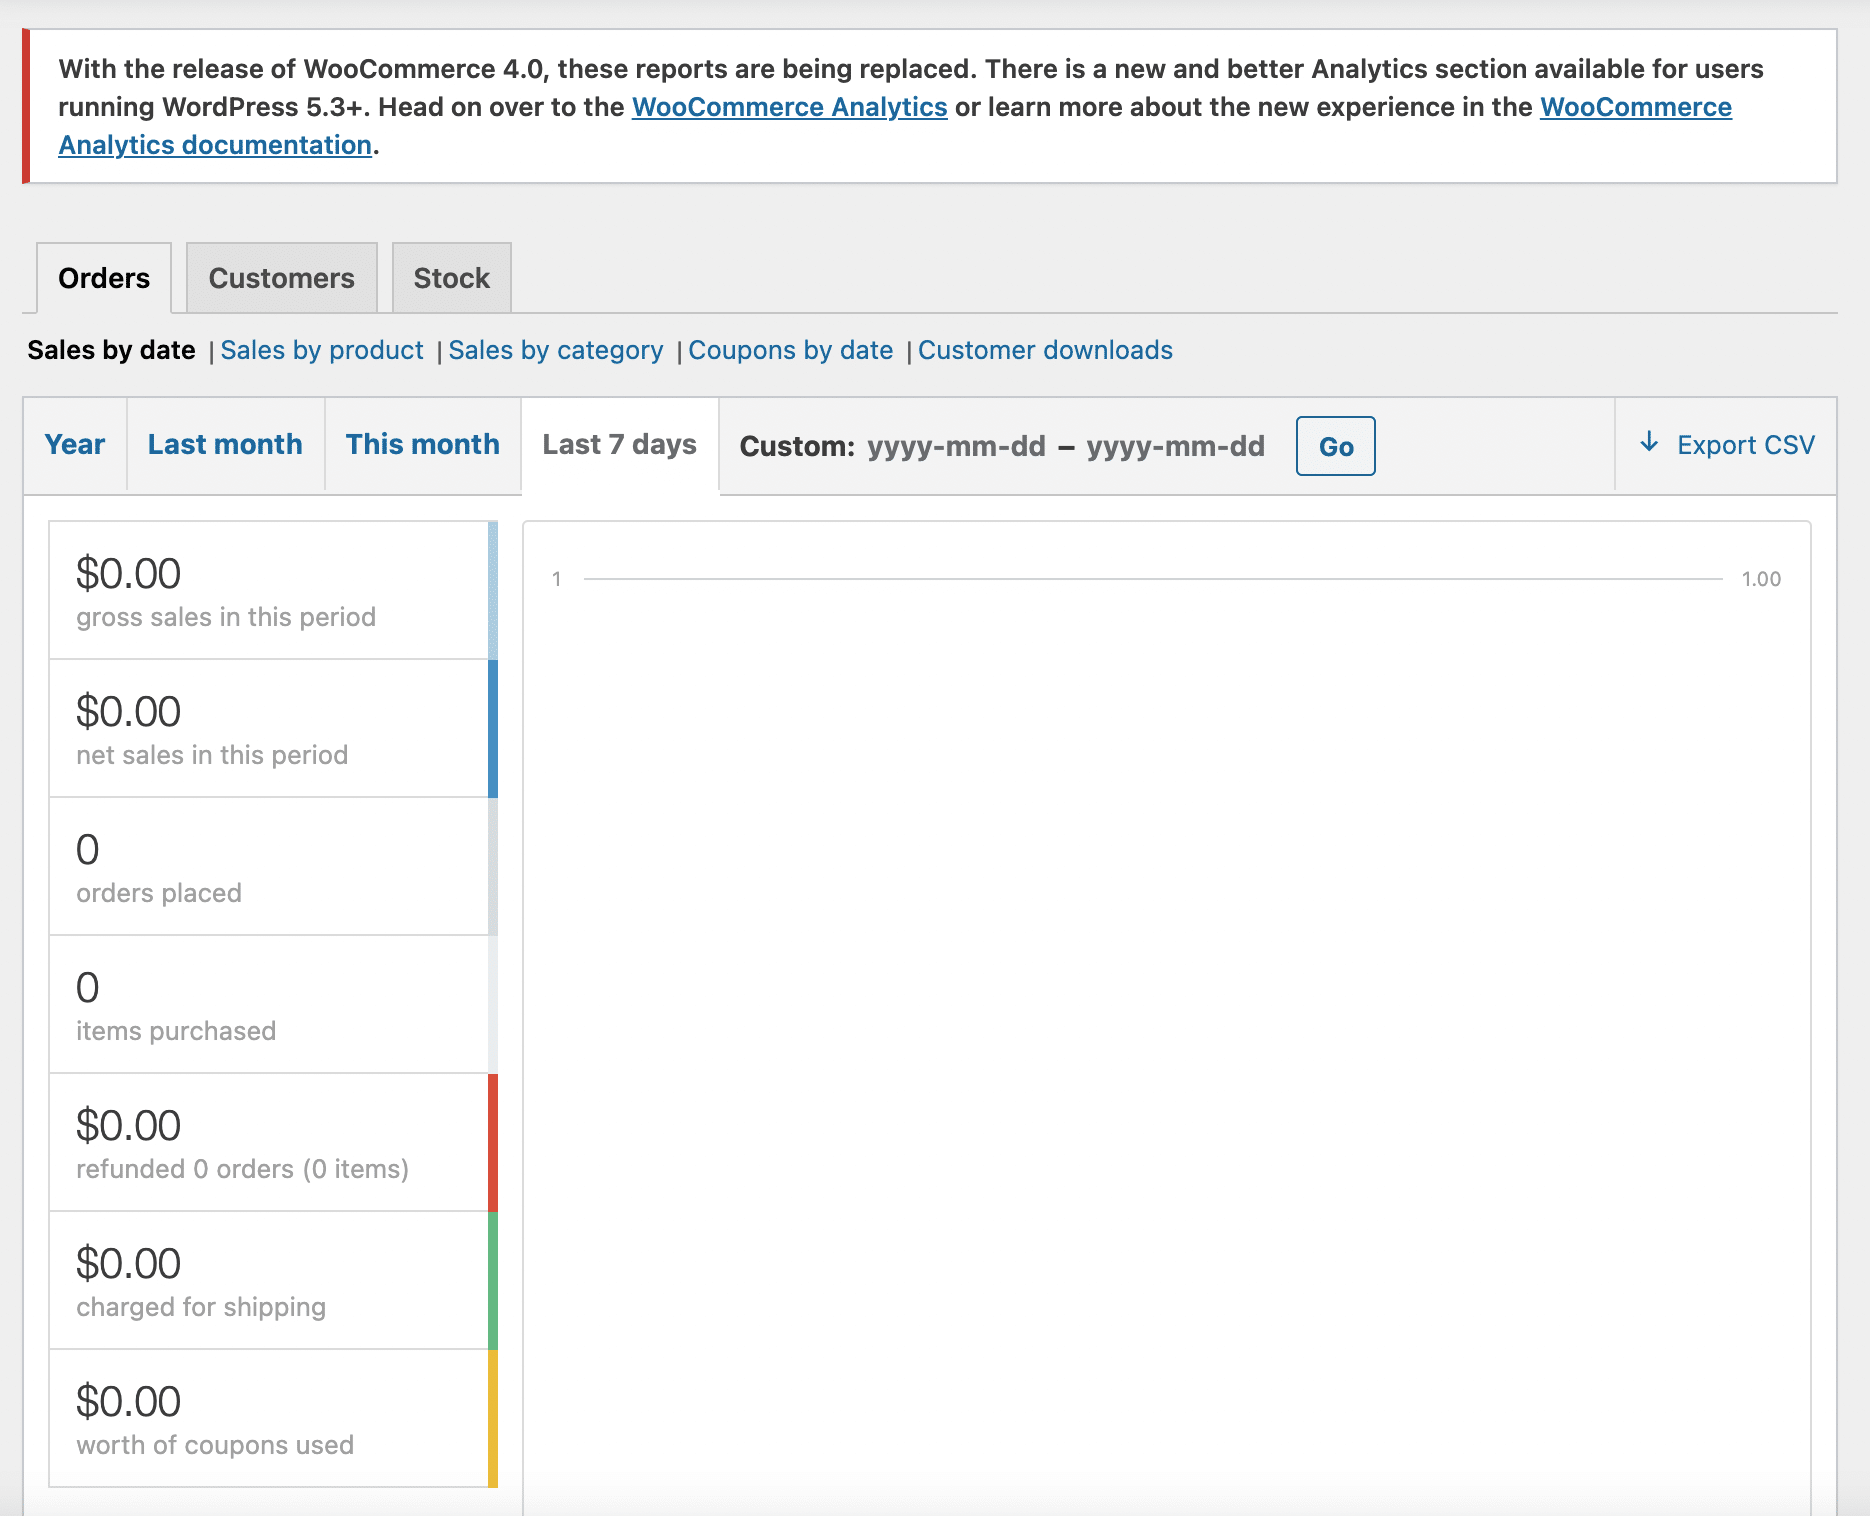
Depending on when you’re going to read this, we can even assume that this Reports submenu might not exist anymore.
Status
If you’re going to be calling on WooCommerce support, you’ll want to give as much information as possible to the person who will be taking care of you.
To help them out, you’ll just have to click on Get System Report, then copy and paste the generated report to them, in order to give them all the information about your store.

Regarding the Status menu, you will see that it is divided into 4 tabs:
- System status: this tab gives access to information about your WordPress environment, server, your plugins, your theme, or if you use HTTPS or not.
- Tools: this tab provides you with some tools to reset or delete some data. Be careful what you do.
- Logs: here you have access to the logs, which are used to list everything that happens in your store (orders, downloads, use of a coupon code, etc). If a problem occurs, studying the logs can help you discover the cause(s).
- Scheduled Actions: this last tab will be mostly dedicated to developers.
Extensions
Finally, the last part of this first menu “WooCommerce”: the extensions. The complementary extensions, also called addons, enrich the functionality of WooCommerce.
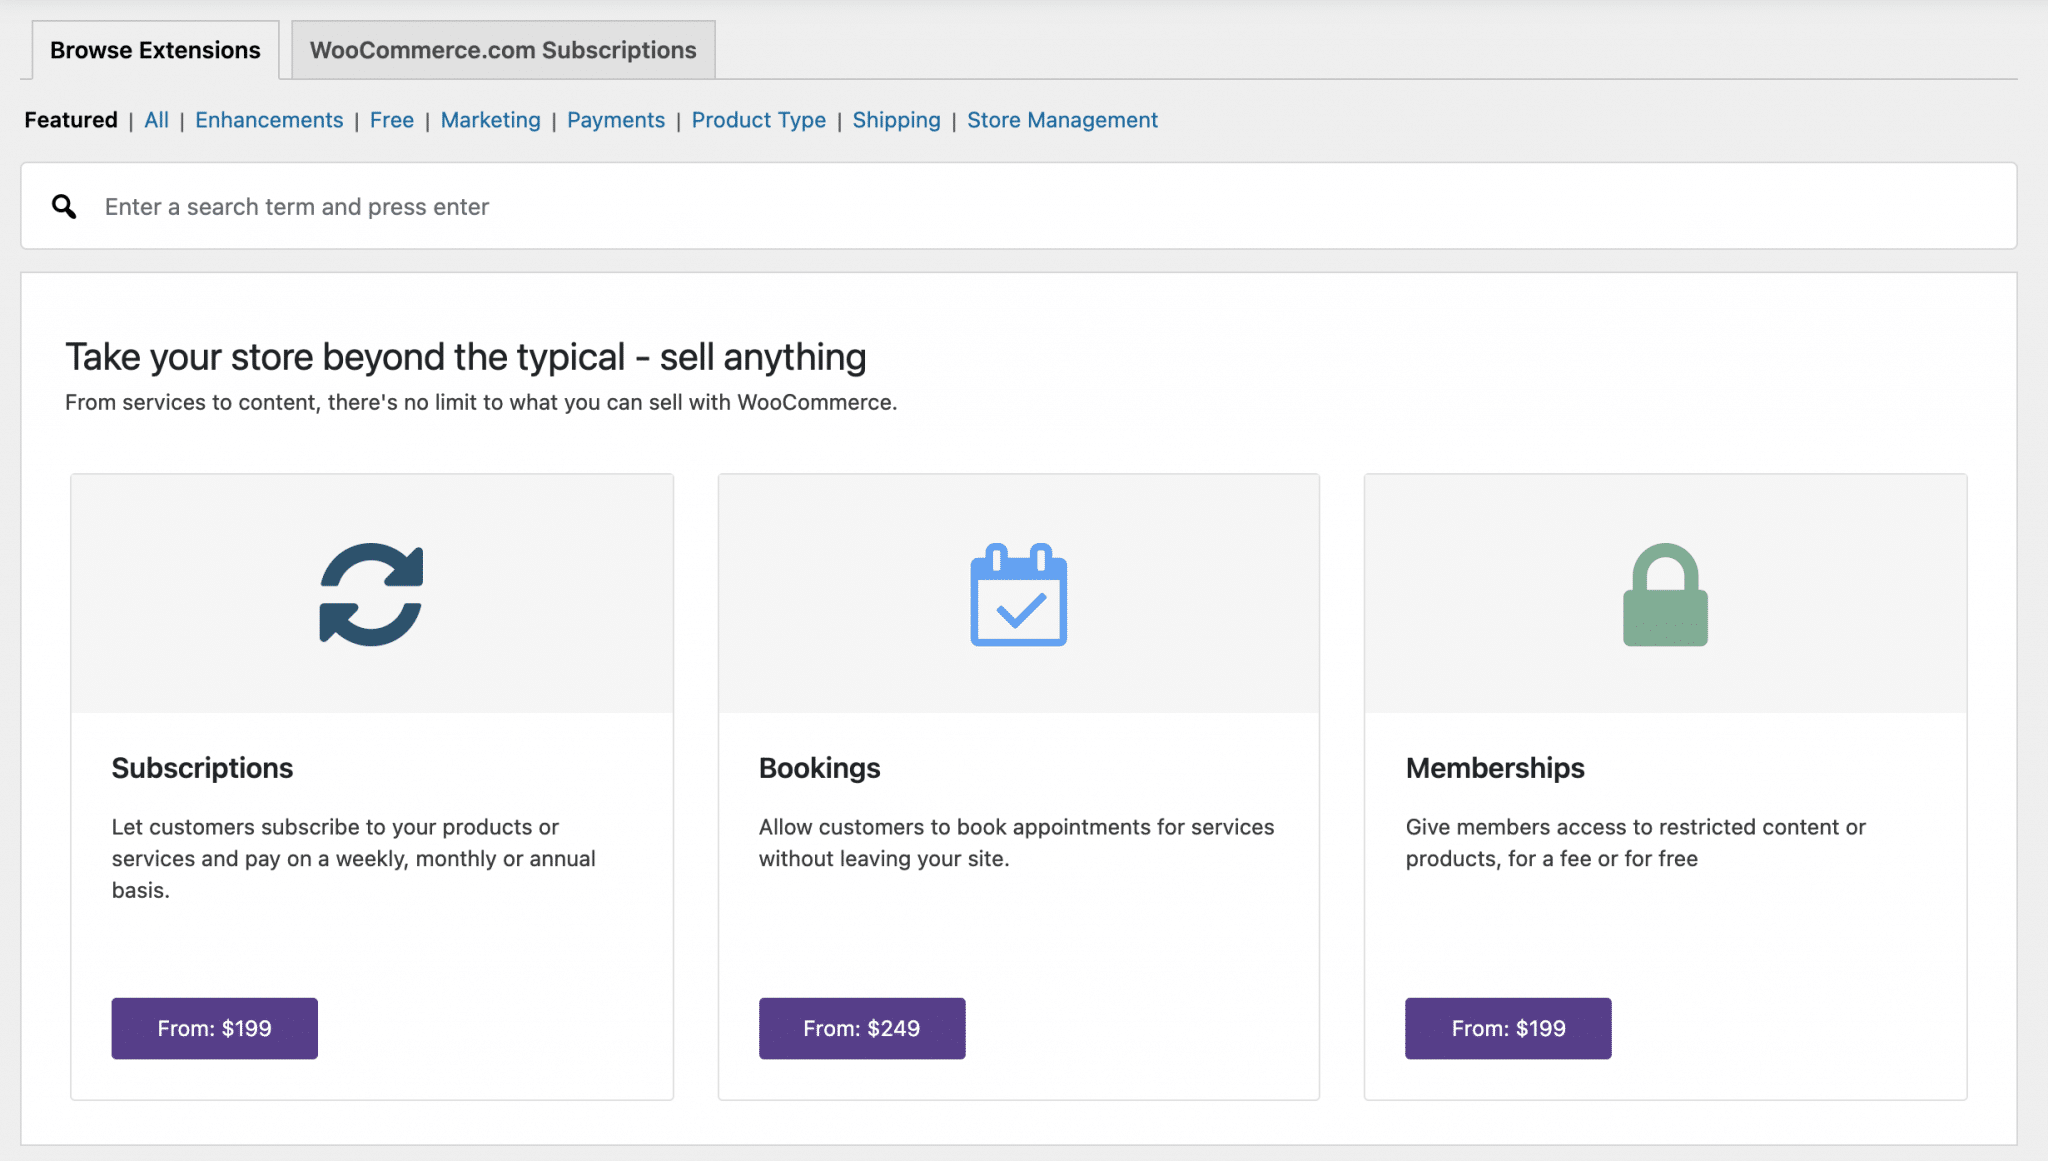
You can find them in this menu, and filter them by domain (Marketing, Payments, Shipping, etc.). Depending on the project you are setting up, some addons will be of great help.
You will also find a selection of them later in this article.
We are now done with this first menu. As you can see, it is very well supplied.
Your store is now set up. Now you probably want to add your products or services, right? Well, that’s what the next part is about.
How to add products on WooCommerce?
Products Menu presentation
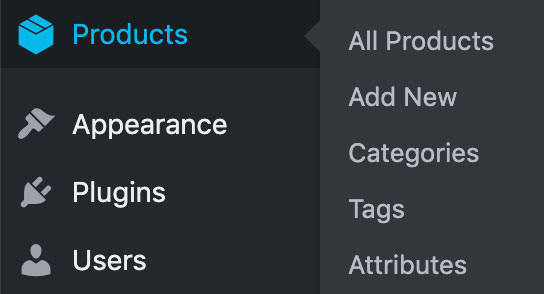
The Products menu has 5 submenus:
- All Products: You will find on this page the list of all the created products.
- Add New: Clicking on this submenu will open the product creation page. We will detail this in a few moments.
- Categories: It is possible to classify products into various categories (e. g. male, female, kids for clothing).
- Tags: As with posts, it is possible to assign tags.
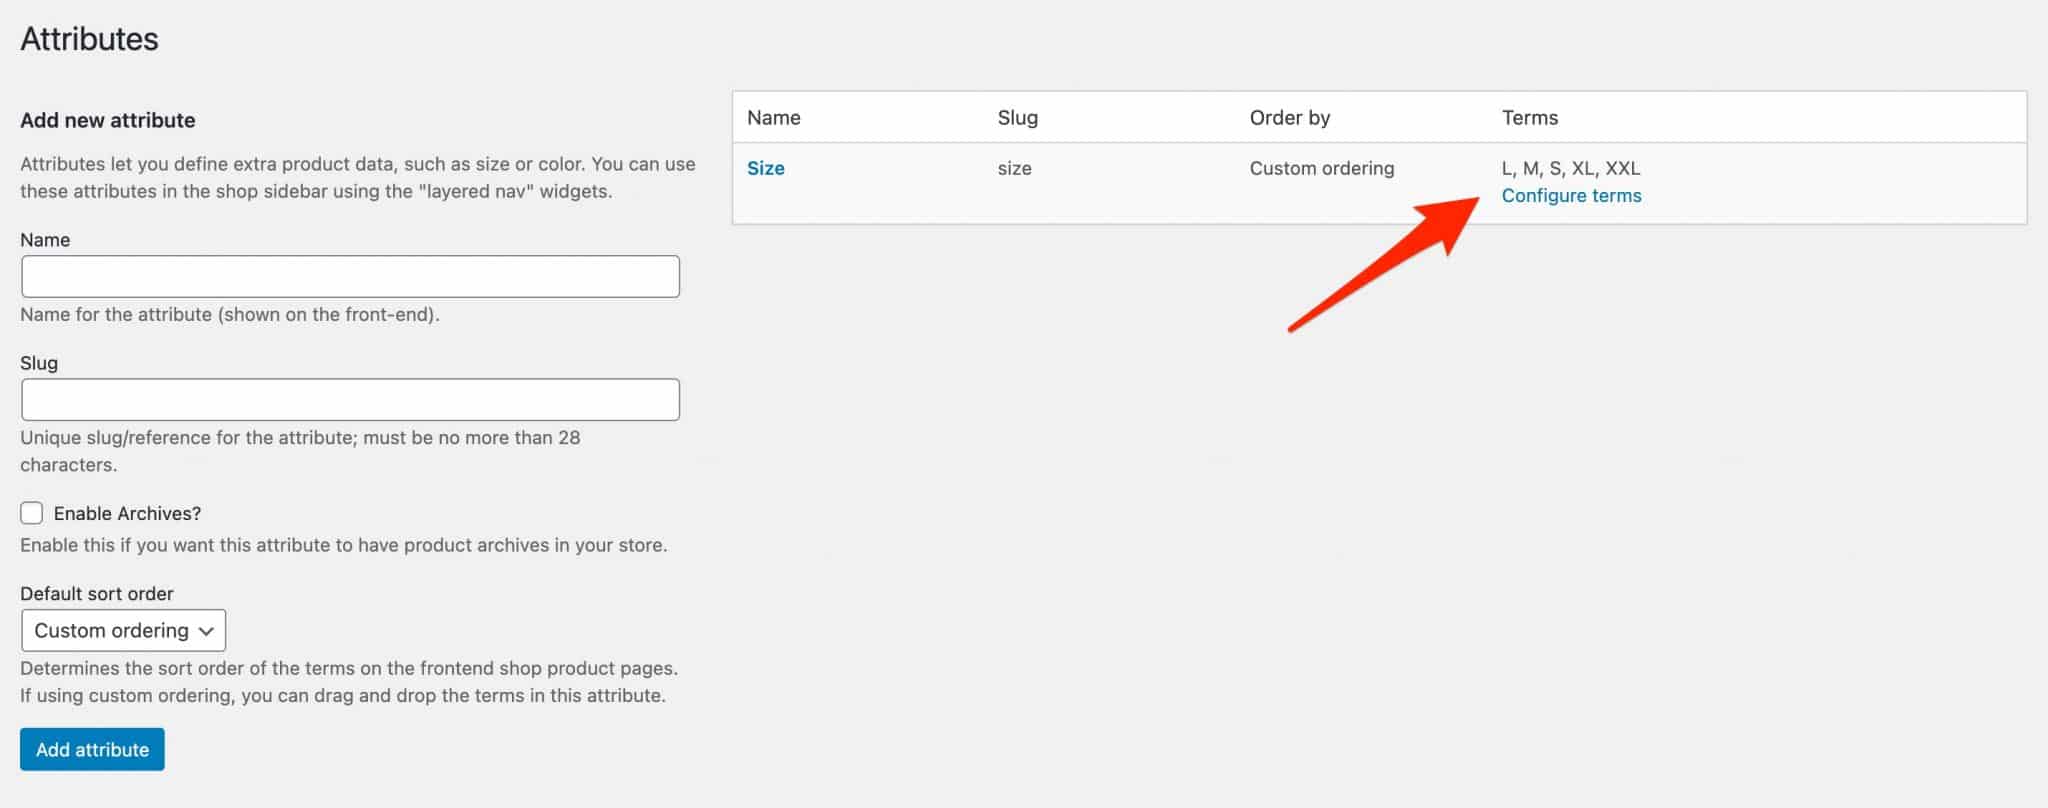
- Attributes: Attributes are product-related characteristics. For example, you can have a Size attribute if you sell clothes. Once the attribute is created, click on the Configure Terms link to enter all possible values (S, M, L, XL, XXL, etc.).
Let’s now focus on adding products.
Adding a product

When you get to the Add new product page (Products > Add New), you’ll realize that it is quite similar to the one used to create a post.
It is possible to add:
- A product name
- A description
- A short description
- A category
- Tags
- A featured image
- A product gallery
But above all, a Product Data meta box is available under the visual editor to set up its features.
6 tabs are available. The first one, General tab, enables us to define the kind of product to be created:
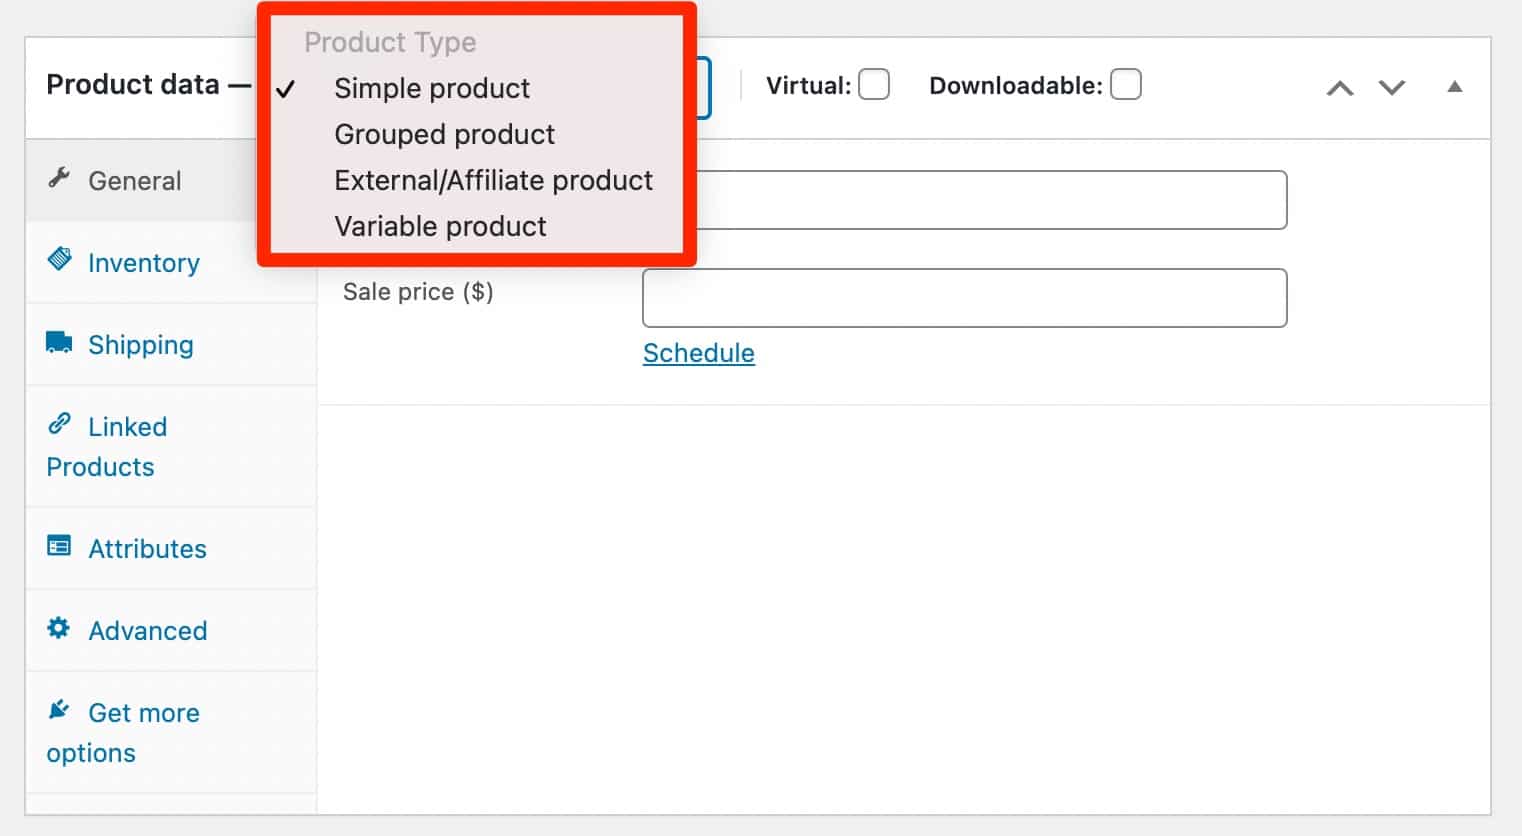
By default, there are 4 types:
- Simple product: The default product, the one you will use in most cases. Two options can be assigned depending on their nature:
- Simple Virtual Product: Ideal if you sell a service (delivery becomes unnecessary).
- Simple Downloadable Product: One or more files will be sent to the customer following the purchase.
- Grouped product: A group of products that can be purchased separately (for example, a computer could be grouped with a basic configuration, a more advanced one and another with the best configuration).
- External/Affiliate product: It is possible to promote products from other shops (and possibly earn a commission on them).
- Variable product: A product that has certain characteristics (color, size etc.). For example, a t-shirt can be available in 3 colours, 5 sizes for men, women and kids.
Then enter the price of your product, and a possible special price. In the following tabs, you will be able to specify :
- A unique identifier, the SKU (Stock Keeping Unit), as well as the available stock (Inventory tab).
- Weight, dimensions and shipping class (Shipping tab).
- Linked products (upmarket, cross-selling) to make additional sales (Linked Products tab).
- The product attributes (Attributes tab). You have normally defined them in Products > Attributes.
- A note to send to the buyer and if you want to activate customer reviews (Advanced tab).
Depending on the type of product you choose, some fields will appear and disappear. For example, the delivery options are useless for a downloadable product.
That’s it, we’re done reviewing the WooCommerce options.
Next step: make your store functional. Let’s look at this in the next part.
Starting up your online store

You have seen it so far, creating an ecommerce website (whether with WordPress or not) requires a lot of work.
For a website to qualify as a shop, it must have a certain number of pages.
Let’s study them in detail.
The pages created by WooCommerce
Yes, WooCommerce gives you a boost by automatically adding pages when it is activated. We can name:
- The Shop page where visitors will browse your products.
- The Cart page where customers will see the products they want to buy.
- The Checkout page where they will pay for their purchases.
- The My account page where they will see their orders and manage the shipping and billing addresses.
If you are curious, you will find that these pages each contain a shortcode (E.g.: [woocommerce_cart] for the Cart page).
These shortcodes will be interpreted and transformed by WooCommerce to display the content of the page.
However, there is a page that is not automatically created, yet it is very important.
The Terms & Conditions page
The Terms & Conditions are used to define the relationship between you (the seller) and the buyers. In particular, they contain a description of the products sold, the accepted means of payment, the conditions of reimbursement etc.
In short, everything you need to ensure so that nothing is left in the dark. We might as well tell you that it’s better to get in touch with professionals to have them written.
Indeed, they must correspond to your activity (and copying and pasting from another site exposes you to lawsuits if you get caught).
You need to make sure that your online store is GDPR compliant! Find out more about the General Data Protection Regulation (GDPR) on the gdpr.eu website.
The Privacy Policy page
With the implementation of the GDPR in May 2018, it is now mandatory to explain what you are doing with your user data.
And that’s where the Privacy Policy page comes in.
These elements should appear in a page embedded in your footer, for example.
You can create your Privacy Policy page by going to the Settings > Privacy menu in your administration interface.
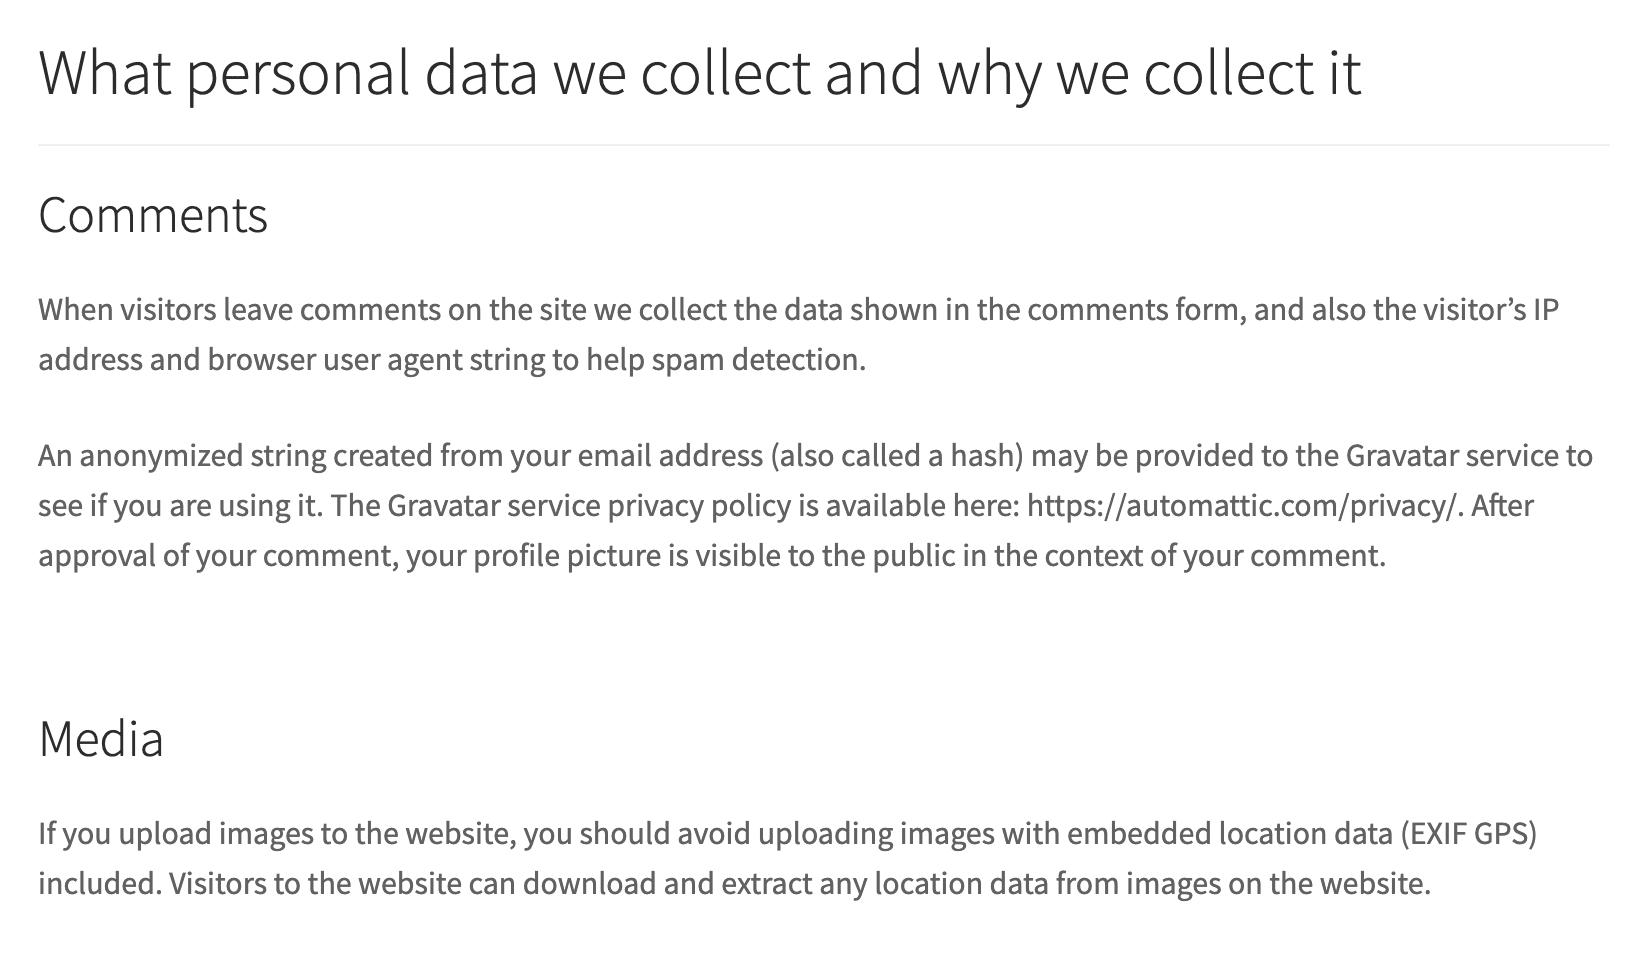
Pre-written paragraphs, optimized for the GDPR, will be proposed: it is up to you to select those that concern your site.
Moreover, on this sensitive issue, do not hesitate to contact a legal specialist, who will be able to advise you according to your personal situation.
The Thank you page
By default, WooCommerce does not allow you to modify this page. A default message will be displayed for all orders.

I think this is a shame because there is no better place to start building a relationship with your customers than on the thank you page.
Once the order is done, you can:
- Suggest they follow you on social networks.
- Ask them to subscribe to your newsletter.
- Put complementary products in front of them to promote additional sales, etc.
To achieve this, you can use the following free plugin NextMove Lite – Thank You Page for WooCommerce.
In premium, you can turn to an official WooCommerce extension: Custom Thank You Pages ($49).
It will allow you to set up one thank you page per product.
Let’s now turn to one key point, being…
Payment methods
If you do not install a payment method on your shop, you may wait a long time before making your first sale!
By default, several payment methods are available:
- PayPal
- Direct bank transfer
- Check payments
- Cash on delivery
To secure payments, set up an SSL certificate to enable HTTPS on the payment page, at least. The procedure is different depending on the web host but it’s very easy with Bluehost, for example. Beyond the payment, you will not have a good reputation if your site is hacked and your customer file is stolen.
You can activate others, like the popular Stripe, using the WooCommerce Stripe Payment Gateway plugin.
Stripe will allow your visitors to pay by credit card on your store.
83 percent of Americans between 30 and 49 years old own a credit card… You must therefore accept this payment method.
Technically speaking, Stripe will add a form on your payment page, then it will check the details. You will just need to create an account to activate this solution on WooCommerce.
Then, Stripe will charge you 2.9% + 30 cents per transaction.
PayPal’s current fee is 2.9% + $0.30 per transaction, which is the same one as Stripe.
The other solution to accept credit cards is to set up a payment gateway in conjunction with your bank.
The advantage of using a gateway is that the cost per transaction is lower.
With the banking solutions you can negotiate the commissions directly with your bank advisor.
Depending on your average cart and your revenue, the savings can be substantial compared to the previous solutions. On the other hand, you have to take into account that a subscription of a few dollars has to be paid, so you need a certain volume of sales for it to be relevant.
Beyond the cost, a gateway will allow you to receive your sales directly into your company’s bank account.
Once you have all the necessary payment methods, you can organize, activate and deactivate them in WooCommerce > Settings > Payments.
Since September 2019, the Payment Services Directive (PSD2) has come into force. Its objective is to protect the consumer by strengthening the security of electronic payments, while fighting fraud in the European Union (EU) and European Economic Area (EEA). To prevent their payments from being rejected, companies must create an additional authentication step for online card payments, or apply specific exemptions to certain transactions, as Stripe explains. The popular payment gateway actually offers a turnkey solution to get you in compliance. As an e-merchant, you “just” need to make sure that the payment method you use is PSD2 compliant.
Shipping management
In ecommerce, selling is not enough. You have to ship what was ordered.
When you order from huge sites like Amazon, you know that your items will be delivered. On the other hand, with a young shop, you will have to be convincing and keep your promises.
In WooCommerce, you have the possibility to set several options for order shipping in WooCommerce > Settings > Shipping.
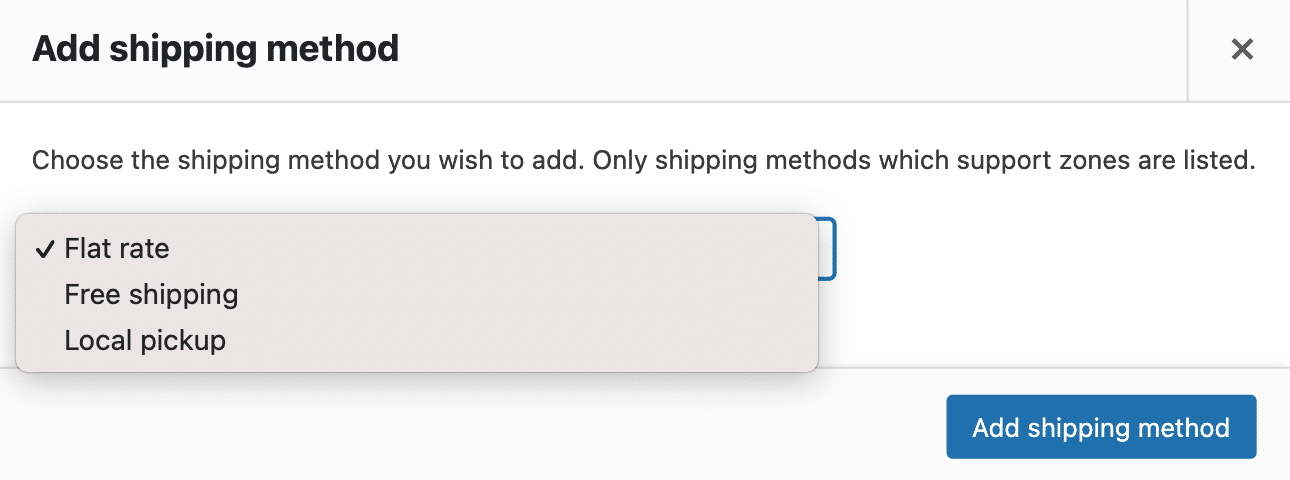
You will first need to add a shipping zone (e.g. US domestic zone). Then, by default, WooCommerce will offer you several shipping methods depending on the zone name (e.g. flat rate, free shipping, local pickup).
Marketing on WooCommerce
Since the release of its version 4.1, WooCommerce offers a new Marketing menu. This is “the foundation for the development of a robust Marketing Hub to enable central management, control and guidance for effective marketing”, WooCommerce says.
For now, we’re still in the early stages, which is why you’ll only find a list of recommended extensions and articles from the WooCommerce blog to help you implement best practices on your online store.
Not forgetting, of course, the management of promo codes, as seen before.

Access to your statistics
Finally, to finish our complete tour of WooCommerce options, I suggest you stop by the Statistics menu, also freshly integrated.
As its name suggests, it will provide you with precise and advanced statistics on your product sales, orders, downloads, coupon codes, etc.
All things considered, it is similar in form to what a tool like Google Analytics can offer.
You have access to precise stats, with the possibility to filter according to the period of your choice, to segment, and even to download these data in CSV format.

Well, I think that with all this you have good leads to build your store, right?
Are you a little bit lost when you first start using WooCommerce? You can check the resources provided by the plugin:
- WooCommerce Getting Started Guide
- WooCommerce Store Owner guide
- Official documentation of the plugin
- Official WooCommerce blog
- Official Facebook group
- Slack group
Otherwise, you know what? WooCommerce wouldn’t be WooCommerce without its complementary extensions. Let’s find out what they are in the next part.
Which WooCommerce plugins to install to go further?
Like WordPress, WooCommerce has an ecosystem.
It is possible to create plugins and themes especially for it.
You can therefore enrich your shop functionalities with addons to go beyond what is offered by default.
Indeed, the WooCommerce plugin does not allow you to do everything.
Whether you are looking to increase your store traffic, increase sales, reduce your cart abandonment, or diversify your payment methods, you will surely have to turn to an addon.
To find the right one, there are first of all the official WooCommerce extensions. There are more than 500, both free and paid.
They are classified into different categories such as payments, marketing, shipping, or subscriptions.
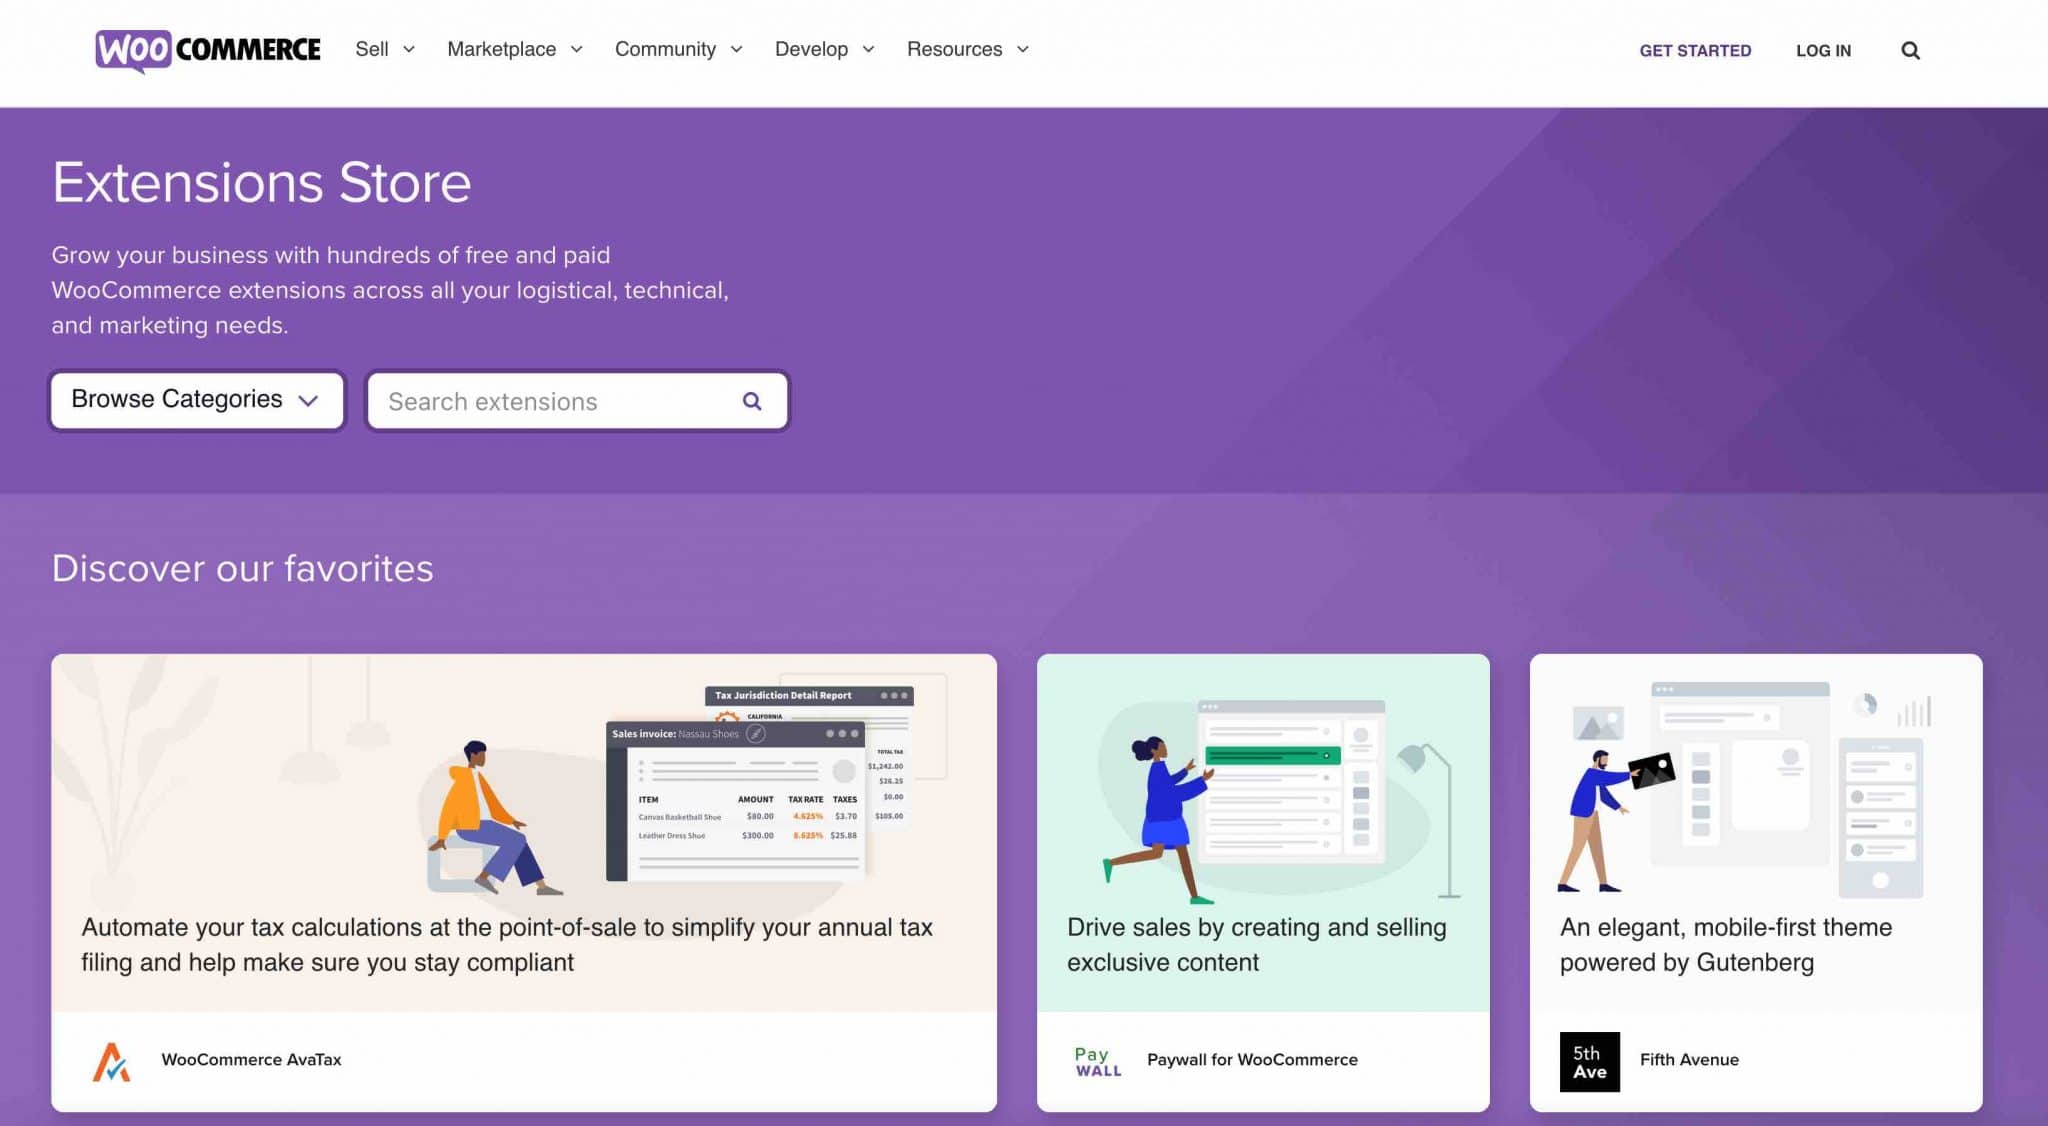
Then, you can also find the extension of your dreams on specialized premium platforms like Code Canyon, or on independent sites.
Finally, you can find free extensions related to WooCommerce on the official WordPress directory, by typing the keyword “WooCommerce” in the search bar.
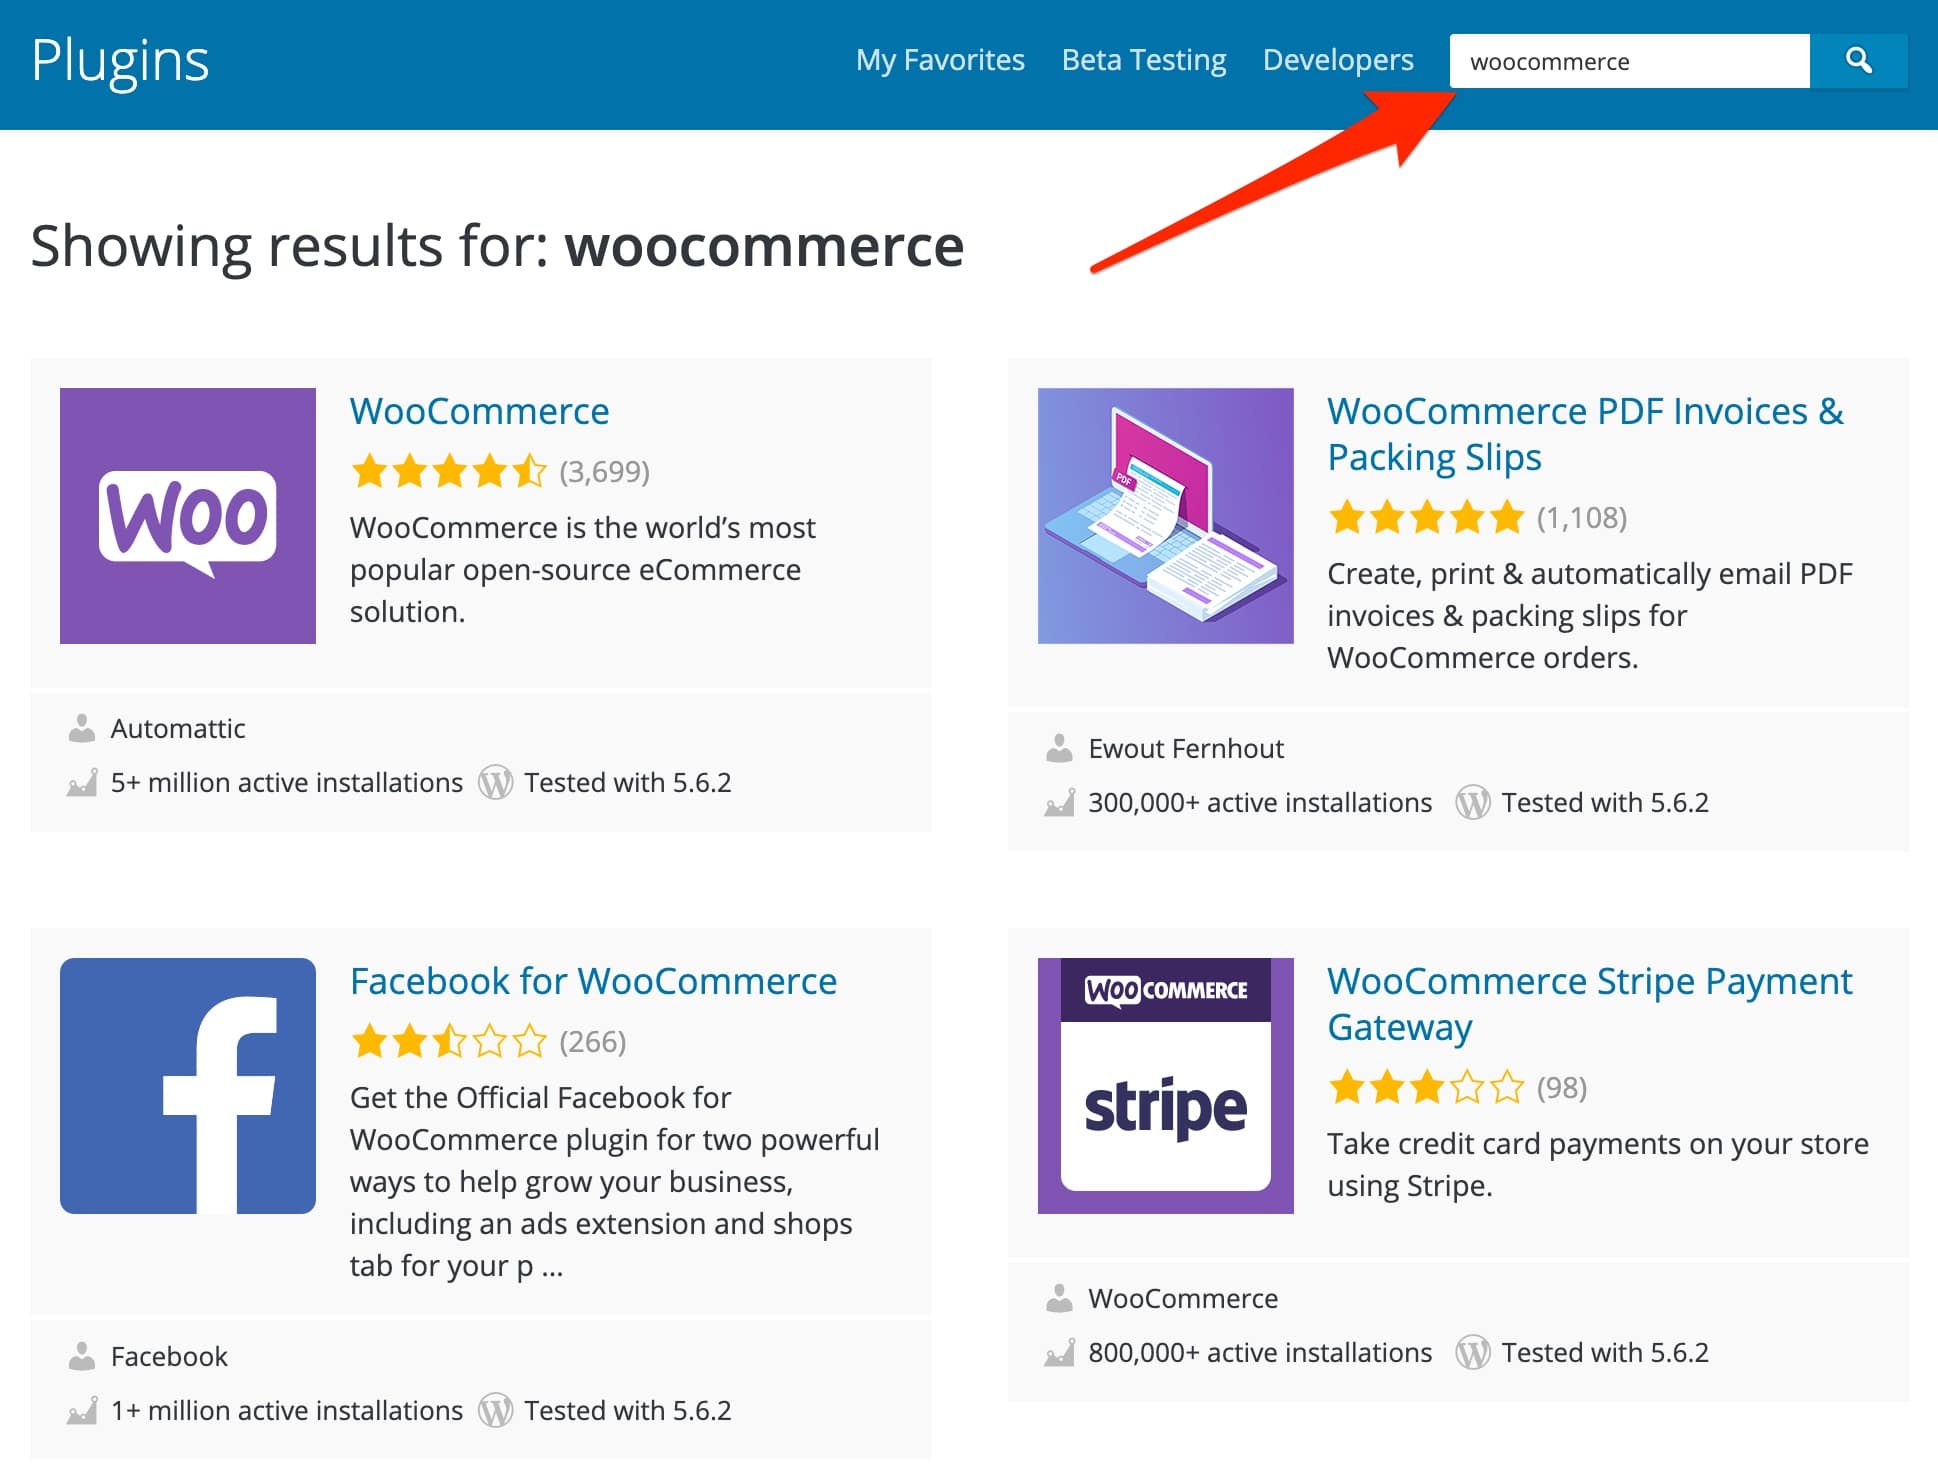
To make your life easier, here are a few that could give you a good hand… and help you create a wide variety of ecommerce sites:
- WooCommerce Bookings (premium): to allow your customers to make online reservations easily (see our tutorial on the subject).
- WooCommerce PDF Invoices & Packing Slips (freemium): to automatically add a PDF invoice to the order confirmation email your visitors receive after their purchase.
- EU VAT Number (premium): to directly deduct the VAT amount if you sell to professionals based in the European Union. If you sell digital products (ebooks, themes, plugins, training, etc.) to individuals based in the EU, be aware that THEIR VAT rate must be applied to their order. For this, use Simba Hosting (WPMarmite uses it).
- Flexible Shipping (freemium): to calculate shipping costs based on the weight of the order and/or the total cart.
Which theme to choose for your WooCommerce website?
Storefront, the in-house theme
By default, WooCommerce is compatible with almost any WordPress theme.
Only disadvantage? The appearance may not always be optimized. By this I mean that visitors may have difficulty browsing your site.
To overcome this, the solution is to use a theme optimized for WooCommerce.
The first one I think about is Storefront, the flagship theme of WooCommerce, made by Automattic. During the installation process, the plugin offers an activation option, remember?
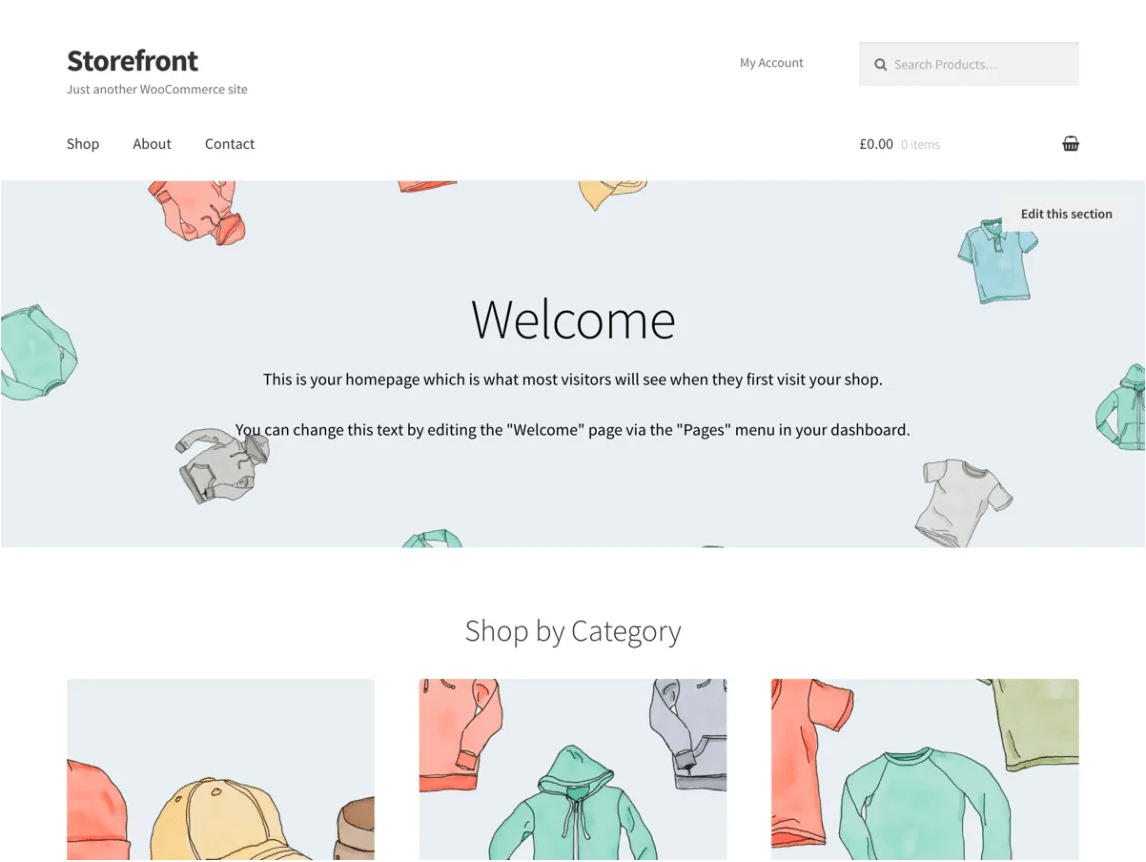
Storefront is free of charge. WooCommerce also offers dozen of child themes for Storefront, in different fields (Fashion, Sport, Beauty, etc.).
Even though it is a must-have WordPress ecommerce theme to quickly design a custom online store, Storefront also has some limitations:
- Its default design remains basic.
- A lot of features to customize it are not free, while other themes offer the same kind of options for free. Find out which ones just below.
The other options
However, you may find these themes quite basic. To benefit from more sophistication and more choices, I advise you to take a look at this selection of ecommerce themes, mostly from the specialized platform Themeforest (it lists more than 1300).
Most of the time, you will find themes with more options than the ones available for free. However, the themes sold on ThemeForest are sometimes difficult to get started with for beginners.
Personally, I recommend you to turn to freemium themes that are more manageable and just as efficient, like Astra, GeneratePress, Neve or OceanWP.
They integrate very well with WooCommerce and pair perfectly with a page builder like Elementor, Divi Builder or Beaver Builder.
These page builders sometimes even offer their own WooCommerce Builder to customize native WooCommerce pages and add ready-to-use modules without coding. This is the case with Elementor Pro and Divi Builder, for example.
You can also look at specialized theme stores like CSSIgniter or WPZoom.
Whichever theme you choose, remember to pay particular attention to the following criteria:
- Simplicity. The design must be clear so as not to lower the conversion rate.
- The number of stars.
- User reviews.
- The number of downloads and/or purchases.
- The date of the last update.
- Responsive: the theme must display optimally on any device (computer, smartphone, tablet).
- The loading speed. This last point is very important in ecommerce. Indeed, 47% of consumers expect a page to load in less than 2 seconds.
How much does WooCommerce cost?
The WooCommerce plugin is free. However, in order to have a functional store, you’ll need to invest a minimum in some areas.
First of all, using a premium theme – rather than a free one – is interesting for several reasons:
- You will have more options.
- You will benefit from the developers’ assistance (support).
- Its update will normally be frequent, which is important in terms of security.
A paid theme is on average sold for around $60/year.
Then, as you develop your store, you will notice that it is difficult to do without certain indispensable paid extensions. Which ones? It all depends on your needs, in fact.
For example? If you want to sell products by subscription, WooCommerce Subscriptions will be a great help ($199/year).
Also keep in mind that you will pay fees on online payments made by your customers.
Moreover, managing a store also includes SEO, security, web marketing, maintenance, etc. Here again, you will probably have to spend some extra money to equip yourself.
Our opinion on WooCommerce
Here you are at the end of this article dedicated to WooCommerce.
Throughout these lines, we have reviewed the following:
- Presentation of WooCommerce.
- How to create and set up a WooCommerce store.
- The essential pages for your online store.
- WooCommerce extensions and themes.
- WooCommerce pricing.
What to keep in mind from all this? In my opinion:
Thanks to its wide range of extensions, you will be able to customize it as you wish, without getting your hands dirty.
However, it is worth noting that it requires a learning curve to be properly mastered. Allow a few hours to familiarize yourself with all these menus and understand how they work.
Now the ball is in your court. You have the information, it’s time to roll up your sleeves and get started.
What type of store are you planning to launch? What do you think of WooCommerce?
Tell me all about it in the comments below.

Receive the next posts for free and access exclusive resources. More than 20,000 people have done it, why not you?





The more I browse your site, the more impressed I am with your content! Once again, an article that is really going to help me grow and learn as an online businesswoman. Thanks!😊 – Jessica