If you are new to WordPress, you may have already heard some of its technical jargon.
Between the shortcodes, custom post types, taxonomies, or even the header, there are chances to get mixed up. And go a little crazy, too.

In the midst of this collection of weird terms, let’s not forget an essential one: the footer of your WordPress site.
Even if it is used to being hidden in the shadows at the very bottom of your site, the footer deserves to be highlighted. Why put the spotlight on it? Well, simply because it’s important, and even very strategic.
If you’ve gotten in the habit of neglecting your footer, the next few lines should change your mind.
This comprehensive guide takes you through the footer from top to bottom, and gives you plenty of tips to customize and optimize it like a pro. By the end of this guide, you’ll know just how to put your best foot forward.
Presentation of the footer and its importance
What is a footer?
The footer refers to the lower section of a website. It is identical on all the pages of a site and contains information to help visitors get a feel for a brand and to navigate within the pages.
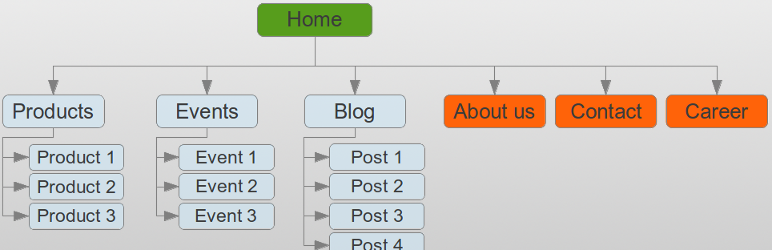
This is one of the 4 major elements that make up the skeleton of a page or article on WordPress, along with the header, body, and sidebar (when there is one).
There are no pre-set rules regarding the organization, design, and size of your footer. That’s why you’ll find some rather minimalist footers, as you can see on this WordPress footer template:

But you will also come across “massive” footers containing several columns and many links, especially on ecommerce sites:

Note also that some sites using the infinite scroll technique, which allows a user to scroll the content of a page without ever seeing the end of it (Instagram uses this technique, for example), give the impression of not having a footer.
In fact, they do have one, but in this case, the content always pushes it further down the page. However, this type of site remains a relatively small minority on the Internet.
Finally, one last thing: technically speaking, on WordPress, the elements contained in your footer are generally found in the footer.php file. The latter allows you to display the footer of your site.
Why is a footer important?
It may not look like it, but our footer is very important and strategic. We can note the following assets:
- It facilitates navigation and helps the visitor to find his way around, particularly through links, or even a site map.
- It ensures compliance by including mandatory legal information (e.g., legal notices).
- It can help reinforce the credibility and expertise of a brand, for example by displaying badges and other certifications.
- By encouraging action, it can improve your conversions (an action you want your visitors to perform, such as downloading a white paper).
To be effective and functional, your footer must contain several essential elements, however. Learn more in the following section.
What makes a good WordPress footer?
The essential elements
A footer is specific to the website it’s attached to. From one site to another, you will notice differences in structure, content, and design.
However, several elements are unavoidable, which is why you will often find them on the sites you browse.
The terms of service
The terms of service are mandatory for any website, even for a personal blog.
They represent all the information of a website and its owner, for the benefit of internet users. They aim to protect the readers and the webmaster.

Privacy Policy
Your legal notice must be accompanied by a privacy policy page, especially since the General Data Protection Regulation (GDPR) came into force in 2018.
In particular, this page must explain in concrete terms what you do with your visitor data.
It’s pretty simple to create: since version 4.9.6, WordPress has been helping you out by providing a template that you can access through the Settings > Privacy menu in your administration interface.
All you will have to do is select and reshape the proposed paragraphs and add them to your footer. For instructions, stay here: we tell you everything in the second part of the article.
Terms and Conditions
If you sell products or services online, you must include Terms and Conditions on your site, traditionally in the footer.
We advise you to get in touch with a legal specialist to assist you in drafting these.
A sitemap
A sitemap is a file that lists all the URLs of your website.
There are two kinds of sitemaps: the XML sitemap, mainly for search engines, and the HTML sitemap, which presents the contents of your site in detail.
It is this famous HTML sitemap that is found in the footer of most sites. In order to create it, you can use the WP Sitemap Page plugin, as specified in this article.
The copyright
Represented by the © symbol, the copyright is found in many footers. However, contrary to what one might think:
In the United States, the Berne Convention Implementation Act of 1988, effective March 1, 1989, removed the requirement for the copyright symbol from U.S. copyright law, but its presence or absence is legally significant on works published before that date […].
From Wikipedia
So, you don’t need to include the © symbol. However, doing so allows you to indicate that a work is subject to copyright, while at the same time having an informative purpose for your readers, who immediately know who owns the site.
It’s therefore a good practice to mention who is behind a site, as WPMarmite does (though without using the small © symbol):

Contact information
We end with a final element that is strongly recommended: contact information. Though including contact info isn’t mandatory, we advise you to look into the matter, especially if you have a service activity.
This information can be added via the presence of:
- A link to your contact page
- A contact form
- A call to action button containing your phone number, or redirecting to a specific page
- Text content: phone number, email, etc.

Other elements to consider
In addition to the essentials you’ve just read, you can also incorporate other ingredients into your footer, as long as you remain coherent and concise. We’re thinking, for example, of:
- Icons that encourage a visitor to follow you on social networks. We could also imagine adding your Facebook, X (formerly Twitter), or Instagram news feed.
- A Google Maps widget so that your visitors can locate your business. This is a practical idea if you have a physical store.
- Your logo.
- The latest articles published on your blog.
- An opt-in form to subscribe to your newsletter, like on the WP Lift website:

- A button or a link to connect to your site, if you have a members area.
- A background image and/or video.
- Certifications to demonstrate your expertise in one or more fields.

- Testimonials from satisfied customers to reinforce social proof (what others think of you).
- A call to action button.
Thanks to these tips, you may have already decided on the future footer components of your WordPress site. Now it’s time to put these ideas practice.
In the next section, you’ll see how to create and customize your footer.
How to create and customize a WordPress footer
Using the Customization Tool
The first way to customize the footer of your WordPress site is to use the Customizer (with a “classic” WordPress theme).
The latter, accessible from the menu Appearance > Customize, allows you to change basic settings on your theme in real time, all without touching a single line of code. It’s therefore a great tool for beginners.
On the other hand, we should point out: not all themes use the Customizer.
If you are using a block-based theme (like the Twenty Twenty-Five default WordPress theme, for example), you’ll have to use the Site Editor (also called FSE, which stands for Full Site Editing).
Luckily, we detail that process in a dedicated section a little further down in this tutorial.
In general, most WP themes have settings to customize your footer. You’ll usually be able to customize the colors, text, layout, and/or copyright.
But again, the range of possibilities depends on what the developer of your theme has decided.
For example, the free version of the GeneratePress theme allows you to modify the following:
- Footer width settings
- The number of widgets to display
- Option to activate a back-to-top button

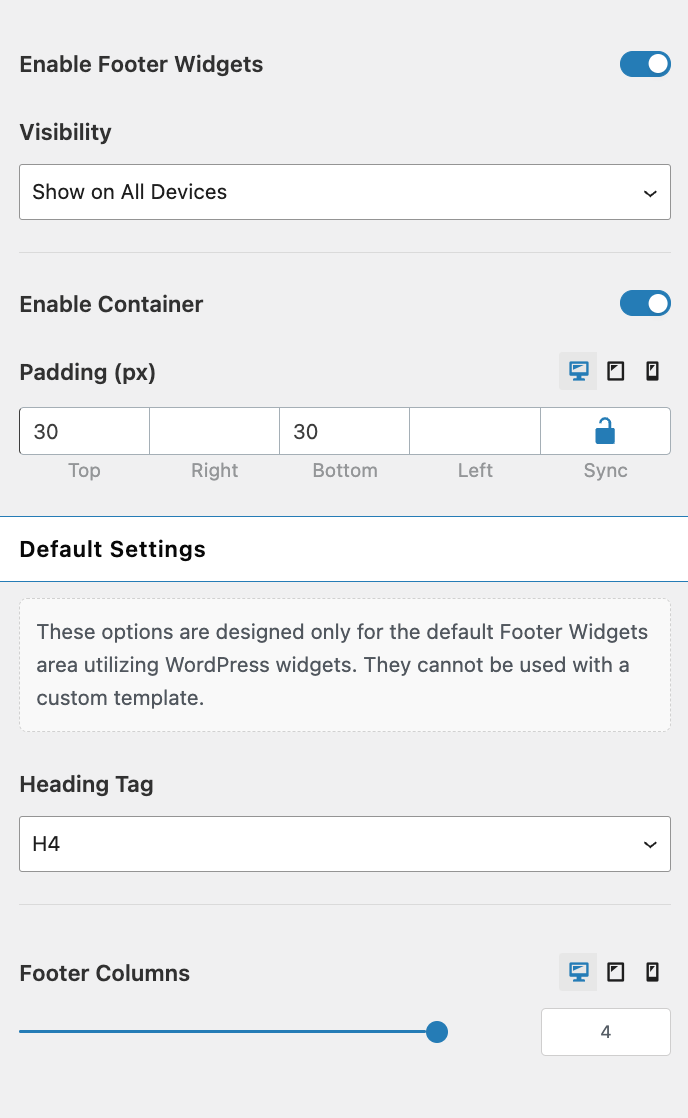
As a comparison, the free version of the OceanWP theme offers the following options:
- Choice of the footer visibility according to the device used by your visitor (computer, smartphone, tablet)
- Option to edit the copyright
- Padding settings
- Heading tag
- Number of columns
- Choice of colors (background, text, links, on mouse over)
- Special effects (fixed footer, parallax effect)
Don’t be surprised if you find your footer settings in different places on the Customization Tool. Again, it is your theme that decides where they are located. For example, GeneratePress has included them in a menu called “Footer,” while OceanWP has them in “Footer widgets.”
Is everything clear for the Customization Tool? Then let’s move on to the widgets.
Using the widget areas to customize your WordPress footer
The appearance and content of your footer can also be modified using WordPress blocks, which you can place in a widget area like the sidebar or the footer.
The number of widget areas available varies depending on the theme you use.To find out what your theme has in store for you, go to the Appearance > Widgets menu . For the example, I have activated the OceanWP theme. As you can see below, it offers me four widget areas: “Footer 1,” “Footer 2,” “Footer 3,” and “Footer 4.”
With a simple drag and drop or by clicking on the “+” icon, I can add the block of my choice.
Each block can be customized by using the settings menu on the right:

To understand the usefulness of blocks, here are 3 ideas for integrating them:
- The “paragraph” block can, for example, be useful to add your contact information.

- If you want to add buttons to allow your readers to follow you on social networks, you can use the social icons block.
- Want to integrate your latest articles in your footer? Take advantage of the “Latest Posts” block.

Customize your footer with the Site Editor (with a block-based WordPress theme)
If you are using a block-based theme, you can modify your footer by using the WordPress Site Editor.
For the purpose of this tutorial, I activated the default WordPress theme, Twenty Twenty-Five.
Go to the Appearance > Editor menu in the WordPress administration, then scroll down to your footer. Click on it, then click on “Edit.”

This is where you’ll be able to edit or delete the blocks in your footer, or add blocks if you want, by clicking on the “+” icon.

Once you’re happy with your footer, don’t forget to click on the blue “Save” button at the top right of the page.
As you can see, the footer of your WordPress site is very easy to modify if you use a block-based theme.
In addition to the Customization Tool, the Site Editor, and the specific settings offered by your theme, the footer of your WordPress can also be created and modified using a page builder, as long as it allows you to modify this specific area. This is the case for Elementor Pro, Divi Builder, Beaver Builder, and Thrive Architect. To know everything about page builders and check out a comparison of ten of them, read our dedicated resource.
Using a plugin
After the Customization Tool, widgets, and the settings offered by your theme, let’s go to the fourth way to customize your footer: plugins.
For info, plugins are used to add new features to your site without coding.
Check out our guide to the top 25 plugins you’ll want to install right away.
For our present topic (the footer), there are a lot of plugins to choose from on the official WordPress directory. If we want to be organized, we can group the most popular (more than 10,000 active installations) into 3 categories:
First of all, we can see that some of them have been specifically designed to work with page builders, in particular Elementor. Ultimate Addons for Elementor and ElementsKit Elementor addons will both help you design a custom footer.
Then there are plugins to add specific pieces of code, such as tracking codes to link Google Analytics and the Facebook pixel, insert scripts, and more:
Note that these plugins also work for the header of your WordPress site.
On the other hand, let me clarify something: they are not used to customize the visual aspect of your footer, or to add content to it.
Finally, we also note the existence of plugins to modify the copyright of your WordPress footer. I personally have already used Remove Footer Credit, which I recommend for its simplicity.

Going through the code
Although getting your hands on the code can be intimidating, especially if you’re just starting out, it’s still a “natural” way to create and customize your footer.
However, there are two main precautions to take, if it doesn’t scare you:
- Use a child theme, a sub-theme that inherits all the features and style of the main theme (also called the parent theme). With a child theme, you’ll make sure that you don’t lose the changes you made (e.g., your CSS modifications) in the next updates of the main theme.
- Backup your site (files + database) before you get to work. No one is safe from a bug or syntax error, so be careful!
After that, you’re good to go.
The changes you can make are made in two files. The first one contains all the pieces of code related to the visual appearance of your footer. It is called style.css.
Want to change the size of your WordPress footer? Or maybe you want to change the color?
With this style.css file you will be able to do both, along with a lot of other things (manage spacing, change the font and size, etc.).
We are talking about the manual method here, but it’s good to point out that more and more themes allow you to modify the visual aspect of your footer without using CSS code. This is also the case with page builders, which often offer very comprehensive options for these settings. However, modifying the code directly allows you to finely apply the settings of your choice: basically, you’re in complete control.
The second file is called footer.php. As its extension indicates, it contains PHP code, which is a bit like gibberish for the novice.
Footer.php is the template for the partial page displaying the footer. By editing this file (or rather its copy in the child theme), you can modify the HTML code used to display the footer, add or remove elements, etc.
Footer.php includes code snippets to customize the structure and organization of your footer.
Best practices for optimizing your footer on WordPress
Focus on simplicity
In order to not degrade the user experience, keep it simple. Even if I explained to you that your footer is a strategic area of your site, don’t take the opportunity to add everything that comes to mind.
Integrate the essential elements listed above (legal notice, privacy policy, copyright, etc.), and for the rest, it’s up to you.
To determine the priorities, focus on the action(s) you want your visitor to perform next.
In this context, we advise you for example to use only one call for action.
To keep it simple, don’t overload your site with links; concentrate only on the most relevant ones.
To maintain clarity, group them into categories. If you can’t fit some of them into categories, you probably don’t need them.
For example, on the blog, WPMarmite has classified its links into 4 areas: “Resources,” “Categories,” “Hubs,” and “More About.” This makes it easier for the readers to find their way around.

You can also make your footer breathe by spacing out its different components and using white space:

Finally, provide a clear separation between the body of your site and the footer. This can be created by using a more pronounced color, a border, etc.
On WPMarmite, you can clearly see this demarcation with a footer that is organized in 3 sections:
- A call to action that prompts you to subscribe to the newsletter (light blue zone, number 1)
- Navigation links split into 4 columns (dark blue zone, 2)
- A copyright, a link to switch to the French version of the website, and links to our social networks, under a line (3).

Maintain your visual branding
While organization and visual hierarchy are fundamental, they go hand in hand with respect for your visual identity.
It goes without saying that if your main colors are blue and white, you should not find a red background in the footer of your WordPress site.
In short: use the same fonts and colors found on the rest of your site. There’s no room for innovation around here: just be coherent.
To make it all more digestible and pleasing to the eye, you can easily incorporate effects to improve navigation. I’m thinking, for example, of underlining your links when hovering.

Make your footer readable in all formats
According to the stats compiled by MobiLoud in 2024, 58% of internet traffic comes from a mobile device.
This means that the display of your WordPress footer must be optimal on a tablet, and especially on a smartphone. This is called responsive design, which is a technique that ensures that your site is readable on any screen (computer, smartphone, and tablet).
The responsive aspect is automatically supported by the vast majority of WordPress themes on the market, both free and paid. This is such a challenge that developers are optimizing this aspect as best as they can.
As a result, you’ll be relatively safe on this side, but sometimes you’ll still need to make adjustments to make the display meet your expectations.
You will then have the choice to use the settings allowed by your theme and/or page builder. If they are not sufficient, you’ll have to get your hands dirty by customizing your CSS style sheet.
In order to verify that your entire site (and therefore your footer) is responsive, know that the WP Customization Tool and the WordPress Site Editor have 3 small icons to simulate the display of your footer on computer, smartphone, and tablet.


If you are using a page builder, you will find the same mode of operation in most of them.
In any case, make sure that the different elements are not too small, the links are not too squeezed, and that the footer is not too big vertically.
We recommend this post from our friends at Pixelgrade: Creating your website’s footer — from a sitemap to a smart layout. If you like their footer, then go ahead and follow their great detailed tips!
Forget about SEO over-optimization
Previously, I was telling you about your footer links and the need to select them carefully. This is important for the user experience, but also for SEO.
Don’t take the opportunity for keyword stuffing, as can still be seen on some sites, with the hope of climbing in search engine results.
This medieval technique is today depreciated by Google, the most used search engine in the world.
Venturing into these troubled waters is above all risking being penalized and losing positions (or even disappearing) in search results.

Delete it
Finally, the last good practice I would like to discuss with you: the removal of your footer!
You may be thinking I just put my foot in my mouth after emphasizing the importance of the footer throughout this post. Well, hear me out. In fact, this practice should only be applied if you design landing pages.
These marketing-oriented pages often tend to be stripped of all extras (no header, footer, or navigation bar) so that your visitors will be prompted to accomplish a specific action (e.g., give you their email address or download an ebook) with as little distraction as possible:

How do we sum it all up?
Along with the header, the footer of a WordPress site remains an essential element not to be neglected.
Even if it is relegated to the bottom of your pages, it is necessary to optimize it to make life easier for your visitors, make the user experience more pleasant, and to “push” them to accomplish one or more specific actions.
In this post, you’ve learned about the footer’s importance, several ways to create and customize this part of your site, and best practices to optimize it.
Now it’s up to you. Tell us all about your footer and share your tips and feedback on the subject.

Receive the next posts for free and access exclusive resources. More than 20,000 people have done it, why not you?

Continue reading
Articles posted in WordPress TutorialsHow to update the PHP version of your WordPress site
What comes to mind when you think of WordPress speed and security? Your favorite plugins, perhaps? You should also think about… PHP! If you’re looking for a site that loads fast, while offering a solid shield against hacker attacks, there’s a…
How to create an effective HubSpot conversion funnel on WordPress (complete guide)
In the drawers of a kitchen, there are often two very useful utensils lying around. The first is the colander. And to illustrate, some WordPress sites unfortunately resemble it. Why? Well, because visitors arrive on the site in question… then…
How to fix the ERR_CONNECTION_REFUSED error: A complete guide
Does your browser display the ERR_CONNECTION_REFUSED message when you try to access a website? This error means that the target server – or your own configuration – is actively rejecting the connection request, leaving you at a dead end. But…