On his Wikipedia page, we learn that he wants to promote and develop open source artificial intelligence, to change the world and humanity, as well as to send a human colony to Mars.
Long before he had all these great ideas, CEO of Tesla Elon Musk – among others – was one of the major actors in the creation of the “Pay a Buddy” service.
At the time of writing, 426 million people are using it. “Pay a Buddy” is PayPal, of course!

I’m sure you’ve heard of it. In fact, you may be looking to add PayPal to your WordPress.
And that’s where it gets complicated. A bit like sending humans to Mars, for example.
There are a lot of possible options, loads of plugins and it’s hard to find your way around.
In this tutorial, I’ll help you to see more clearly by presenting you several ways to use PayPal on your site, including if you use WooCommerce.
Overview
Choose your domain name with the help of our dedicated guide. Once that’s done, learn how to create a professional WordPress website. After that, have fun picking a WordPress theme from the best free ones.
Who are you, PayPal?

PayPal is a service that allows you to pay online, receive payments and send money with a simple email address and password. And this without entering your bank details for each transaction.
Created in 1998, it is the most widely used online payment system in the world.
426 million people use it worldwide, and the numbers are growing.
Today, PayPal and eWallets in general are taking an increasingly important share. More than 36% of online buyers say that their online prefered payment method is a eWallet like PayPal, just before credit cards and debit cards.
In general, 87.5% of online shoppers use PayPal.
A Statista study noted, for example, that “In the second quarter of 2021, PayPal’s net payment volume amounted to around 311 billion U.S. dollars, representing a 41 percent year-on-year growth“. They account for 22% of transactions on the internet in the United States.
Yes, PayPal is doing well. Very well, in fact. Thanks for asking. For PayPal, all the lights are green. If it enjoys such a popularity rating, it is because it combines a lot of benefits:
- Simplicity: no need to enter your credit card information for each purchase. If you want to receive money, for example, an email address is enough. The PayPal.Me service also allows you to get paid with a simple link. We’ll come back to this later, so let’s stay focused.
- Security: PayPal states that it uses “the best encryption methods available on the market”. If it is secure, this does not prevent it from being the target of quite frequent hacker attacks. Keep in mind that its reputation attracts nasty hackers.
- Transparent and clear fee policy. PayPal is a free payment method for your purchases. You only pay a fee on the payments you receive (3.49% + fixed fee per transaction).
- PayPal is used by millions of sites around the world: almost everyone knows it, which is highly reassuring when making a purchase. By using it, consumers know that they are not dealing with the local corner shop that has just been launched.
So let’s recap: if you want to set up a simple and quickly operational payment method on your site, PayPal can be an excellent compromise.
Thanks to PayPal, you won’t necessarily have to “bother” setting up an online store.
The integration of buttons can already do the trick. I’ll explain it all in the second part of this guide.
Brace yourselves, because the chapter is quite dense.
How to add PayPal to WordPress?
To add PayPal to WordPress, you have two major options: opt for the manual method, or use a plugin.
Let’s talk about PayPal plugins. Generally speaking, there are 4 main families of plugins in the official WordPress directory.
You can use them to add:
- A payment button.
- A button to make a donation.
- A payment form.
- A shopping cart.
For detailed instructions, follow me now.
Adding a PayPal payment button on WordPress
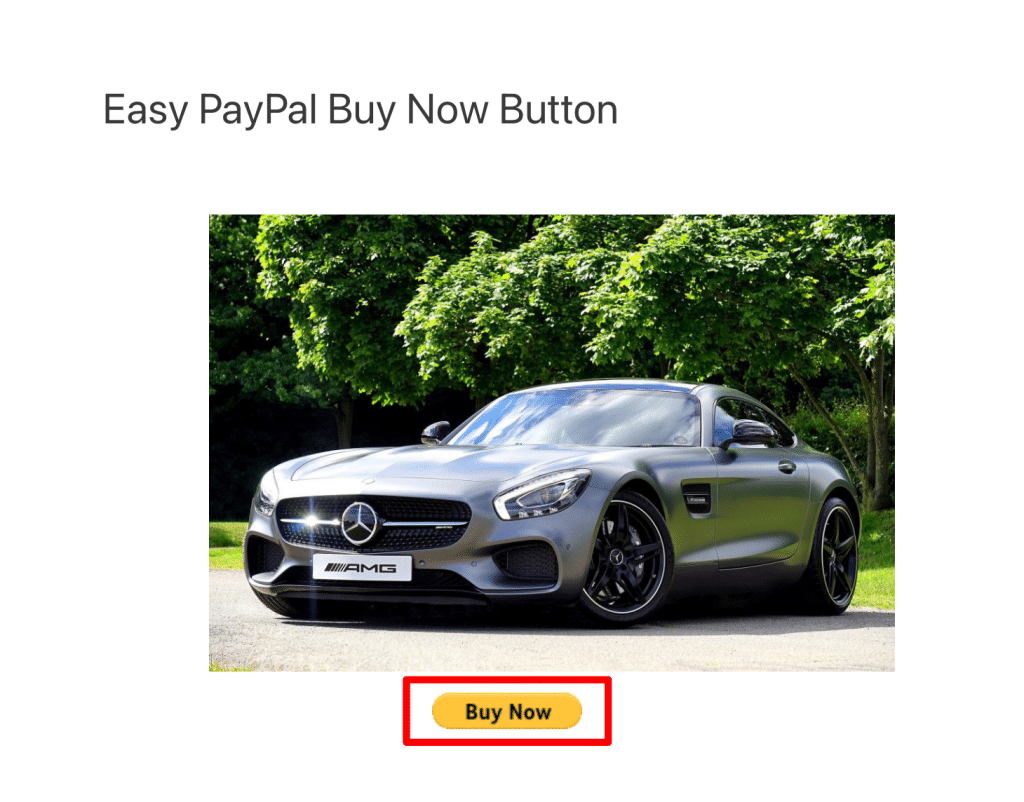
The Easy PayPal Buy Now Button plugin

Easy PayPal Buy Now Button allows you to add a PayPal purchase button wherever you want on your site (posts, pages), thanks to a simple shortcode.
As soon as one of your visitors clicks on the button to proceed with the payment, they will be redirected to the PayPal website to complete the transaction.
You will need a PayPal account to receive the funds (follow this link to create one if you don’t have one yet).
Why am I focusing on this plugin? First, because it is one of the most popular plugins to add a purchase button (20,000 active installations).
Second, the developer of the plugin Scott Paterson is an official PayPal partner, which is a good indication of the reliability and quality of the plugin.
Paterson also offers several other plugins dedicated to PayPal. You’ll see that we will mention some of them in the course of the article.
Third: the Easy PayPal Buy Now Button is very easy to use. If you need an example, look at the settings page, which only asks you for the bare minimum, without drowning you in unwanted information.

In detail, here’s what you’ll be asked to do to make it work:
- Choose one of the 18 languages offered: this is used to modify the Buy text of the call-to-action button.
- Select one of the 25 currencies. The dollar is of course available.
- Choose one of the 4 button sizes.
- Enter your merchant ID, or the email address associated with your PayPal account to receive payments.
- Finally, you can choose to open the payment page in a new tab and redirect the future buyer to the page of your choice if he decides, at the last moment, not to proceed with the payment.
Now, all that’s left to do is to pour your batter into the content of your choice.
To do this, go to the post or page you want to embed.
Choose the Shortcode block in Gutenberg, the WordPress content editor:

Then add the following shortcode to the location of your choice:
[wpecpp name="car" price="39.99" align="left"]
Remember to replace the name, price and alignment (left, right or center) by the value of your choice.
Publish your content or update it, and you will notice your button appearing online.
As soon as the visitors click on it, they will be redirected to the PayPal interface where they can pay with their own account or with a credit card.

If you want to add your PayPal button in the sidebar, copy and paste the shortcode in a Text widget under Appearance > Widgets, and you’re done.
In short: Easy PayPal Buy Now Button will allow you to add a payment button on WordPress in a few clicks, without any headache. We appreciate it.
However, it’s a pity that it is not possible to customize the design of the Buy button.
Finally, if you want even more options, please note that Easy PayPal Buy Now Button has a Pro version starting at $49.99 for 1 website.
Download Easy PayPal Buy Now Button:
Additionally, you should also know that the WP Easy PayPal Payment Accept plugin (+10,000 active installations) also allows you to add a payment or donation button on your site thanks to a shortcode. It is quite similar to Easy PayPal Buy Now Button, but it has less buttons choices (2 vs. 4), less currency options (7 vs. 25), and you cannot change the language of the text displayed on the button (Pay Now will be displayed by default). On the other hand, this plugin allows you to offer up to 6 different price options.
Adding a payment button: the manual method
If you don’t want to use a plugin and aren’t afraid to get your hands dirty, PayPal also offers to create your payment button manually.
With the manual procedure, you will be able to create a payment button, but also a button to make a donation, a button to add a cart, and a button to make a recurring payment (e.g. a monthly magazine subscription).
However, I prefer to warn you: the process is not the easiest and the final result is slightly disappointing (the integration of the button on your site is quite ugly).
So, I won’t really go into details. However, I will explain how you can use the manual method to create a custom button that fits your website design.
To start with, you can set up everything from this page.
Once your button is configured, copy the code located in the email tab.

Now, let’s add the button to WordPress. Go to a page or post of your choice and select the Gutenberg Button block. Paste the code inside, and you’re done.

By clicking on it, your visitor will be redirected to the PayPal interface where he will be asked to log in or to use his credit card to pay the amount you set in the button settings ($20, in this fictitious example).

The PayPal.Me option to add a PayPal payment button to WordPress
If you’re paying attention, you may remember that I told you about the PayPal.Me service at the beginning of this article.
It can also be useful to create a custom button.
The method is simple: you will use a PayPal.Me link and embed it directly into a button on your site to receive your payment.
Here is how to proceed.
If you have a PayPal account, you will have access to the PayPal.Me service in the Account tab.

Otherwise, go to this page.
Then, follow the instructions and create the link of your choice. For example, you can include your company name.
Then, add it to a button of your choice on your website. By clicking on it, your customers will be redirected to their PayPal account to make their payment.
Add a button to make a donation
The PayPal Donations plugin
If you don’t sell products or services, you can also use PayPal to appeal to your visitors’ generosity: ask them to make a donation.
A donation is not only for charities.
For example, a blogger who wants to monetize the many hours he spends on articles that help his faithful readers, asks them for a little financial help (even if it’s not the best way to monetize a site, as we explained in this article).

Let’s go back to the plugins that allow you to add a button to make a donation. Two of them are in competition on the official directory:
- PayPal Donations (40,000 active installations).
- Accept Donations with PayPal (30,000 active installations).
Good to know: the developers of these two plugins are the same as those of the Add a PayPal Button plugins. Some of them sure know how to ride the gravy train. 🙂
PayPal Donations was created by Tips and Tricks HQ, like WP Easy PayPal Payment Accept. Scott Paterson is the developer of both Accept Donations with PayPal and Easy PayPal Buy Now Button.
I tested both: they are very similar. In practice, I found that PayPal Donations is even simpler and faster to set up. So let’s take a closer look at it.

Within a minimalist settings page (thank you for this), you will find some classic options.

For the plugin to work, only two fields are required:
- The one dedicated to the merchant ID or your PayPal email address.
- The one dedicated to your currency (choose from 25 currencies).
Then, the rest is optional. For example, you can set a minimum donation amount for your visitors, or choose from 4 types of buttons (one of which is custom).
For the integration in your content, you’re already familiar with it. You will have to use a shortcode. This one, precisely:
[paypal-donation]

Note that a PayPal Donations Widget is also available to add a donation button to your sidebar, footer or header, if your theme allows it.
As soon as one of your visitors clicks on Donate, they will be redirected to a PayPal page where they can show their support using either their own PayPal account or their credit card.

Bottom line: the plugin does what it promises.
I also liked the possibility to redirect your visitors to a personalized page of your choice after they have made their donation.
For example, you can use this option to thank them with a dedicated message.
Apart from that, I would raise the same complaints as with Easy PayPal Buy Now Button: it’s a shame that you can’t customize the design of the button, which remains very classic.
Download PayPal Donations:
Adding a PayPal Payment Form
The third option for adding PayPal to WordPress is to use a contact form as a payment interface.
If you are looking for a free plugin, I suggest Contact Form 7 – PayPal & Stripe Add-on.

Developed by Scott Paterson (again, he’s definitely chasing you), this plugin allows you to integrate PayPal – but also Stripe – to Contact Form 7, the most famous plugin of the official directory that allows you to create contact forms (more than 5 million active installations).
Download Contact Form 7 – PayPal & Stripe Add-on:
But for even more customization options, I advise you to opt for a Premium plugin like Gravity Forms, Ninja Forms or WPForms.
For the purpose of this article, we will focus on Gravity Forms, a great plugin presented on our blog.
With this plugin, you will be able to create complex forms quite easily.
Thanks to its module called PayPal Add-On, you will be able to create custom fields for the products of your choice and, at the time of payment, your visitors will be sent to PayPal.
To make it clearer, I’ve prepared a simple demo with an imaginary T-shirt that I sell in several colors (white, black, red), and several sizes (S, M, L, XL).
I’ll choose to buy two of them. Let’s watch what happens when I click on the Submit button:
Magic happens: I’m sent back to the checkout page on PayPal!
Of course, the look of this PayPal form on WordPress is very basic. But I wanted to show you that it is possible to create a simple shopping cart directly in the page of your choice.
Download Gravity Forms (affiliate link):
Speaking of shopping carts, we are now going to explore them much more in detail.
You’ll understand what I mean in the following part.

Adding a WordPress Simple PayPal Shopping Cart Plugin
A PayPal form or payment button can be very useful if you sell only ONE product.
On the other hand, if you sell several products, you will quickly be limited, or at least you will make life more difficult for your future customers.
Imagine someone who wants to buy two of your creations and place two PayPal orders: with a single individual button, he will have to pay twice, which makes the process long and tedious.
On top of that, you even risk loosing sales. The natural solution in this case is to set up an online store.
But for a few products, you don’t need to bother and waste valuable time.
The WordPress Simple PayPal Shopping Cart plugin (+ 30,000 active installations) will become your new friend.

It will somehow turn your site into an online store thanks to the integration of a Shopping Cart with an overview of the different products added.
Result: they can easily add several products at the same time, and pay for them all at once. At checkout, they will be redirected to PayPal, of course.
Among the competitors of WordPress Simple PayPal Shopping Cart there is, guess who: Easy PayPal Shopping Cart, a plugin developed by… Scott Paterson. It can also do the job but has less options for customization.
Technically, the plugin allows you to include an Add to Cart button in your content (article, page or sidebar) with the following shortcode:
[wp_cart_button name="Test Product" price="29.95"]
Replace Test Product by the name of your product, and Price by the value of your choice.
If you want the Shopping Cart to be displayed as soon as a product is added, consider incorporating this shortcode (after the Add to Cart button, in a sidebar, etc.)
[show_wp_shopping_cart]
This will result in something like this on your WordPress editing page, which you can customize to your liking:

And this is what will happen once the visitor adds our beautiful vintage phone to their Shopping Cart:

Hello? What? Well, as you can see, it’s not bad at all.
But it’s not over yet. You can go much further by:
- Setting up shipping costs.
- Setting an minimum order amount for free shipping.
- Changing the image in the Shopping Cart to one of your choice.
- Adding product variations (e.g. different colors for a pair of pants).
- Redirecting your visitors to a checkout page that you have created beforehand.
- Creating inserts to add promo codes for your products/services.
- Setting up a standard email to send after the purchase.
If you just want to sell some products, I’m sure you’ll like it.
After that, if you want to go to the next level, you’ll have to install an ecommerce store, using the WooCommerce plugin, for example.
By chance, in the next part, I’ll show you how to add PayPal to WooCommerce.
We’ll focus specifically on WooCommerce because it’s the most popular ecommerce plugin in the official directory. Indeed, it has more than 5 million active installations.
But for the record, it’s not a monopoly. For ecommerce plugins on WordPress, there are also WooCommerce alternatives which we present in this post.
Download WordPress Simple PayPal Shopping Cart:
Integrate PayPal to WordPress with WooCommerce
WooCommerce will allow you to turn your WordPress website into an online store.
The native WooCommerce functionality to add PayPal
Among its many native features, WooCommerce has an option to accept payments with PayPal.
You can enable this option in the WooCommerce Settings, via the Payments tab.

However, beware: WooCommerce specifies that you will need a PayPal Business Account for the service to work.
Until now, you probably opted for a Personal account. To make the switch, go to the Account tab of your PayPal profile.
Then click on Upgrade to a Business account.

You can then open a dedicated Business account with a new email address, or upgrade your Personal account by keeping the same email.
After this real good work, don’t forget to set up the PayPal option on your WordPress admin.
The most important thing is to enter the email address linked to your PayPal Pro account.

Once everything is set up for you, you’ll find that the PayPal Standard payment method will redirect your customers to PayPal so that they can proceed to checkout.
As a result, your visitors will leave your site, which is not great for your conversions (in other words, a specific action you want your visitors to perform, such as a purchase).
By multiplying the steps to complete before payment, you risk losing some customers along the way.
As a result, your sales may be a little sluggish.
To get your business back on track and solve this problem, how about a plugin?
Wondering which one? The answer in the next part.
Which plugin for more advanced features?
To simplify the order flow and avoid that your visitors leave your site to pay their purchases on Paypal.com, you can use a dedicated plugin.
The problem is that there are dozens of them. Frankly, it’s quite a mess.
PayPal Advanced, PayPal Checkout, PayPal Pro, PayPal Here: PayPal is everywhere and it’s getting difficult to find your way.
Moreover, each plugin has its own specificities. For example, some will only work for companies located in a different country.
Fortunately, to make things easier for you, WooCommerce had the good idea to create a small summary table with some in-house extensions.

Among them, one is standing out: PayPal Checkout. You will find it on the official directory under this name: WooCommerce PayPal Checkout Payment Gateway.
Free of charge and developed by the WooCommerce team, it is active on more than 600,000 sites and allows you to keep your visitors on your page when they place an order.
It works in a simple way: opening on a highlighted page, the modal window will be displayed as soon as your visitors start the checkout process, either on your cart or on your product description page.
Thanks to this, they will be able to pay their purchases without going anywhere.
On your side, you will increase your chances to maximize your conversions. Not bad, right?
Download WooCommerce PayPal Checkout Payment Gateway:
Checkout, please?
After studying the WordPress integration of the online payment service, it’s time to do the math.
Throughout these lines, you’ve seen that you don’t necessarily need to set up an online store to add PayPal to WordPress.
A simple button can already do the trick to sell one or more products, or to enable your visitors to make donations.
If you are using WooCommerce, the native PayPal Standard feature will work fine.
Now it’s up to you. To make a donation, follow this link.
OK, I’m just kidding. But on a more serious note: do you use PayPal on your site?
If so, what is your advice to take advantage of it?
Feel free to comment below, it may also help other readers of the blog.

Receive the next posts for free and access exclusive resources. More than 20,000 people have done it, why not you?

Continue reading
Articles posted in WordPress TutorialsHow to update the PHP version of your WordPress site
What comes to mind when you think of WordPress speed and security? Your favorite plugins, perhaps? You should also think about… PHP! If you’re looking for a site that loads fast, while offering a solid shield against hacker attacks, there’s a…
How to create an effective HubSpot conversion funnel on WordPress (complete guide)
In the drawers of a kitchen, there are often two very useful utensils lying around. The first is the colander. And to illustrate, some WordPress sites unfortunately resemble it. Why? Well, because visitors arrive on the site in question… then…
How to fix the ERR_CONNECTION_REFUSED error: A complete guide
Does your browser display the ERR_CONNECTION_REFUSED message when you try to access a website? This error means that the target server – or your own configuration – is actively rejecting the connection request, leaving you at a dead end. But…