

It’s password or bust. This is what the visitor of your WordPress site will experience when he lands on a password-protected page.
In short: if he enters a password, he will be able to access your content. However, no password, no chocolate (well, no content).


Are you interested in setting up a password on some of your pages? You’ve come to the right place.
At the end of this article, you’ll know how to create a password-protected page using two methods that are described step-by-step in the following lines.
Overview


Why password protect a WordPress page?
On WordPress, a password-protected page will not be publicly visible to your visitors.
Only those who have the password you set can browse its contents.
There are several reasons why you might want to do this, especially if you need to:
- Strengthen privacy. This could be the case if the page contains sensitive information, such as documents or personal information (identity, bank details, etc.).
- Facilitate collaborative work. If you create a new page (such as a landing page or presentation page) for a client, you may feel the need to show them your progress in order to get feedback… without everyone else knowing what you’re working on. This can be a way to avoid creating a maintenance page, for example.
- Give access to exclusive content. This can be a preview of an article, a PDF guide, a special announcement, etc.
- Manage your members. If you have a site that requires a subscription or membership to access certain content, protecting your page with a password can help you manage members and provide them with privileged information.
- Improve security. A page that is only accessible by password is by definition better protected than a page that is visible to everyone. But beware: this is far from enough to protect you against a possible hacker attack. At the very least, install a general security plugin like SecuPress, iThemes Security, or WordFence Security.
Without further ado, I suggest we get to the practical details. You will learn two ways to protect a WordPress page (or post) with a password.
Protecting a WordPress page has no negative impact on your SEO (search engine optimization). Search engine spiders will continue to crawl and index your page as normal.
How to password protect a WordPress page: two methods explored in detail
Method 1: Using the WordPress content editor (Gutenberg)
By default, you should know that a published page automatically has public visibility. What you may not know, however, is that WordPress natively allows you to protect this content with a password, with just a few clicks.
Yes, your favorite CMS is a little secretive and has more than one trick up its sleeve! Find out how to proceed in 3 steps.
Step 1: Create and publish a page
To start, go to Pages > Add. Give your content a title and add some blocks (e.g. Paragraph, Title, Image).
For this example, I just added some fake text (Lorem ipsum).
Step 2: Set password-protected visibility
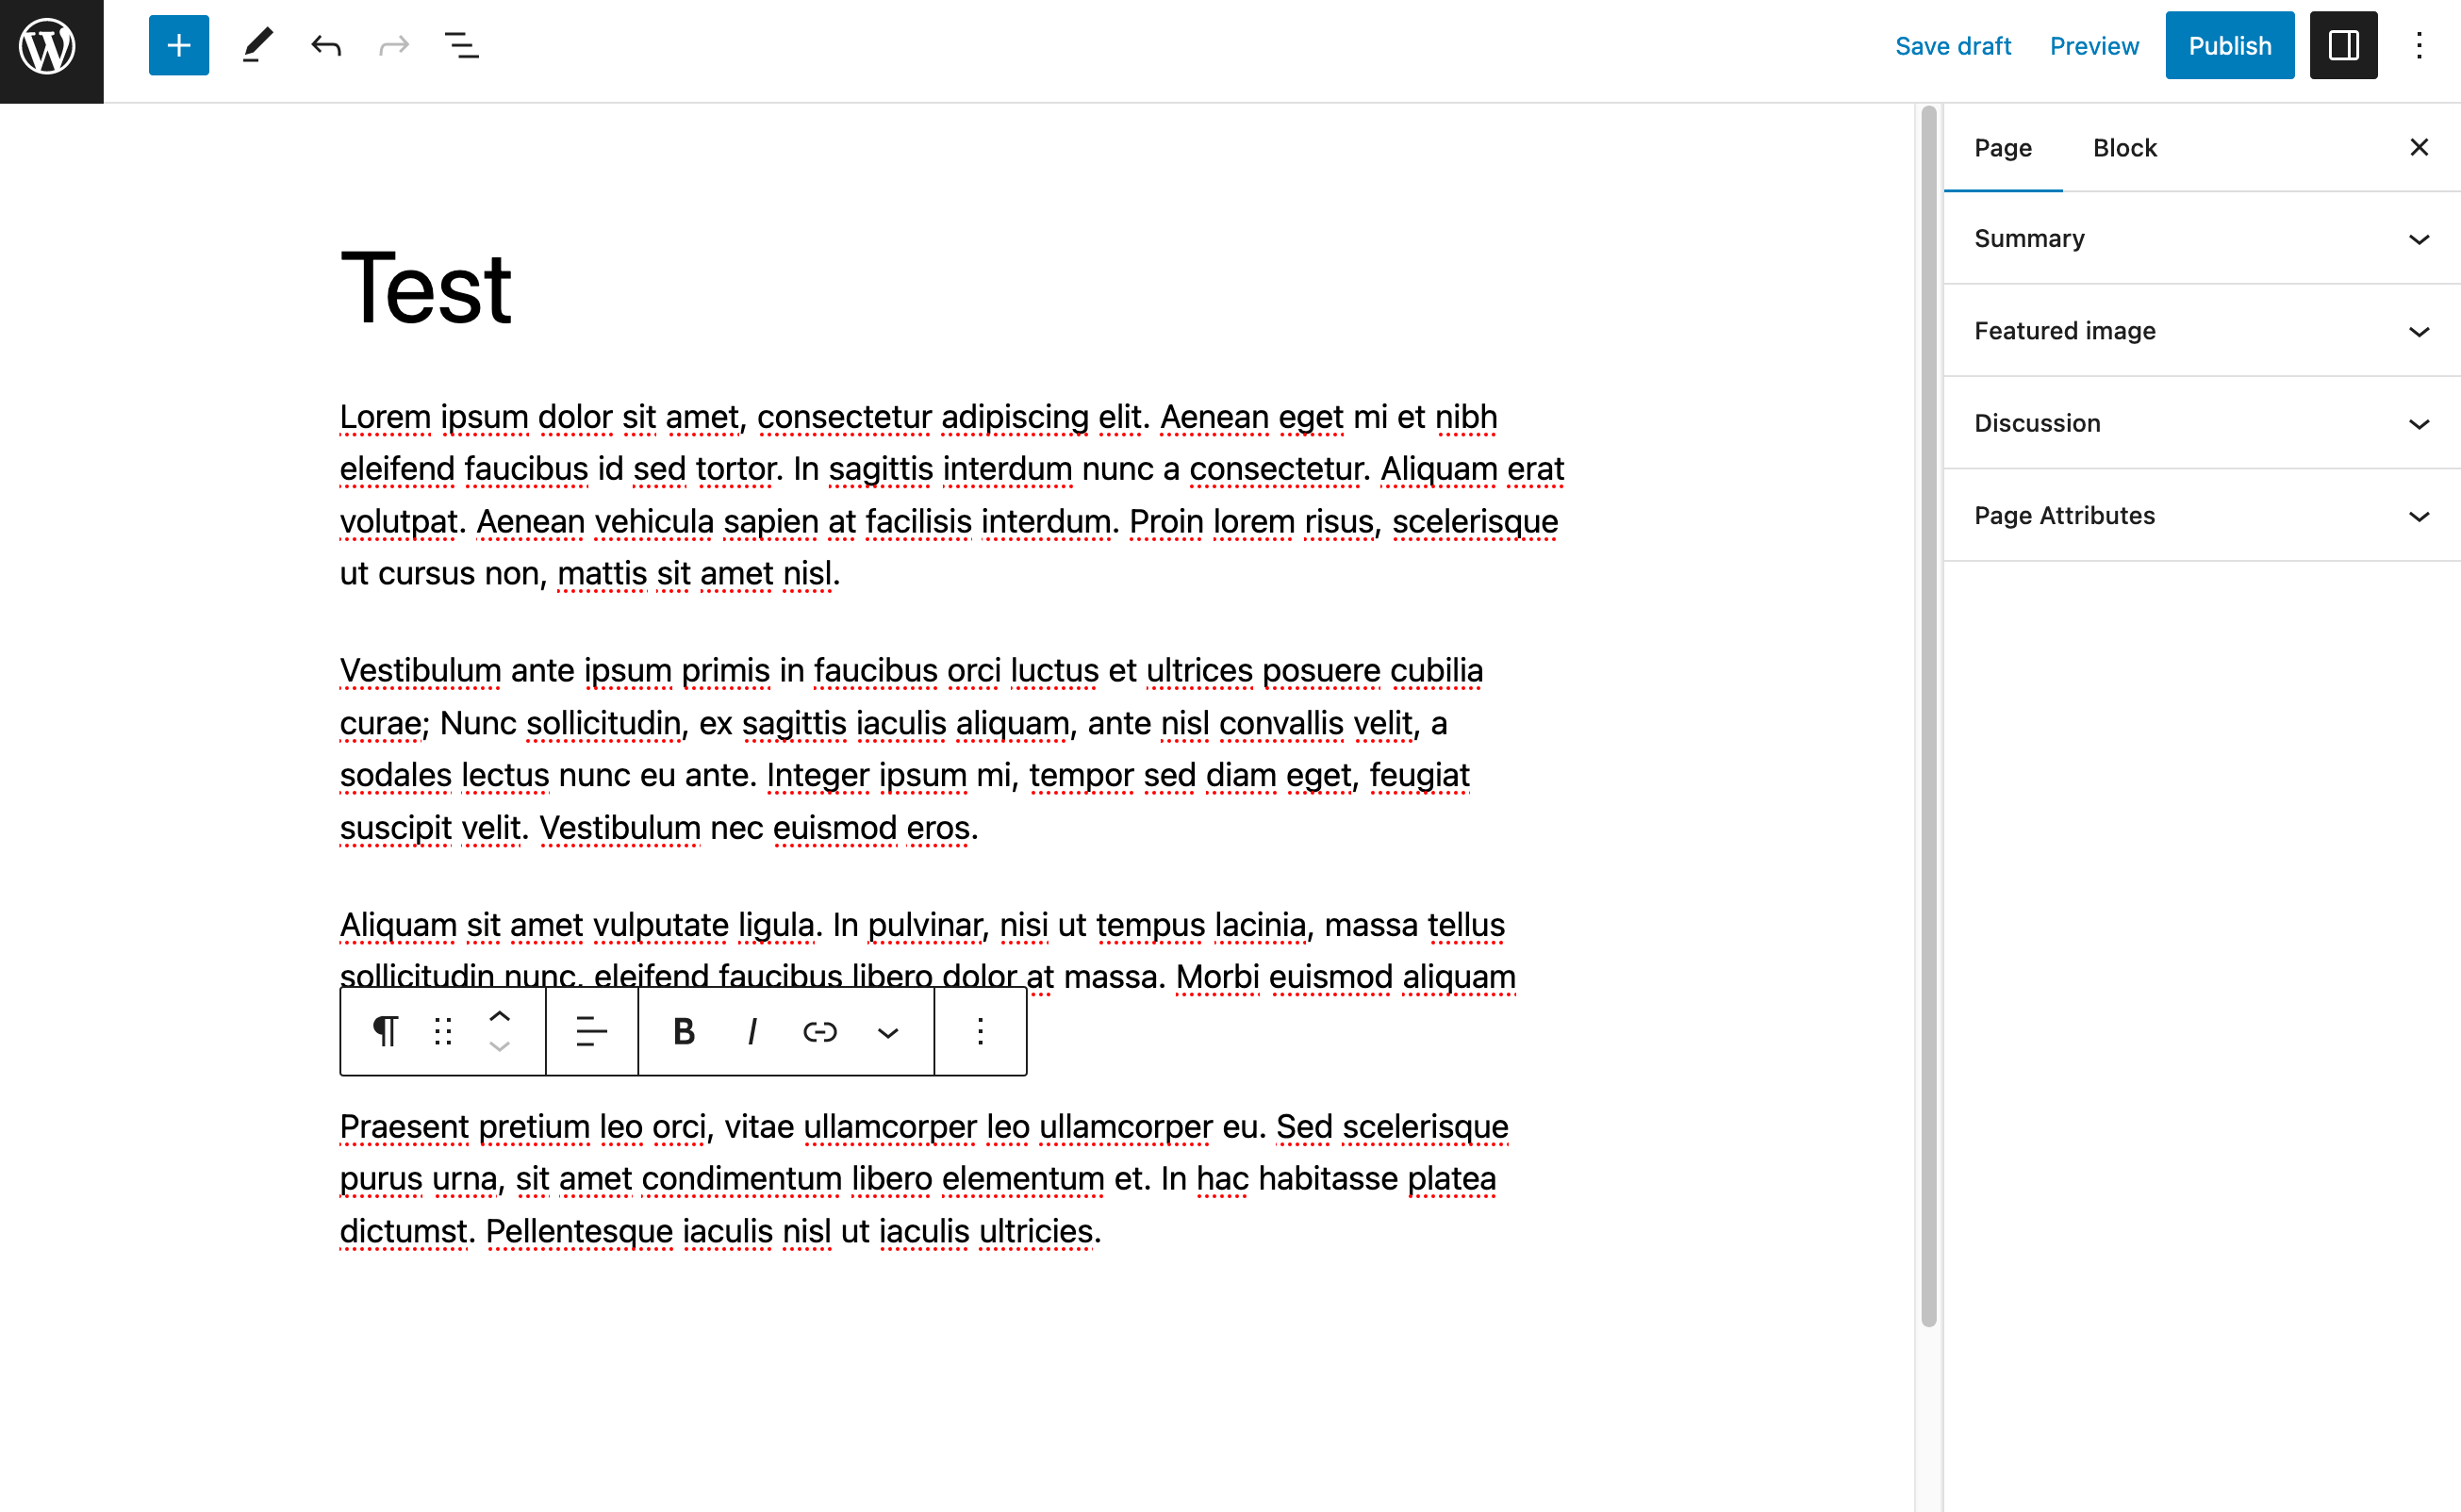
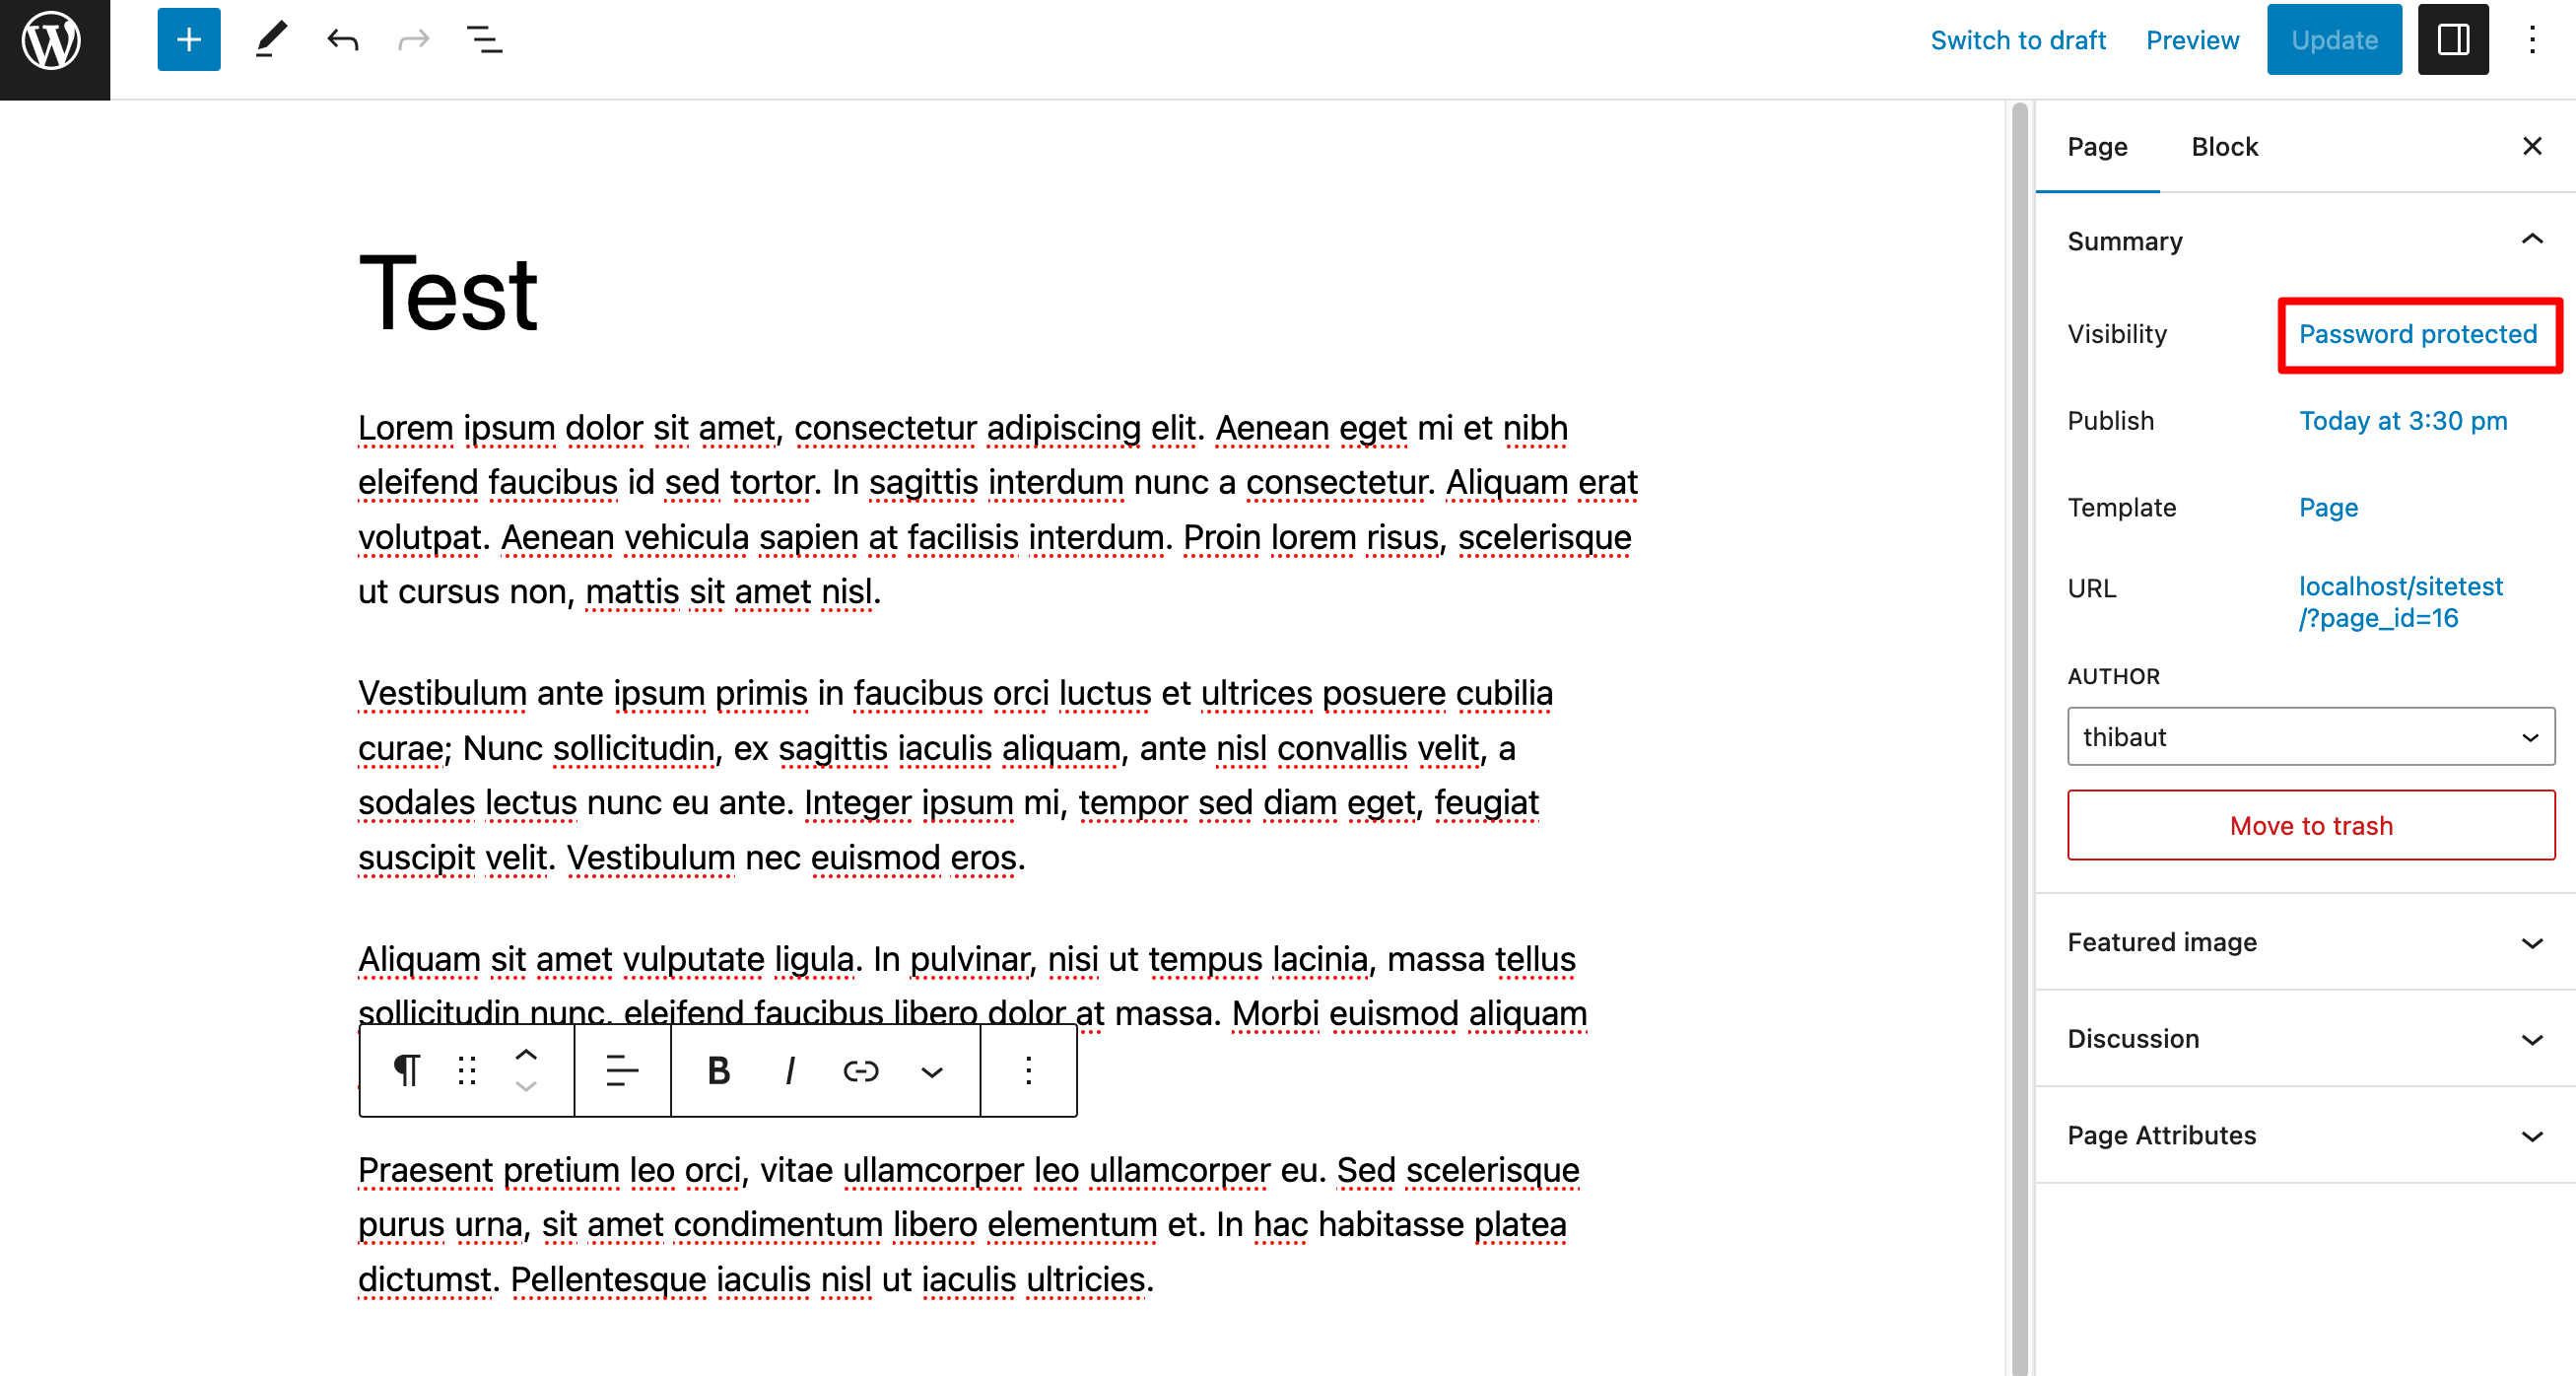
When your page is ready, don’t publish it yet. On the “Page” tab of the content editor, open the box called “Summary.”
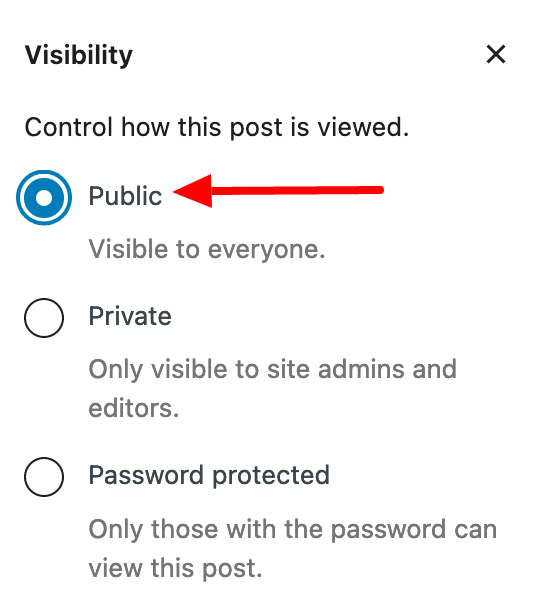
Click on the link called “Public” next to “Visibility.” Then click on the “Password Protected” button.
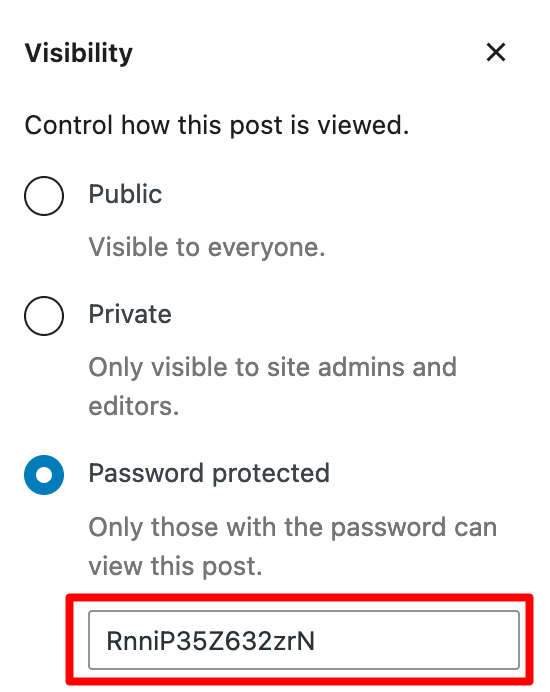
WordPress will then prompt you to fill in a text field with your password. Please note that the password is limited to 20 characters.
Obviously, for security reasons, choose a strong password. Leave 0000 and 123456 to people who are eager to be hacked.
You can rely on a password generator:
- As a free option, use either passwordsgenerator.net or the tool offered by Avast.
- If you want a more complete (but paid) solution, use a password manager like Dashlane or LastPass.
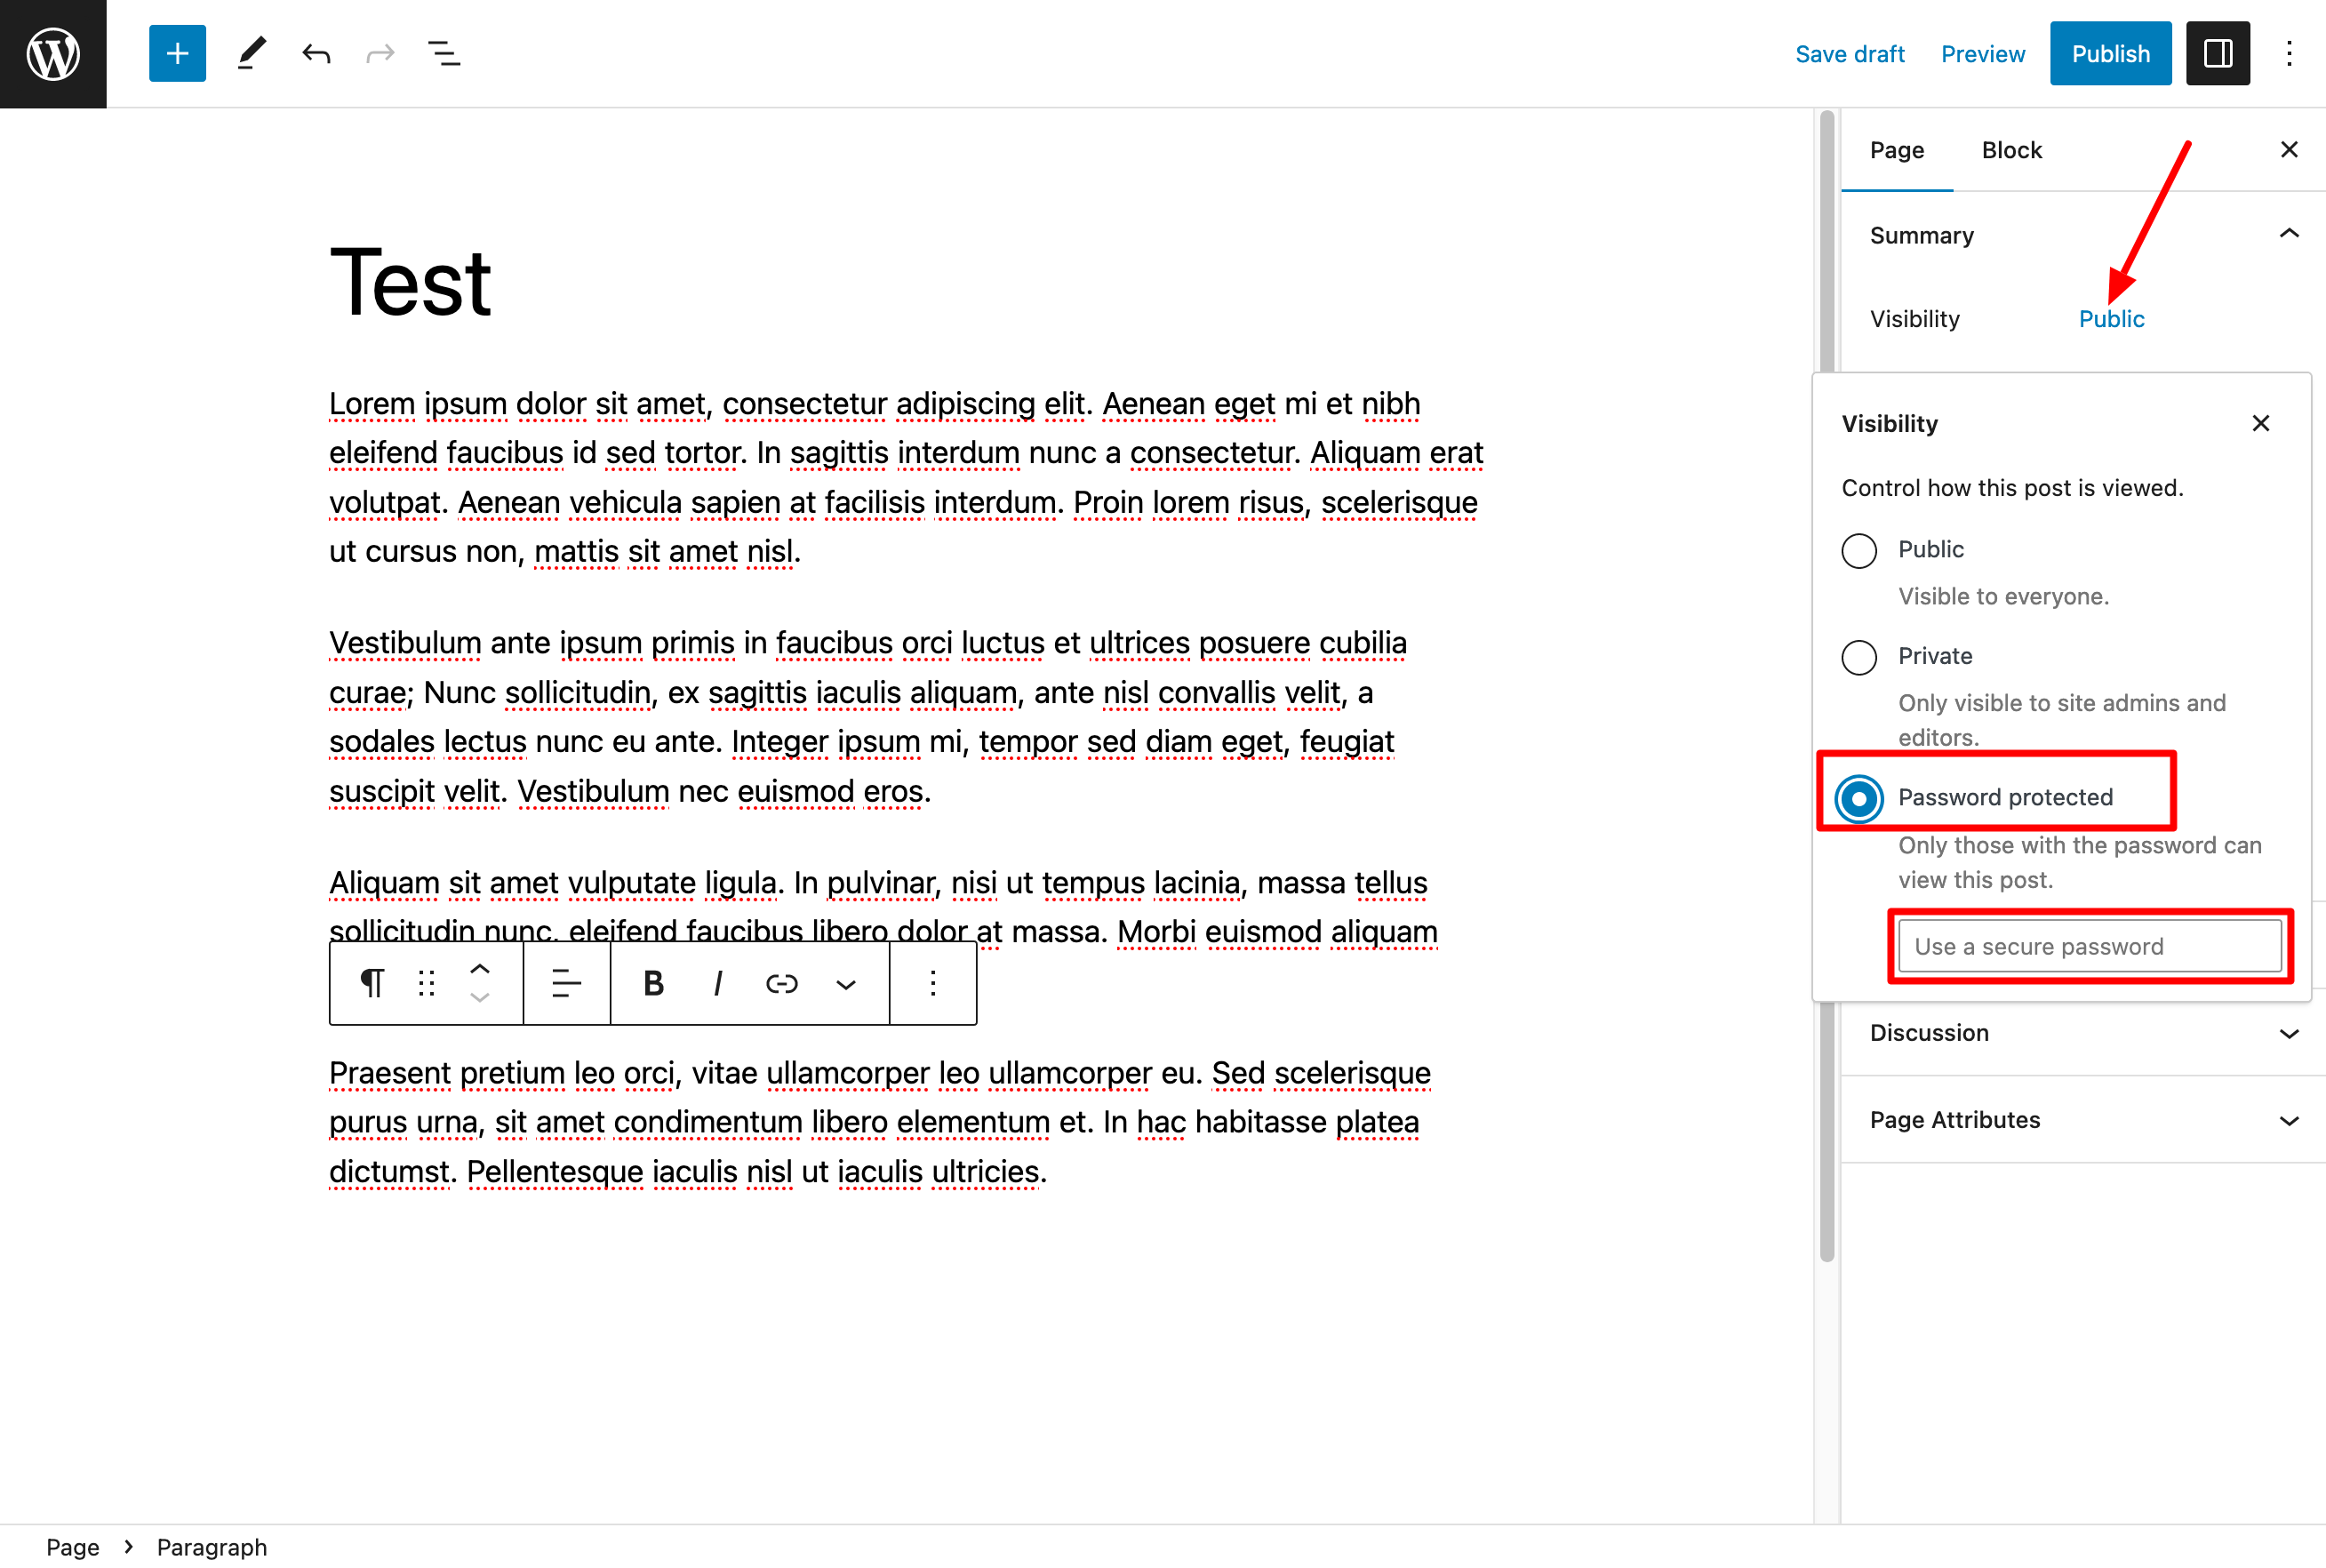
Step 3: Publish the password-protected WordPress page
Got the ultimate password? Paste it into the field that’s waiting for it, then publish your page by clicking the corresponding button:
As you can see, WordPress now tells you that the page’s visibility is no longer public but “Password protected”:
WordPress also allows you to make a page private, i.e. “only visible to administrators, editors, and publishers.”
To see if the process has worked, go to the front end of your site.
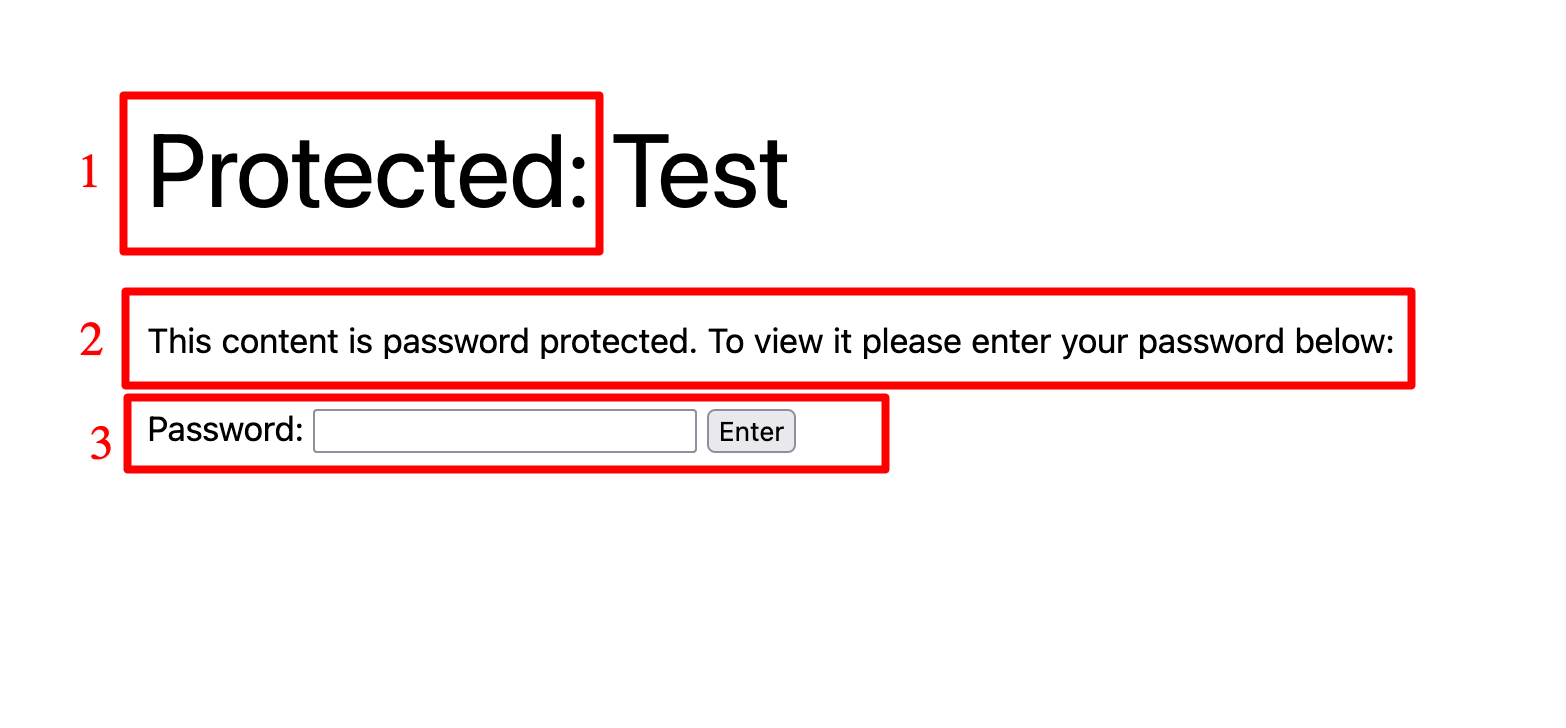
In principle, here is what should change compared to a public page:
- The term “Protected” must precede the name of your page.
- Instead of the excerpt of your page, you have a text with the following message: “This content is password protected. To view it please enter your password below.”
- Finally, a field invites you to enter your password to be able to access the content of the page:

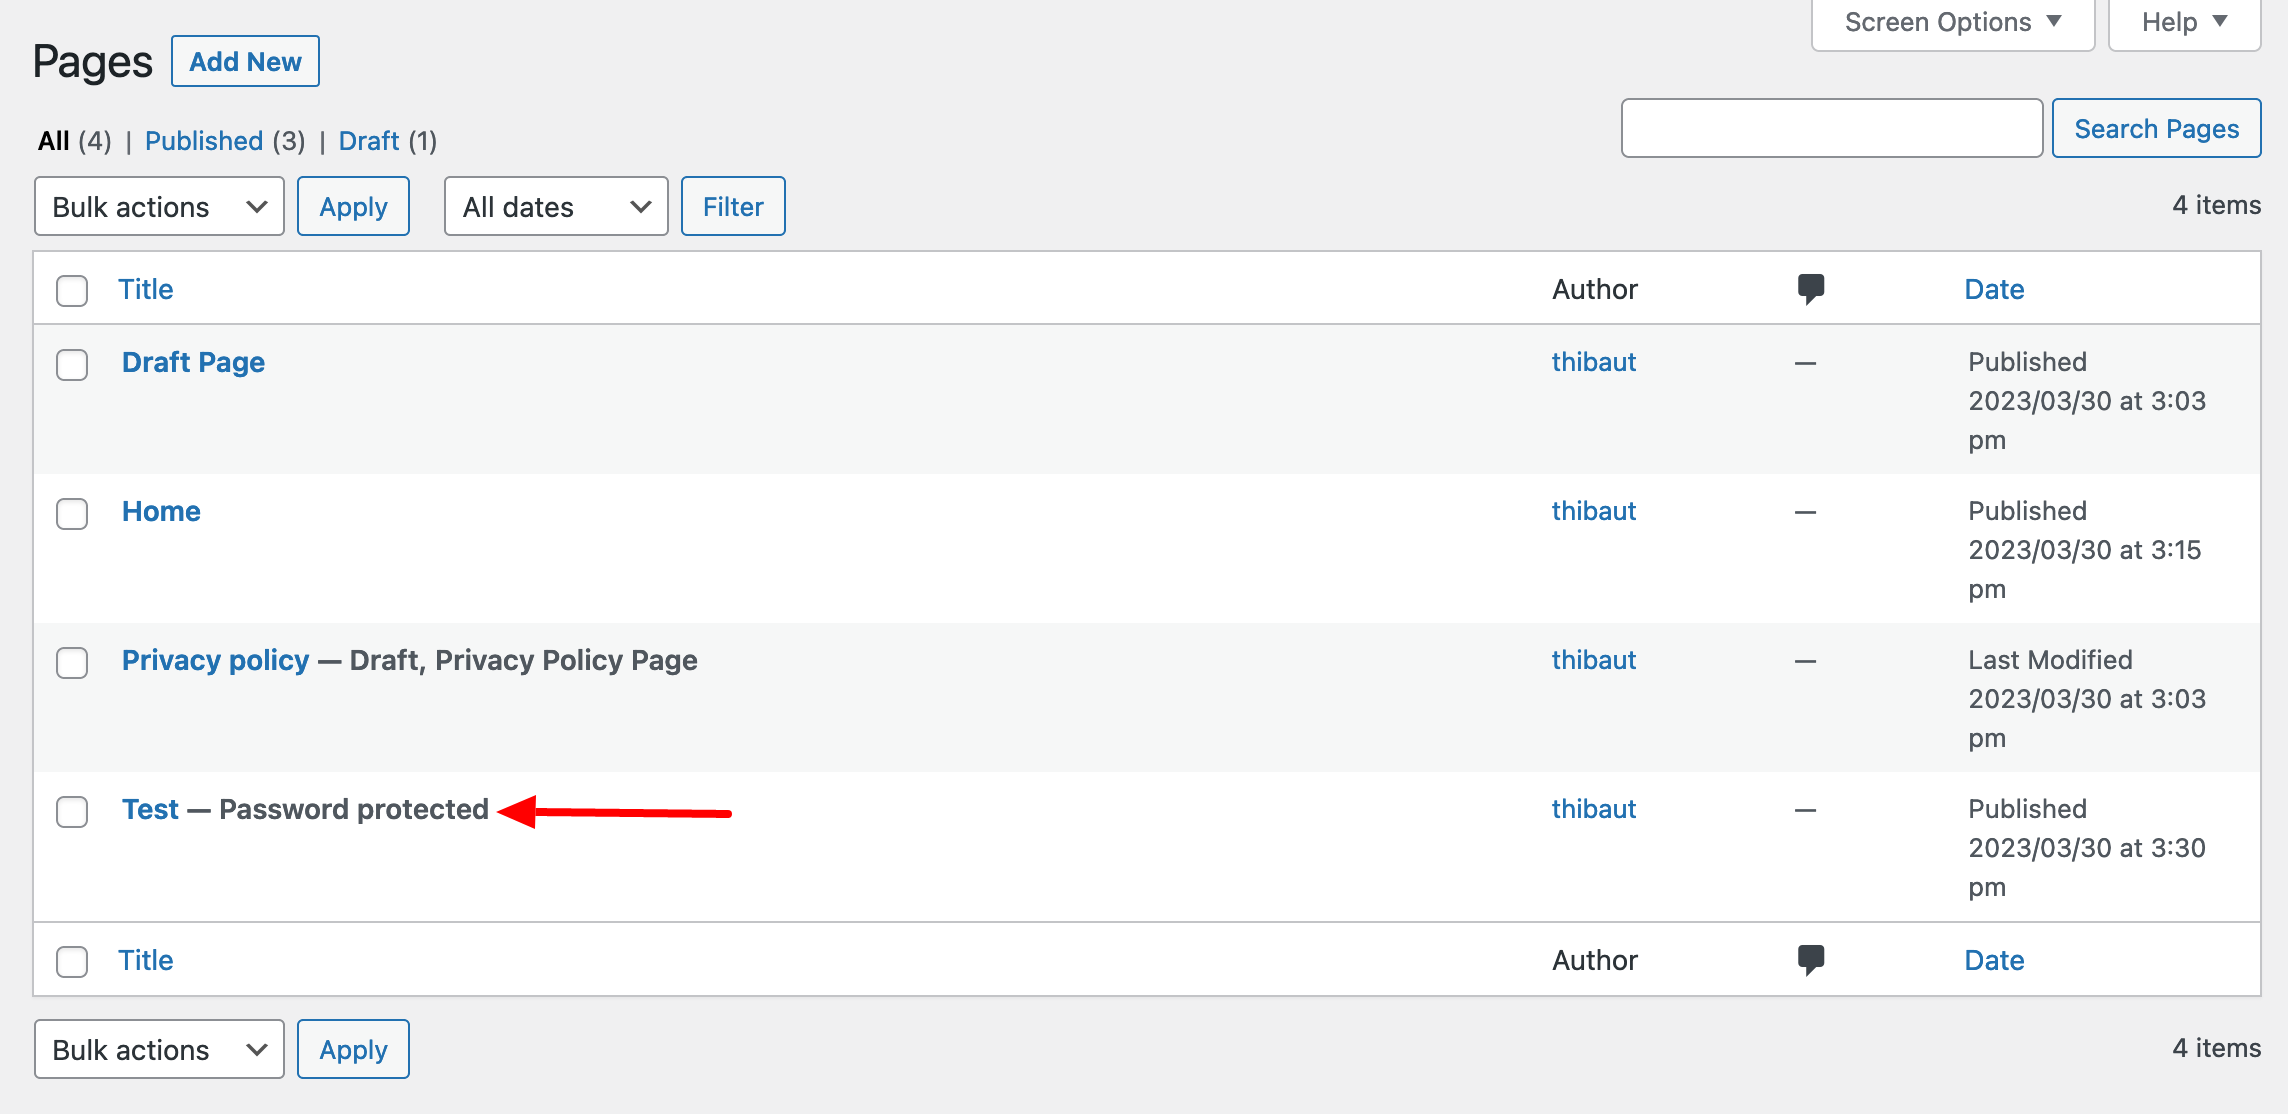
So, everything works perfectly! As you can see, it wasn’t that difficult. If you go back to the list of your pages (menu Pages > All pages), you can see which WordPress pages are protected by a password:
It’s also possible to assign a password to a page or to a post that has already been published. You just need to change its visibility, as we have just seen above.
How to remove password protection
As an administrator (or editor), you can quickly retrieve the password assigned to a page in two different ways:
- On the WordPress content editor, click on Visibility > Password protected. The password is shown in the associated field.

- On the page listing all your pages, click on “Quick Edit.” The password will then be displayed.
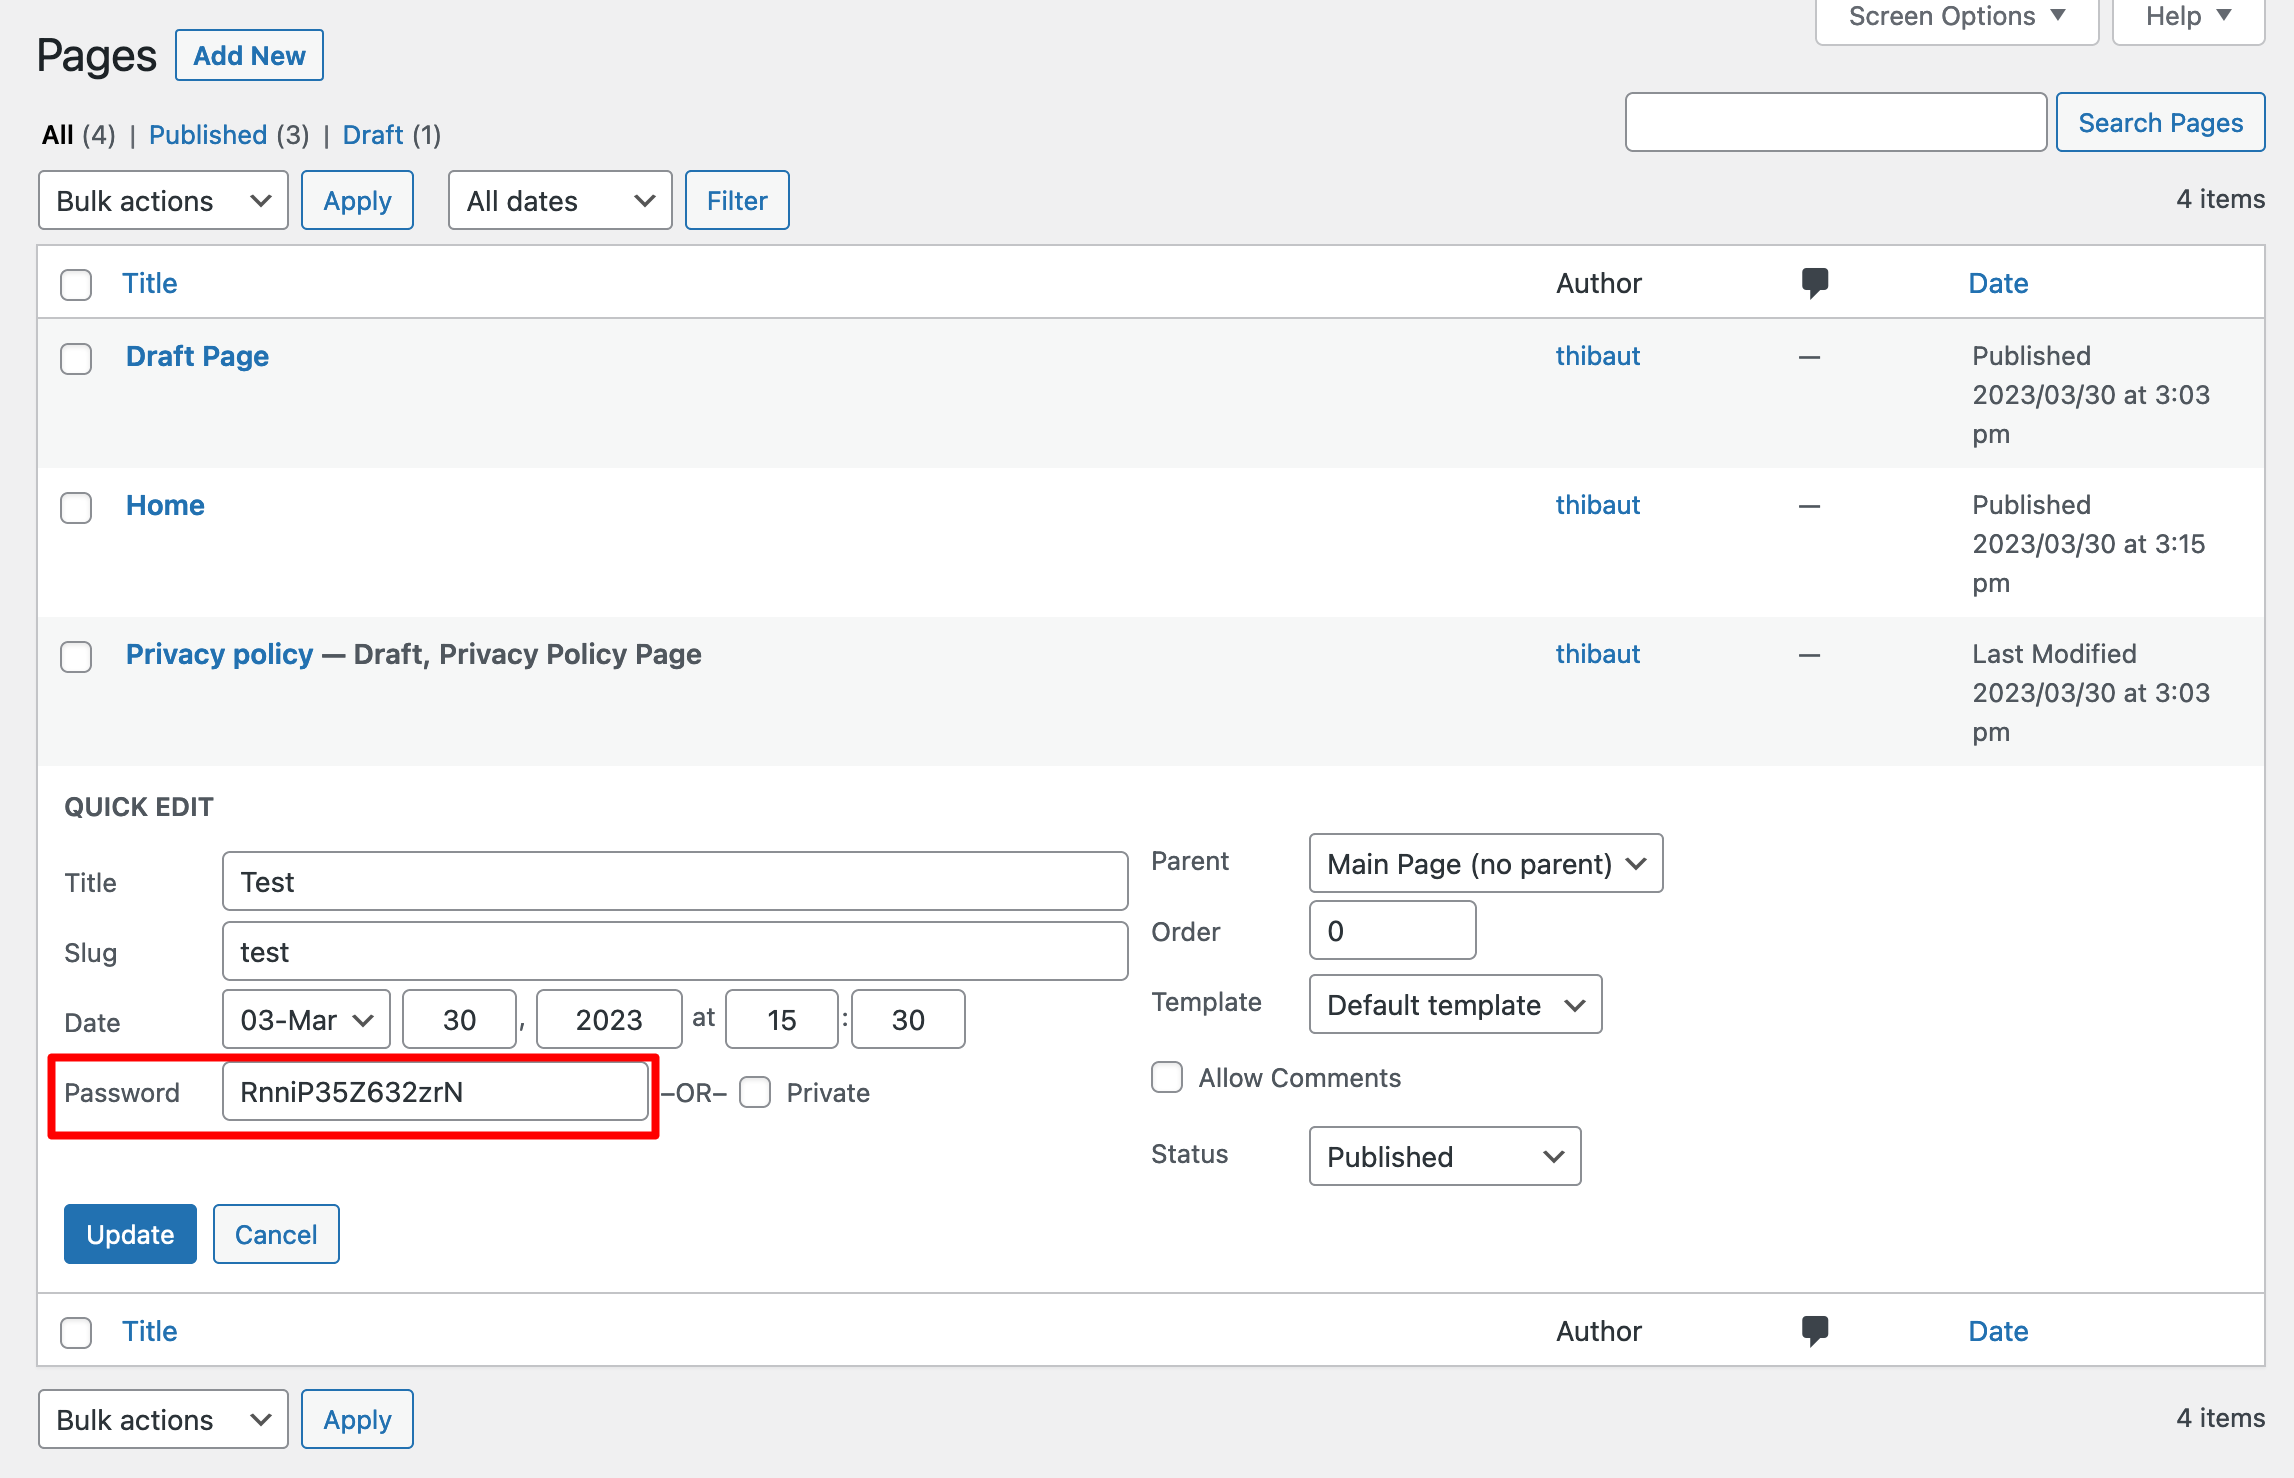
Finally, when you no longer want a WordPress page to be password-protected, make it publicly visible again:

Regarding password protection, the WordPress documentation states the following: “WordPress saves the password entered by visitors in its browser cookies, so they won’t have to re-enter it if they visit the same web page multiple times. Also, if multiple posts have the same password, visitors won’t have to re-enter the password for each post.”


Method 2: Design a password protected page on WordPress with the Passster plugin
The manual method (use of the WordPress content editor) will already give you a valuable hand in password-protecting a page quickly.
However, this method has some limitations. Without touching the code, you cannot, among other things:
- Change the visual appearance (design) of the field indicating to your visitor that he has to fill in a password. By default, it inherits the colors of your theme.
- Customize the texts displayed on your protected page (excerpt, button, etc.)
- Set the lifetime of a cookie: Before it expires, the visitor will no longer need to enter his password to view the page, as long as he has entered it once.
These limits are overcome by using a dedicated plugin. On the official directory, there are two main ones for protecting a page on WordPress with a password:
- PPWP – Password Protected Pages. This is the most popular one, with 30K+ active installations.
- Passster – Password Protection, which has 10K+ active installations.
Both plugins are frequently updated and have a similar overall rating.
As a user, I found Passster’s interface simpler and more pleasant to use, which is why I will focus on this one in the next few lines.
But frankly, it’s very comparable to PPWP, which you can also use without any problem.
Let’s start setting up Passster right away.
Step 1: Install and activate Passter
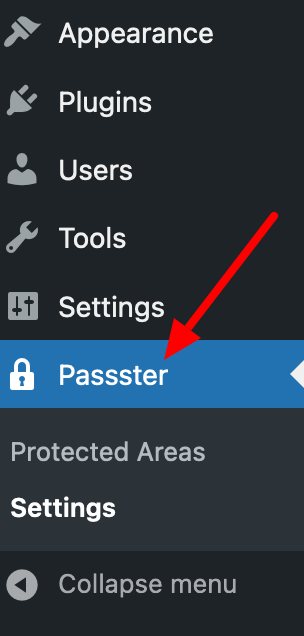
Go to Plugins > Add New, then type Passster (with three “s”) in the search bar.
Install and activate the plugin in order to benefit from its settings on your administration interface:

Step 2: Proceed to the general settings of the plugin
In Passter > Settings > General, enter the texts that will be displayed on the password protected page. You have control over:
- The title (Headline)
- The message to be displayed to your visitor, just above the field requesting the addition of a password (Instruction)
- The text contained in the field requesting the addition of a password (Placeholder)
- The error message that will be displayed if the visitor does not enter the correct password (Error)
- The button text (Button label)
- Settings on the automatic password generator offered by Passster. For example, you can specify the number of characters you want a password to contain.

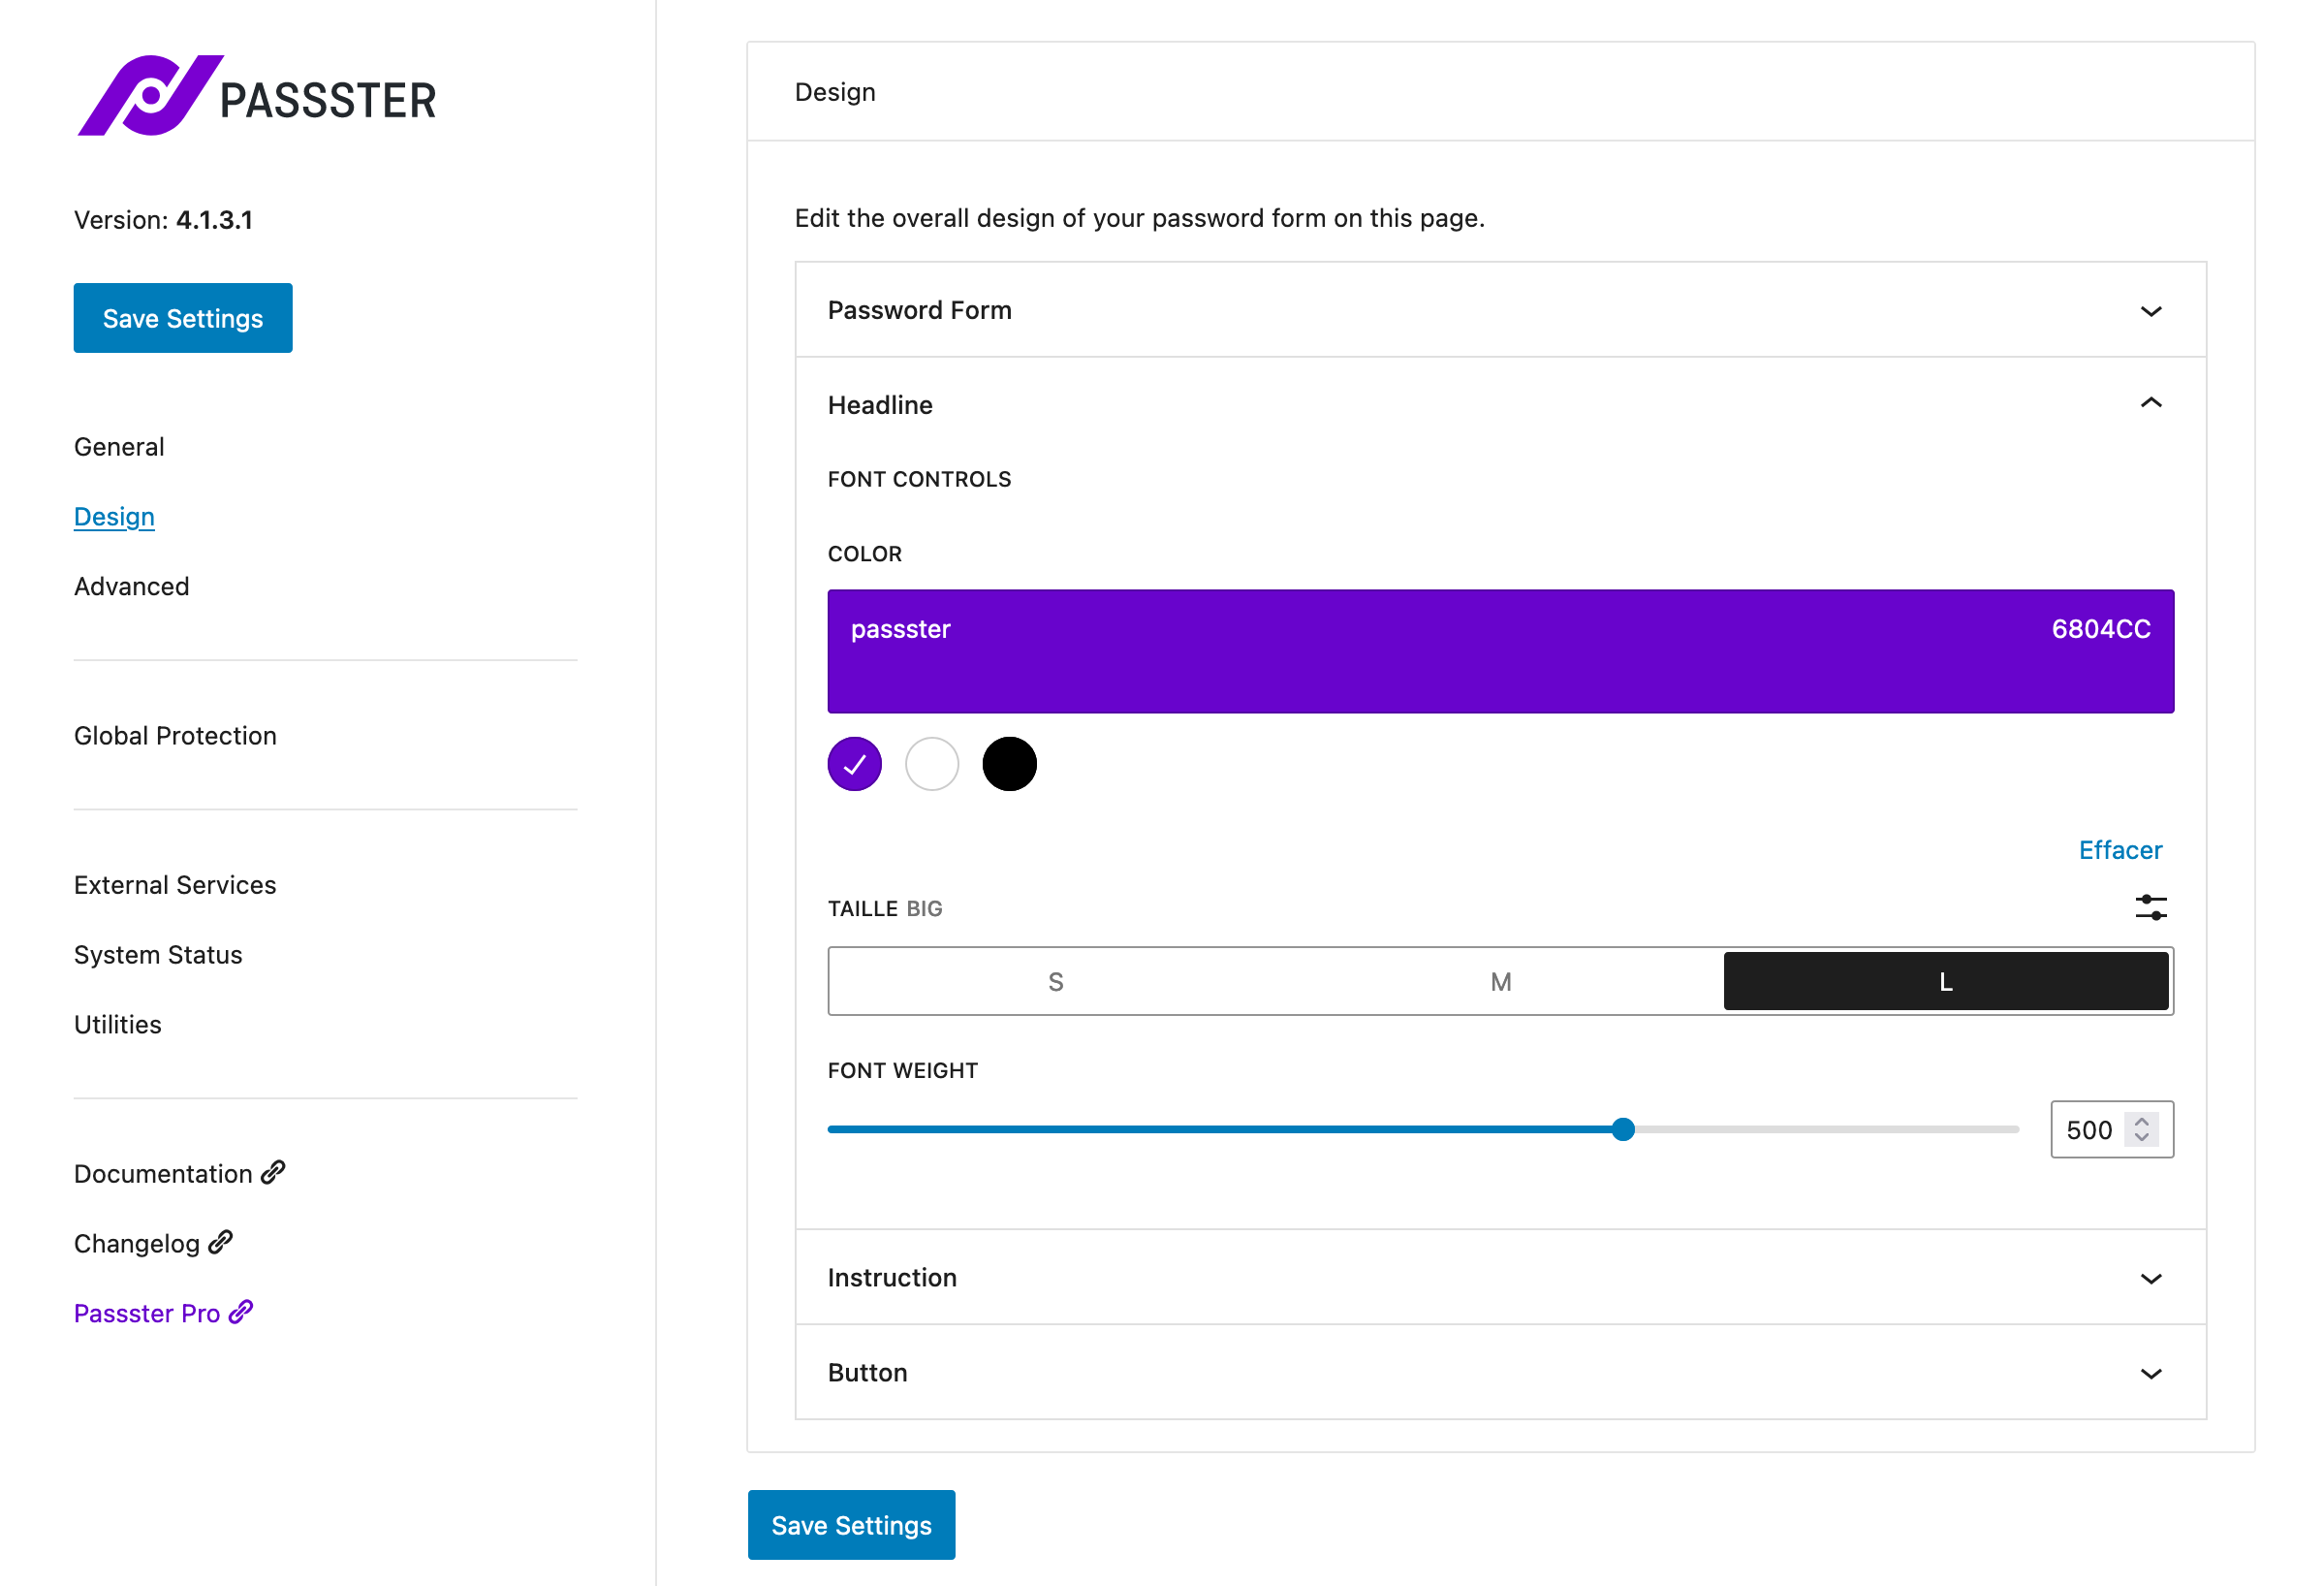
Step 3: Customize the design of your password-protected WordPress page
In Passster > Settings > Design, you can edit the design of the insert containing your password form.
You can edit the form, the title, the instructions, and the button by modifying the following:
- The colors
- The background
- The size of the text
- Margins
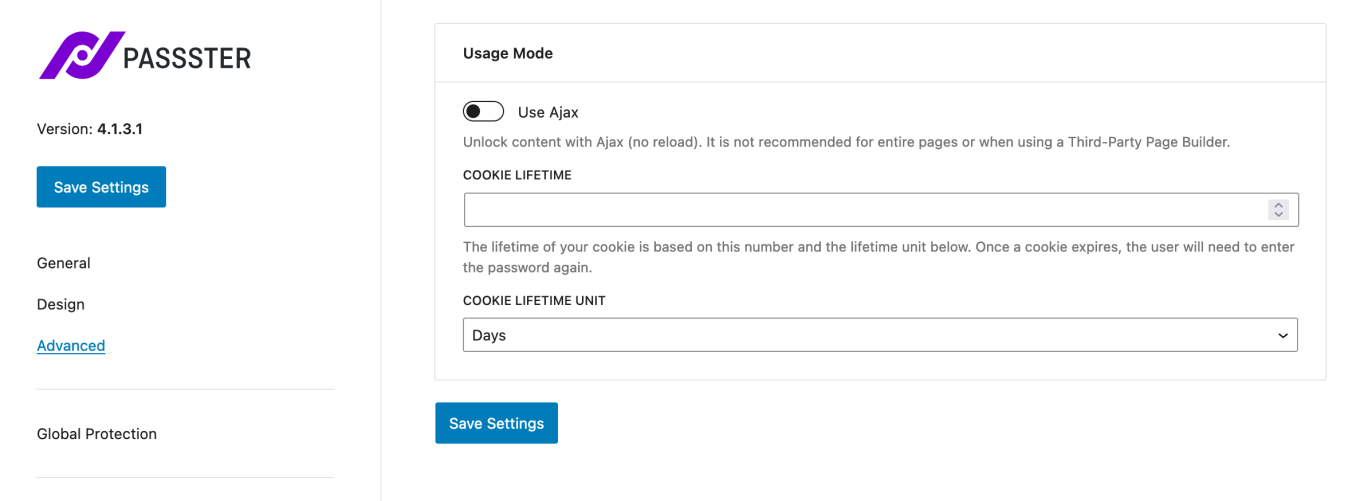
Step 4: Configure advanced settings
In the Settings > Passster > Advanced menu, you can define the lifetime of your cookies (days, hours, or minutes):
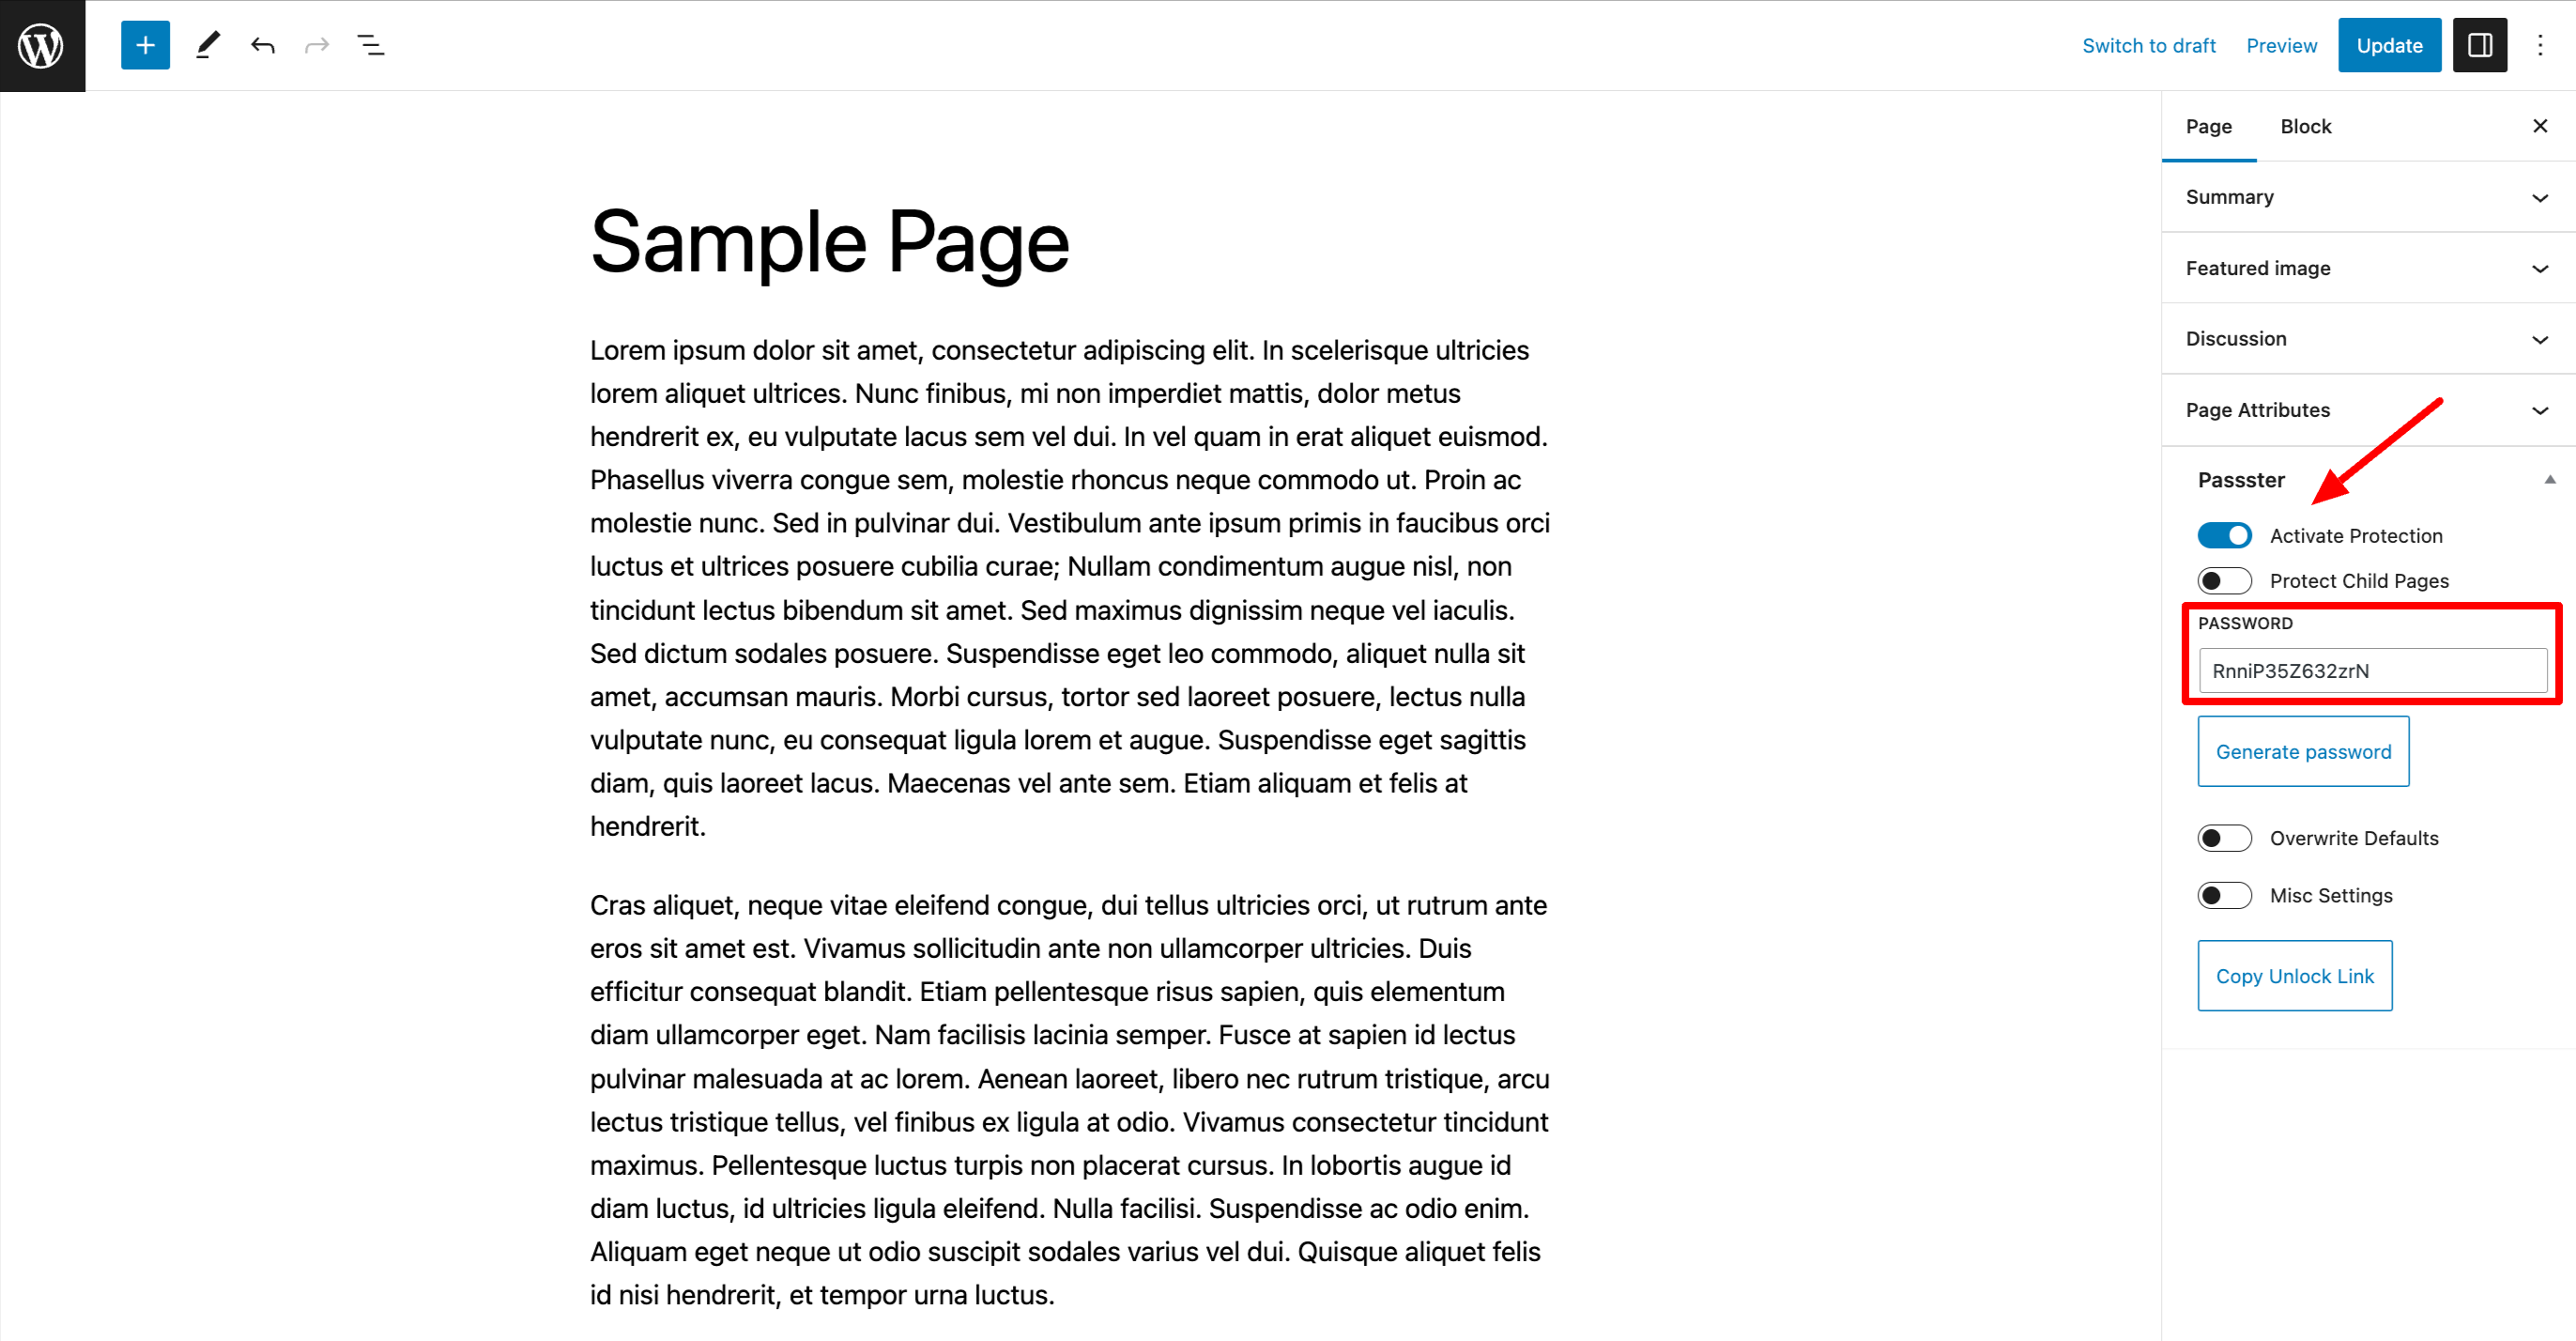
Step 5: Set the password for your page on the WordPress content editor
Once your general settings have been made, go to the page of your choice (existing or to be created).
At the bottom of the “Page” tab, you will find a box labeled “Passster”. Click on the “Activate Protection” button and enter the password of your choice. If you don’t know what to do, take advantage of the generator offered by the plugin by clicking on the “Generate Password” button:
Finish by clicking on the “Update” button (for an article already published) or on “Publish” for a content you just created.
Go to the online page to see the results of the races. Enter your password and there, magic:
Congratulations: you now know how to create a password-protected WordPress page with and without a plugin.
If you ever feel the need to push the protection a bit further, read the recommendations presented in the section below.
Taking WordPress password protection to the next level
In some cases, protecting a page or post may not be enough. What if you want to make your entire site invisible? Or just part of an article?
Briefly, here are some solutions that may help you:
- Want to password protect an entire WordPress site? Use Passster again and enable global protection in the following menu: Passster > Settings > Global Protection. If you want an alternative solution, turn to either Password Protected or PPWP.
- Want to password protect a category? Opt for PPWP or Password Protected Categories (paid, also works for your WooCommerce categories, if needed).
- Want to password-protect an item? Again, Passster or PPWP will do the trick. You can also use a plugin to create opt-in forms such as Thrive Leads.
The latter has an option called Content Locker to hide the content of an article with a short code. However, the user will not have to enter a password but his email address. 😉 Smart way to start building your email list.
Passwords and last words
In this article, you learned that on WordPress, a page can be password protected using two methods:
- Using the WordPress content editor
- Using a dedicated plugin like Passster
With this protection measure, you will increase the security and privacy of your pages, while allowing a restricted group of people to access content that is exclusive or intended for them first.
Is this a practice you’re familiar with using on your WordPress site? Let us know what you think by posting a comment.