


A beautiful photo often makes a lasting impression. On an ecommerce site, for example, it’s an essential element for presenting your product, making it look appealing, and encouraging a purchase.
However, a beautiful photo can also be a false friend. The heavier they are, the more likely images are to slow down the loading speed of your pages.


Imagine a WordPress site with hundreds of overweight photos. The negative impact on the user experience and conversions, in particular, can be serious.
Fortunately, there are solutions like the Smush plugin that allow you to optimize your overly large images.
By the end of this article, you’ll know this plugin inside and out and how to set it up in detail. You will also know if you should use it.
Overview
- What is Smush on WordPress?
- What are Smush’s main options?
- Why is the optimization of your images important?
- How to configure the Smush plugin on WordPress
- How to compress your images on WordPress with Smush
- What are the other options of Smush in the free version?
- Smush Pro: features in the paid version
- What are the alternatives to WP Smush?
- Our final opinion on Smush


What is Smush on WordPress?

Smush is a WordPress image optimization plugin. It allows you to compress your images from the dashboard of your website without loss of quality that is visible to the naked eye. Its main benefit lies in improving the loading time of your pages.
With 1M+ active installations, it’s one of the most popular plugins for optimizing images in the official directory.
It’s also the best rated, with an overall rating of out of nearly 6,000 reviews at the time of writing.
Also known as WP Smush, the plugin has been developed and maintained since 2014 by one of the strongest companies in the WordPress ecosystem: WPMU DEV.
Present in the circuit since 2007, WPMU DEV is a platform that offers many tools for developers, freelancers, and agencies. To date, it offers its 49,000 customers:
- Plugins such as Smush, as well as Hummingbird (Performance), Defender (Security), SmartCrawl (SEO), Snapshot (Backups), Forminator (Form creation), etc.
- A hosting solution
- A tool to manage the maintenance of your WordPress sites, called The Hub
In order to attract a good number of users, WP Smush.it — its former name — has focused on two main aspects:
- The user experience: Smush offers a readable and easy-to-use interface. A few clicks are enough to set up and use the plugin.
- A large number of options. This is true even in the free version. Let’s explore those now.
What are Smush’s main options?
In its free version, the Smush plugin on WordPress offers the following features (a non-exhaustive list):
- Bulk optimization of your images
- Lossy and lossless compression formats. In lossy, the image loses some quality, but the reduction in image size is greater than in lossless.
- An option to automatically compress your images
- Lazy load, in order to load and display your images only when your visitor scrolls to them. This option should be qualified, however, since WordPress activates lazy image load by default since its version 5.5.
- No limit on the number of images to optimize. The only restriction is their weight (5MB maximum).
- Compression of your images in all the directories of your site (not only in the
uploadsfolder). - Multisite accounting
- Detecting images that are too large
- The option to define a maximum size (width and height) to upload images
Why is the optimization of your images important?
Before we get to the technical part, related to the configuration of the WP Smush plugin, I would like to draw your attention to the importance of optimizing your images.
It is essential that you get into the habit of reducing their weight for the following reasons:
- You will offer a better user experience to your visitors, who will appreciate viewing images that load quickly.
- You will improve the loading speed of your pages. The more unoptimized resources a site has, the slower it runs. And since images can be responsible for nearly 50% of the weight of a web page, you know what you have to do. If you haven’t heard, one out of two people (40%) leave a website if it takes more than 3 seconds to load.
- You will have a better chance of improving your conversions (an action you want your user to perform, like buying a product). For your information, the conversion rate drops by an average of 4.42% each time your loading time is delayed by one second.
- You will facilitate the work of search engines like Google (a fast site is easier to explore and index). Moreover, Google takes loading speed into account when ranking pages, even if the impact of loading time remains low.
- You will preserve the efficiency of your hosting server, consuming less bandwidth and storage space.


Well, that’s it for the theoretical explanations. It’s time to get your hands dirty, as they say. Let’s go and set up Smush, but without coding, I assure you!
How to configure the Smush plugin on WordPress
Step 1: Install and activate the plugin
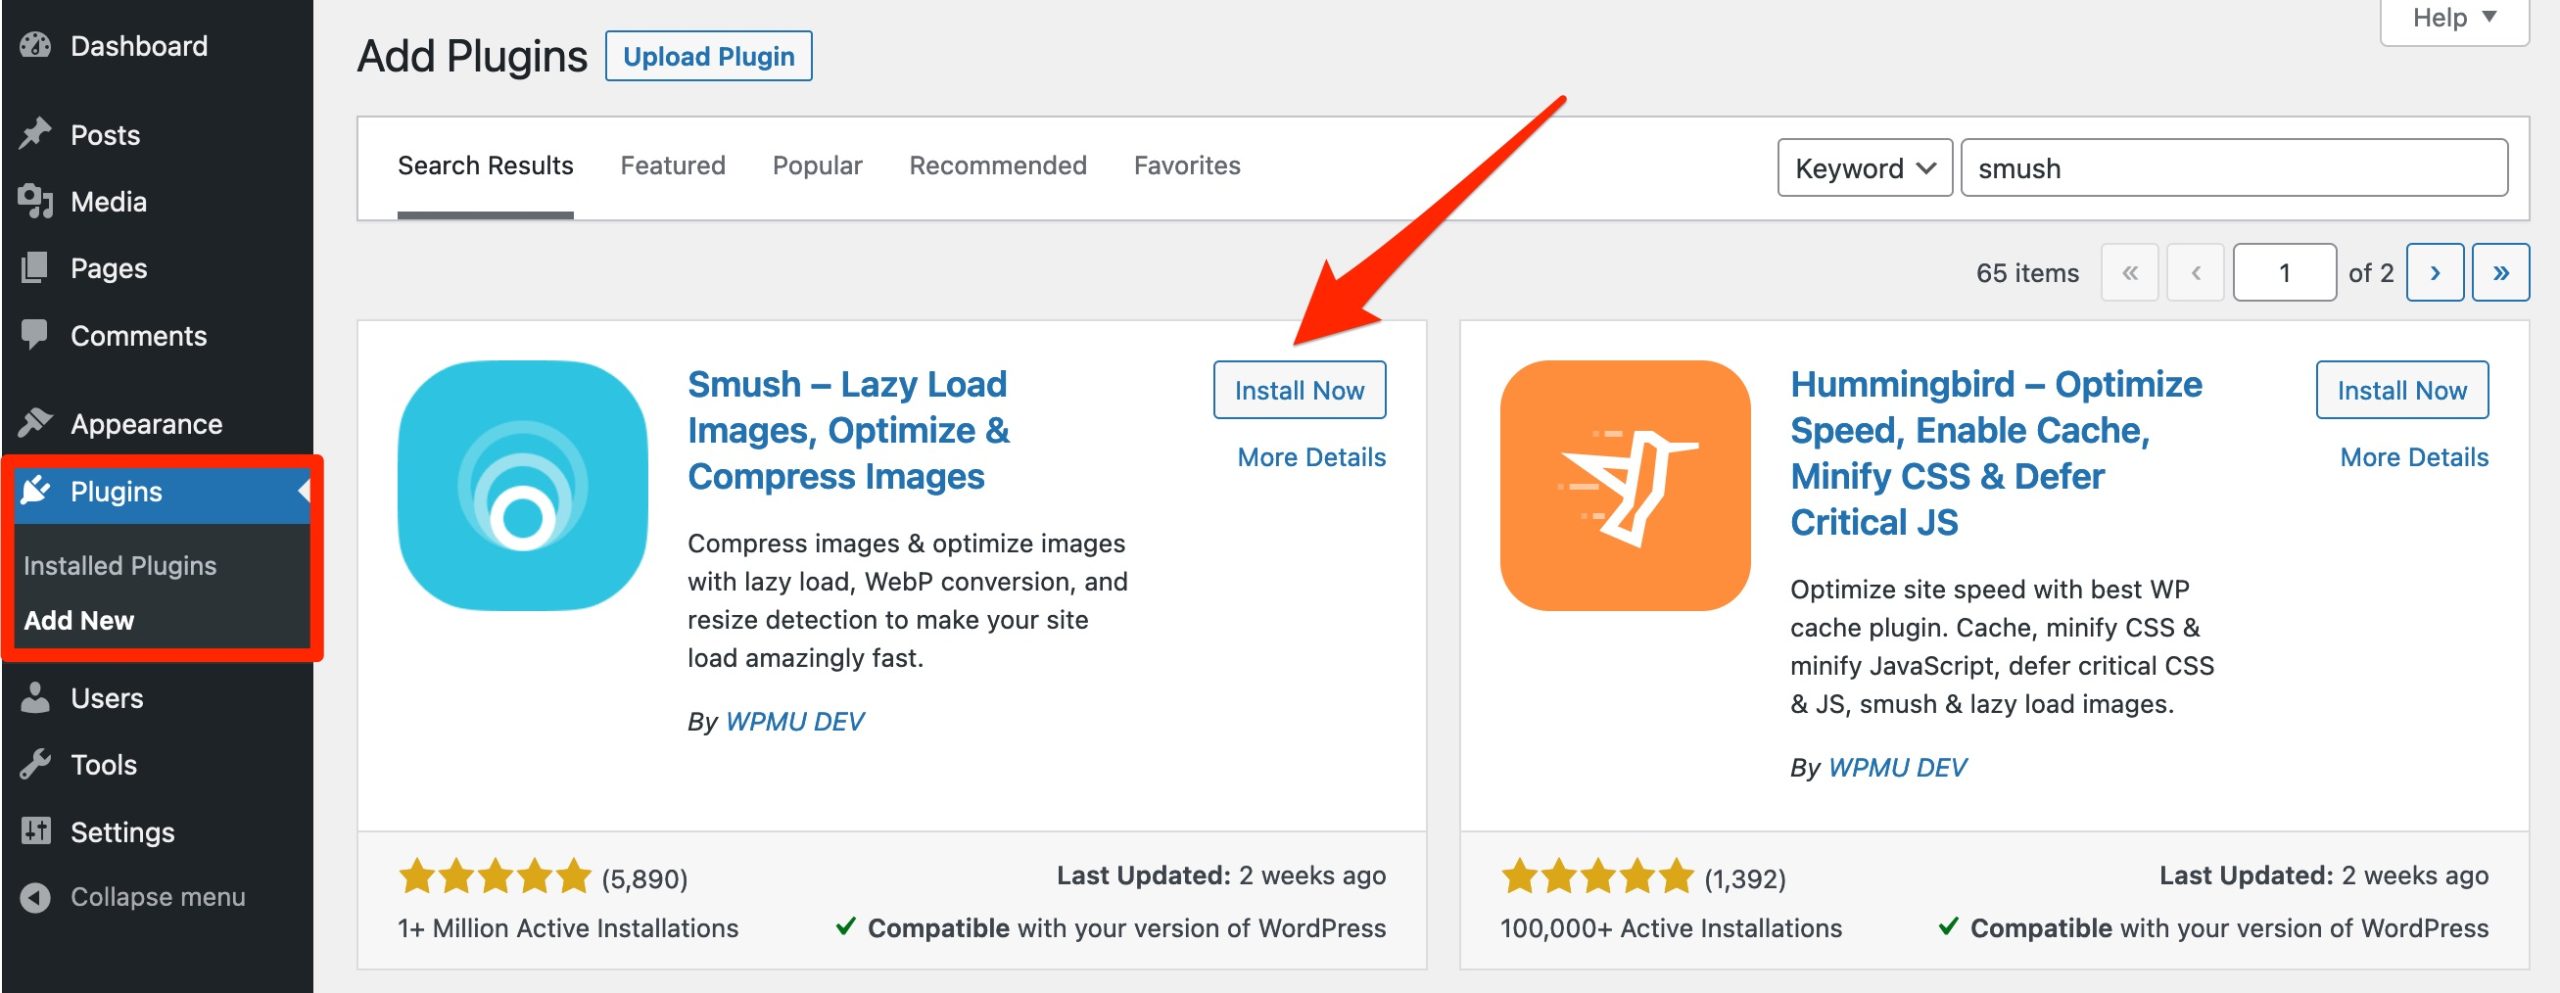
First, install the Smush plugin on your WordPress dashboard. Go to the Plugins > Add New menu. In the search bar, type “smush” and click on “Install Now”:
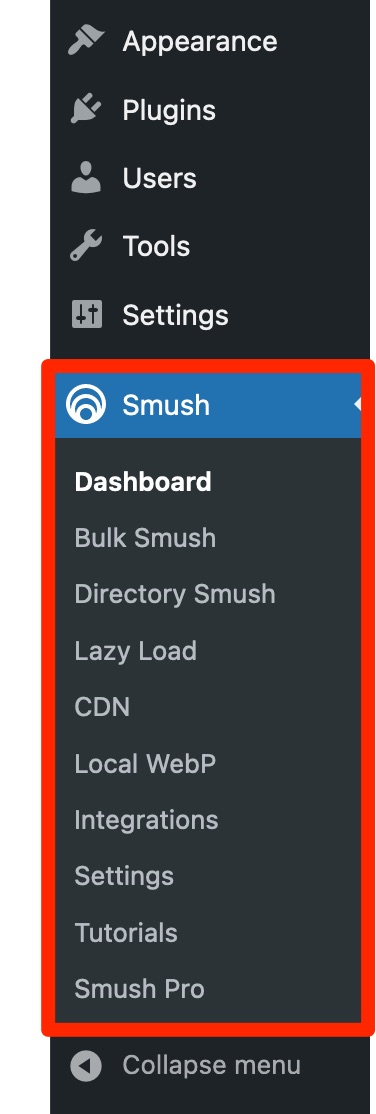
Finish the operation by activating the plugin. Now you will see a new menu called “Smush” in your left sidebar.
It contains all the options and settings of the plugin, in several submenus (Dashboard, Bulk Smush, Directory Smush, Lazy Load, etc.):

Step 2: Define the basic settings
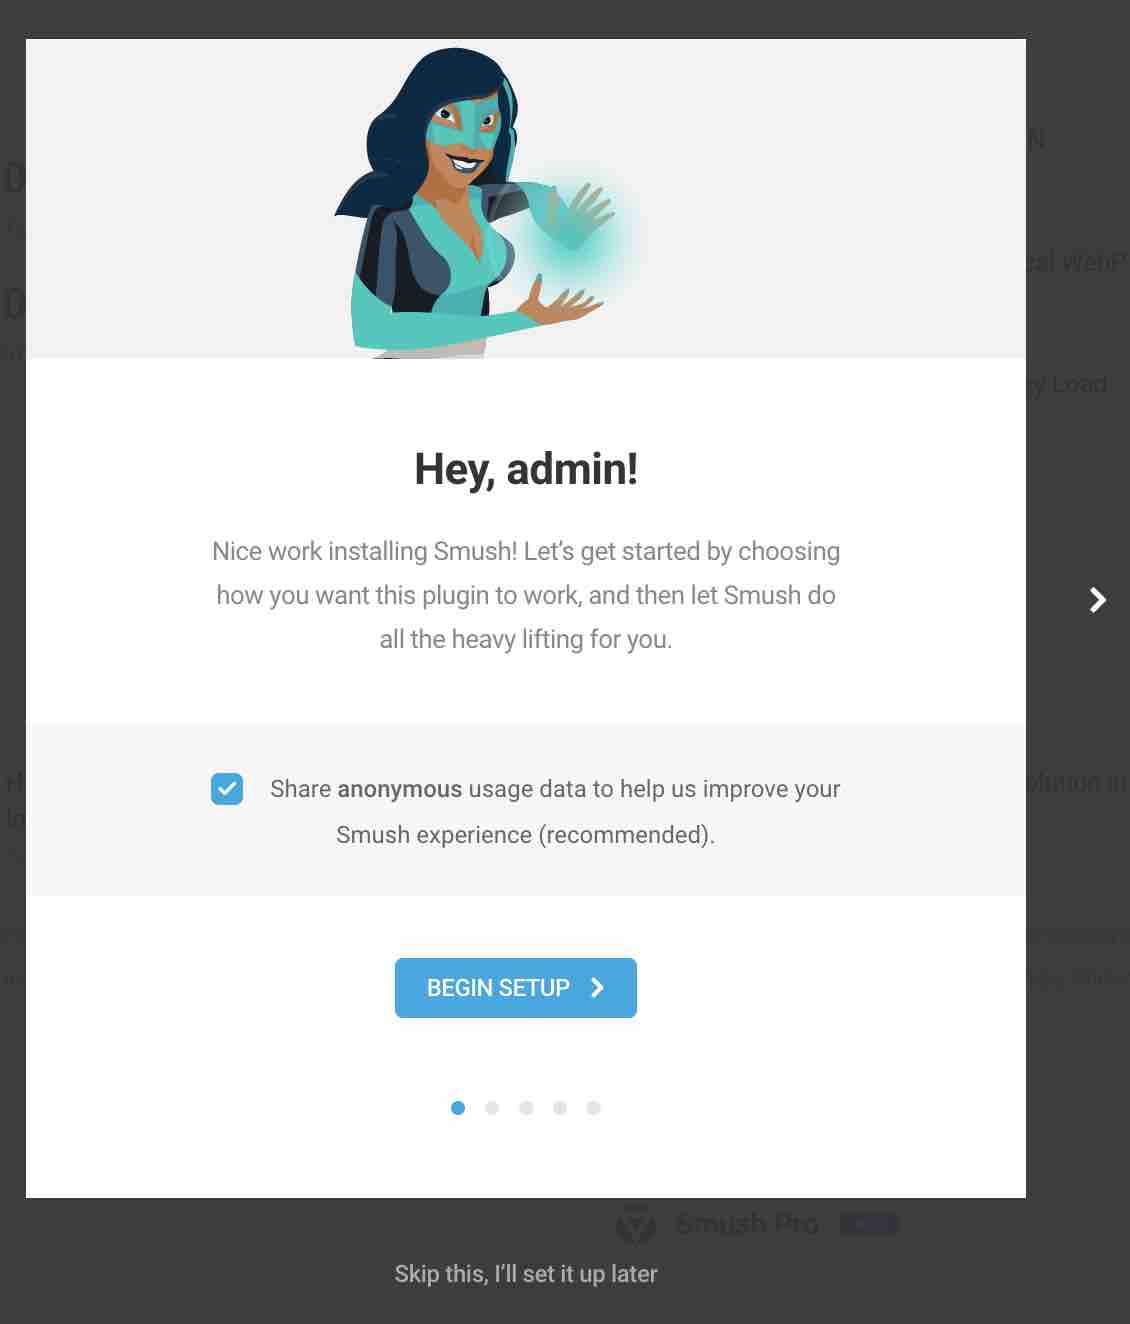
Whichever menu you choose to browse, a highlighted window should appear on your screen.
This is a configuration wizard that you can use to fine-tune your initial settings. You can also skip this step and choose your settings later, if you prefer.
Smush recommends that you first share your usage data with them to improve the plugin. Check the corresponding box if you like, then click on “Begin Setup”:

In the initial set-up, Smush offers you several types of settings, which you can activate with one click:
- Automatic compression of images as soon as you upload them to your WordPress site
- Advanced compression, for twice the compression gain as classic compression, according to Smush. To do this, the plugin uses lossy compression.
- Removal of the metadata of your images (EXIF Metadata), in order to reduce the size of your files (without touching the SEO metadata). This concerns, for example, the place where the picture was taken, the serial number of your camera, etc. This is useful if you’re a photographer, but for everyone else, it’s better to remove this data.
- Lazy load
Smush activates these four settings by default. You can just leave this as is, unless you are already using a plugin with a similar feature.
For example, if you are using the WP Rocket caching plugin, there is no need to activate the “Lazy Load” option. WP Rocket already offers this feature (for images, iframes, embeds, etc.), so it would be a duplicate.
When you’re satisfied with everything, click on “Finish Setup Wizard”:

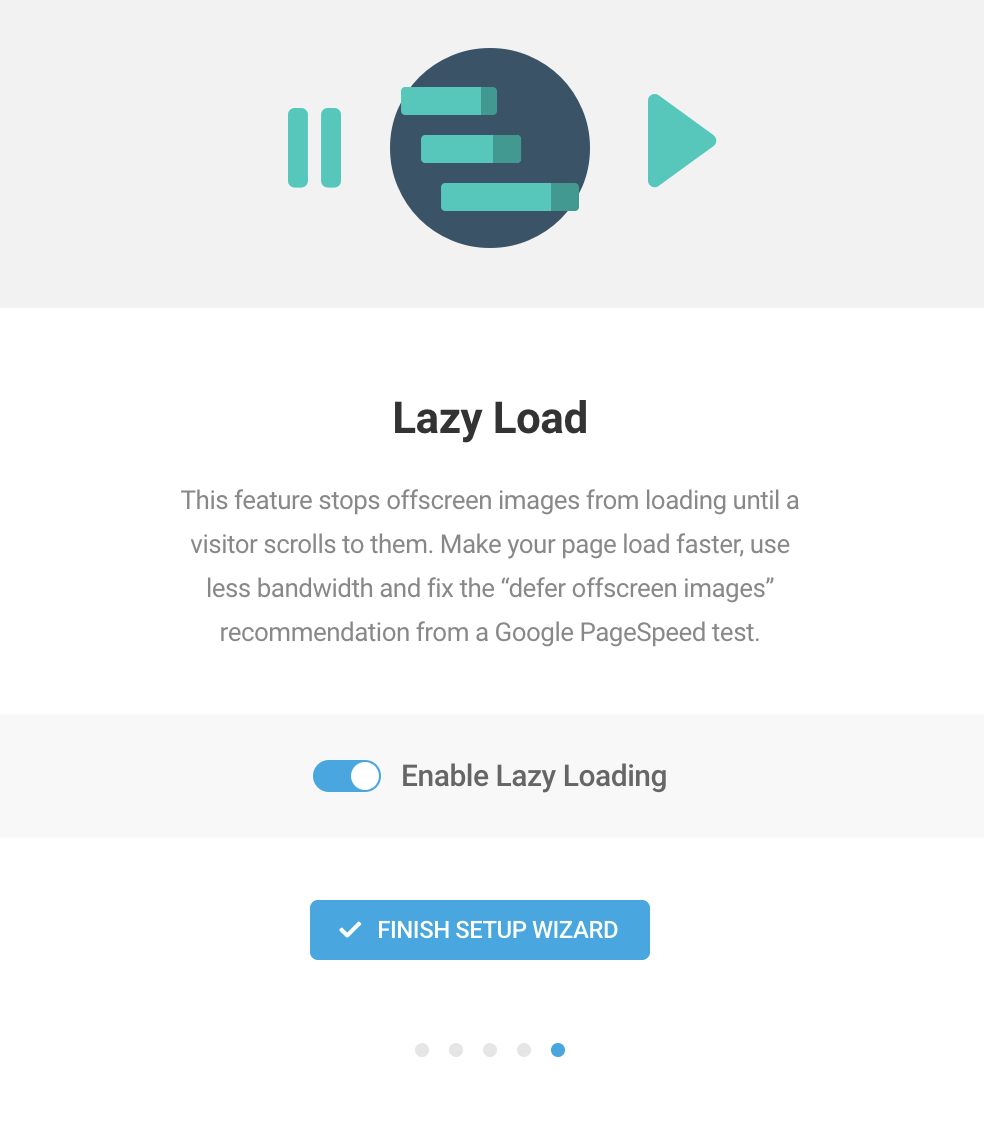
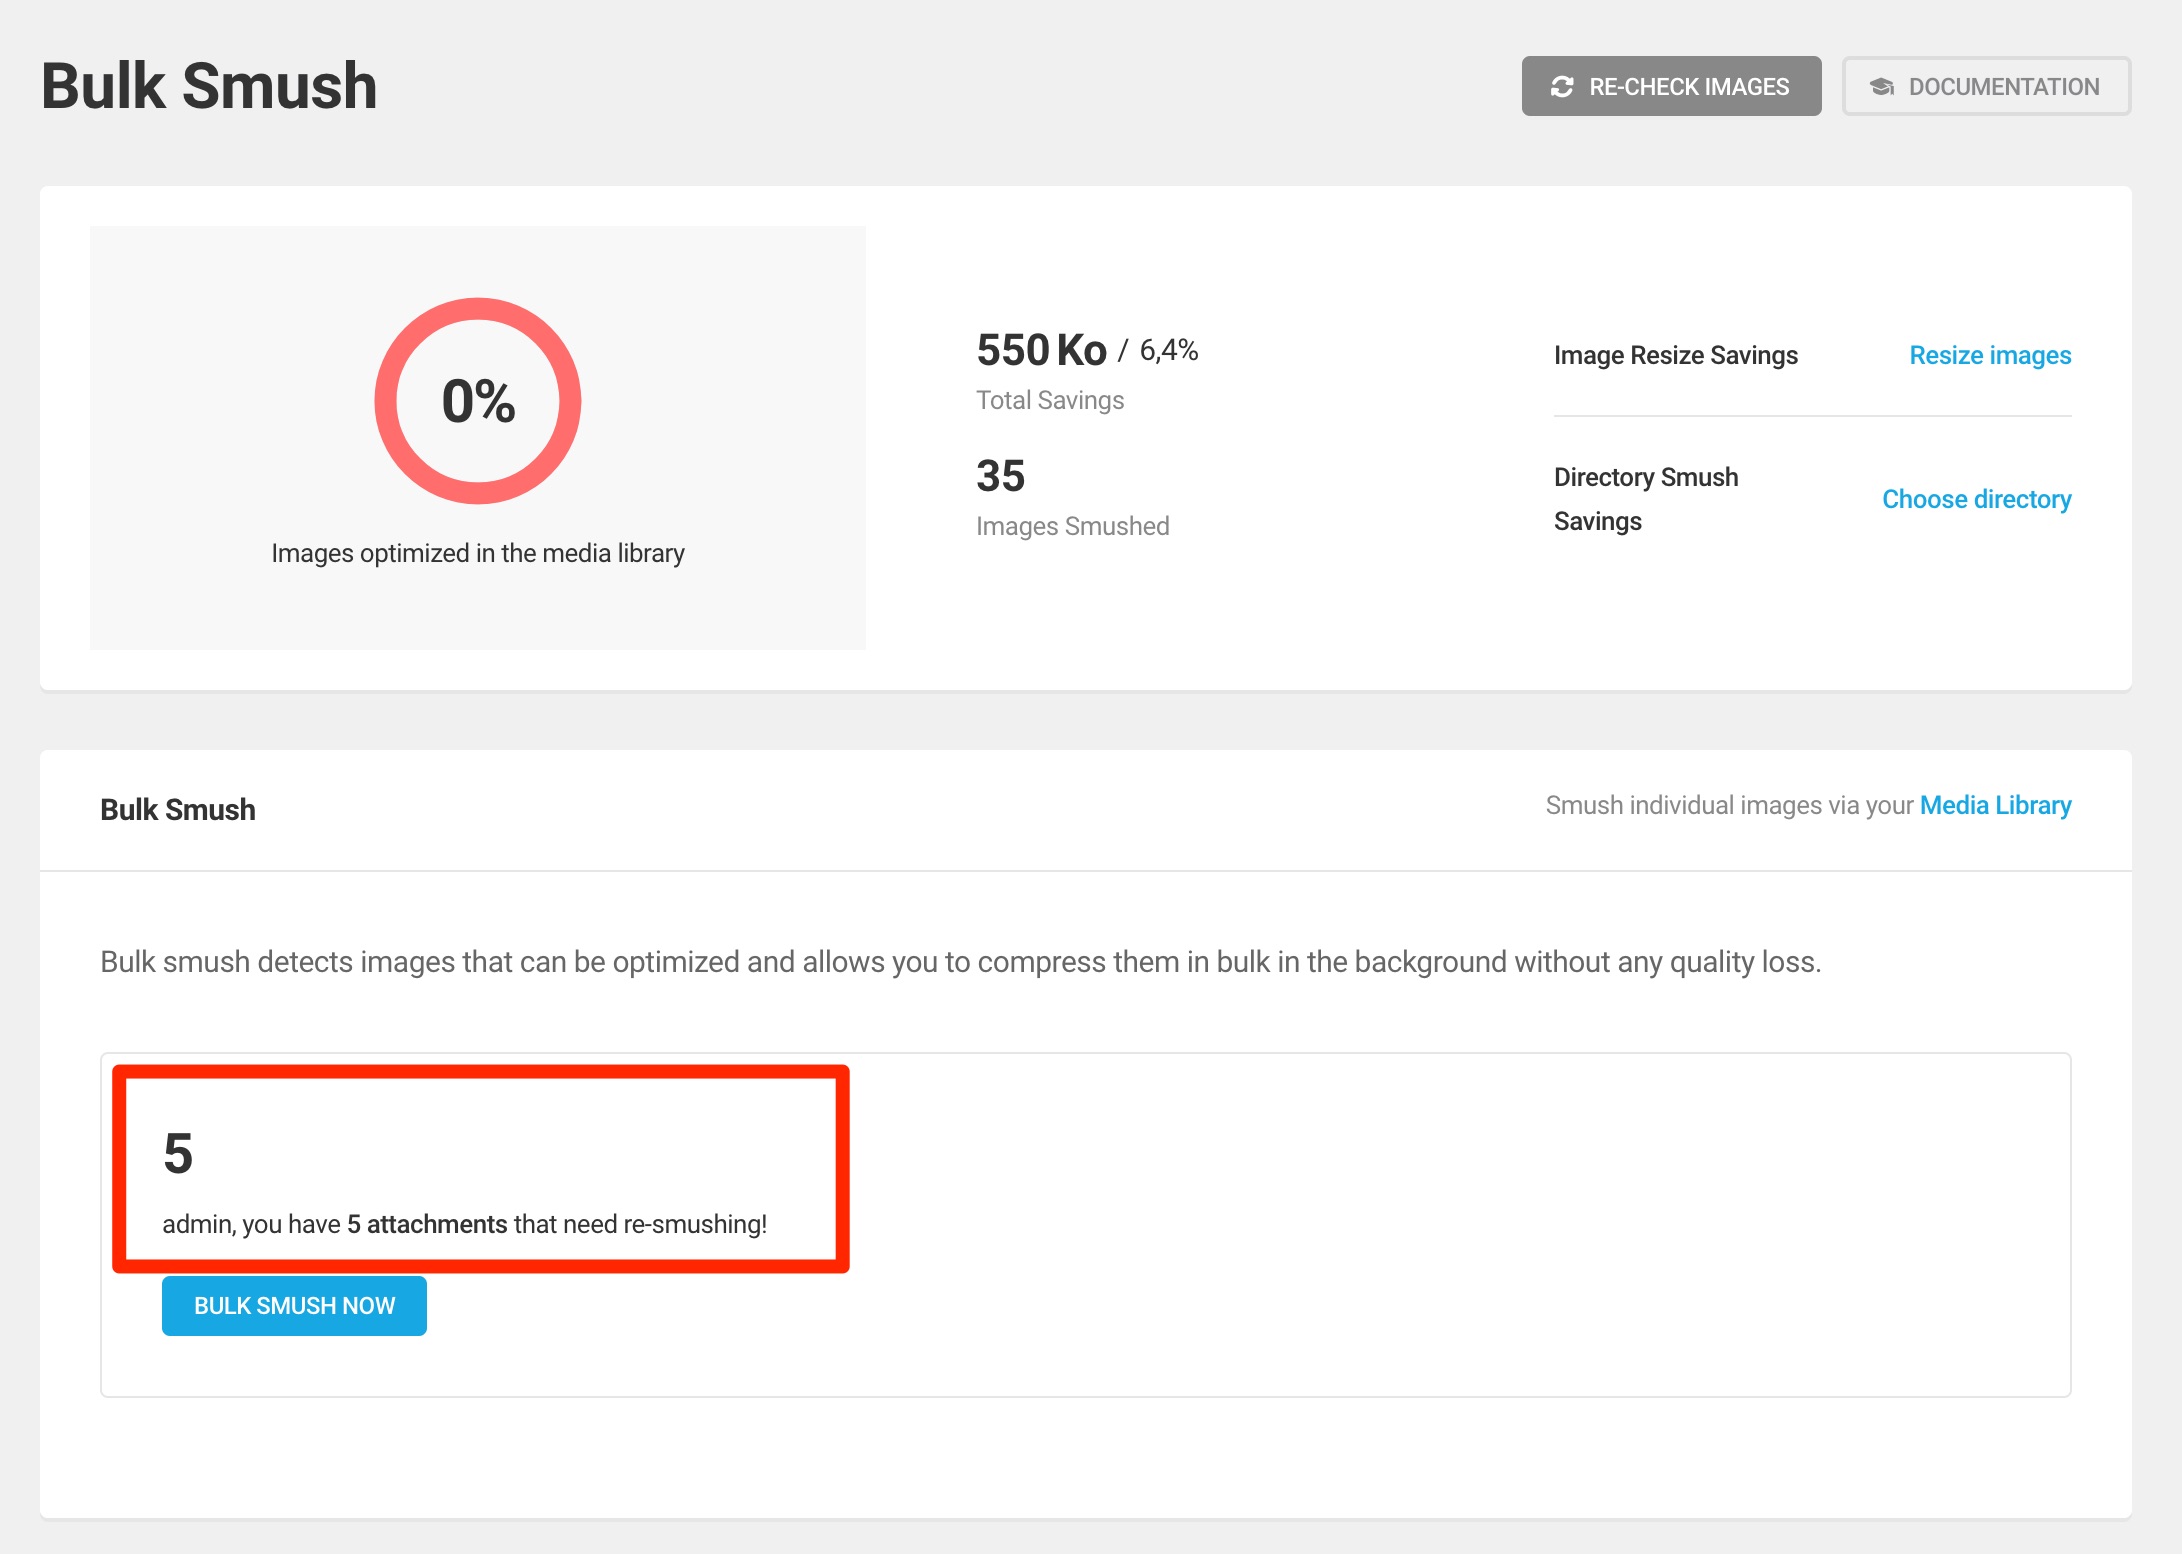
Smush redirects you to its “Bulk Smush” menu. In my case, Smush tells me that it has detected five images in my Media Library that need optimization:
Learn how to proceed to compress them all at once just below.
How to compress your images on WordPress with Smush
How to optimize your images in bulk
When you are in the “Bulk Smush” menu, you can first change several settings (in the “Settings” insert) before optimizing your images in bulk. Here is what you can set:
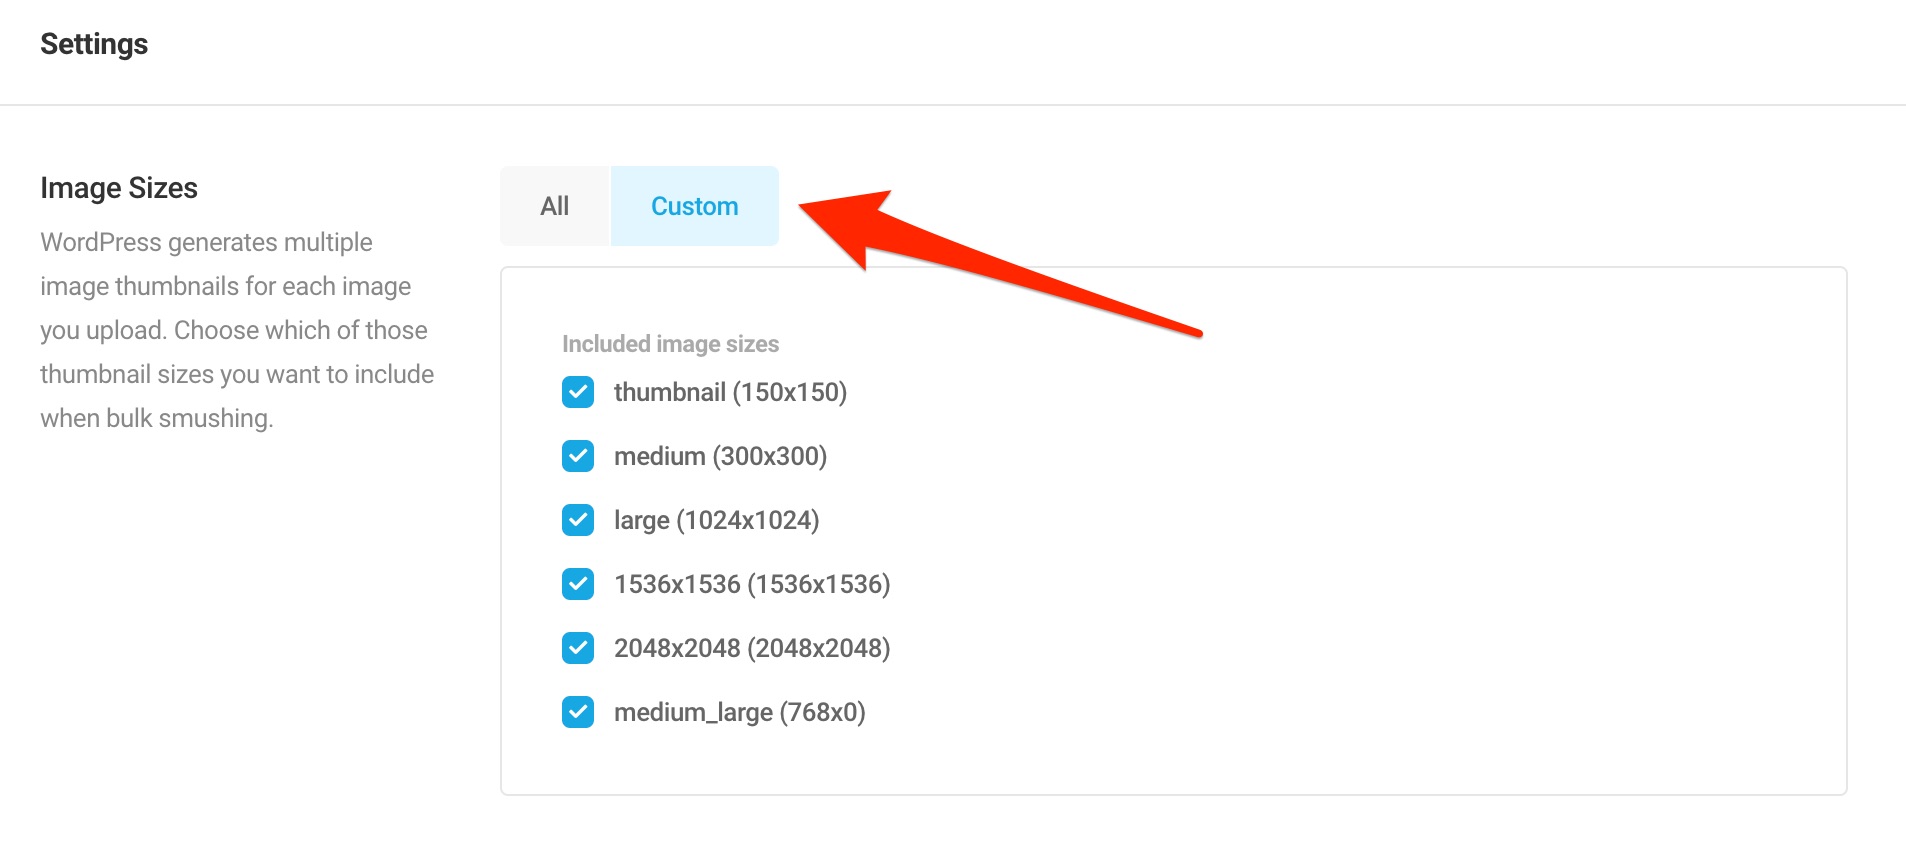
- Image Sizes. By default, WordPress generates thumbnails of different sizes for your images when you upload them to your Media Library. You can prevent certain image sizes from being compressed by clicking on “Custom.”
- Automatic Compression: your images will be automatically compressed when you upload them. This is what we saw in the step about the configuration wizard.
- Super-Smush is used to optimize your images with lossy compression. If you have a lot of images on your site, I advise you to activate this option to improve the loading time of your pages. If you only have a few pictures to offer to your visitors, you can do without it because the compression causes a little loss of quality.
- Metadata: what we have just saw in the configuration wizard, concerning EXIF metadata.
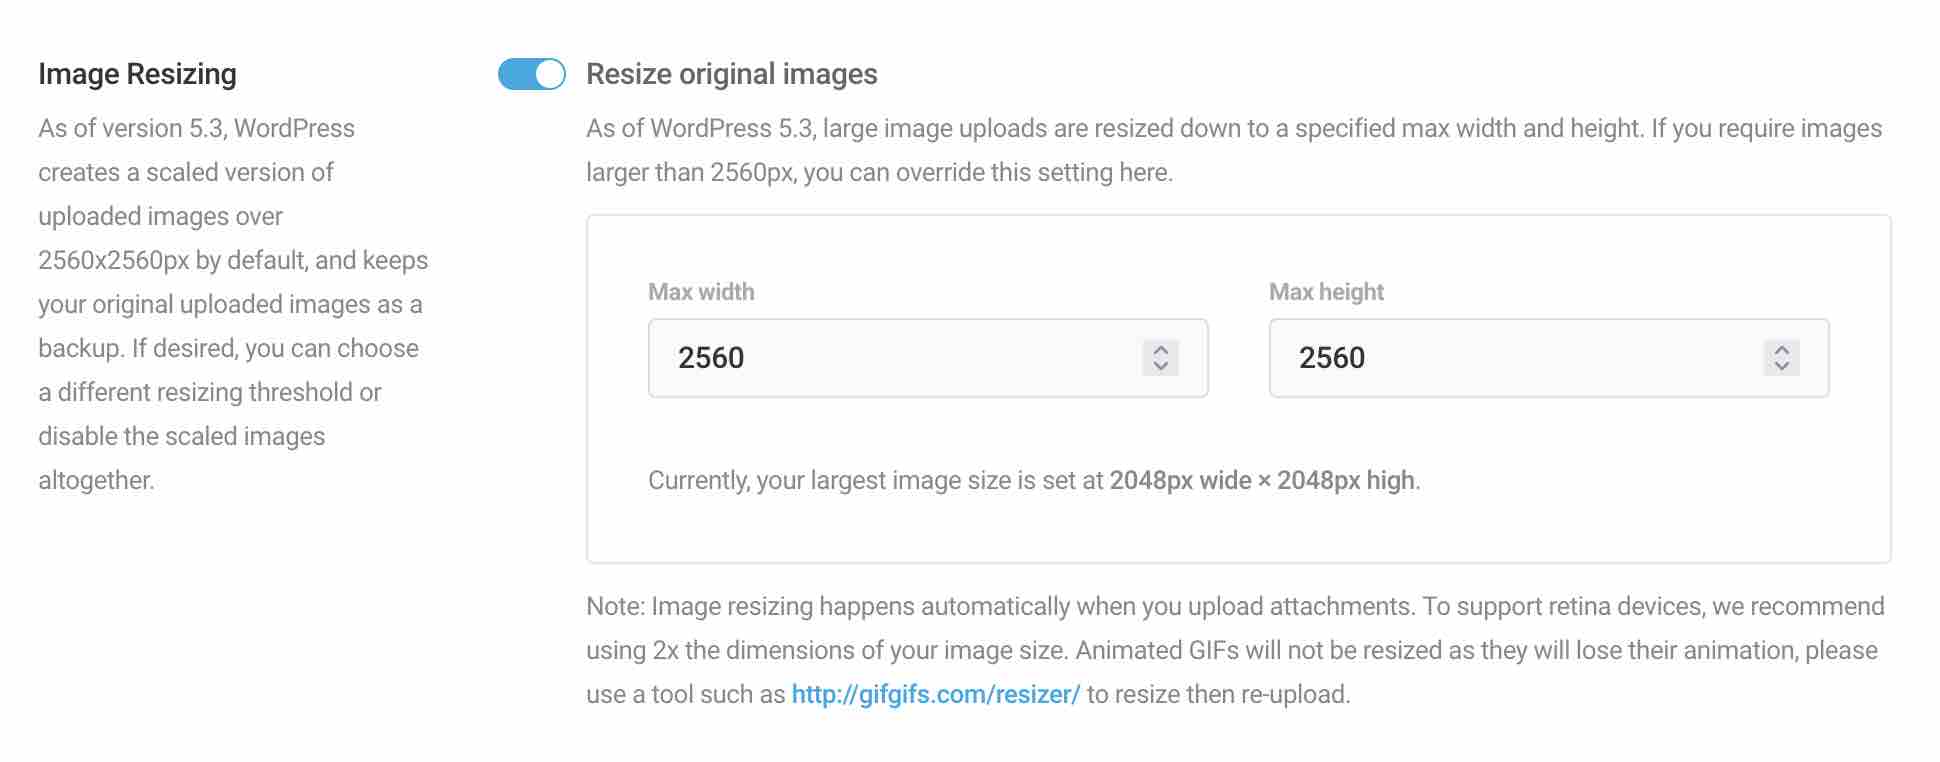
- Image Resizing. By default, WordPress resizes your images when you upload them, so that they don’t exceed the following size: 2560 pixels (in width and height). If you want to be able to upload images in a larger size so that WordPress doesn’t resize them to 2560 pixels, click on “Resize Original Images” and enter a value of your choice (e.g. 4000 pixels X 4000 pixels). This can be useful if you are used to uploading high resolution images, but be careful not to overdo it!
- Original Images. By default, Smush does not compress your original images during a bulk optimization: it compresses all image sizes produced by WordPress that are associated with your original image (e.g. thumbnails). Check the “Compress original images” box to have it compress your original images.
- Email notification: by checking this box, you will receive an email notification when a bulk optimization takes place.
- Bulk restore allows you to restore your original thumbnails.
When you are done, save by clicking on the blue “Save changes” button.
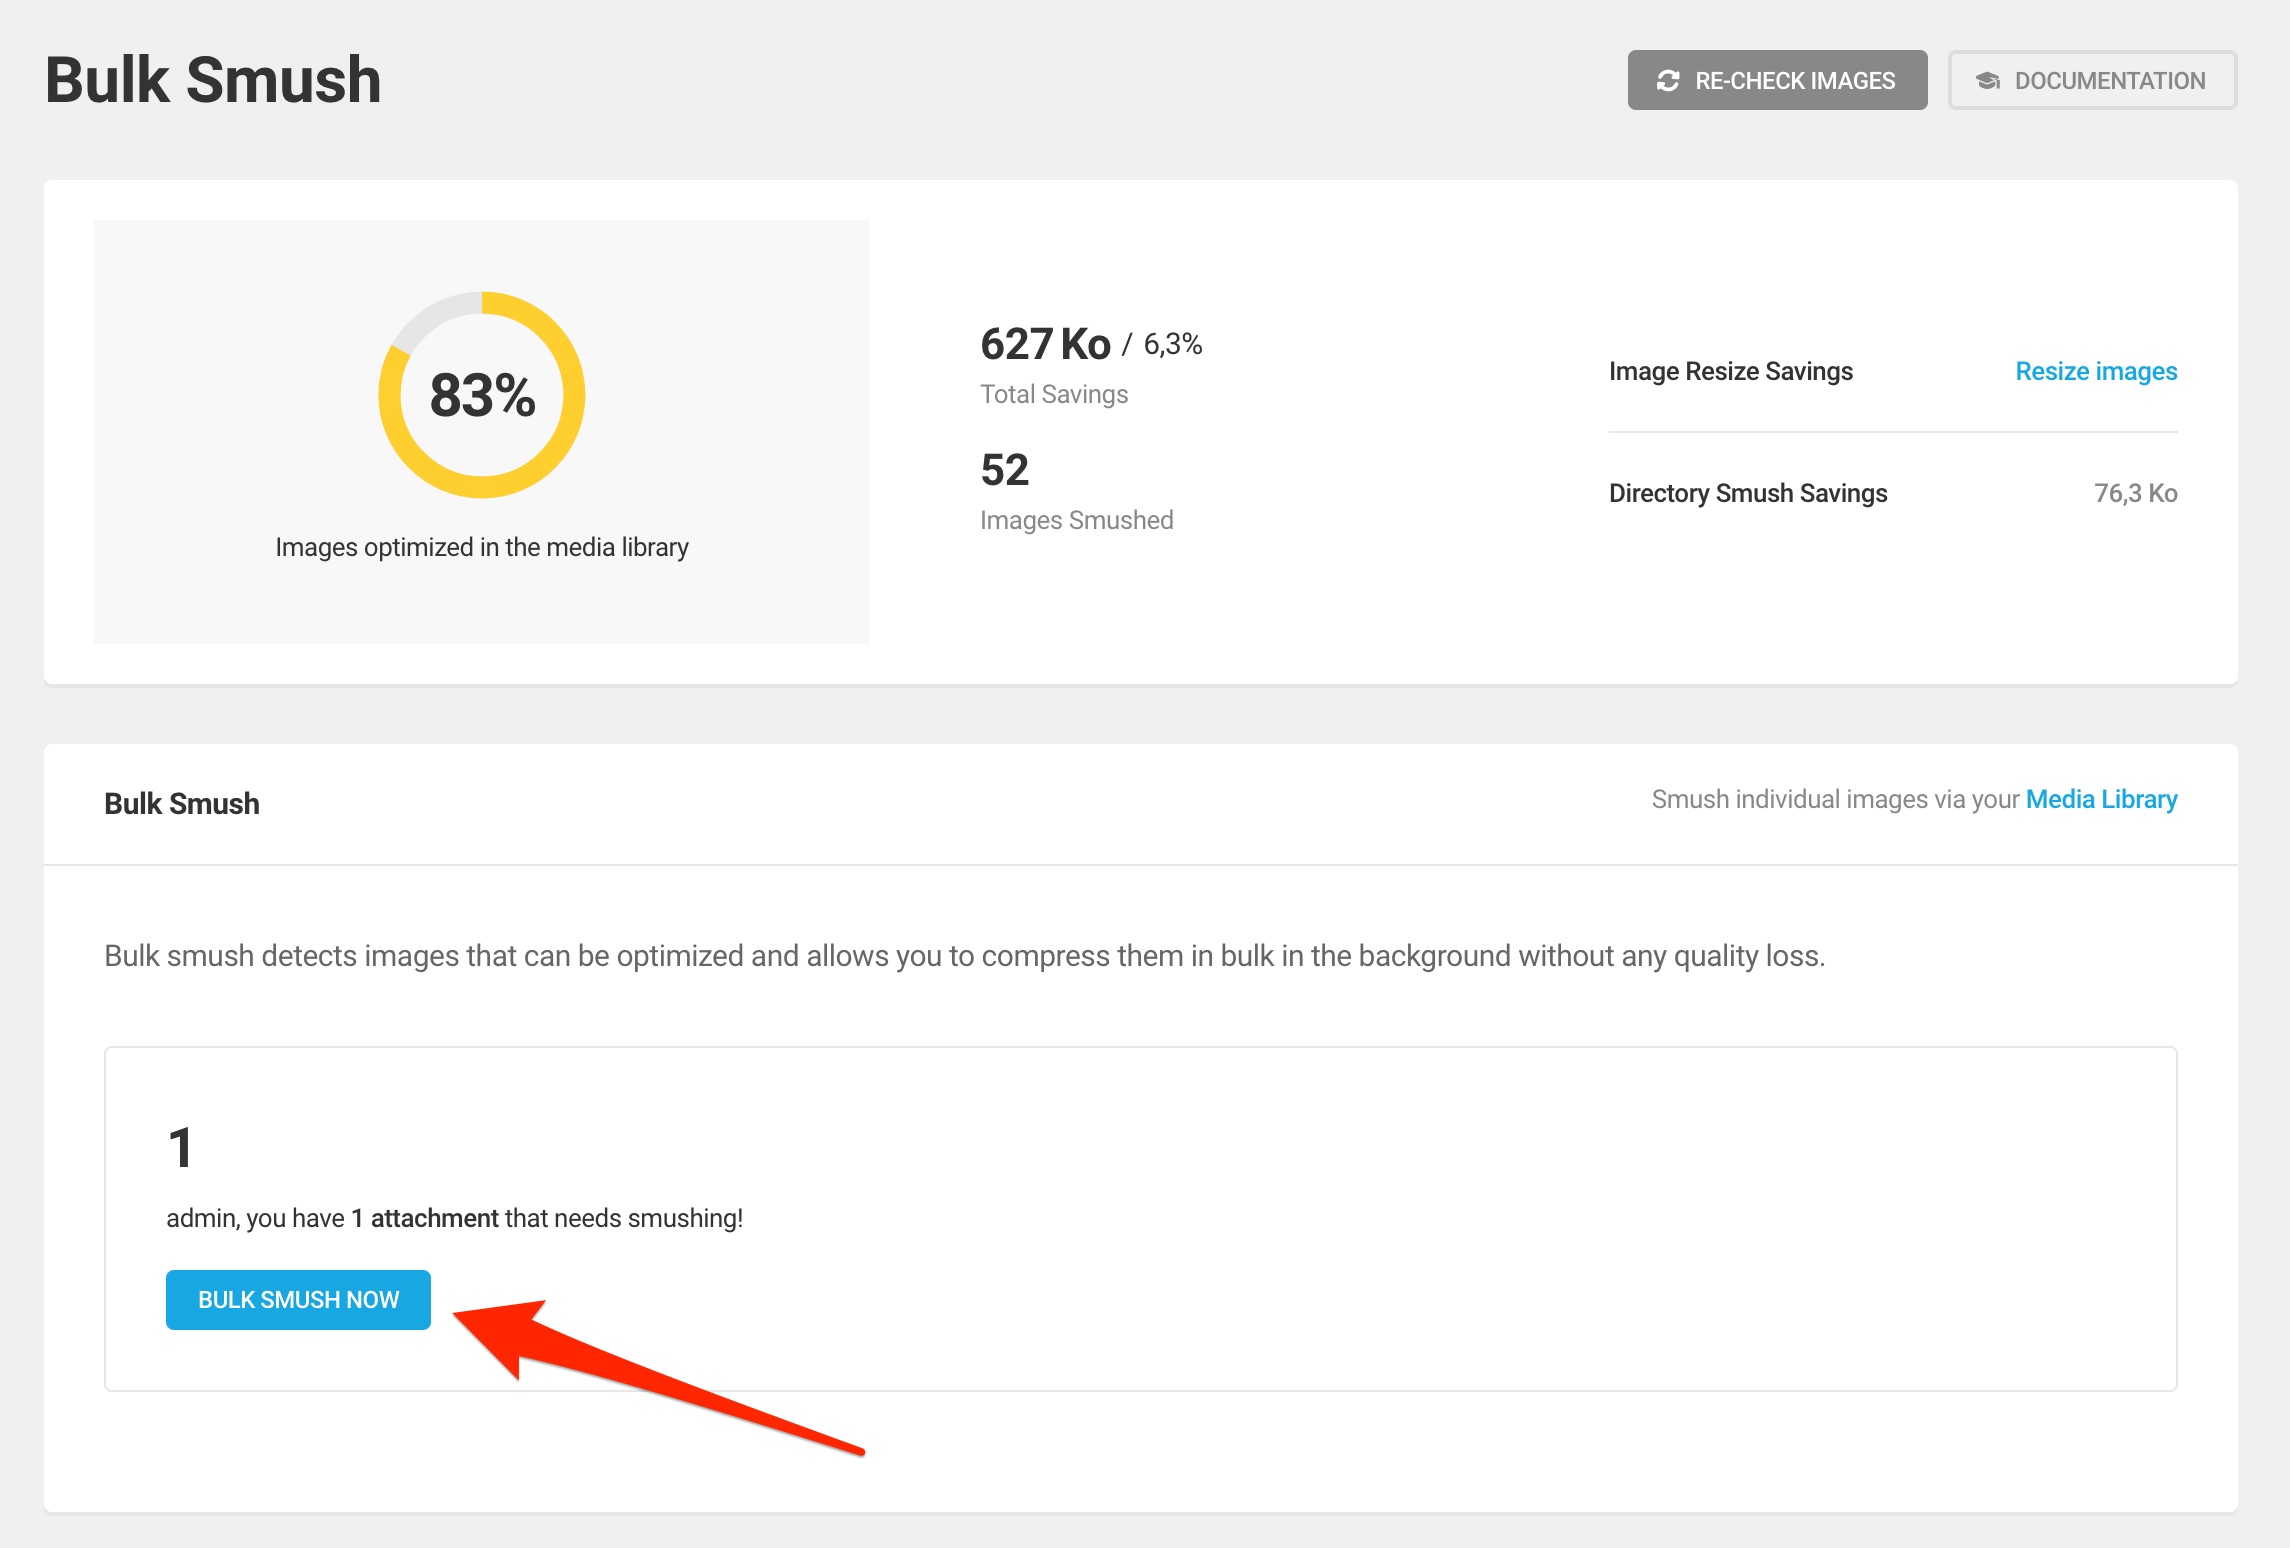
Now you just need to optimize your images in bulk by clicking on the “Bulk Smush Now” button:
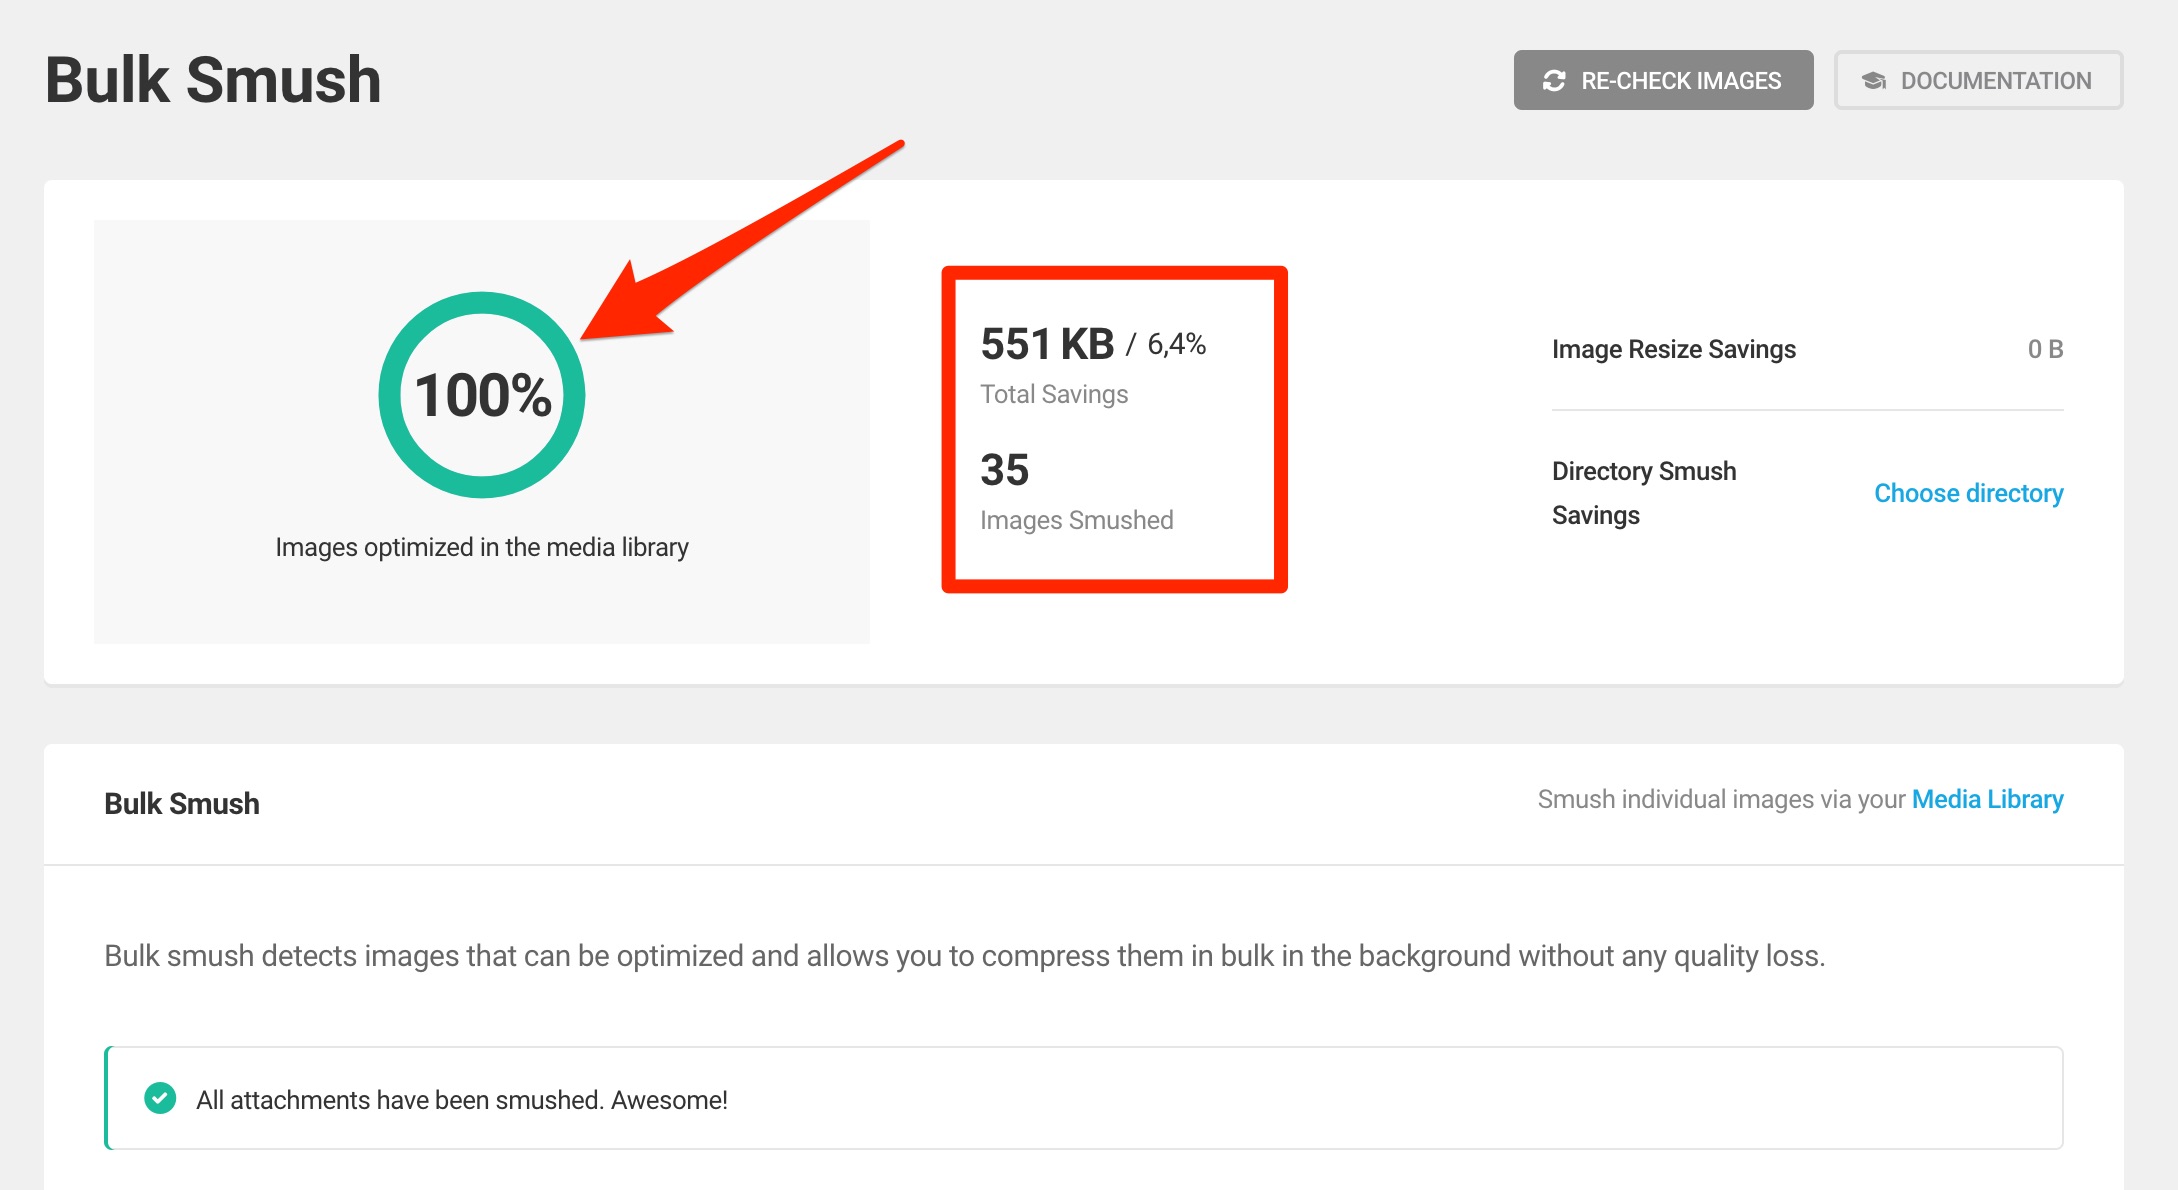
When all your images are optimized, Smush displays a 100% progress circle (in green). You can also get a preview of the total compressed weight.
Here we can see that Smush has compressed 35 images (including thumbnails), for a total weight reduction of 6.4%:
How to optimize your images individually with Smush
Bulk optimization is very convenient, especially if you have many files to process. The more images you have, the more time you will save.
However, you may just want to optimize your images one by one, as it comes up. If you only upload a few from time to time to your Media Library, this will be efficient enough.
Individual optimization is also useful if you just want to optimize the weight of a particular image (provided you have not activated the Automatic Compression option beforehand).
To do this, go to the Media > Media Library menu. Choose the photo of your choice, and click on “Smush”:
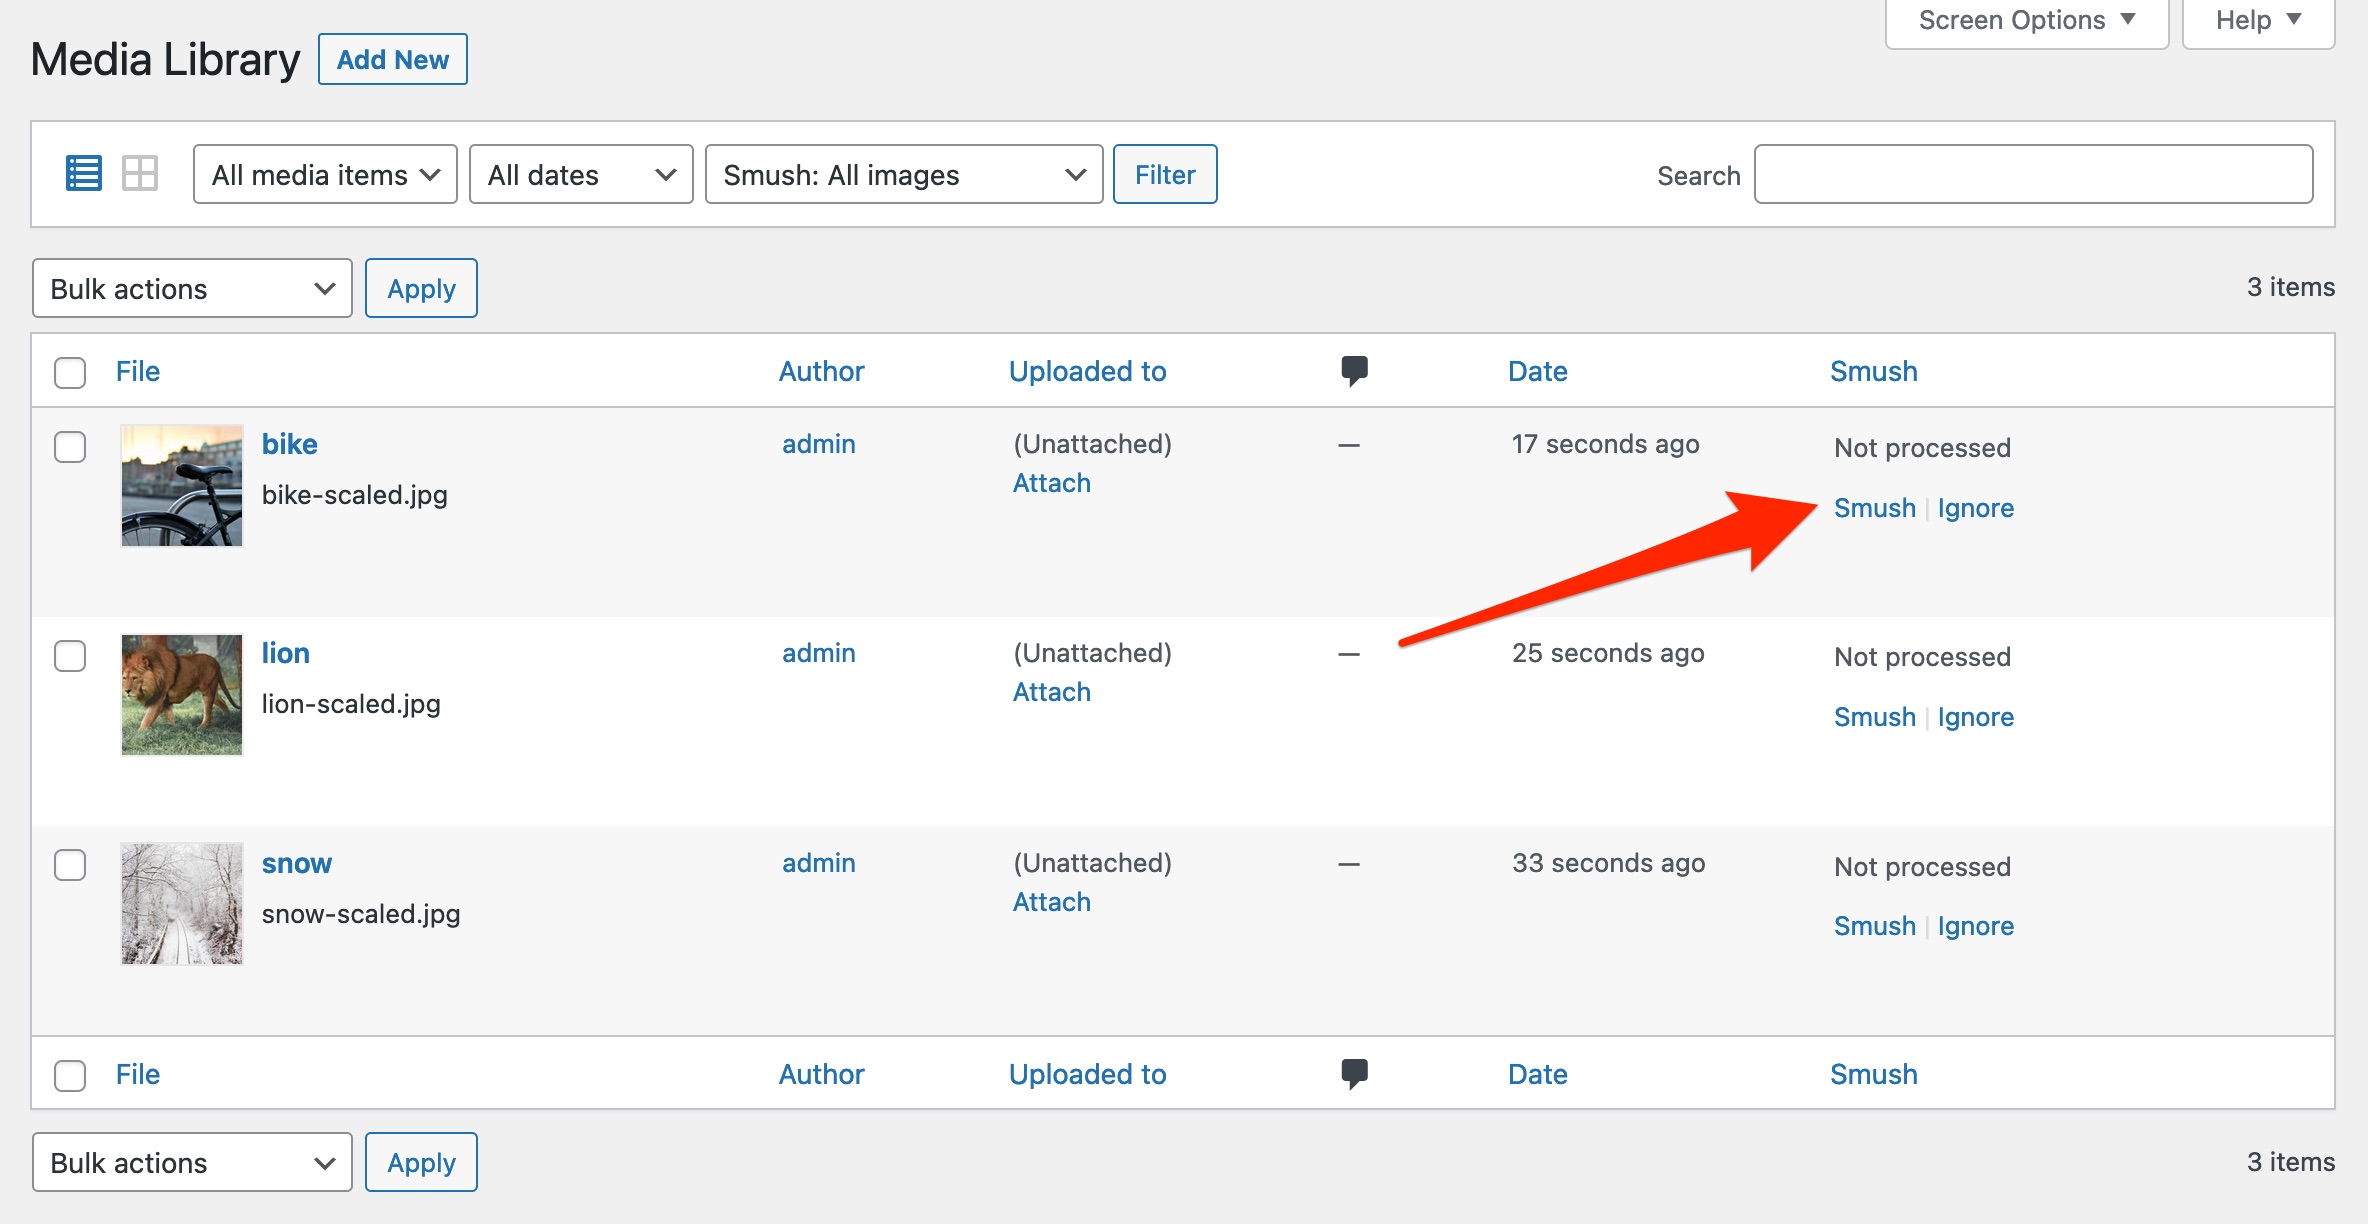
Note that if you click on the “Ignore” link, Smush will not take this image into account during a future mass optimization.
That’s it for the basic Smush functionality: image compression. Now you know how to use it in bulk and individually.
However, this plugin’s range of features doesn’t end there. It has even more resources to offer you for free. We’ll introduce them in the next section.
What are the other options of Smush in the free version?
Smush directory
By default, Smush only optimizes images uploaded to your Media Library (those that end up in the uploads directory of your WordPress installation).
If images are present in other directories of your site (e.g. those of your theme), you can also put them on a slimming diet with the “Directory Smush” feature.
In the relevant menu (Smush > Directory Smush), click on the blue button entitled “Choose Directory”.
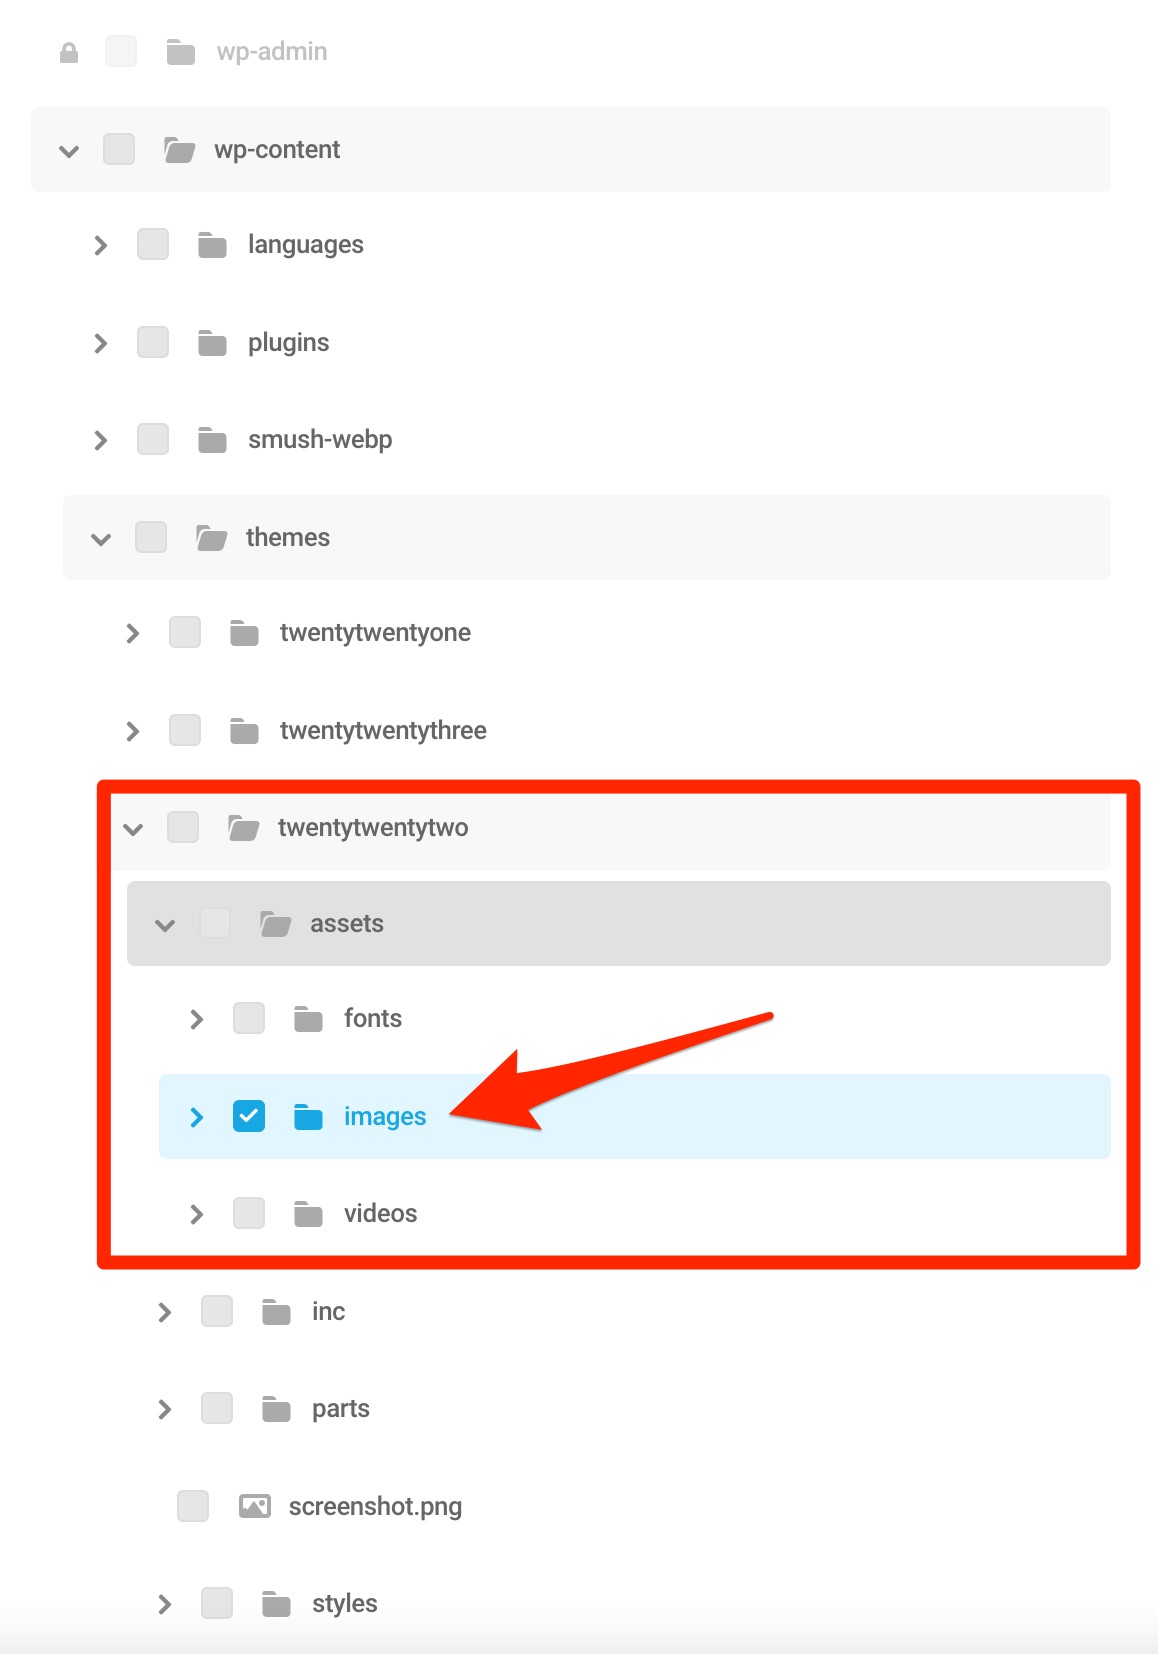
Smush only allows you to select the directory
wp-content. You cannot choose the directorieswp-adminandwp-includes, because they contain the CMS Core files.
Select the folder containing the images to be optimized. For the example, I have chosen the files contained in the “Images” directory of the Twenty Twenty-Two theme:

Finish by clicking on the blue button “Choose Directory.” That’s it!
Lazy load
Without transition, let’s move on to another feature of Smush: the lazy load. Here, you will not compress your images, but delay their display on the screen of your visitors.
This allows you, among other things, to reduce the load on your hosting server: it will not have to load all the images of your site at the same time.
By activating the lazy load option, the images will be displayed as the user scrolls through the page.
In concrete terms, if a visitor doesn’t scroll through your entire page, the images located in your footer will not be loaded, for example.
Several settings are available in the Smush > Lazy Load menu, such as:
- The file extensions you want to exclude from lazy loading (jpg, png, gif, webp, etc.)
- The option of excluding certain types of content from lazy load, such as your posts or pages
- The way you want your images to be displayed during lazy loading. You can add animation effects or the display of a loading bar (spinner).
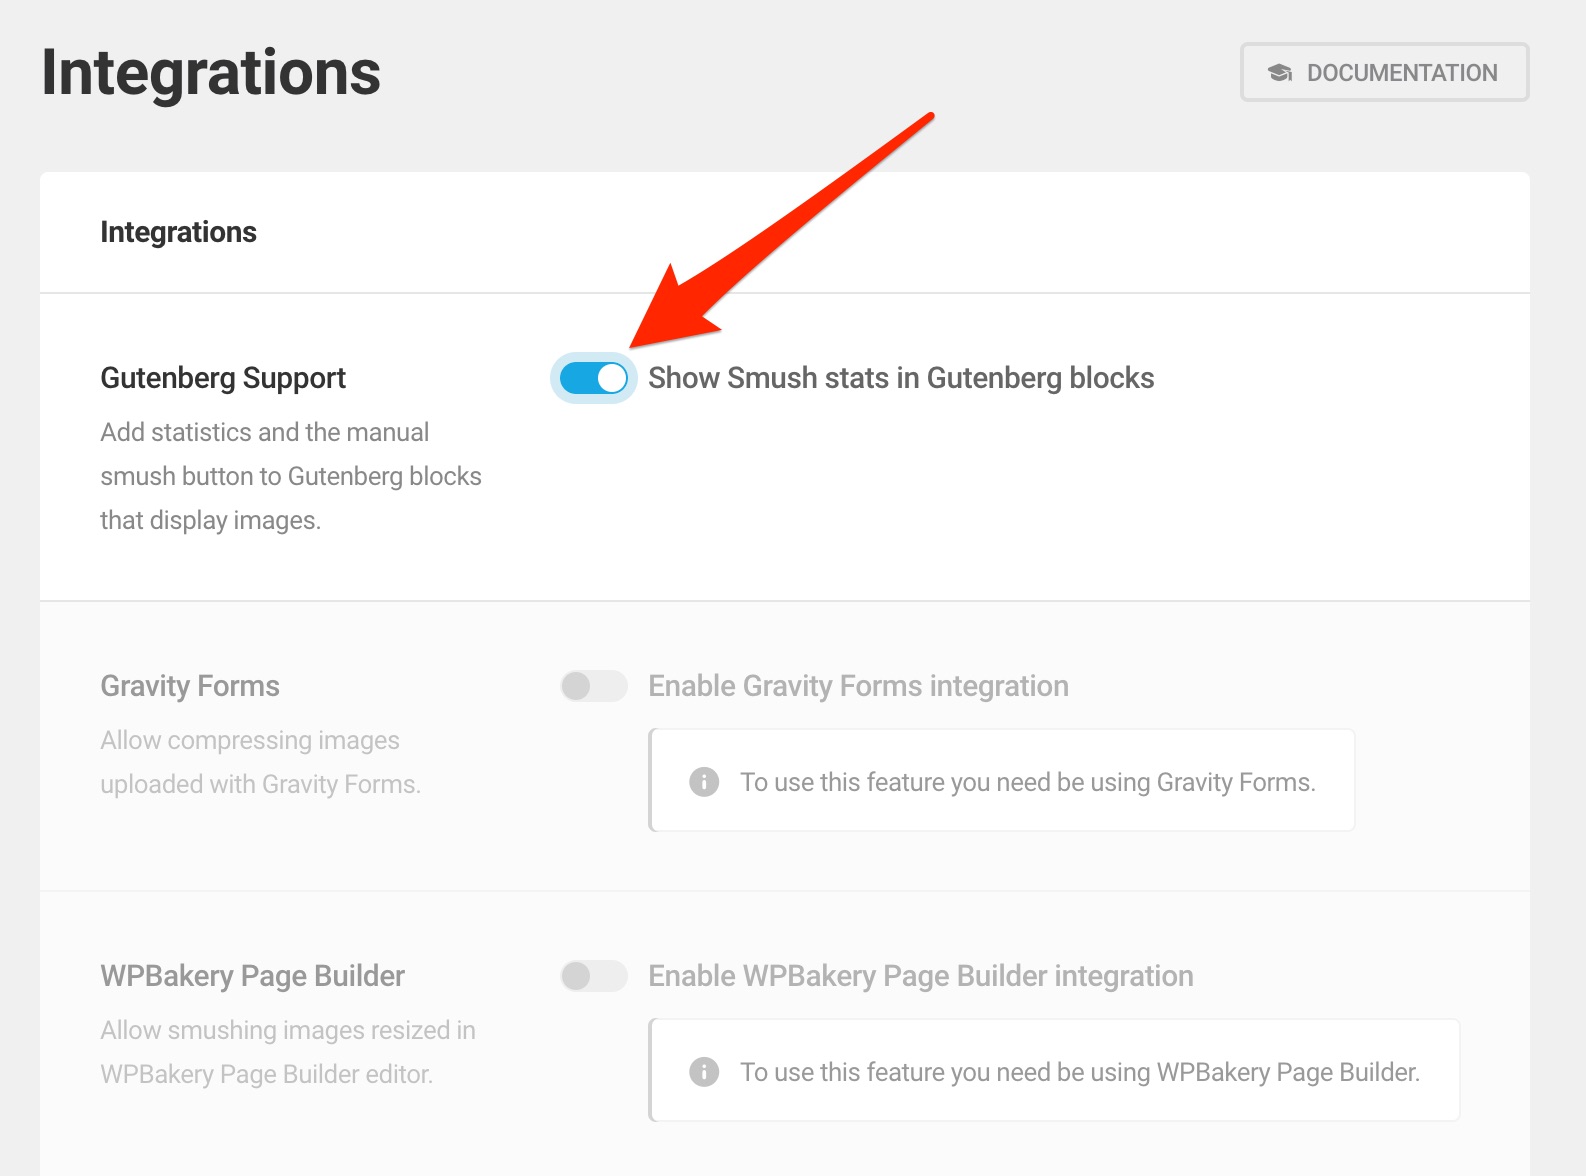
Integrations
In its free version, Smush offers integrations with:
- WordPress content editor (Gutenberg). You can get statistics on your compressed images, as well as a button to optimize them, on Gutenberg.
- WPBakery. Images uploaded from this page builder can be optimized by Smush.
- Gravity Forms. If you use this integration, you will be able to compress the images uploaded with the Gravity Forms plugin.
To activate one or the other of the proposed integrations, go through the Smush > Integrations menu and check the box of your choice (you must first install WPBakery and Gravity Forms, of course):

With Smush Pro, the plugin is also able to optimize images stored in the cloud on the Amazon S3 service with the WP Offload Media plugin, as well as images uploaded to a gallery created with the NextGen Gallery plugin.
Other settings and dashboard
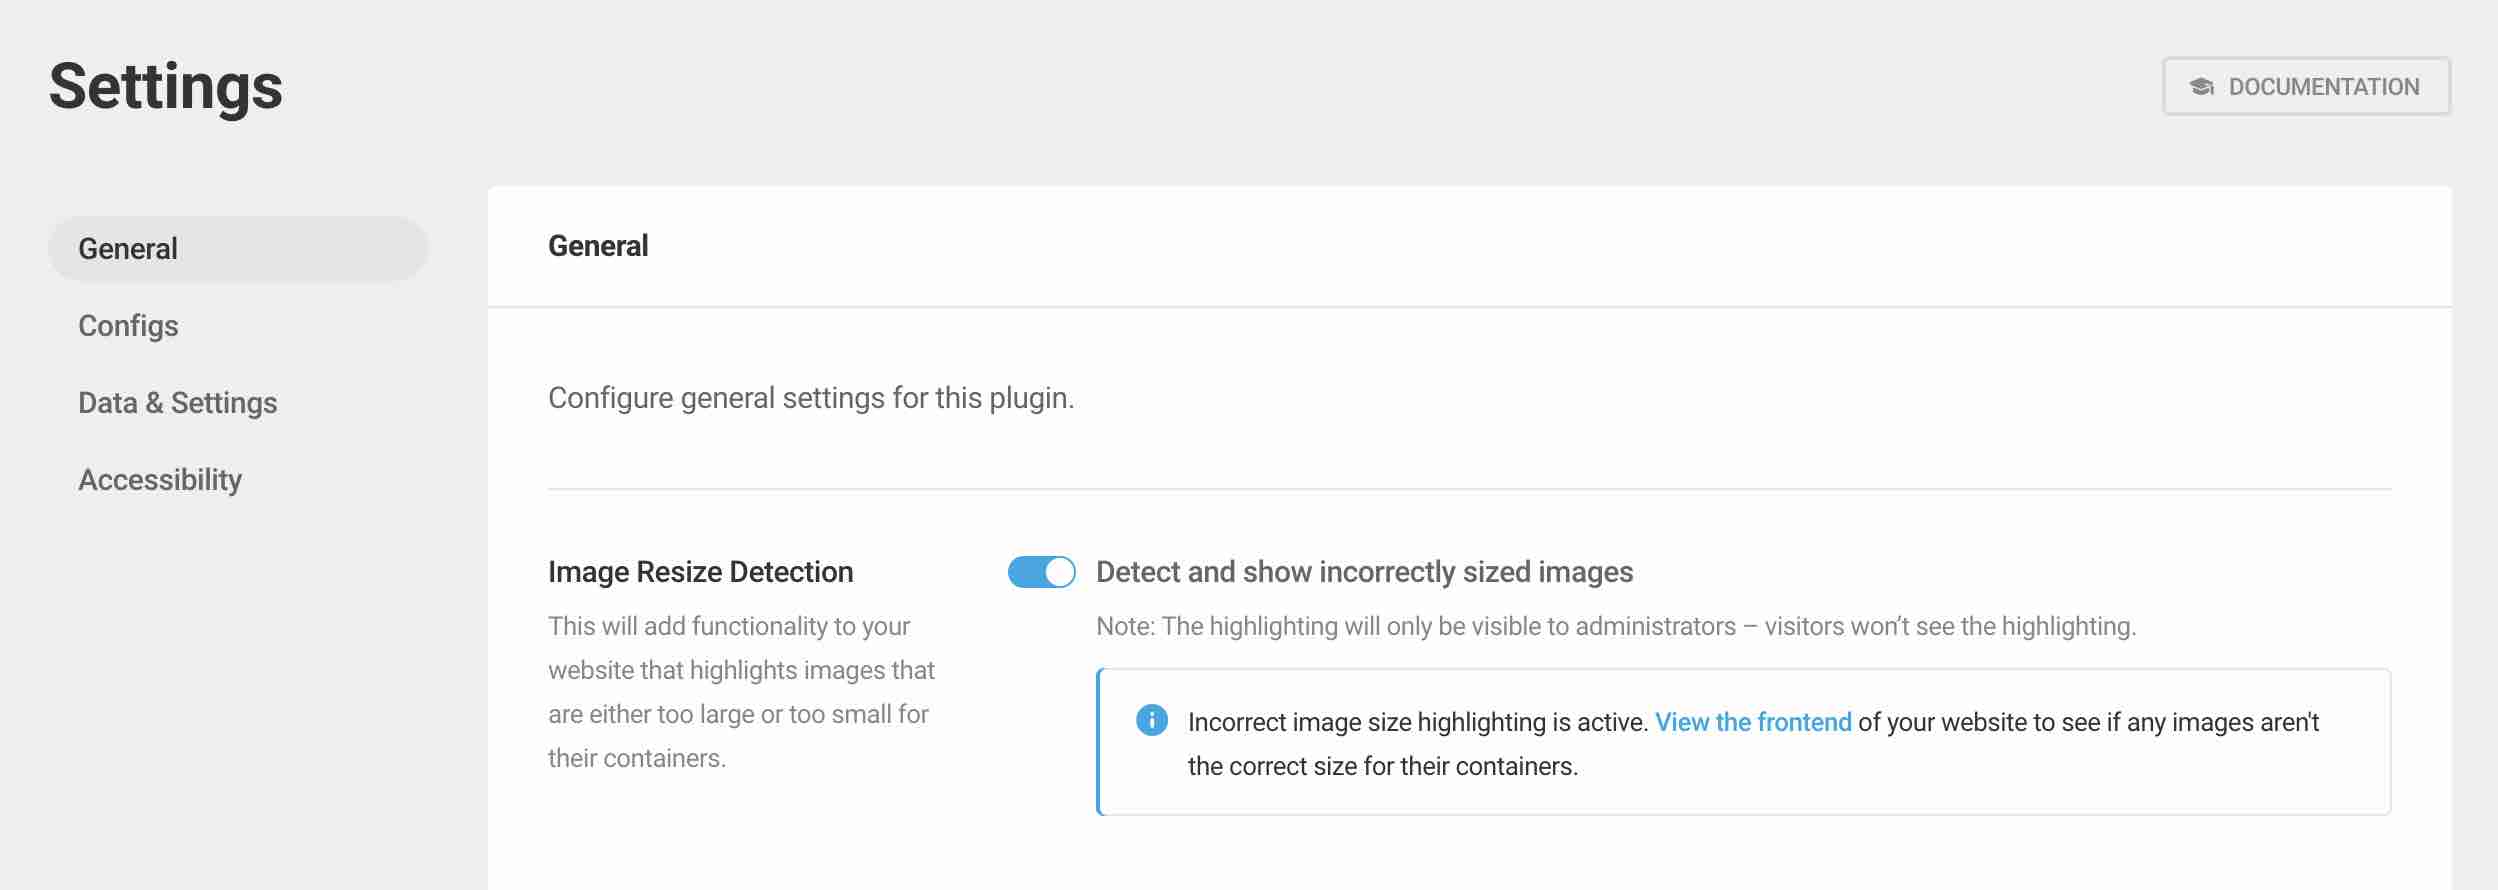
Finally, you’ll find two more useful settings in the Smush > Settings menu:
- Image Resize Detection: when this option is enabled (in Smush > Settings > General), Smush will highlight images that are too big for their container on your screen (only visible to the admin, not to a visitor). It’s up to you to optimize them afterwards.
- Preset Configs: allows you to download your Smush settings to apply them on another site (in Smush > Settings > Preset Configs).
Finally, you will find a direct access to all the features presented so far directly on your dashboard (Smush > Dashboard).
Call-to-action buttons redirect you to the different submenus (Bulk Smush, Directory Smush, Lazy Load, etc.).
We’re done with the free version. Now see what the Pro version has in store for you.


Smush Pro: features in the paid version
What does Smush Pro offer?
One of the strengths of WP Smush is that it offers a multitude of options in its free version.
But you can go even further with its premium plugin, called Smush Pro. Here are the main additional features offered, compared to the free version:
- Conversion of your images to WebP format (Local WebP). WebP is a raster image format proposed by Google. It compresses images even more than JPG or PNG, without loss of quality.
- Automatic conversion of your PNG images to JPG, if it reduces their weight.
- No limit on the size of the images to be optimized. By default, the free version only allows you to optimize images up to 5 MB.
- Access to Smush’s CDN (Content Delivery Network), to display your images even faster to your visitors.
- Access to all the premium plugins offered by WPMU DEV.
- Access to The Hub, WPMU Dev’s tool to manage the maintenance of all your WordPress sites from a single interface.
- Unlimited 24/7 support.
Premium Version Pricing
If you wish to opt for Smush Pro, you will have to opt for a monthly membership including all WPMU DEV plugins (Smush Pro cannot be purchased alone).
The subscription for use on one site starts at $7.50/month. For use on an unlimited number of sites, budget $82.50/month.
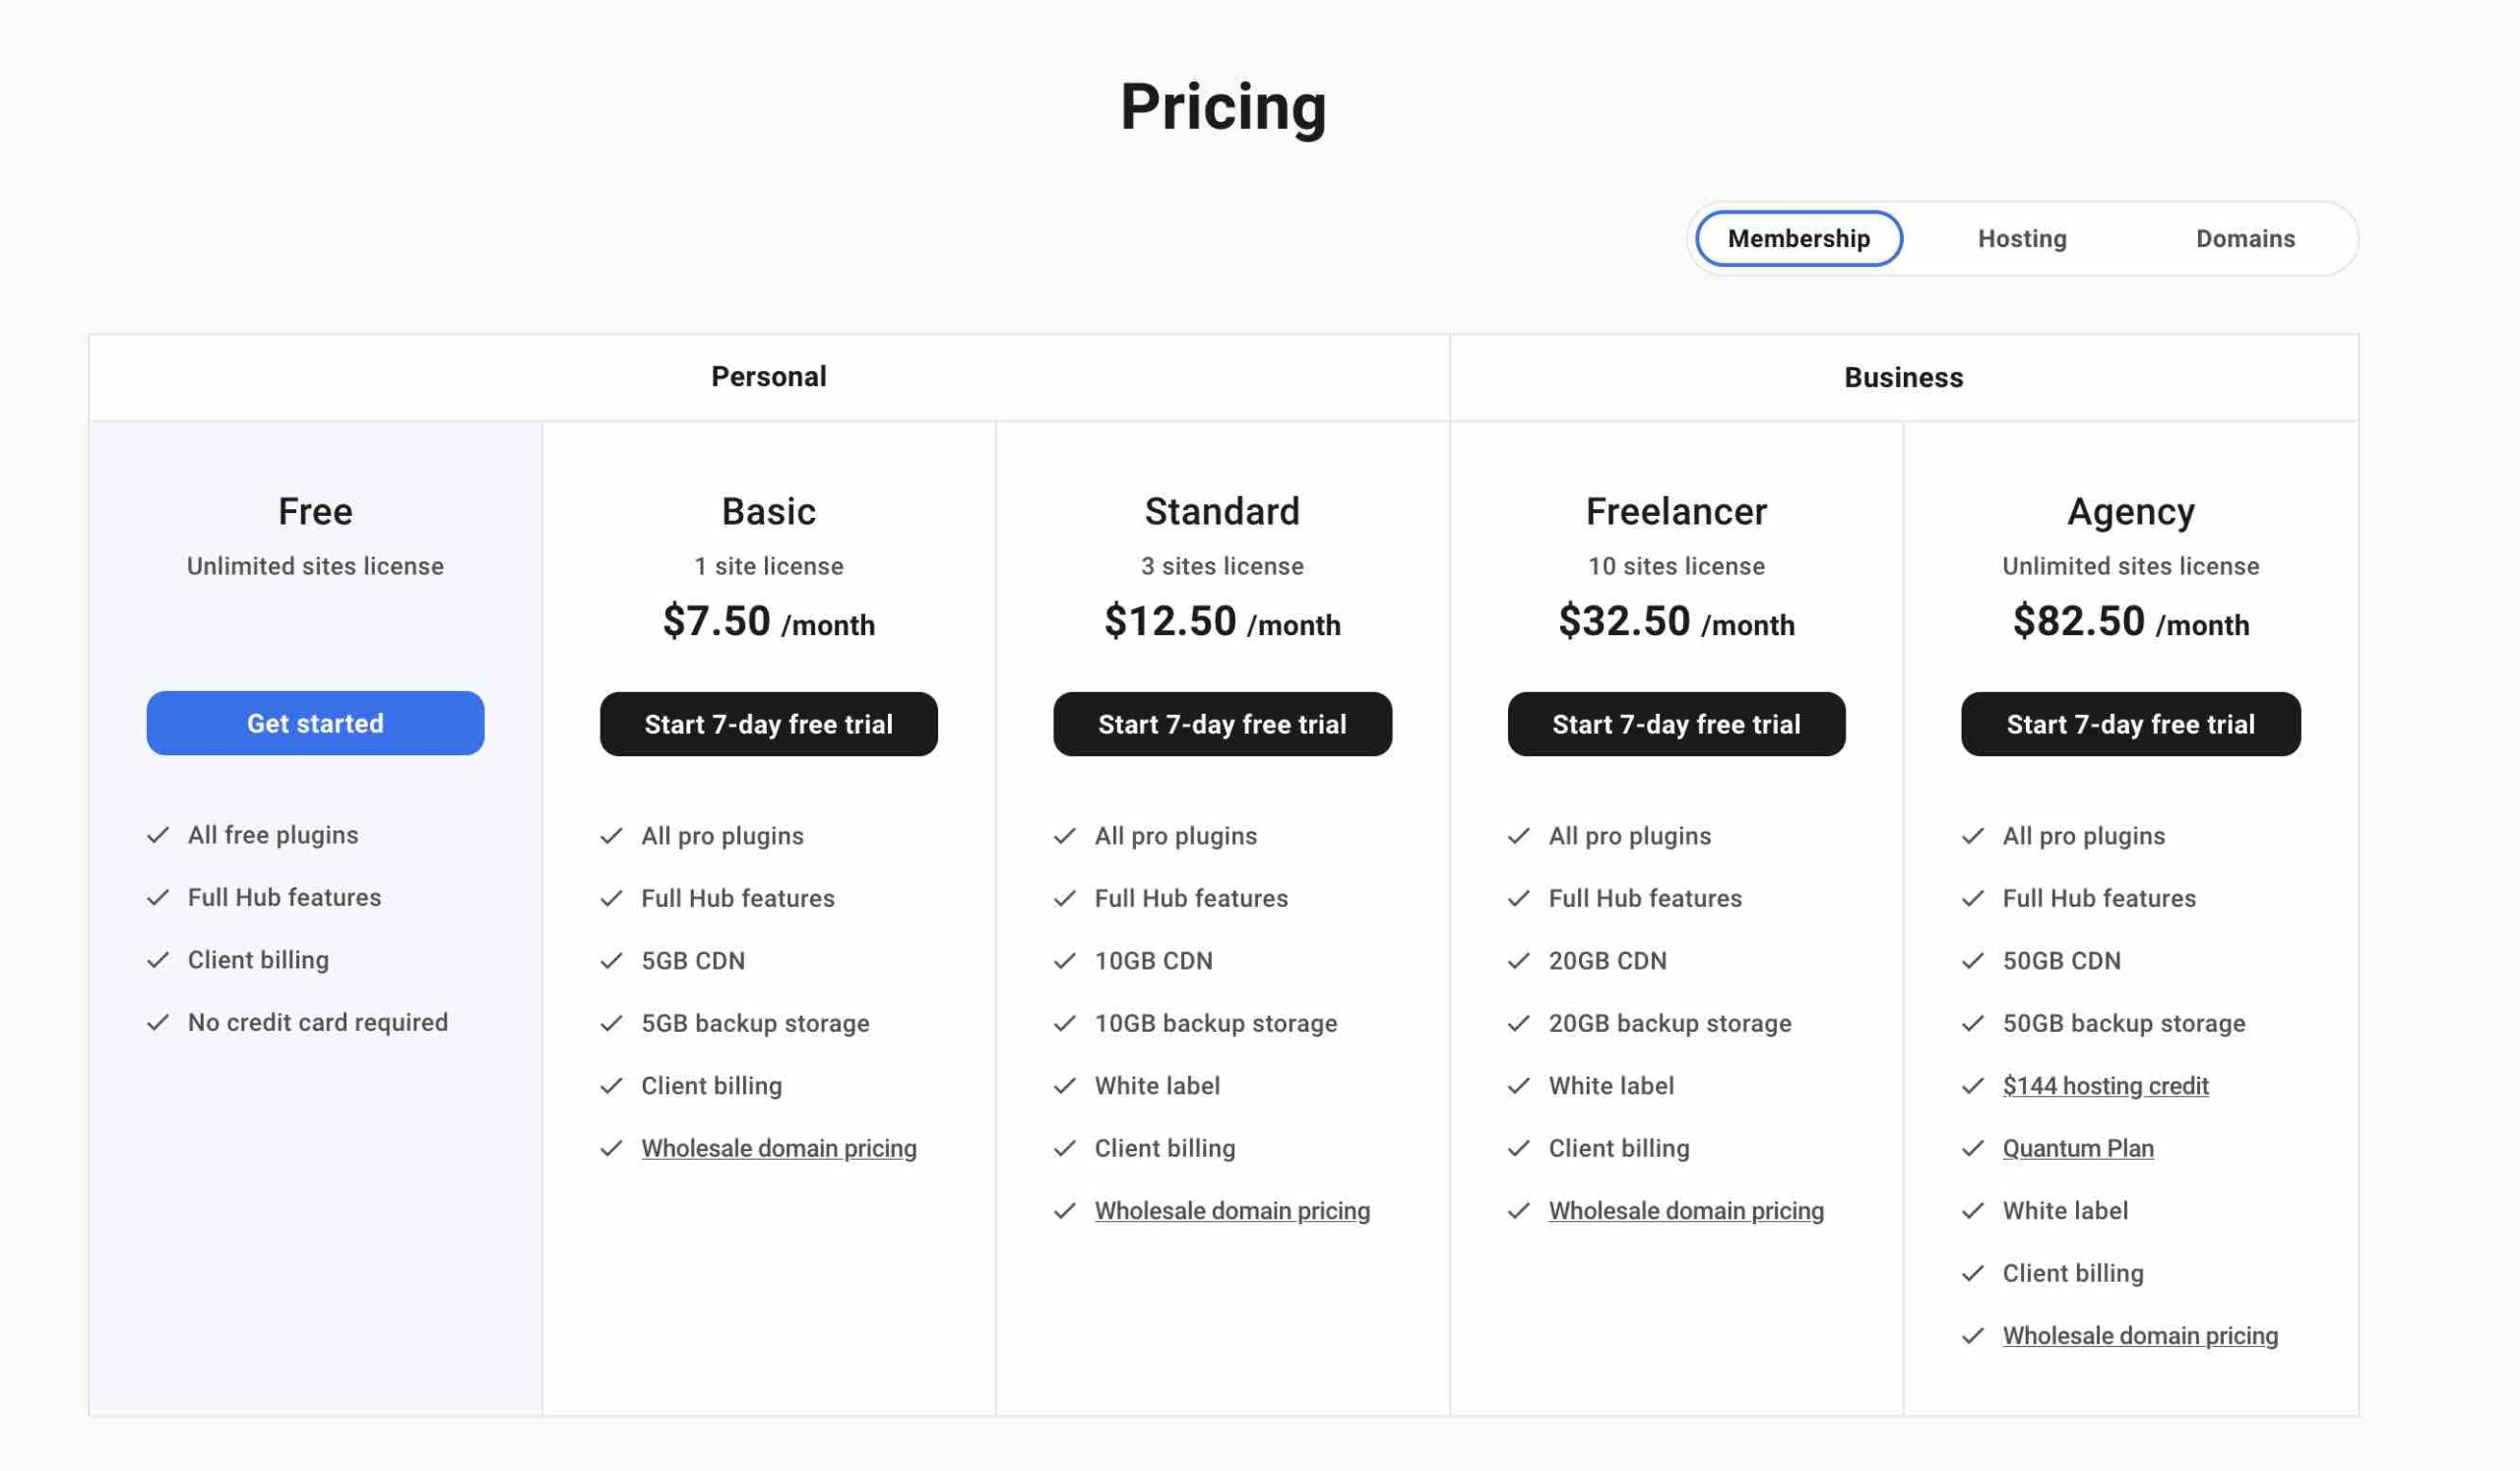
A free 7-day trial is offered, as well as a 30-day money back guarantee.
What are the alternatives to WP Smush?
Before concluding this test, I wanted to give you an overview of competing solutions to Smush that are present on the market. If you haven’t made your choice yet, don’t hesitate to have a look at the alternatives below:
- Imagify, a plugin made in France and designed by WP Media, the company behind the excellent WP Rocket caching plugin (affiliate link)
- EWWW Image Optimizer
- ShortPixel
- Optimole
- reSmush.it
- Robin image optimizer
- WP Compress
That’s it for these additional options. Now let’s summarize what we’ve just covered.
Our final opinion on Smush
Advantages of Smush
- A relatively easy to use plugin: its options are activated in one click.
- Mass image optimization, which saves valuable time if you have a lot of images to process.
- No limit on the number of images to optimize in the free version (just their weight).
- The lazy load feature.
- Access to all the plugins and tools of the WPMU DEV suite if you choose Smush Pro.
- A solid plugin backed by a company that is well established in the WordPress ecosystem. Using Smush means trusting a major player with strong backbone. In principle, you limit the risks that the plugin will be abandoned in the coming months.
Disadvantages
- The high price, especially if you plan to use Smush Pro on several sites.
- It’s impossible to get the plugin alone.
- The free version of Smush does not offer conversion to WebP format.
Who is Smush for?
Smush is an efficient and easy-to-use plugin to optimize the weight of your images. Because of its ease of use, it’s intended for all types of users, from beginners to advanced.
You’ll get good results using Smush, but should you use it? Actually, it all depends on your needs. When choosing an image optimization plugin, I advise you to consider the following criteria:
- The budget you want to allocate to image optimization
- The limitations of the plugin, especially in terms of the maximum size of the files to be optimized
- The options offered (e.g. bulk optimization), which should be adapted to your needs
- Ease of use
- The clarity of the interface
- The type of files supported for the compression of your images. At a minimum, the following classic formats should be included: JPEG, PNG, and GIF
- The quality of the compression, with an effective reduction of the weight of your photos
Personally, I think that the paid version of Smush is mainly intended for people who want to take advantage of all the tools and plugins of WPMU DEV (mainly developers and webmasters maintaining several sites).
The free version is useful, but it won’t necessarily be necessary for you if you have a site or a blog containing only a few dozen media (the same applies to other image optimization plugins).
If this is your case, get into the habit of compressing your images with an online tool like Squoosh or TinyPNG, before uploading them to WordPress. This way, you avoid activating an additional plugin.
Finally, personally, I prefer Imagify over Smush. Imagify gets excellent results in image compression. This plugin can be used on an unlimited number of sites, for a lower price than Smush if you have a “normal” size site ($4.99 for 500 MB, or about 5,000 images).
But you may not share my point of view. I’d love to hear your perspective. So, what do you think of Smush?
Share your opinion in the comments.