

By default, the WordPress administration login page lacks charm. It’s cold, impersonal, and rather austere.
Yet it has no shortage of flatterers eager to coax it into opening the doors to your admin interface.


On a daily basis, without you even realizing it, it’s under attack from malicious robots and/or people with bad intentions.
Their goal is to take control of your site and ruin your life. To avoid this, it’s essential to limit the connection attempts on your WordPress site.
This article provides you with detailed instructions to do this at home in a few minutes, regardless of your skill level.
Overview


Why should you limit the login attempts on WordPress?
Limiting login attempts to the WordPress administration interface helps to strengthen the security of your site.
By default, WordPress doesn’t limit the number of times you can attempt to log in.
As a result, hackers use this open door to try to take control of your site.
In the jargon, we call this a brute force attack. When it happens, bots go to your site’s login page and try to find out the administrator account’s username and password by testing different combinations automatically.
These combinations very often include the most commonly used usernames and passwords, such as “admin” and “123456.”
If these bots manage to enter your site, the consequences can be disastrous. They can, for example:
- Add spam links to penalize your natural referencing (SEO)
- Steal confidential information, both yours and those of your visitors. This could be data from a contact form, or banking information if you sell products on a WooCommerce site
- Install malicious software
- Crash your site and make it unavailable


That’s why it’s a good practice to limit the number of connection attempts to protect your WordPress installation.
This can be done very easily with a dedicated plugin that will impose a limit on the number of connection attempts.
If this limit is exceeded, the person or robot will not be able to try to connect for a given period of time, or permanently.
I’ll tell you more about this in the next section.
How to limit login attempts on WordPress with the Limit Login Attempts Reloaded plugin
Why this plugin?
In order to limit login attempts to your WordPress site, I will use the Limit Login Attempts Reloaded plugin.

This was my natural choice for several reasons:
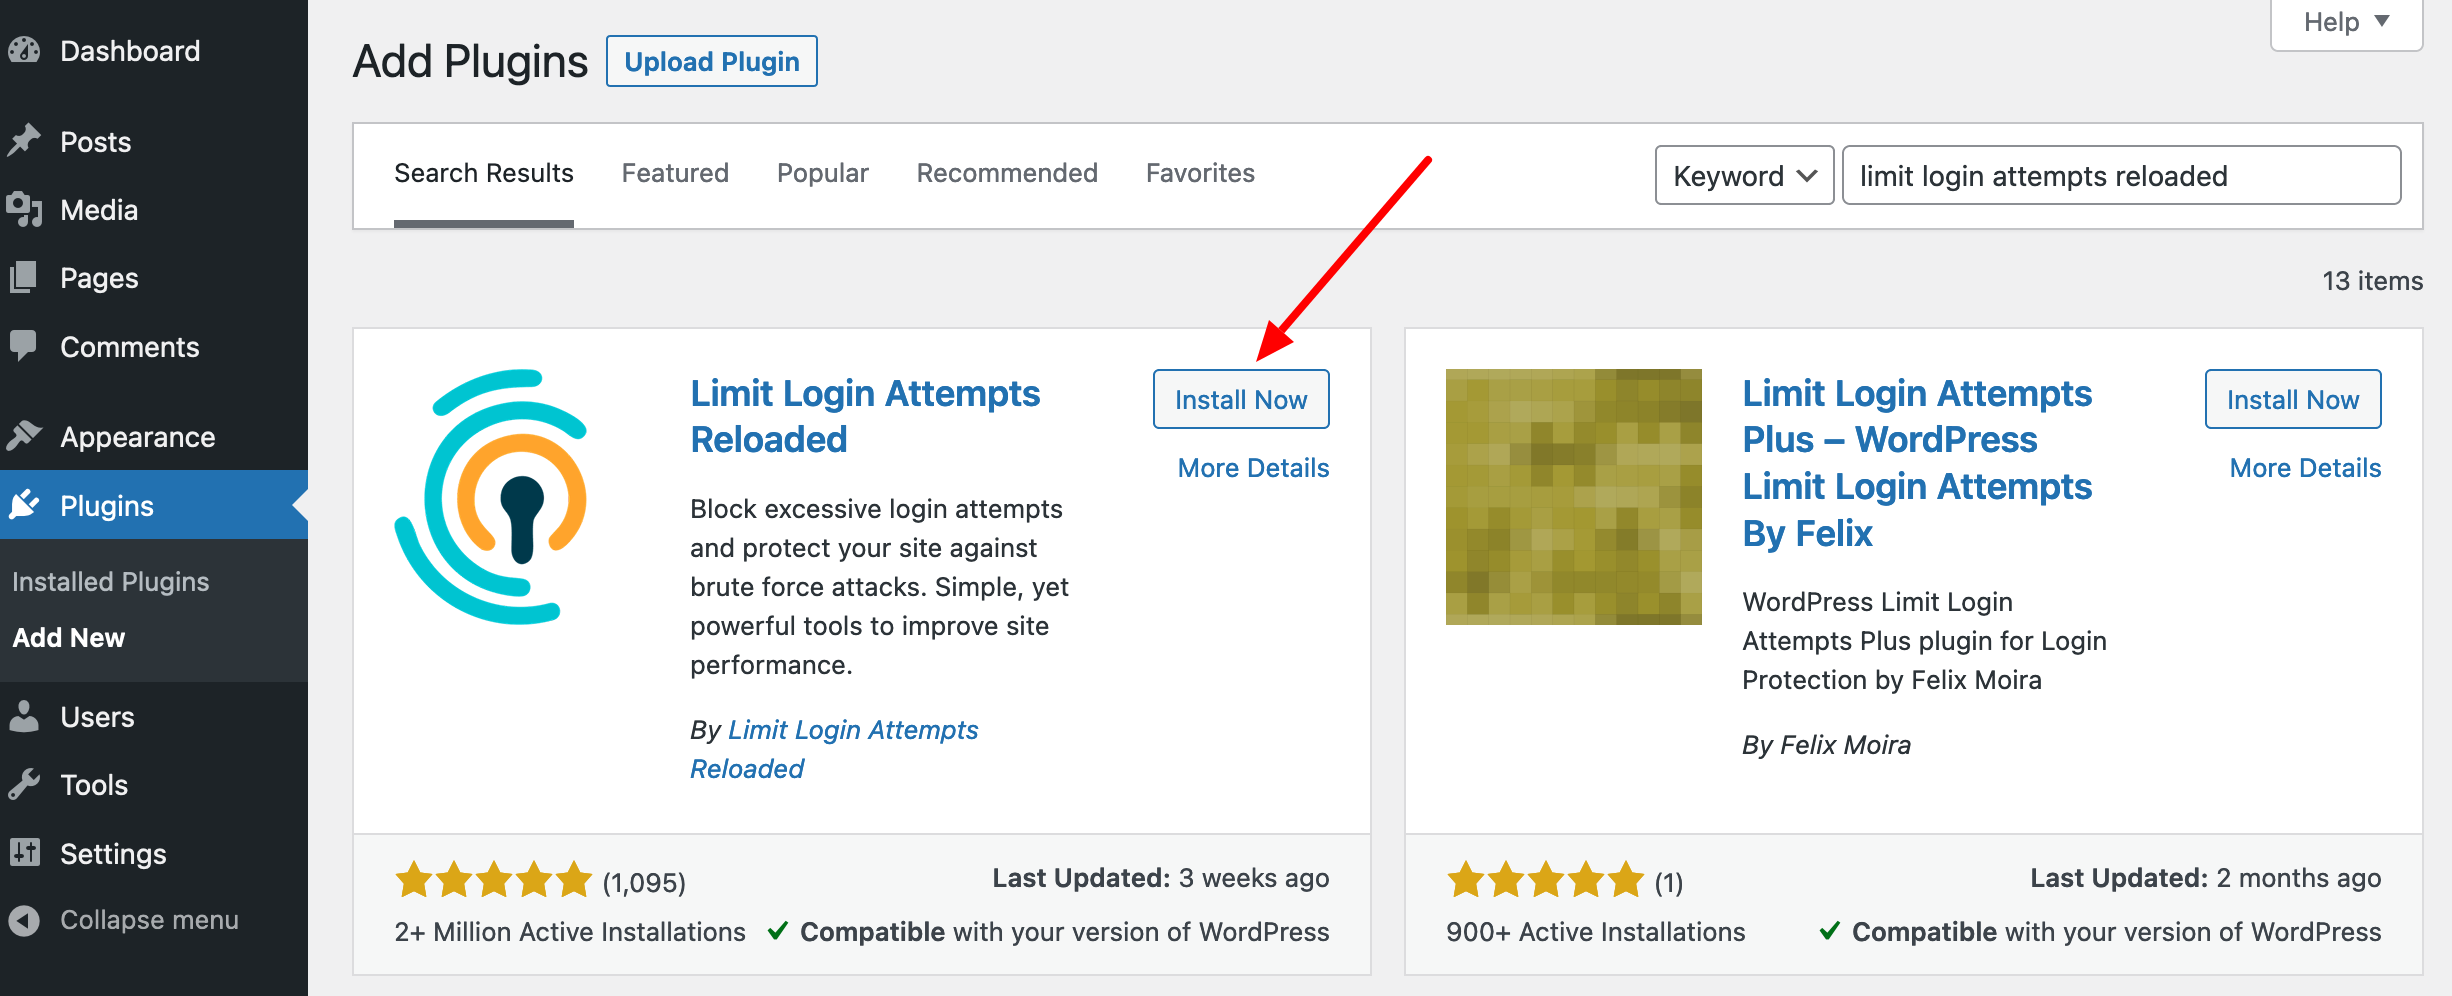
- With 2M+ active installations, it’s the most popular plugin in the official directory in its category, ahead of competitors like WPS Limit Login (70K+ active installations) or WP Limit Login Attempts (20K+ active installations). It’s also the plugin with the highest user rating in this category
- Limit Login Attempts Reloaded is frequently updated
- Its options for limiting login attempts are free
- It’s easy to learn and use.
Without further ado, let’s find out how to set it up in two steps.
While using a plugin is the quickest and easiest way to limit login attempts to WordPress, it’s not the only way. You can also achieve a similar result by manually adding code to your functions.php file.
However, this practice is reserved for experienced users with a good technical background in PHP code. One small mistake in the syntax of your code will crash your site.
Step 1: Install the Limit Login Attempts Reloaded plugin
On your WordPress admin interface, go to Plugins > Add New. Install and activate the Limit Login Attempts Reloaded plugin:

You will then see a new custom post type called Limit Login Attempts appear on the left sidebar of your admin interface.
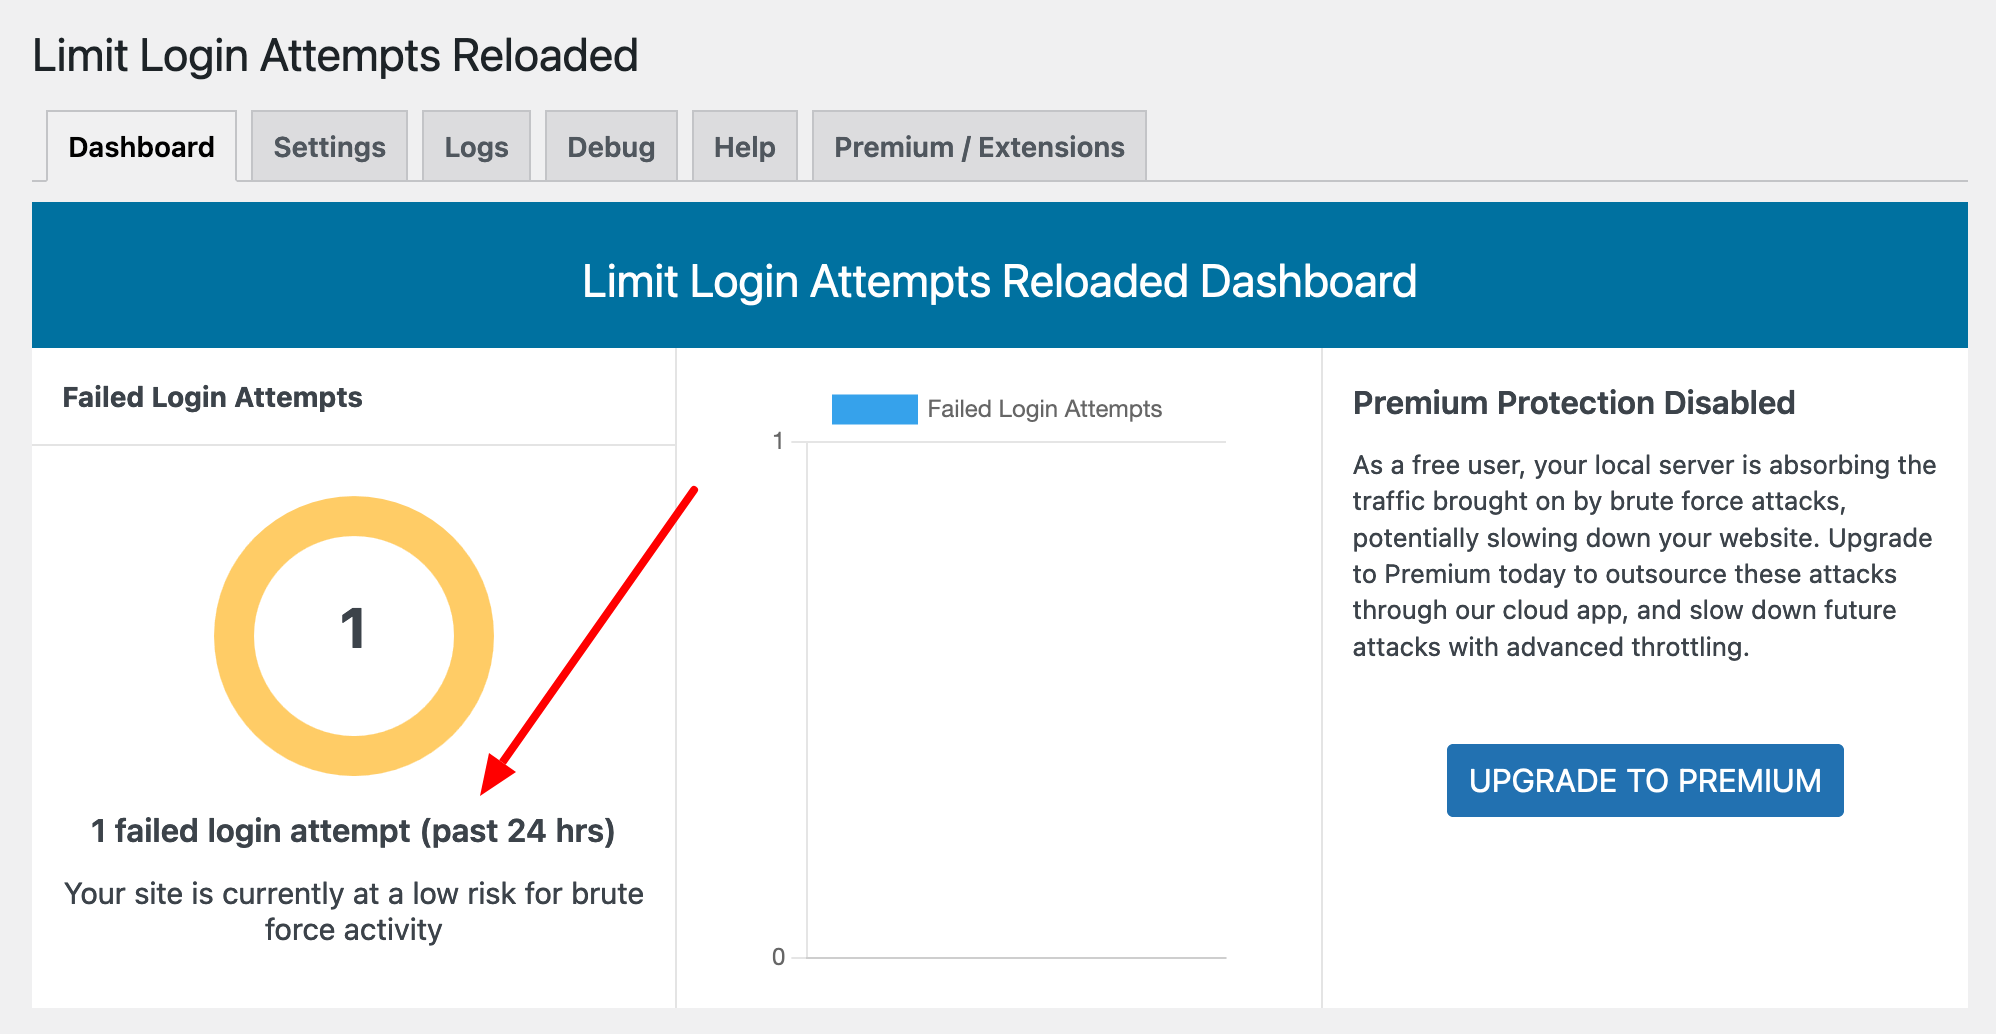
When you click on it, you will land on the plugin’s dashboard, which shows the following information, among other things:
- The number of failed login attempts
- Failed login attempts per country
- Total failed login attempts
- Links to the plugin’s settings
At the top of your dashboard, five additional tabs provide access to the plugin’s configuration settings:


Step 2: Specify the number of allowed attempts
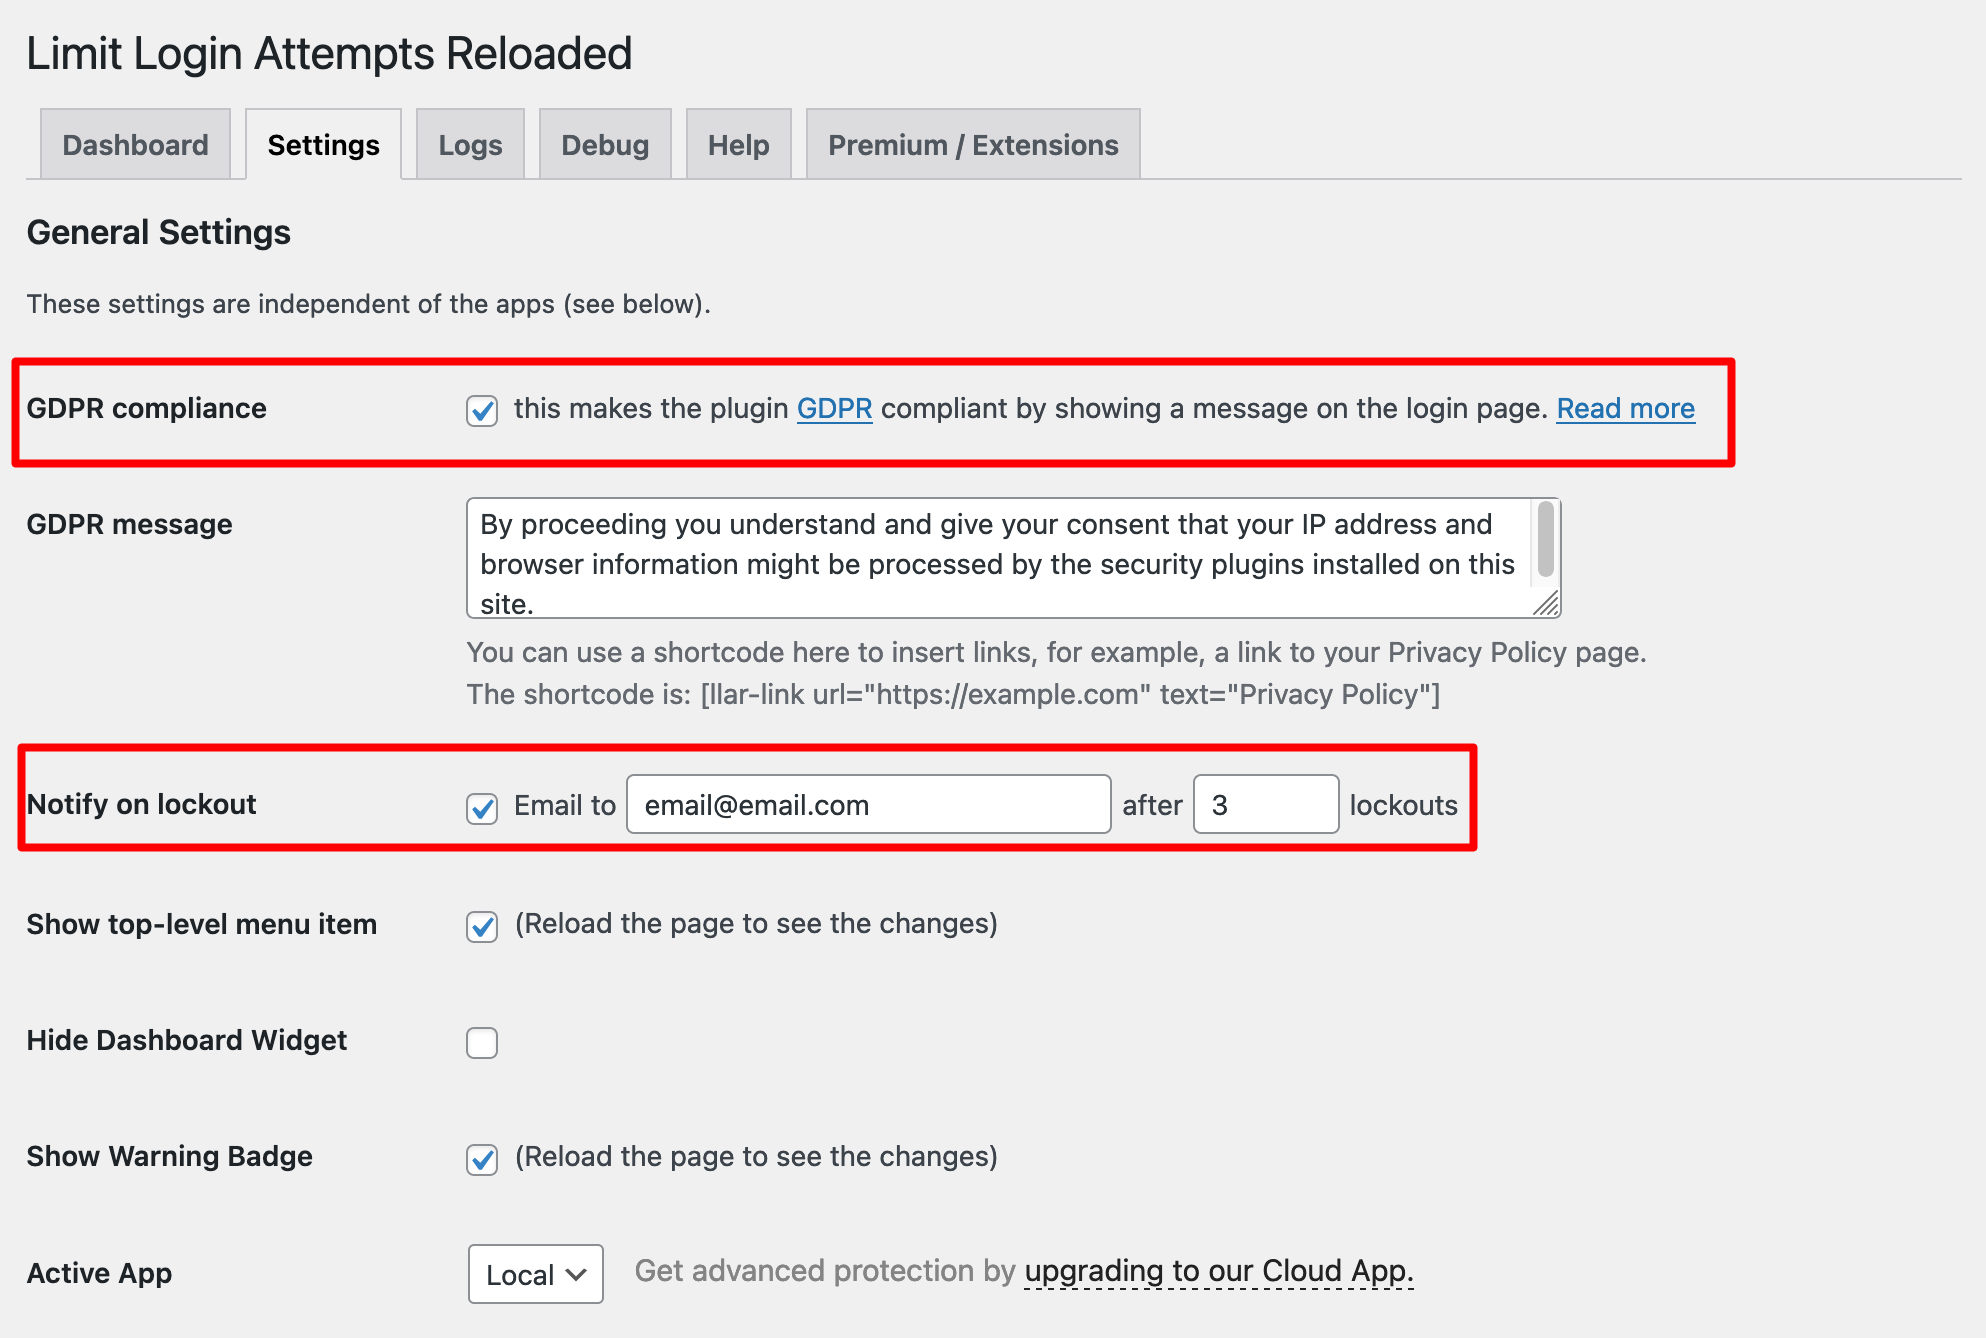
To configure the settings of Limit Login Attempts Reloaded, go to the “Settings” tab.
At the top of the page, I recommend you first check the “GDPR Compliance” box, which will display a small message on the WordPress admin login page.
To make your site GDPR compliant, see our dedicated guide.
Next, it may be worth checking the “Notify on lockout” box. If you do so, you will receive an email each time an IP address tries to connect after X attempts (you can enter any number you like).

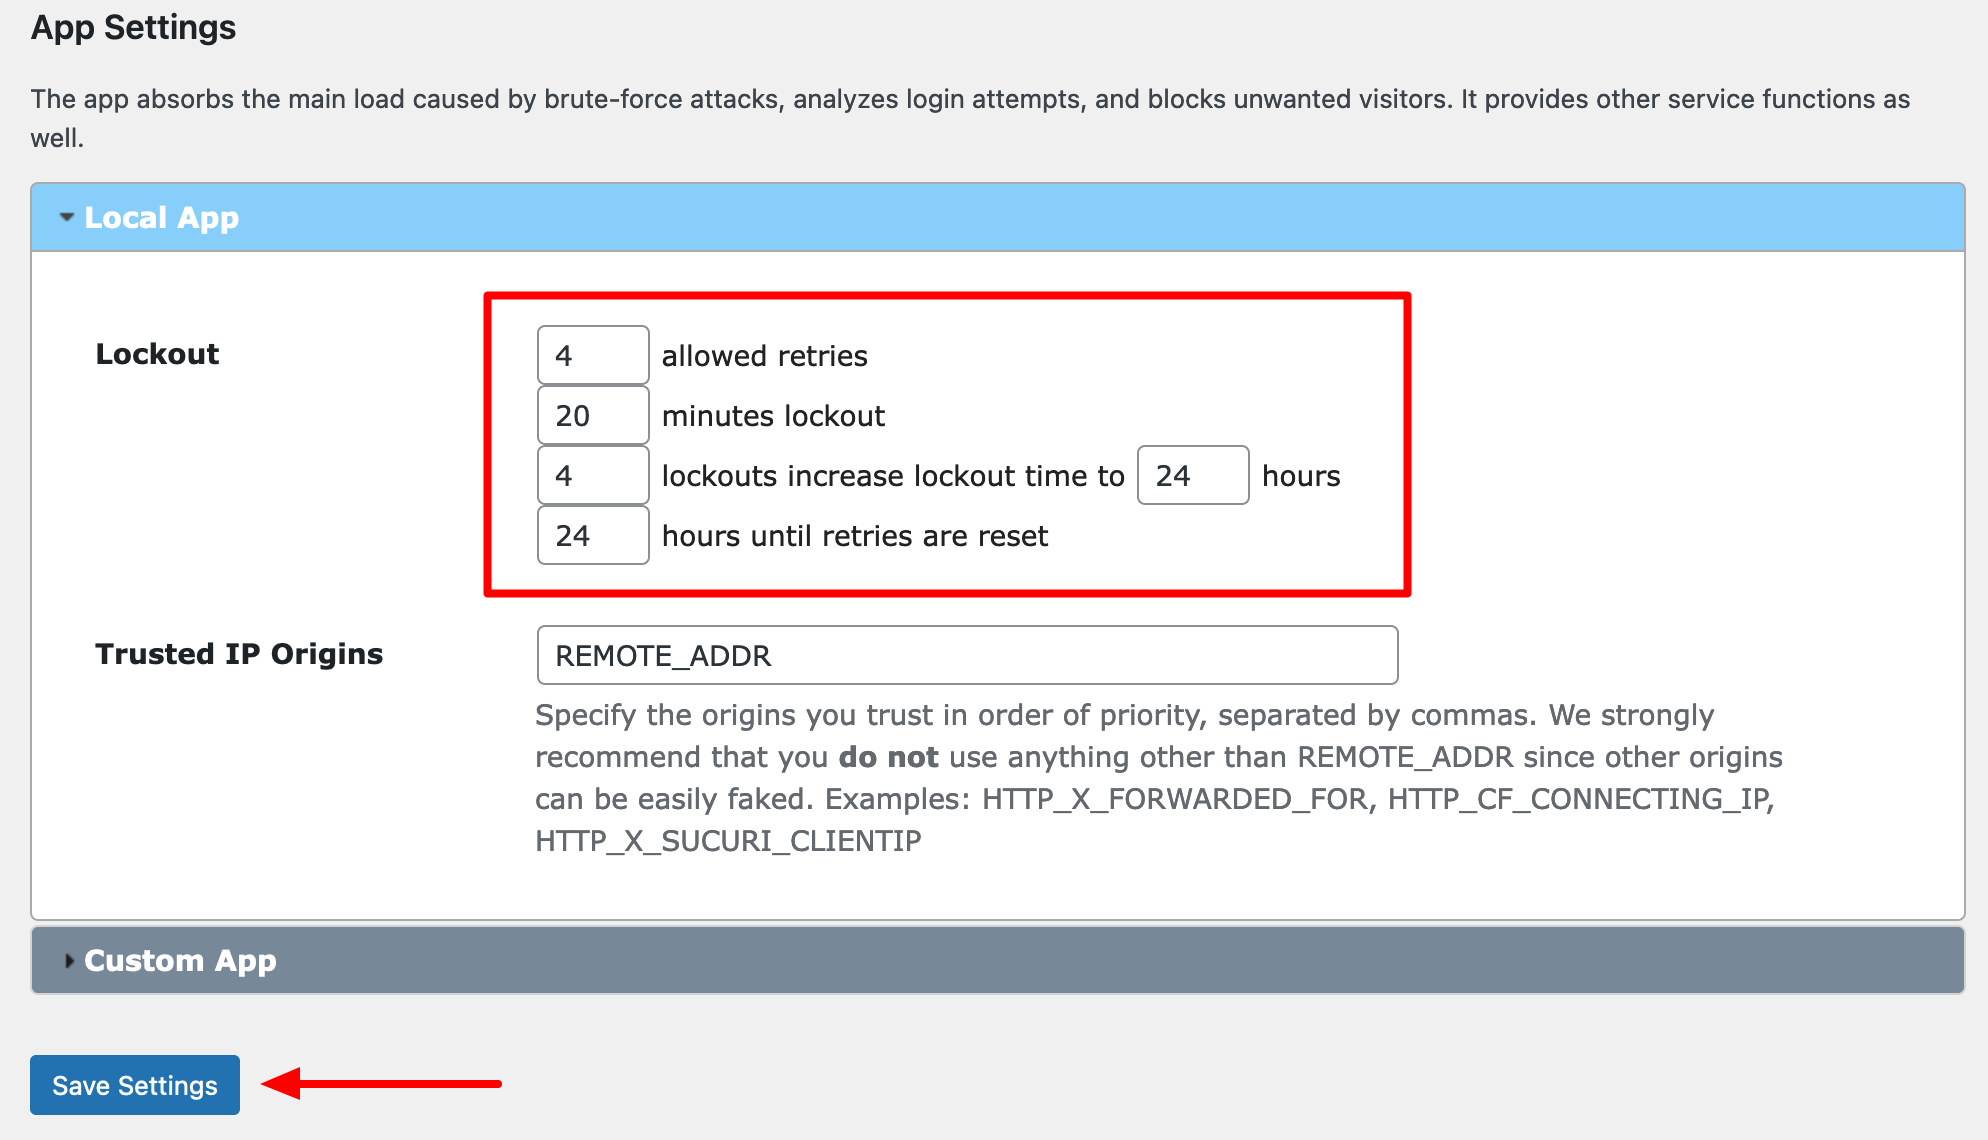
The settings for limiting the number of connection attempts are located in the box just below, called “Local App.”
The default settings are already effective, but you can of course enter the values of your choice. In particular, it’s possible to specify:
- The number of connection attempts allowed
- The number of minutes during which a person will be unable to attempt to connect after failed connection attempts (lockout minutes)
- The time a person or bot will be locked out after X locks (locks increase the lockout time by X hours)
- The number of hours that elapse before login attempts are reset
You don’t need to touch the text in the “Trusted IP Origins” box. Finish by clicking on the blue “Save Settings” button:

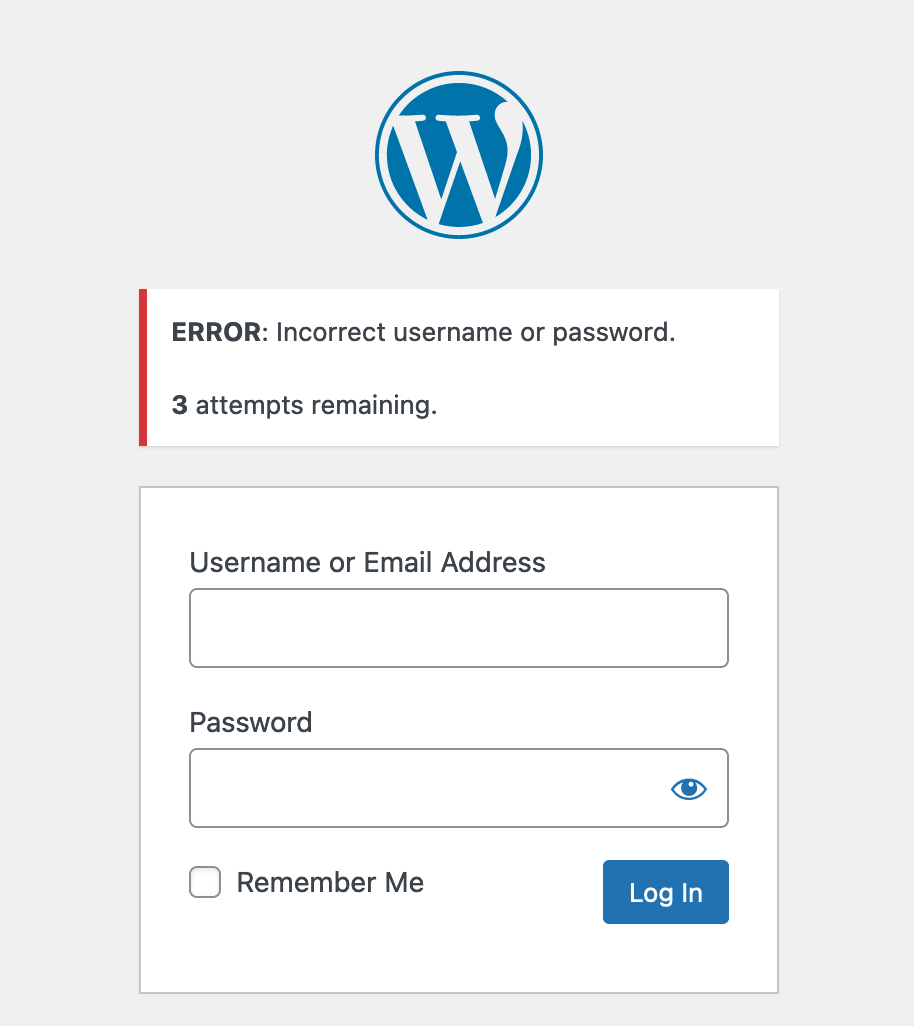
To see how the plugin works, go back to your WordPress login page, and enter a wrong password.
You will then see the number of attempts left before a possible block:

And of course, you will also be notified of this failed login attempt on your dashboard:

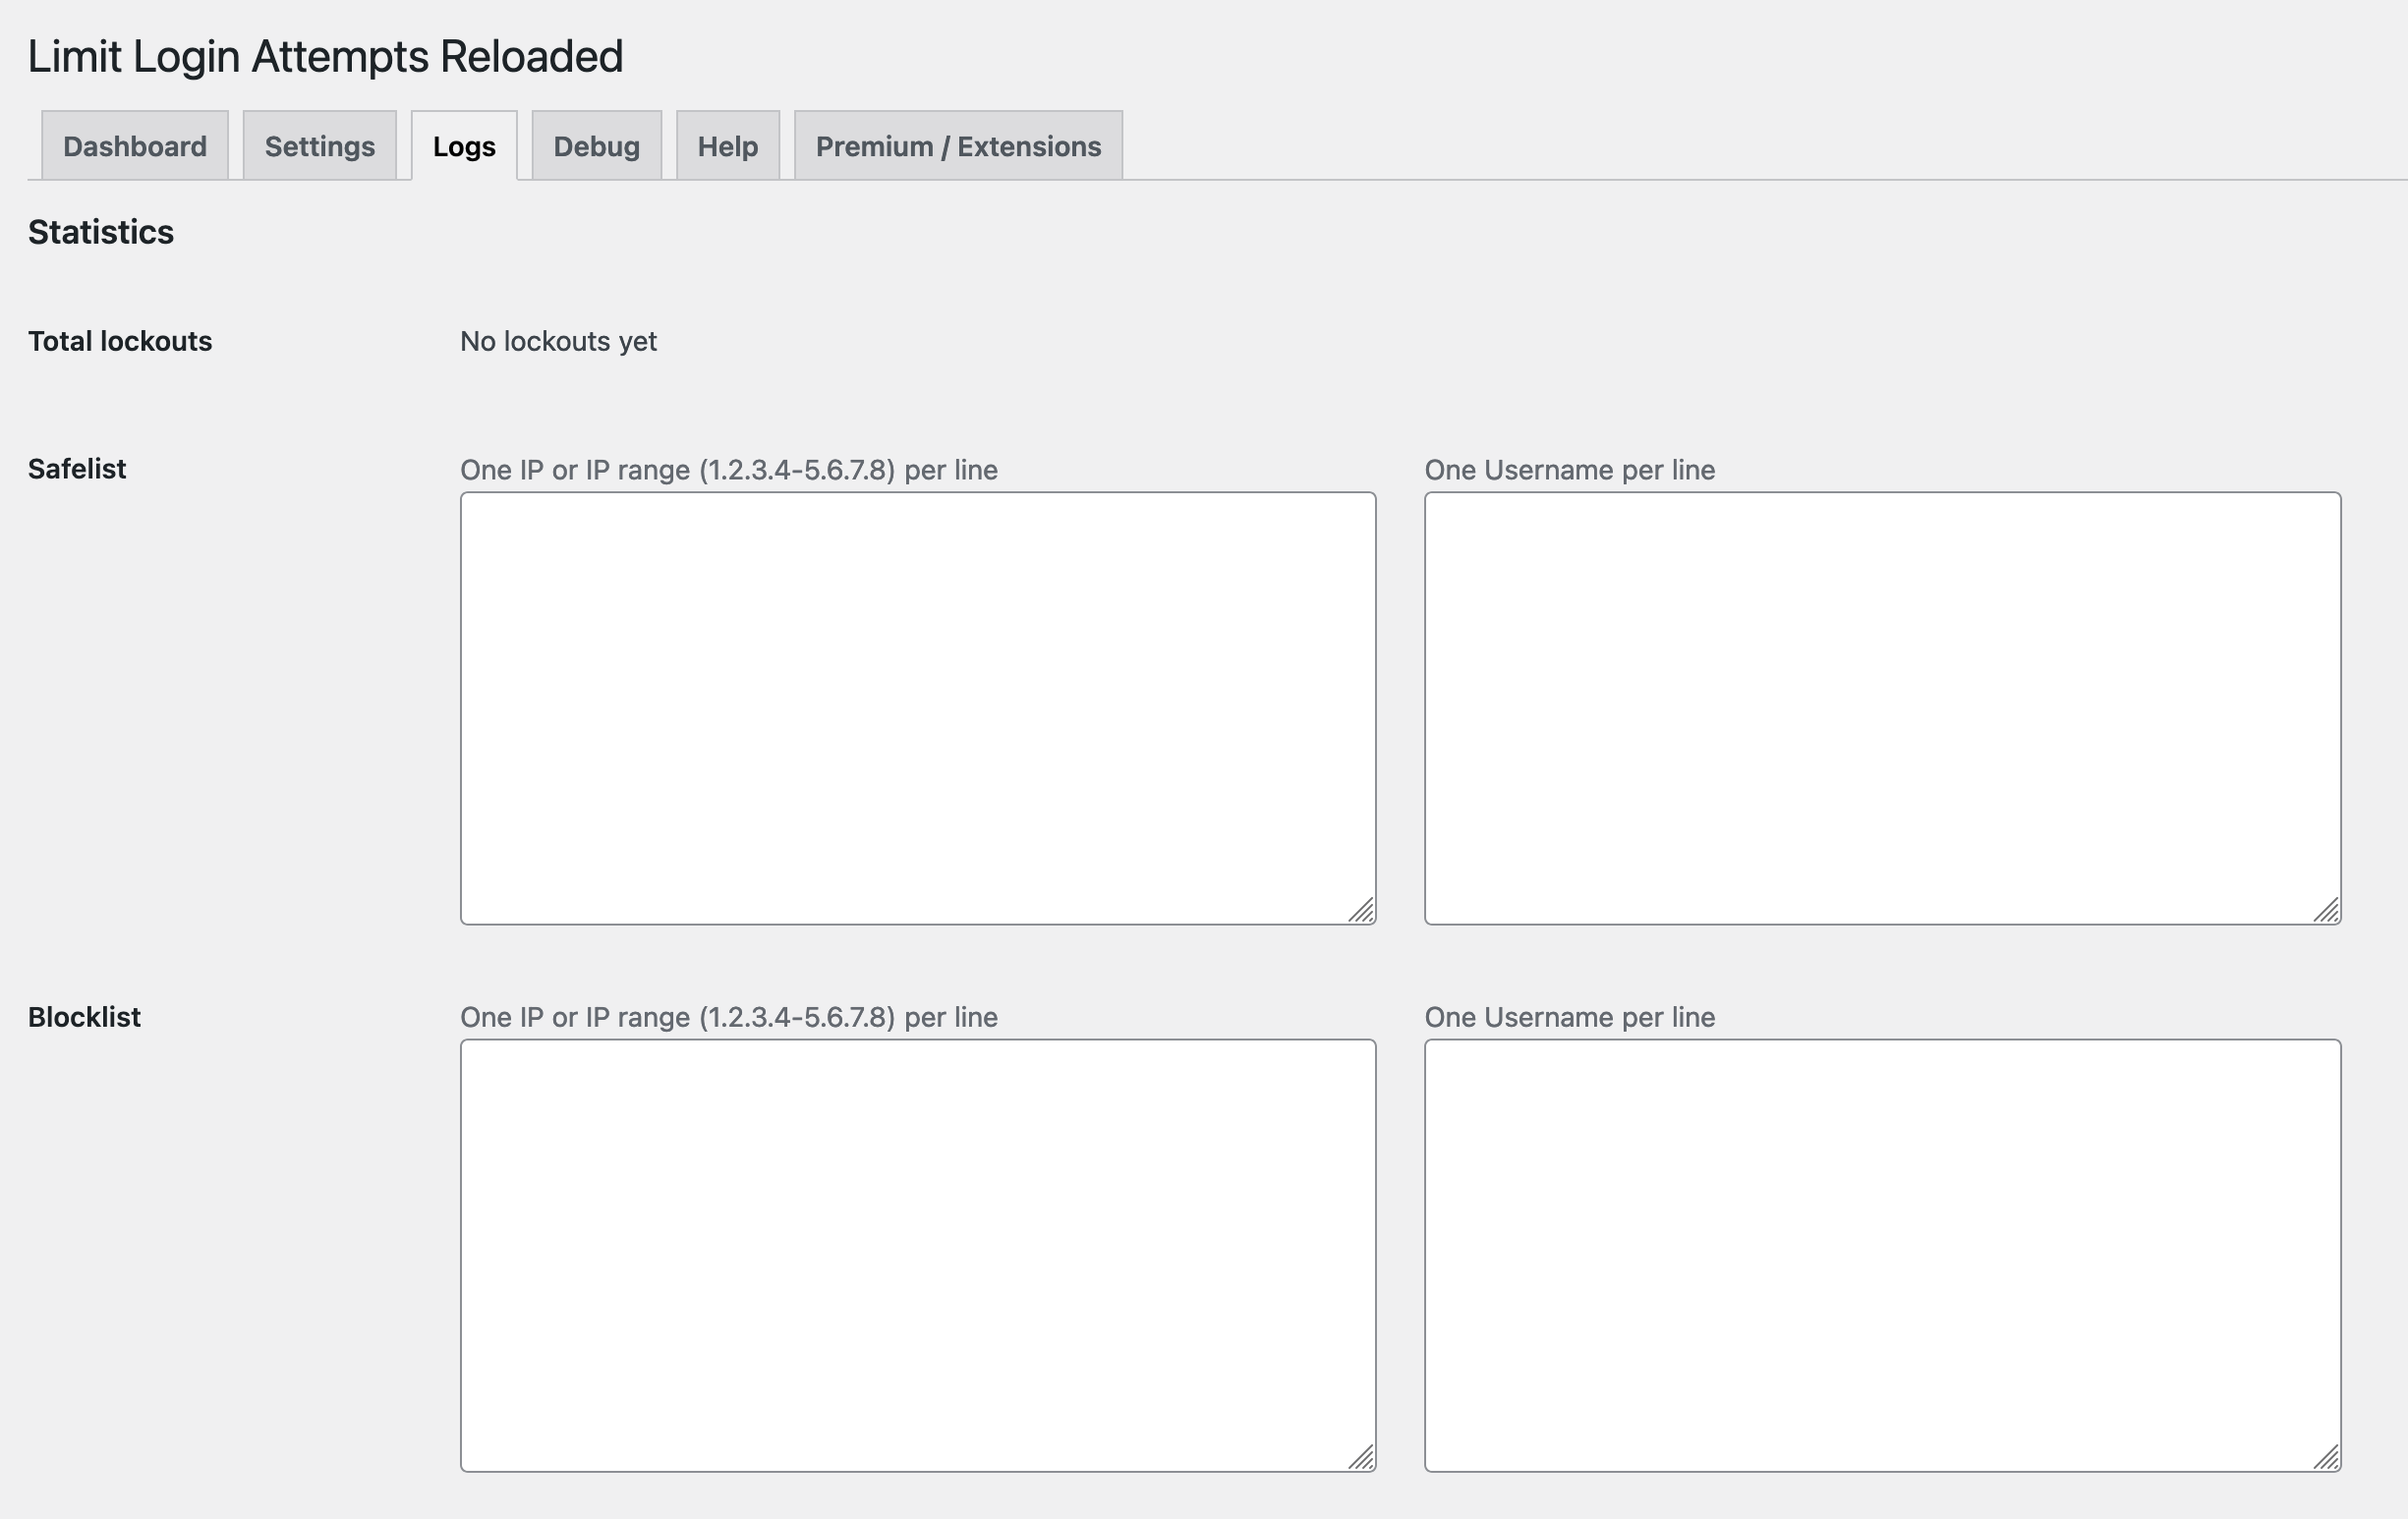
Finally, note that the “Logs” tab of Limit Login Attempts Reloaded allows you to enter logins or IP addresses that you would like to prevent from usernames to your site (Blocklist).
And on the other hand, you can enter the usernames and IP addresses that will be able to try to connect as many times as they want (Safelist).

And that’s it, your site is now a little more secure: congratulations!
Note that some general security plugins, such as iThemes Security or SecuPress, also offer an option to limit login attempts to the WordPress administration. If you’re using one of them, there’s no need to enable Limit Login Attempts Reloaded, as it would be a duplicate.


How do I unblock login attempts to the WordPress admin interface?
As you can see, Limit Login Attempts Reloaded is very effective in limiting WordPress login attempts.
It’s great for protecting you from brute force attacks, but sometimes it can also play tricks on you!
Indeed, you may very well find yourself blocked and unable to connect to your site if you make one too many connection attempts.
Even if a clearly visible error message warns you about the number of remaining connection attempts, this can unfortunately happen.
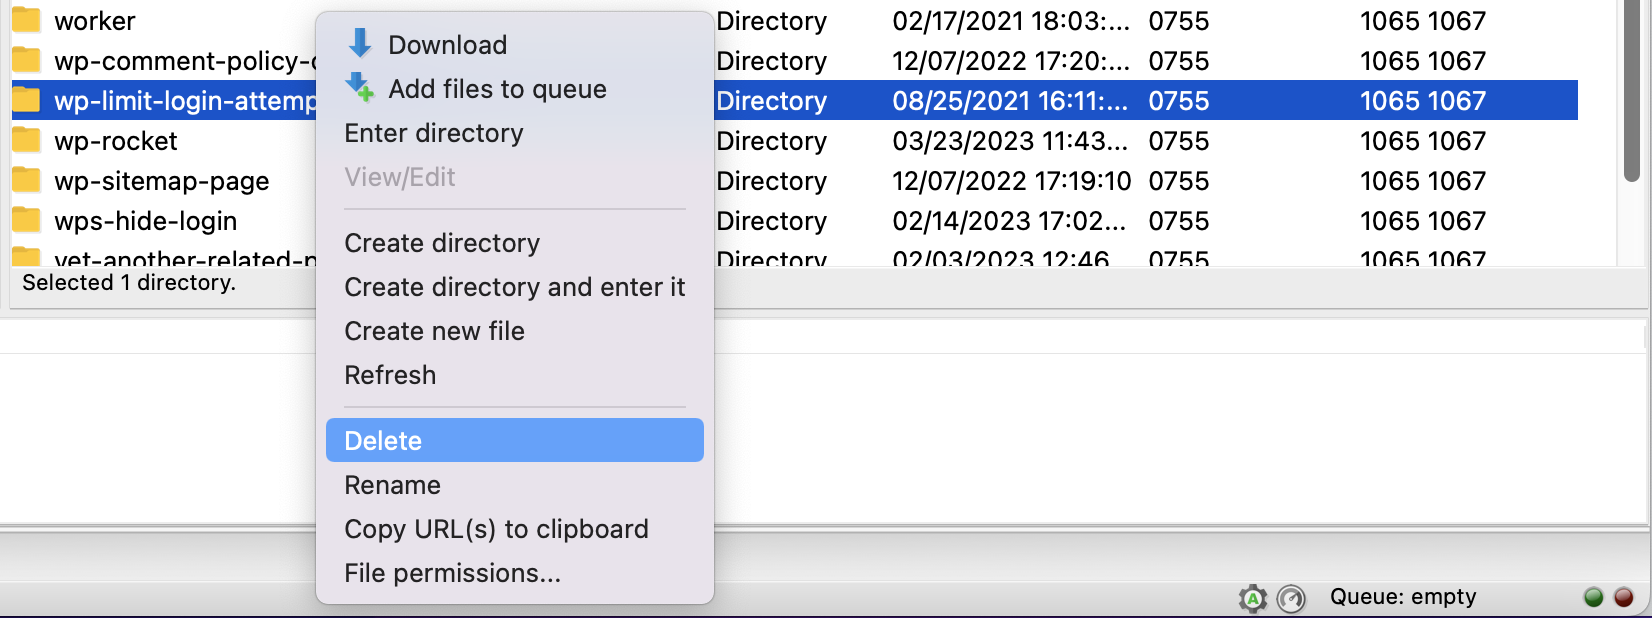
If this mishap strikes you, here’s a handy tip to unblock the situation. Connect to your favorite FTP client (FileZilla, Cyberduck, or Transmit).
Double-click on the root directory of your site, then go to the following directory: wp-content/plugins.
Right click on the plugin directory (limit-login-attempts-reloaded), and delete it. Now you can try to connect to your site again.

Once on your WordPress dashboard, remember to install and then activate Limit Login Attempts Reloaded again so that it protects your site.
To make sure you never lose your login and password, use an online password manager like Dashlane or LastPass. You can store your passwords in a secure online safe and automatically log in to your site with either one.
Going further to secure your site
In this article, you discovered the importance of limiting login attempts to your WordPress site with the Limit Login Attempts Reloaded plugin.
As you can see, it’s essential to apply this best practice to strengthen the security of your site.
With this plugin, you can limit brute force attacks and the risk of your hosting server going down (as soon as a brute force attack is performed, a request is sent to the server).
When it comes to security, don’t just limit connection attempts. To protect your installation as much as possible, also apply the following tips:
- Back up your site frequently. You can do this with a backup plugin (see our comparison), or with an all-in-one maintenance tool like WP Umbrella (affiliate link).
- Install a general security plugin like SecuPress to provide your site with major features such as a firewall, dual-factor authentication, and blocking of bots and malware.
- Enable the Akismet plugin, to limit spam.
- Adopt a strong password, for example using the Dashlane tool I just mentioned, or from a free online generator like https://www.random.org/passwords/.
Are you ready to keep the nasty bots off your site? It’s your turn to take action at home, so don’t delay.
On the way, leave us a comment or share your experience, which will also benefit other WPMarmite readers.