


333.2 billion: This is the number of emails that are sent and received every day in the world.
By 2025, it is estimated that this figure will increase to 376.4 billion, a figure that has been constantly increasing in recent years.
In the United States, 92% of the population uses email, greater than the number who use social media or other messaging apps.
And email often means newsletters. Speaking of which, if you’re here, it’s probably because you’re wondering how to create a newsletter on WordPress, right?


How does it work on your favorite CMS? Which service or plugin should you choose? How do you set up everything correctly? What best practices should you adopt?
At the end of this article, you will have answers to all these questions.
Overview


What is a newsletter?
Information, list, and form
To begin, let’s clarify what is meant by a newsletter, to lay the groundwork for the topic.
A newsletter is simply an email sent to your subscribers to inform them about specific news, such as the release of a new blog post, the organization of an event, a promotion on one of your products or services, etc.
Creating a newsletter implies having a list of subscribers. This list includes all the people who have given their consent, and therefore their email address, to receive your newsletters.
The term “newsletter” is also associated with the term “registration form,” also called an opt-in form (we will come back to this). It’s this form that allows you to collect the email addresses of your subscribers, which is essential to be able to communicate with them.

What are the main types of emails?
A newsletter allows you to send an email. That’s all. However, we should distinguish between:
- Transactional emails
- Marketing emails
As this Sendinblue article explains, “Transactional email is an email that’s automatically sent by your website to an individual recipient following a transaction or specific action performed by that person, such as an ecommerce purchase or a password request… Marketing emails have a supplementary function: to promote and inform.”
The limitations of WordPress emails
By default, WordPress only allows you to send transactional emails. They are used to:
- Notify you of a new comment on one of your articles
- Reset a user’s password
- Notify you of new member registrations (if your site allows it)
- Ask you to moderate a comment
- Etc.
These default emails are not really optimized to showcase your site. They are ugly and cold. To make them warmer, you can consult this resource on the WPMarmite blog.
In relation, let’s also mention the emails you receive with the contact form you have installed.
What about Gmail, Outlook, and Yahoo?
To design marketing emails (e.g. creating a newsletter) on WordPress, you will need to use a dedicated email marketing tool (a WordPress plugin or third-party service).
This solution is preferable to using a classic email service, such as Gmail, Yahoo, or Outlook.
If you use the latter, you will be limited very quickly. The main reason is that these tools do not allow you to send mass emails, which is annoying when you start accumulating subscribers.
Moreover, their deliverability rate (percentage of emails that reach your subscribers) often leaves something to be desired, and their personalization options are reduced to a minimum.
What are the advantages of a newsletter?
Now that you have a better understanding of the overall emailing picture, let’s look at the benefits of a newsletter on WordPress.
To start with, emailing offers a very high return on investment (ROI). On average, $1 spent on emailing gives back $35 to $40.
ROI is “expressed as a percentage and is calculated by dividing an investment’s net profit (or loss) by its initial cost… Essentially, ROI can be used as a rudimentary gauge of an investment’s profitability.”


Secondly, a newsletter that follows good practices has many advantages. Thanks to it, you will be able to:
- Build a list of loyal subscribers
- Generate more traffic to your site
- Increase the number of visitors who come back to your site
- Promote your blog posts and/or sell your products and services through personalized communication
- Reinforce your brand image and build loyalty by communicating with your readers on a regular basis
And finally, let’s mention that email marketing is inexpensive to start with (after that, it depends on the size of your list), and that it allows you to very precisely target a certain group of people.


How does a newsletter on WordPress work?
To create a newsletter on WordPress, you need two main elements:
- A tool to design and send your newsletter. To put it simply, you can either use a third-party service or rely on a dedicated plugin.
- An opt-in form to capture your visitors’ emails. They will land directly in your mailing list. Whatever solution you use (third-party service or plugin), it will usually offer a way to create this subscription form (and the list associated with it), often with ready-to-use templates.
At this point, you need to ask yourself which option to go with. Online service? Or a WordPress plugin? Often, this decision can be a headache. To help you decide, follow the guide 😉
Who should be using a WordPress plugin to create a newsletter?
The use of a WordPress plugin to create a newsletter is mostly recommended for beginners.
With a dedicated plugin, you will find all the options on your dashboard. This makes it easier to get started, since you don’t need to go to another interface.
Moreover, the free version of the newsletter plugins is often enough to get you started, without overwhelming you with options you might not need at first (A/B tests, advanced stats, etc.).
Finally, some of these plugins now offer their own sending service (or a third-party server), which was not often the case when the first version of this article was written.
As a result, the deliverability is improved and the chance is lower than before that your emails end up in your subscribers’ spam folders.
Who should use a third-party service?
The use of a third-party service (Mailchimp, ActiveCampaign, Sendinblue, AWeber, ConvertKit, etc.) is intended for intermediate or experienced users, such as marketers.
For the beginner, these services have two main drawbacks:
- Their interface is not integrated with WordPress, so you have to connect to the emailing service’s website to create and send your newsletters. The learning curve is longer.
- Their price. Some services like Mailchimp offer free options, but you can quickly be limited with these (you can send 2,500 emails/month with the free version of Mailchimp) .
On the other hand, a third-party service will often become indispensable if you want to benefit from advanced options:
- A/B testing
- Automations
- Segmentation
- Advanced statistics
- Additional features in terms of design and customization
While some WordPress plugins may offer these kinds of options, they are often more advanced with third-party services. Third-party services are still ahead of WordPress plugins, even if the gap is gradually narrowing over time.
Is this clearer for you? Let’s get down to business right away. I will now show you how to create a newsletter on WordPress using a plugin AND a third-party service.


How to make a newsletter on WordPress with a plugin
What options are available to you (and which one to choose)?
The official directory offers dozens of newsletter plugins for WordPress. Here are a few of them, classified according to their popularity:
- MailPoet (700K+ active installations)
- Newsletter (300K+ active installations)
- Sendinblue (100K+ active installations)
- ConvertKit (40K+ active installations)
- MailOptin (20K+ active installations)
- Mailjet (20K+ active installations) ;
- AcyMailing (7K+ active installations)
- Jackmail ( active installations)

To make your choice from among them, I recommend you base your decision on the following criteria:
- The ease of use and configuration of the plugin
- User reviews
- How often the plugin is updated
- The overlap between the options offered by the plugin and your needs
- The price of the plugin: Most of them have a free version, but there are sometimes limitations, especially on the number of emails you can send (check this on a case by case basis)
- Deliverability. It is difficult to check without testing, it’s true. However, you can go for a plugin that offers its own sending service (or allows you to configure an SMTP server), rather than an plugin that relies on the native WordPress email sending function (WP is not made for that, and the deliverability will be much worse).
For your information, SMTP is “an Internet standard communication protocol… to send and receive email messages,” says Wikipedia.
Spotlight on two plugins: MailPoet and AcyMailing
I didn’t have the opportunity to test each plugin individually: it’s impossible to tell you which is the best newsletter plugin on WordPress. However, the WPMarmite blog has taken a closer look at two of them, MailPoet and AcyMailing, which happent to be made in France.
Over one or the other, I can assure you that the quality and the options are there for both. MailPoet may have a small advantage over its competitor, since it offers its own email sending system (this should happen with AcyMailing by the end of 2022), and is set directly on the WordPress content editor (Gutenberg).
To learn how to configure them and create a newsletter from your WordPress site with them (either one or the other, don’t use both at the same time!), check out our dedicated articles:
If these two don’t meet your needs and expectations, don’t hesitate to test the free version of one of the others listed above, in order to form your own opinion.
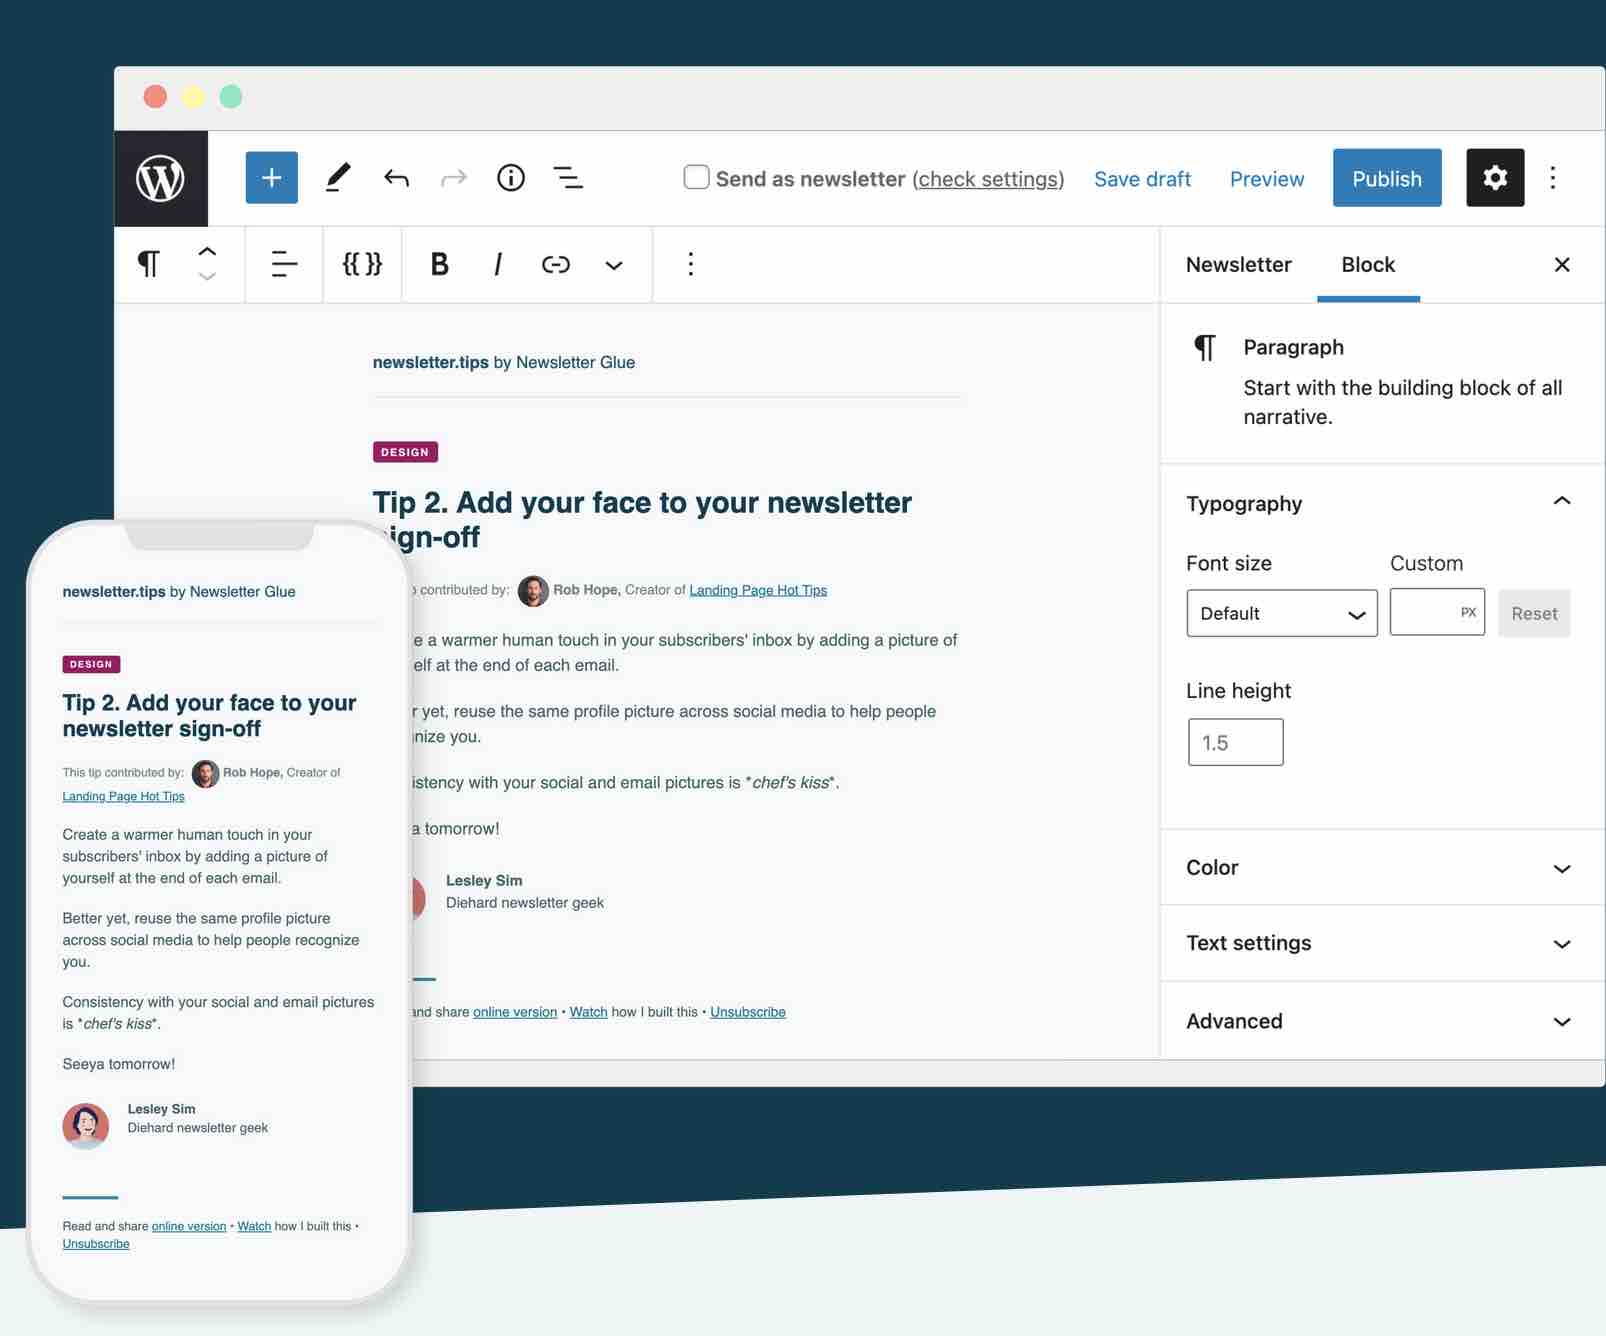
In parallel, there is also a very interesting plugin that is a bit different: Newsletter Glue. To work, the Newsletter Glue plugin needs to connect to an emailing service (Mailchimp, MailerLite, Mailjet, Moosend, Sendy, or SendGrid), but it can be used directly on your WordPress site.
What makes it different and what is its main point? With this plugin, you write and publish a newsletter exactly as you would with an article. Newsletter Glue uses the interface of the content editor, which makes the operation familiar and very simple.
However, the options are not as numerous as with MailPoet, for example. And the plugin is only available in premium (from $99/year for a maximum of one site)

How to create a newsletter on WordPress with Mailchimp
Initially dedicated to the creation and sending of newsletters, Mailchimp has diversified in recent years.
The company is presented today as “an all-in-one integrated marketing platform dedicated to helping small businesses grow the way they want” (website creation, CRM, online appointment setting tool).
Acquired by Intuit in 2021, the company is the world’s most popular newsletter creator, with 14 million users.
It’s known for its ease of use and free plan (500 contacts maximum, 2,500 emails/month). So it’s hard not to introduce it to you.
Let’s look right away at how to create and send newsletters with Mailchimp.
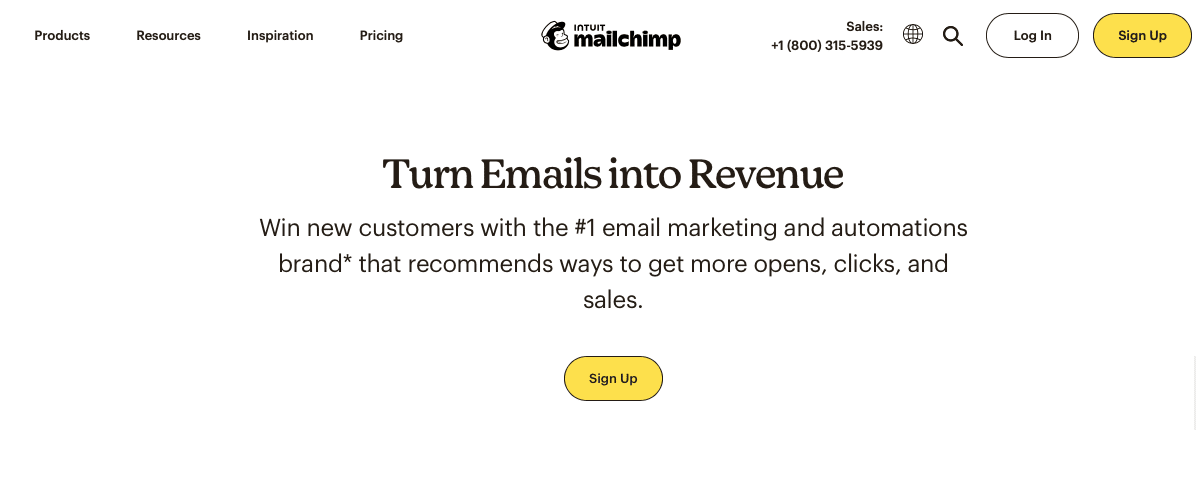
Step 1: Create a Mailchimp account
Go to Mailchimp and click on the yellow “Sign up” button in the middle of the screen.

Enter the requested information (email, username, password) and click on the “Sign up” button.
Normally, Mailchimp will send you an email asking you to confirm your account creation.
Then, Mailchimp asks you for information about yourself such as your first and last name, business name, address, etc.
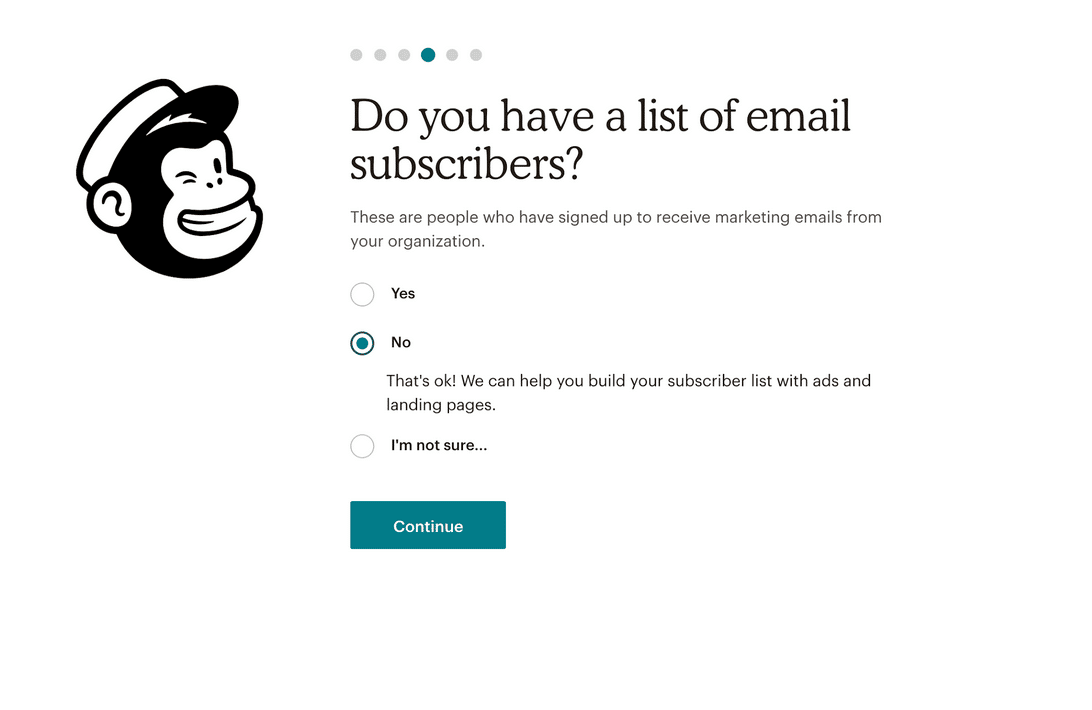
Mailchimp also asks you if you already have a list of subscribers. Let’s assume that you don’t, so check “No.”

Finally, you can also connect your Facebook and Twitter accounts; it’s up to you if you want to do so. Your Mailchimp account is created, so let’s go to the second step.
Step 2: Activate the Mailchimp for WordPress plugin
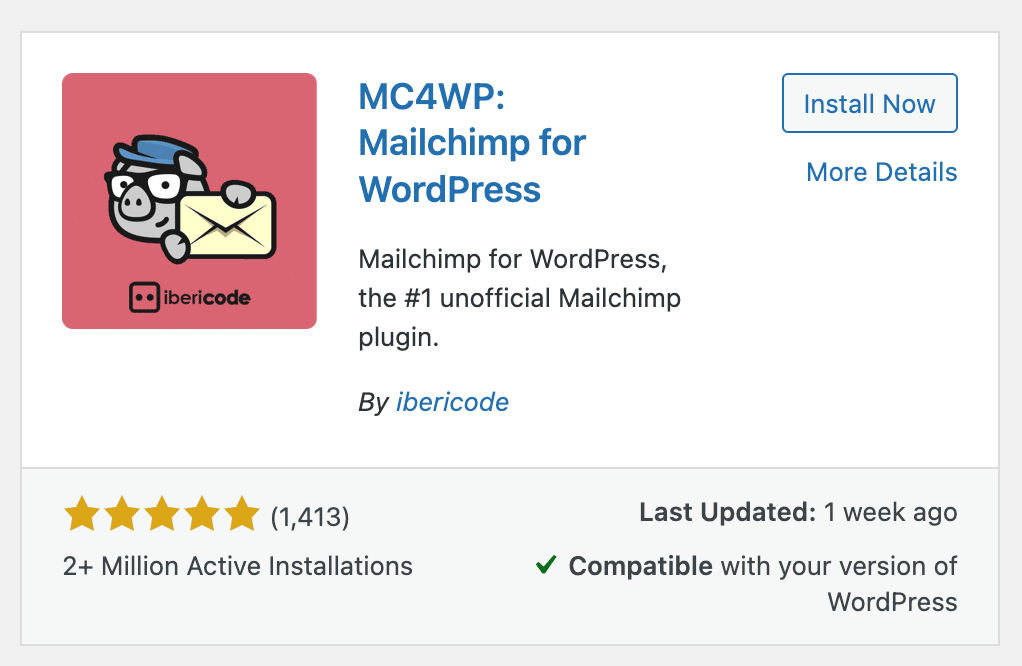
In the second step, you need to connect your Mailchimp account to your WordPress site. This is done with the Mailchimp for WordPress plugin (MC4WP), which also allows you to design a sign-up form for your email list (more details later).
On your WordPress Dashboard, go to Plugins > Add, and search for Mailchimp for WordPress.
Install and activate the plugin.

To start, you need to get an API key. This will connect the plugin to your Mailchimp account so they can interact.
An API is the part of a computer program that is freely available to anyone with valid access, and that can be manipulated to create a new way to use an application.
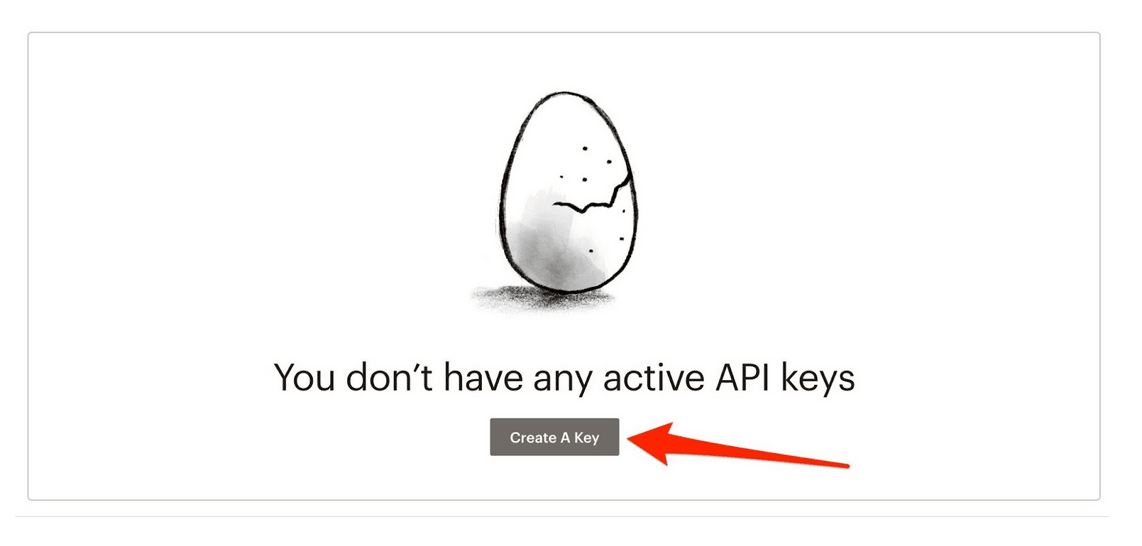
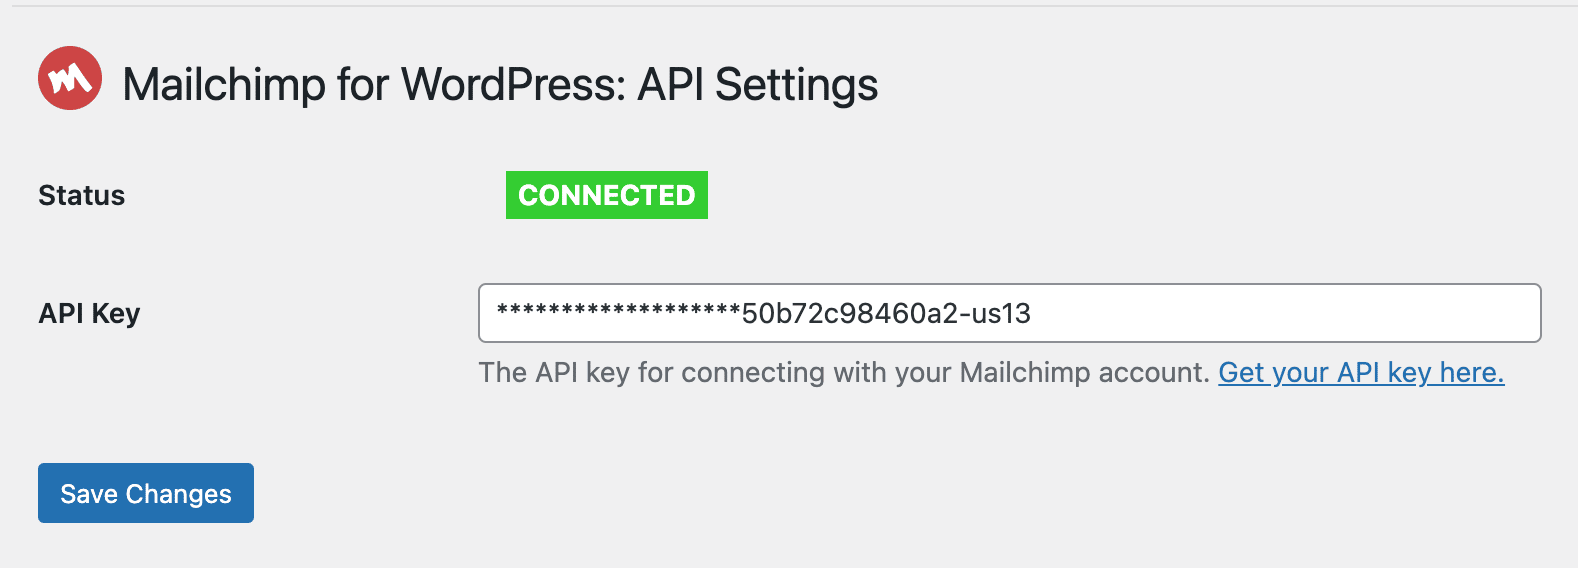
On your dashboard, click on MC4WP > Mailchimp, then on the link “Get your API key here.”


You are redirected to your Mailchimp account, in the Extras > API Key menu. Click on “Create A Key”:

Retrieve the one that Mailchimp has just generated:

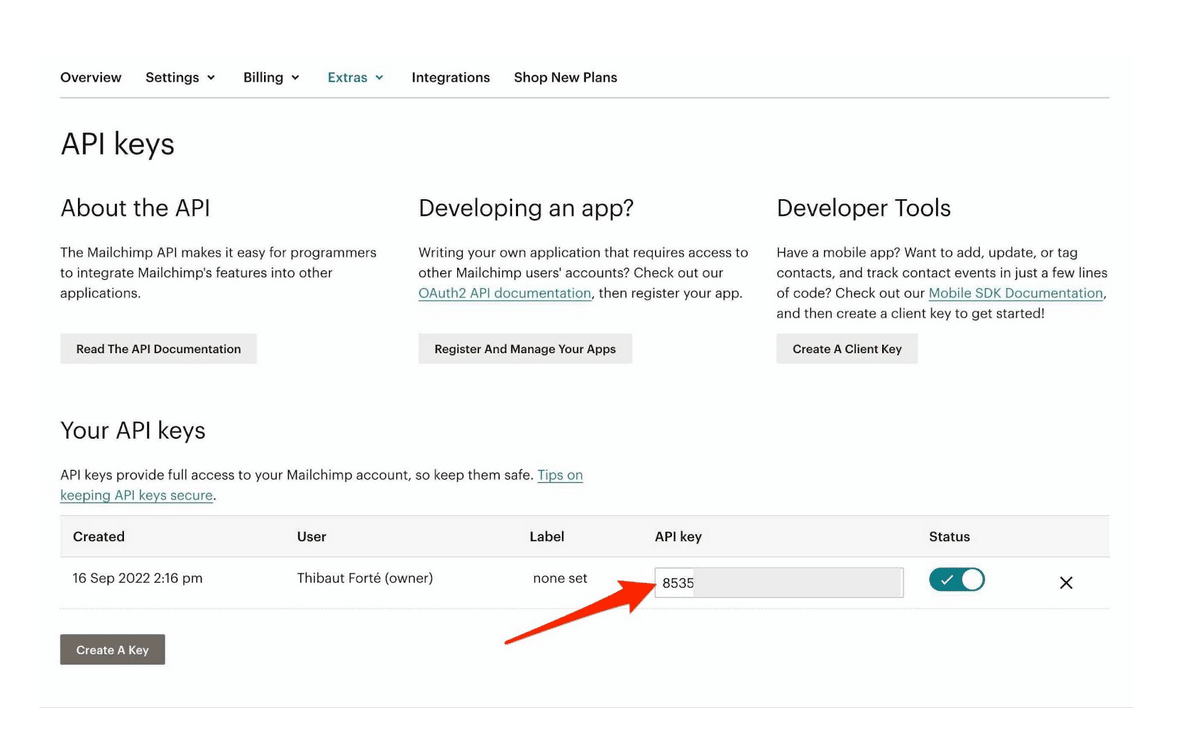
Then copy and paste the key into the “API Key” field of the plugin, on WordPress. Click on “Save changes.” Normally, the status should change to “Connected” (green box below).

Step 3: Set up your Mailchimp list
Now let’s leave WordPress and go back to your Mailchimp account to set up your list.
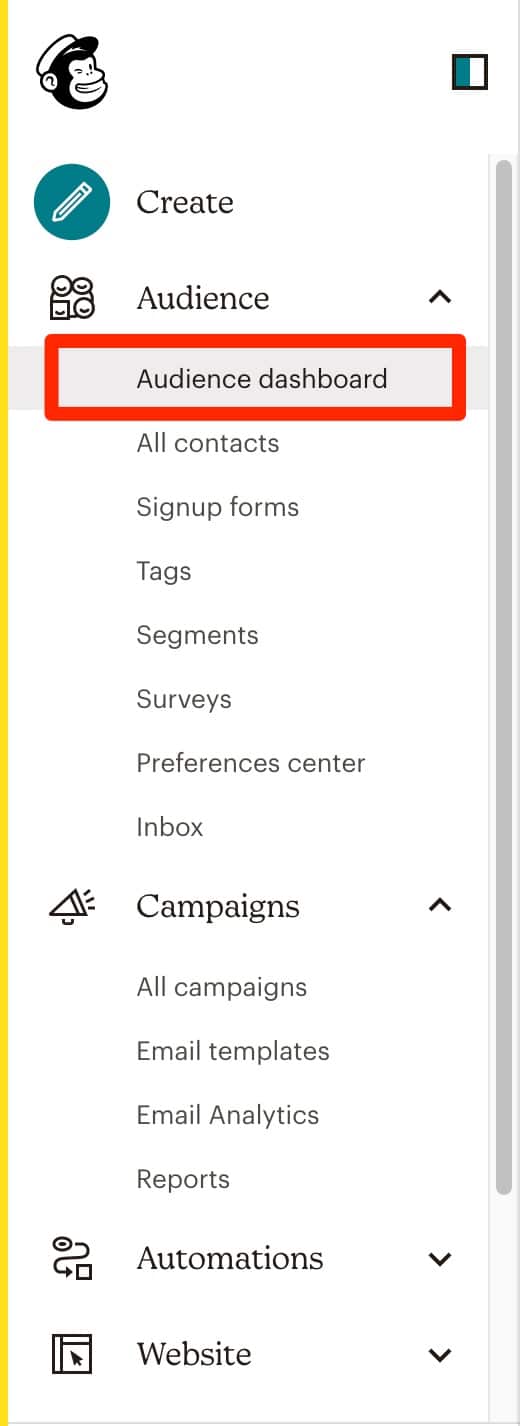
In the sidebar, on the left of your screen, click on “Audience dashboard.”

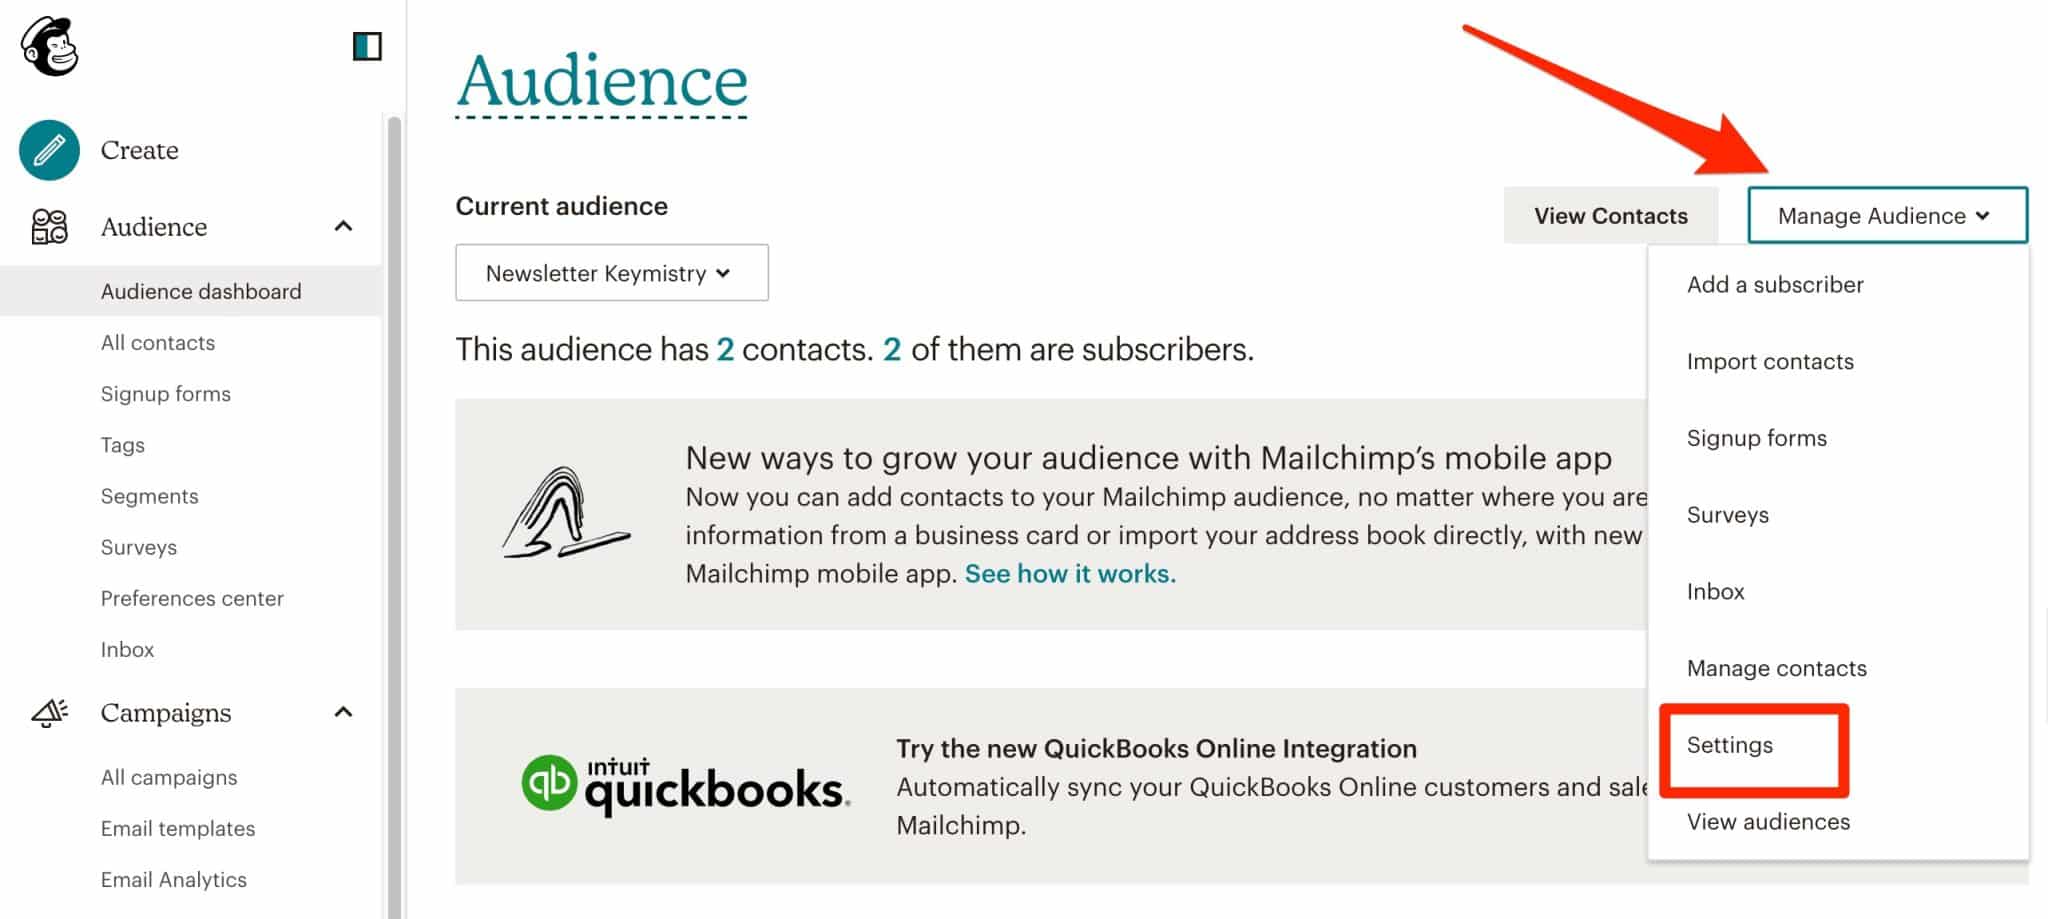
Then, in the drop-down menu labeled “Manage Audience”, click on “Settings,” then “Audience name and Defaults.”

The menu you are about to see contains the basic settings for your list.
There are 3 main sections: “Form Settings,” “Campaign Defaults,” and “New Subscriber notifications.”
Form Settings
In “Form Settings,” check all the boxes:
- “Enable double opt-in”: Once your visitors have completed the subscription form for your newsletter, they will receive an email asking them if they really want to subscribe and will have to confirm again.
- “Enable reCAPTCHA“: Activate this box if you want to prevent robots from adding spam emails to your list.
Please note that in Mailchimp, there are two types of reCAPTCHAS. One will ask new subscribers to check a box that says “I am not a robot.” There is also another invisible one, which does not ask new subscribers to check a box. “The type of form you’re working with determines the type of reCAPTCHA you’ll use,” as Mailchimp explains.


I also recommend checking the box to allow GDPR fields. This option is now available in the Audience Dashboard > Settings > GDPR fields and settings menu.
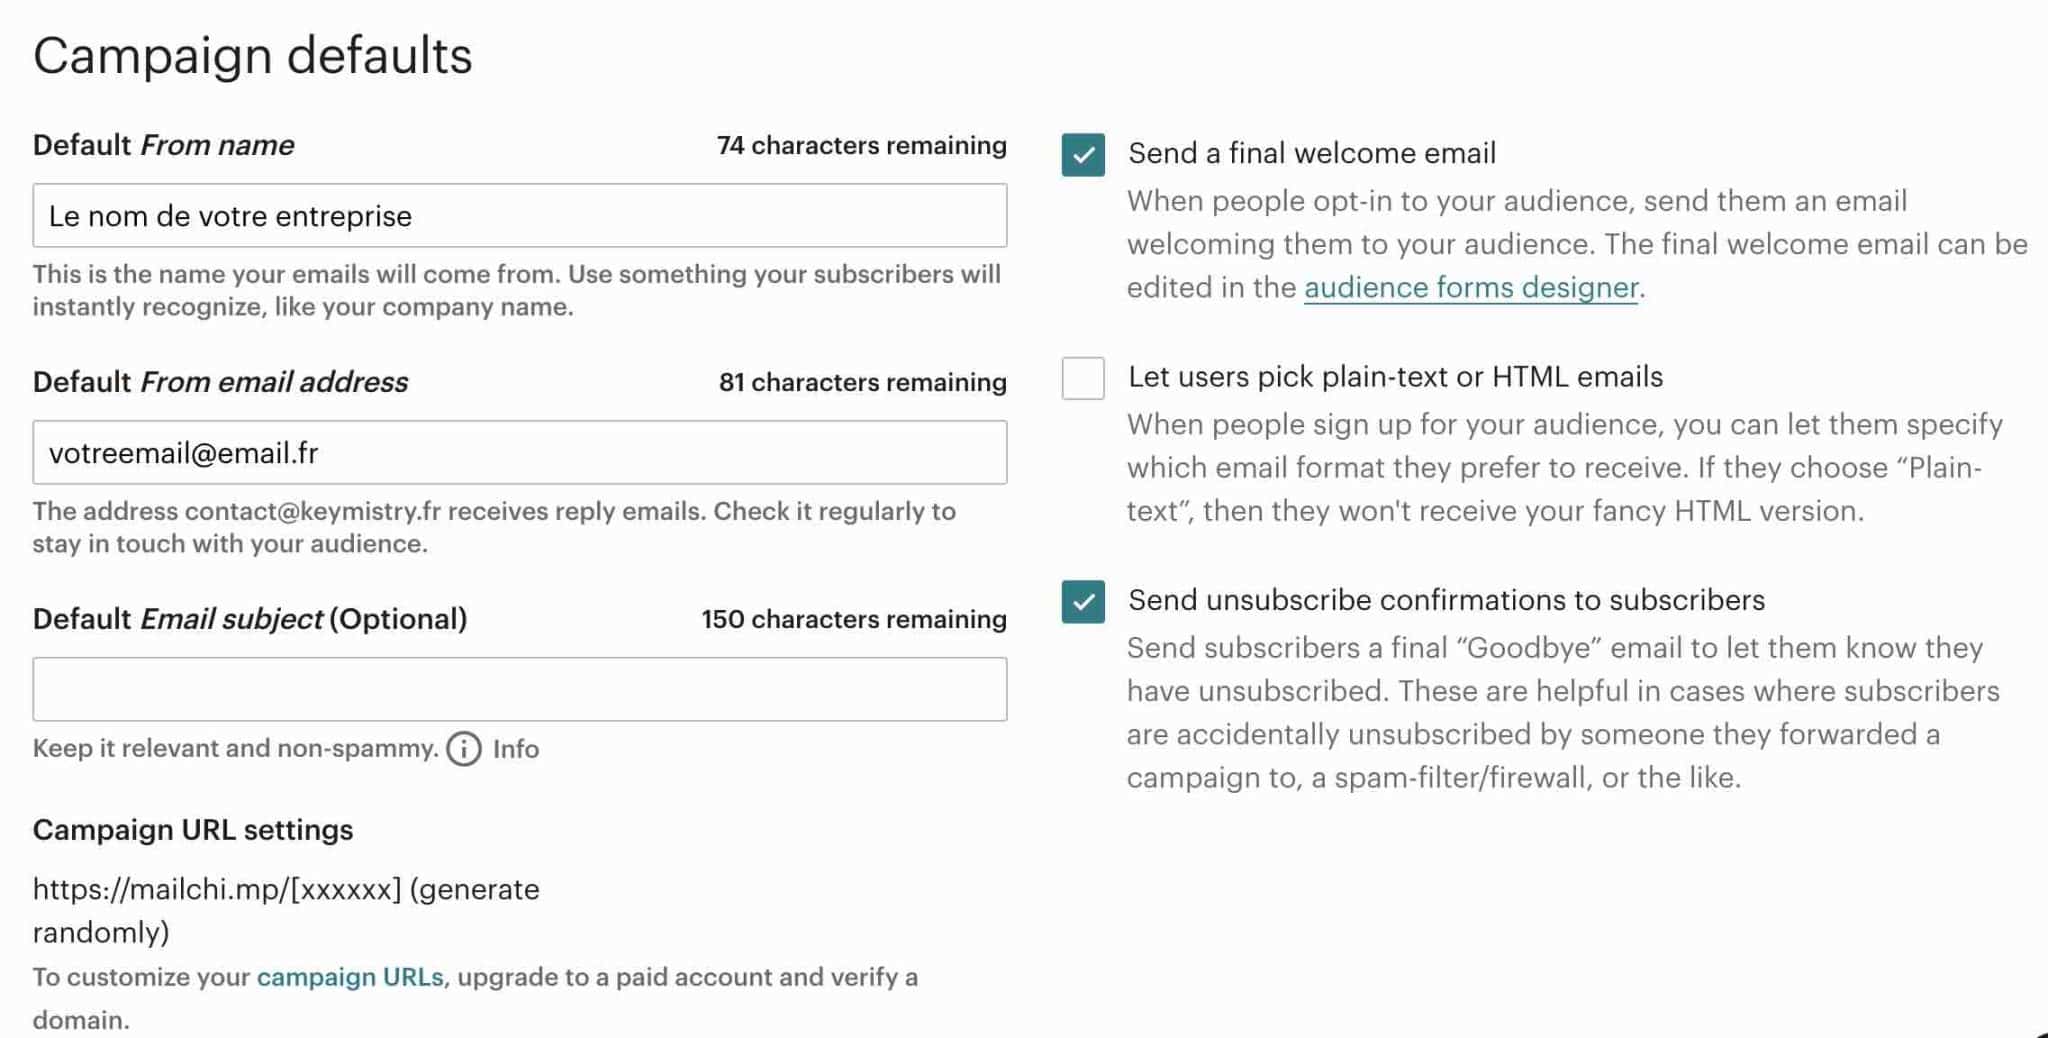
Campaign default settings
In “Campaign Defaults,” I advise you to:
- Check the box “Send a final welcome email”: This will trigger a welcome email to be sent to your mailing list after a user has signed up. Don’t forget to personalize it!
- Don’t check the box “Let users pick plain-text or HTML emails.”
- Possibly check the “Send unsubscribe confirmations to subscribers” box: This allows you to send a goodbye email to someone who has unsubscribed from your mailing list. Personalize it with a humorous message to wish them well and let them know you are sad to see them go.
- Fill in the “Default from name” field with an explicit term. Ideally, put your name followed by your site so that your subscribers can easily identify you (it’s always less austere than a company name). For example, if you are subscribed to the blog newsletter, you should receive emails from “Alex from WPMarmite.”

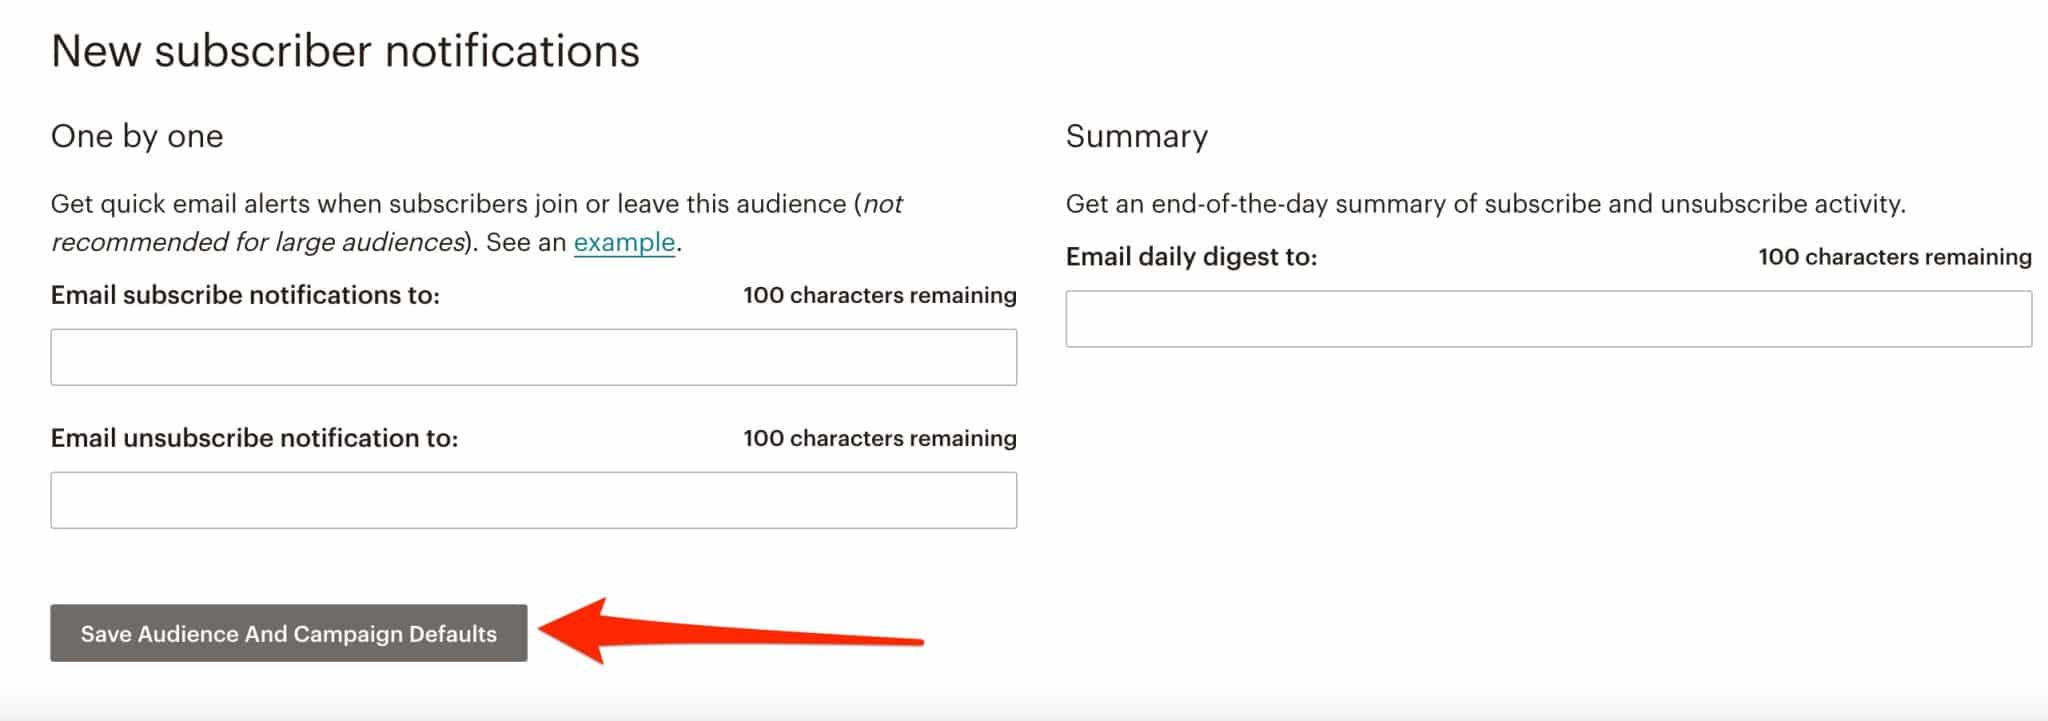
Notifications for new subscribers
In the third section, labeled “New subscriber notifications,” you can choose to enter your email to be notified when a subscriber subscribes or unsubscribes, and receive a daily summary of activity on your list.
Personally, I get enough emails like this every day and I don’t check anything in this section. But if you’re interested, you can enter your email.
Remember to save by clicking the “Save Audience and Campaign Defaults” button:

Step 4: Translate Mailchimp emails
One potential problem with Mailchimp is that everything is in English. It doesn’t look very professional if you’re communicating with an audience that speaks another language. But let me reassure you, it’s very simple to change this.
On your Mailchimp account, click on Audience > Signup Forms.
Select “Form builder”:

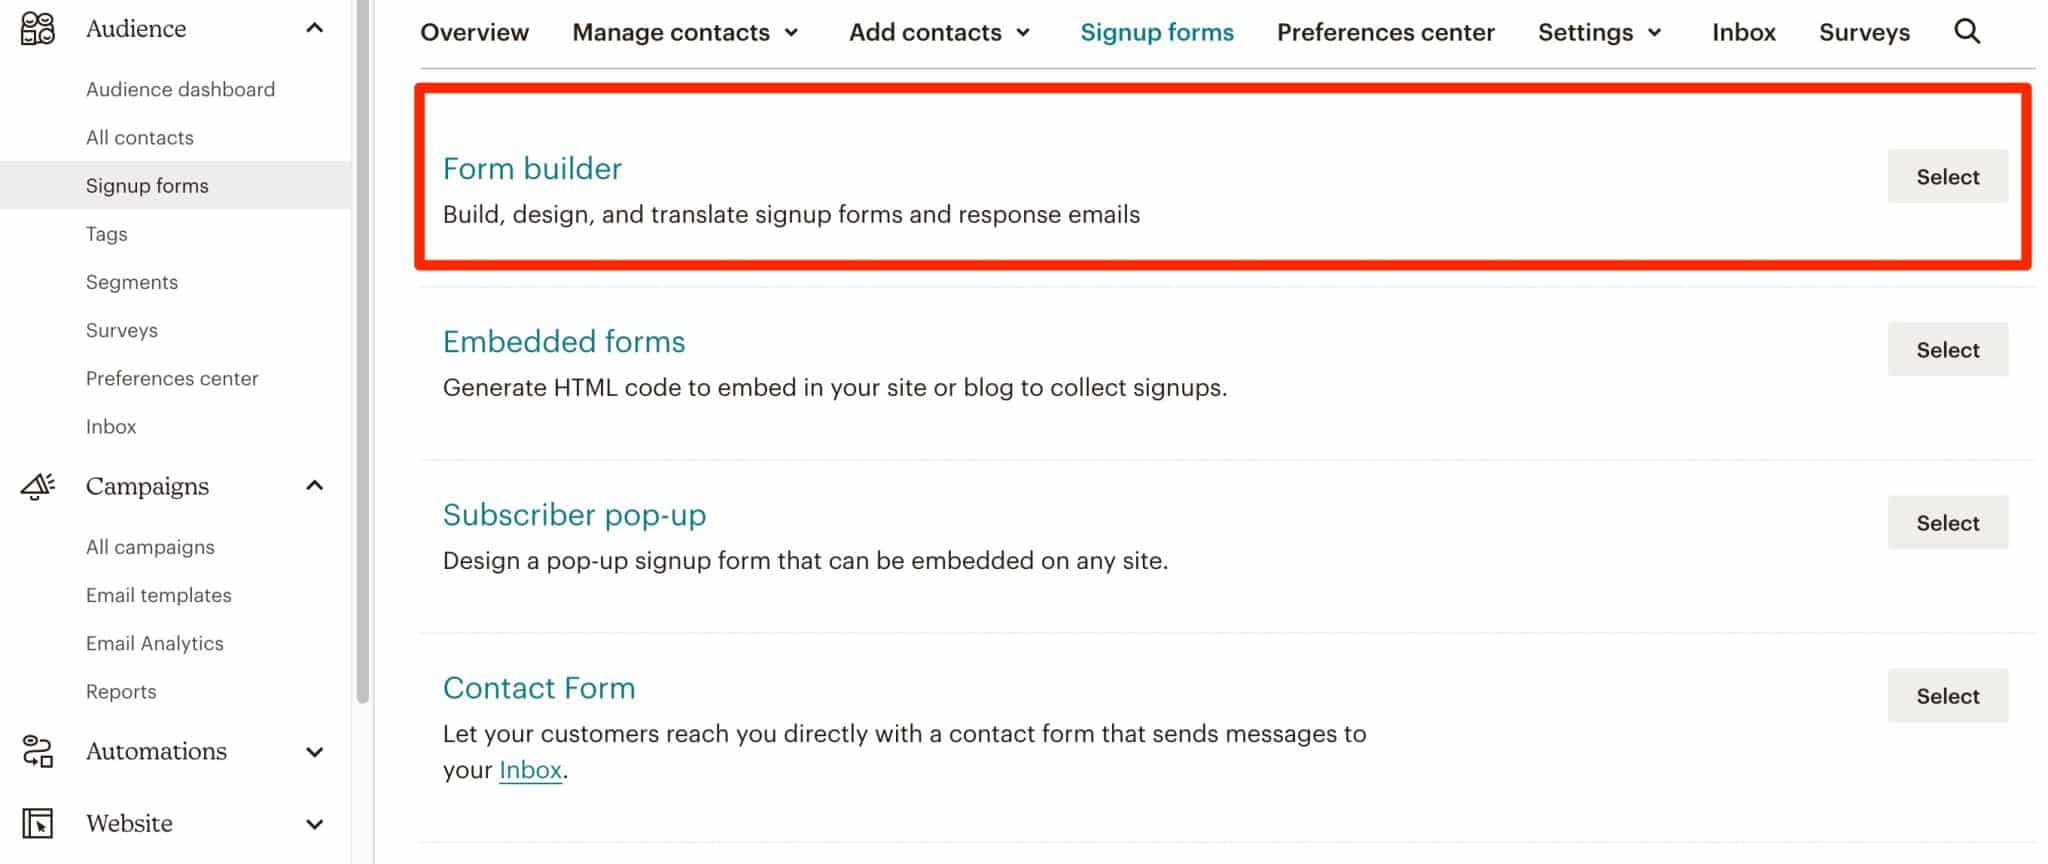
A drop-down menu will show all your forms. Choose the one you are interested in. For the example, we will use, “Final welcome email,” which we mentioned earlier.
You have three options:
- “Build it“: To add fields to your email.
- “Design it”: To modify the design of your email.
- “Translate it”: To translate your email.
Choose “Translate it” and select the language you need.
The translations are then displayed below. Feel free to modify them if you want to personalize your emails a little more, and then save it.
Then repeat this process for all the Mailchimp notification emails you want to translate.

Step 5: Create a newsletter signup form
Your list is correctly set up and translated. Now, I suggest you go back to the Mailchimp for WordPress plugin interface to create your subscription form.
This plugin will allow you to capture the emails of your visitors and then send them your WordPress newsletter.
To start, go to MC4WP > Form.

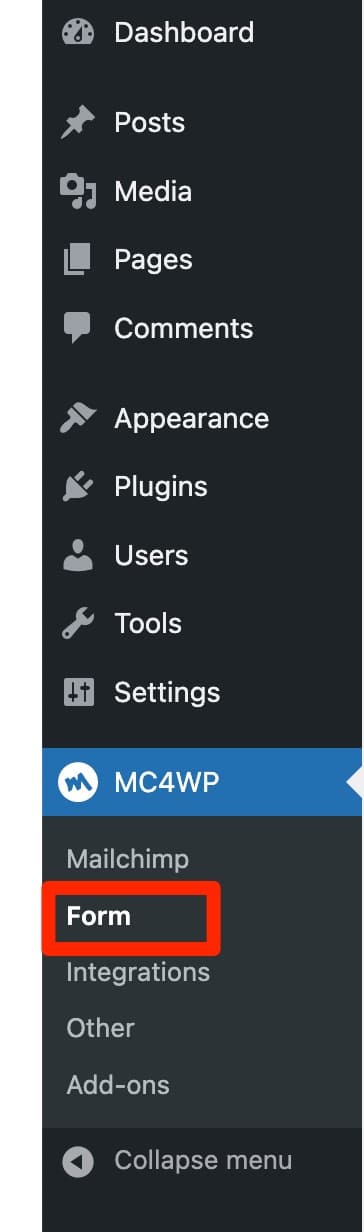
Give your form a name, attach it to the list of your choice, and click on “Add a new form.”
As you can see below, the interface with code is reminiscent of Contact Form 7, but frankly, it doesn’t get much better than this in a free plugin.

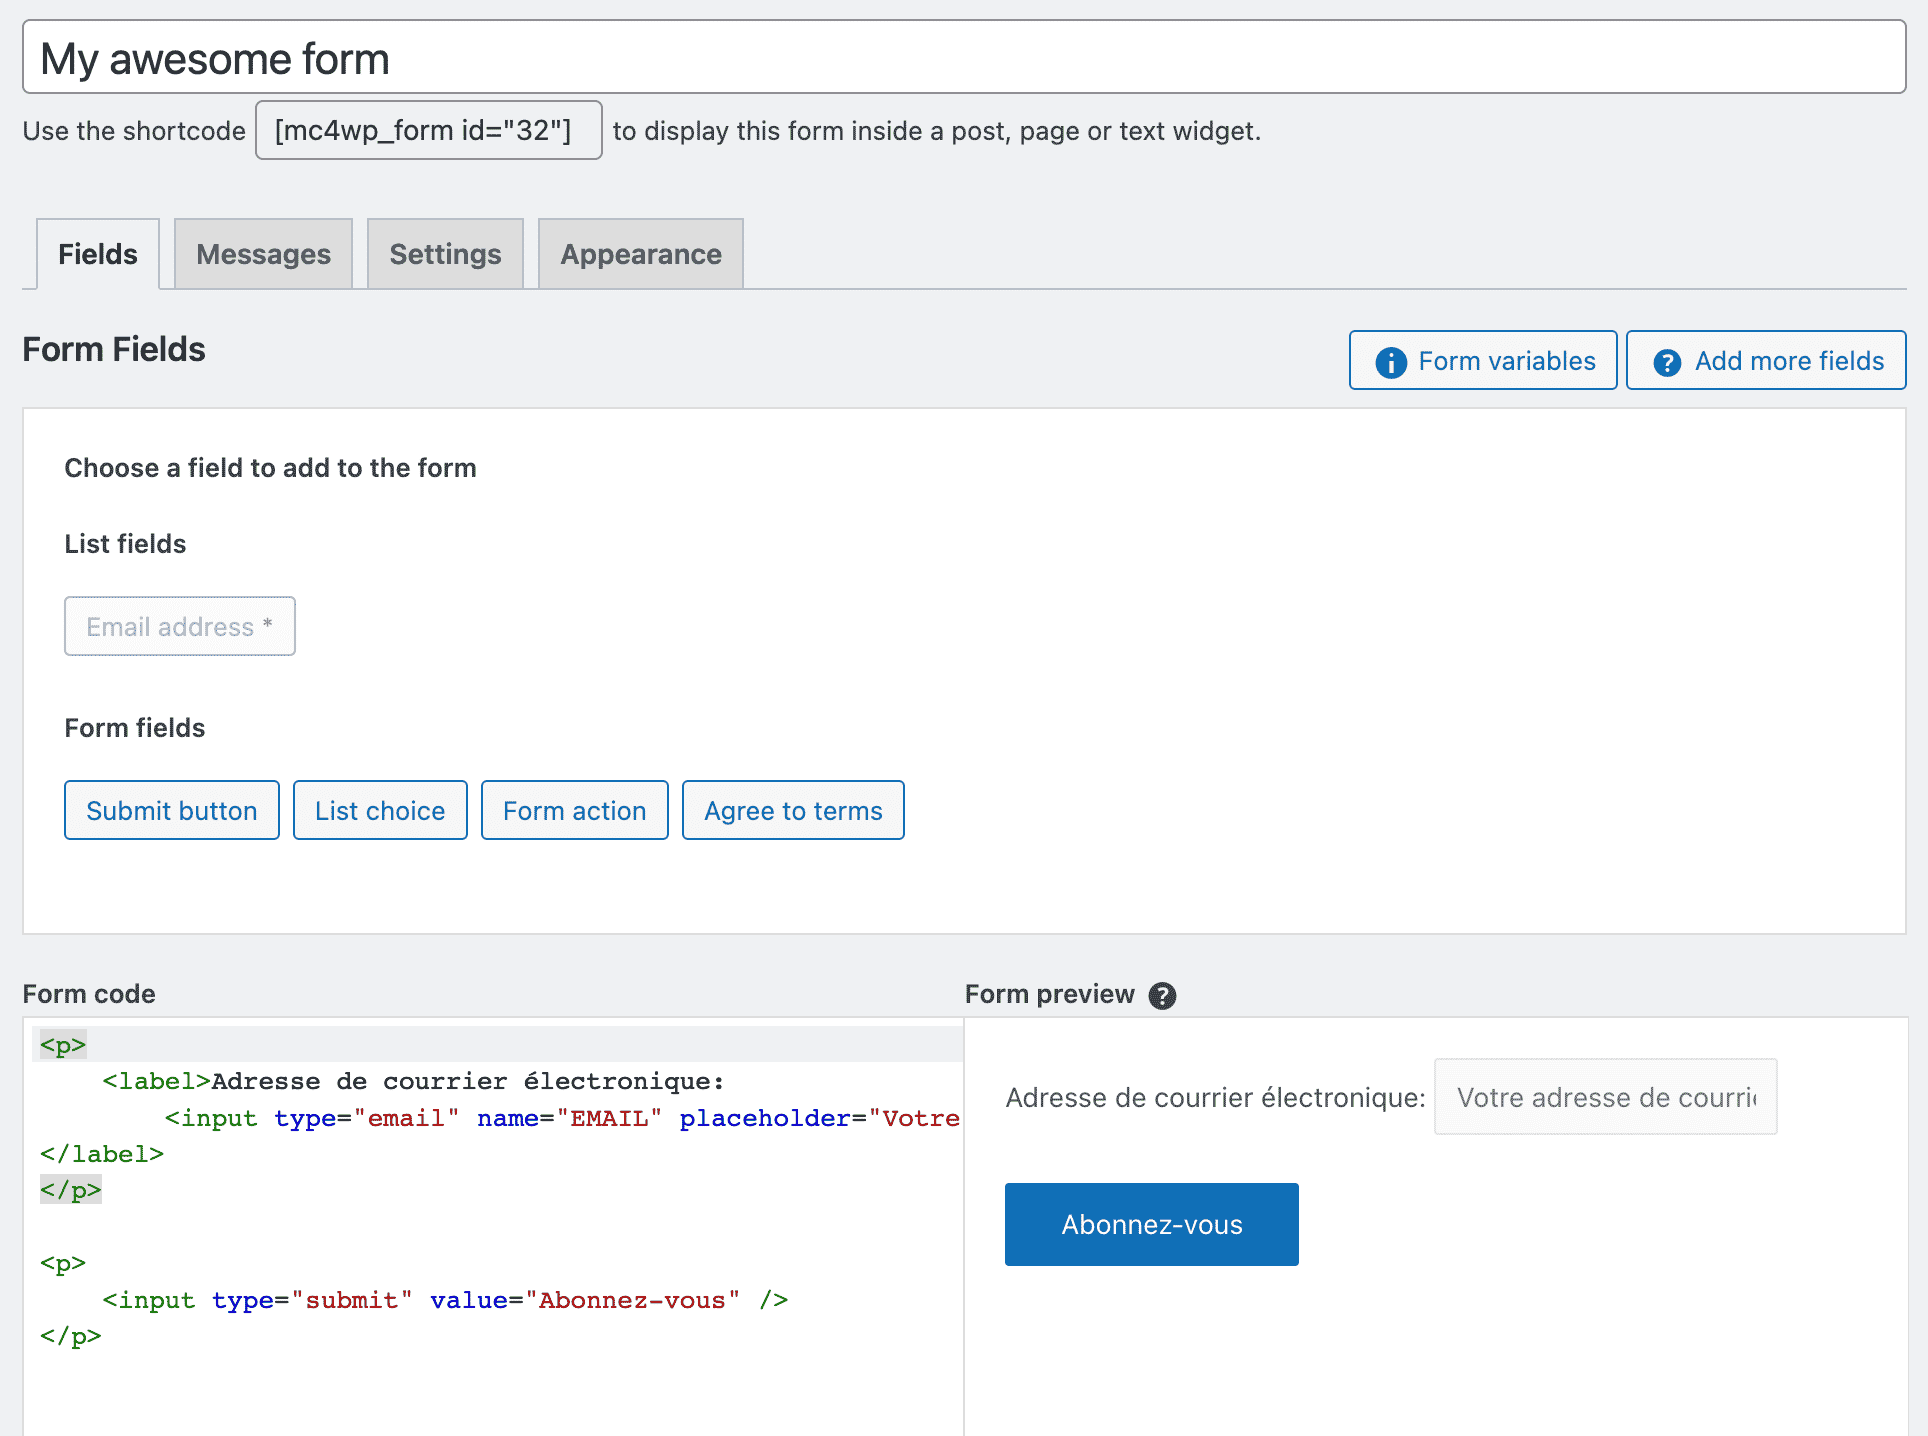
You will have four main tabs, as in the above screenshot:
- “Fields”: Here you can add the fields of your choice to your form. I advise you to include the one called “Accept conditions.” It allows you to make your visitors accept your privacy policy and to be in compliance with the GDPR.
- “Messages”: In this tab, you can translate and modify all the strings displayed by the plugin when a user registers, unsubscribes, does not fill in a mandatory field, etc.
- “Settings”: This allows you to define on which list the users subscribing to this form will be registered. I advise you to activate the options “Update data of already registered users” and “Do you want to hide the form after a successful registration?”
- “Appearance”: To customize the design of your form.
To display the form on your site, all you have to do is copy the shortcode displayed under the title of your form, and paste it in the place where you want to display it (post, page, widget area, footer, etc.) using the “Shortcode” block provided by the WordPress content editor.


Well done! Your visitors will now have the opportunity to subscribe to your newsletter.
Now there’s just one more step: writing and sending your first newsletter.
We’ll get to that right away.
Step 6: Write and send your newsletter
First thing to do: go back to your Mailchimp account. Click on Campaigns > All Campaigns in the top left corner, then on the “Create Campaign” button:

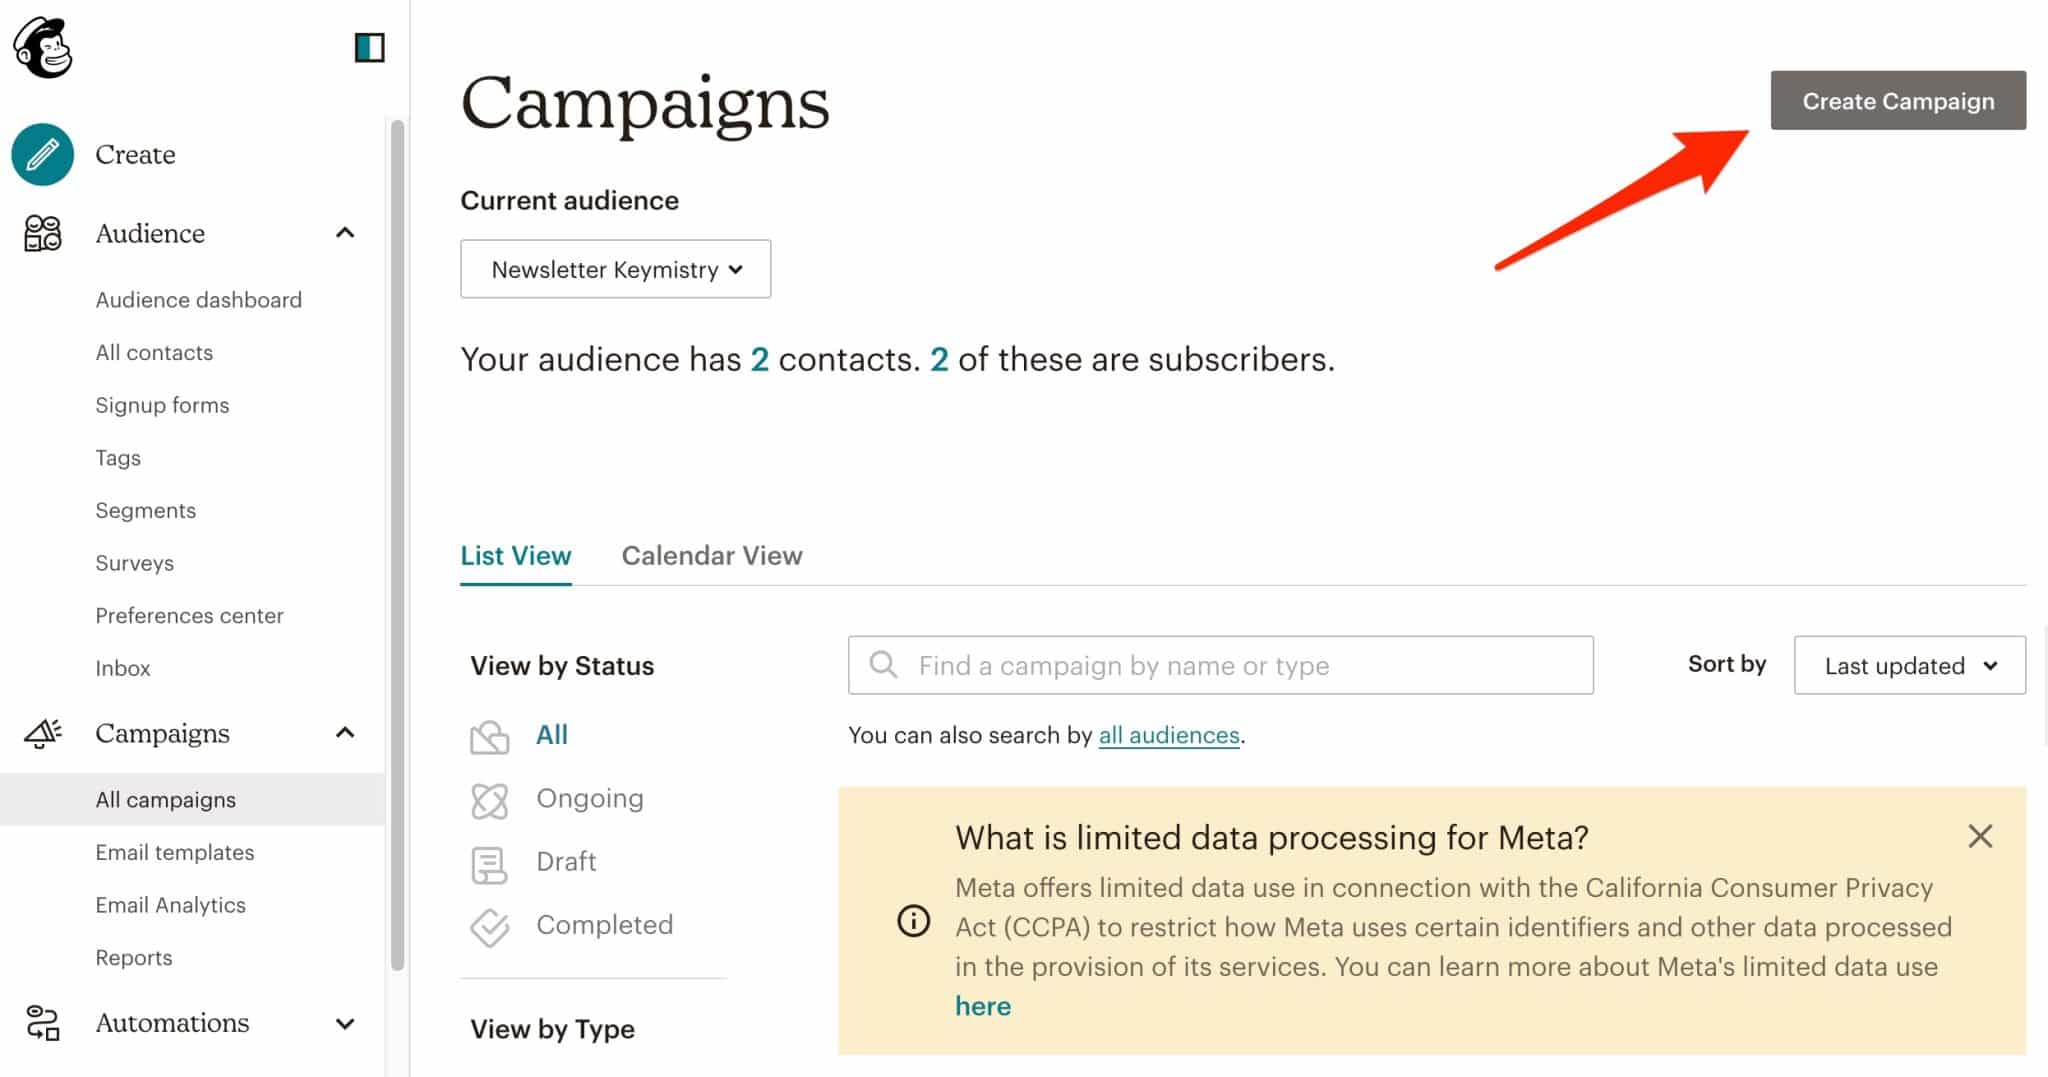
Among the choices offered, choose “Regular email”:

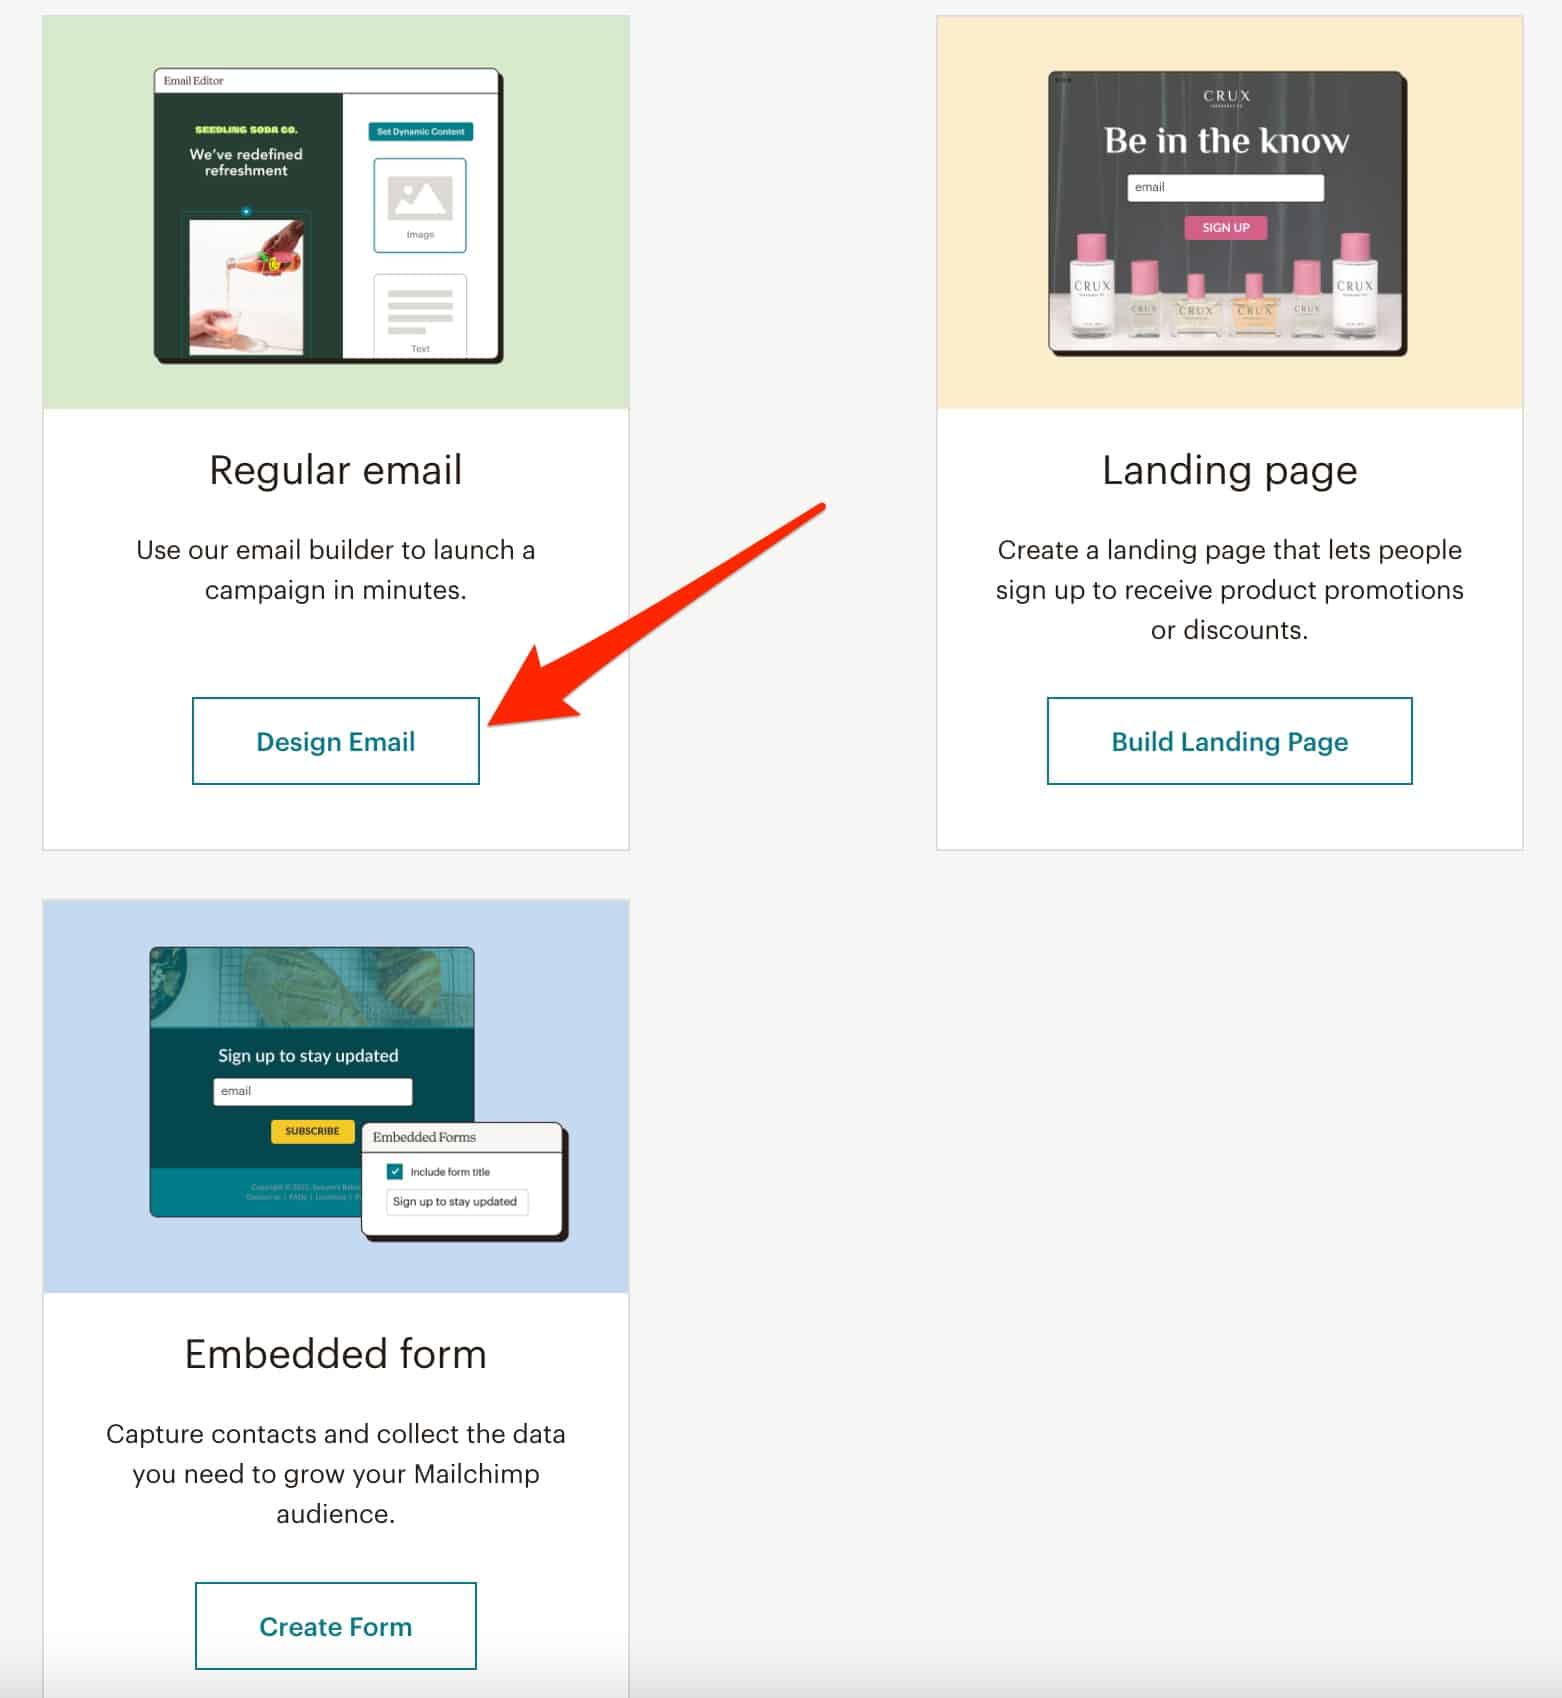
Give it the name of your choice at the top of the page. You are now able to edit your campaign.
Configure and customize the style of the newsletter

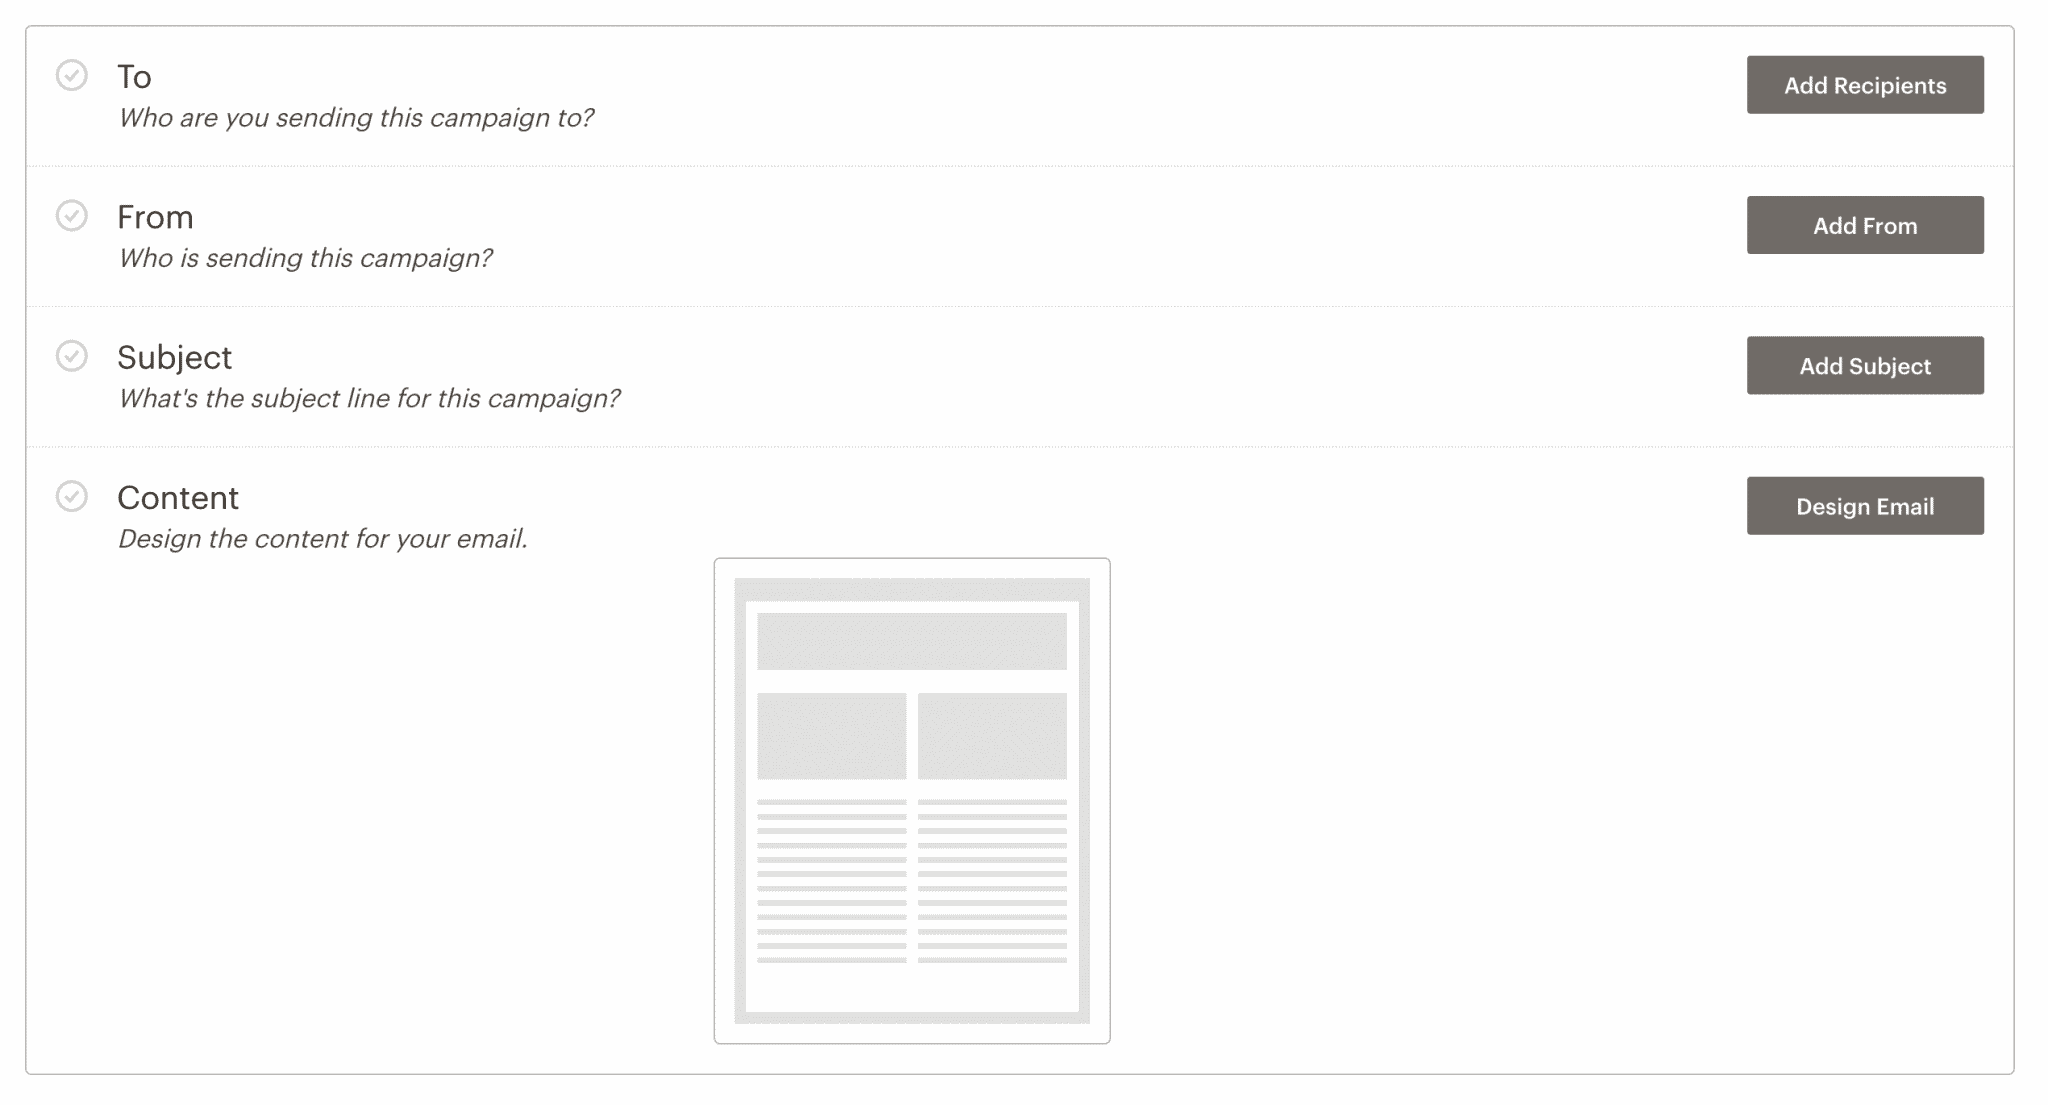
Four fields are available:
- “To”: Allows you to define who to send your emails to. When you click the “Add Recipients” button , you can choose your previously created mailing list. Save.
- “From”: Allows you to edit the name and email address of the sender, i.e. yourself. But normally, you’ve already configured it beforehand.
- “Subject”: Allows you to choose the subject of the email, as well as the subtitle that often appears on the mailboxes. Title it whatever you want and save (but make sure it’s interesting enough for your subscribers to open your emails).
- “Content“: You can use the “Format” button to format your email. You can choose predefined email types or particular layouts in the “Layouts” tab. The “Themes” tab offers you already formatted emails that can be used in different areas (Newsletters, E-commerce, Holidays, Photos, etc.).
A piece of advice: keep it simple and don’t write newsletters that you wouldn’t like to receive.
Once you have chosen your “Layout” or “Theme,” a visual editor allows you to edit the content and design.
You can easily add and edit any element using drag and drop.

Once you’ve made your changes and the design of your email is in place, click on the blue “Continue” button in the top right corner.
This will take you back to the previous settings page. Now all you have to do is send your beautiful newsletter by pressing the “Send” button. But before doing so, you must read the following.


Good emailing practices
Wait just a minute, please. Now you know how to send emails via your newsletter. Great news.
But before you really start, and press that “Send” button, are you sure you know the best practices in email marketing?
I’m telling you this because it would be a real shame to ruin all your previous efforts, right? Accidents do happen, so to avoid getting burned, find some tips in the last part of this article, just below.


General tips
Send your emails based on your targets’ habits
What time and day should you send your newsletter? It’s difficult to answer this question precisely because it depends a lot on your target.
However, several studies have identified trends. They suggest that the most appropriate time to do so is Tuesday at 10am.

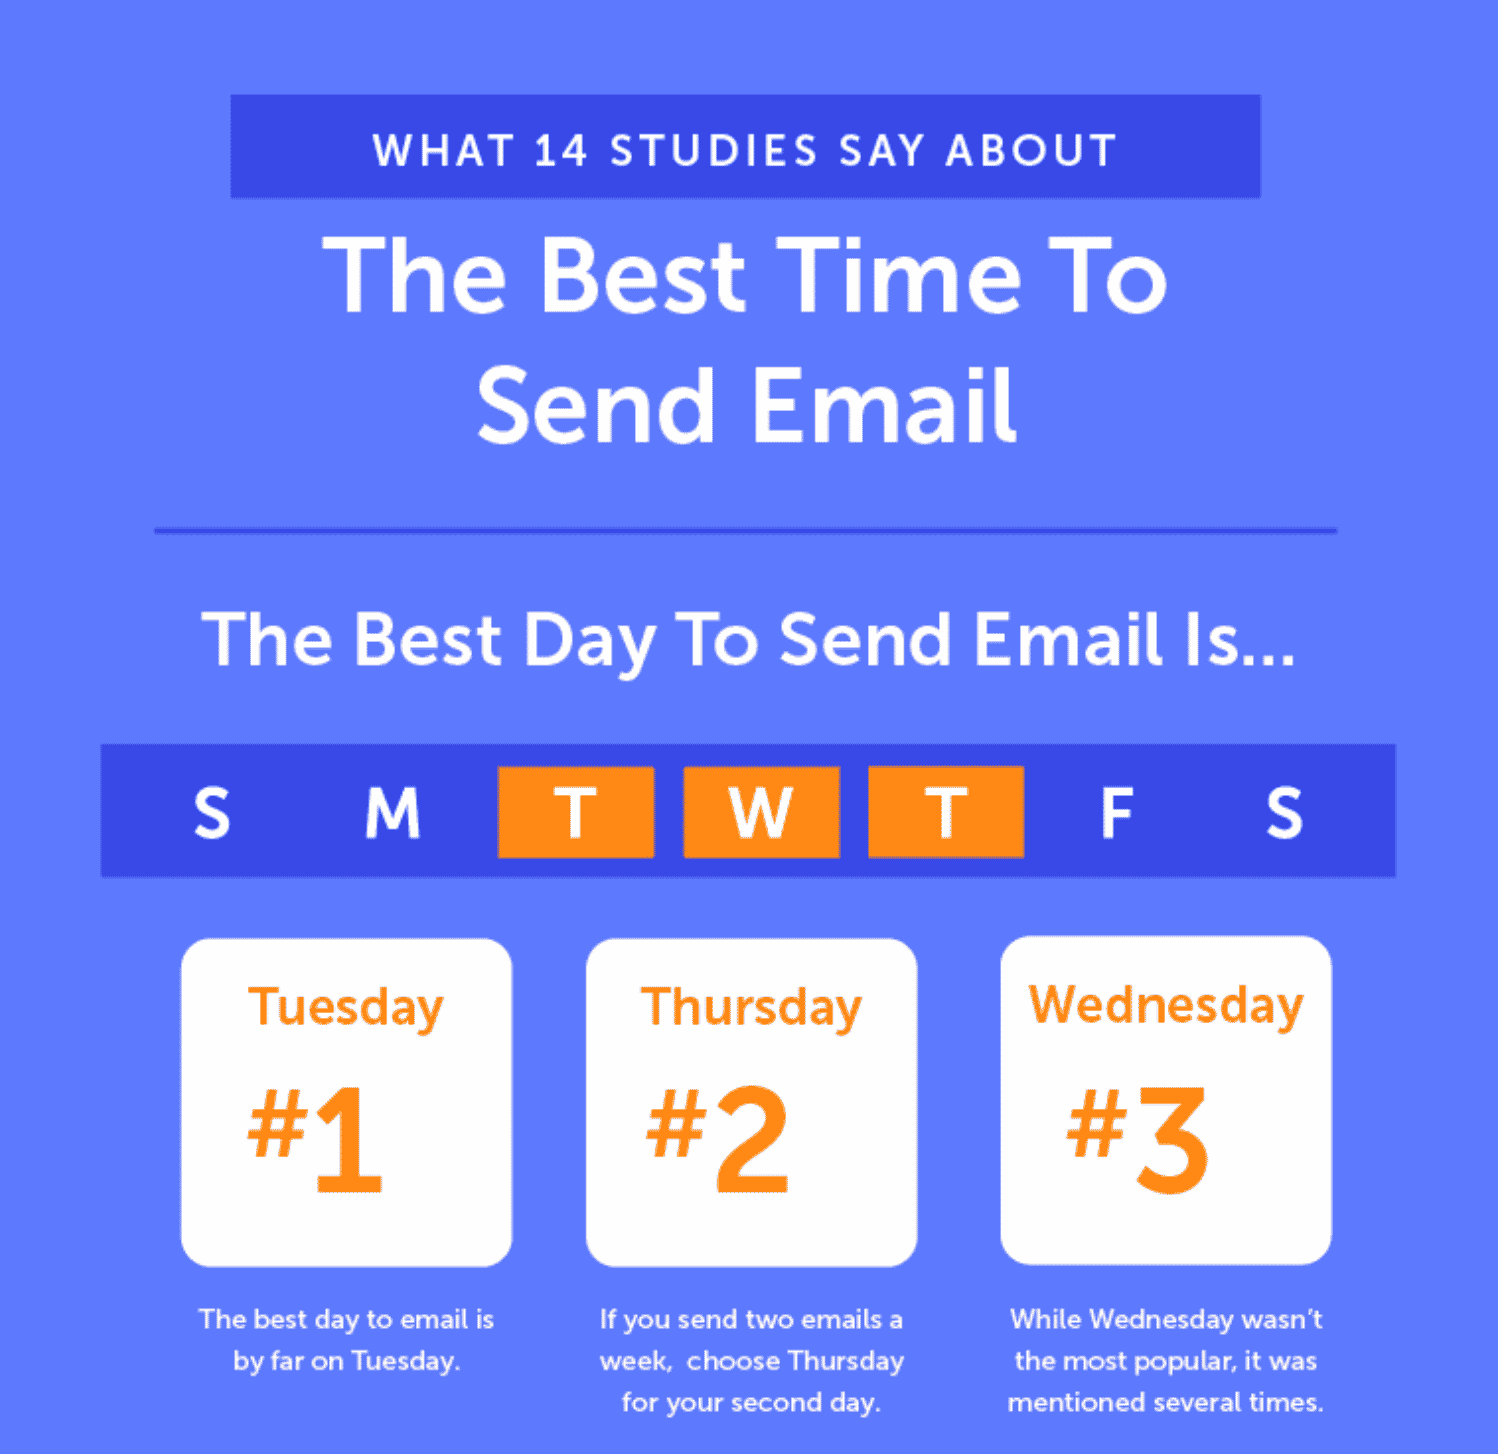
Overall, Tuesday, Wednesday, and Thursday would be the best days to send your emails.
If you think about it, it’s quite logical. On Monday, we’re often overwhelmed with emails that have accumulated over the weekend, and they tend to drown in the mass. On Friday evening, we often have our head elsewhere.
Note,, however that there is no set rule. Test mailings on different days and times to see what works best. If your target tends to read their emails on Sunday, then send them yours on Sunday!
Consider sending a test email
This seems like a no-brainer, but before you send your email to hundreds or thousands of subscribers, it’s best to proofread it and make sure it works.
Most services offer to send you a test email. Take advantage of this to check, among other things, that:
- There are no spelling mistakes
- Your links work
- Your images appear correctly
- Your email is displayed equally well on a computer as on a smartphone or a tablet
Be GDPR compliant
The General Data Protection Regulation (GDPR) ensures that every individual has control over and protection of the personal data he or she disseminates while browsing the web.
This implies that your forms must comply with this legislation. In principle, most email services/plugins are up to date. On your side, you must check that:
- The subscriber can freely give his consent if he wishes to subscribe to your newsletter, for example via a checkbox (which must not be pre-checked).
- The future subscriber is informed about the processing of his personal data, for example with the presence of a Privacy Policy page accessible next to the consent button.
- Your users can easily unsubscribe from your newsletter, for example with a link provided in the footer of the email.
Regarding the regulation on personal data protection (GDPR), do not hesitate to consult our dedicated resource on the WPMarmite blog.
If you still have any doubts, the best thing to do is to get in touch with a specialist in the field.
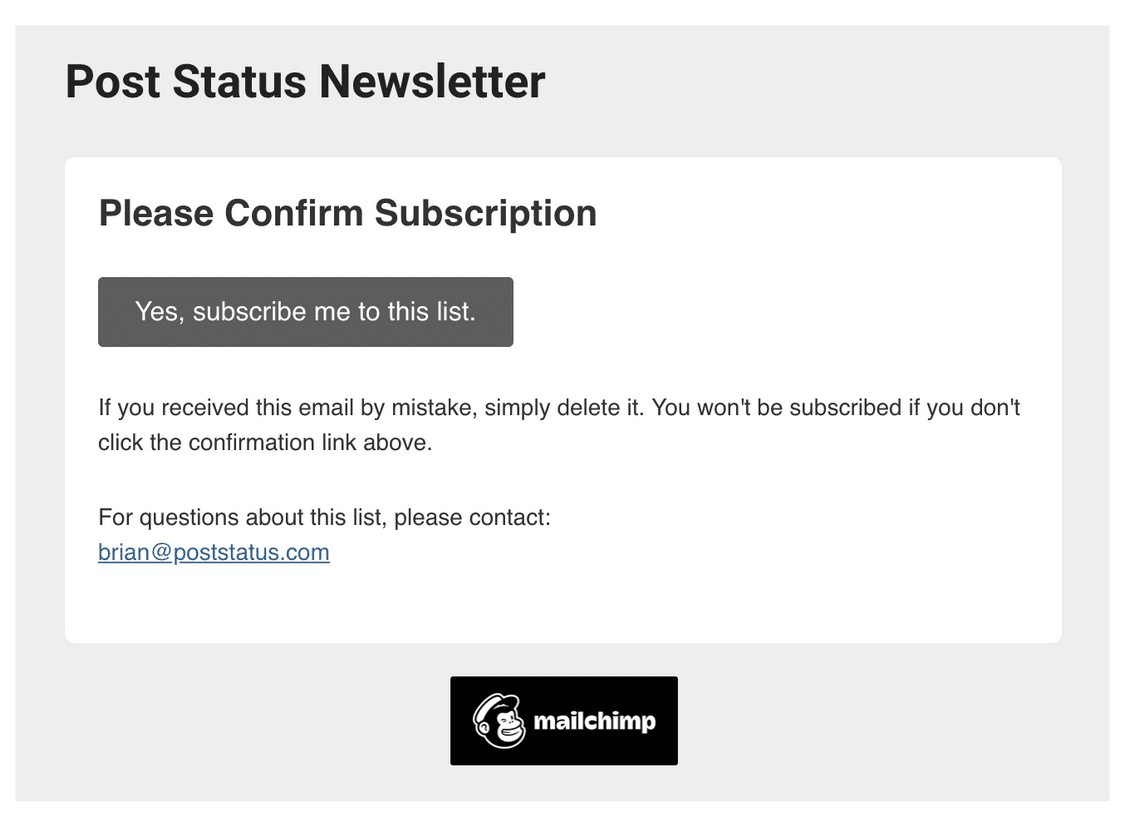
Use the double opt-in
The double opt-in consists in sending a confirmation email to a person after he/she has subscribed to your list of subscribers.
This allows you to validate their subscription definitively, and avoids ending up with spam email addresses.
Without this, your newsletter will not reach them. In short, you make sure that the person really wants to receive your next emails and you reinforce your targeting.

In addition, it is hyper efficient. Compared to emails with simple confirmation, emails with double opt-in have a better open rate (studies show a 72.2% increase with double opt-in) and promote less unsubscribes.
This allows you to better “qualify” your subscribers because you are sure to have people who are really interested in what you offer.
Opt for a responsive design
What is a responsive design?
It is a design that displays perfectly on all types of media: computer, smartphone, or tablet.
And for your emails, this is of paramount importance: 46% of email occurs on a smartphone.
With Mailchimp and newsletter creation plugins on WordPress, you don’t have to worry about this: these services take care of everything.
Avoid spam
This is an obvious one, but it’s always good to remember it: avoid spam! To do this, you must include a way to unsubscribe in your email and add your contact information (address).
You can add this in the footer of your email.
Secondly, “avoid using all capital letters, too many exclamation points, and gimmicky words or phrases” as Mailchimp explains. The spam filters of Gmail and friends hate it.
Ready to move on? Without further ado, let’s tackle the content.
Writing your emails
Optimize the subject of your email
It’s like fishing: if the fish doesn’t bite the hook, you won’t be able to catch it.
Conclusion: you have to attract him to the bait.
Finding a good subject line for an email is crucial. According to this infographic, 47% of email recipients will open an email based on its subject line.
Start by putting yourself in your subscribers’ shoes and asking yourself if the subject line is really relevant.
Then, as with everything else, you have to test it. In principle, it’s better to personalize your communication. For example, include your recipient’s first name in the subject line.
Obviously, do not make it too long (30-50 characters) and you can dare to be original with an emoji, for example (but be careful with their display on some devices).
Don’t hesitate to include the benefit(s) that your newsletter will bring to your reader.
To go further, OptinMonster offers a resource detailing 164 email subject lines.
Sprinkle your WordPress newsletter with a pinch of copywriting
In the body of your text, use short sentences and break up your text into several paragraphs.
Avoid impersonal emails. We all receive dozens of them a day and you know where they end up: in the trash.
Address your reader by mentioning his or her first name if you have collected it, and don’t hesitate to talk about him or her using the pronoun “you.”
As all good copywriters say, people don’t care about you, they only care about them. So show them how they can benefit from your writing.
In other words, offer them useful content. If you can help them solve a problem, they will read your words carefully.

Finally, be clear and concise. There is no set rule on the length of your email. But don’t overdo it if your content doesn’t add anything. Your goal is not to impress your reader, but to inform them in the fewest possible words.
Include a call to action
Just like the subject line, the call to action (CTA) is fundamental.
Indeed, your email always fulfills an objective: to make your reader perform an action. For example, you can ask them to read an article on your blog by clicking on a link, download a document, or give their opinion by answering an open question.
It doesn’t matter, but don’t forget to get them to take action. For example, you can include a call to action in a button or in a link. Whatever form you choose, it should be easy to identify.


To conclude your email, you can also include a PS reminding them of a deadline for your offer if it contains one, or explaining to your reader what they will miss if they don’t take action.
Next, it’s time to move on to reviewing your results. This is the subject of the next part.
Statistical follow-up of your emails
So, did your readers like your newsletter? To find out, every self-respecting email service will allow you to follow several performance indicators such as:
- The opening rate
- The click rate
- The unsubscribe rate
- The delivery rate
- The bounce rate
As an example, a good opening rate is between 20% and 25%.
But this figure must be put into perspective. It can vary quite a bit depending on your sector of activity, the time your email was sent, the subject of your email, etc.
Summary
Here you are at the end of this article. You have understood that email marketing can be extremely effective, provided that it is well mastered.
To start, you’ll need to choose a service to create your newsletter on WordPress (a plugin or a third-party service), then install an opt-in form.
Then, you’ll have to respect good practices to hit the bull’s eye and reach your target. To do this, convince your visitors to sign up, then send them interesting and useful emails. Don’t just advertise all the time.
Now it’s your turn to speak up. Have you created a newsletter for your site? Do you use a plugin or an external service? If yes, which one?
Tell us all about it in the comments. We love to hear your feedback.