


A WordPress blog post is like a good little dish: to be devoured (with the eyes), it has to make you want to eat it.
Because it’s a fact: to be seen and read, your blog post must be attractive… but no less digestible and well thought out!
No quality content? No quality traffic.
No quality traffic? Well, no visibility.
And unless you want to settle for a ghost audience, you’d better create posts that are perfectly crafted and optimized.

So let’s get started, foodies: here’s our checklist with 8 key steps to writing, editing, and publishing a quality WordPress blog post efficiently!
Overview
- #1 Writing a catchy and informative title
- #2 Taking care of the structure and presentation of the blog post
- #3 Using clear language that is accessible to everyone
- #4 Using relevant and quality illustrations
- #5 Integrating an attractive and meaningful featured image
- #6 Optimizing your post for SEO
- #7 Ending the blog post with an understandable call to action
- #8 Proofreading yourself before publishing your blog post to WordPress


#1 Writing a catchy and informative title
It’s the hard 80/20 law: by publishing an article on your blog, 80% of the Internet users will read your title… then only 20% will read the rest.
I repeat: no matter how sensational your content is, if your title is bad, your article will be doomed to disappear in the meanders of the Internet. Conversely, the better your title, the better your chances of being read by a large number of people.
You might as well say that the choice of your title is more than decisive!
But what exactly is a “good” title for a WordPress blog post?
Don’t worry: there’s no need to panic. An optimal title simply has to be:
- Captivating : you need to catch your reader’s eye, for example by disclosing a fact or a crunchy number. The idea is not to be boring, at the risk of going unnoticed! After all, your headline should make you want to click to read on, right?
- But no less informative: beware of smoke and mirrors! If your title must be – certainly – catchy, avoid at all costs the “The 3rd picture will surprise you” style titles (the famous clickbait, click traps). Don’t forget: the primary purpose of a title is to inform, so it must be clear, useful and representative of the subject!
And what about the length of the title?
A title containing 60 characters would attract the most traffic. However, there’s no need to be constrained by the length: your title should not be too long… but the most important thing is that it is perfectly understandable!
At worst, you can always shorten the number of characters of your title as it is displayed to search engines, via the Yoast SEO plugin for example. To do so, simply write a meta title/SEO title (at the very bottom of your WordPress post editor) that will be displayed on Google’s mobile and desktop versions.
Easy, isn’t it?
Are you out of inspiration? Here are a few concrete ways to handle the art of the title like a chef:
- Add numbers: “3 good reasons to…”, “10 tips for…”, “The top 20 of the…”
- Ask a question, especially in the context of a tutorial: “How to… ?”
- Use superlatives: “The best way to…”, “The simplest tool…”, “The quickest solution to…”
- Give sincere advice: “Why you should choose to…”. Or even better, tips based on your experience: “What I learned in…”, “5 mistakes that made me grow up”
- Insert [square brackets] or (brackets), if the subject of your article is relevant: according to a Hubspot study, SEO titles/title tags with brackets are 38% more clicked! For example, in an interview, you could write your headline like this: “Blah blah blah blah blah blah blah [Interview]”
- Appeal to emotions: “Overcome the fear of…”, “Surprise: XXX product has arrived!”, “Smile, WPMarmite is back in 2021”
And above all, test, test and re-test: it’s only by trying that we end up finding!
#2 Taking care of the structure and presentation of the blog post
Ah, the structure… An element that is (too) often neglected, and yet so essential to the success of a blog article. That’s right: editing an article in a neat and airy way is to make the content readable and pleasant to read.
And who says pleasant reading, says possibility to extend the reading time of your targets… and who knows, make them addicted to your blog?

In short, the structure is to your article what beef is to a burger: essential. To guide you, here are a few key structuring components to integrate without moderation in your WordPress blog post:
- An introduction: the intro of your article must allow the Internet users to understand in 2-3 sentences what you are going to talk about. Here, it’s exactly like the title: make sure to arouse the reader’s curiosity, while remaining true to the subject and angle of your blog post. A tip: introduce your article with an evocative word, so that the reader’s attention is drawn to the topic of your article. For example, this post starts with “a WordPress blog post”: boom, we know what to expect!
- A table of contents (or summary): if your article is too long, remember to include a small summary below your introductory text. The advantage is twofold: in addition to seeing more clearly, your readers will be able to identify at a glance the elements that interest them. This will help you keep your target audience on your super blog! Clever, isn’t it?
Mini tutorial: how to create a good table of contents?
First, insert a “Bulleted list” block via the Gutenberg editor. Then, create anchors leading to the different titles of the article. Finally, why not add a different colored background to attract attention, and that’s it!
- Intertitles (or subtitles): this is the basis. To organize the information in your article in a logical order, but also to guide the reader’s gaze as they read it, don’t skimp on adding headings. You can even arrange them in numerical order (“#1 #2 #3…” as in this article) to provide ever stronger informational cues. Fluid reading guaranteed!
- Short and airy paragraphs: unless your readers are ogres who eat large blocks, air out your text with small paragraphs, bulleted lists, etc. Also think about writing short sentences: the simpler they are, the more your article will be memorable by Internet users (and Google’s robots).
- A conclusion: to guide readers through to the end, don’t forget to close your blog post with a short review. A good way to take stock of what has been said, and why not open a discussion with your readers through comments.
And what about presentation? Think of punctuating your blog post with a few boxes, as WPMarmite usually does to provide tips. The idea is to highlight the most important tips in your WordPress blog post… and to take advantage of this opportunity to break the rhythm, especially if you write articles that are a real treat. It’s an opportunity to always maximize the attention of your beloved readers. 😁
By the way, speaking of boxes…
When publishing your WordPress blog post, pay particular attention to the uniform spacing of your various elements.
An extra space between two letters, an irregular gap between paragraphs or headings… Hunt down all the little typos, so as to deliver an article that is 100% coherent and pleasant to read. After all, details make perfection, don’t they?
One last presentation tip for the road: also remember to put your essential words and groups of words in bold. The idea? Offer a sort of “second reading” to Internet users who, at a glance, will easily identify the great ideas in your WordPress blog post. Clever!
#3 Using clear language that is accessible to everyone
“WPMarmite.com is the uniform resource locator of our WPMarmite digital space where newbies to the open-source WordPress CMS can find posts full of concrete tips”. Huh?!

Didn’t you understand anything? I didn’t get it either. And that’s normal: the language used is vague and complex. Not to mention the way the sentence turns out to be far too diffuse, which makes the information downright indigestible. And what could be worse than a blog post misunderstood by Internet users?
So don’t make the same mistake as those bloggers who write for them, before writing for their audience! Without falling into “simplistic” writing either, make sure you:
- Popularize complex terms: would you prefer to read that Eliott crushed a “helix aspersa aspersa” with his shoe, or a “snail”?
- Remove technical jargon and lengthy sentences: your WordPress blog post must be simple and understandable by everyone, including your grandmother who discovers the “Amstragram” app (if it is in your target, of course);
- Favour spoken language: avoid dissertation-style turns of phrase; for example, use “despite” instead of “notwithstanding”;
- Use the present tense of narration to facilitate the effort of comprehension of the Internet users, and make the story more vivid.
You’ll see: your WordPress blog post will be all the more persuasive and easy to remember. Your readers will have a much better time on your blog… and may come back for more. It’s a win-win situation!
How about… storytelling?
If you want to write clearer and more memorable blog posts, don’t hesitate to use storytelling, the art of telling stories. And with good reason: stories are 22 times better remembered than facts alone. Crazy, isn’t it?!
For those new to storytelling, here are a few tips that always make their little effect:
- Amplify the intensity of the emotions : for example, don’t say “be satisfied” but “be filled with joy”.
- Create an element of surprise: Incorporate breaks and twists (“suddenly, when suddenly, and drum rolls…”) to keep your readership on the edge of their seats.
- Use idioms: have fun making comparisons (“like two peas in a pod”), cultural references (“a dime a dozen”), or metaphors (“think outside the box”) that your readers will be able to picture to their minds.


#4 Using relevant and quality illustrations
“A good blog post is just a good text“: that’s what you would have said, if you lived in a cave.
Because if the textual aspect is crucial in blogging, a second part of your WordPress blog post deserves just as much attention: I named, the images!
And with good reason: articles containing images would get… 94% more views. Wow!
But why is that? Well, it’s very simple: just like headings, images make the content easier to read by creating “breaks” between the different elements of your post. You have to admit that adding an image between two text blocks makes the article more fun to browse through, right?
But that’s not all: in addition to optimizing the attention of Internet users, images are also an effective way to popularize the sometimes complex texts, thus allowing Internet users to represent textual information more easily. You have probably already experienced this by reading a tutorial!
In short, your blog post will be visual or not. And here’s how to do it:
- Add photos, drawings, diagrams, screenshots… or any other visual element to help you digest the information better;
- Integrate infographics, but sparingly: as they are not read by Google robots, they are not very efficient in terms of SEO (unless your infographics get a lot of backlinks, eh);
- Why not add emojis in your article, if they suit your business or your targets: just on Twitter alone, adding emojis increases audience engagement by +25%!
- And of course, use videos and GIFs (via the Giphy tool, in particular) to convey emotions to your readers.

In any case, always opt for relevant and quality images. What’s the point of including a photo of your cat in an article dedicated to your professional review, or a pixelated image?
But beware: before you even think about including images in your blog post, don’t forget to make sure they are royalty-free images!
You don’t use your own images? Read the conditions of use of the royalty-free image banks and, if in doubt, always insert the mention “©” (Rights Reserved) under your images or at the end of the article. You wouldn’t want to violate copyright and receive a hefty fine, would you?
The extra tip
Just like for your text, don’t neglect the structure of your images! In particular, remember to insert all your images in a centered way, to offer a coherent and pleasing reading to the eye.
#5 Integrating an attractive and meaningful featured image
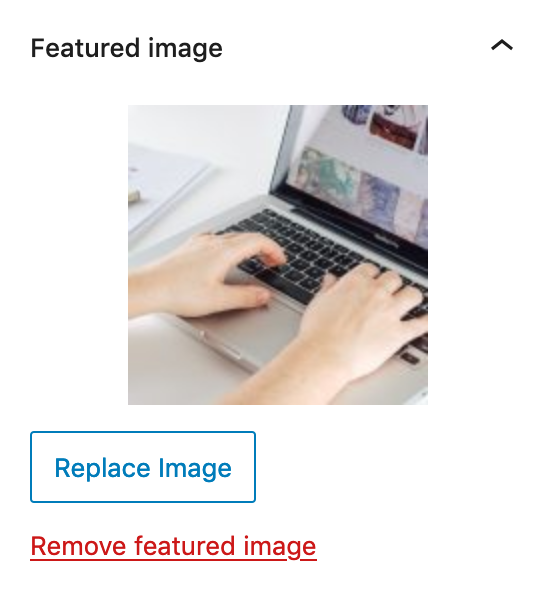
While we’re on the subject of images for your WordPress article, don’t forget to add a nice featured image to your blog post. For casual bloggers, it’s simply the image that appears (usually, depending on your theme) in the list of articles on your blog’s home page.
To do so, you have two choices:
- Create your own featured image with a Canva-type tool: here, make sure you create a visual that catches the eye, without overdoing it.
- Use a royalty-free photo or video on a visual bank such as Unsplash or Pexels.
Then, all you have to do is click on your Post > Edit, and go to the “Featured Image” section in the menu on the right of the screen.
Upload your image, and there you have it!
The extra tip
In order to harmonize and make your content consistent, you should also consider standardizing the size of all your article thumbnails. Professional rendering guaranteed!
#6 Optimizing your post for SEO
To recap: you know how to write a blog post optimally, how to integrate images and even how to structure your blog post like a boss.
And here, you probably think:“Great, I can finally publish my great article… ” Not so fast!
Because we’re talking about the web, you are not without knowing that to be visible online, your article must first be optimized for search engines. SEO (Search Engine Optimization), it speaks to you, doesn’t it?
SEO is a notorious booster for bloggers, and is roughly a set of levers to activate so that Google can propel your articles on the SERP (Search Engine Results Page), the first page of search engines. And when you know that 93% of online experiences start with search engines, it’s clearly worth the effort, right?
Yes, but here it is: search engine optimization what’s-his-name, you don’t know anything about it. Don’t panic: just follow the 6 SEO tips below. And after that, be sure to improve the visibility of your WordPress post!
Keywords
SEO Rule #1: optimize the keywords of your article. Hm okay, but still?
A keyword is simply the word (or group of words) associated with your content that, once integrated into your article, will make your article stand out on Google.
Let’s imagine, for example, that you write a post to teach your readers how to make an anti-Covid mask: in order for your content to appear in the first pages of the “mask easy tutorial” search, you will have to insert this same group of words (your famous keyword) enough times in your blog post… and in strategic places!
Concretely, it is advisable to:
- Use the main keyword in the first 50-100 words of your article;
- Integrate the main keyword in five key places (see below): the h1 title, the h2 heading, the URL, the alt tag and the body of the article;
- Enrich the article with a lexical field close to your main keyword: to do so, you can use a synonym dictionary or sift through related Google searches via Answer The Public.
Warning: do not insert your keyword like a horse in your article!
Google would risk sanctioning you for spam and your attempt to gain visibility would, therefore, be reduced to nothing… 🥴
In short, keywords are like alcohol: in moderation. Although there is no precise rule, make sure you insert your keyword in a reasonable way (at least 3 times, that said) in your article.
Don’t worry: search engines will be smart enough to understand the intention behind your keyword, without it being all over the place. This is the principle of LSA (Latent Semantic Analysis): Google will take into account not only your main keyword, but also the whole associated semantic field. Hence the interest of enriching the lexical field of your article!
Looking for an efficient SEO tool, based on the famous LSA, to identify the right keywords to integrate in your article? Try TextOptimizer: at WPMarmite, we don’t do without!
Title tags
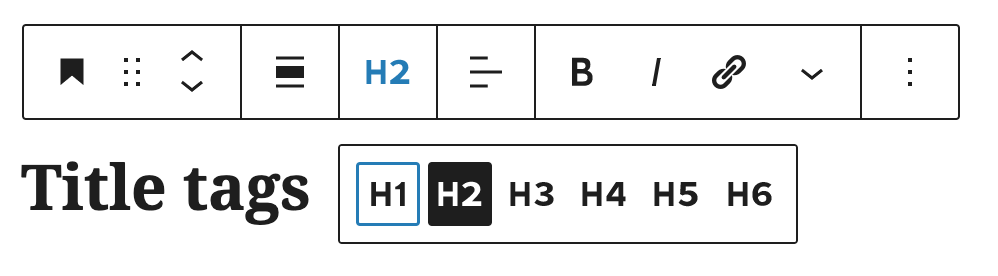
Search engines love clear and well-organized content. And to prove to Google & Co. that the structure of your article is optimal, you’ll need to include what are called “title tags“.
Already lost? Don’t worry: it’s simply the titles of your blog article (title, subtitles, etc.), surrounded by code tags. In HTML language, these title tags are represented by the letter “h”, followed by the associated hierarchical number:
- The <h1> tag represents the main title (“8 tips to follow…”);
- The <h2> tag represents the intertitles (“#6 Optimizing your post for SEO”);
- The <h3> tag represents the subtitles (“Title tags”);
- And so on until the <h6> tag!
To integrate these tags in your blog article, simply insert a Title block in the Gutenberg editor, then select the tag of your choice (H1, H2, H3…). Like this:
Note that the level 1 title (the <h1> tag) is automatically activated when you use a WordPress theme. However, think about this if you are creating a custom page with a page builder like Elementor!
The extra tip
If you’re writing your text in a Word document or Google Doc beforehand, make sure you copy and paste your content in Text mode (not Visual mode) into the WordPress editor, to avoid polluting your blog post with unnecessary HTML tags!
Linking (internal/external)
What are internal linking and external linking? Well, it’s the set of hyperlinks that link your blog post to other web pages dealing with a similar and/or complementary subject to your post. In total, there are two types of linking:
- Internal links (to pages of your own site)
- External links (to other pages of the Web)
Let’s take the example of this article: to complete my comments on WordPress SEO, it would be appropriate for me to add an internal link to WPMarmite’s SEO articles, or an external link to a site of my choice that I consider relevant.
Easy, isn’t it?
The extra tip
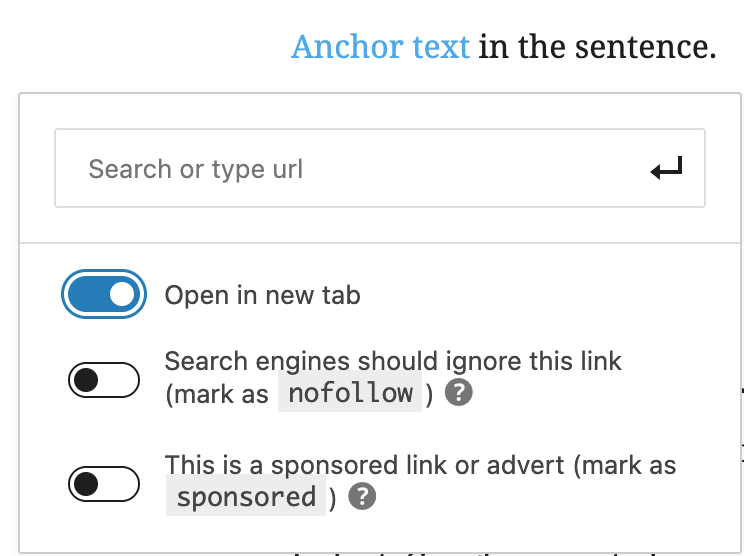
To optimize the retention rate of your blog (the time spent by users on your articles), it is advisable to activate the opening of your external links in a new tab. Your readers will then be able to click on your links, without even leaving your blog article!
How to do it? In the WordPress editor, select the anchor text then type the URL and simply enable the button “Open in new tab” (target: _blank). That’s it!
Images
We saw it above: Google can read words. On the other hand, as far as images are concerned, it is a little more complicated!
In fact, Google cannot always decrypt and index an image alone. To optimize the SEO of your images, the search engine will need a little help: you will have to give it textual indications about the nature of your images, in the form of keywords (yes, Google is a lazy teenager).
How do you do that? Here again, nothing very complicated:
- Before embedding your image or GIF on WordPress, rename the file with the targeted keywords. For example, if the main keyword of your article is “mask easy tutorial”, you can rename your media as: “mask-easy-tutorial.jpg”. But keep in mind that each image has to have a unique title so think about variations like “mask-easy-tutorial-study” or “mask-easy-tutorial-example”, and so on, as long as the image and its title are relevant.
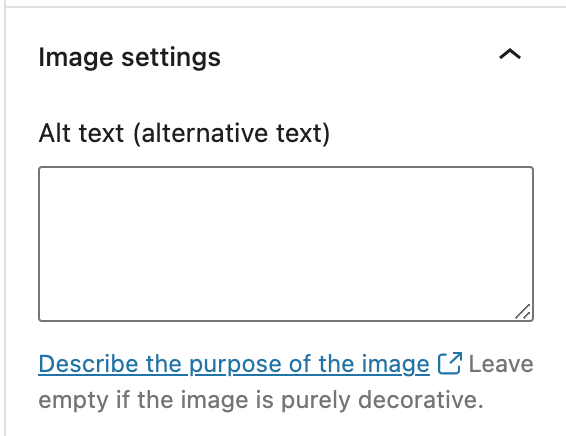
- Once your visuals (correctly renamed) are integrated into the article, add the alternative text of your image (alt attribute): this small description of the image will allow search engines to better identify it. Here, don’t write with dashes (-) between words: instead, make whole nominal and/or verbal groups (example “Hand-stitched blue and white anti-Covid mask in fabric”).
To add an alternative text to an image, simply click on the visual of your choice from the Gutenberg editor. Then, in the right-hand column, you just have to fill in the empty Alternative text (alt) field. And that’s all!
Pssst… In addition to optimizing the SEO of your images, don’t forget to optimize their weight!
Yes, an image that is too heavy could significantly slow down the performance of your blog. And you wouldn’t dare to publish an incredible blog post, if it is displayed at the speed of a turtle?
Before uploading your images to WordPress, make sure you compress them.
For your general knowledge, know that:
- Any file larger than 4 to 5 MB can usually be reduced for faster loading without losing too much quality. To do so, you can use a compression tool like Imagify… or also TinyPNG, if you are looking for a free and basic solution.
- An optimized GIF should be between 500px minimum and 600px maximum. Here, the EzGif tool can perfectly do the job.
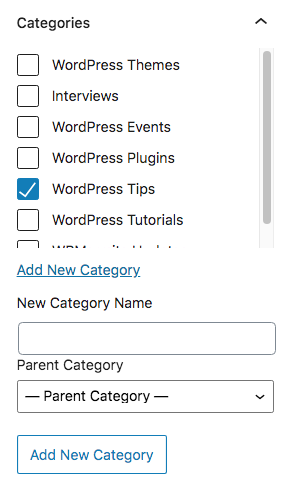
WordPress categories and tags
To index your article on your website – and by the way, to please Google robots – don’t forget to assign a category to your blog article!
Warning: WordPress automatically assigns the default category “Uncategorized” to content whose category has not been defined by the user. If this is the case for your blog post, remember to deselect “Uncategorized” and check the correct category for your blog.
To go further
To get rid of the “Uncategorized” category once and for all, also remember to set your own default category in Settings > Writing.
To add a category, simply go to“Category” in the sidebar of the editor, and check (or add) the category(ies) of your choice.
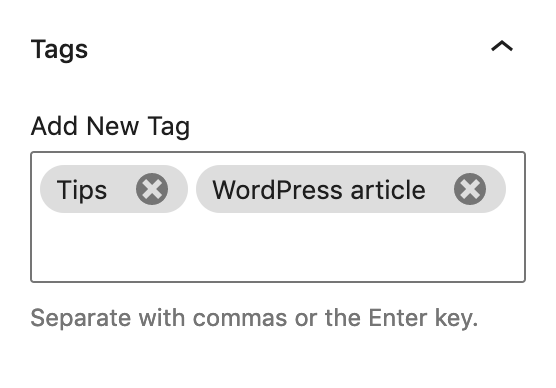
If your blog enables this, you also have the option of adding tags: this is, roughly speaking, another content classification system (optional) that allows you to group different articles together, regardless of their main category.
Let’s take the WPMarmite blog as an example: here, the “Ecommerce” label allows to gather all the articles dealing with the issue: WooCommerce tutorials, ecommerce plugins presentations, etc. Got it?
To add tags, the principle remains the same: go to the “Tags” section, just below the“Category” section, then insert the tags of your choice.
That’s it, fingers in the nose!
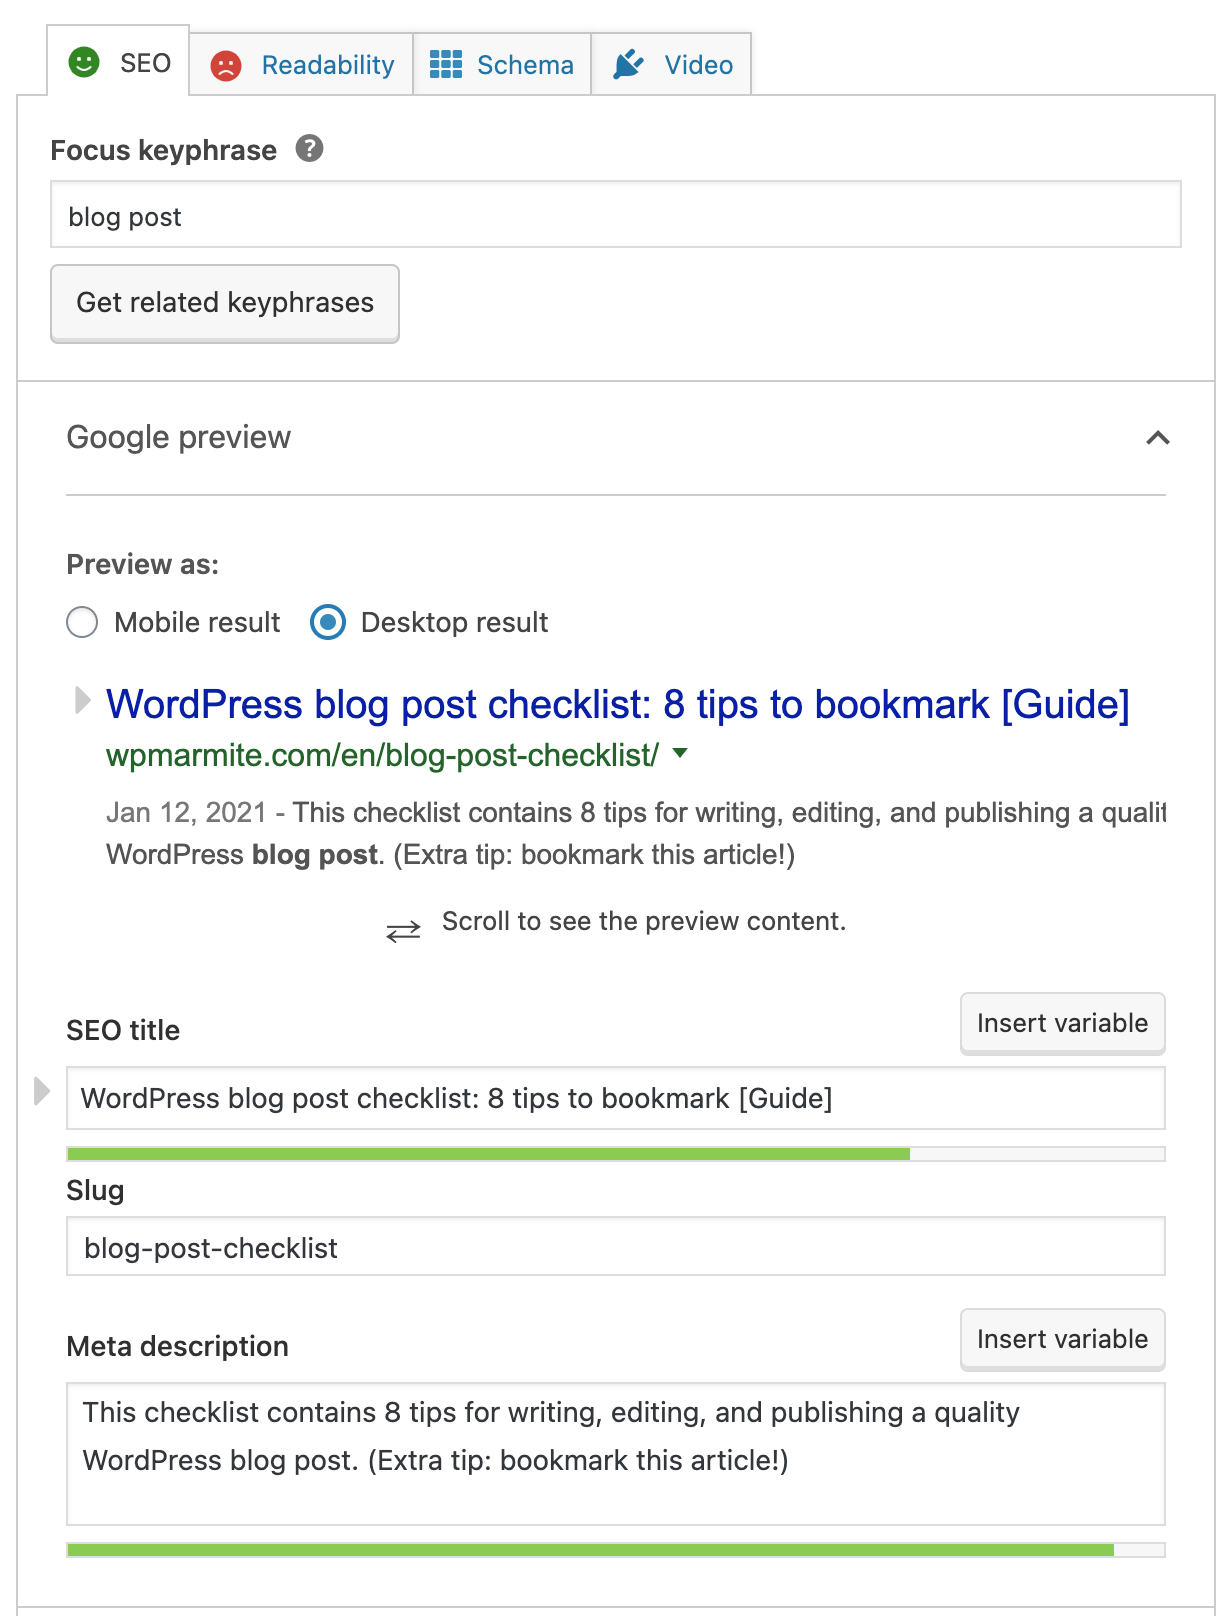
The meta title, the slug URL and the meta description
Congratulations: if you’re reading these lines, the SEO optimization of your WordPress article is probably coming to an end! But before you take off your SEO-master hat, don’t forget to fine-tune the SEO of these four crucial elements:
- The focus keyphrase: that is your keyword (here, with the example of “mask easy tutorial”).
- The meta title: or title tag; this is the title that will appear on search engines. Depending on the length of the initial title of your blog article, you are free to keep the same one… or to shorten it to optimize it on mobile and desktop. For your information, it is recommended not to exceed 65 characters!
- The slug (permalink): this is the URL address of your article. Be sure to write a slug consistent with the subject of your article, which includes your main keyword (example: “www.myblog.com/covid-mask-tutorial”). Here, you will notice that it is not useful to integrate the articles such as “the, a, an,…”
- The meta description: this is the brief description that is displayed under the title of your article in search engines. In 1 or 2 sentences (160 characters maximum), the goal is to describe your content as faithfully as possible, while making Internet users want to click on your link. Got it?
OK, but how to optimize concretely these four elements of SEO on a WordPress article?
Nothing could be simpler: first install the Yoast SEO plugin. Then, go to your WordPress editor in Post > Edit: scroll down the page, at the very bottom of the back office of your article, to the “Yoast SEO“ section.
There you go: all you have to do is optimize your slug, your meta title and your meta description, until you get the green color. Of course, this won’t be enough to make you an SEO expert. Nor will it guarantee that your blog post will appear on the first page of Google search results. Having said that, it will give you a good base to get your hand in SEO, and that’s already pretty good!
Also think about optimizing the social sharing of your blog posts!
In practice, it is possible to customize:
- The title of the post that will be displayed on social networks
- The description of the post
- The thumbnail: here, be careful to adapt your visuals to the dimensions of each social network (Twitter, Facebook, etc.). For example, Pinterest requires a vertical thumbnail!
To do so, you can use a social sharing plugin such as Social Warfare (WPMarmite’s favorite solution), via Open Graph data. For more info, check out the ultimate guide to Social Warfare!
#7 Ending the blog post with an understandable call to action
What’s the worst thing a ragtag blog article can do, except leave its readers hungry?
When concluding your article, invite your dear readers to do something concrete in connection with your blog post. In marketing jargon, this is called a“call to action” or CTA (call-to-action): an almost magical blogging ingredient that offers up to 380% more clicks. Interesting, isn’t it?
Here are a few ideas for calls to action to inspire yours:
- Subscribe to the newsletter
- Follow on social networks
- Visit the store
- Or simply invite your readers to leave a comment and ask their questions under your article!
And you, what action would you like to encourage your readers to take?
#8 Proofreading yourself before publishing your blog post to WordPress
Clap, clap, clap: you know all the key ingredients of a quality blog post! Here you are, ready to publish yours and…
Uh – wait, you haven’t forgotten one last step before revealing your WordPress blog post to the world?
Yes, yes: it’s proofreading! A last phase often neglected… and yet so decisive to transform your “good article” into an “excellent article“. Want to bet?
- Reread it 2, 3, 4 times (or even 10 times, if that reassures you): it is the best way to spot and correct possible mistakes, and to deliver a meaningful message. To help you identify typos and other inattentive errors, don’t hesitate to use an online correction tool like SpellCheckPlus.
- Test your linking strategy, to identify possible external (or internal) links that would not open in a new tab. To save time, the Chrome Target Blank extension is really cool.
- Locate images with missing alt text: here, the Chrome Alt Text Tester extension should make you smile.
- Make sure your post looks the way you want it to on your computer, tablet and mobile device.
- And don’t hesitate to have your article proofread by someone who doesn’t have his nose in it: a third person might well identify errors that you might never have seen alone!
Because a piece of advice is never too much...
Before officially publishing your article, take the time to preview it. This will allow you to get a better idea of how your content will look, and correct any final typos you may have forgotten along the way.
Hell yeah!


A standing ovation is required: from integration to optimization, you now have all the keys in hand to write (and publish) an effective blog post!
Now, your ultimate mission, if you accept it, is to interact with your readers in the comments to give your WordPress blog post the visibility it deserves. Alright?
By the way… Do you have a WordPress pre-publishing ritual to share with us? Or some blogger tips to gain visibility? Feel free to whisper your best practices in the comments… or just tell us if you liked this article ☺️ See you soon!