When you start developing your site built with the WordPress CMS, and your first posts start to be ready, if you don’t touch any settings they will all be in the same default category: the Uncategorized category.
We agree: this is not very relevant, and moreover it may be displayed everywhere on your site, like article pages, archive pages or URLs. Not great, in terms of user experience.
Worse: it may even be visible in your URL on search engines like Google, and it may impact your SEO in a negative way!
So let’s see how to change the default category in WordPress, and how to remove it.
No need for code or plugin in this little tutorial: everything is very simple.
Let’s get started!
Overview
How to change the default category of WordPress posts
To change the default category, there is a mandatory prerequisite: to have previously created another category.
Yes, it’s normal: if you don’t have another one, you won’t be able to delete the only existing category.
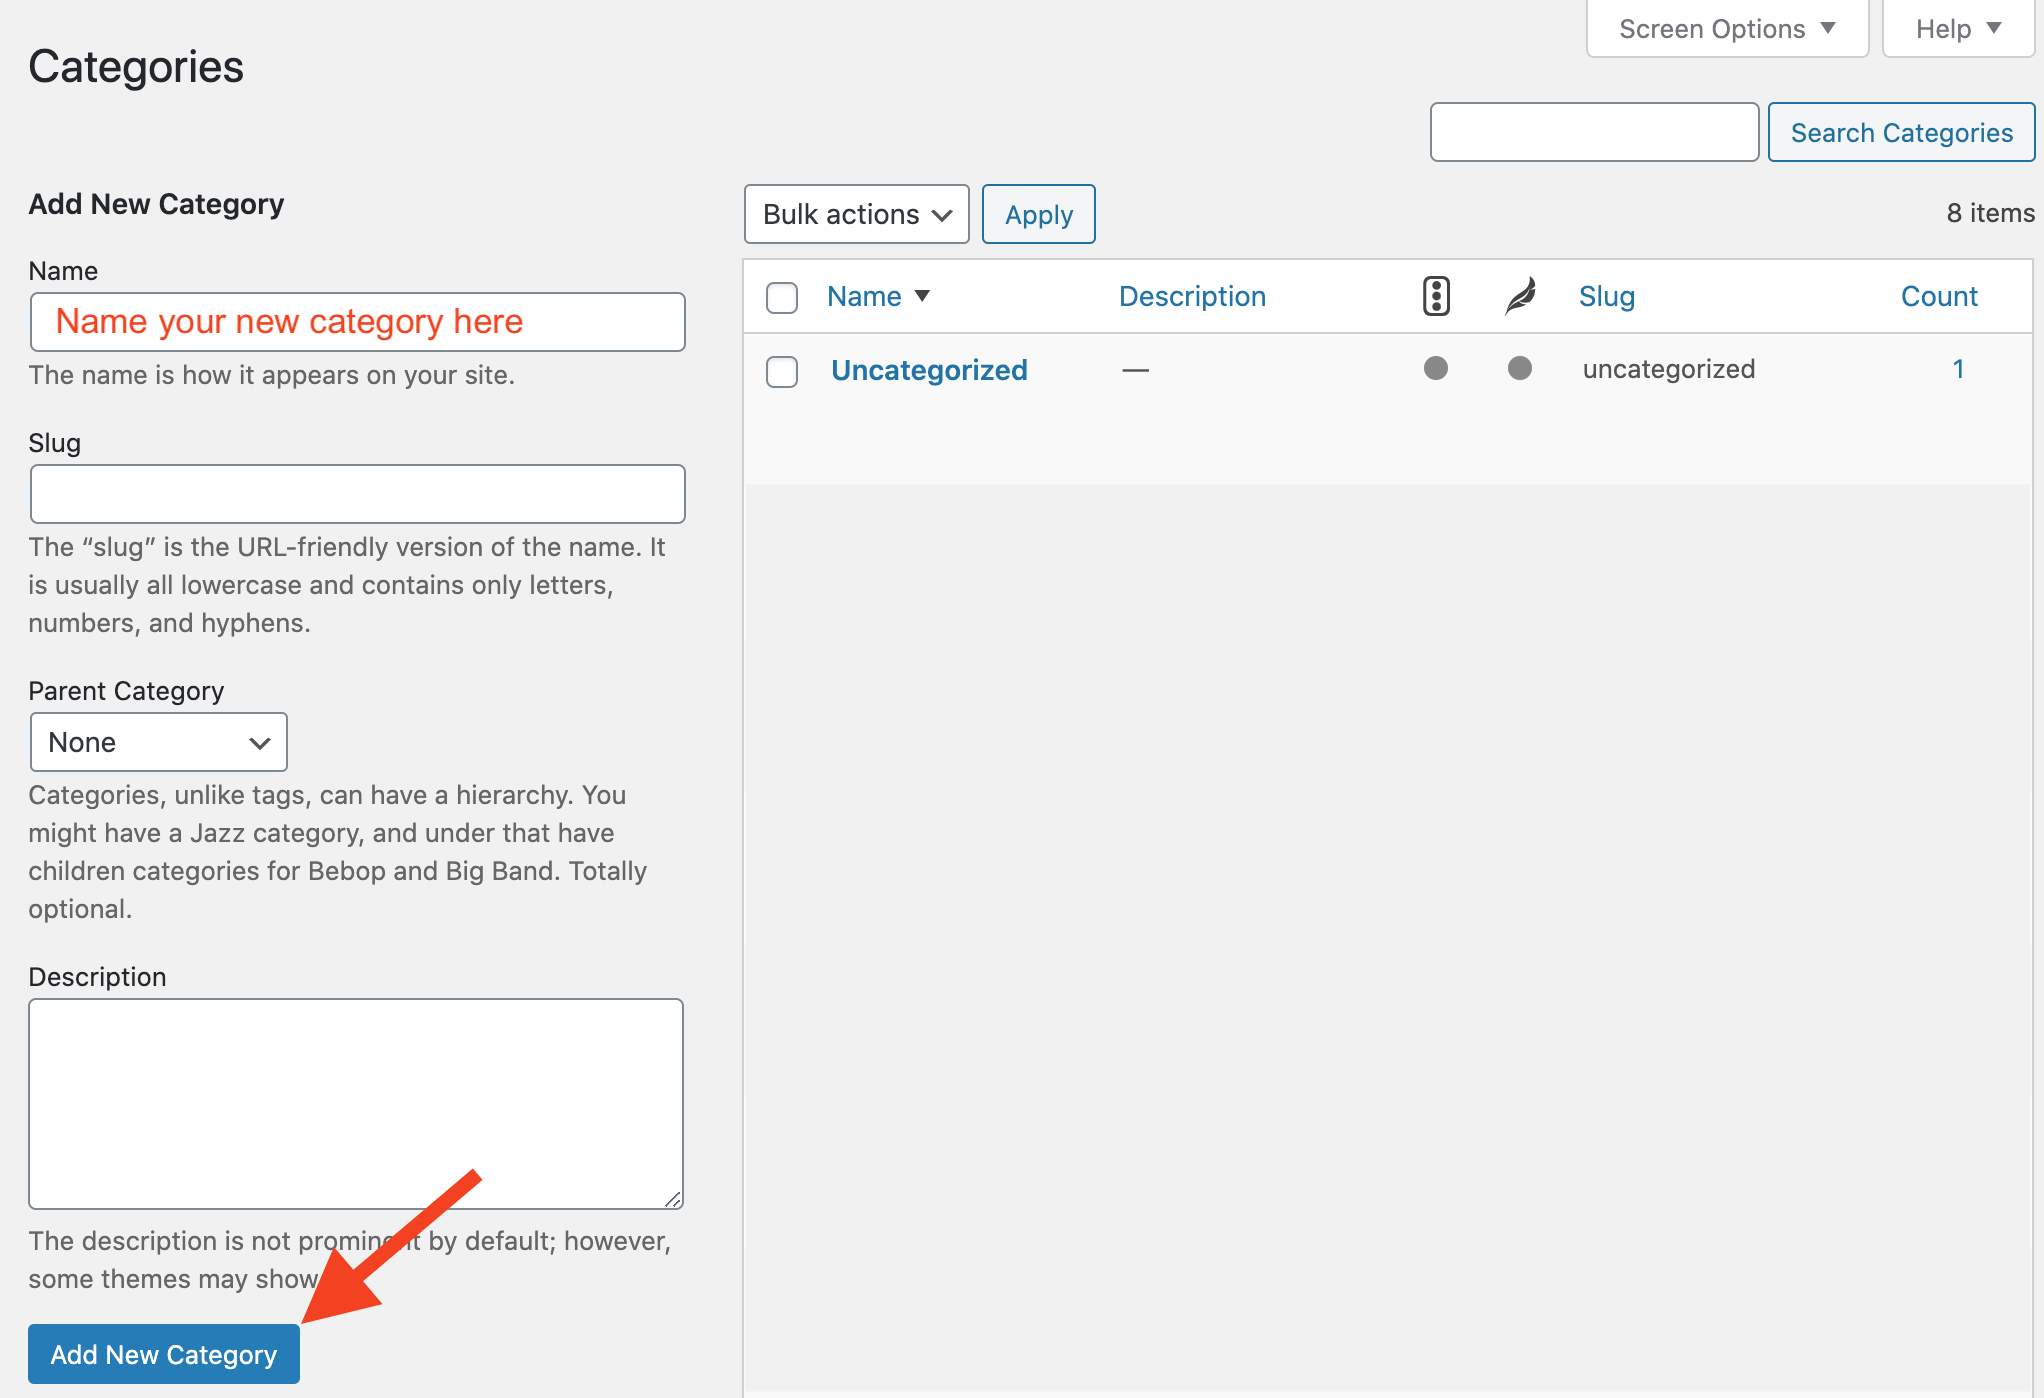
To add a category, go to the administration in the Posts tab and then the Categories submenu. Finally, click on the Add New Category button.

Define the name of the category and possibly a slug, and save.
Remember to name this new category with precise keywords, easily understandable and useful for your visitors. It is a question of helping them, with good labels, to find their way easily in your various themes of articles!
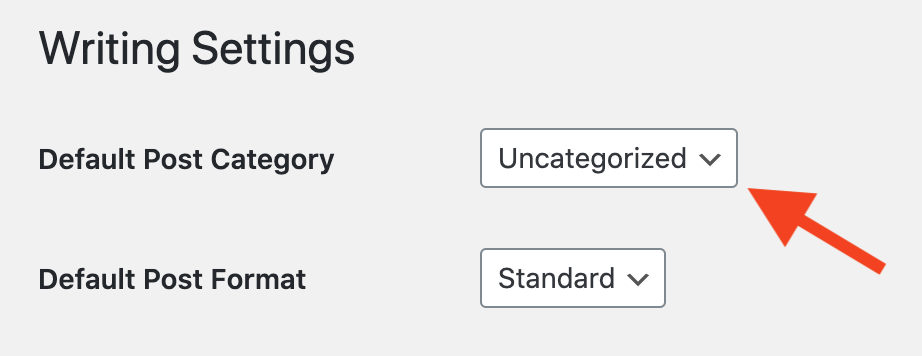
Now go to Settings > Writing and set your new category as the default one for articles.

Click on the Save Changes button at the bottom of the page, and your new default category is now in place. Simple, isn’t it?
How to remove the default category from WordPress
You have read it: it is not possible to delete the default category, since it is the only one available.
But now that we’ve created another one, and it’s set in the WordPress settings as our new default category, we’re finally going to be able to do it.
Go to the Posts > Categories tab.
This page gives you access to the list of categories on your site.
Hover your mouse over the Uncategorized category and click Delete.

Remember to set up a redirection if the category has been present for a long time on your site to avoid generating a 404 error.
If you have published several posts under this category, you will also have to redirect them all if you change the category.
Not sure how to proceed? Follow our smart guide to set up redirects on WordPress.
And last but not least…
With this simple tutorial, you now know how to easily change the default uncategorized category in WordPress to the category of your choice. This will allow you to optimize your site’s SEO and improve your site’s category management by keeping only relevant labels.
It’s your turn now!

Receive the next posts for free and access exclusive resources. More than 20,000 people have done it, why not you?


Continue reading
Articles posted in WordPress TutorialscPanel: Features and how to use this interface for your WordPress site
Need to modify the PHP version of your website? That’s where it happens. Need to create an email address? That’s where it happens too. Need to install an SSL certificate on short notice? Here again. Where? On your WordPress site’s…
How to redesign a WordPress website: the ultimate checklist
Aaah, the redesign of a WordPress website… When you think about the different issues that this mission involves, you usually tend to stress a bit. Who doesn’t dream, in this key moment, of doing a simple Command + Option +…
How to enable two-factor authentication on your WordPress site
A login + a password. Connecting to the WordPress administration interface is very simple, as long as you remember these two elements. From the point of view of the malicious person or robot that wants to access your site, it’s…