

You might be on “Insta,” as they say. But are you also on InstaWP? No, we’re not talking about a new social network specifically dedicated to WordPress.
Today, I’d like to tell you about a tool that’s simple to use, comprehensive, powerful, and flexible. Yes, I mean it.
A tool that lets you create test sites in a matter of seconds (no exaggeration).


Not to mention that you can sell your own templates. Or automatically migrate all changes made to your staging site to your online site. All in a couple of clicks.
Can you believe it? This is just the tip of the iceberg of what InstaWP can do. By the way, it can also save you lots and lots of time.
If you’re not already familiar with it, let me tell you: you’re in for a real treat.
And in the process, your site creation process may even change. Curious? Read on.
This article contains affiliate links. This means that WPMarmite will earn a commission if you decide to purchase a particular plugin via one of these links. Among other things, this enables us to pay for the research and writing work carried out on the blog. However, we remain impartial: if a plugin isn’t worth it, we say so (or we don’t feature it). Find out more about transparency in our publishing policy.


What is InstaWP?
A toolbox for instant site creation

InstaWP is a freemium online tool that lets you launch a fresh installation of WordPress instantly, without going through a hosting server.
In just a few clicks, you’ll have a test or development site up and running, with no configuration required on your part.
Each site comes with a domain name, an SSL certificate for switching to HTTPS (premium), a database, and basic settings.
As a user, you can choose your PHP version, as well as the plugins and theme of your choice.
Everything is customizable, just like a hosted site. All in a secure environment accessible only to the user, much like a local environment.
The difference with a local site (accessible on your machine) is that each site is available online, so you can easily share it with customers, for example.
A site can either be launched from scratch or from a ready-to-use template. You can also move it online to the hosting provider of your choice, if you wish.
InstaWP, a feisty youngster who’s growing up fast
That’s already very appealing. In fact, this tool is starting to get a lot of attention, because it’s really well thought-out and super practical.
In fact, a number of major companies in the WordPress ecosystem have already adopted it, according to InstaWP’s official website.
These companies include:
- StellarWP, the parent company of plugins such as Solid Security (formerly iThemes Security) and Kadence
- Awesome Motive, the company behind plugins such as Smash Balloon, All in One SEO, OptinMonster, etc.
- Gravity Forms, the famous forms plugin
- Human Made, one of the largest WordPress agencies in the ecosystem
InstaWP’s development has even been funded by Automattic, the company that contributes most to WordPress.org.
Officially launched in July 2021 by Vikas Singhal from India, InstaWP is enjoying a steady rise in popularity.
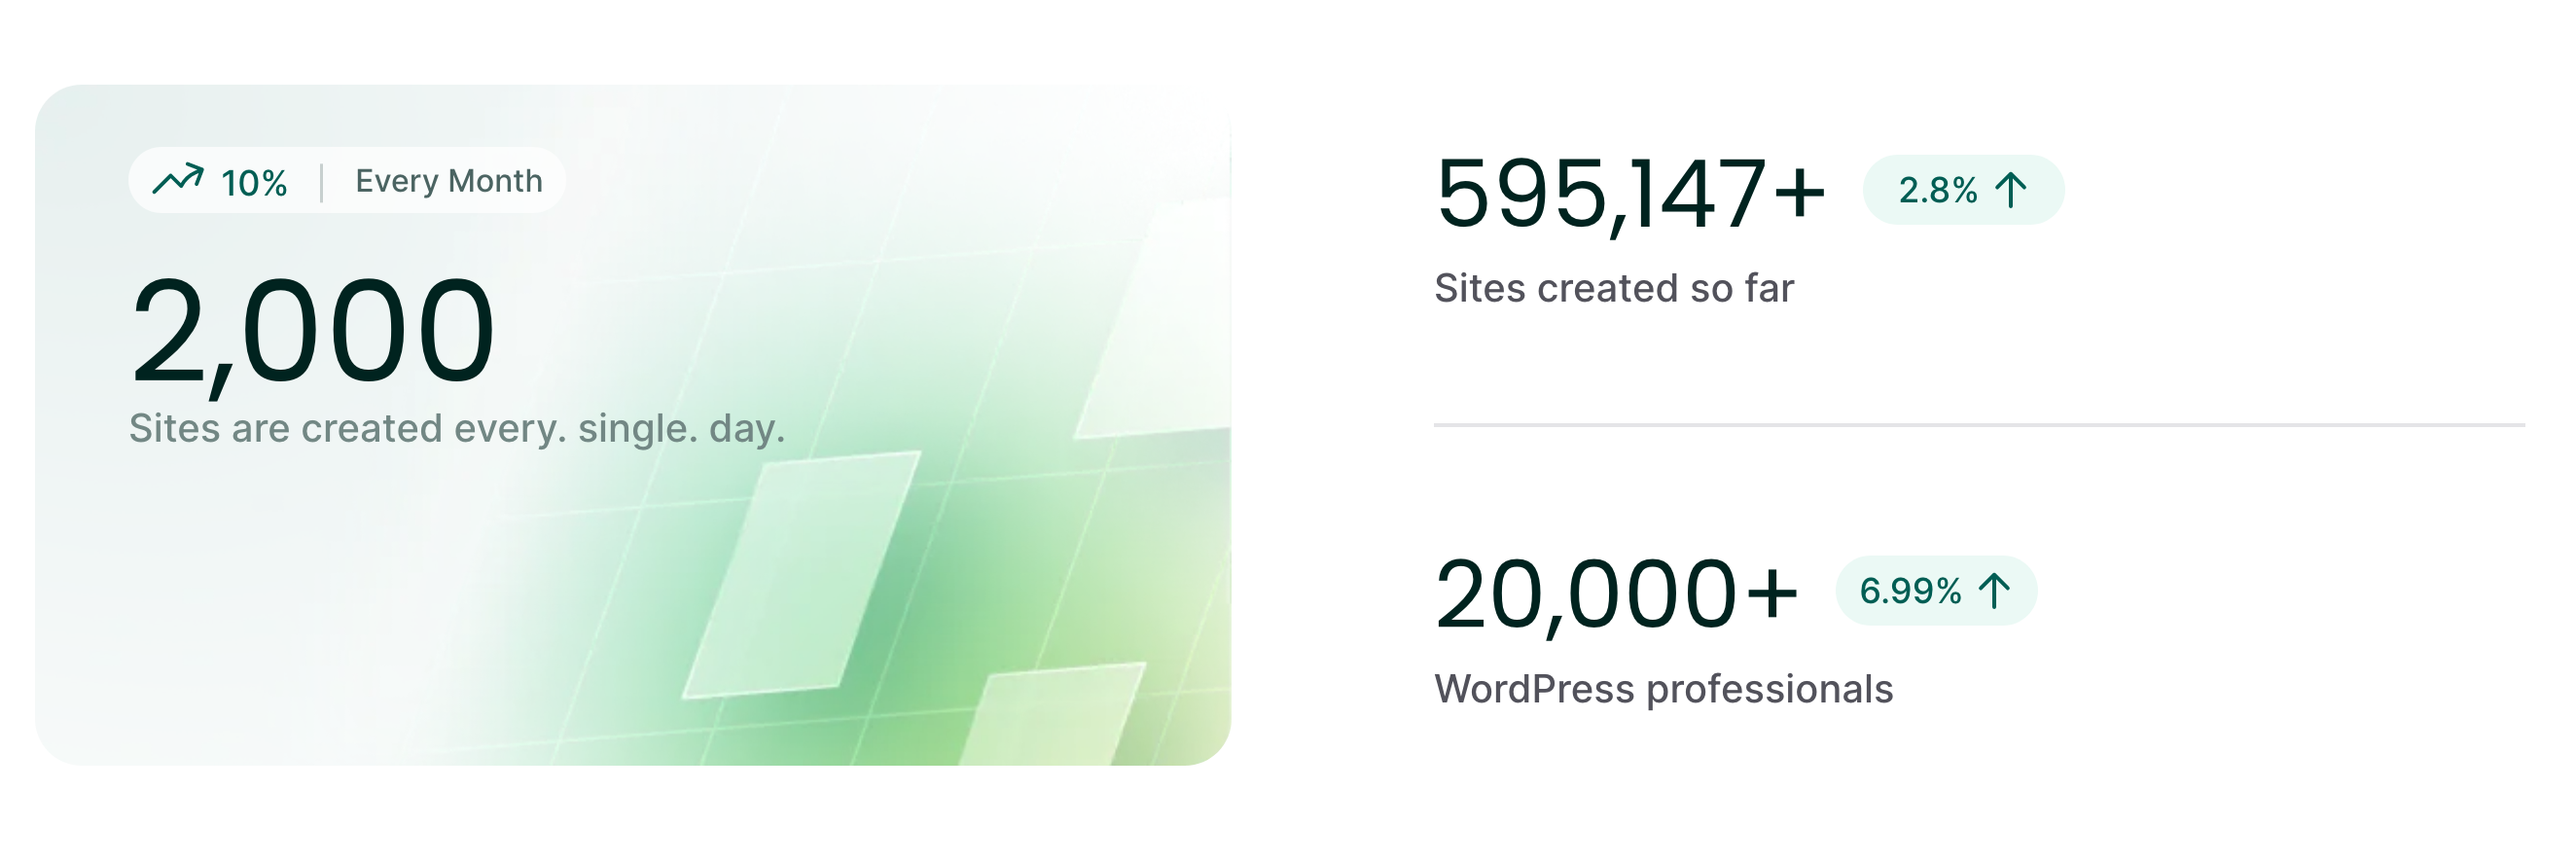
According to the statistics on its home page, 20,000 users are using the service at the time of writing.
2,000 sites are being created every day, an increase of 10% per month:
Why use this tool?
So, what can you do with this toolbox? Well, quite a lot. InstaWP will be an excellent assistant if you want to:
- Create an online site and share its development with your customers by providing them with a secure link.
- Set up a staging site (a copy of your online site) for test purposes. This is particularly useful when you want to carry out a major update, try out a new plugin, or configure new settings.
- Make changes on a staging site and easily move them online. InstaWP has an option for doing this automatically; I’ll come back to this later.
- Design ready-to-use site demos to share with potential or current clients. InstaWP is a simple and effective way to build up a portfolio of sites that you can share with the people you choose. That could be useful if you’re a service provider, for example.
- Work on a personal or client site in complete peace of mind, without the risk of breaking everything during a maintenance operation.
- Launch a site (test or development) without starting from scratch. The InstaWP tool features ready-to-use templates that you can customize as you see fit.
Speaking of which, let’s take a look at how to launch your first site with InstaWP.

How do I create a site with InstaWP?
There are two ways to launch a fresh WordPress installation with InstaWP:
- With a user account.
- As a guest user.
For the purposes of this test, I’m going to use method 1, which gives you access to the tool’s dashboard to create a new site.
If you just want a quick test of InstaWP, opt for method 2 and follow the onboarding process on this page.
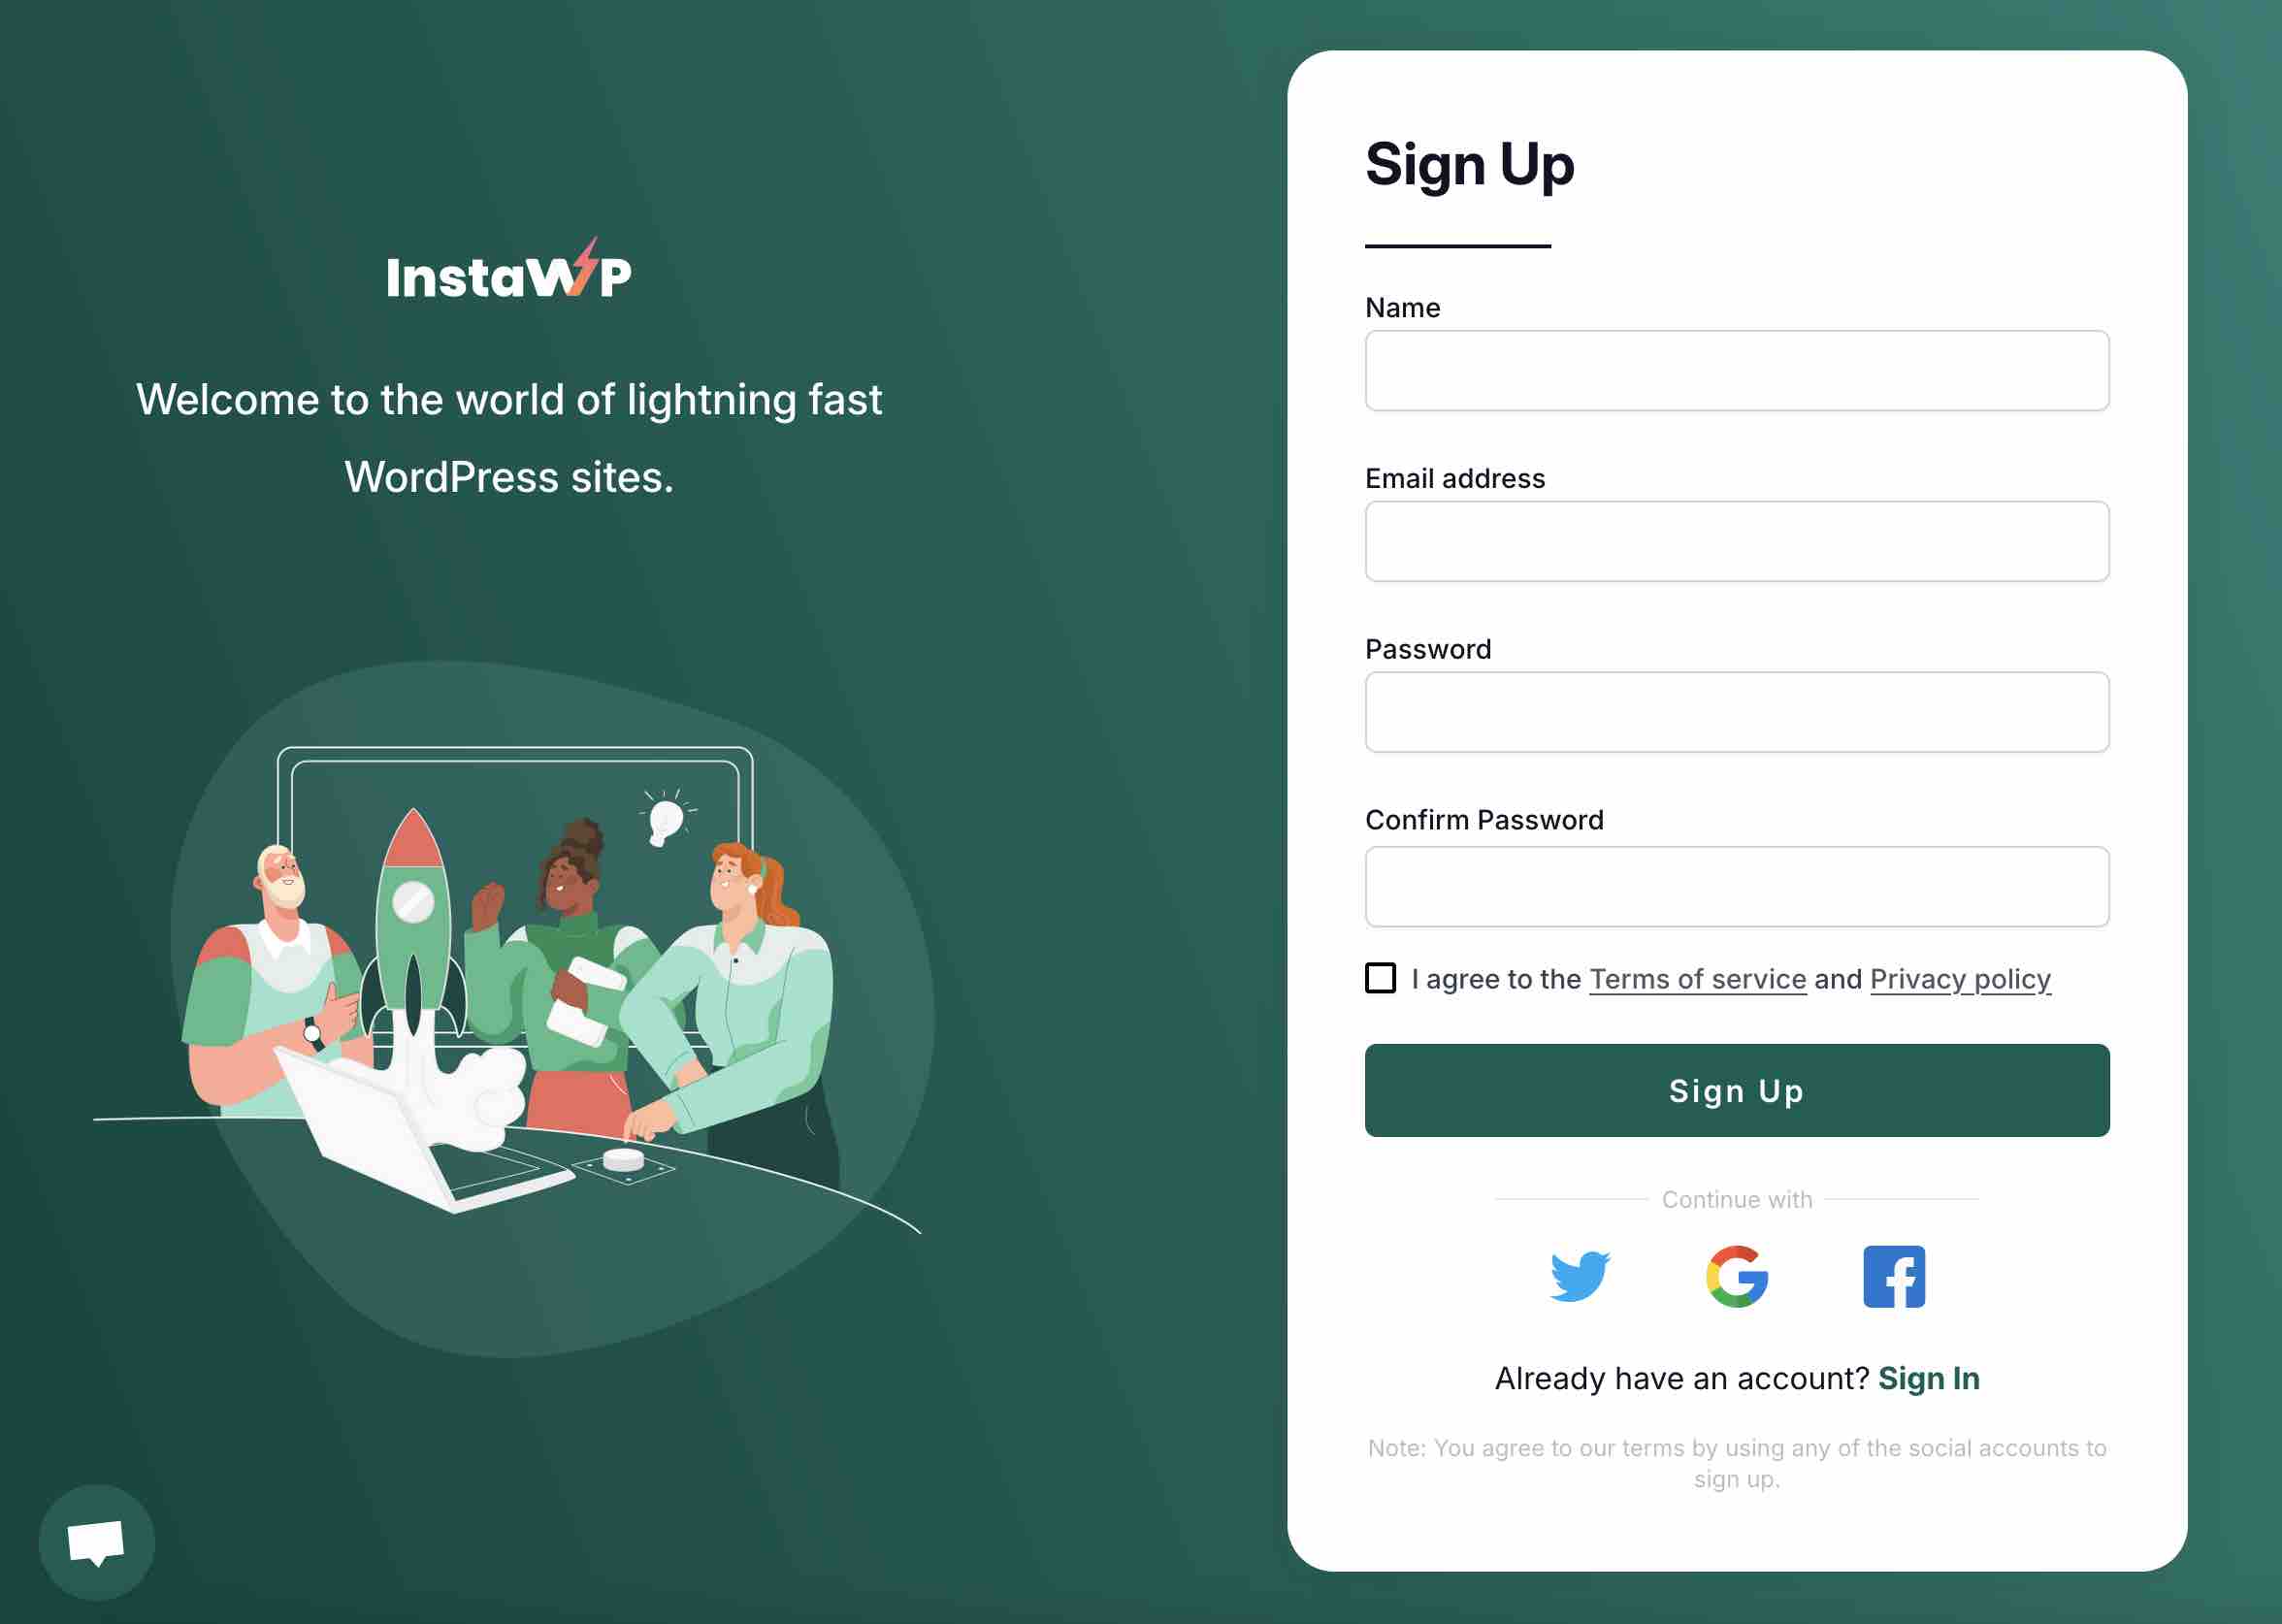
Step 1: Create an InstaWP account
Click on this link and enter the following information:
- Your first name
- Your email address
- Your password
You can also register using your Google, Facebook, or X login:
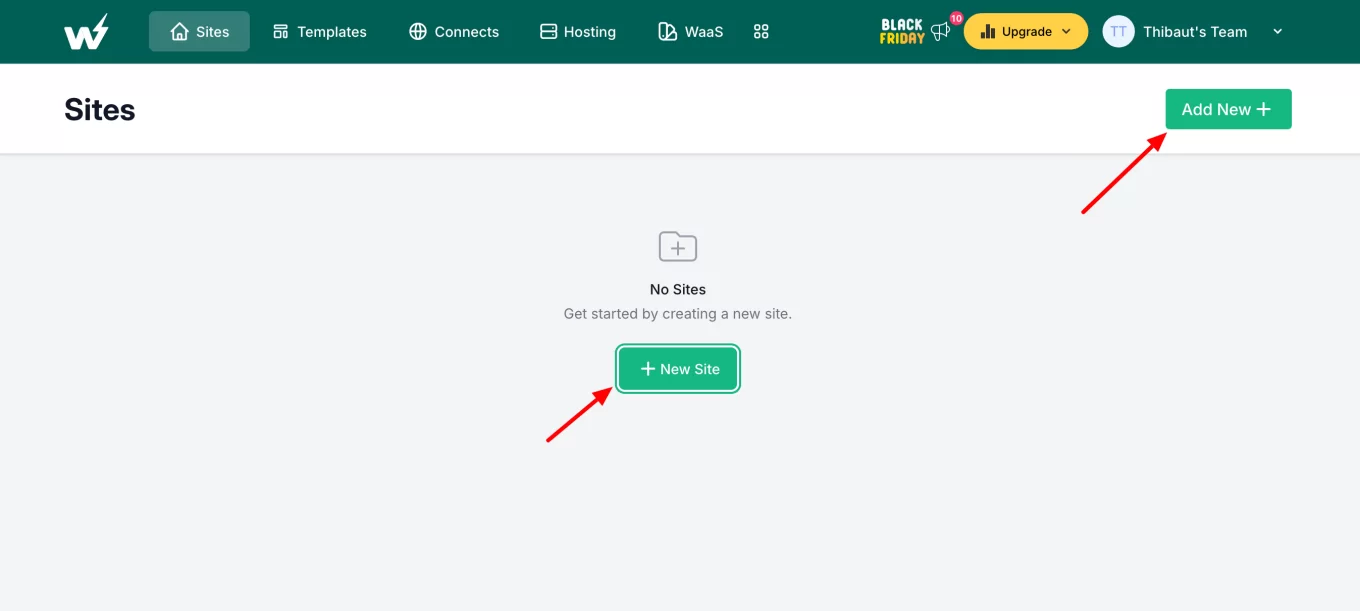
You’ll then land on the tool’s dashboard:

Step 2: Configure your WordPress site settings
To add a new site, simply click on the “Add New” or “New Site” button:
InstaWP will then prompt you to configure your site. There are several possible options. Let’s take a look at them.
Starting from scratch or from an InstaWP template
To get started, you can either:
- Launch a site from scratch (“From Scratch” tab). In this case, you’ll configure the settings of your WP site yourself.
- Use your own template (“From Template” tab). A template is a site previously created with InstaWP that contains your basic configuration, which you use as a template. It contains your site design and content. This means you don’t have to start from scratch, and you save time.
- From a third-party template (“Store” tab).
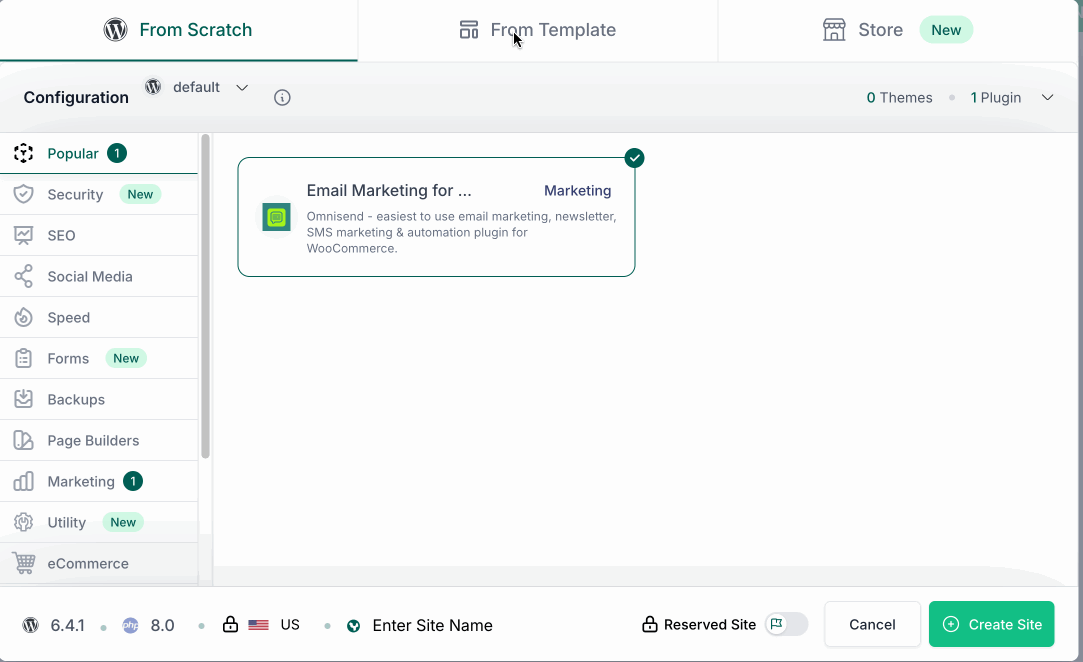
Set the basic WordPress configuration
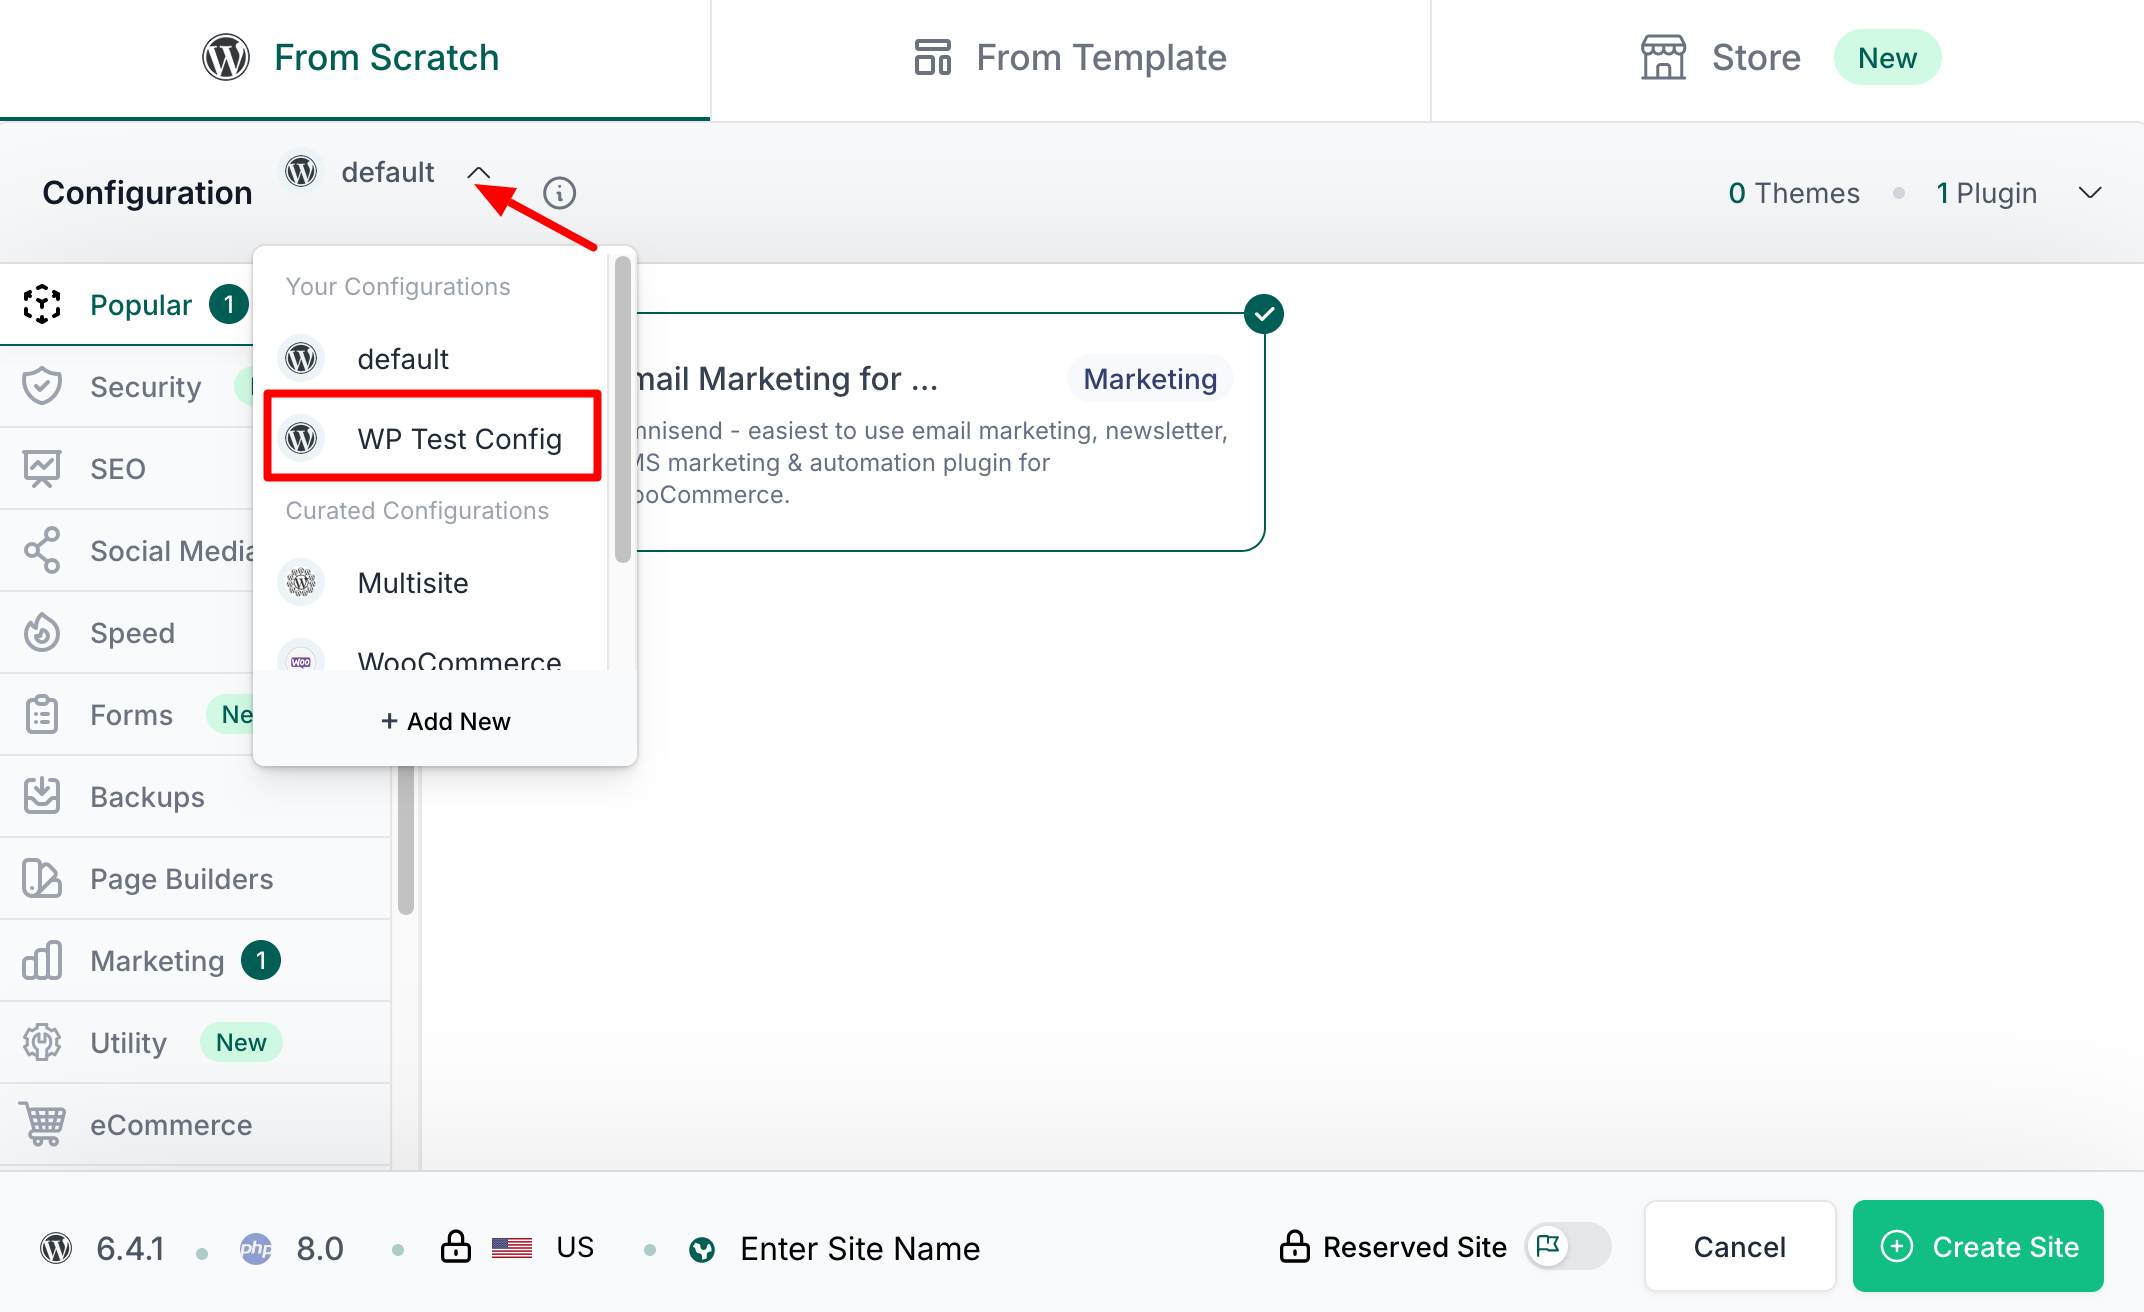
If you choose the “From Scratch” option, you can then define a basic configuration with several options:
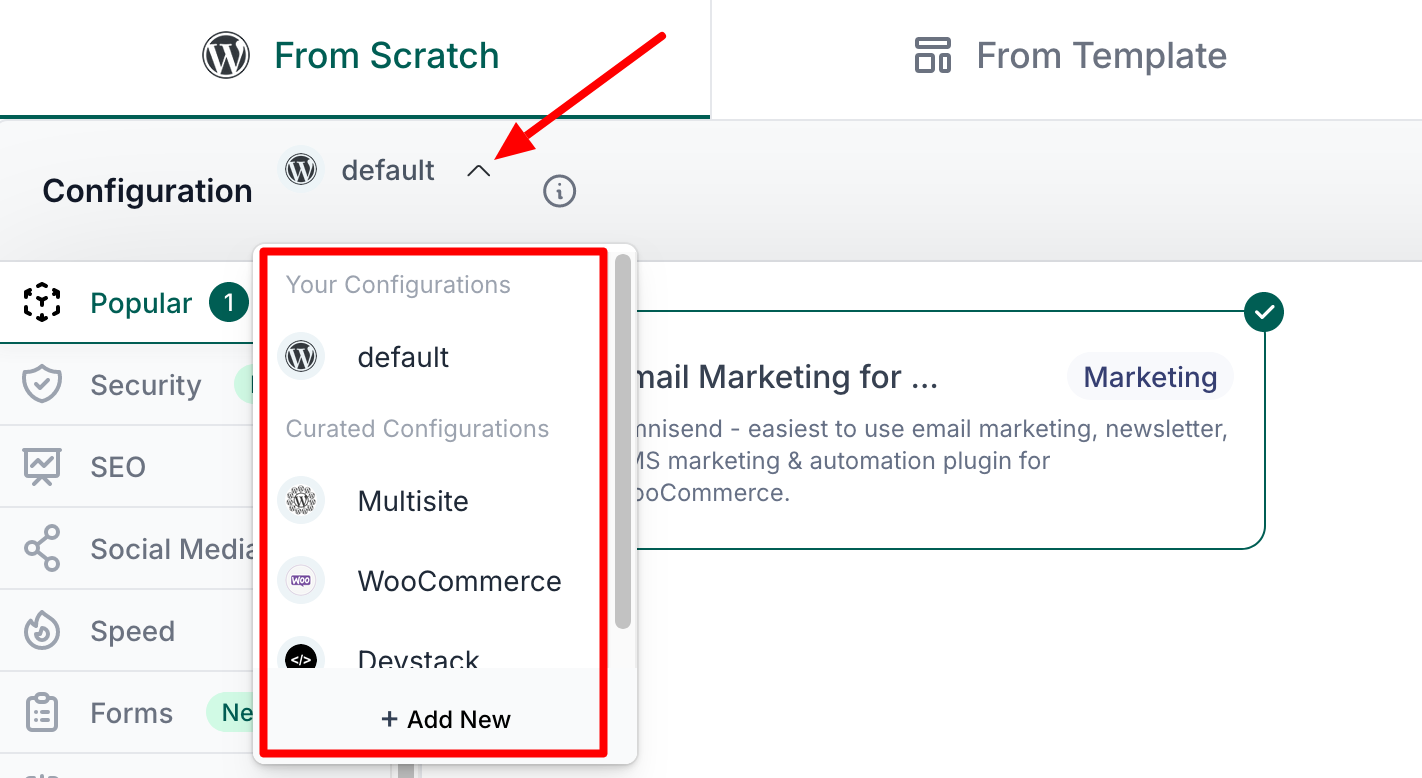
- Default
- Multisite
- WooCommerce
- DevStack
This configuration determines, among other things, the major version of WordPress that will be used on your site, or the version of PHP (the software on which WordPress runs).
You can also define your own configuration by clicking on “Add New.”
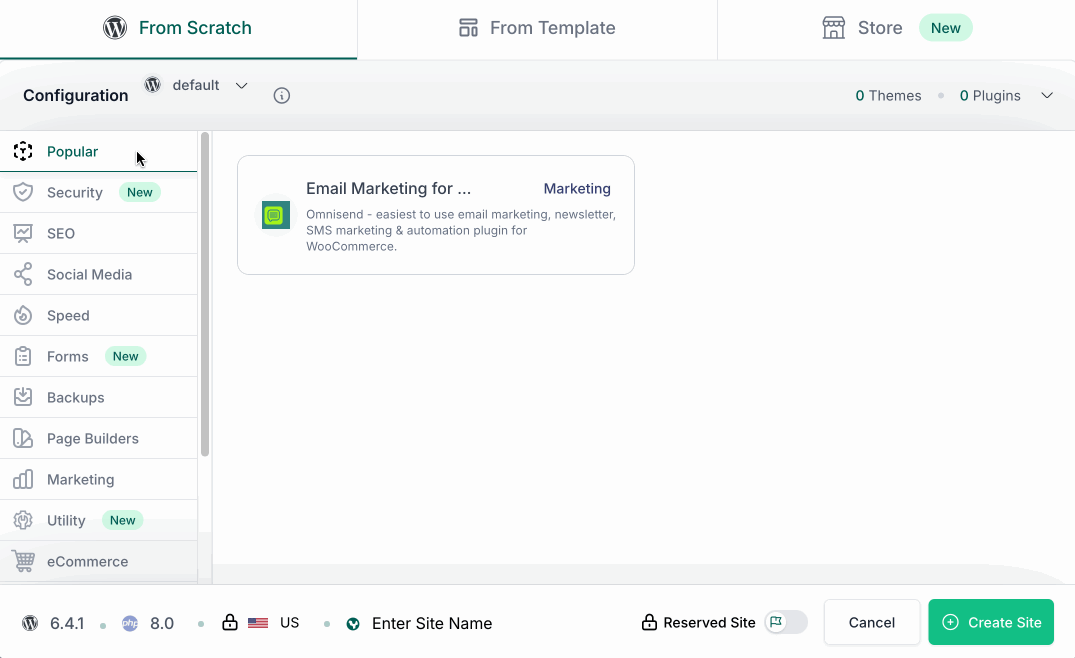
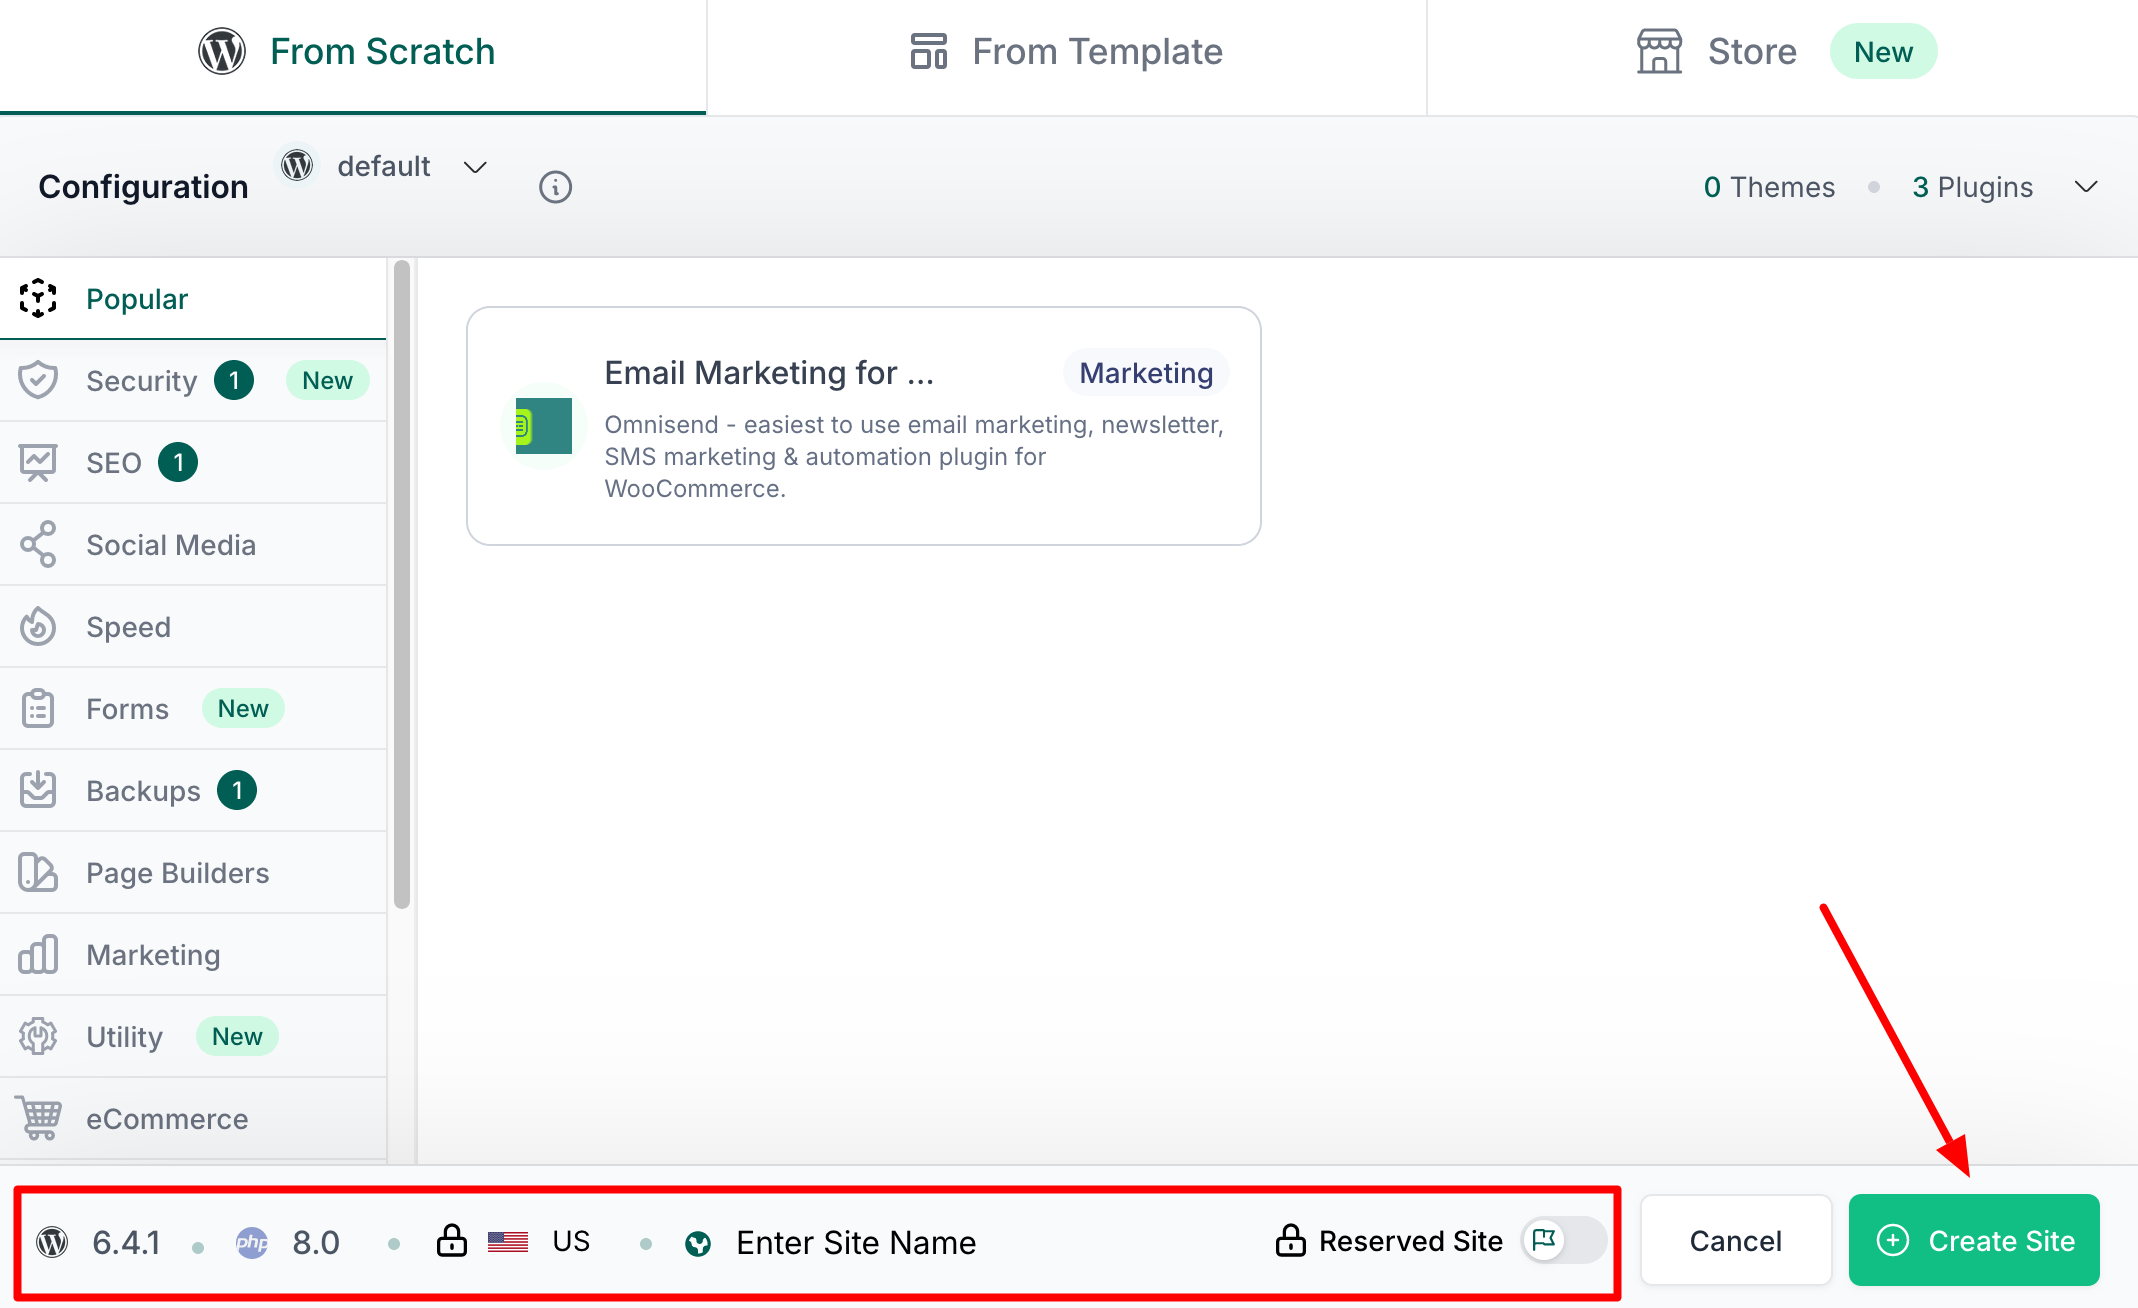
Select the plugins of your choice
Next, on the left-hand side of the screen, you can select the plugins that will be installed on your site.
InstaWP offers 14 categories listing security, performance, SEO, backup, and form plugins.
To add or remove a plugin, simply click on the one of your choice:
You’ll find a number of popular plugins, such as:
Defining WordPress settings with InstaWP
At the bottom of the highlighted window, you can finally choose the general settings for your WordPress site:
- Major version (with the option of going back to WP 3.7 at the time of writing)
- PHP version
- Server location (Pro only)
- Your site name
- Expiration date, with “Reserved Site” option (Pro only). In this case, you can keep the site you’ve created on your dashboard for as long as you like. By default, a site expires after 7 days with the free version.
When you’re ready, click on the “Create site ” button:
Step 3: Connect to your site
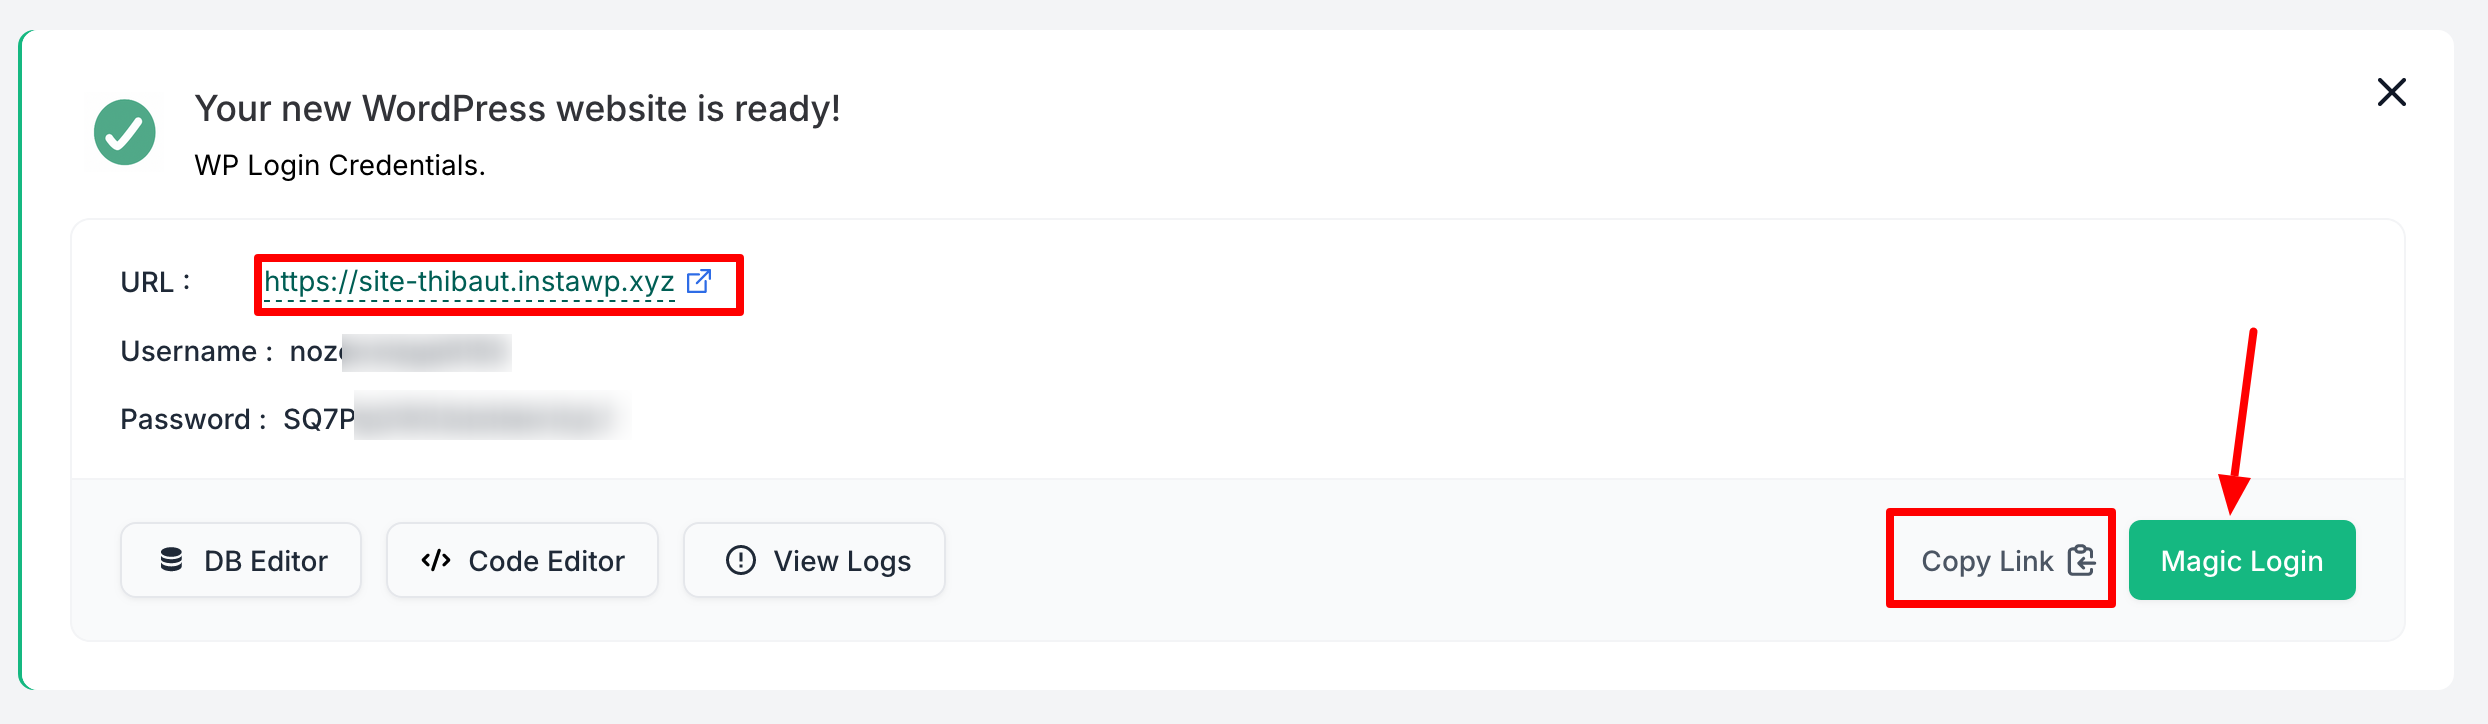
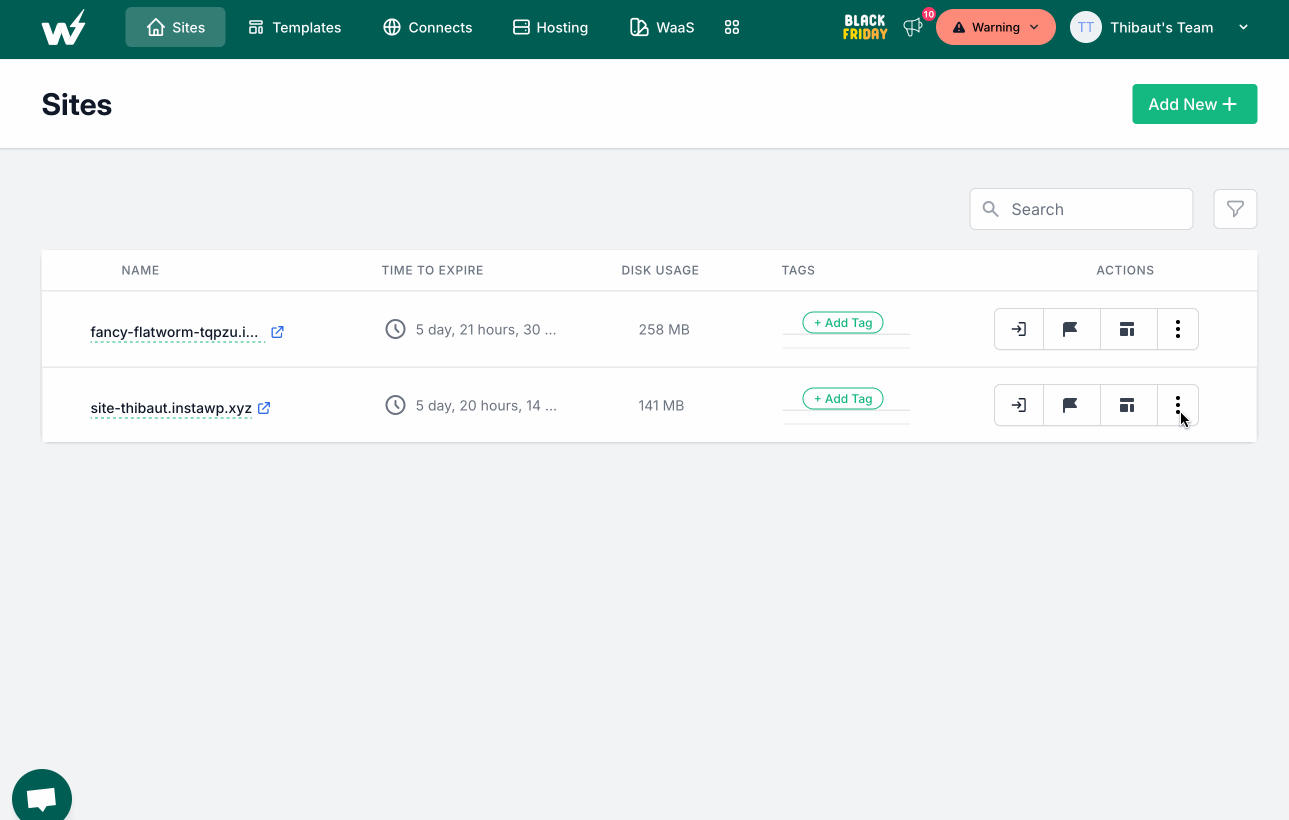
After a few seconds, my site is created! On the dashboard of my InstaWP account, there are two boxes.
The first gives me information on:
- The URL of my site
- My username
- My login password
I can see my site’s visible interface by clicking on its URL. And, of course, I can log in automatically by clicking on the “Magic Login” button.
Note that you can share your site’s link with anyone by clicking on “Copy link”:
The second box, just below, lists the following information:
- Site expiration date
- The disk space it occupies (66 MB in our case)
- The option to add a tag to classify it
- Additional actions, such as reserving the site, saving it as a template, exporting it, cloning it, or deleting it

Step 4: Basic settings
When you log in to your site’s administration interface, you’ll normally find that the entire creation process has gone smoothly.
In detail:
- The latest major version of WordPress has been installed.
- The plugins I selected are active (Yoast SEO, Solid Security, and UpdraftPlus).
- The site runs on a default native theme (Twenty Twenty-Four in my test).
Then you’re free to add the theme, plugins, and content of your choice. Nothing is set in stone, just like a “classic” WordPress site. You can do whatever you like.

Now you know how to launch a site from scratch with InstaWP. In the next section, I’ll show you how to use InstaWP to easily modify one of your existing sites.
To do this, we’re going to set up a test environment, also known as staging. As you’ll see, the procedure is just as quick and easy.
How do I set up a staging site with InstaWP?
With InstaWP, you can also create a production instance of your site for test purposes.
That way, you can make the changes you want (content, design, settings, etc.) without stress. A technical problem arises? The online site won’t be affected, no worries.
What’s more, by opting for a staging site, you won’t need to activate a maintenance mode on your site while you make your modifications. Your site will always be available to your visitors.
Here’s a step-by-step guide to getting started.
Step 1: Activate the InstaWP Connect plugin on the site of your choice
First, connect to your online site. Install and activate the InstaWP Connect plugin:


This plugin will act as a sort of link between the site to be copied and the InstaWP interface. From there, you’ll be able to create a staging site in just one click.
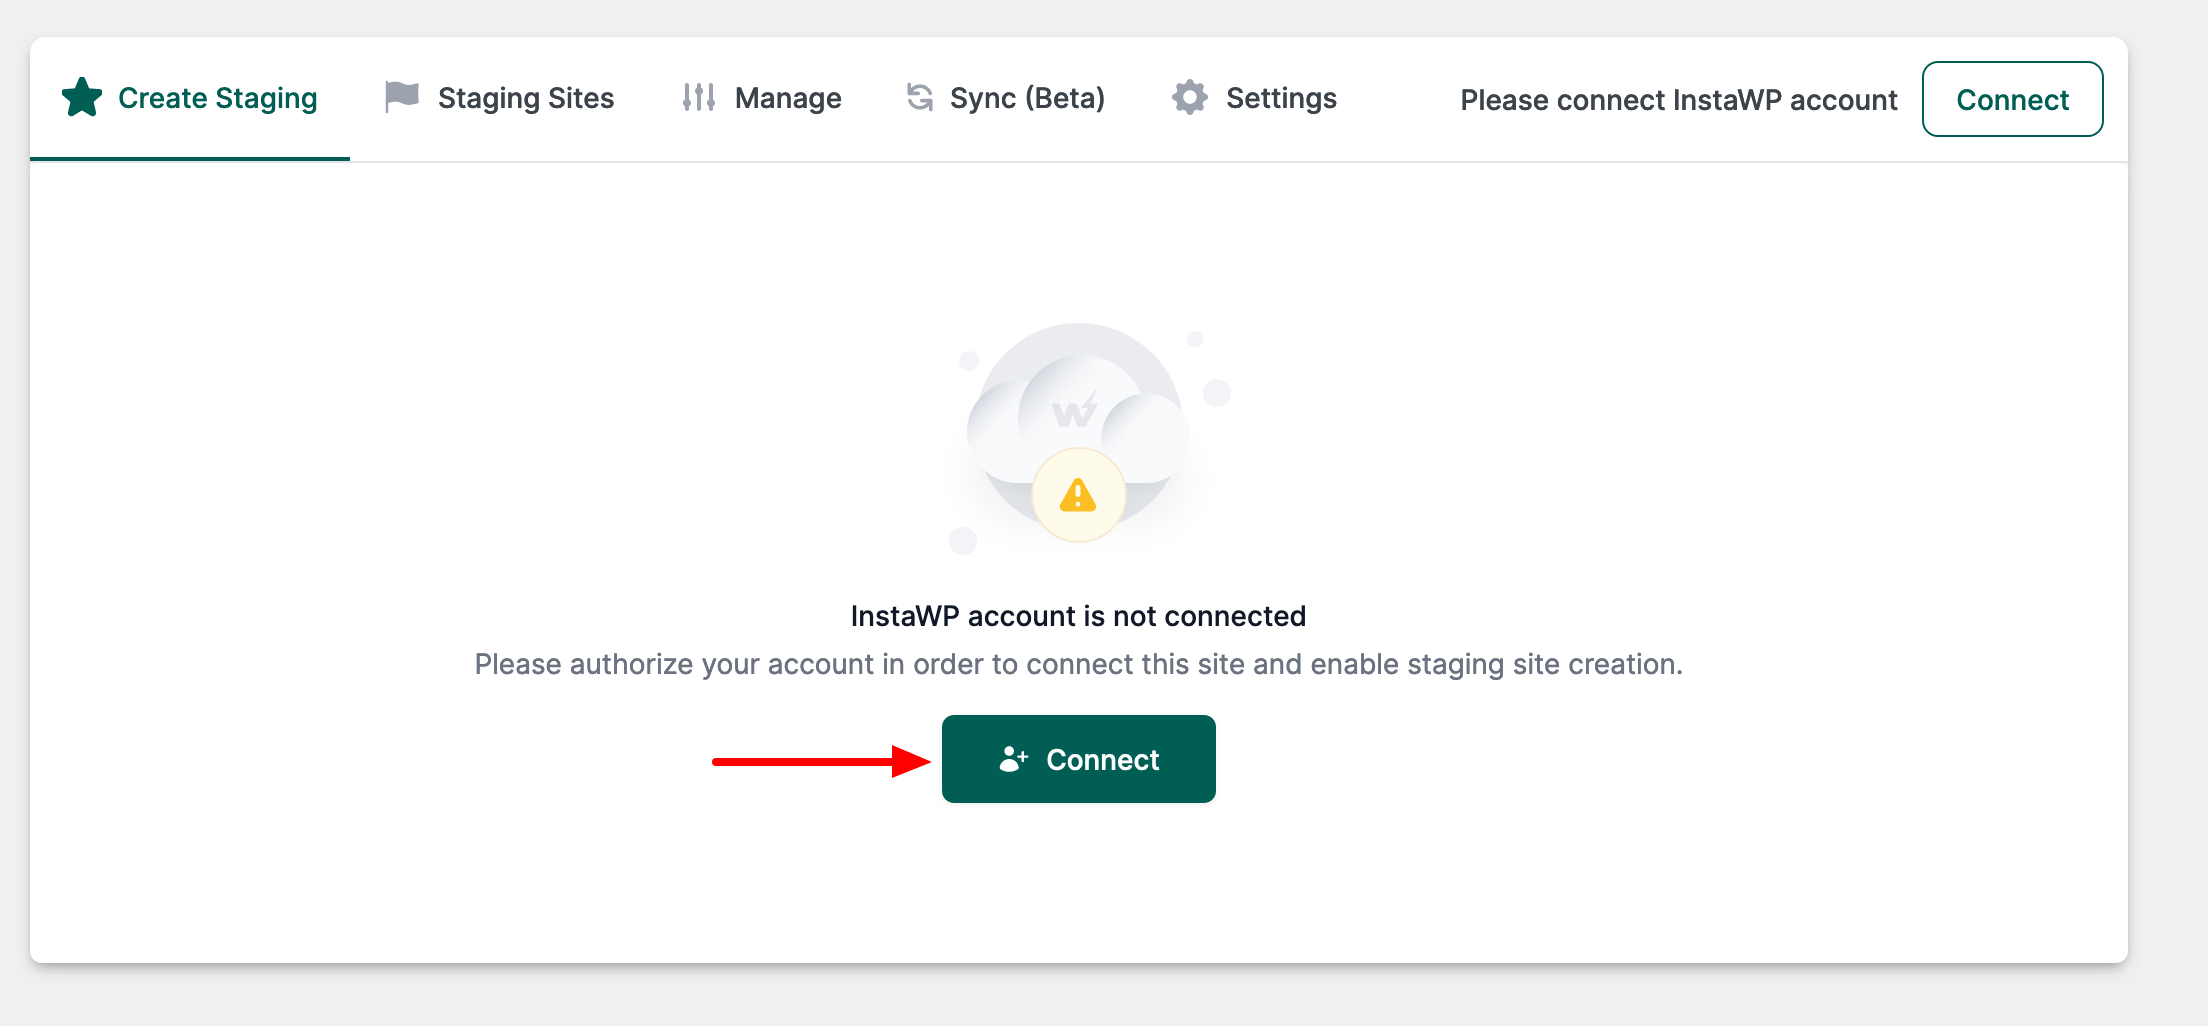
Step 2: Connect your site to InstaWP
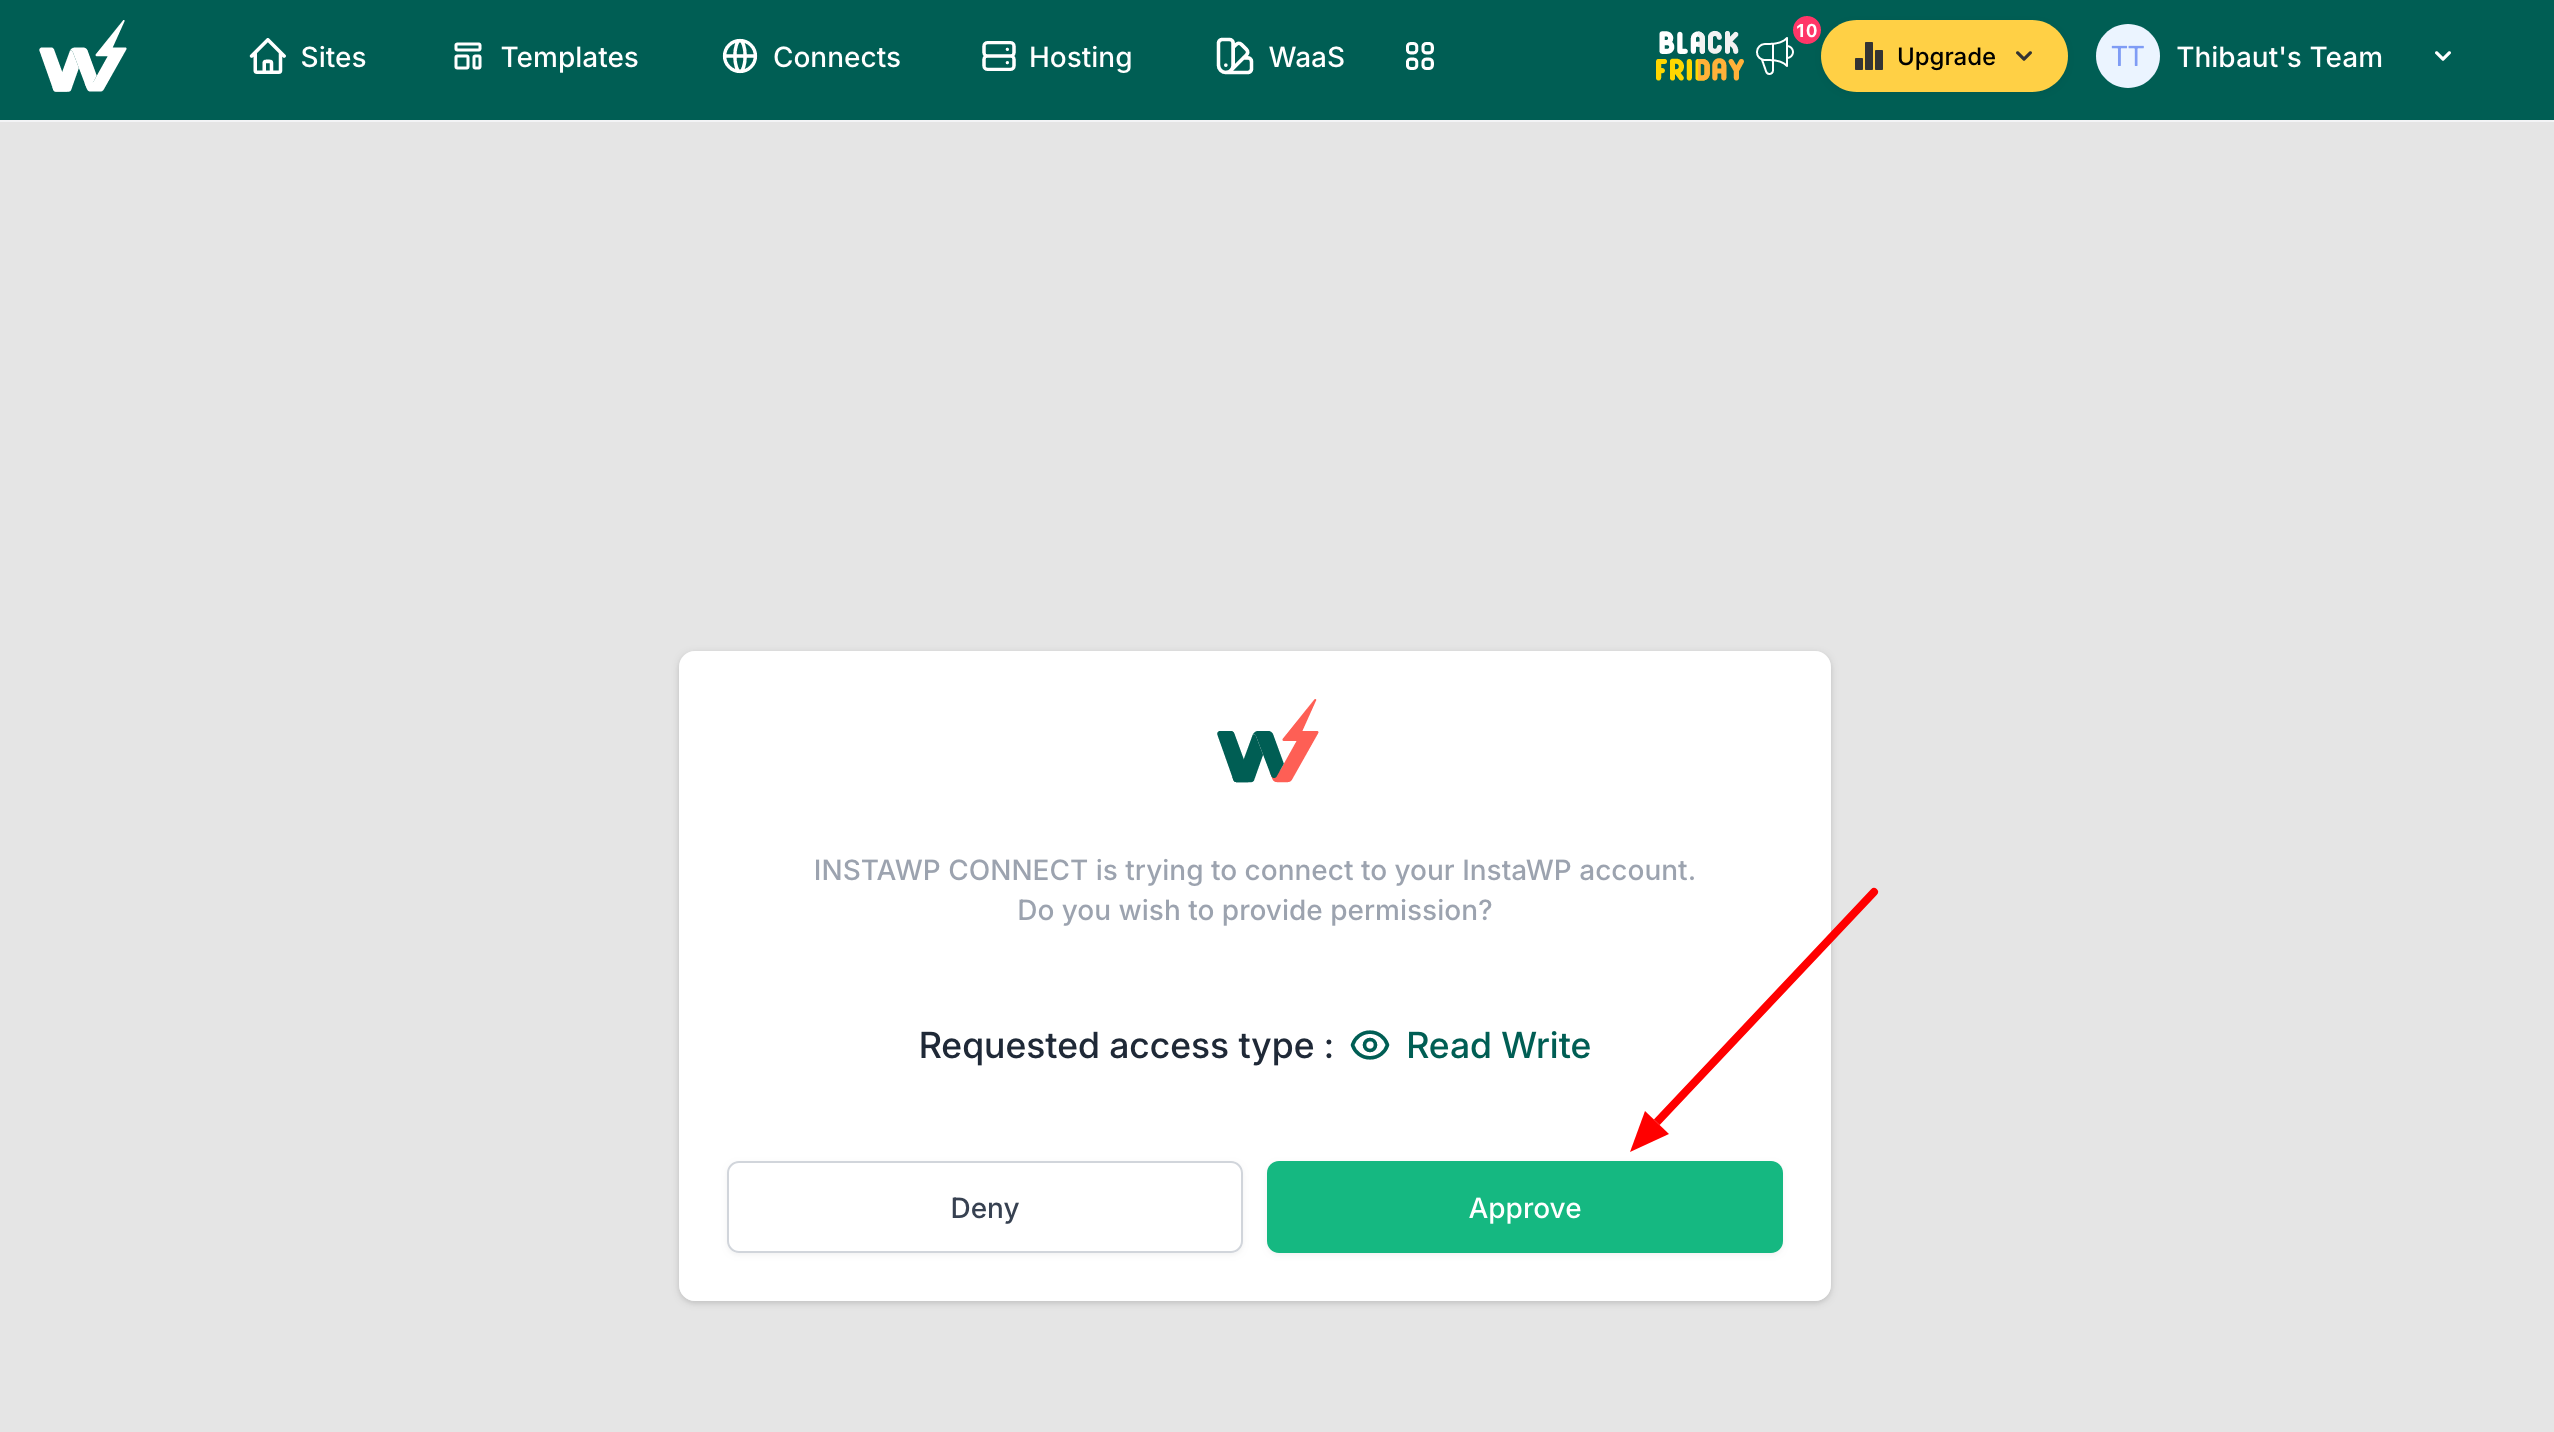
Once the plugin is active on your production site, go to Tools > InstaWP. Click on the “Connect” button:
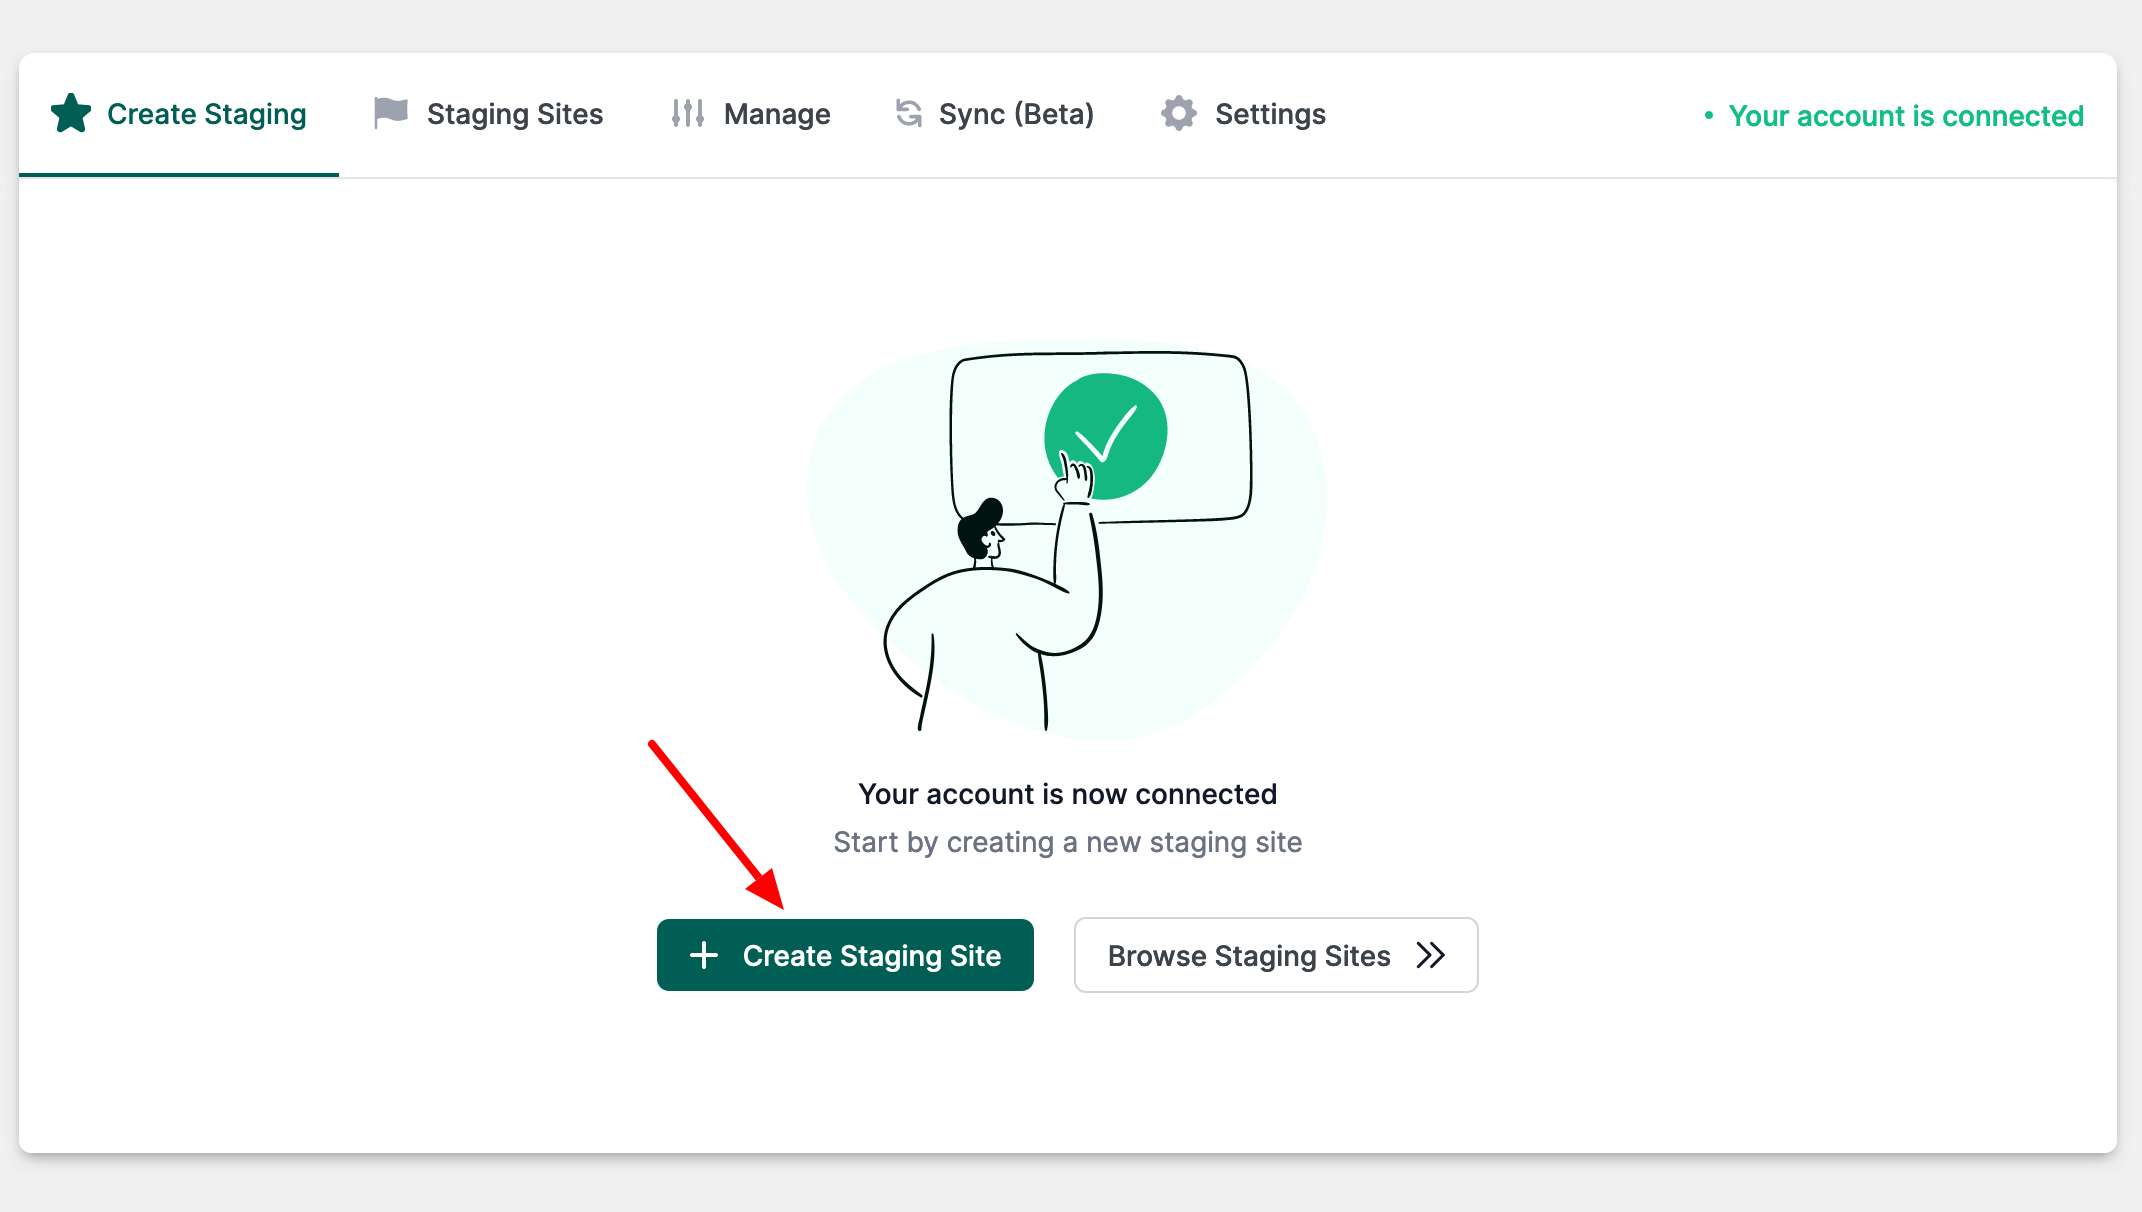
You’ll be redirected to your InstaWP dashboard. Click on the “Approve” button to authorize the connection between your production site and the InstaWP tool:
Step 3: Create the staging site
On your WordPress dashboard, you can now create a staging site. To do so, click on the “Create Staging Site” button:
You’ll be able to set several parameters:
- The type of staging site . You can launch one without your media (“Quick staging”), with the options of your choice (“Custom Staging”) or a complete copy of the production site (“Full Staging”).
- Customization options, such as the ability to copy only plugins and the active theme.
- The database files and tables you wish to exclude.
When you’re finished, click on “Create staging” to create your site:
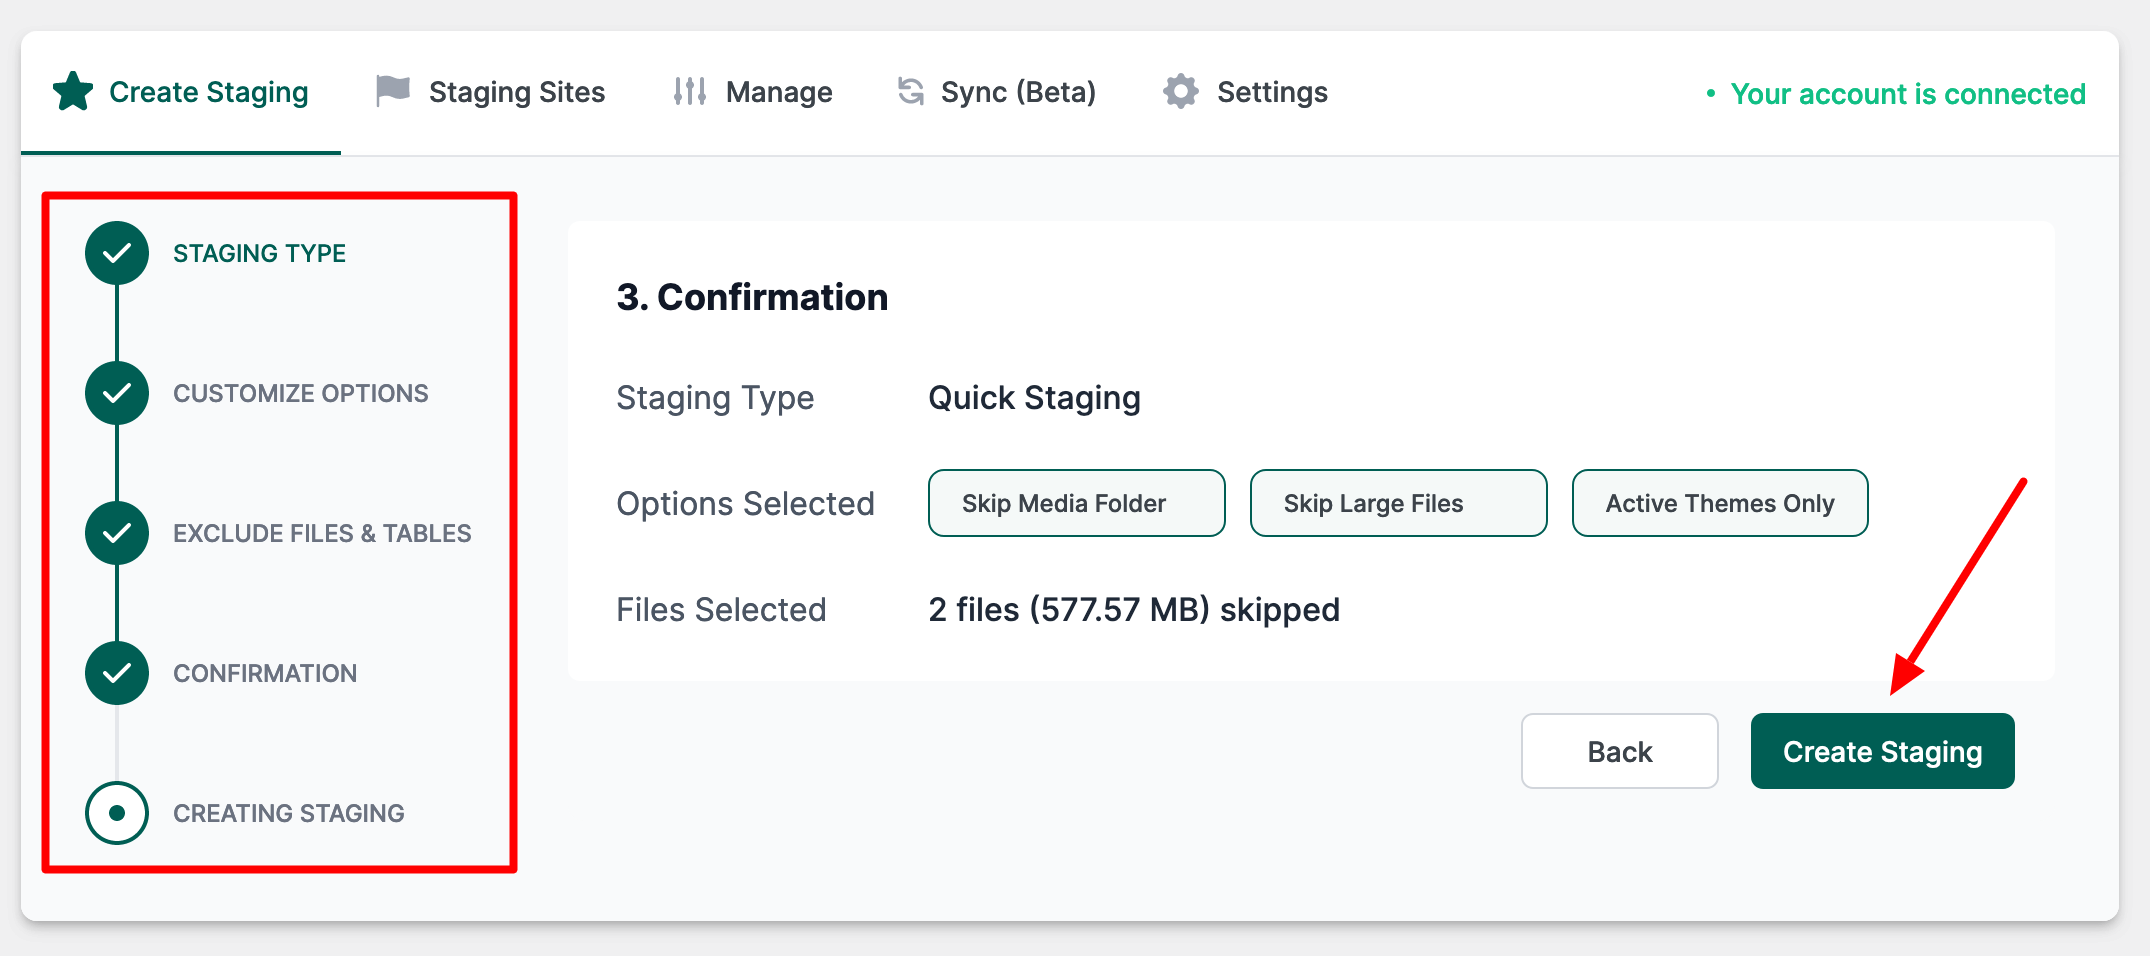
Depending on the size of your site, you’ll need to wait a little longer (it may take several minutes).
Step 4: Connect to the copied site
Your staging site has now been created. You’ll find it in the “Connects” menu of your InstaWP dashboard:
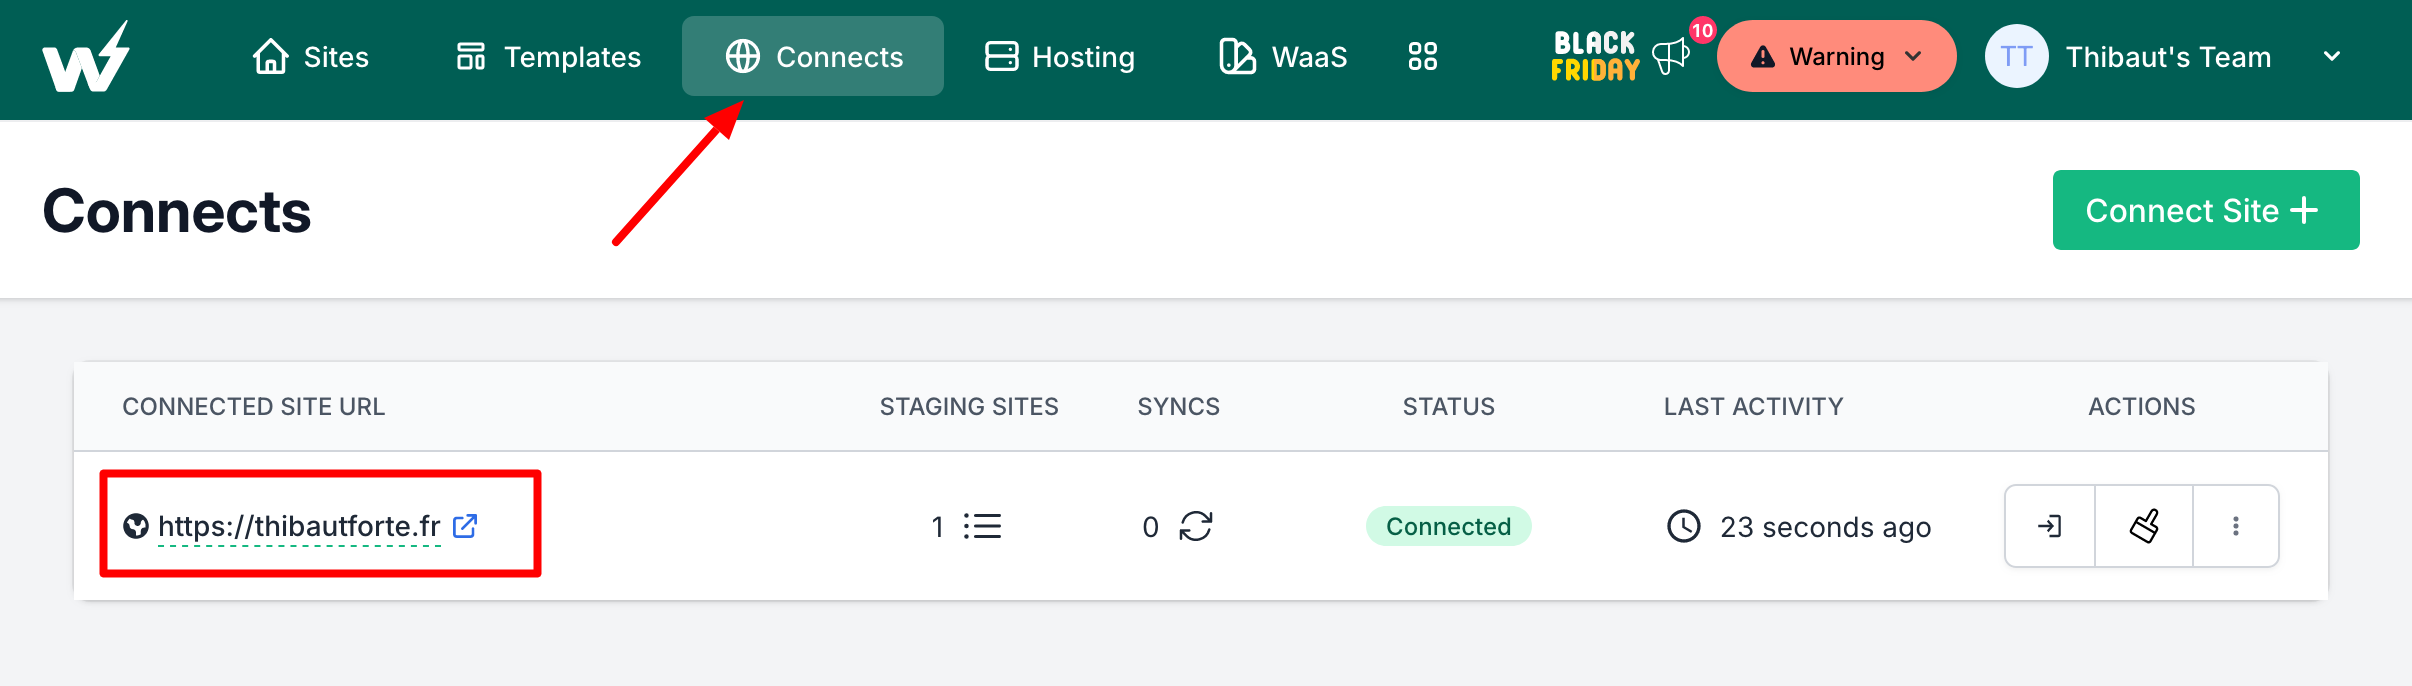
From here, you can connect to this test site by clicking on the “Auto Login” option:

Step 5: Migrate changes online (optional)
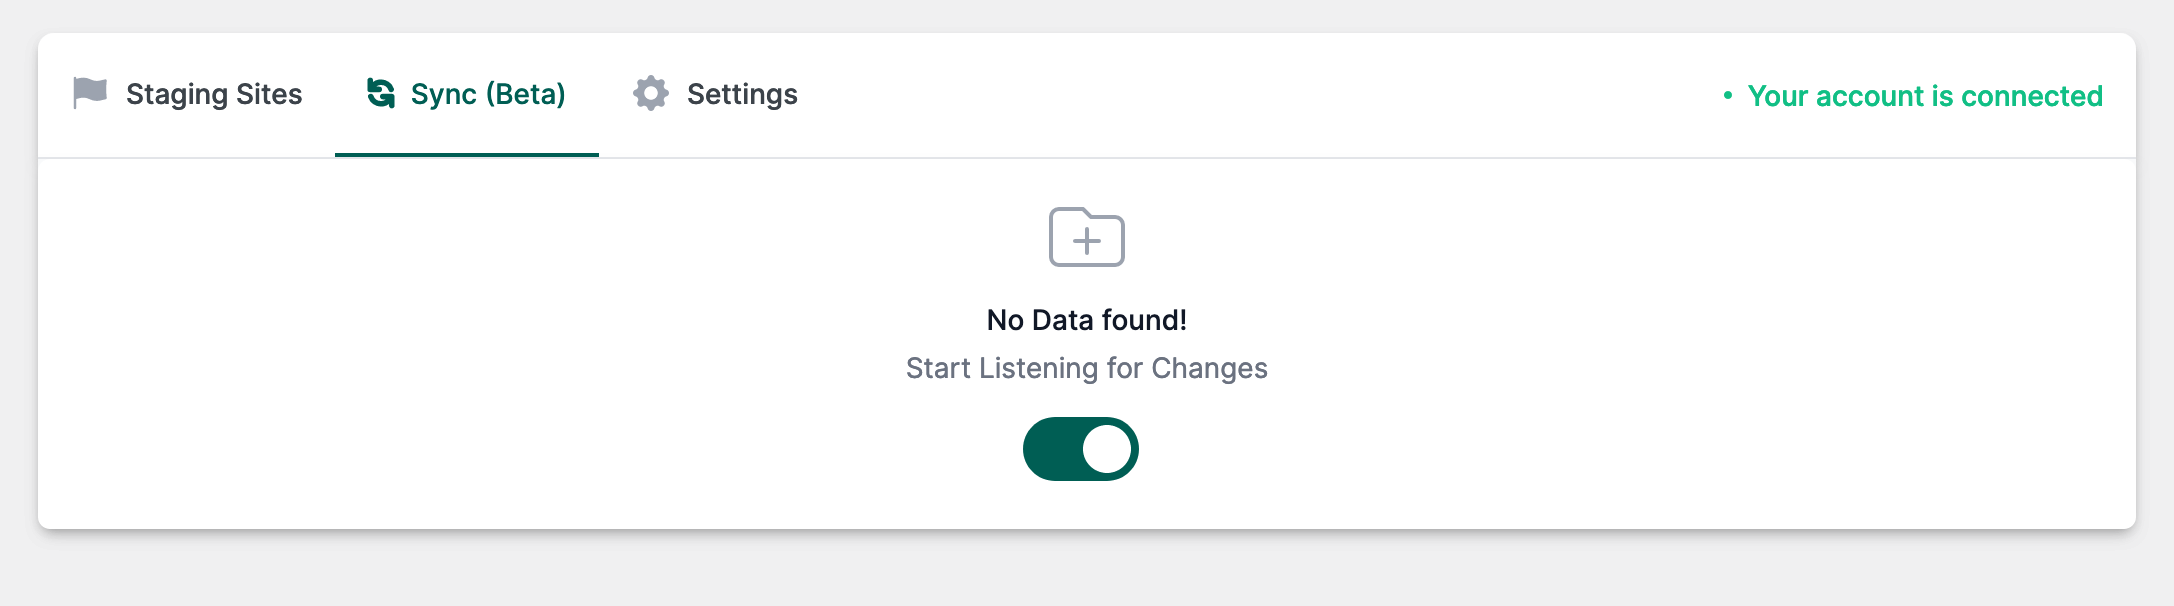
Then make the changes of your choice on your staging site. When you’ve finished, you can synchronize your changes with the online site in just a few clicks.
To do this, start by going to your migrated site’s dashboard. In Tools > InstaWP, toggle the button in the “Sync Beta” tab:
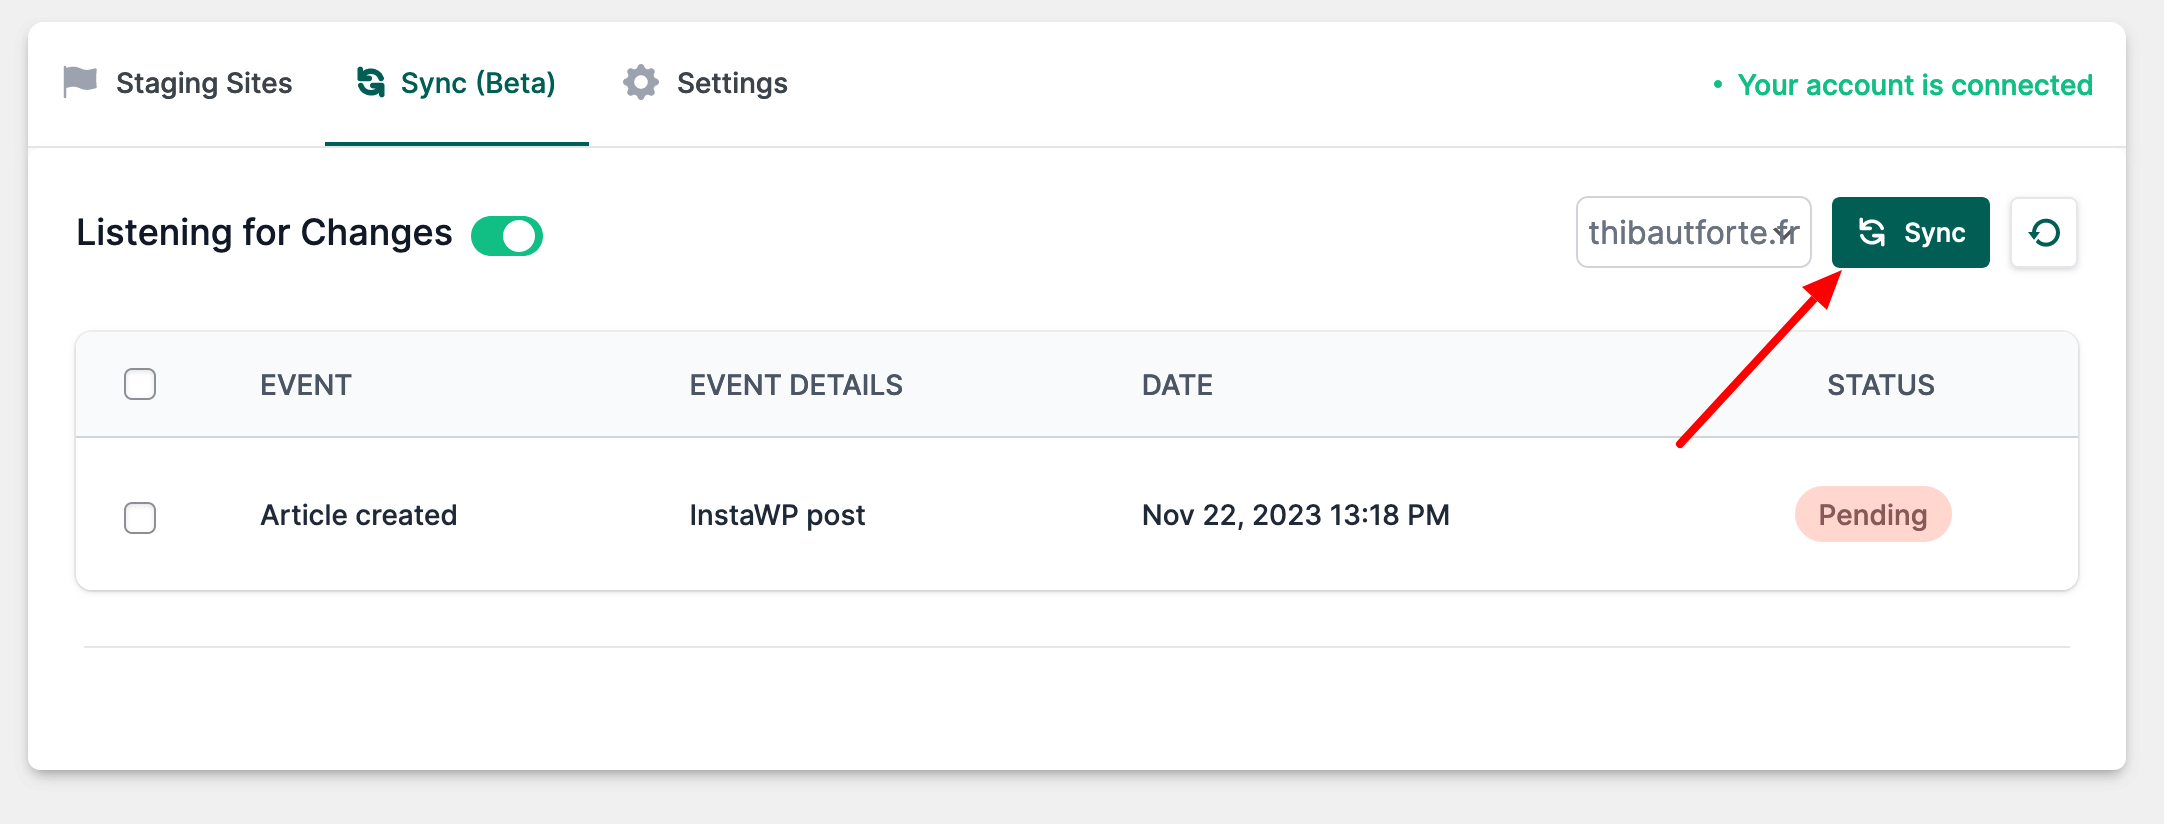
Then, make any changes you wish, such as adding a plugin or creating a page or article.
Return to Tools > InstaWP to make sure that the tool recognizes the change you’ve just made. In my case, it’s the creation of a new article.
To “push” this modification to the online site, click on the “Sync” button, then select your destination site to finish.
You now have a slightly more complete overview of what you can do with InstaWP.
And since the tool is so resourceful, it still has plenty of surprises in store for you!
In the next part, I’ll show you some other handy features that will save you time if you adopt InstaWP at home.
Going further: 4 essential features to take advantage of
How do I create templates with InstaWP?
Let’s start with templates. A super-practical feature to avoid starting from scratch.
InstaWP defines a template as follows: a WordPress site template that has already been created and saved as a template for reuse.
This template can be used as the basis of design and structure to create a new website (much faster, by the way).
A template includes all the content of your site, as well as the settings you’ve already made, starting with the configuration of all your plugins and your theme.
To create a template, click on the “Templates ” menu in your InstaWP dashboard, then on the “Add Template” button:
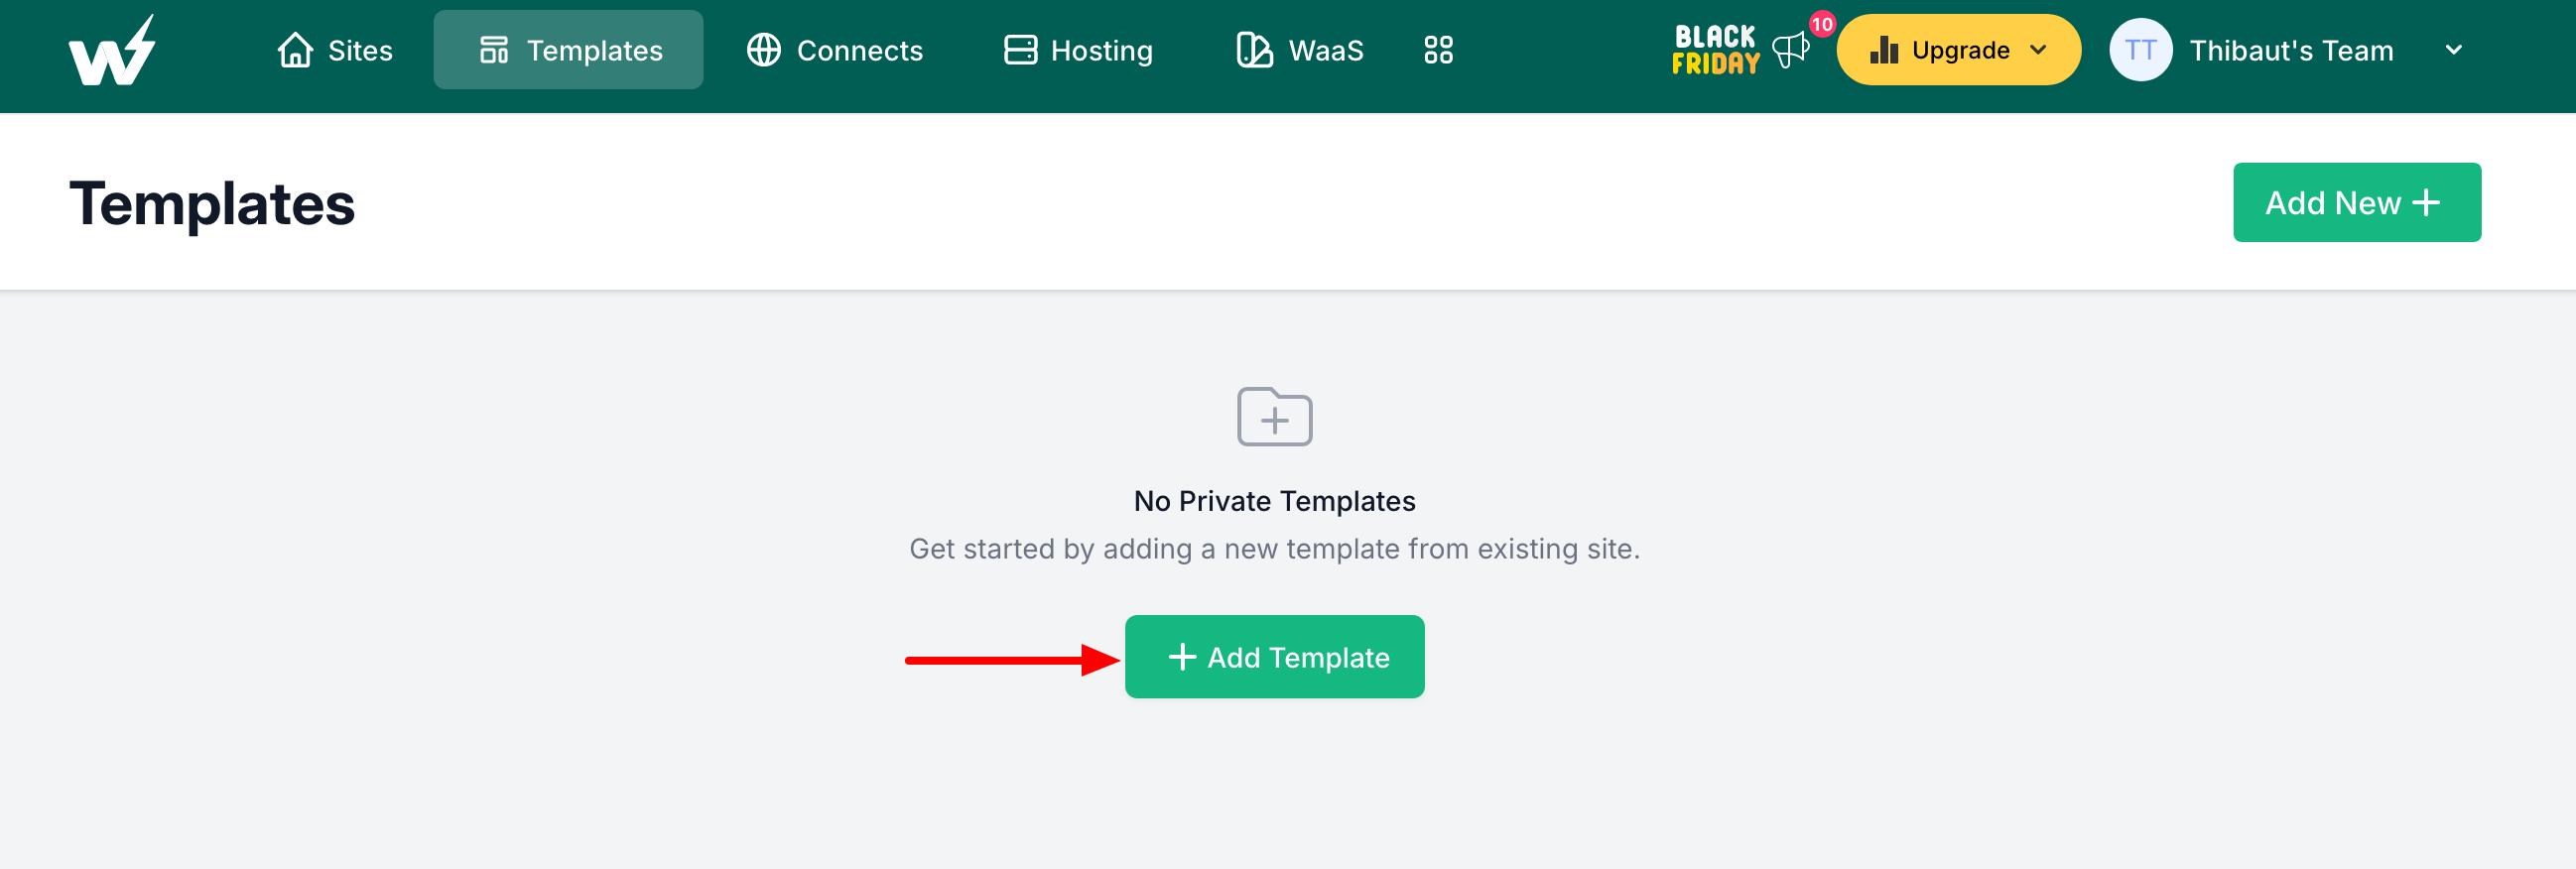
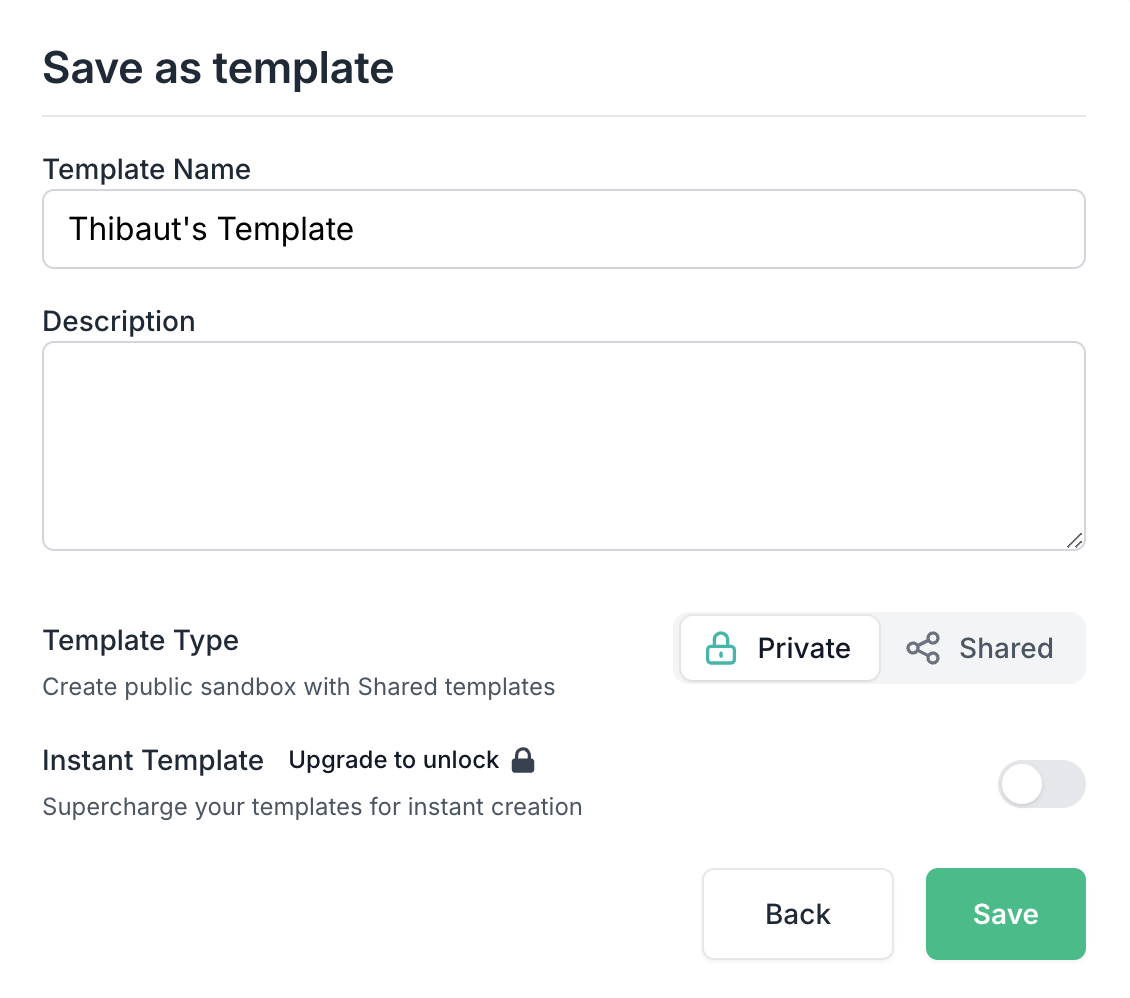
Select the site of your choice and enter the following information:
- Template name and description
- The type of template to be used. You can choose between “Private” (the template is accessible to you only) and “Shared” (the template will be available to any InstaWP user wishing to start creating a site from a template).
- Activation of an “Instant template.” In this case, a site will automatically be created using this template (Pro version only).
Click on the “Save” button when you’re done:

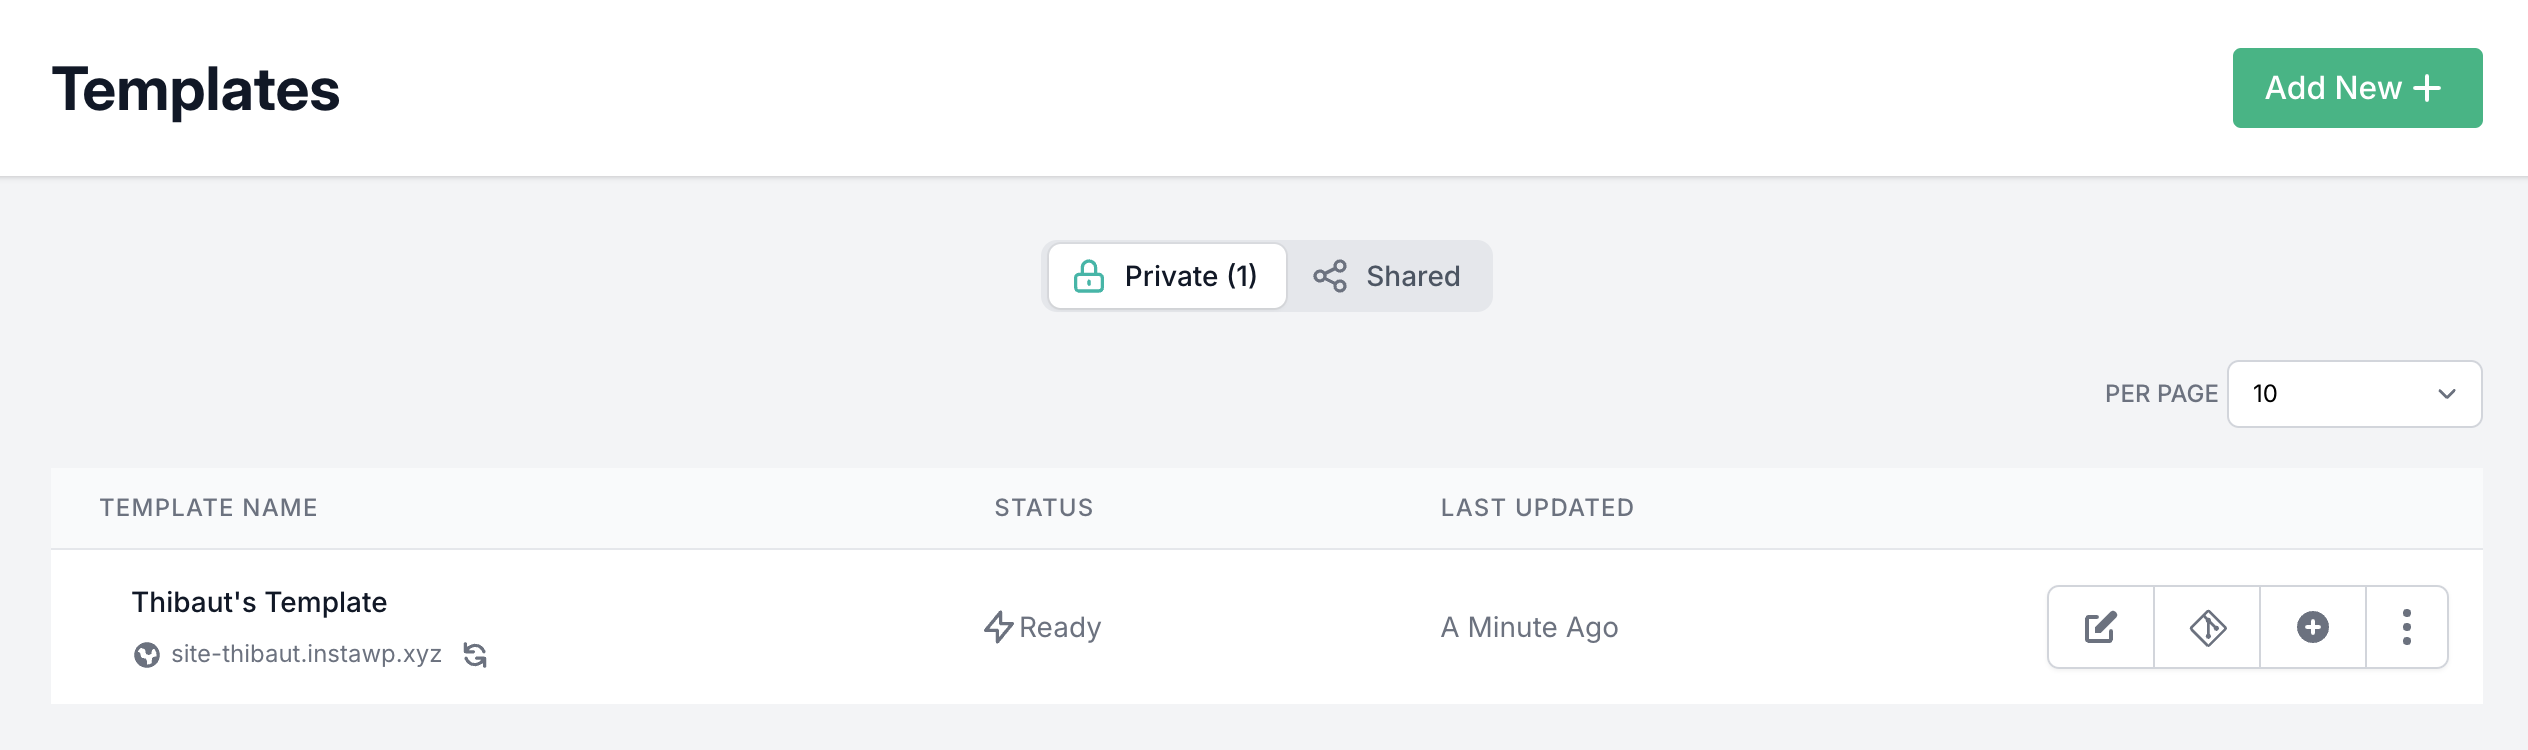
You’ll find this template and all its customizable options in the “Templates” menu of your InstaWP dashboard:
Of course, this template will also be available to you when you create a new site from scratch.
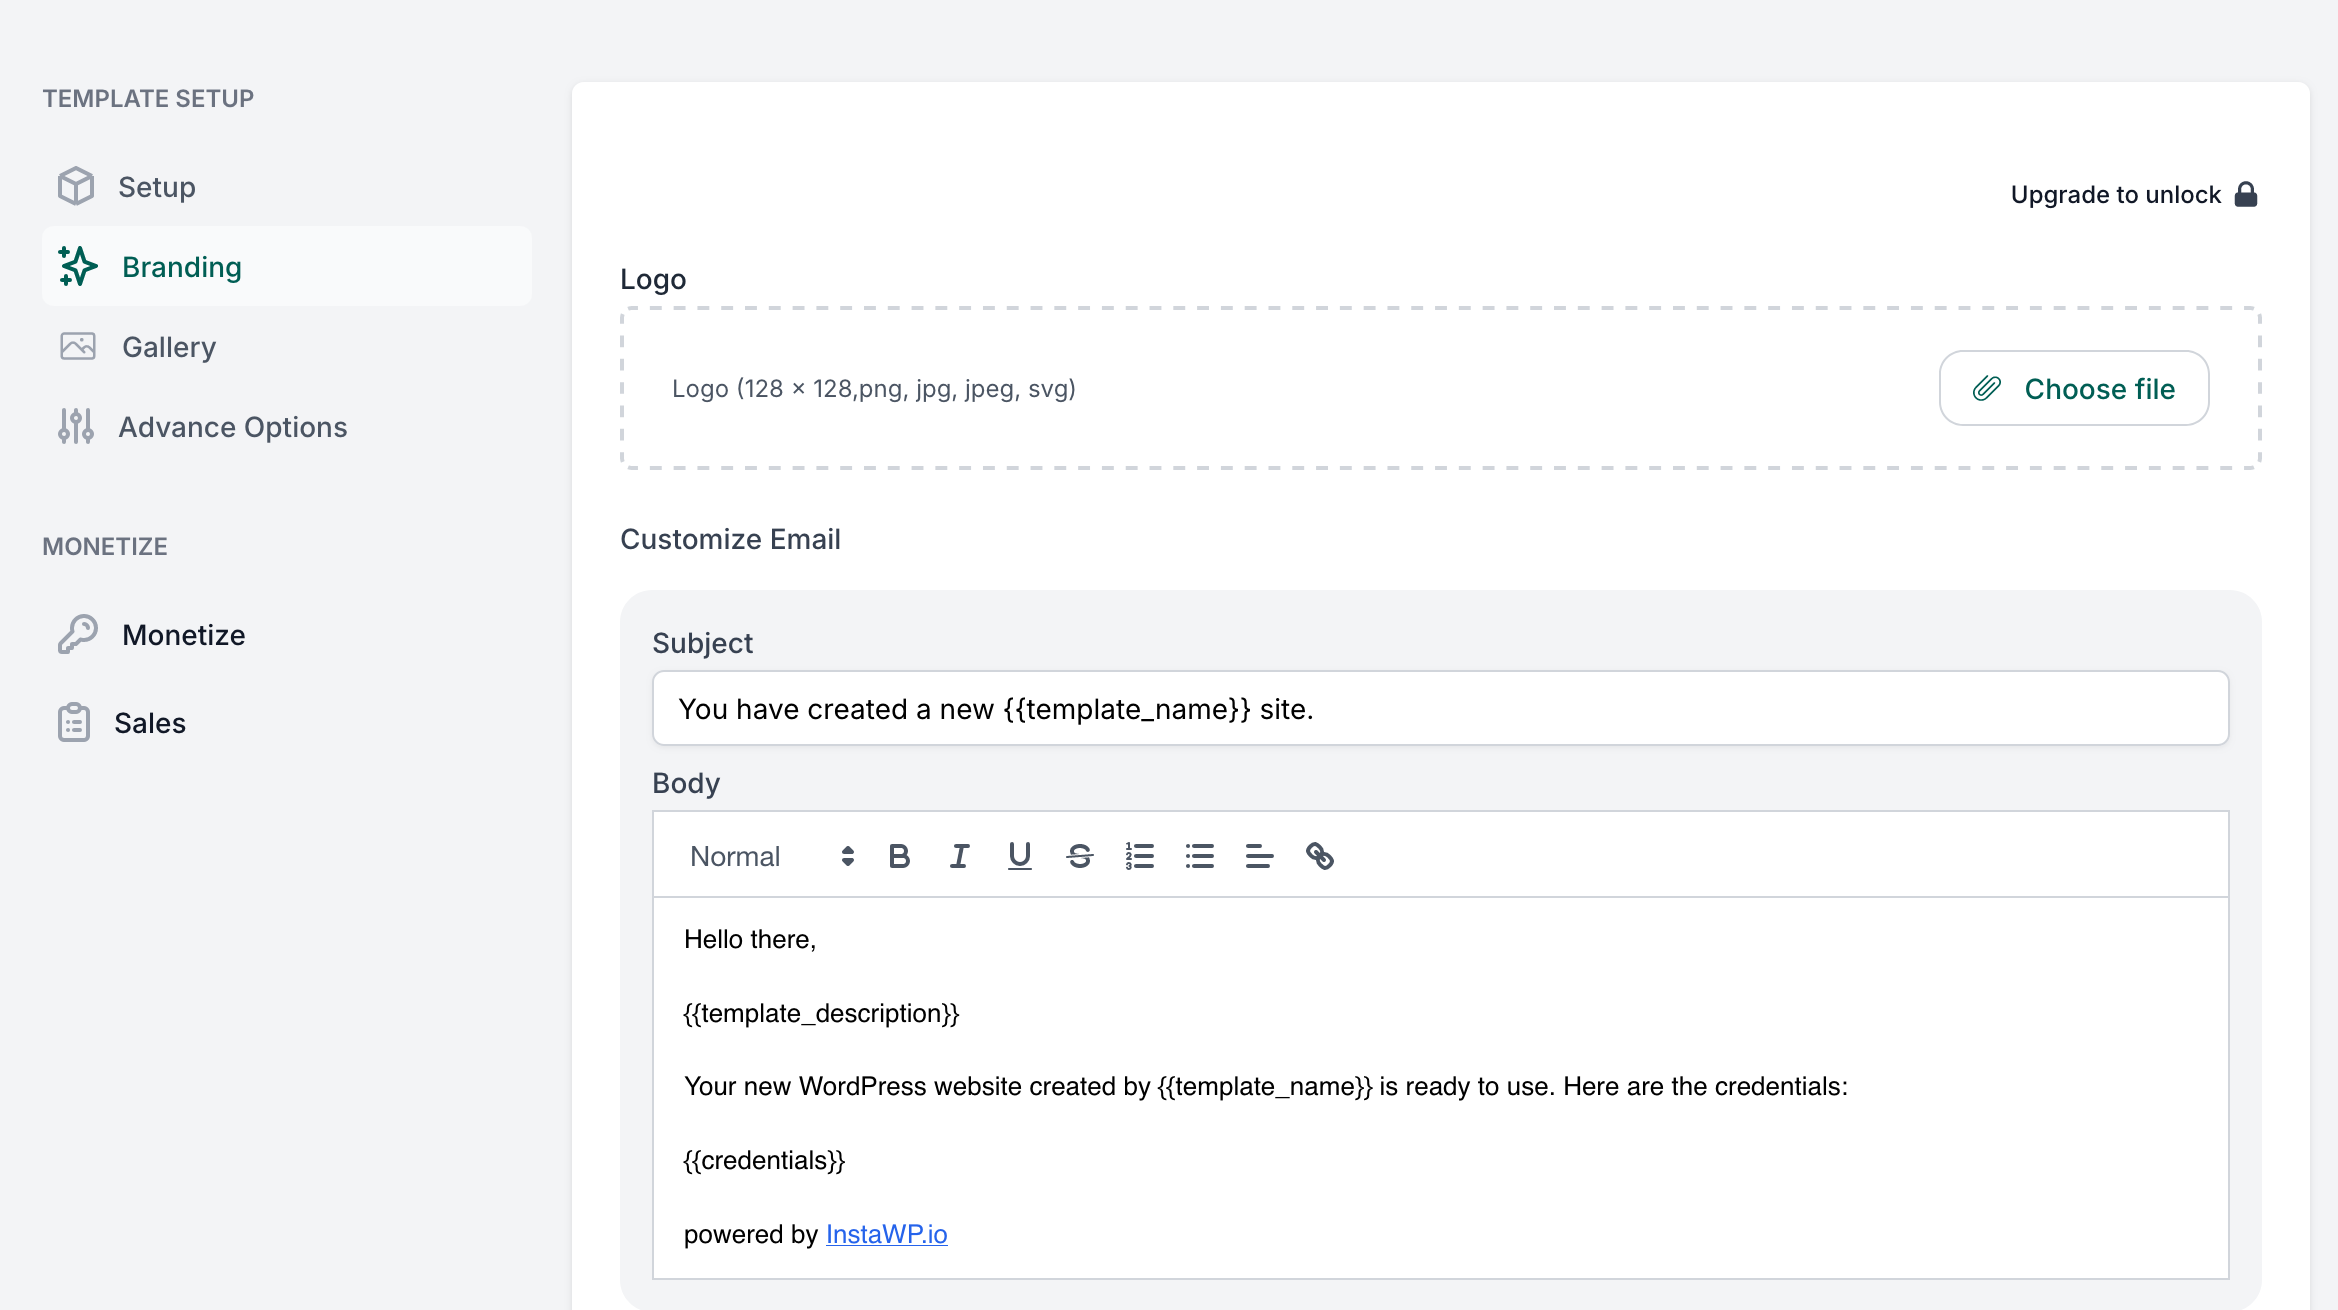
If you choose to design a shared template, you’ll have additional options, such as the possibility of:
- Integrating your logo
- Personalizing the email that people who wish to purchase your template will receive. And, of course, you can collect email addresses from your leads for future email marketing campaigns.
- Adding descriptive images
- Monetizing your template to generate passive income. If you’re interested, you can find detailed instructions here.
How do I test new plugins with InstaWP?
Let’s imagine that you just need to test one or more plugins that catch your eye.
For example, you’d like to find out more about their options and how they work. In this case, there’s no need to launch an entire site.
InstaWP has a neat feature available in the form of an extension for the Google Chrome browser. It‘s called InstaWP Launcher.
If you use this browser, install the extension. Once you’ve done so, every plugin or theme you visit in the official directory will offer you a “Launch” button:

As soon as you click on it, InstaWP will create a fresh new WordPress installation with the plugin or theme in question already activated.
How do I set up a basic configuration?
Without further ado, let’s move on to another point of interest if you’re in the habit of doing a lot of testing and creating sites frequently.
InstaWP allows you to set up different basic configurations that you can use each time you create a new site.
To do this, click on “Configurations” in your settings. This will take you to InstaWP’s default configuration.
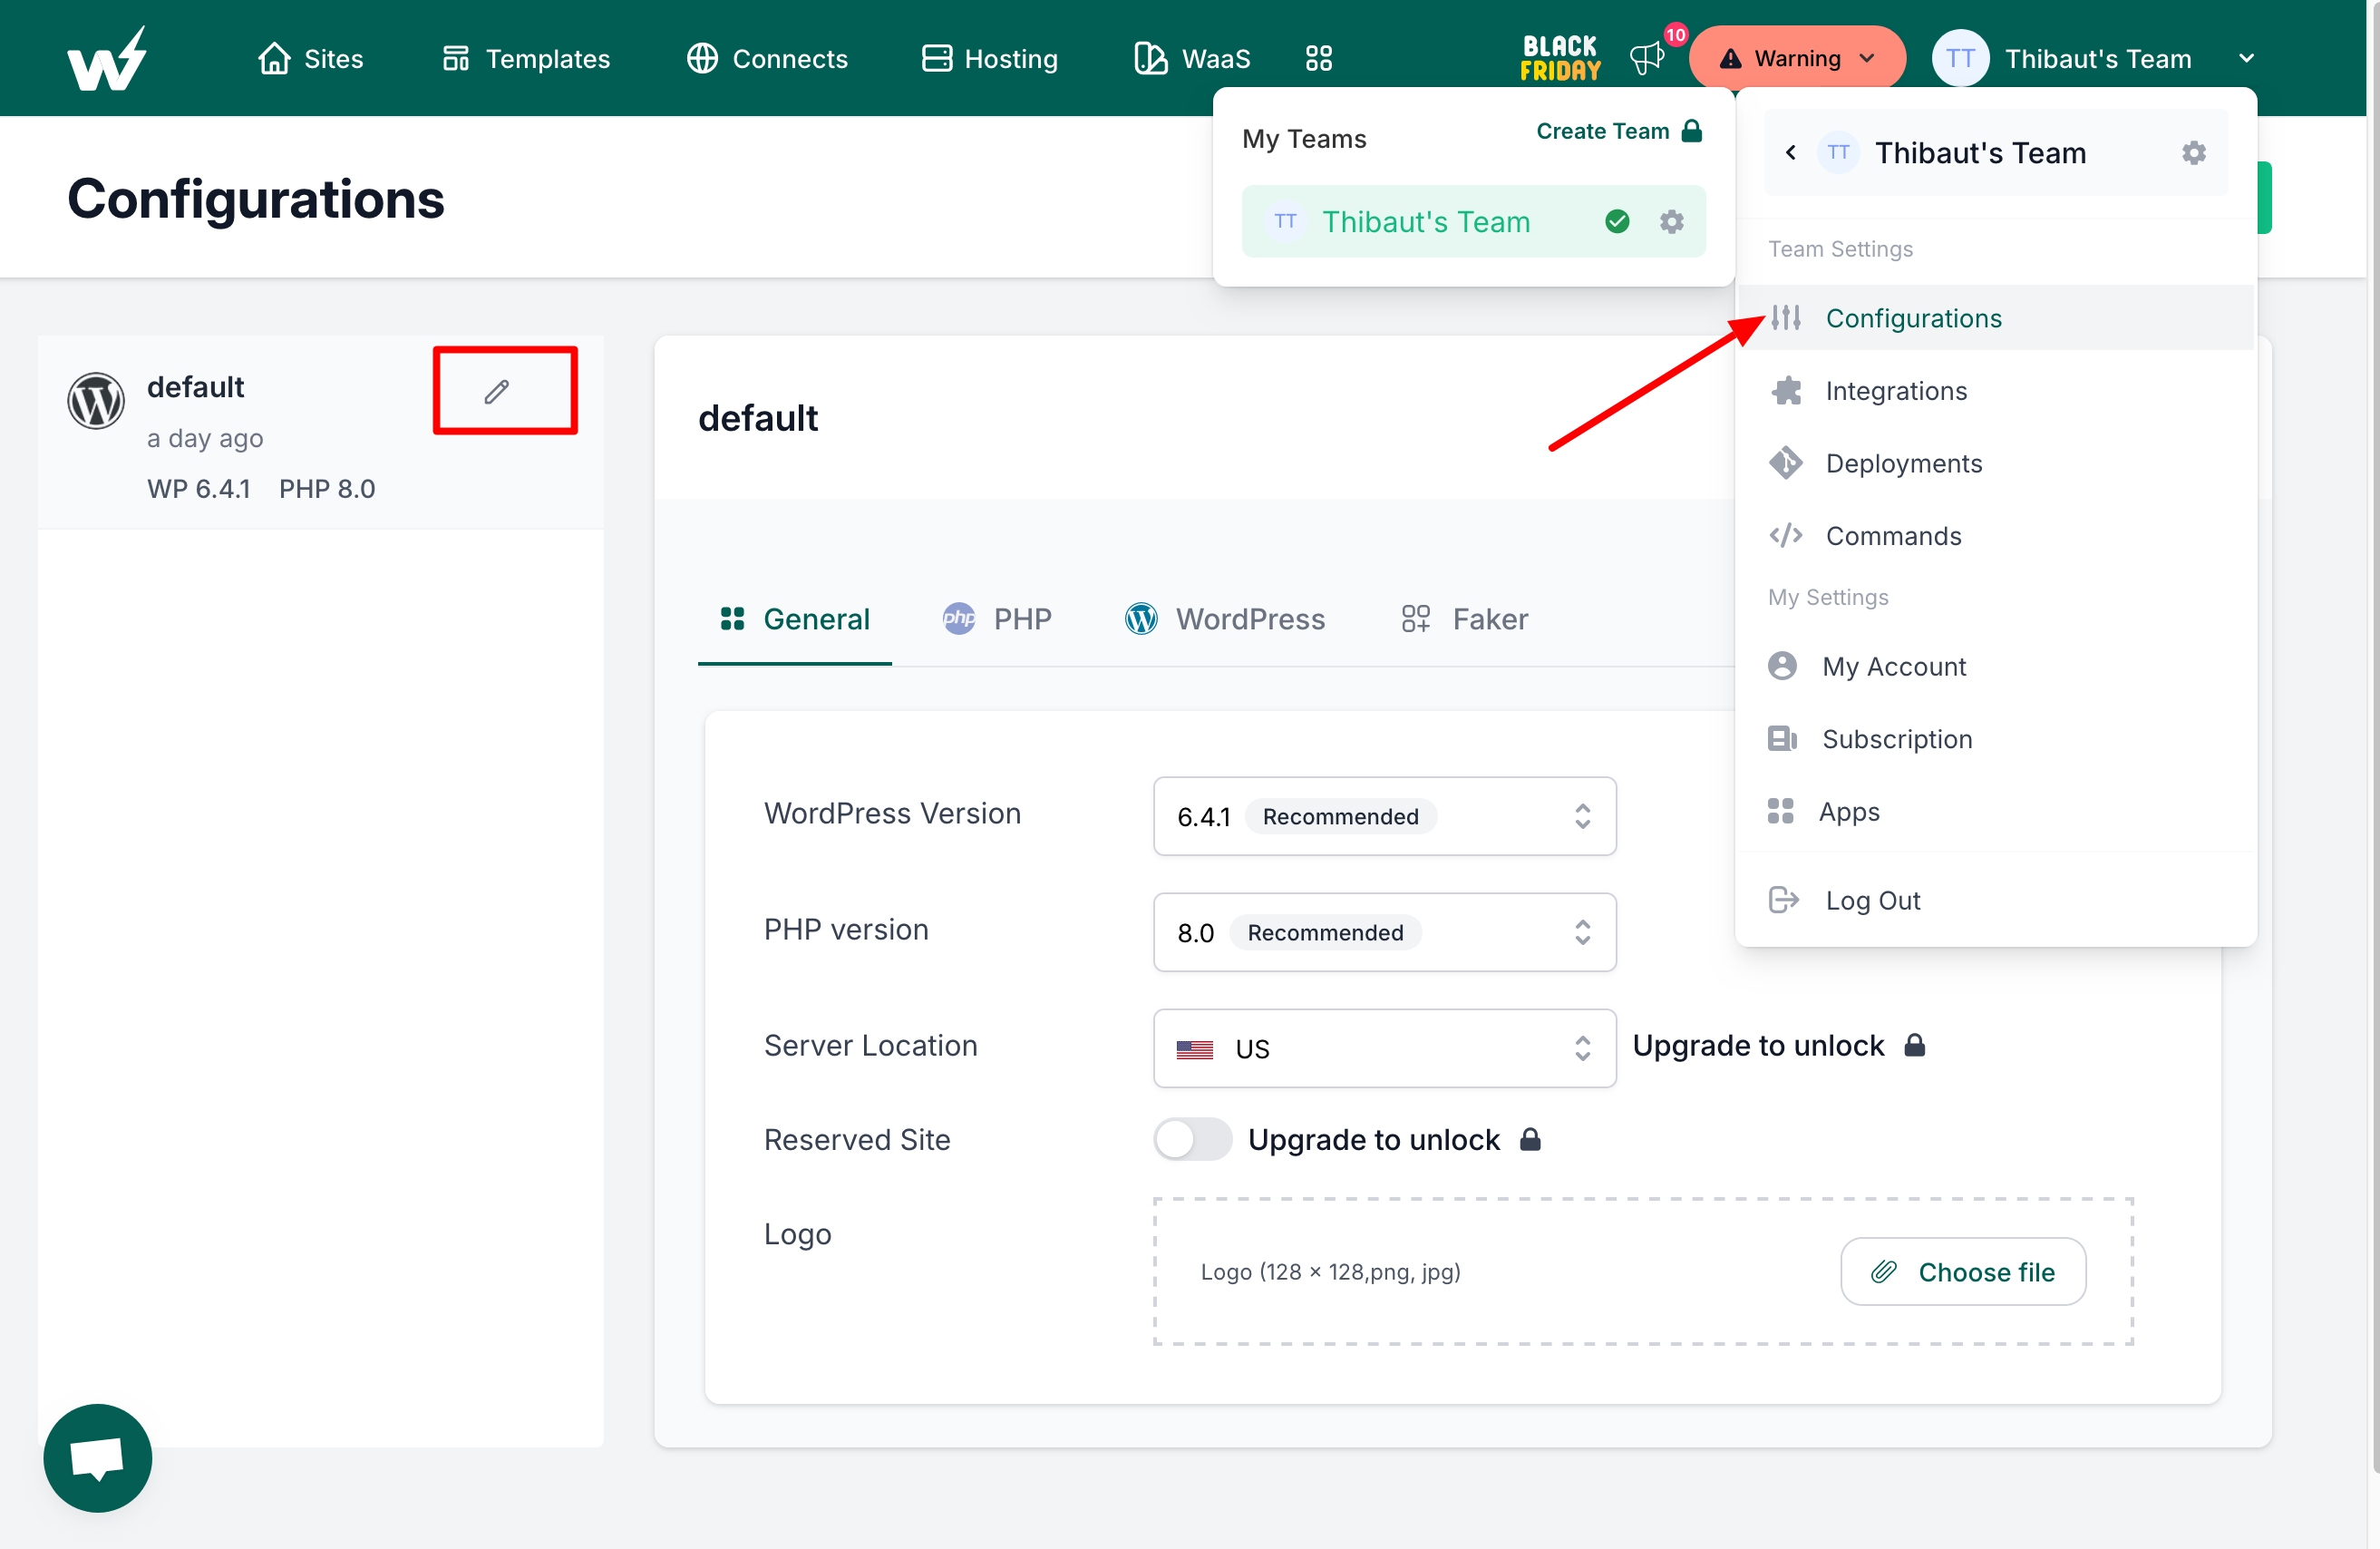
You can modify it by clicking on the pen icon, or prepare one of your choice by clicking on the “Add New” button.
Via 4 tabs, you can then make adjustments to:
- WordPress and PHP version
- PHP variables
- Default site language
- Activation of multisite installation
- Pre-installation of plugins and themes of your choice by entering their slug from the official directory
- The number of articles, pages, categories, tags, etc. you wish to integrate into each site (1 by default)
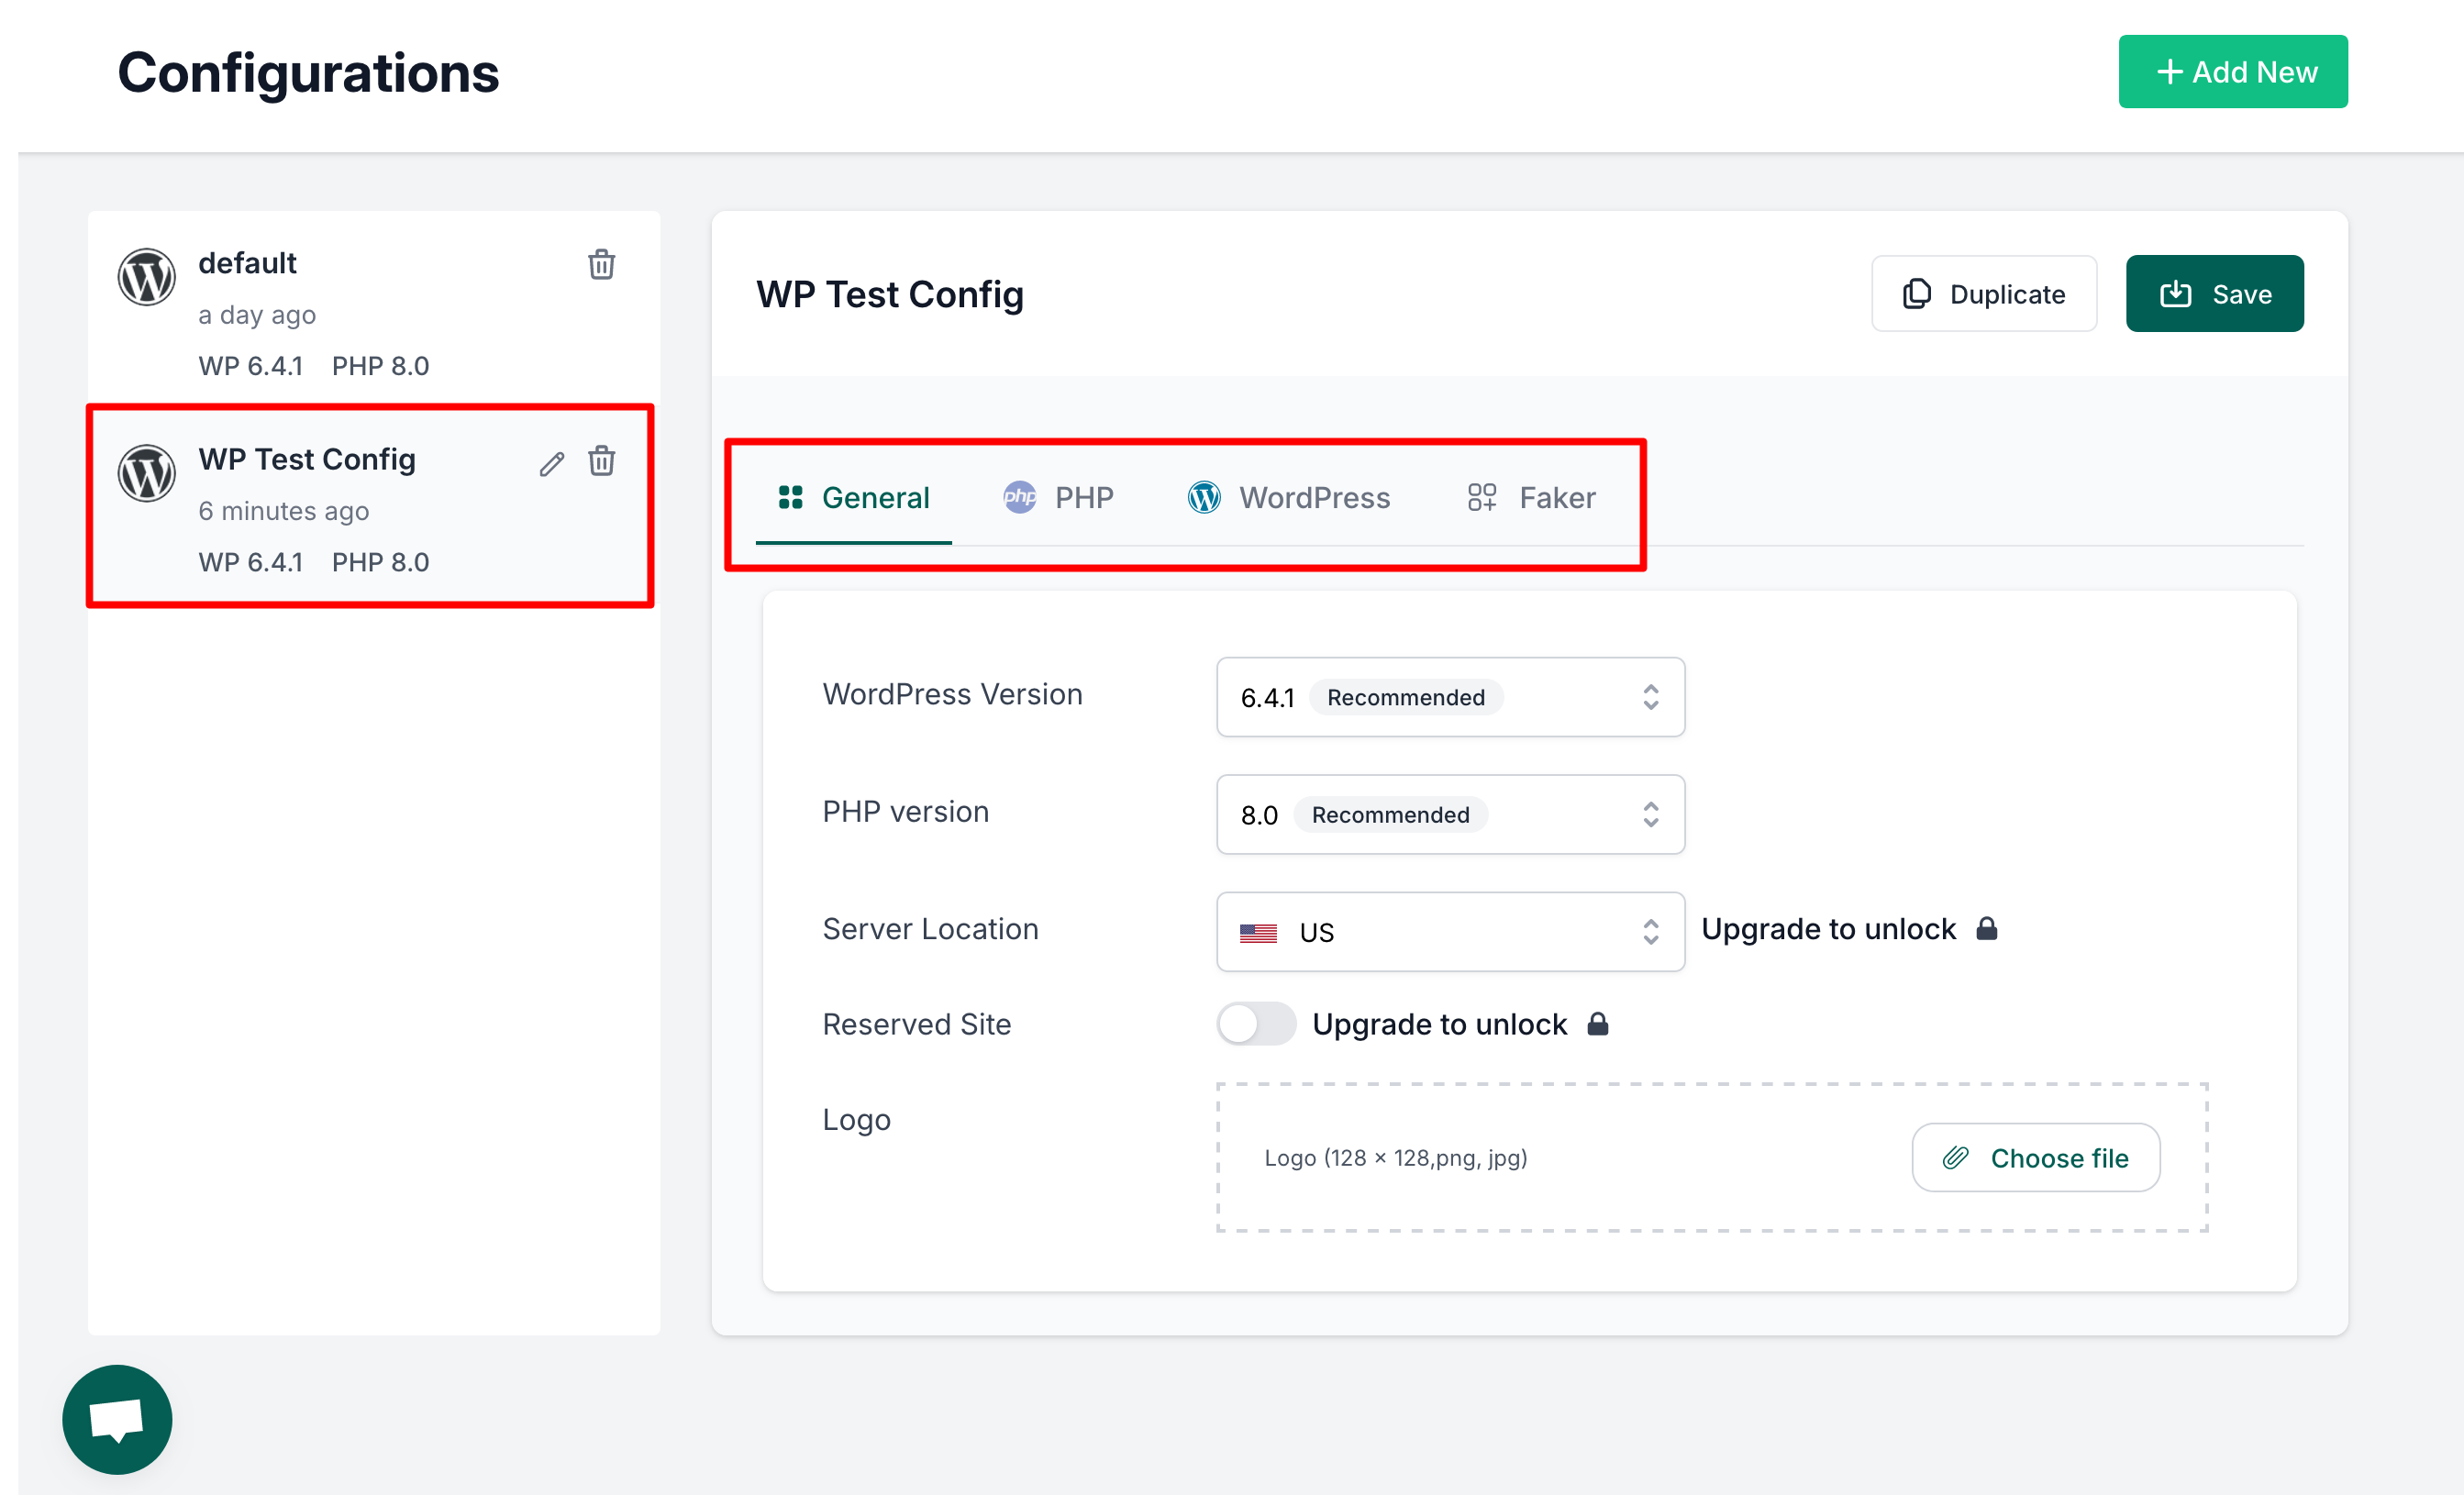
Save once you’ve finished. You’ll then find your default configuration every time you launch a site from scratch:
How can I fine-tune a site designed with InstaWP?
With templates and configurations, I’ve already talked about general settings. In addition, you can fine-tune several settings on a site-by-site basis.
If you click on the “More actions” icon marked with three small dots, new options will appear:
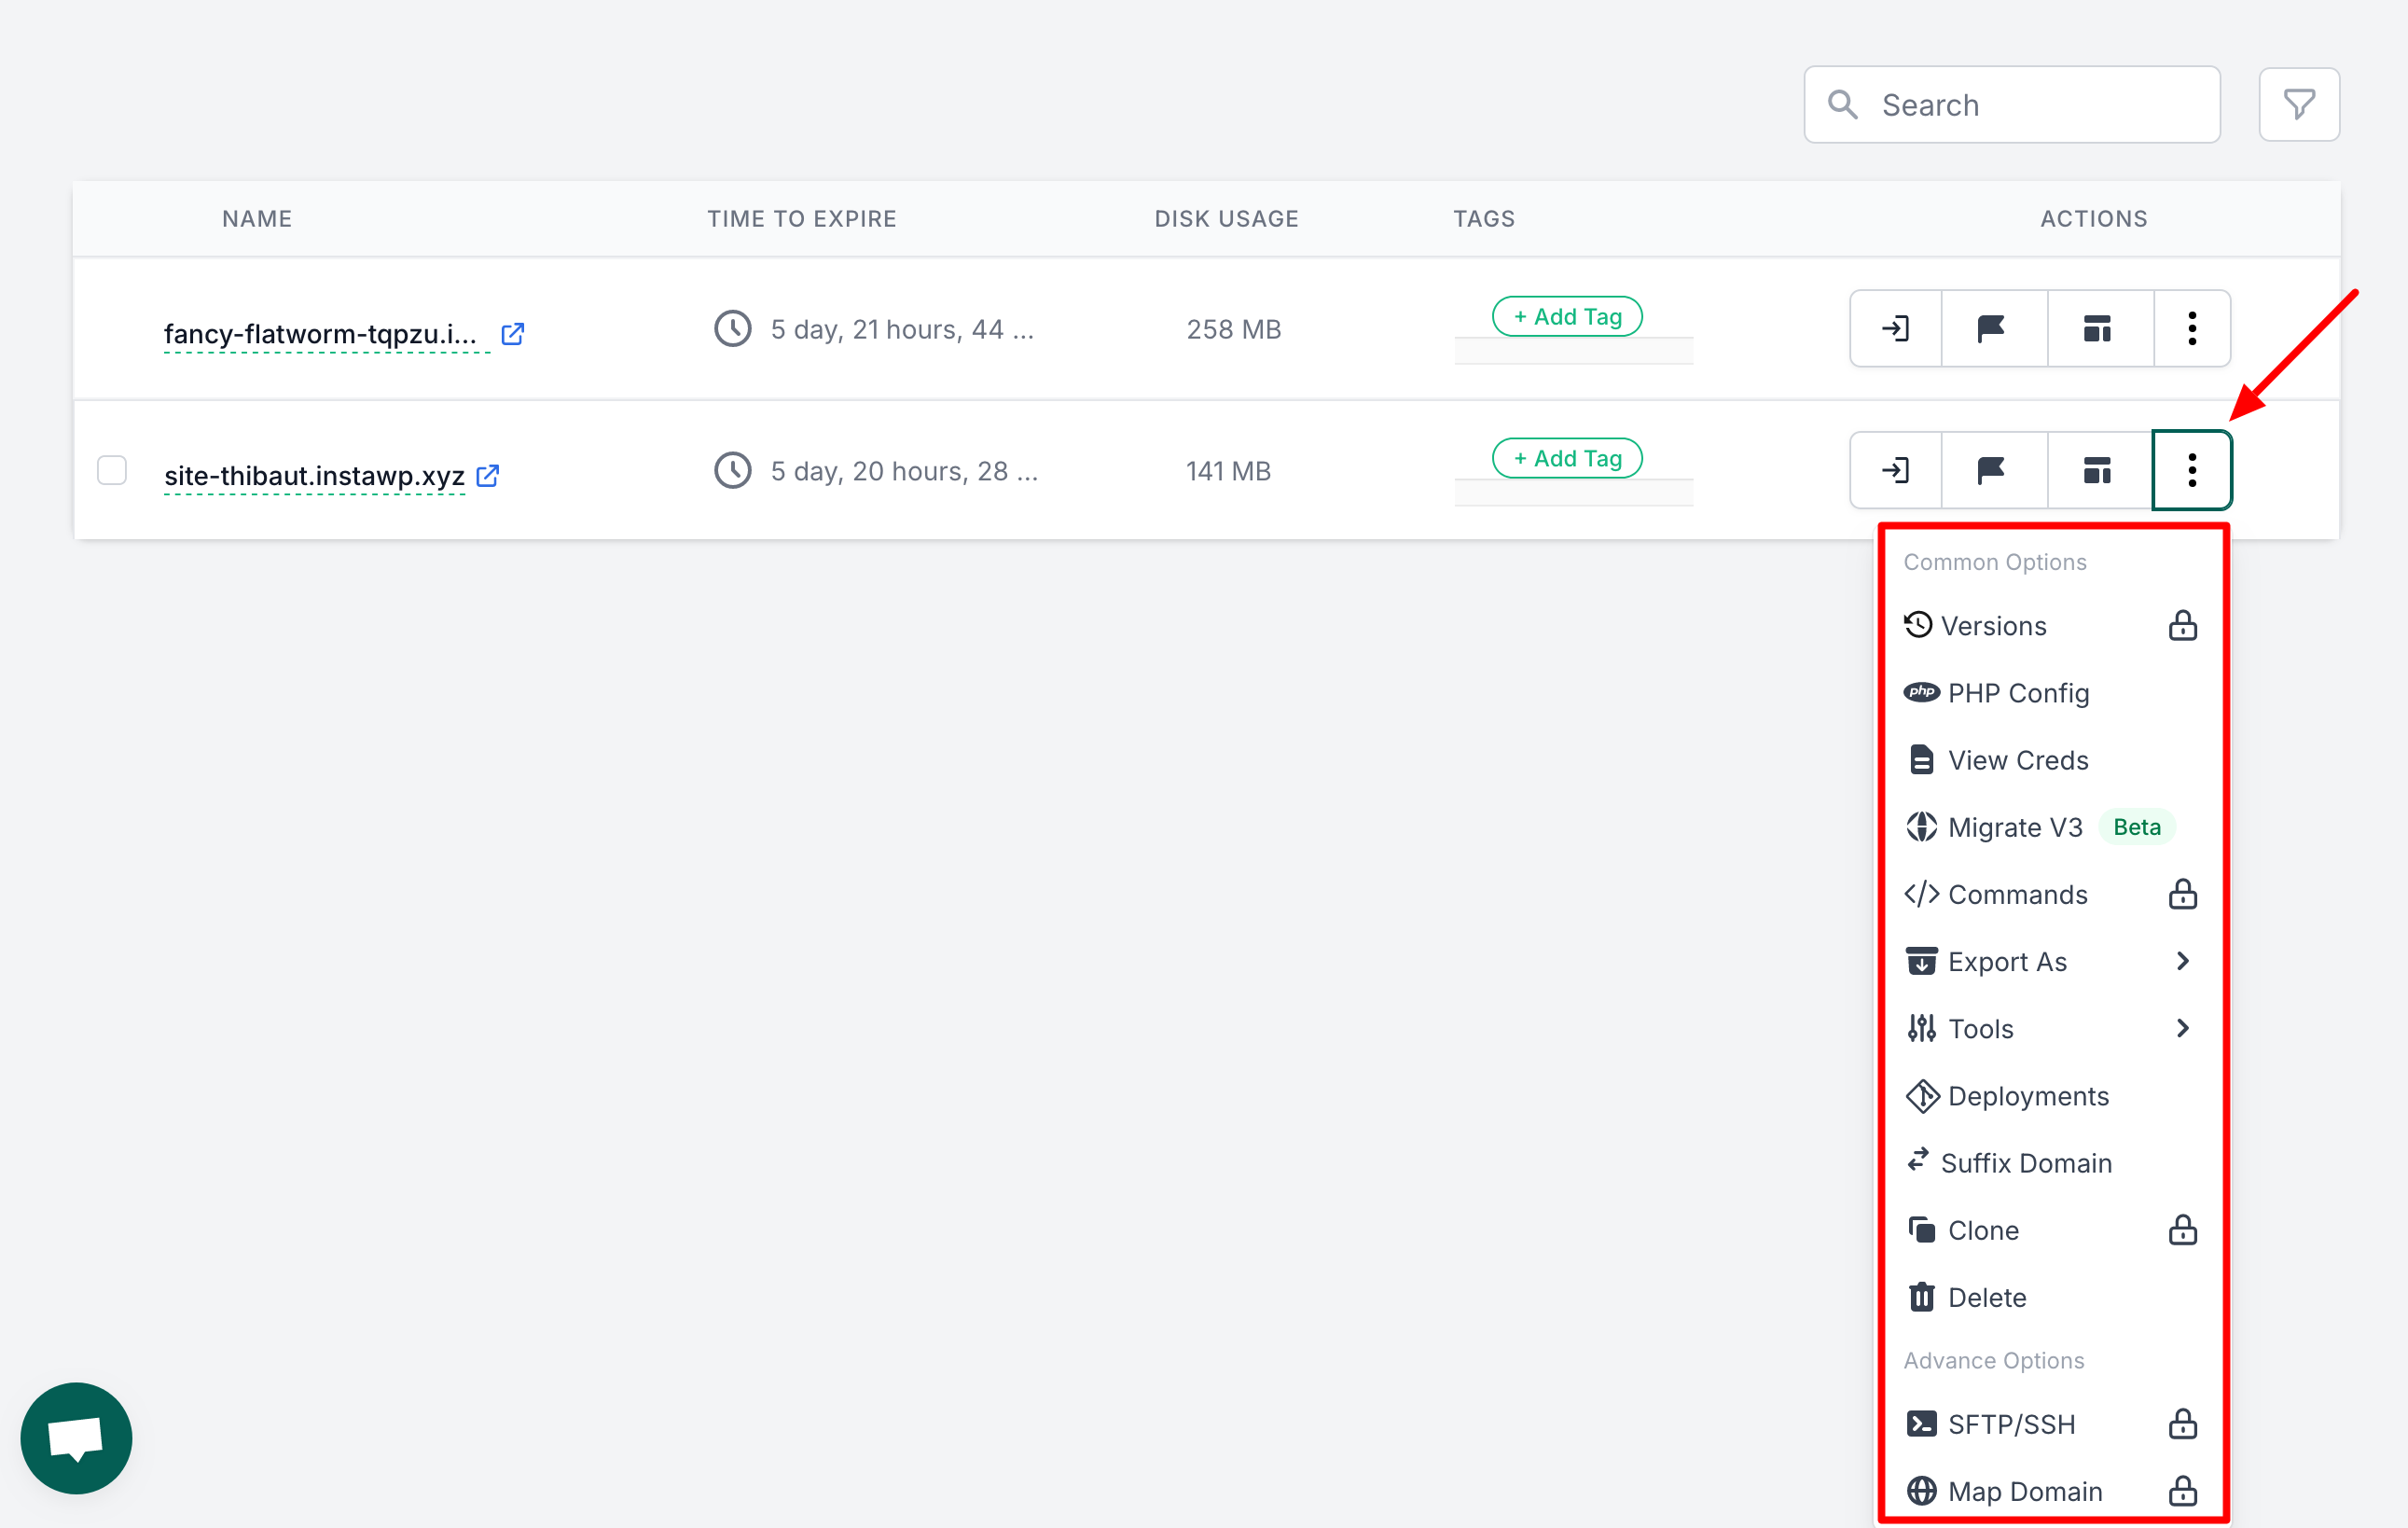
Those marked with a padlock can only be accessed with InstaWP’s paid package: SFTP/SSH activation, adding your own domain name (rather than an instawp.xyz address), site cloning, etc.
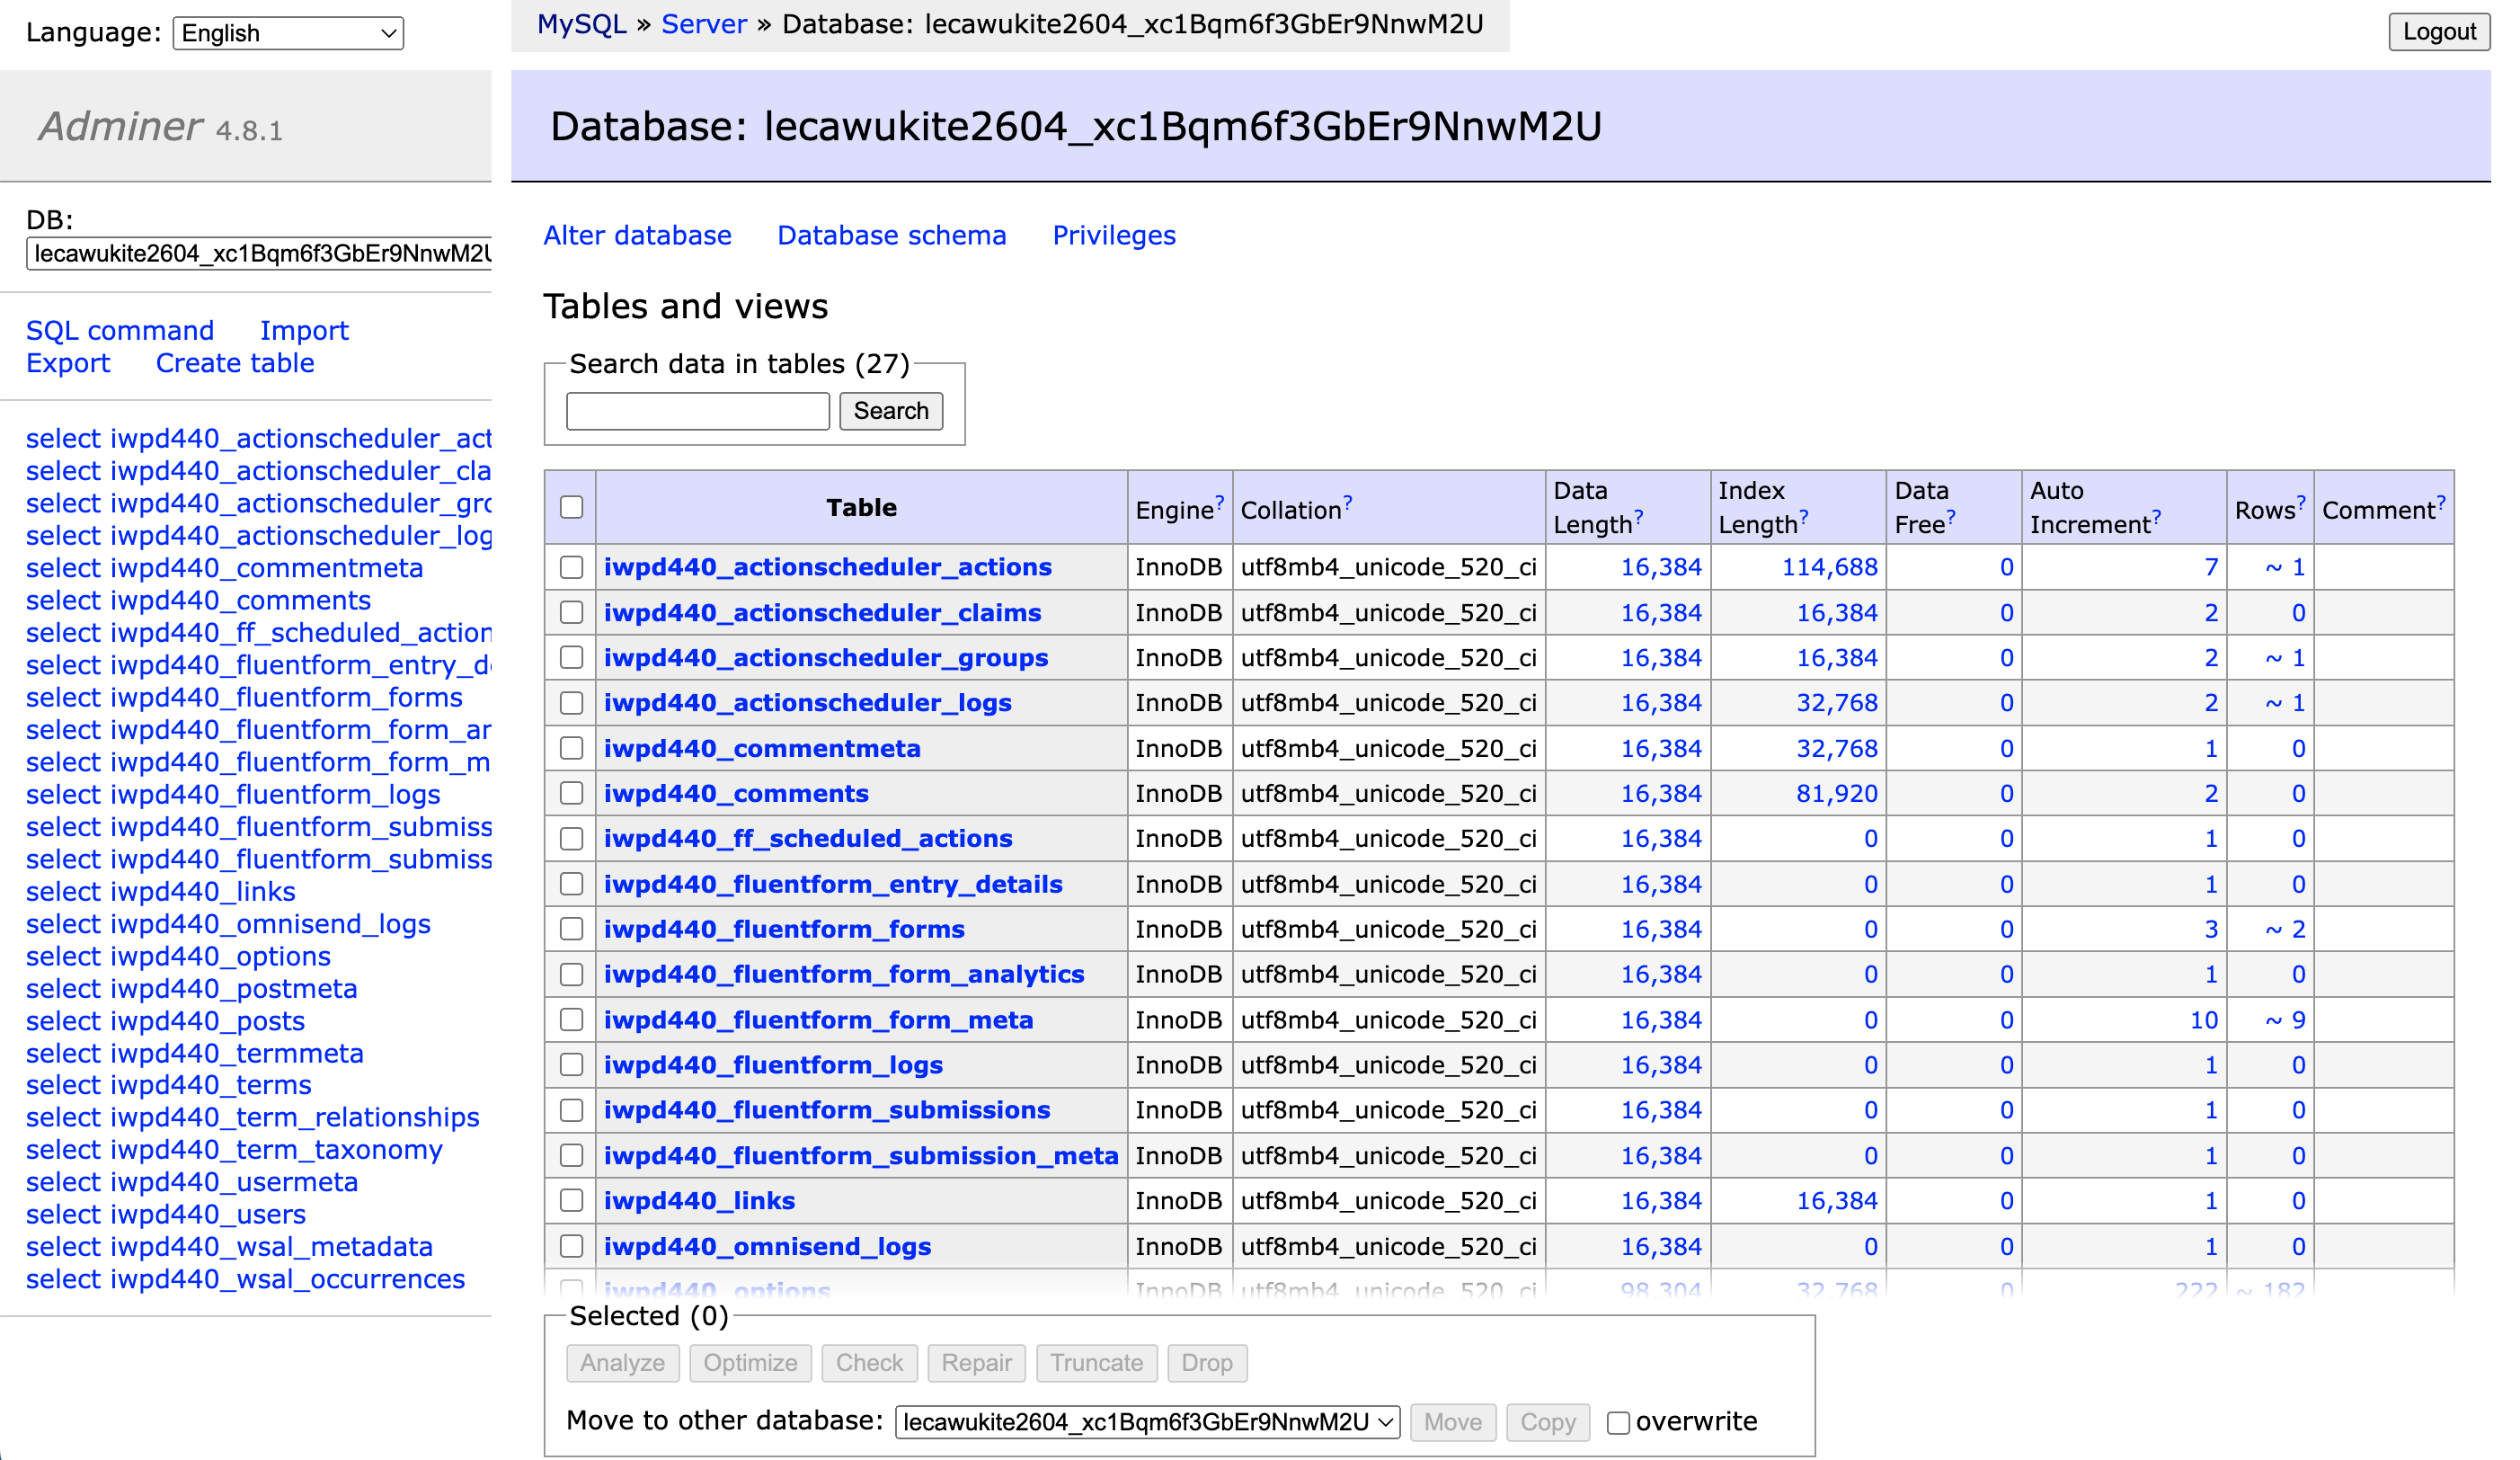
With the free package, you can still make a few useful adjustments, particularly in the “Tools” tab. For example, you can:
- Edit your site’s database, using the online tool Adminer
- Edit site code
- View logs to uncover any errors
- Install the plugins and themes of your choice
And if you click on the name of your site, you’ll be taken to a new menu that allows you to test the loading speed of your pages or trigger a scan to detect vulnerabilities.
Finally, note that you can also migrate your site to your online host. To do so, click on the “Migrate V3” option, then enter the URL of your production site:
InstaWP specifies that you must have performed a basic installation of WordPress on the online server.
Next, you’ll need to authorize the connection to InstaWP from your WordPress dashboard to be able to launch the automatic migration process.
Is InstaWP more powerful than its main competitor, Local?
Simple, fast, practical, efficient. InstaWP has a number of strengths that make it stand out from alternative solutions such as TasteWP, Local, or DevKinsta (I’m excluding MAMP and WampServer, which are 100% manually installed).
At the time of writing, InstaWP’s main competitor is undoubtedly the ultra-popular Local (formerly Local by Flywheel), which has the considerable advantage of being 100% free.
Having tested both, I can tell you that InstaWP has an edge on Local for a number of reasons:
- InstaWP is more complete, with more options
- It’s quicker and easier to use. Unlike Local, you don’t need to install InstaWP on your machine. Everything is done automatically and immediately online.
- Test site configuration is more advanced with InstaWP. For example, you can choose to activate the themes and plugins of your choice, something you can’t do with Local.
- Teamwork is more flexible with InstaWP. If you need to collaborate with another person on a site created with Local, you’ll have to export the site and that person will have to install Local on his or her machine. With InstaWP, all you have to do is connect online.
- InstaWP is faster than Local. Even though I only used it for my test, InstaWP never crashed. Everything loads very quickly. As a Local user, I can tell you that if you open a number of applications at the same time, you’re likely to experience slowdowns on your locally-created site.
- Synchronizing changes from your staging site to your production site is easier with InstaWP. In fact, all you have to do is click a few buttons, and that’s it. With Local, you’ll need to export your local site to the online environment, either using a plugin or manually.
As far as I’m concerned, there’s no real contest in the InstaWP vs Local battle. The winner is InstaWP.


How much does it cost?
So, if you want to start using InstaWP, how much will it all cost?
It all depends on how you want to use it. The free version may be enough to create a simple test site and/or for occasional use. But it’s limited, of course:
- You can only create 3 temporary sites.
- Only one template can be set up.
- Disk space is limited to 1 GB.
And don’t forget: if you don’t create an account, your test site will expire after just 8 hours (as opposed to 7 days with an account).
For even more options, InstaWP offers 4 licenses:
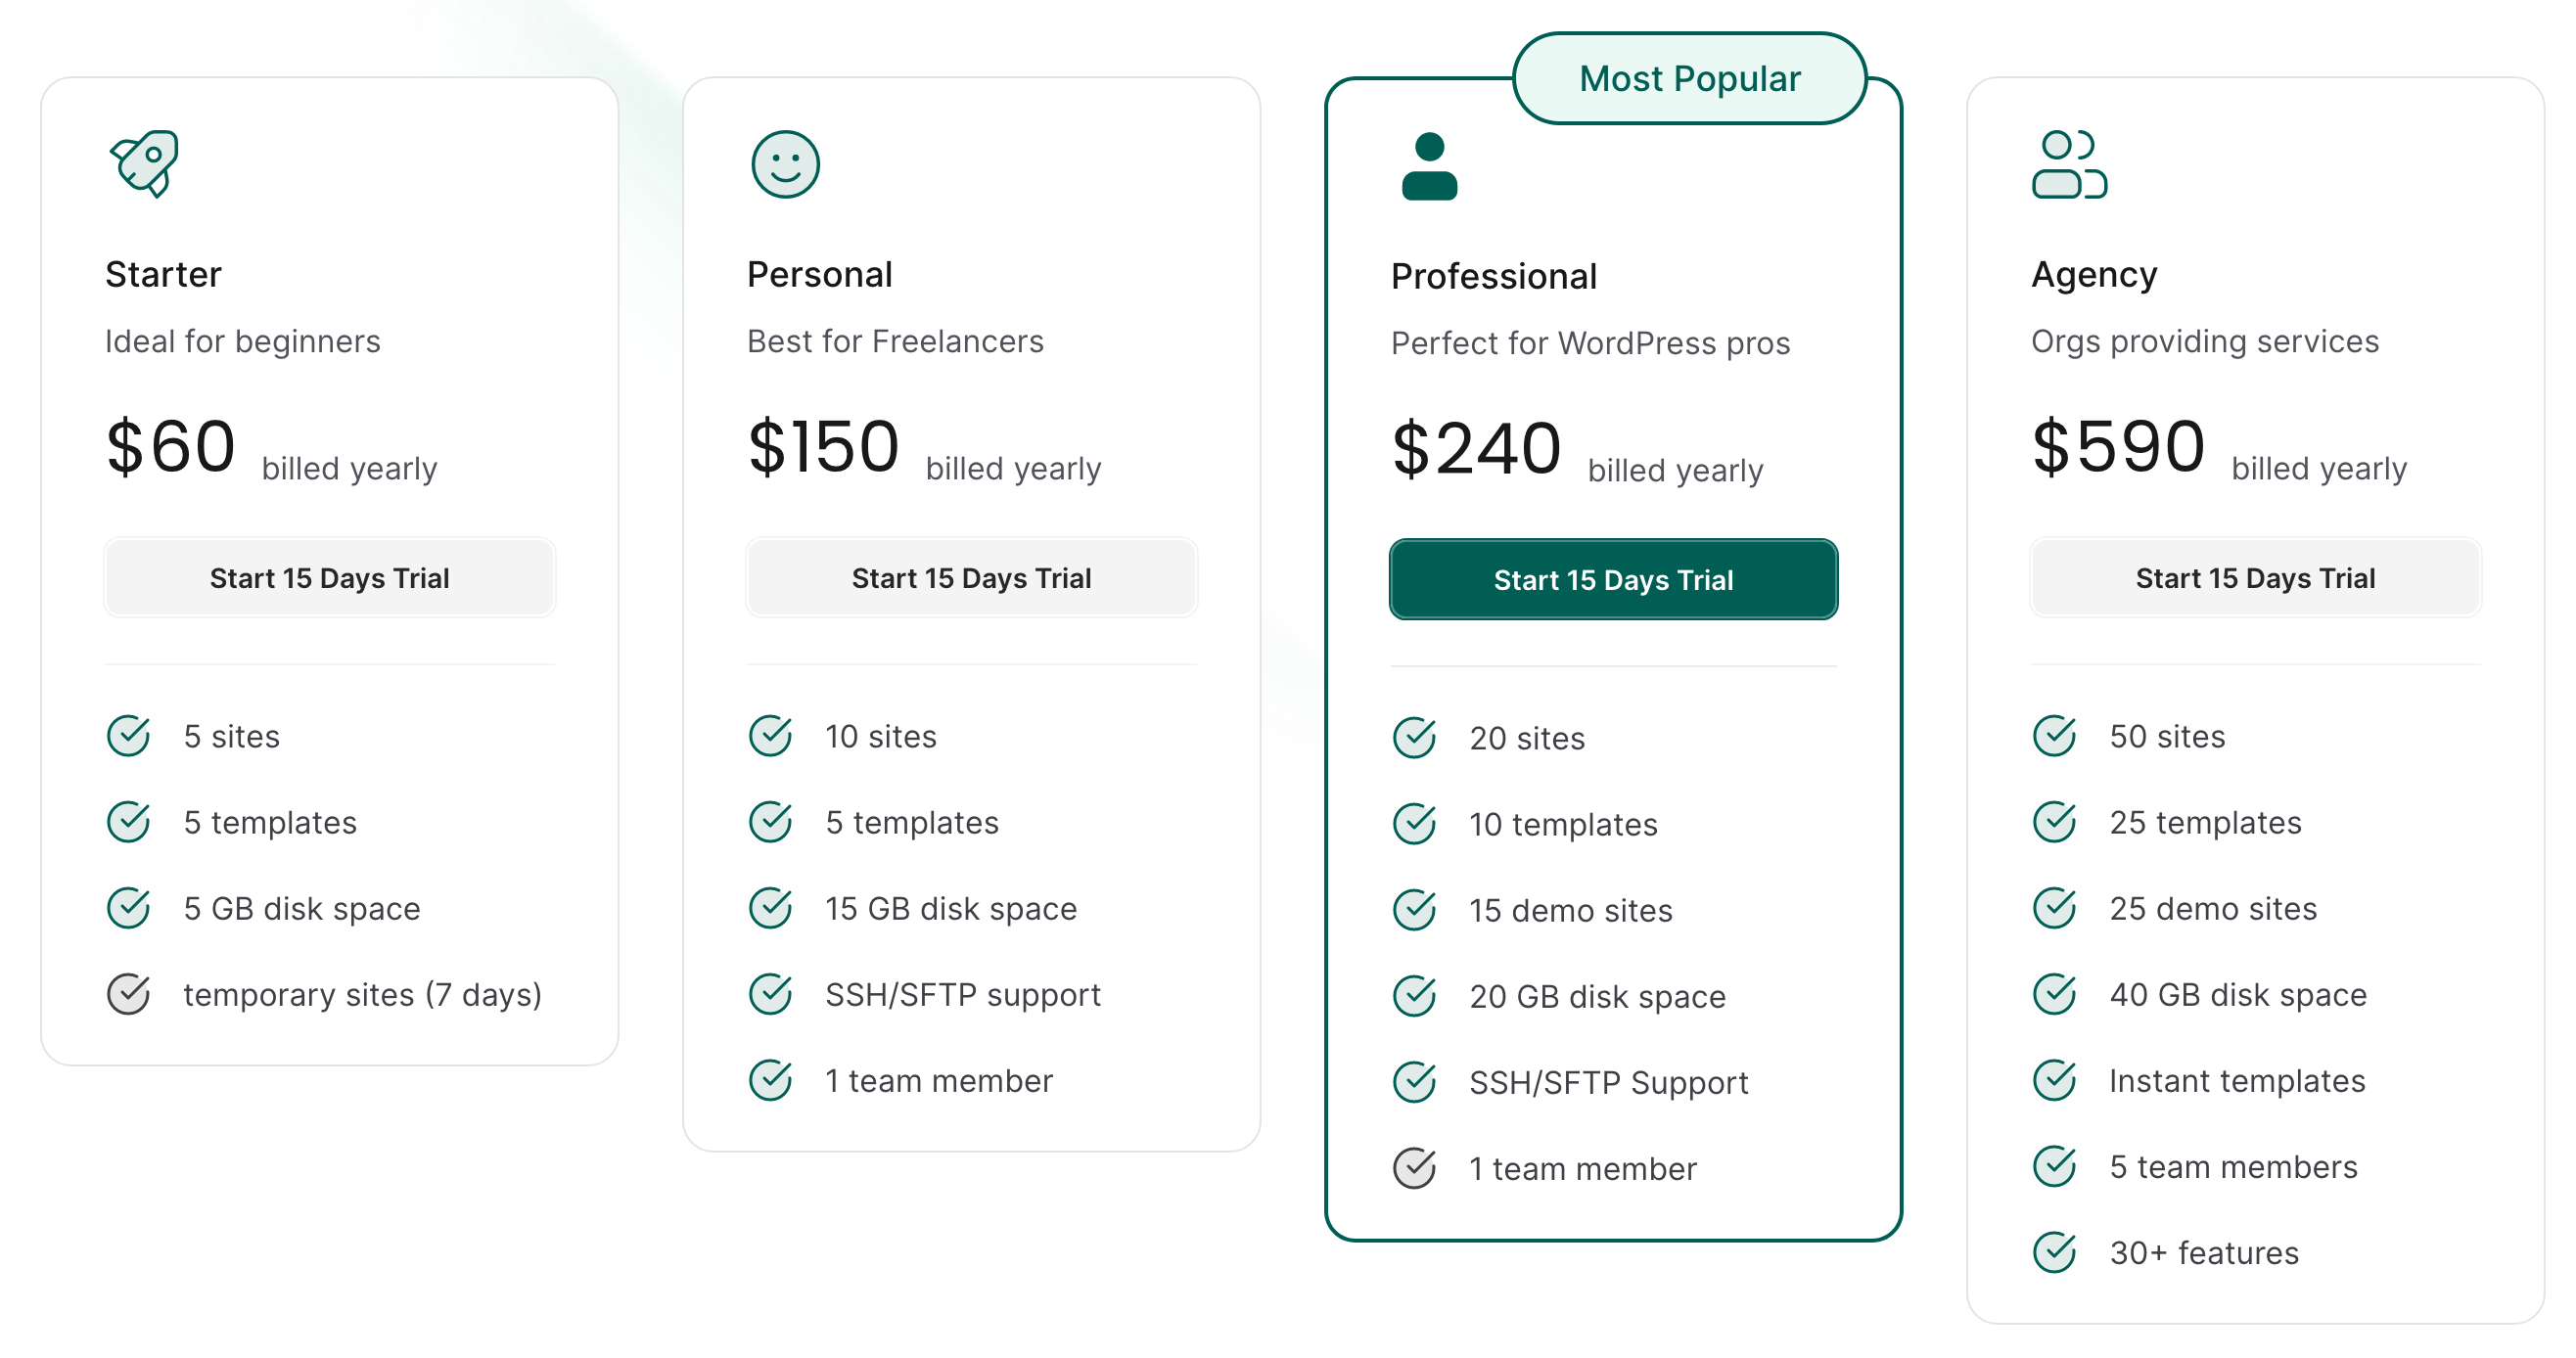
The choice of one or other of these licenses obviously depends on your budget, but also on the volume of test sites to be created.
For example, the “Starter” package ($60/year) allows you to create 5 sites, while the most expensive package (“Agency,” $590/year) allows you to create 50.
Our final opinion on InstaWP
You’ve had a chance to savor a hearty menu while reading these lines. Now it’s time for dessert!
InstaWP benefits
- A comprehensive and reliable tool
- Easy to use and fast to run. No need to install it on your computer — everything works online
- The ability to market your own templates if you’re a developer or site designer
- Templates and configuration that you can customize to save time each time you create a new test site
- Real-time synchronization from your staging site to your production site
- Easier collaborative working (provided you purchase at least the “Personal” license)
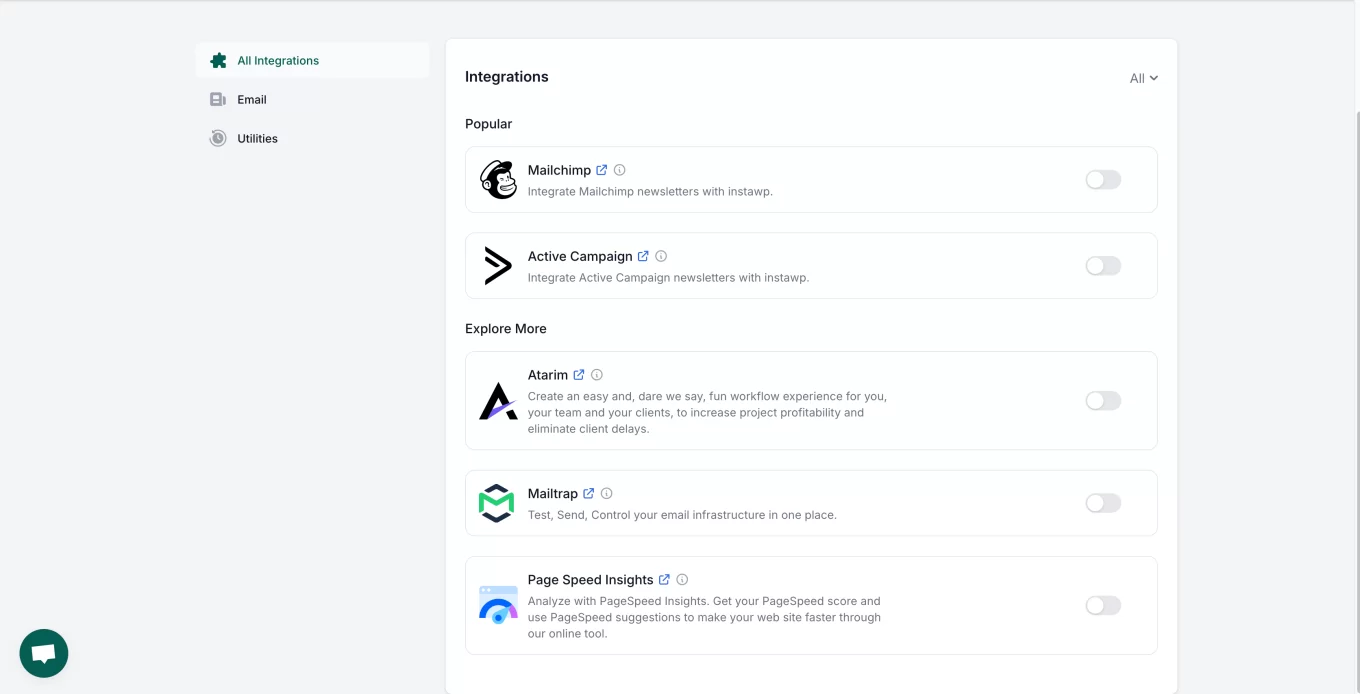
- Integration with email marketing tools such as Mailchimp and ActiveCampaign
- The possibility of using the tool as a white label
- Advanced options for developers, such as tools for editing code and database tables
- Extensive documentation
- The affordable price of the premium version. It will cost you $5/month if you pay by the year.
InstaWP’s limitations
- The free version is limited (although this isn’t surprising with a freemium model)
- Without creating an account, a test site expires after 8 hours
- Impossible to access the tool without an internet connection
InstaWP: For whom?
Finally, let’s turn to the tool’s primary target audience. Well, I think it can be used by anyone, from the novice to the seasoned developer.
Its strongest point is really its ease of use. A beginner will have no difficulty in creating a small test site.
In fact, you don’t even need to go that far if you just want to test a theme or plugin. In that case, activating the InstaWP Launcher extension will suffice.
More experienced users (developers, web designers, freelancers, or agencies) will appreciate the many options available to them and the possibility of working on a white-label basis.
Remember: with premium, you can, for example, connect your domain name to your test sites.
So that’s a big “yes” for me. InstaWP really convinced me, and I recommend it without reservation.
Are you going to give it a try too? Or are you already using it? Tell us all about it by posting a comment.