

Do you know what tends to accumulate on a WordPress site after many years or many theme tests? Media files!
The older your site is and the more redesigns you’ve done, the more likely it is that your media library contains outdated images, videos, or PDF files that are no longer used on your site.
The icing on the cake is that each unused image is present in 4, 8, or even 15 different formats that were automatically generated by WordPress or by an old theme when they were imported, or even by a plugin like Resize Image After Upload.
As a result, your site occupies a disk space on your server that is disproportionate to its real needs. In terms of performance for your visitors, the impact of this accumulation of files is noticeable.
As far as the management of your site is concerned, it’s not much better! Your backups take longer, the free space on your hosting is reduced, and your migration operations become heavier and more perilous.


Media Cleaner lets you automatically get rid of those files that clutter up your media library. Find out how to use it in this guide.
Overview


What is Media Cleaner?
Media Cleaner is a plugin that allows you to clean the media library of your WordPress site. It was created by the French developer Jordy Meow, who is also behind Database Cleaner, Media File Renamer, and other plugins.
This plugin allows you to delete unused media files and repair broken entries (media entries which are not linked to any existing file).
Two versions of this plugin exist:
- A free version, available on the official WordPress directory (70K+ active installations)
- A Pro version, offered at $29/year for use on one site.


Media Cleaner Pro adds various additional features to the free version of Media Cleaner. Here are the main ones:
- File system analysis
- Support for complex plugins like ACF, Slider Revolution, and Metabox. The premium version is also required to clean up sites that use popular page builders like Divi Builder, WPBakery Page Builder, Elementor, and many others!
- Analysis of the online version of your website
- WP-CLI support
When should you use it?
This plugin is best used on special occasions rather than routinely. Its ability to clean up your media files requires special attention to its settings.
I therefore advise you to use it in special circumstances like:
- Regular cleaning of your site: you should perform a thorough cleaning of your site files and database once or twice a year. This allows you to maintain its performance over time.
- The implementation of a redesign: developing a new version of a website is a demanding operation that monopolizes all your attention. In order to deploy the site on time, developers rarely have the time to completely clean up obsolete media files.
- After testing different themes: many themes offer to load test data during their installation. When you uninstall them or add your own data, the uploaded images and videos remain in the media library.
- Before changing server: a server migration is like moving houses. There’s no point in carrying things you no longer need. You’ll reduce the size of the files to be migrated, which will allow a faster deployment and slightly reduce the risk of errors.
To learn all the essential steps of a WordPress website redesign, check out our dedicated checklist.
Precautions to take before using Media Cleaner
Media Cleaner is a very powerful plugin. It will automatically and quickly delete a large number of files. The slightest mistake in the settings will expose you to data loss.
It is therefore imperative to make a backup of your site before using it. This will protect you from any irreparable setback.
How to set up and use Media Cleaner on WordPress
Media Cleaner is a plugin. Before getting started, you will need to install and activate it.
Whenever you want to use Media Cleaner, I recommend that you always follow these steps:
- Set up the scans
- Scan and clean your media files
Setting up scans
To access the Media Cleaner settings interface, click on the sidebar of the WordPress administration interface, on the “Meow Apps” tab and then on “Media Cleaner”.
This will take you to the first screen of the plugin’s interface, the “Media Library Scan”. This shows the settings for the first action that you’ll take during a clean-up session of your media library.
I particularly like how easy this plugin is to use. You perform each action by checking a box whose purpose is explained below it.
Each recommended action has a specific tab that is logically organized to follow the sequence recommended by the plugin. Here they are:
- Media Library Scan settings
- Filesystem Scan settings
- Advanced options
- License (for Media Cleaner Pro)
- Logs and debugs
Tab 1: Media Library Scan
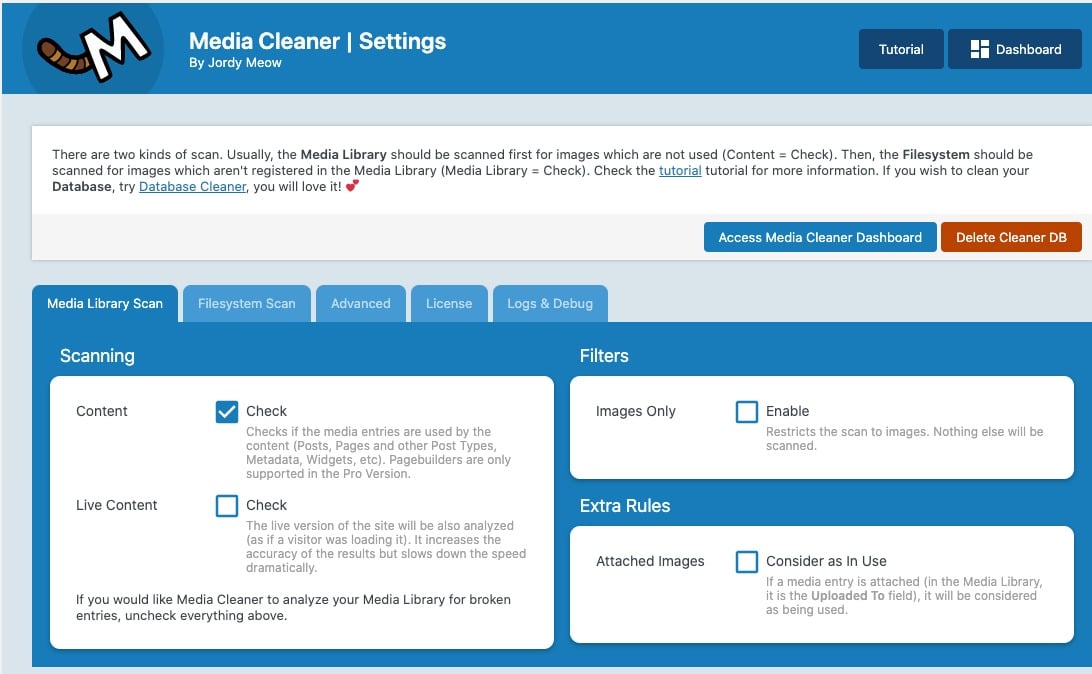
As I mentioned earlier, the Media Library Scan feature is open by default when you enter the Media Cleaner user interface.
This feature allows you to scan the media to identify the ones that are not used on the site. There are three types of scans, a specific filter to target only image files, and an optional rule to activate.
Different types of media library scans are available:
- Search for unused content in the site admin: check only “Content”. If you’re using a page builder, you will need the Pro version to get a reliable search.
- Search for unused content on the online site: check the “Content” and “Live Scan” boxes. The plugin will also scan the online site by simulating a user’s navigation. This provides more reliable results, but the scan will take much longer.
- Search for broken entries: To search for broken entries, you need to uncheck both scan boxes.
In the “Filters” box, the “Images Only” filter allows you to restrict the scan to the site’s image files.
In the “Extra Rules” box, you can choose to consider attached images as used, by checking the “Consider as In Use” box.
Tab 2: Filesystem Scan
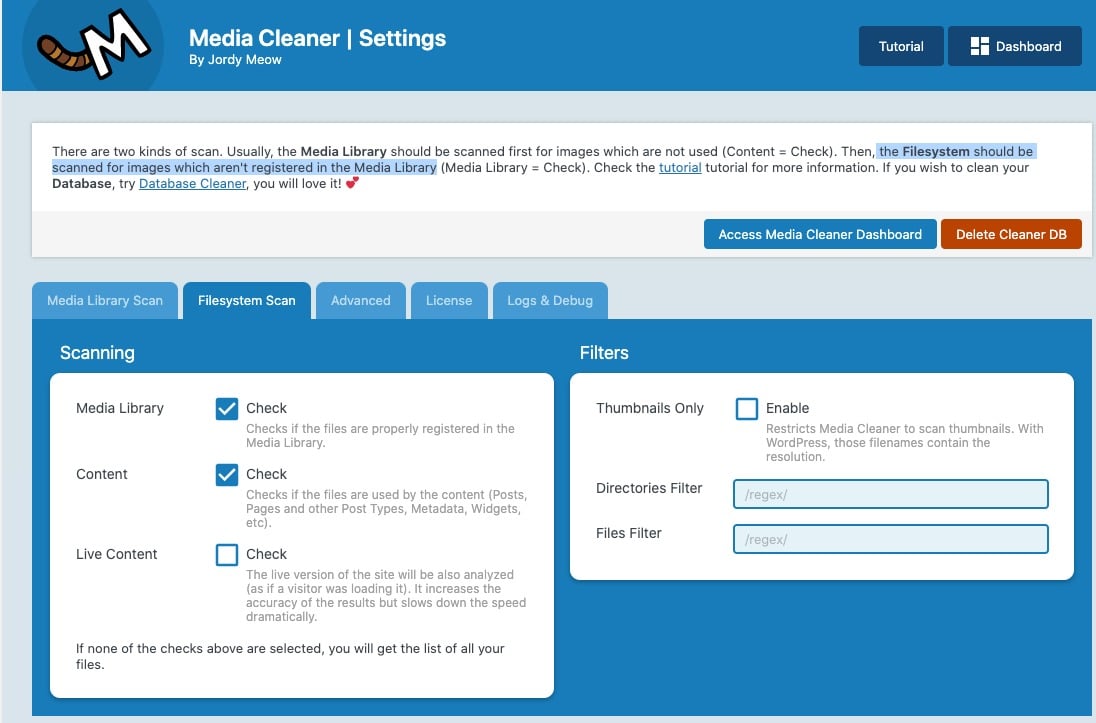
The Filesystem Scan allows you to identify images that are not saved in the media library. You should run this search after cleaning the library.
Media Cleaner provides three possible scan modes and three specific filters. Here they are just below.
The different types of file system scans:
By default, the options “Media Library” and “Content” are checked. I advise you to keep this configuration.
- Analysis of the recording in the media library: by checking “Media Library,” the plugin will check that the files are correctly recorded in the media library.
- Content analysis: by checking “Content”, it will analyze the use of files in the site content (pages, posts, widgets, etc.).
- Analysis of the online site: the “Live Content” option allows you to ask the plugin to analyze the use of a file on the online version of the site. This increases the accuracy of the scan, but greatly increases the processing time.
If none of the above options are selected, you will get a list of all your files.
Filters applicable to the file system analysis:
- Restrict the scan to thumbnails: the “Thumbnails Only” filter allows you to scan only the thumbnails.
- Restrict to a folder: you can restrict the scan to a specific folder on your site. To do this, specify a Regex statement in the field that follows (“Directories Filter”). You can find a tutorial with more details on the Meow Apps website.
- Restrict to one file: the analysis can also be done on one file type only. By indicating /.jpg|.png/ in the field following “Files filter,” you will restrict it to JPG and PNG files only.
Tab 3: Advanced settings
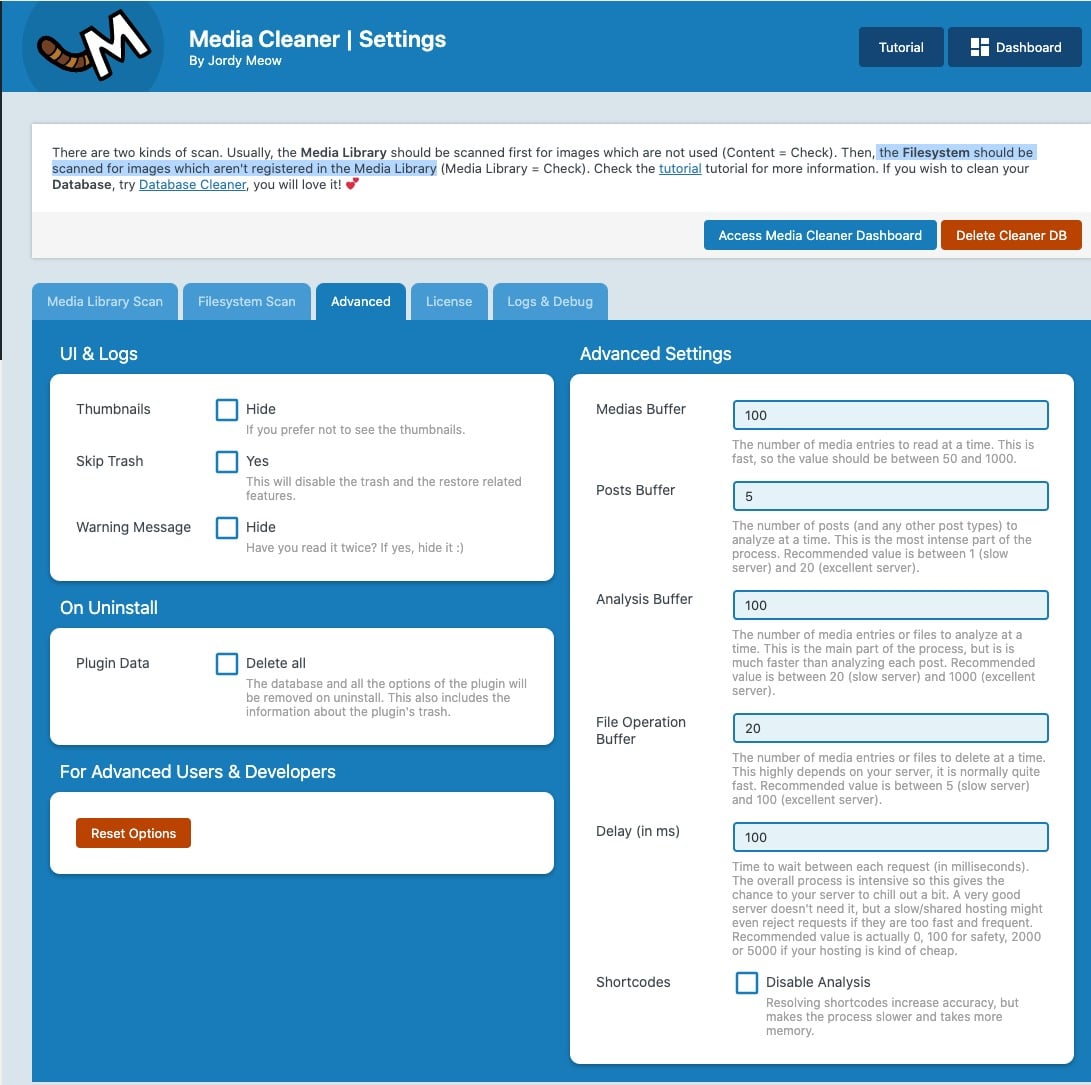
The “Advanced” tab allows you to fine-tune your plugin settings.
These different options are mostly reserved for advanced users. You can use Media Cleaner without touching it.
You’ll find four types of settings in this tab:
- “UI & Logs”: These three options, which I advise you to leave unchecked, allow you to:
- Hide the thumbnails in the list of files with problems
- Disable the storage of deleted files in the trash and the ability to restore them
- Remove the warning message about the use of the plugin
- “On Uninstall”: By checking the box, all the options set and the data stored in the database will be deleted in case of uninstallation. Activate this setting only if you are sure that you will not need the plugin in the future.
- “For Advanced Users & Developers”: This button allows you to restore the default options.
- “Advanced Settings”: You can specify different criteria that are supported when scanning the media library and file system. These include the number of files and items scanned at the same time, the delay between each request, and the number of files that can be deleted at the same time. You can also disable the analysis of data from shortcodes on the site.
Tab 4: License
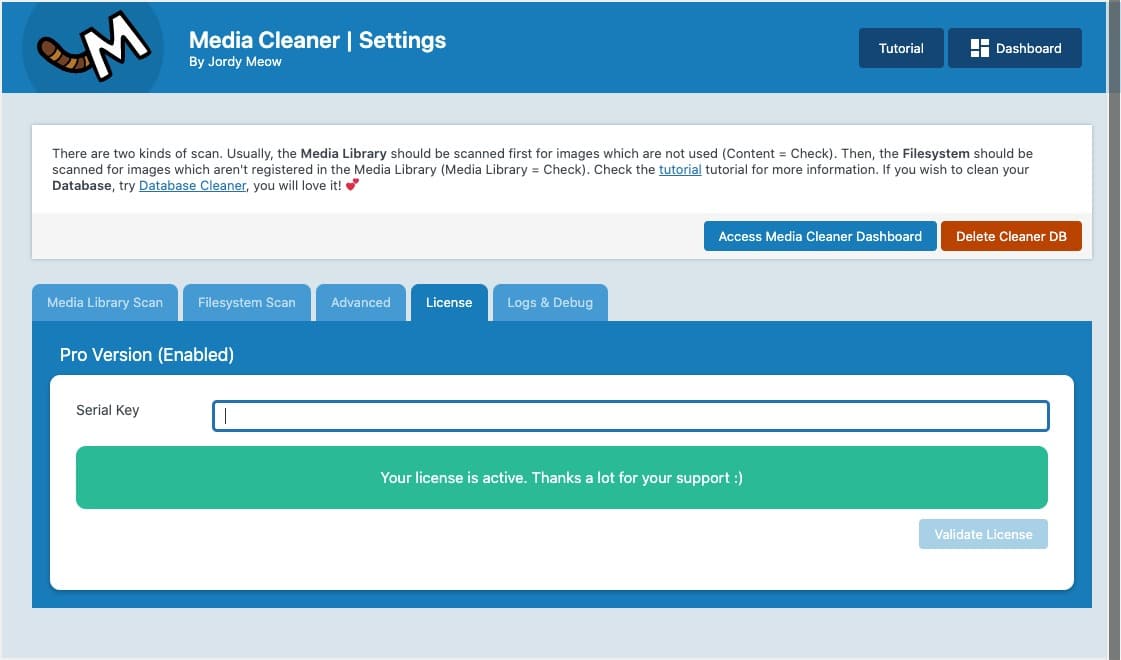
This tab allows you to add the authentication key for your version of Media Cleaner Pro.
To do this, simply paste the key into the “Serial Key” field and click the “Validate License” button.
Tab 5: Logs & Debug
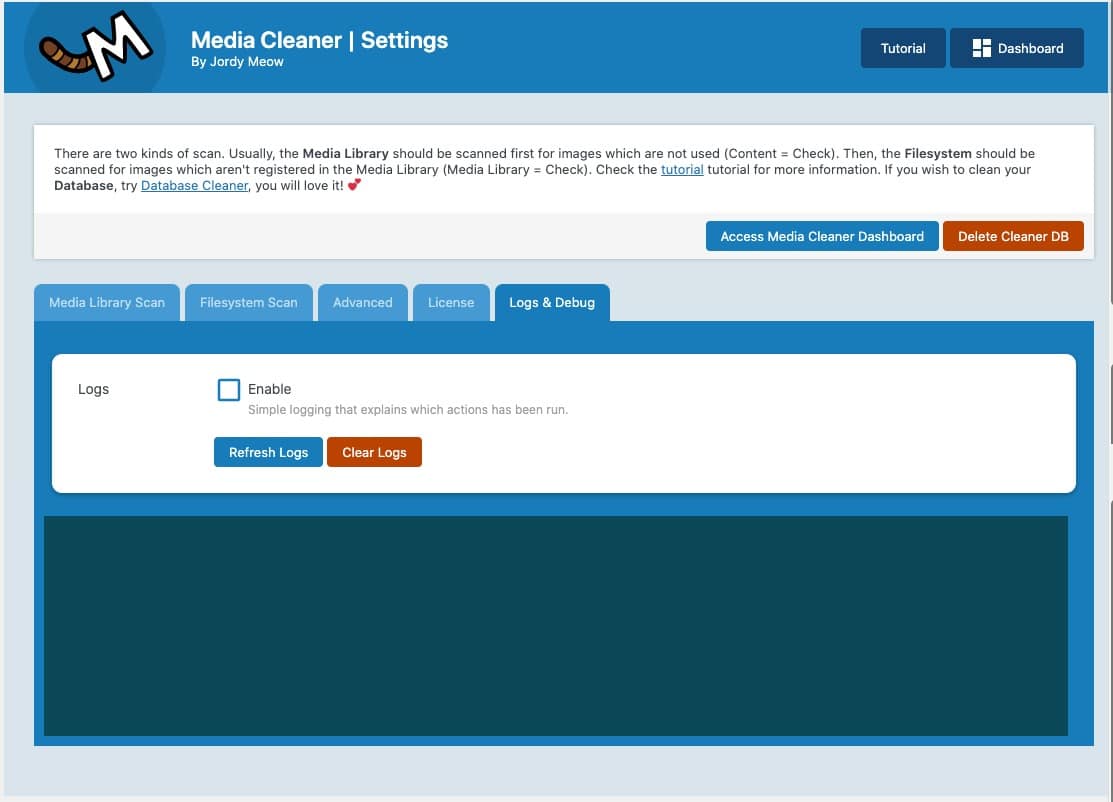
You have the option to activate a log that will allow you to follow the cleaning actions that have been performed. To do this, check the Logs > Enable box.


Scan and clean your media files with Media Cleaner
Now that you have set up Media Cleaner, it’s time to move on to scanning and cleaning your files.
If you haven’t already done so, backup your site with a tool like UpdraftPlus or BlogVault. Any mishandling of the steps you take could result in the loss of important files. A backup of your site is an essential security measure.
Proceed with the analysis
To access the scanning interface, you have two options:
- The “Access Media Cleaner Dashboard” button above the settings tabs:
- The “Cleaner” option now present in the left side menu as a sub-category of “Media.”
As extra precaution is always a good idea, take the time to read the warnings published by the editor and the recommended best practices.
Now you can scan your files.
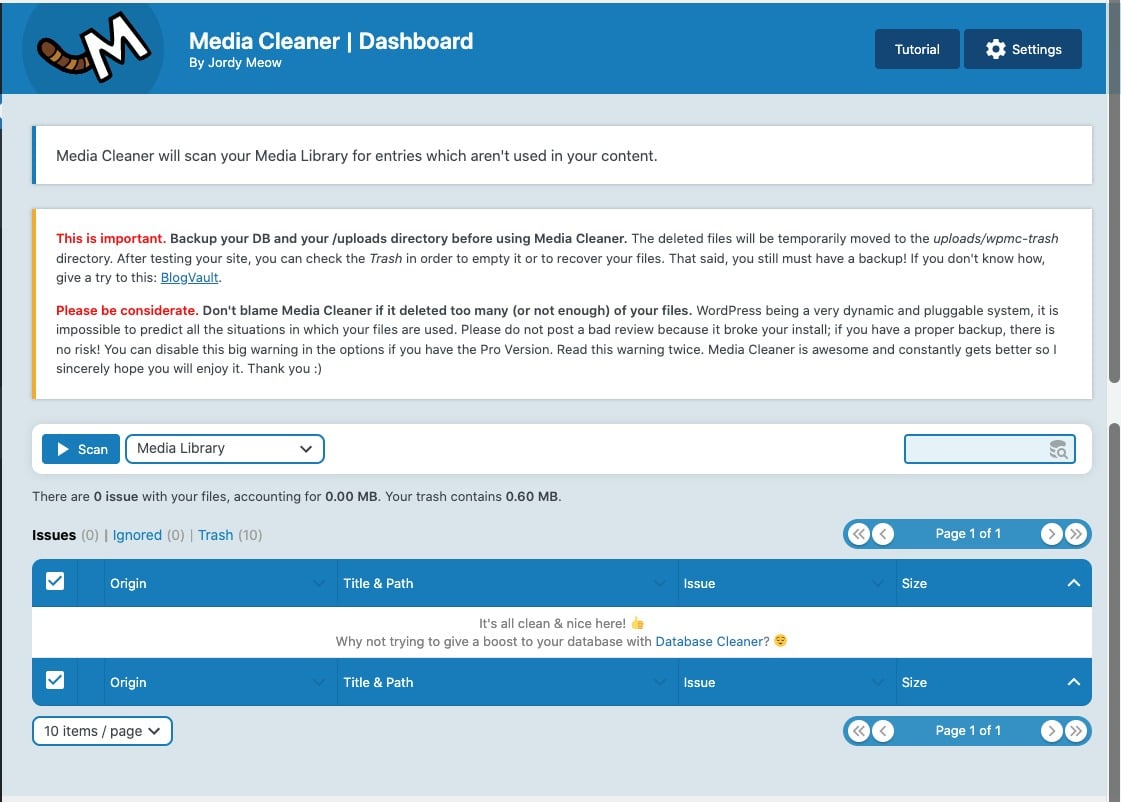
Before pressing the “Scan” button, define the type of file search you wish to undertake by selecting “Media Library” or “Filesystem” from the drop-down menu.
I decided to follow the editor’s recommendations, so I opted first for a scan of the media library to find the images installed during the import of the demo data of my site’s theme.
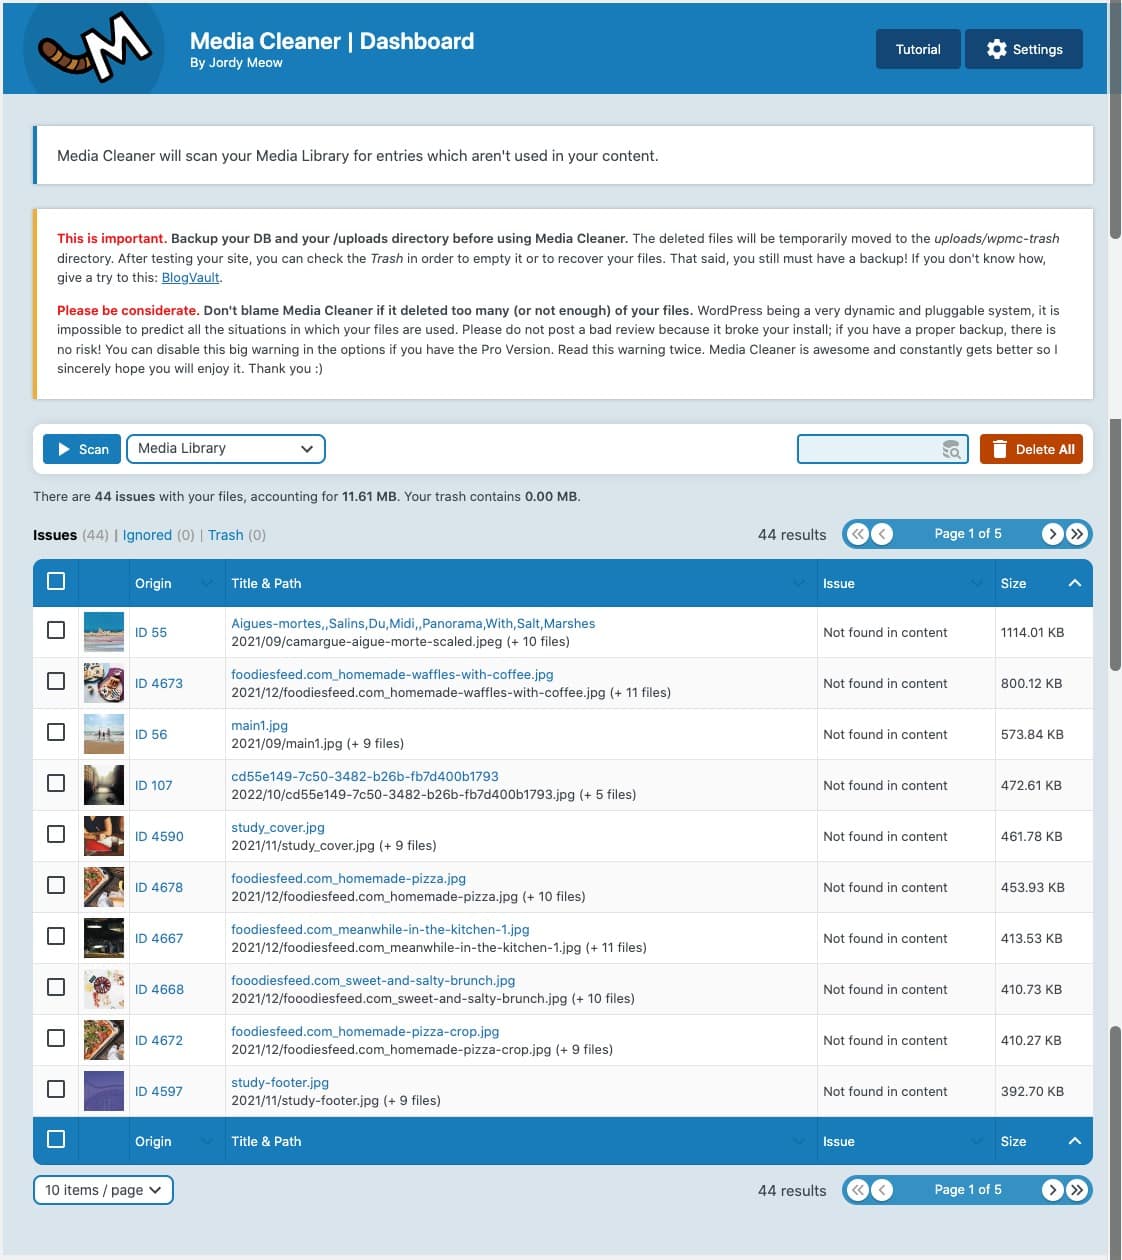
In my case, the scan identified 44 files that have a problem. These are image files that are missing from the site content. To deal with them, I have two options:
- Mass processing: the red “Delete All” button allows you to remove all the files identified.
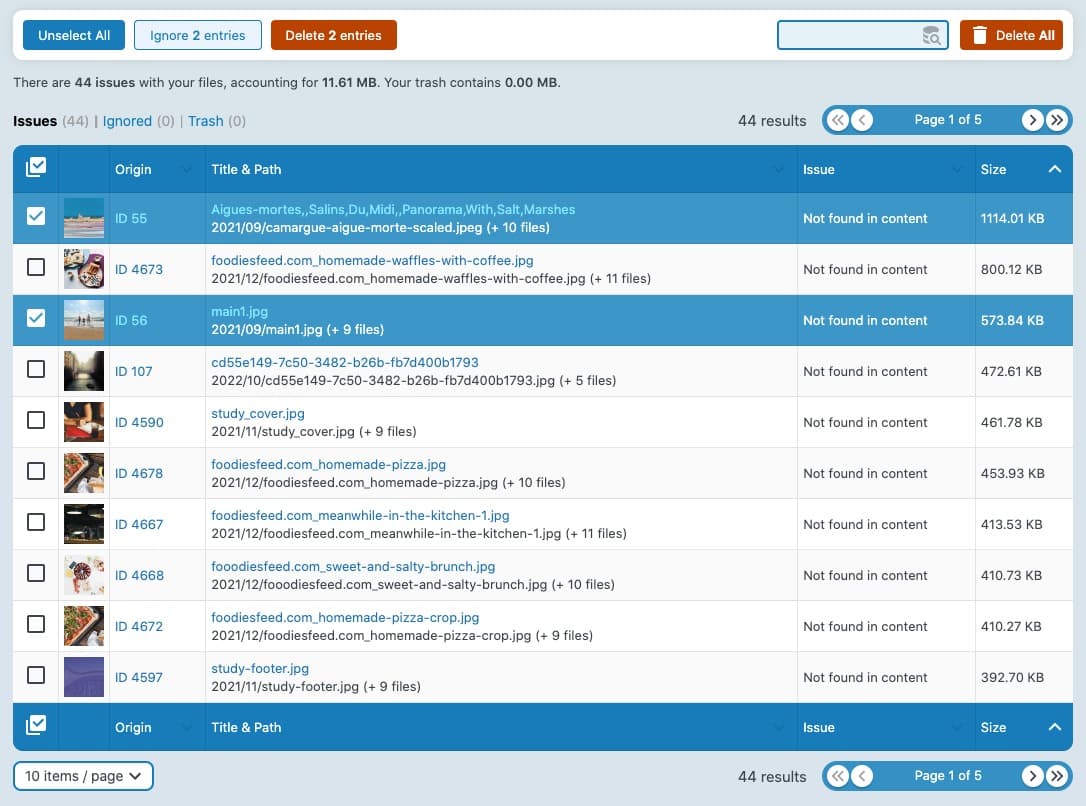
- Case by case processing: the checkbox on the left of the thumbnail allows you to select each file individually. Once the first media is selected, the “Scan” button is replaced by a contextual menu that allows you to delete the files you have chosen. Once all the files have been processed, click on the “Delete X entries” button.
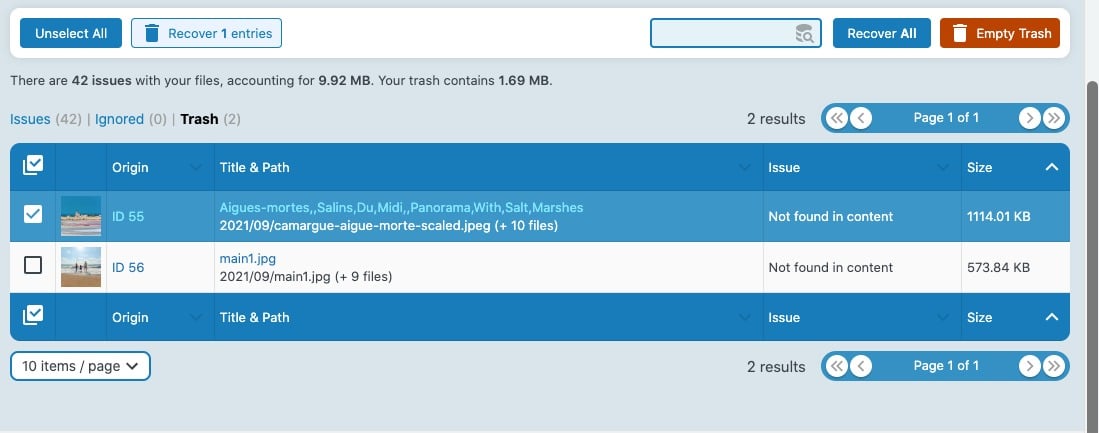
If you delete files by mistake, you can find them in the Trash, as long as you have not disabled this option in the advanced settings.
To recover them, click on the checkbox next to the items you want to restore, and then click on the blue “Recover X Entries” button that has replaced the “Scan” button.
Now that the media library clean-up operations are done, it’s time to repeat the operation by performing a file system scan.
To do this, select “Filesystem” in the drop-down field and then click “Scan.”
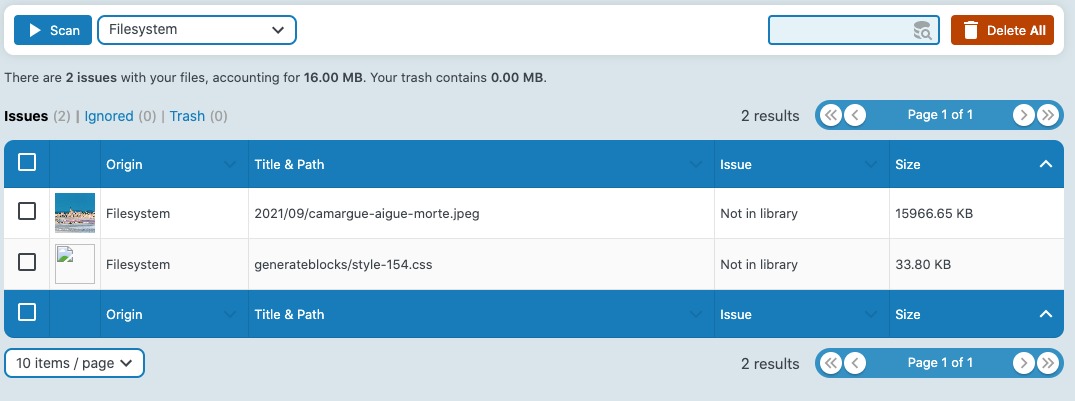
As you can see, this scan finds traces of files deleted in the previous step.
To delete elements of the filesystem, you can also opt for a mass or individualized treatment. The steps to follow are identical.
Our final opinion on Media Cleaner
Media Cleaner is an extremely powerful specialized plugin that allows you to quickly clean up the media library of a WordPress site.
It is particularly useful:
- On older sites that have undergone graphical redesigns and editorial content overhauls
- To proceed to an express cleaning of all the media files installed while testing certain plugins or themes for example.
Download the Media Cleaner plugin:
If you’re using a page builder, it’s essential to invest in a Media Cleaner Pro license in order to get an optimal and complete treatment of all the files imported into your WordPress site.
How do you go about cleaning up the media library on your WordPress site? Do you use the Media Cleaner plugin? Tell us all about it in comments below. 😉