This has probably already happened to you: on an ecommerce website, you find the product of your dreams. It’s beautiful, you put it in your shopping cart. Then go to the order page… And that’s where the drama happens.
You don’t understand anything anymore: you are told about shipping costs you never heard of, you have to fill in about twenty fields that seem useless to you… and your product doesn’t seem that interesting anymore. Result? You leave the page, and the website, forever.
This is the haunting of those who create ecommerce websites: that their order validation page is not optimized.
If you use WooCommerce for your website, you know the classic order page that comes with the plugin. Although it meets the classic expectations that you may have, it is not necessarily adapted for all needs.
You might want to remove a field that is not relevant in your context, or add another one that is missing.
This is where WooCommerce Checkout Manager comes in.

This is a plugin that allows you to customize the WooCommerce order validation page.
In this article, we’ll see exactly what it’s all about, and how you can take advantage of this plugin to provide a personalized experience for your online store’s customers.
Overview
In this post, you’ll come across some affiliate links. This means that WPMarmite gets a commission if you buy something through those links. It won’t cost you more though but it will reward the research and writing work of the blog’s writers.
What is WooCommerce Checkout Manager?
WooCommerce Checkout Manager is a product of QuadLayers, a company that develops solutions for online stores.
They are also editors of other popular WordPress plugins like WP Social Chat, Social Feed Gallery or Direct Checkout for WooCommerce. These three plugins cumulate more than 200,000 active installations on the official WordPress plugin directory.
The plugin comes in a free version, and a paid version available with three types of licenses.
Unlike most of the premium WordPress plugins, you will be able to get it with a one-time payment of:
- $20 for 1 site
- $40 for 5 sites
- Or $80 for an unlimited number of sites
It means that once you buy the license, you get lifetime updates on the plugin.
On the other hand, the company offers only 6 months of personalized support when you buy the license. You then have the possibility if you wish to subscribe to another 6 months of support, for the price of $20.
For this post, we will use the free version of WooCommerce Checkout Manager.
What are its key features?
Checkout Manager for WooCommerce offers a complete set of features to manage WooCommerce order pages.
- First, you have the basic features like adding and removing fields from the order form. Super useful if you want to collect, during the purchase, some information which fields are not present on the default form.
- You can also rearrange the order in which the fields are displayed on your order form.
- Another super interesting feature: conditional fields. Do you need to request additional information from your customers located in Paris? Instead of displaying this new field to all your customers, you can use this feature to make it visible only if a customer adds Paris in the “City” field.
- You can also add CSS directly to the WooCommerce order page. The plugin provides a dedicated field for that.
Not bad, already, right?
Alternatives to Checkout Manager for WooCommerce
It must be said that there are many plugins to customize the WooCommerce order page. Most of them offer some of the basic features listed above.
These are some of the most used plugins:
- Checkout Field Editor (Checkout Manager) for WooCommerce by ThemeHigh
- Checkout Field Editor by WooCommerce themselves
- YITH WooCommerce Checkout Manager
We will see at the end of this post the little extras Checkout Manager for WooCommerce offers. 😉
Now that we’ve talked long and wide about what you can do with Checkout Manager for WooCommerce, how about getting your hands dirty?

How to install WooCommerce Checkout Manager
First thing before installing WooCommerce Checkout Manager is to have installed and activated WooCommerce. Obvious: we want to customize the WooCommerce home page.
If you don’t know how to install WooCommerce, you can read the article of WPMarmite dedicated to the subject which details the process.
Then, from your dashboard, go to Plugins > Add New, and type “Checkout Manager for WooCommerce” in the search field. It’s the easiest way.

You can also download the zip of the plugin from the official WordPress directory, and upload it manually to your website. Then you’ll just have to activate it.
Whatever method you use to install the plugin, a new Checkout menu item is added in the Dashboard, under the WooCommerce menu.
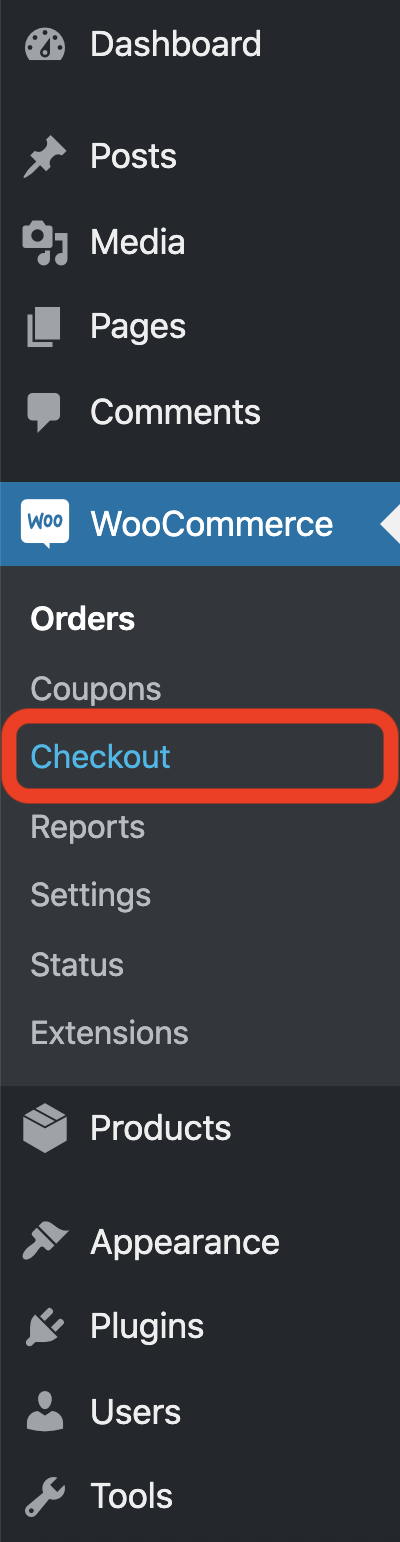
This menu item links to the plugin options page, which is a new tab added in the WooCommerce settings.
How to customize your WooCommerce order page
WooCommerce 4.0 and more: reconfigure conditional fields settings before use
If you were using a version of WooCommerce lower than 4.0, and you had conditional fields on your order form, you’ll have to reconfigure them after upgrading WooCommerce. Indeed, this version of WooCommerce has introduced a number of changes for these fields.
The reconfiguration of conditional fields concerns websites that already had the Checkout Manager for WooCommerce plugin installed, then upgraded their WooCommerce version to 4.0 or more.

If your version of WooCommerce is 4.0 or higher, or if you didn’t have any conditional fields in the order form, you can simply skip this step. Phew!

Add, modify and remove fields
For the purposes of this post, we’re going to assume that we have a store selling hoodies and t-shirts.
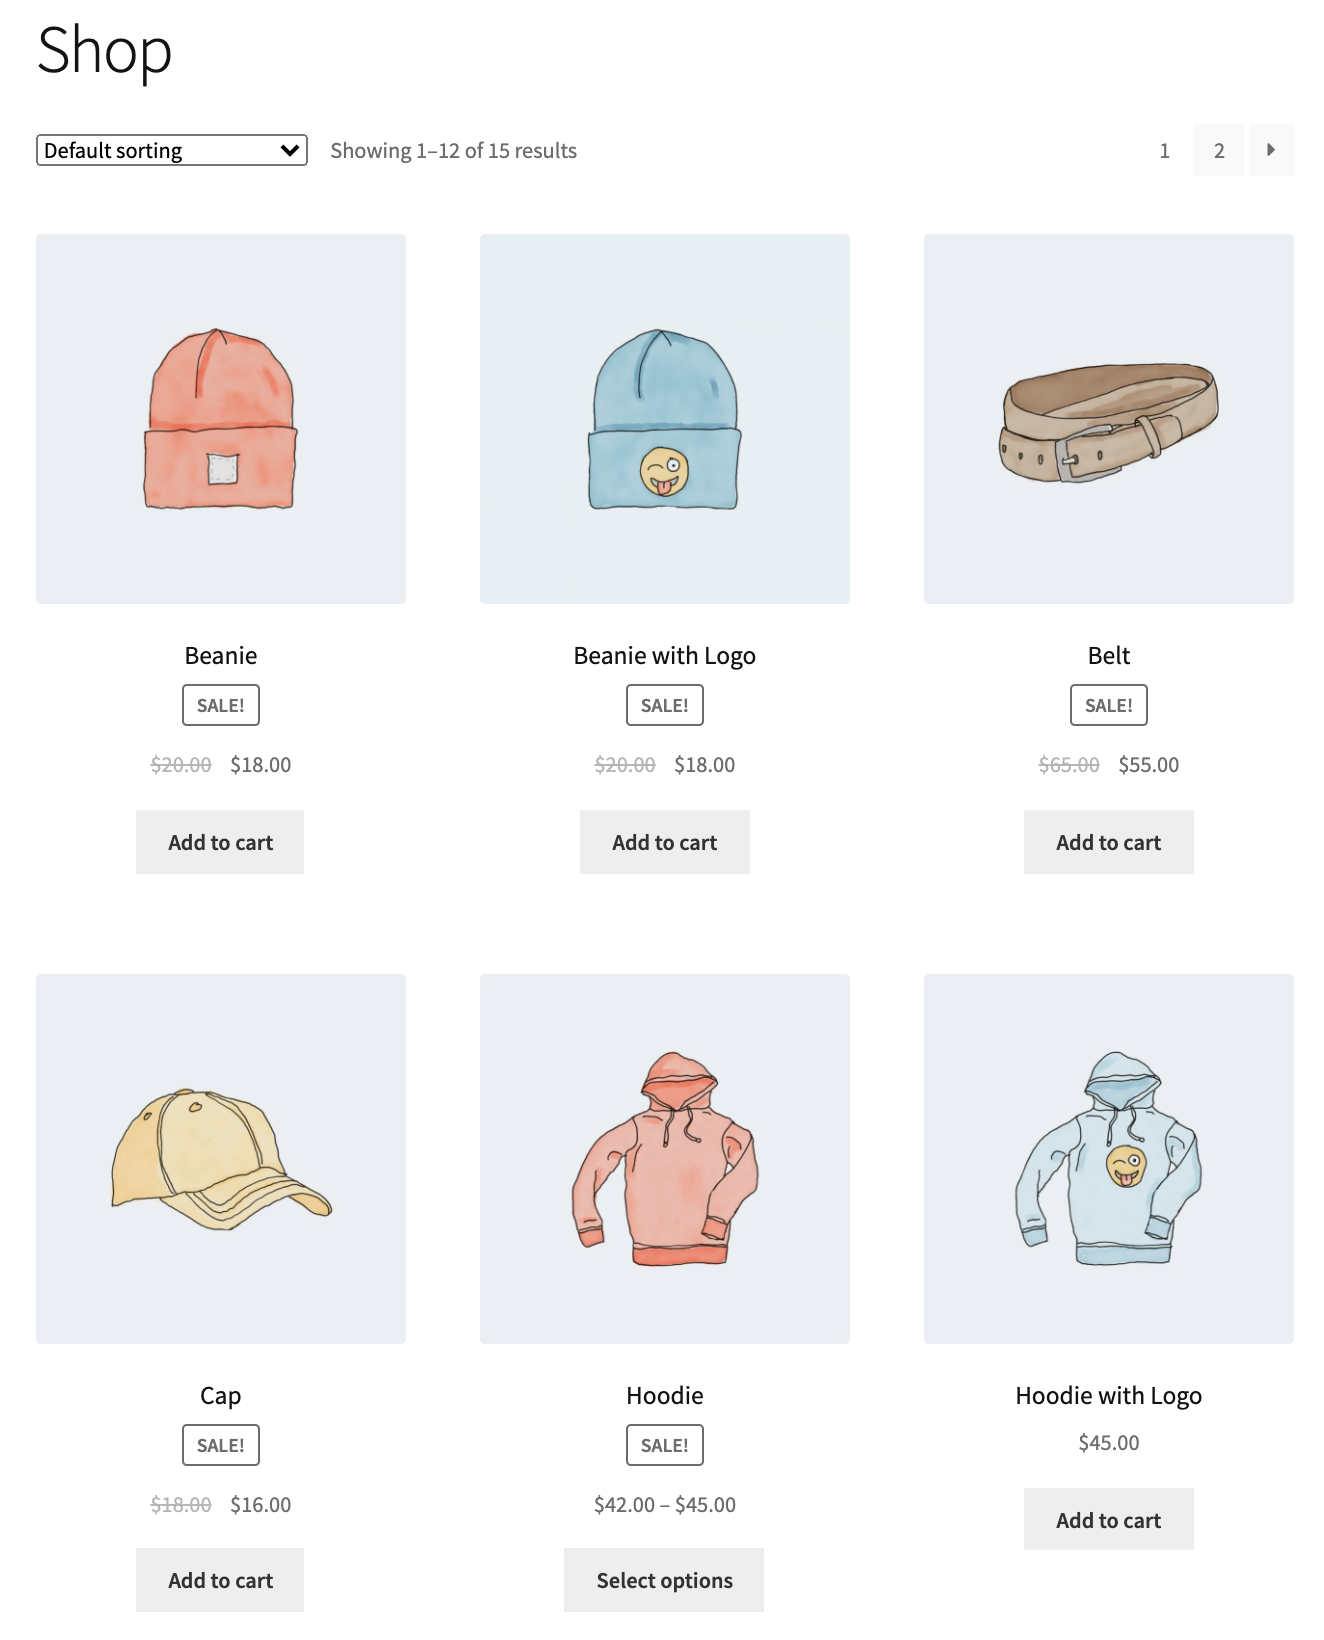
Here is what the WooCommerce default order page looks like before any modification:

For this order page, we will add a new field to ask our customers if they usually buy their hoodies from other online stores. This field will be of the drop-down menu type.
To do so, go to the options page of WooCommerce Checkout Manager in WooCommerce > Checkout then in the Billing tab.
Then just click on the + Add New Field button.

A new window will appear where you can add different information such as:
- The name
- The label
- The description of the new field to create
In the case of a selectable field like ours, you will also be able to add the different options to choose from. Please see below what you must do next:
- General tab:
- Type: you need to choose Select.
- Label: give a name to your field (which will appear to your visitors on the order page).
- Options tab: rename the Option field by the desired store name (remember we want to ask customers if they usually buy their hoodies from other online stores) and repeat by clicking on the Add new option button for as many stores as you need to put in the selection list.
Once you’re done, click on the Save button at the bottom of the page.
Then, you’ll see the list of all your billing fields from which you can choose to mark this new field as Required to make it mandatory. Again, remember to click on the blue Save changes button to apply your choice. Do not mark it as Required if you want to leave it as optional. 😉
Once the field is added, you will see it on the order page, at the bottom of the form.
You can add as many fields as you want to the form on your order page. There is no limit.
But beware! Remember that this page plays an important role in the decisions your customers make. Therefore, you have to stay strategic… Don’t get greedy! 🙂
Reorganize the fields
Now that our new field is added, we’re going to move it up.
The interface of WooCommerce Checkout Manager is very intuitive. Moving a field is simply drag and drop, or click on the arrows that are near each field. So we will bring our new field just after the Town/ City field.
And tadam! Our new field is right where we put it.

Take advantage of the power of conditional fields
Conditional fields are fields that are displayed based on responses to other fields; or fields that are only displayed for specific products.
Using our previous example, we may want to display our new field only if our customers are in France. Concretely, we will link our Other hoodies’ online stores field to the Country/Region field of WooCommerce.
When you click on the Edit button of our new field, you will notice on the right hand side the presence of an Activate conditional field requirement checkbox. Once checked, you will be able to choose the field on which the condition will be verified, and the response to verify.
In our case, we choose Country/Region, and as an answer France. Don’t forget to save your changes!
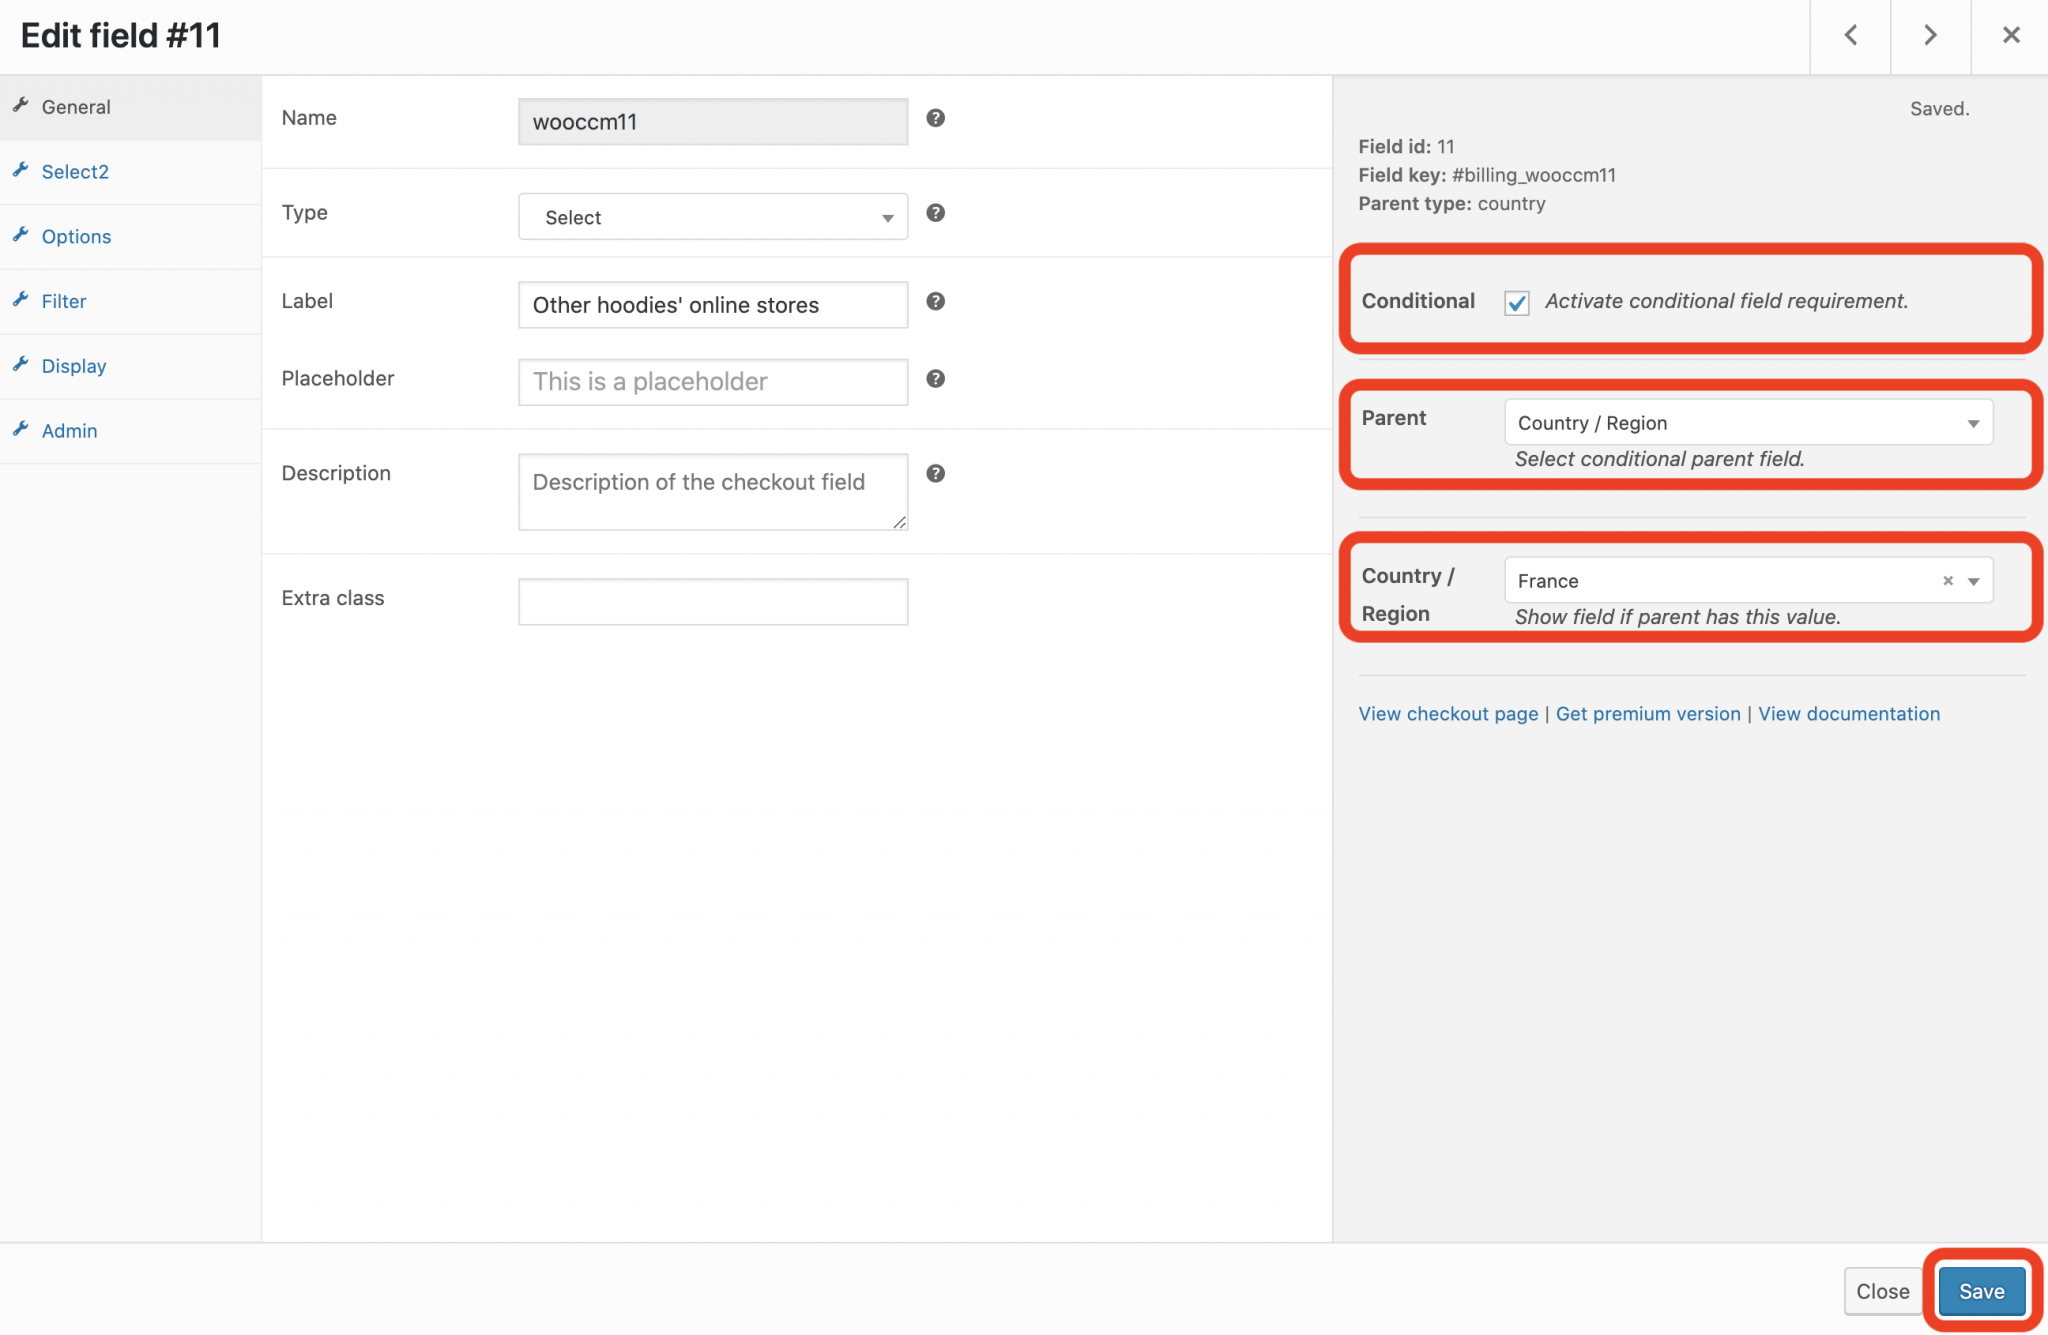
Is it done? The Other hoodies’ online stores field is displayed on our order page only if France is chosen as country.

Add custom CSS to the order page
The custom CSS field of WooCommerce Checkout Manager allows you to add CSS code that will be added specifically to the order page of your site. Super useful if you’re not a code cracker, and you don’t want to bother with CSS selectors.

Adding CSS code is done from the Advanced section always from the plugin options page.
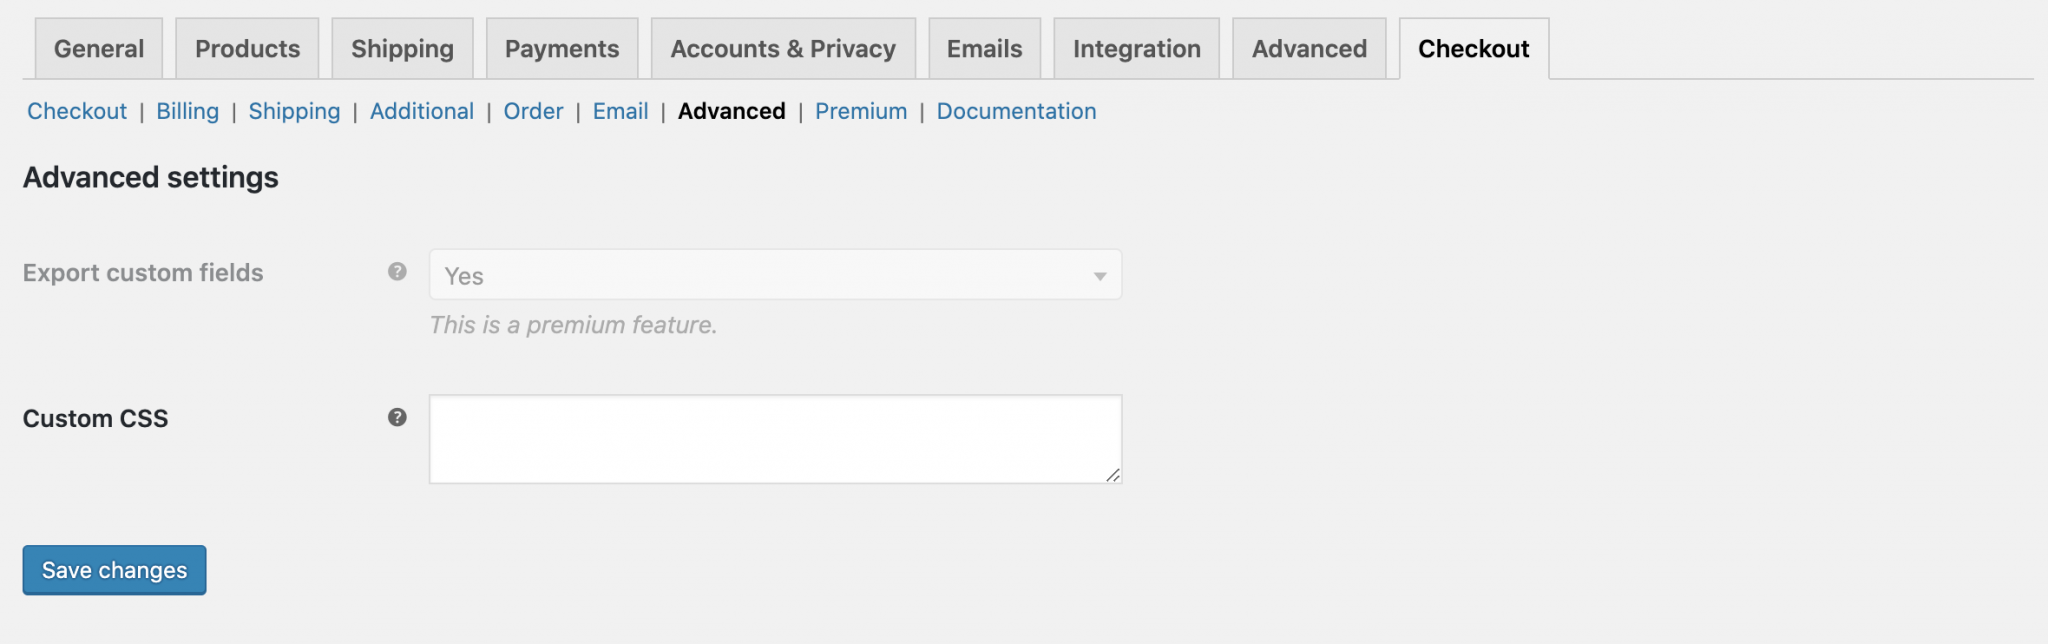
Small downside however, the custom CSS field proposed by the plugin has no syntax highlighting or error validation. Make sure that everything is in order before going into production!
What about the functionalities?
The Checkout Manager for WooCommerce plugin also offers many other very interesting features.
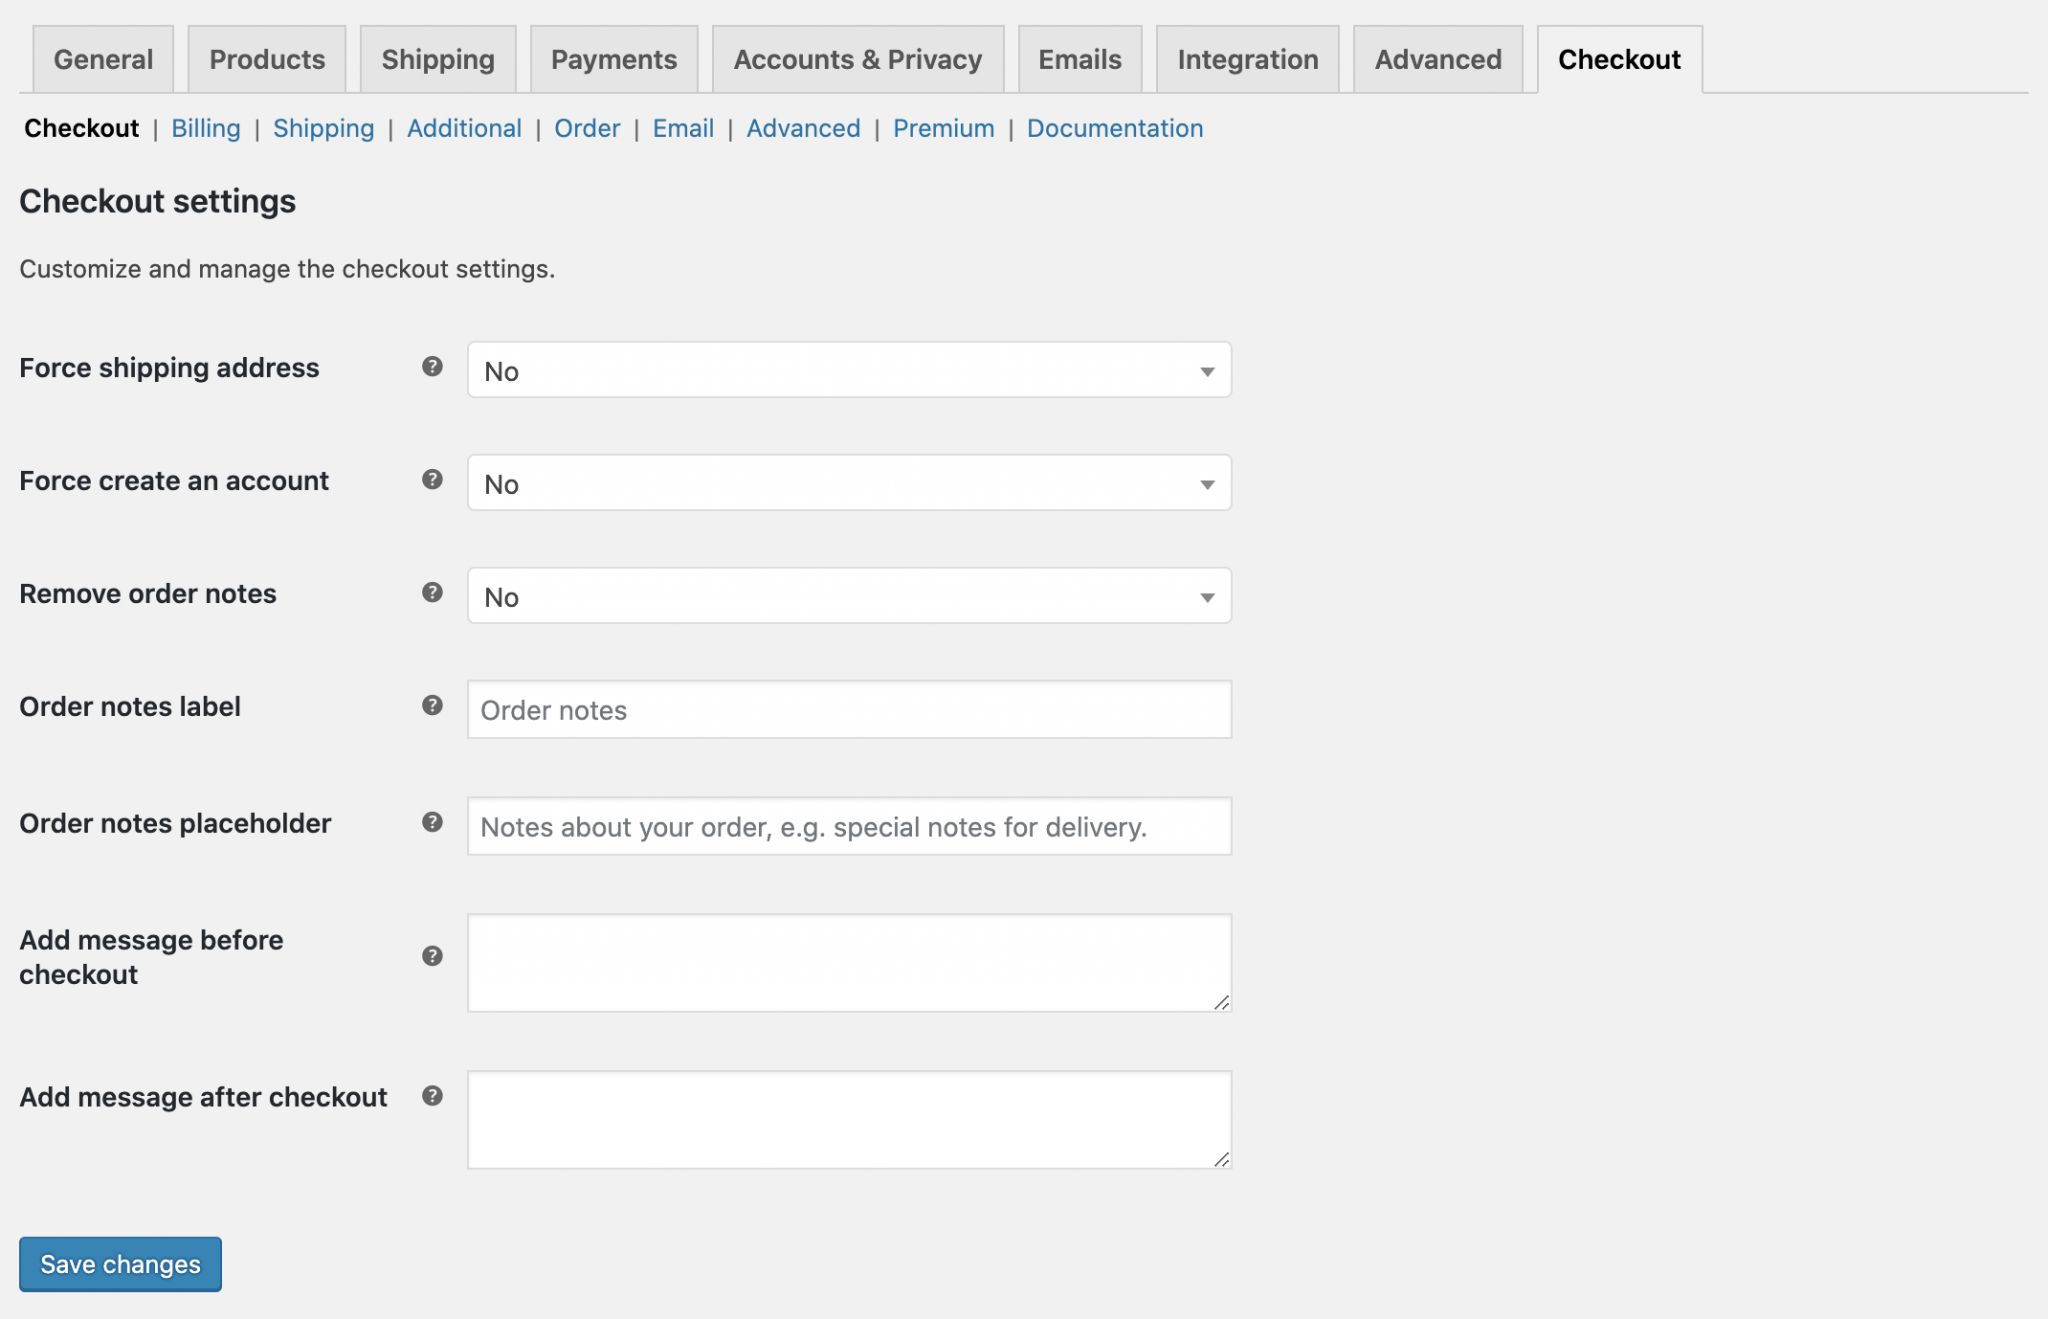
For example, from the main options page, you can:
- Delete the Order Notes field.
- Add custom messages on the thank you page that appears after a customer has made a purchase. Nice to say thank you to your dear visitors!
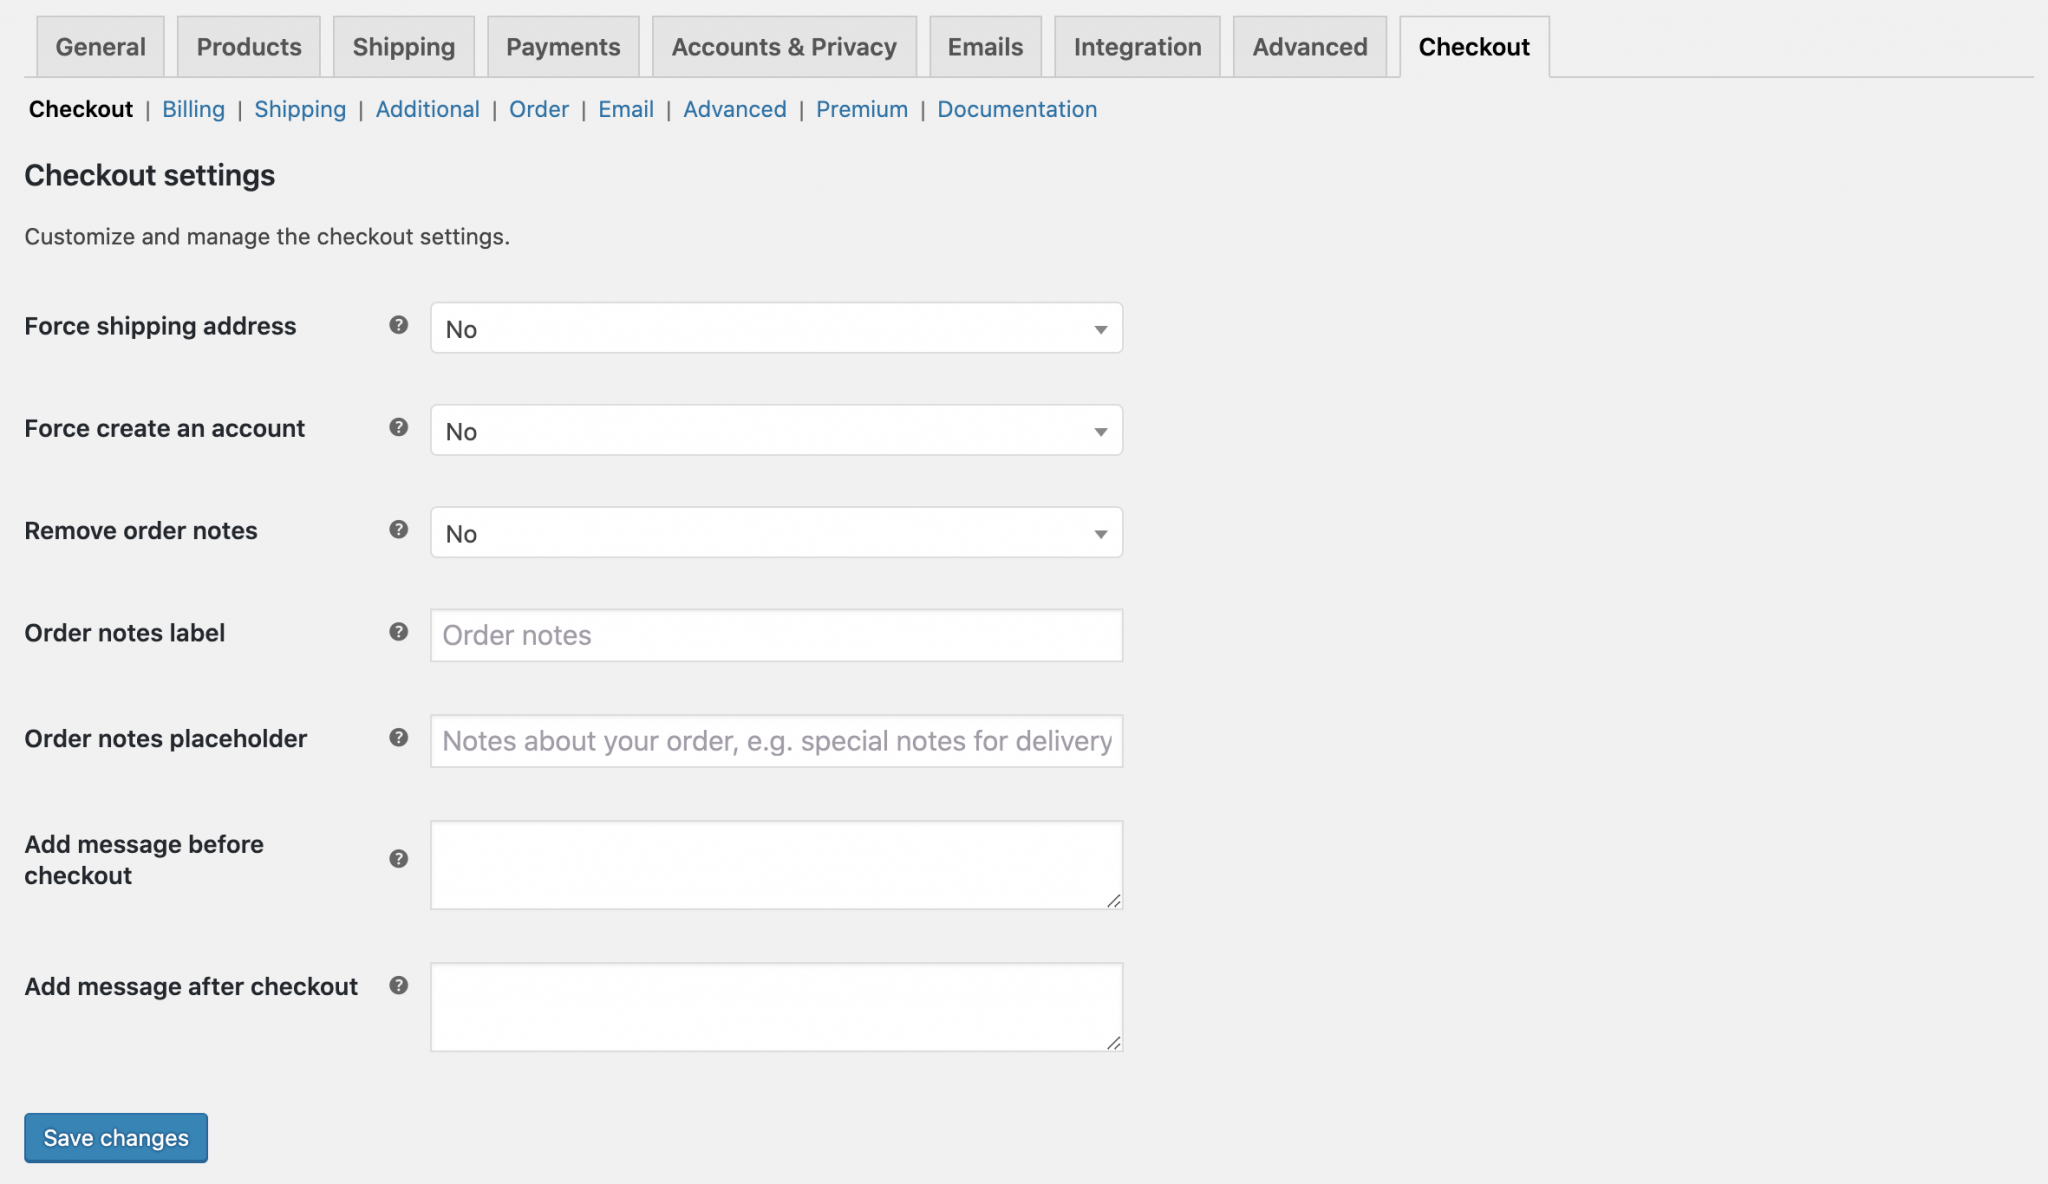
Other features such as order emails customization, or options export, are only available with the premium version.
If you want to discover in depth what Checkout Manager for WooCommerce is capable of, I strongly recommend you to have a look at the documentation that is proposed here: it is very complete.

What to do with these additional fields?
When a customer finishes an order, you will see the details of the order on the order page of WooCommerce from your WordPress admin panel: WooCommerce > Orders.
You can then open each order individually to change its status or view the different information entered by the customer.
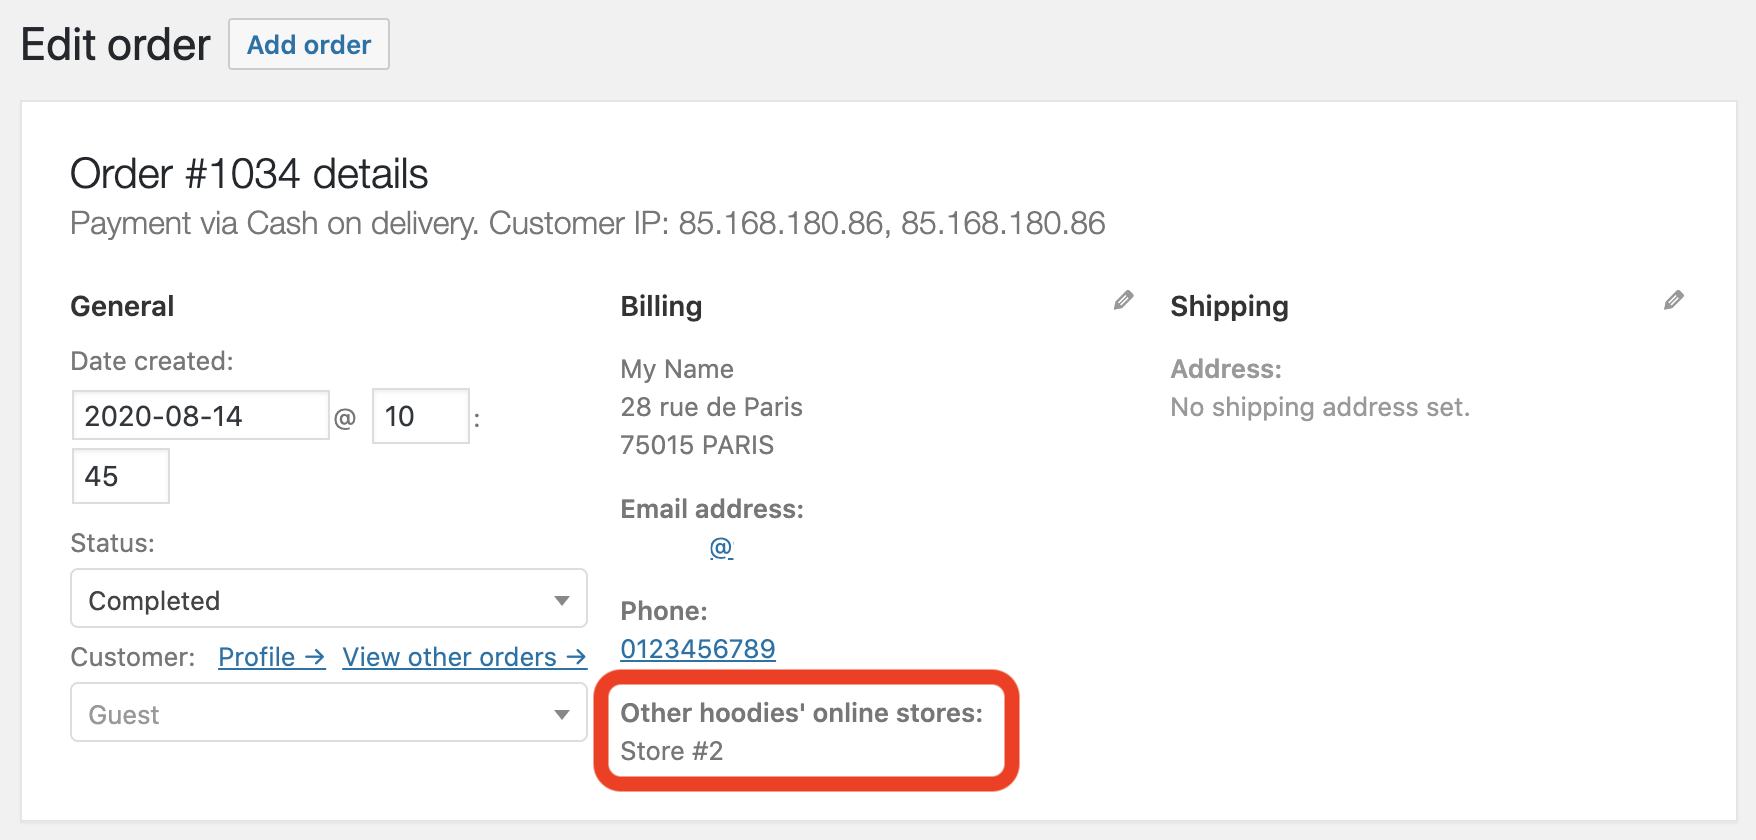
The additional fields that you have added to the form will also be there. In the image above, you can see, framed in red, the Other Hoodie Shops field that we created earlier.
Use it to improve your customer knowledge, launch targeted marketing campaigns, or offer personalized products for your different customer segments!
And what do we get out of it?
Having control over the different fields on your order page can really be very useful to offer a personalized shopping experience to your customers.
And among the various plugins that offer this, QuadLayers Checkout Manager for WooCommerce does a pretty good job of doing that, with its full suite of features. Plus, most of the useful features are available in the free version of the plugin.
So tell me? Do you also use WooCommerce Checkout Manager to customize your order pages? Or do you use another plugin? What best practices have you implemented on your WooCommerce order page? We want to know everything, share us your findings in the comments below! 😉

Receive the next posts for free and access exclusive resources. More than 20,000 people have done it, why not you?
Continue reading
Articles posted in WordPress PluginsOur review of B2BKing: A WooCommerce plugin built for B2B commerce
“Hi, I need 200 units of this product with fast shipping please”. As an online store owner, receiving this kind of message puts a smile on your face. Answering it, on the other hand, becomes a lot less fun… Basically,…
GTranslate on WordPress: our full review of this tool for creating a multilingual site
“Hello, how are you?” “What do you think of this computer mouse?” For you, everything is easy to understand in these two sentences. For someone living deep in the Shetland Islands or Yucatán, it’s probably a bit more complicated… If…
Air WP Sync: Test and review of this plugin for integrating Airtable into WordPress
Do you use Airtable and WordPress? Then some of your days probably look something like this. In the morning, you update your Airtable database as soon as something changes. In the afternoon, you copy and paste the same data into…