


His name is Richard Browning. He’s British. And he holds the world speed record in a jetpack.
The patrol clocked him at more than 136 km/h over the English Channel, near the town of Brighton (England)!


You must be wondering what this funny news is doing here — with good reason.
If I mention Jetpack for WordPress, do you catch the parallel?
Well, yes: our famous CMS also has its own jetpack.
Let me reassure you, it’s much less dangerous to use since it’s just a plugin you can install on your site.
Its creators define it as “the best all-in-one high performance toolkit for WordPress.”
In this article, I’ll examine it from A to Z. I’ll show you how to install this plugin step by step, following a detailed tutorial. Then I’ll show you its essential features, and explain why it’s sometimes controversial.
You’ll become an expert on the subject, believe me.
Overview
- What is Jetpack on WordPress?
- How to install Jetpack on WordPress
- How do I activate Jetpack modules?
- How to set up Jetpack on WordPress: A look at 10 free modules
- What are the free alternatives to Jetpack modules?
- What are the premium features of Jetpack?
- What is the user experience like?
- Final review of Jetpack


What is Jetpack on WordPress?

Jetpack is a freemium plugin that embeds about 50 modules in a single plugin. All of them can be activated and deactivated in one click and they aim to improve the management and the function of your site in three main ways: security, performance, and marketing.
Jetpack is developed and maintained by Automattic, the major contributor to WordPress.org.
With 4M+ active installations, Jetpack is one of the most famous plugins in the WordPress ecosystem, just like Yoast SEO, Contact Form 7, or WooCommerce.
Finally, you should know that the services provided by Jetpack are normally reserved for WordPress.com users. You will have to create an account on this platform to activate Jetpack on your WordPress.org installation.
Now I’ll show you how to do that.
For more info on the differences between WordPress.com and WordPress.org, I recommend you read this article by Alex.
How to install Jetpack on WordPress
To install Jetpack on WordPress, the easiest way is to go through your administration interface (back-office).
Once on your Dashboard, click on Plugins > Add.
Jetpack should be at the top of your page. If not, search for it via the search bar.
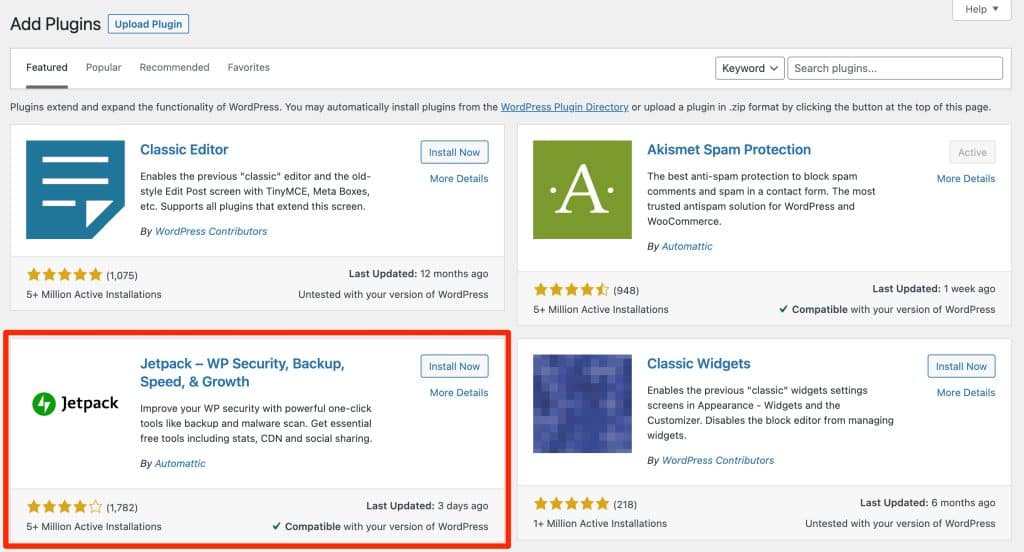
Click on “Install Now” and then “Activate.”
You should be looking at this page:

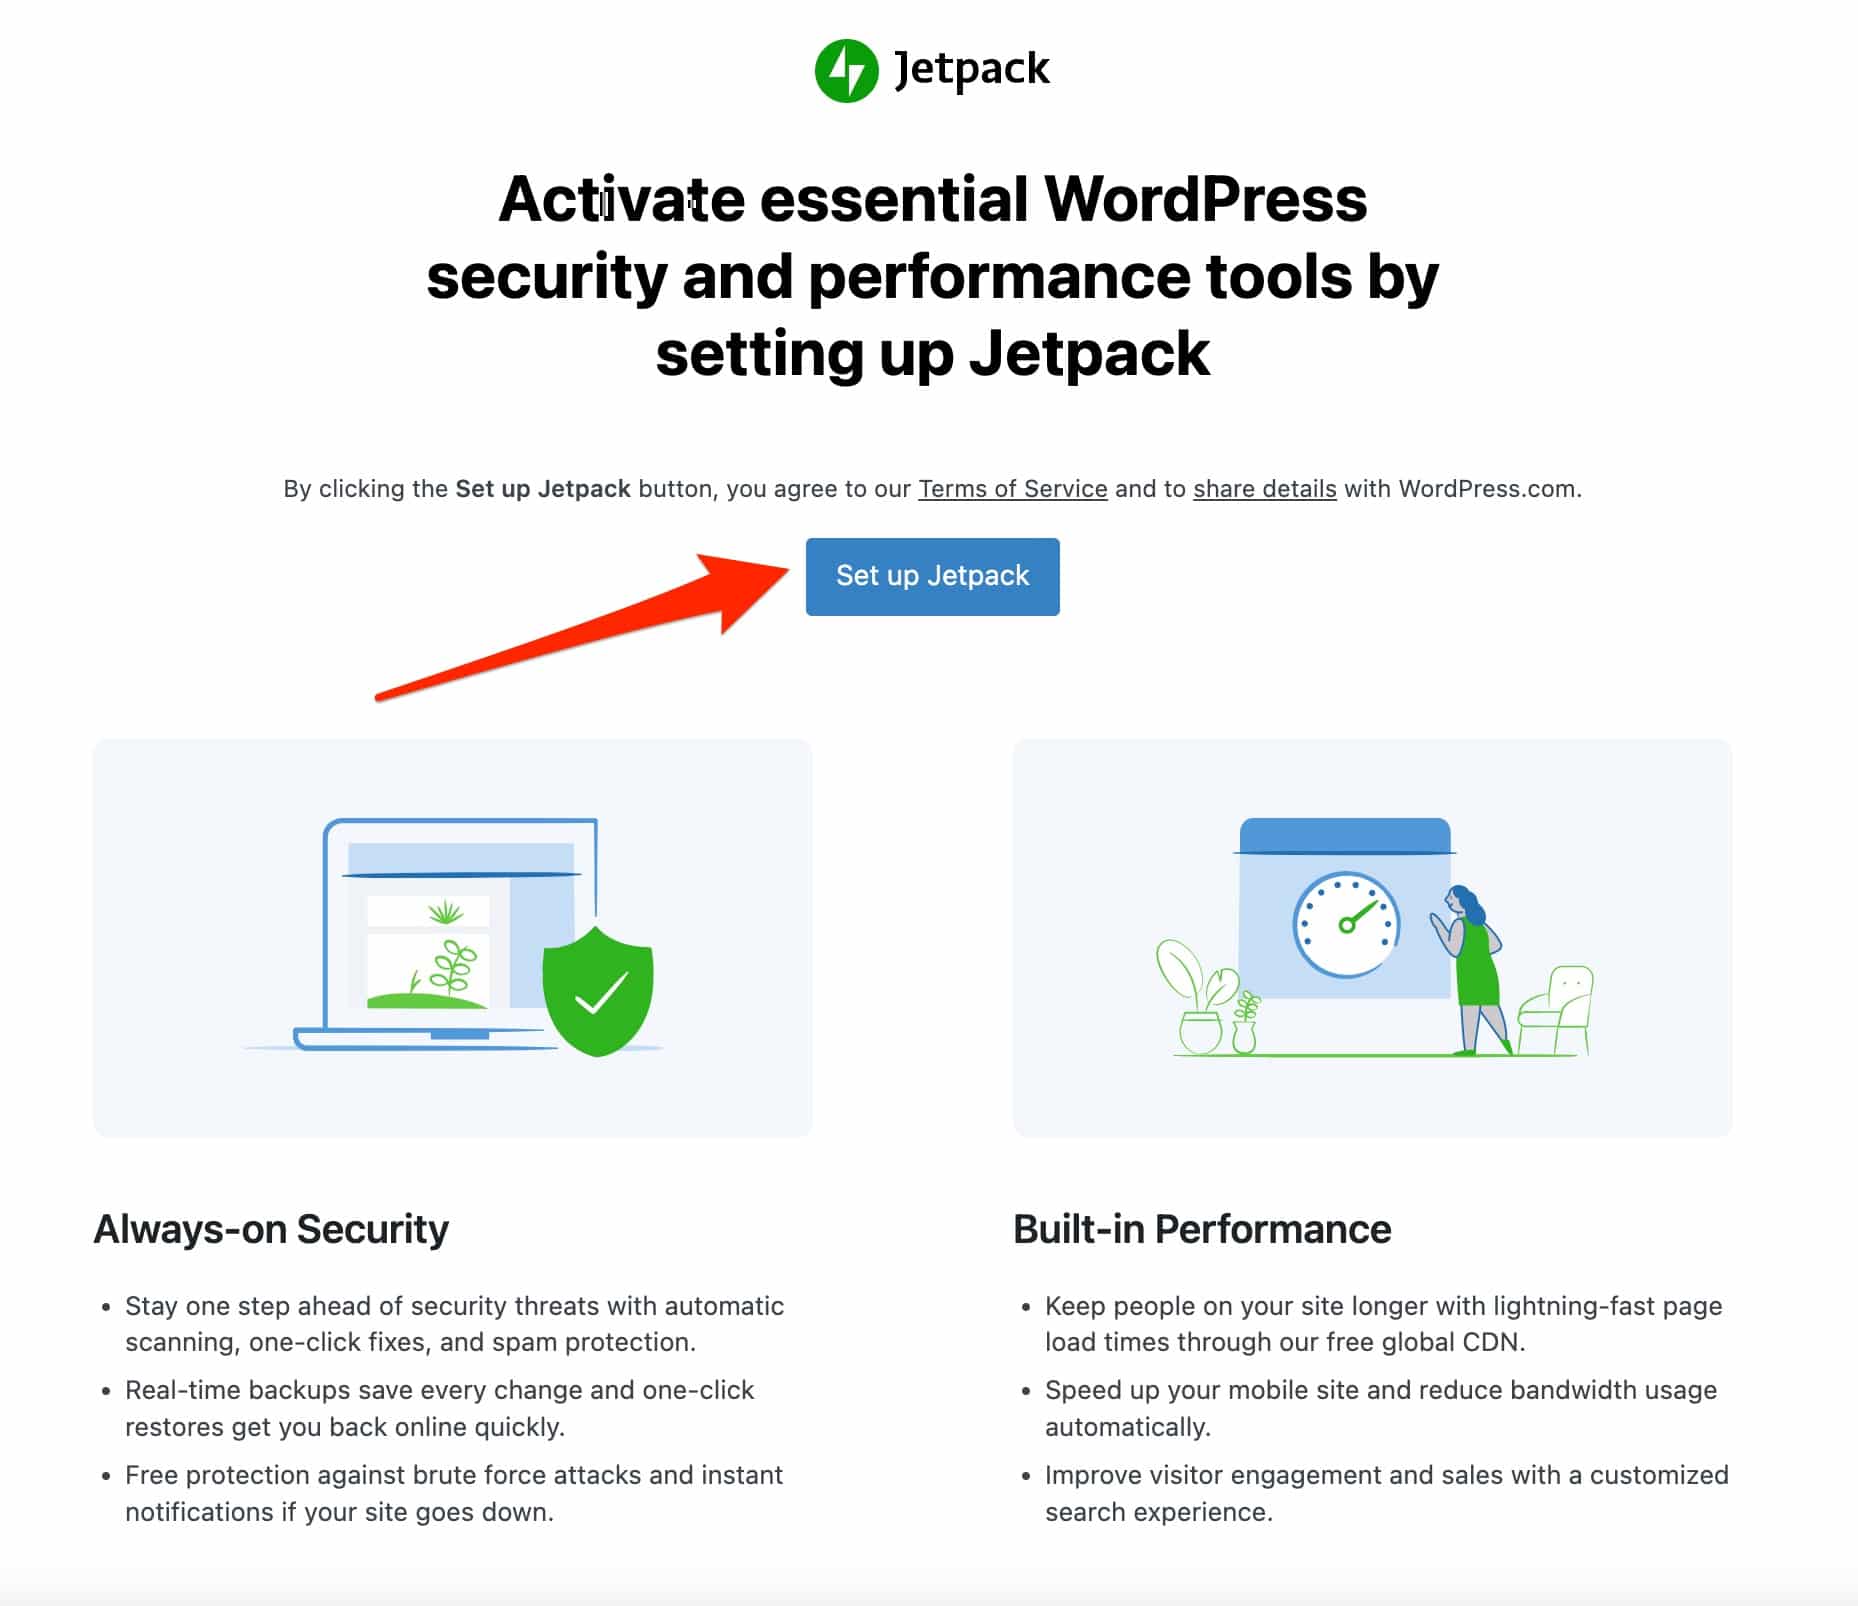
Click on the blue “Set up Jetpack” button. You will then see a new menu, titled “Jetpack,” in your left sidebar.
As mentioned at the beginning of this article, Jetpack and its services are provided and hosted by WordPress.com. A WordPress.com account is therefore necessary to use Jetpack.
You’ll also see that you won’t be able to activate many modules if you’re not logged into a WordPress.com account.
If, like me, you already have a WordPress.com account, simply click on the “Connect your WordPress.com account” link in the “Account connection” box in the “Dashboard” menu:
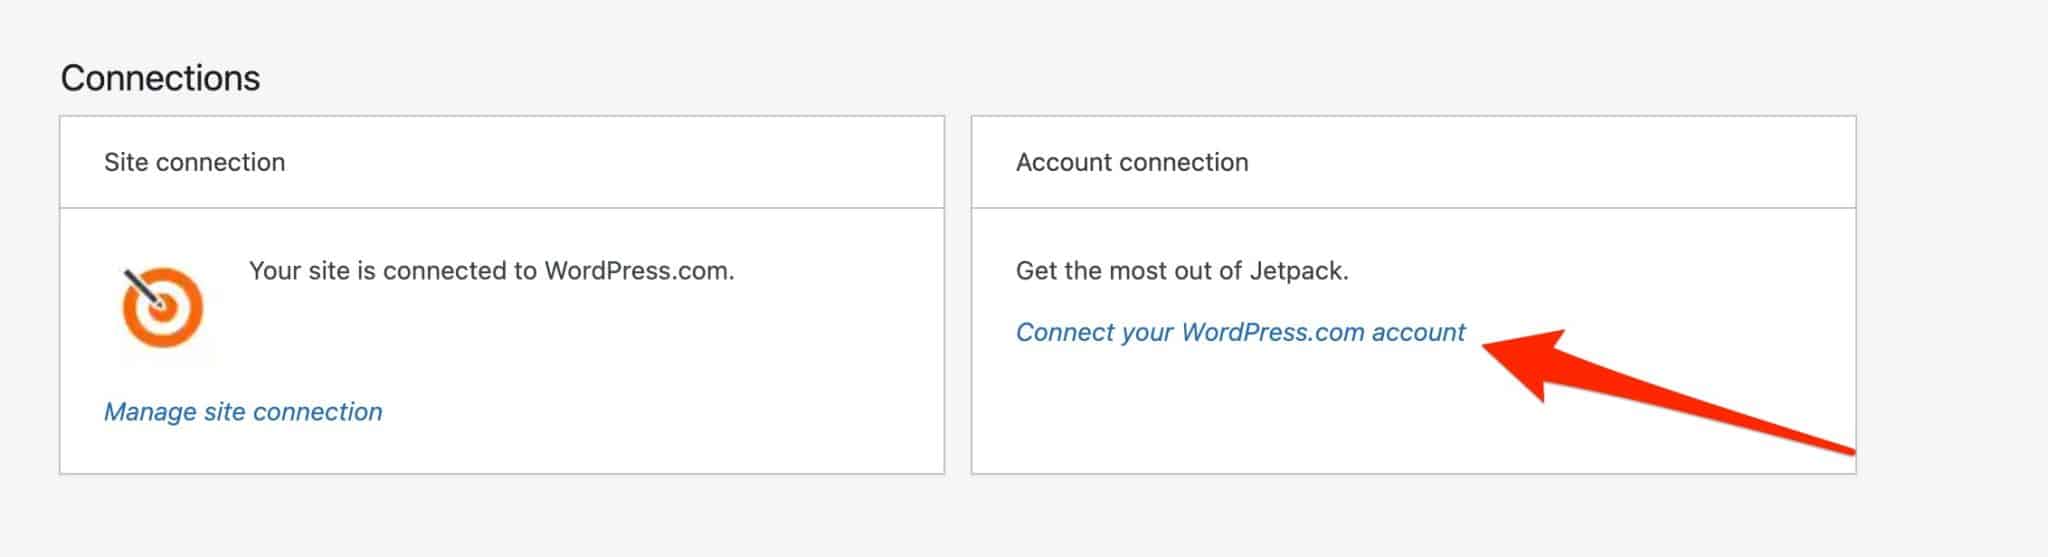
If you don’t have a WordPress.com account yet, you can create one through the “Site connection” box next to it.
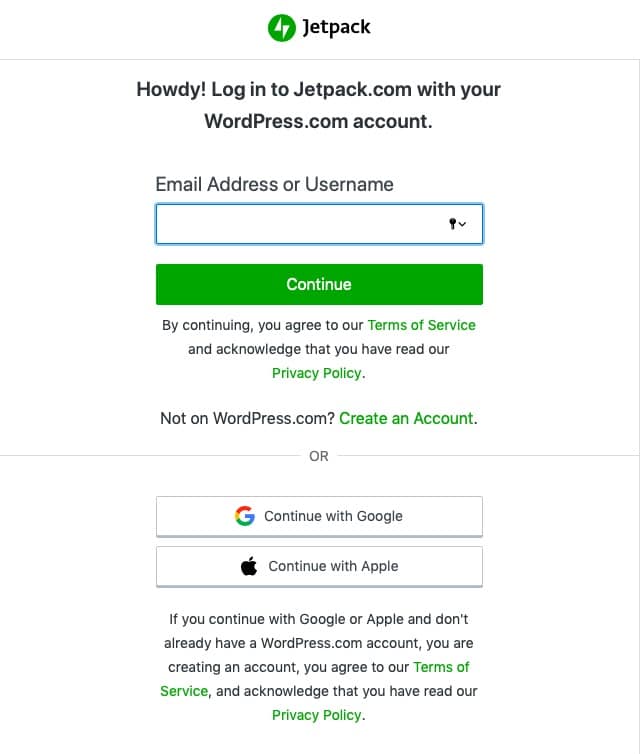
Jetpack will then prompt you to connect to your WordPress.com account. To make it easier and faster, I log in with my Google account by clicking on “Continue with Google”:

Jetpack will connect your profile to your site. It will then offer you the option to sign up for one of its paid plans.
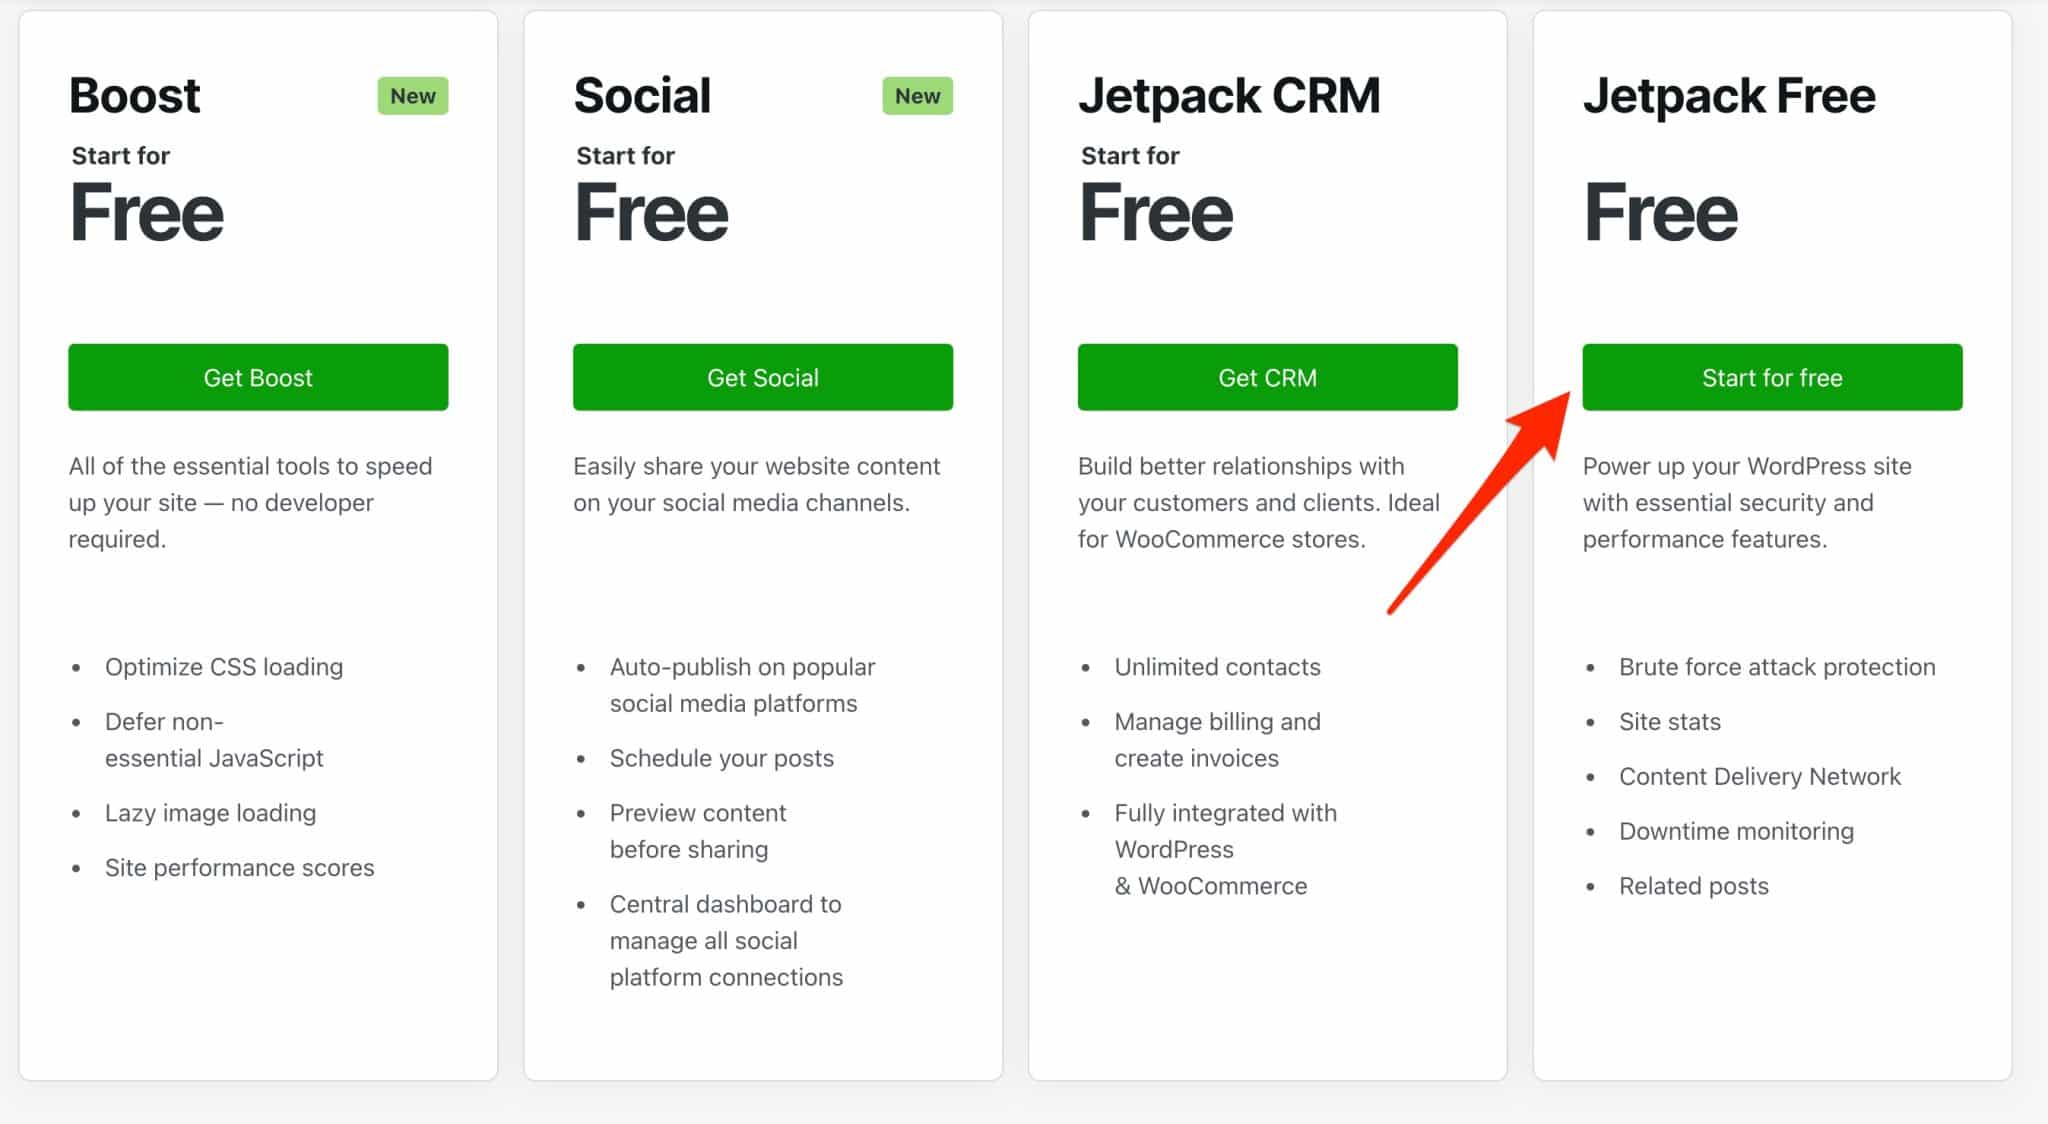
I recommend that you start with the free version. You can always upgrade to a premium version later on.
To use the free version, scroll down the page and click on the green “Start for free” button in the “Jetpack Free” column.
Jetpack is now ready to be used.
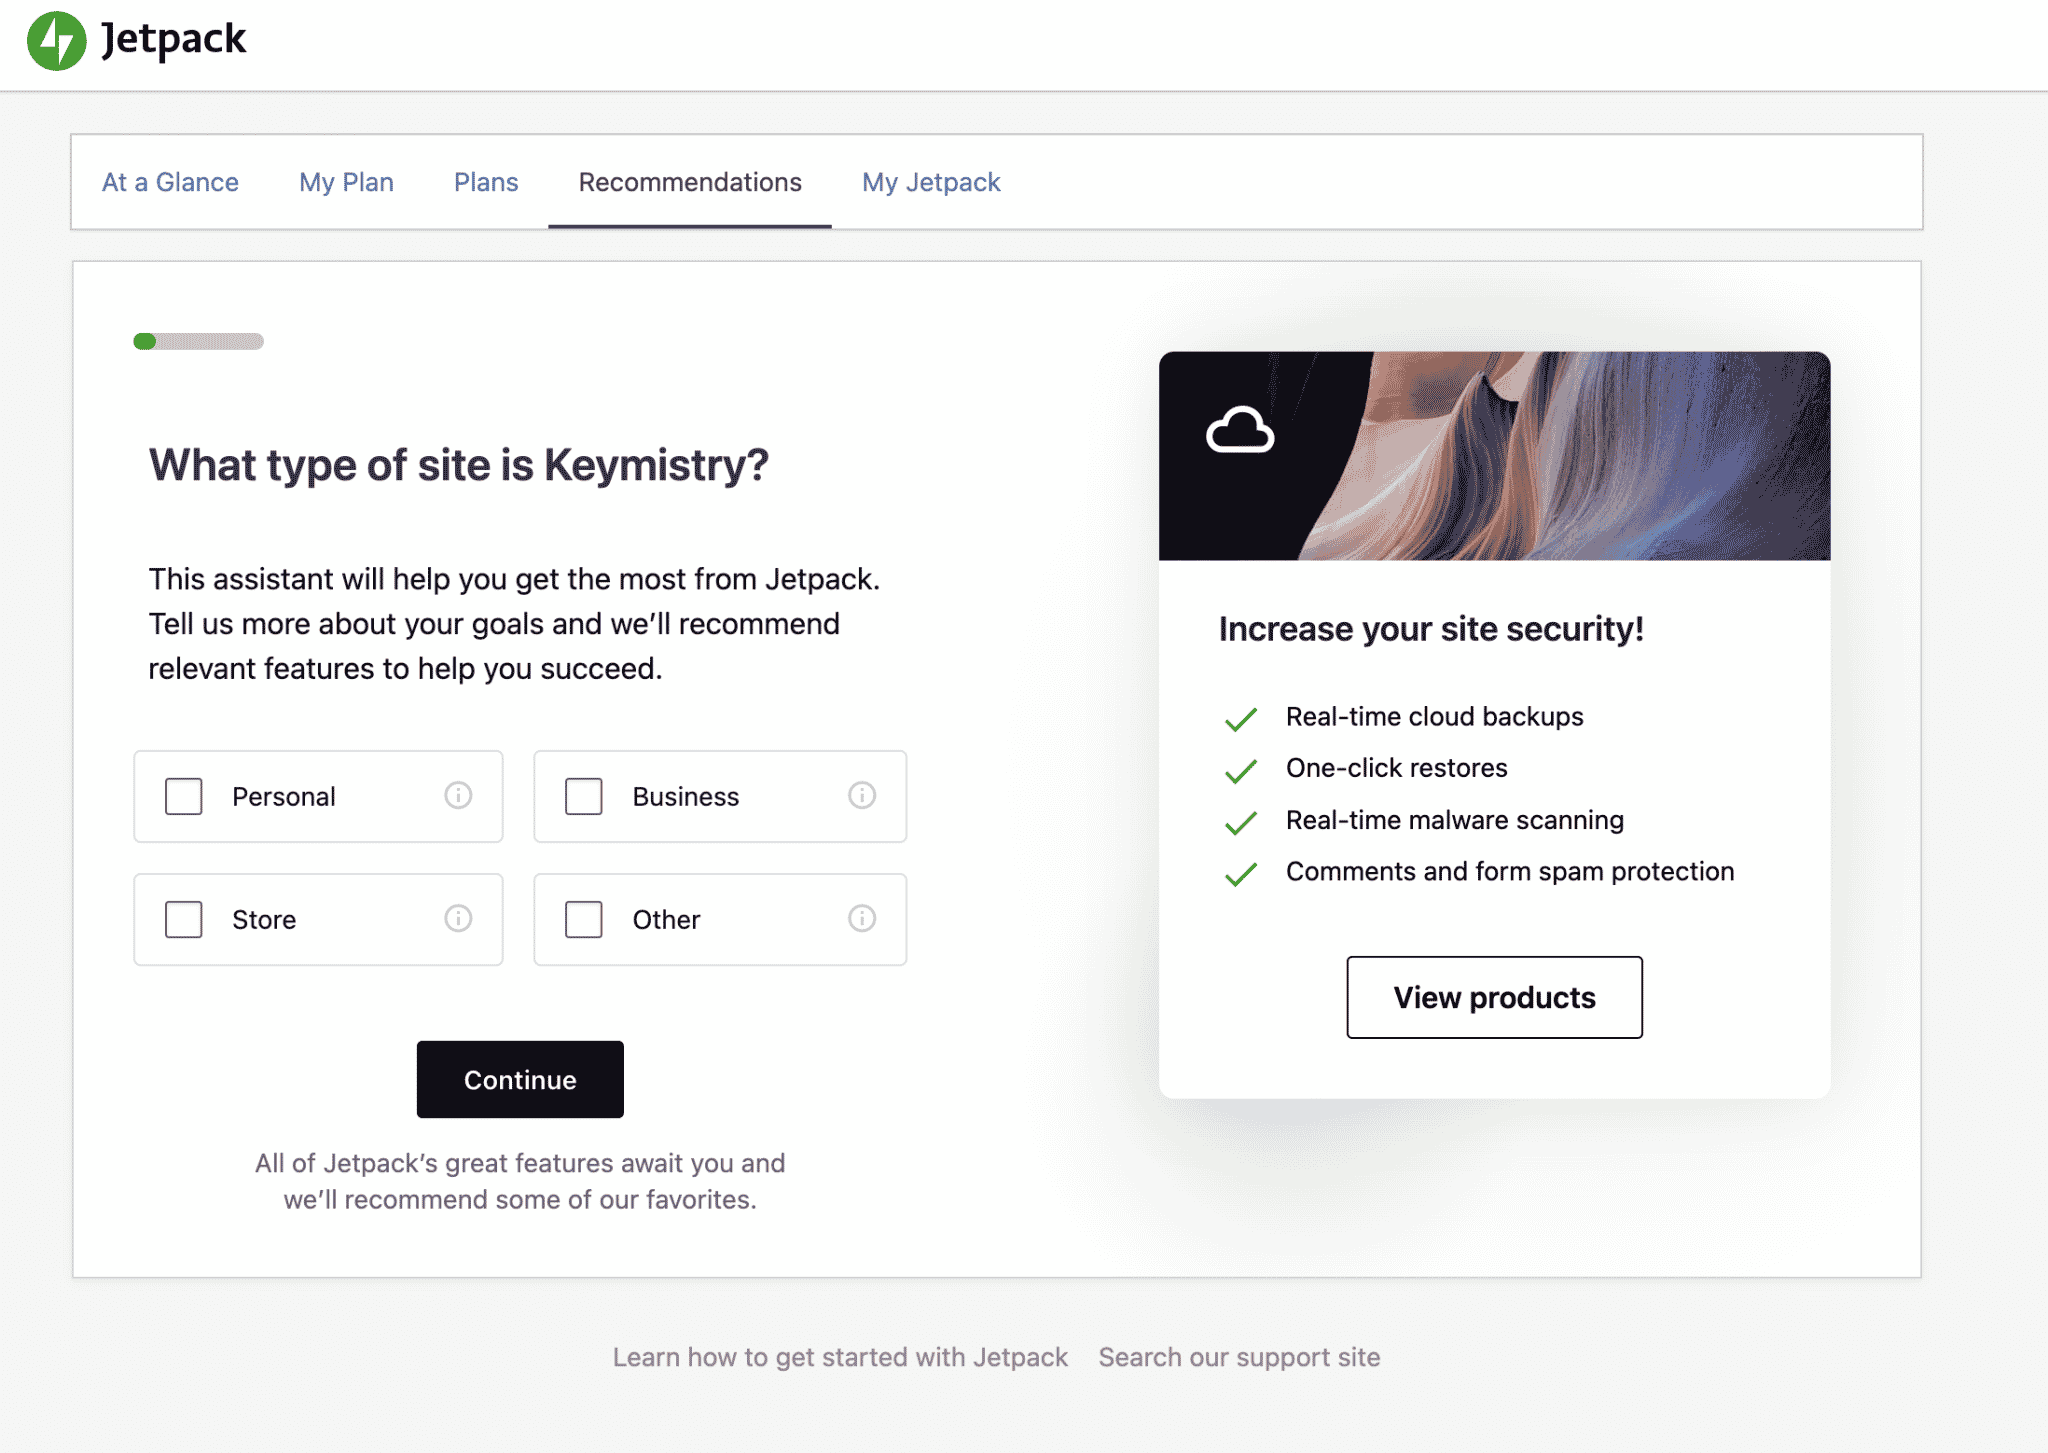
On your WordPress dashboard, the plugin will ask you to indicate your goals for your site, in order to recommend “relevant features to help you succeed.”
It’s up to you to decide what you want to do, but keep in mind that you can change these settings afterwards.
All of your options are managed and configured through the Jetpack interface, directly from your WordPress administration (you can also do this by going through your WordPress.com account, but it’s much less convenient):

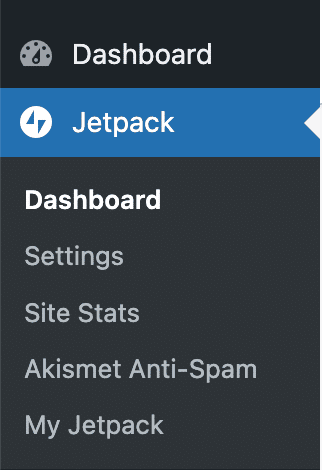
You’ll find that you have access to 5 sections:
- Dashboard: You can see at a glance the three main sections of Jetpack (Stats, Security, and Performance and Growth). For security and backup, in particular, you’ll need to upgrade to a premium plan if you want to take advantage of all the options offered.
- Settings: This is where you enable or disable the features offered by Jetpack.
- Site Stats: This section lists the number of visits to your site (you can filter by days/weeks/months), the number of clicks, and the search terms most used by your visitors. It’s a kind of small analytics tool.
- Akismet Anti-Spam: Gives you access to the statistics of undesirable comments on your site, provided you have activated the Akismet plugin beforehand.
- My Jetpack: Allows you to activate additional services/plugins offered by Jetpack, including both free and paid.
Without further ado, let’s discover how to activate your first modules.
How do I activate Jetpack modules?
Technically, there are two ways to activate Jetpack modules.
Option 1: Go to the “Settings” menu
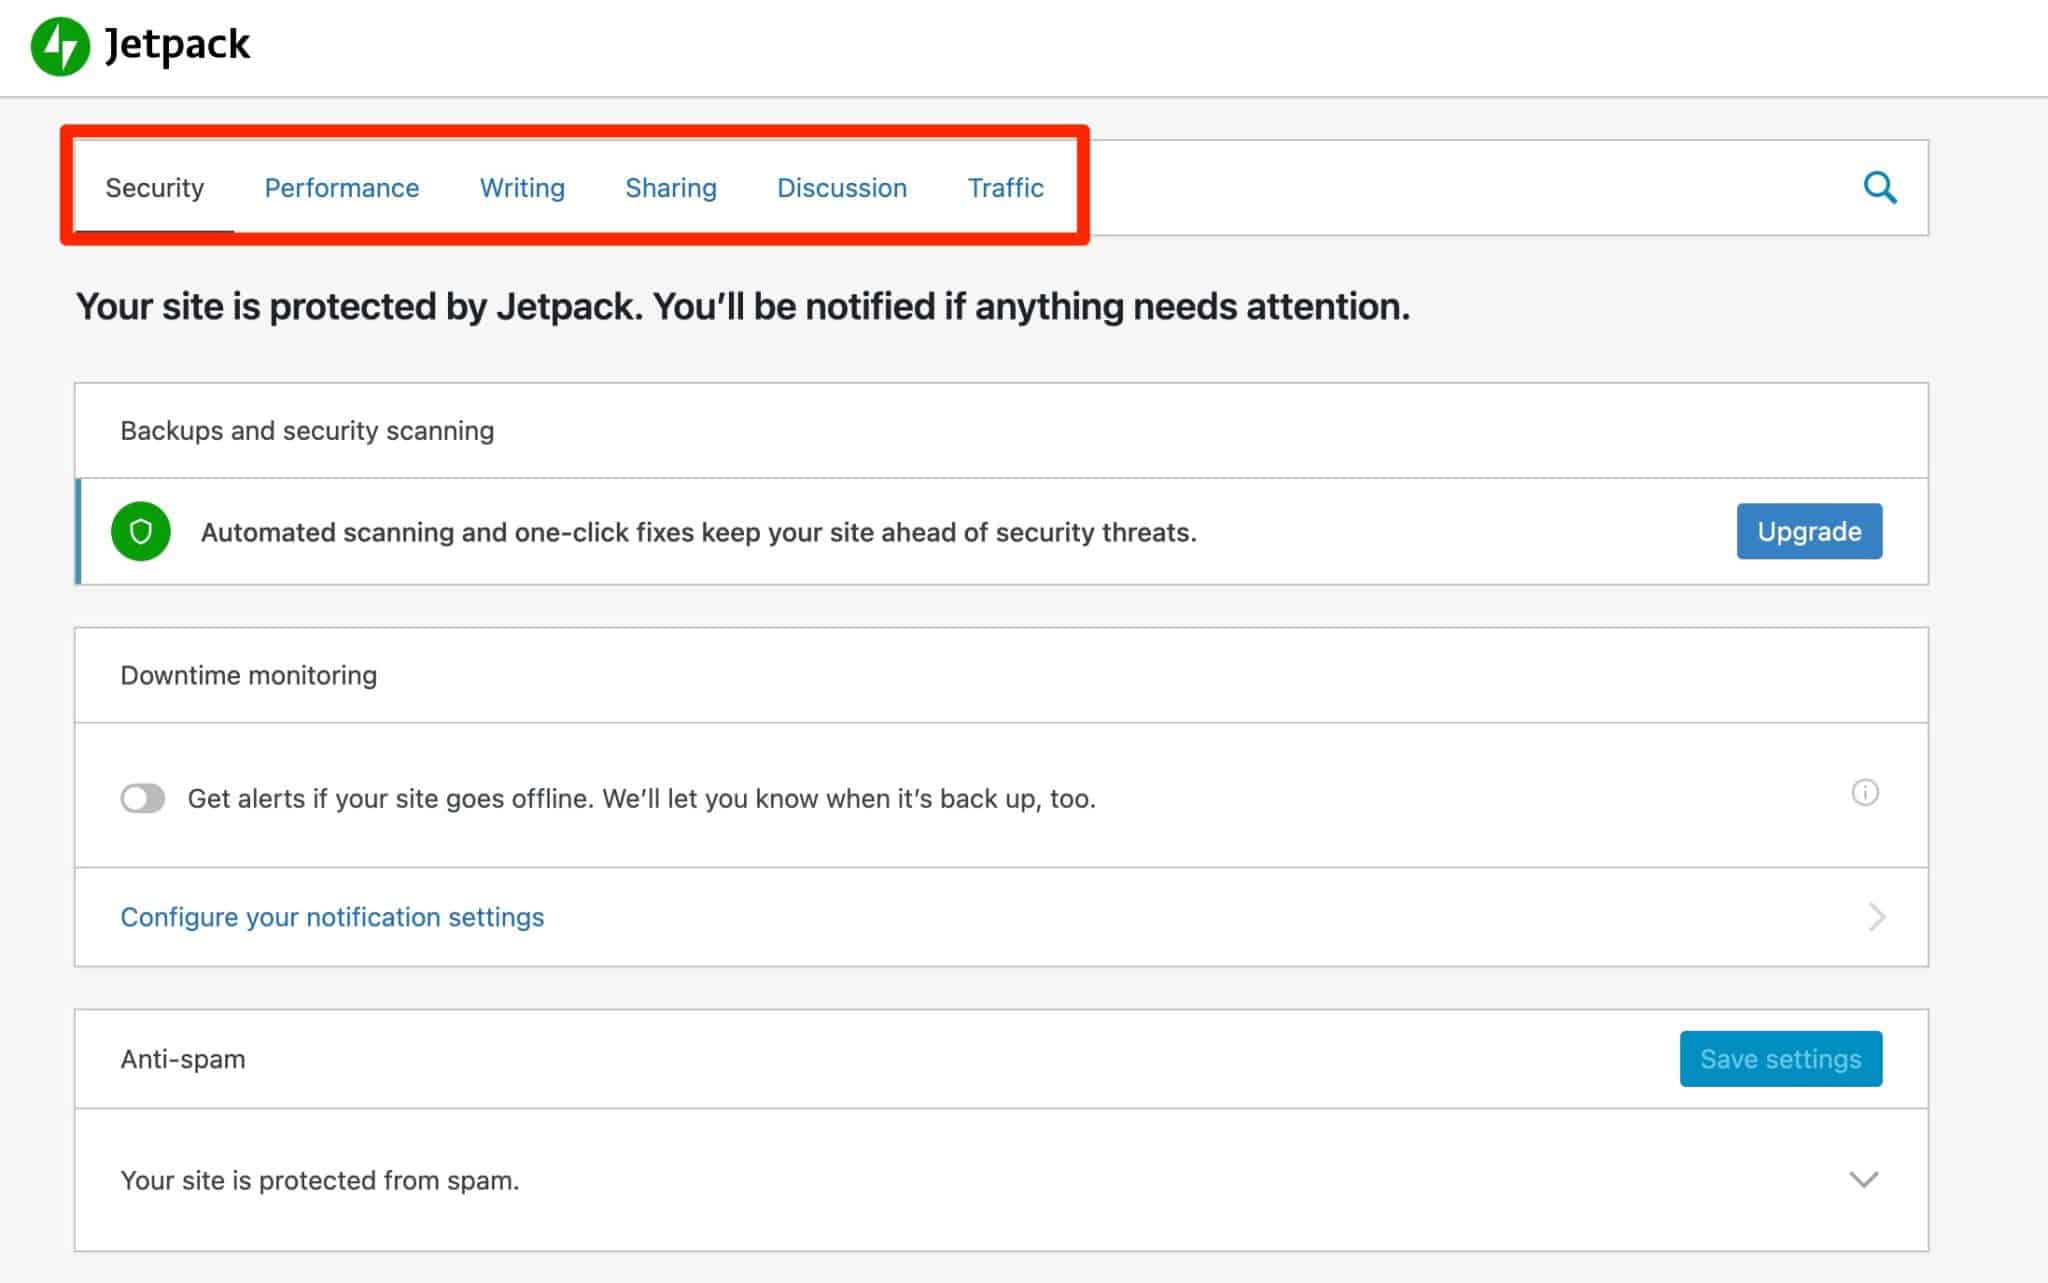
The quickest way to activate the modules of your choice is through the Jetpack > Settings menu.
You will find that the modules are categorized within 6 tabs:
- Security
- Performance
- Writing
- Sharing
- Discussion
- Traffic
Some modules will be activated by default, such as the one that protects you against brute force attacks (when malicious bots repeatedly try to connect to your site).
For the rest of the troops, you can activate the module of your choice with a small click on the insert that interests you:
Additional options are sometimes offered for certain modules; it’s up to you to decide if you want to activate them or not.
Option 2: Go through the “Modules” menu
There is also another option, less intuitive and visual in my opinion, to activate Jetpack modules.
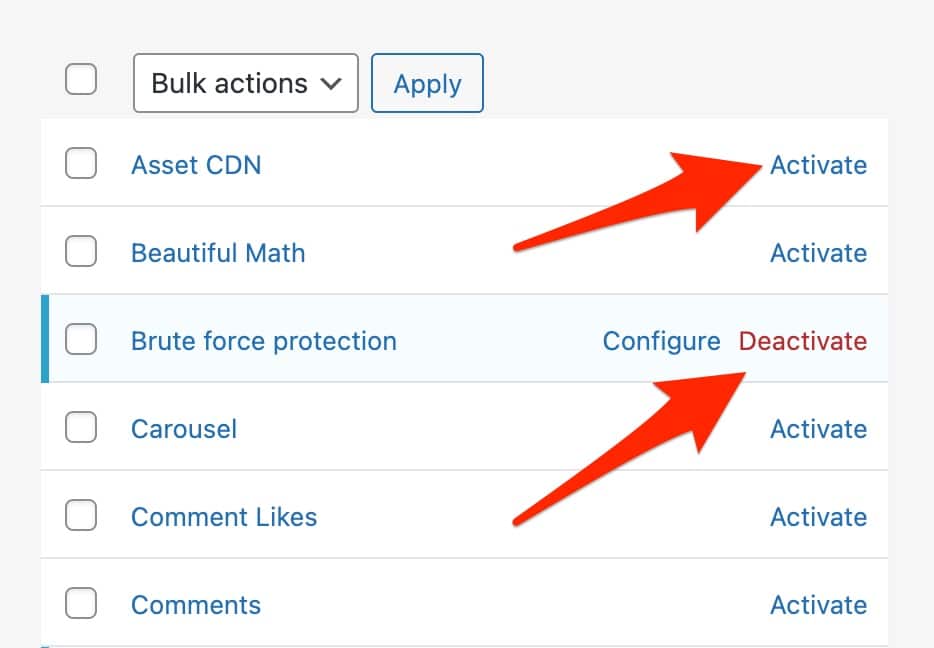
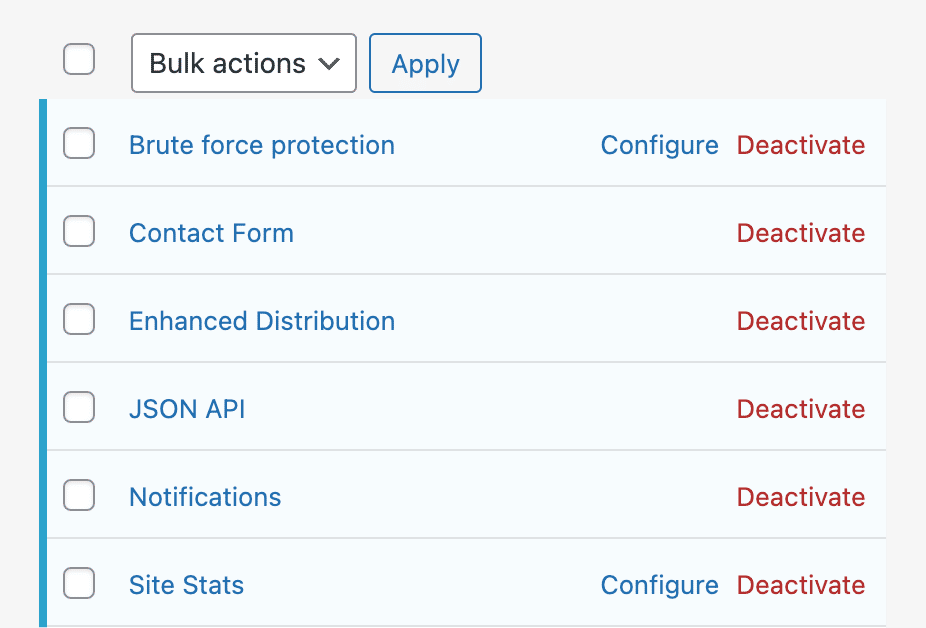
The plugin has a well-hidden “Modules” menu, located at the bottom of each of its settings pages. You can find it for example by scrolling to the bottom of your dashboard:

Inside, you will find a list of all your modules. You can filter them according to several criteria:
- Status: all/active/inactive. By default, 6 modules are automatically activated.
- Alphabetical order or most recent.
- Category.
Simply click on the “Activate” or “Deactivate” link associated with each module to implement the action of your choice.

Note that almost all of the modules presented here can be found in the Jetpack “Settings” menu.
In fact, if you activate a module from the “Modules” menu presented above, you will automatically be redirected to the “Settings” menu of Jetpack.
Now that you know a little bit more about how this Swiss army knife plugin works, you might be wondering which features to activate.
That’s right — after all, there are quite a few of them and not all of them may be useful. I propose to highlight ten features that I think are essential.
How to set up Jetpack on WordPress: A look at 10 free modules
Downtime monitoring
I think you’ll agree with me: as a webmaster, there’s nothing worse than finding one of your sites down.
And, sometimes, you don’t realize it right away. Disaster in the making.
Through its “Downtime Monitoring” feature, Jetpack can send you an email whenever your WordPress site is offline (and also when it becomes accessible again).
It won’t solve the problem, but it will let you know as soon as possible, which is a big help. To enable this option, go to Settings > Security > Downtime Monitoring.

Protection against brute force attacks
You may not know it, but your WordPress is subject to a lot of “brute force” attacks on a daily basis.
Basically, malicious bots try to log into your admin interface, trying usernames and passwords to access your site.
Of course, to protect yourself, use strong passwords and a login that’s not too obvious (don’t say “admin,” or I’ll skin you alive).
But I also recommend activating the dedicated Jetpack module, by going to Security > Brute force protection.

Content Delivery Network
Jetpack offers a CDN (Content Delivery Network) service for your images. To put it simply, this means that the plugin will host your images on its servers, not on yours, in order to improve the loading time of your pages.
Yes, bulky images can be a real drag on your site, as this article shows.
A CDN, Content Delivery Network, is “a geographically distributed network of proxy servers and their data centers,” created “to provide high availability and performance… to users,” according to Wikipedia.
If you have a site with an international scope or use a shared hosting service, this option of Jetpack could be interesting.
To activate it, go to Settings > Performance > Performance and Speed.
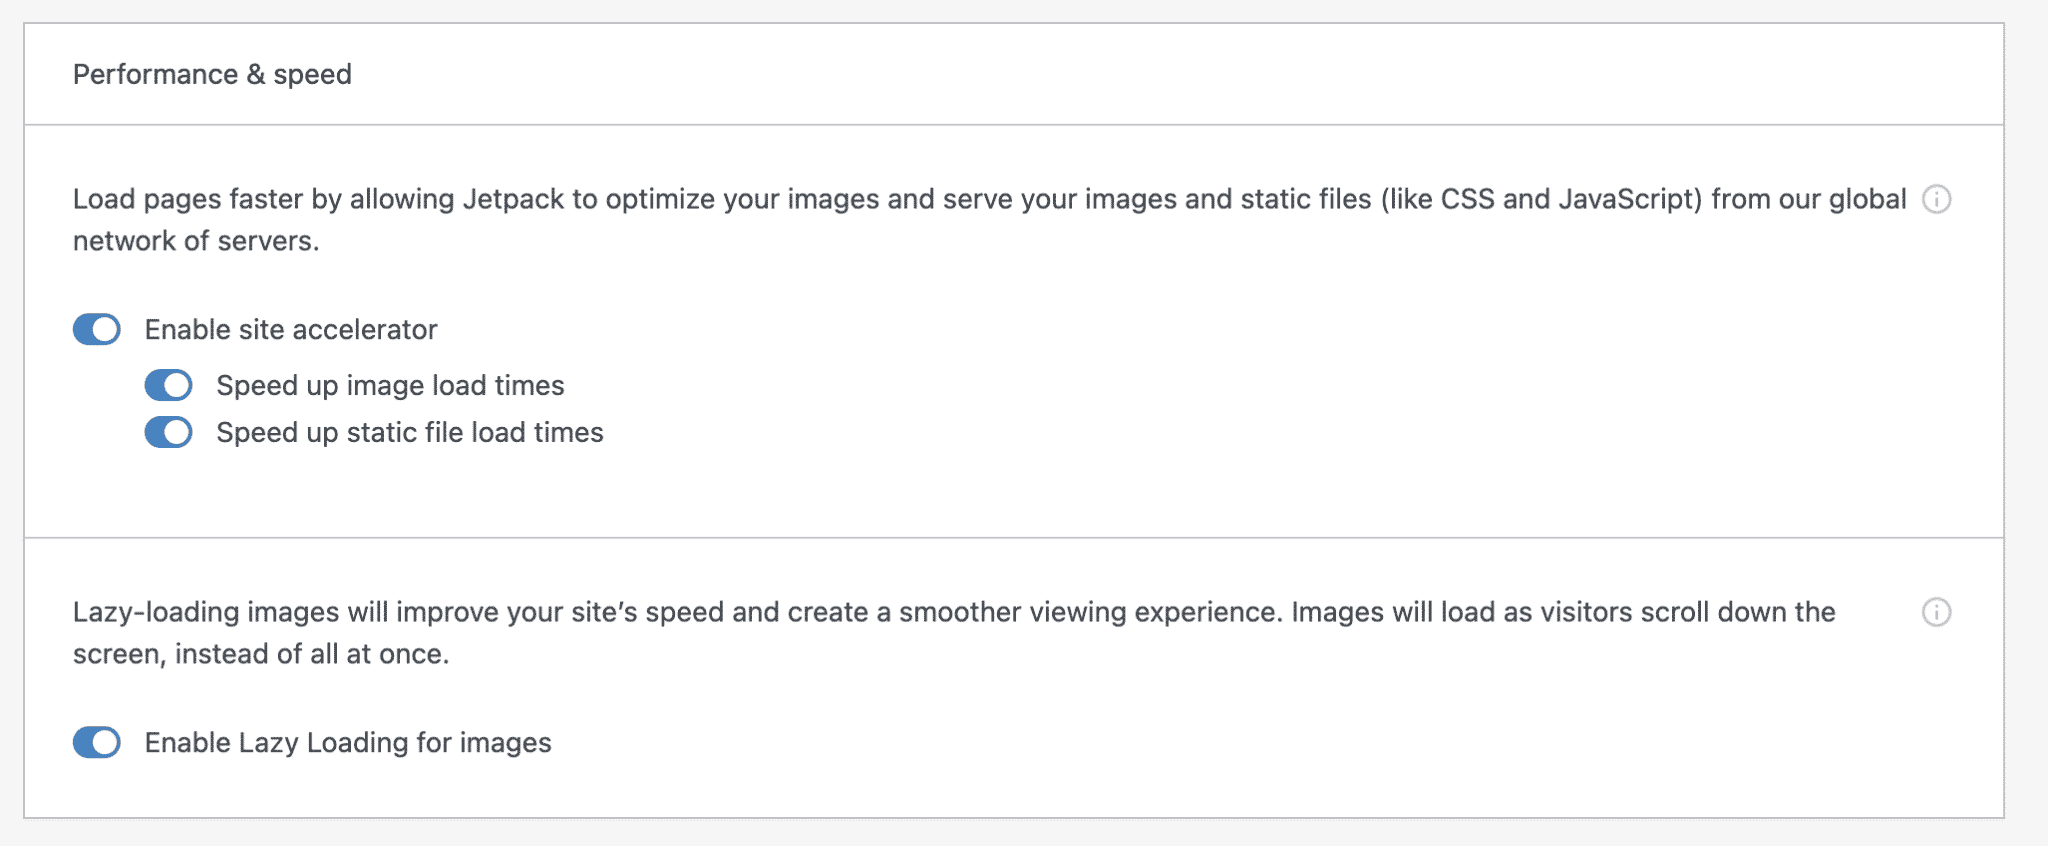
Note another interesting feature within this module: the option to enable postponed loading of your images (lazy-loading). This can improve the loading time of your pages, because your images will only load when your visitor scrolls through the page.


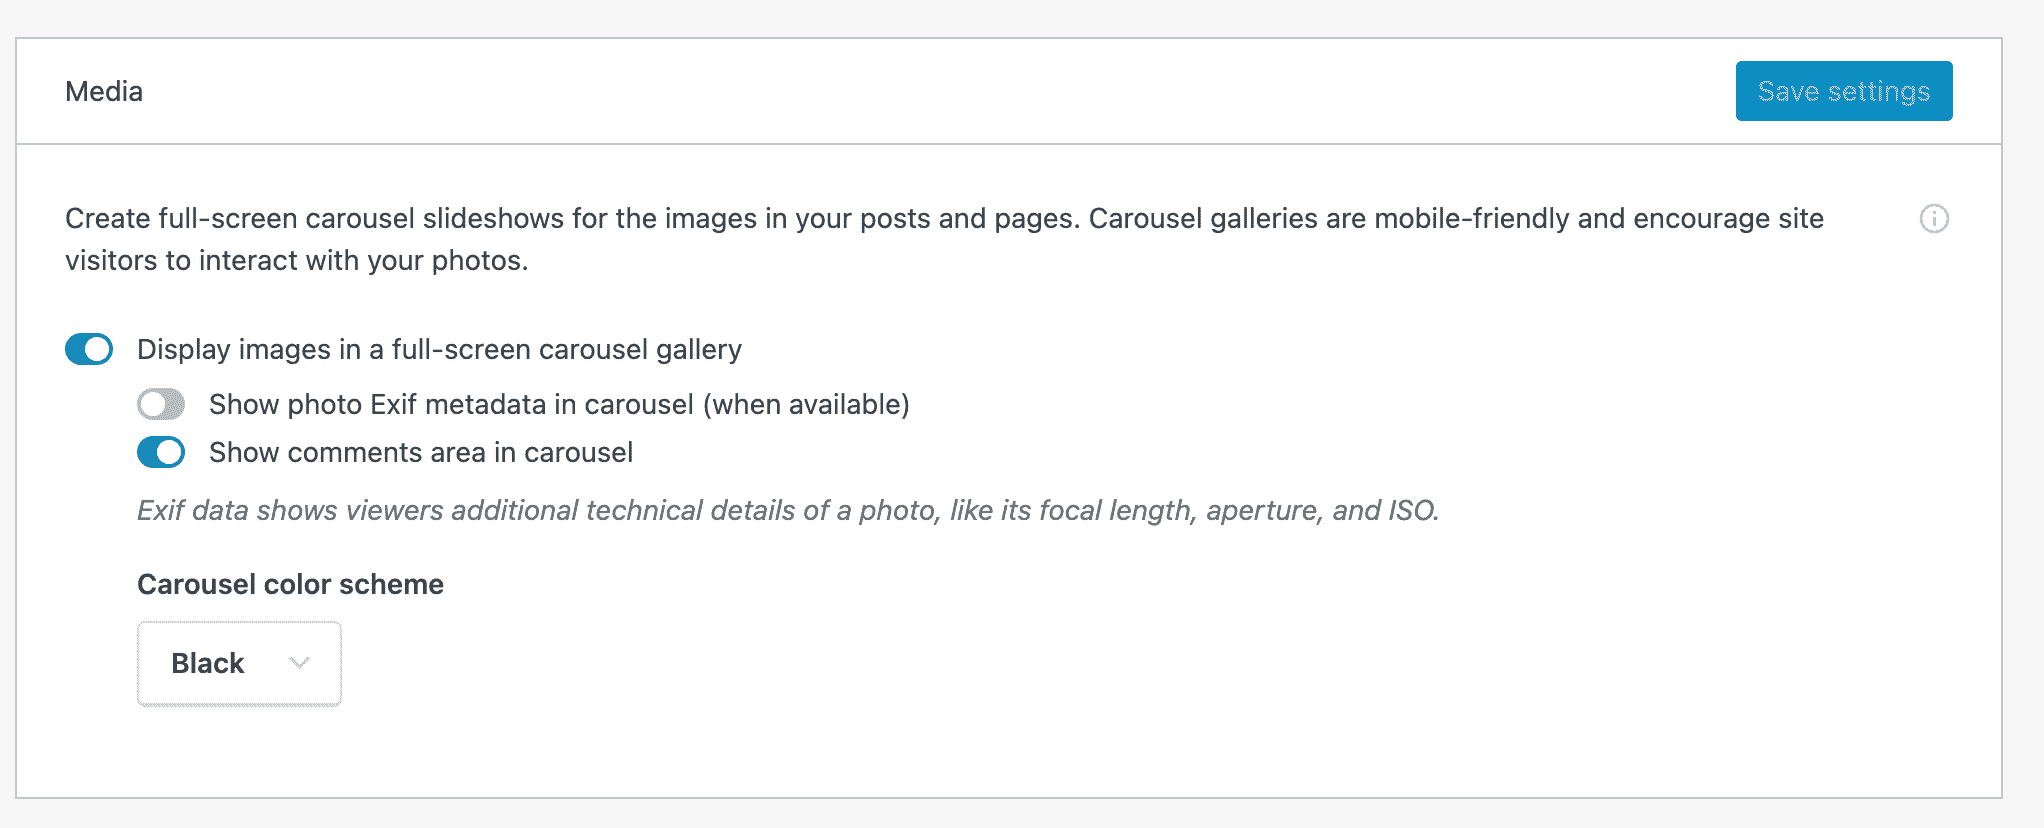
Image carousel
If you’re a photographer or just like to share your photos with your readers, you might like this feature.
Once activated, it will turn the photo galleries located in your articles and pages into a full-screen carousel.


To enable this feature, go to Settings > Writing > Media.
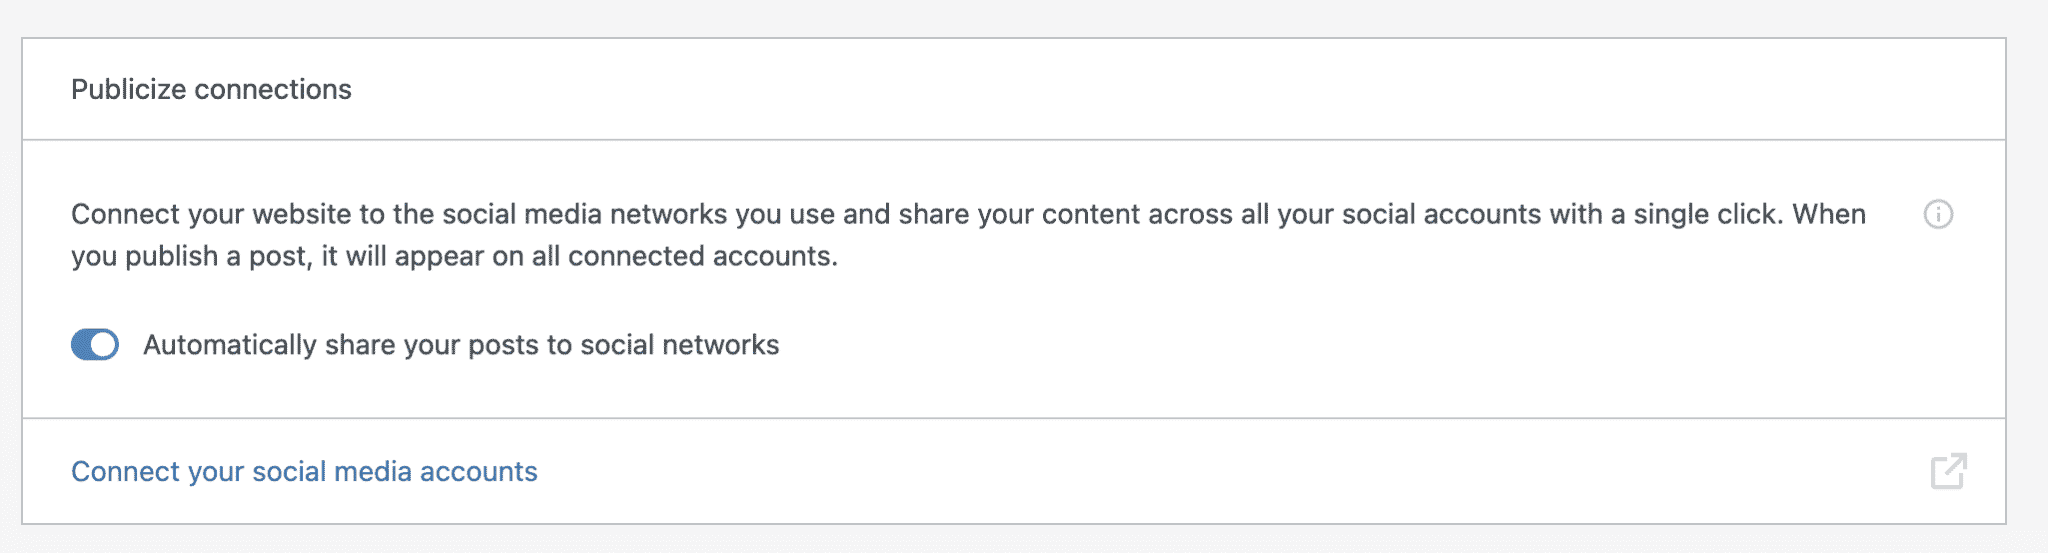
Automatically share your articles on social networks
The title is self-explanatory. If you’re not using another method to share your articles, check out this handy option (you’ll also find it under the name Publicize).
Once activated, you will be prompted to connect your accounts by being redirected to WordPress.com.
There aren’t a ton of social networks to choose from, but you will have access to:
- Tumblr
Connect the networks you’re interested in, and you will then find them in the “Publish” box as soon as you write a new article.
To conclude this sharing feature, note that it is activated in Settings > Sharing > Publicize connections.
Sharing buttons
In the same vein, I suggest you take a look at the Sharing Buttons option.
As the name suggests, it will add buttons that allow your visitors to share your content on social networks.
As before, you’ll need to connect your social network accounts to WordPress.com.
Here is an overview of the different buttons available:
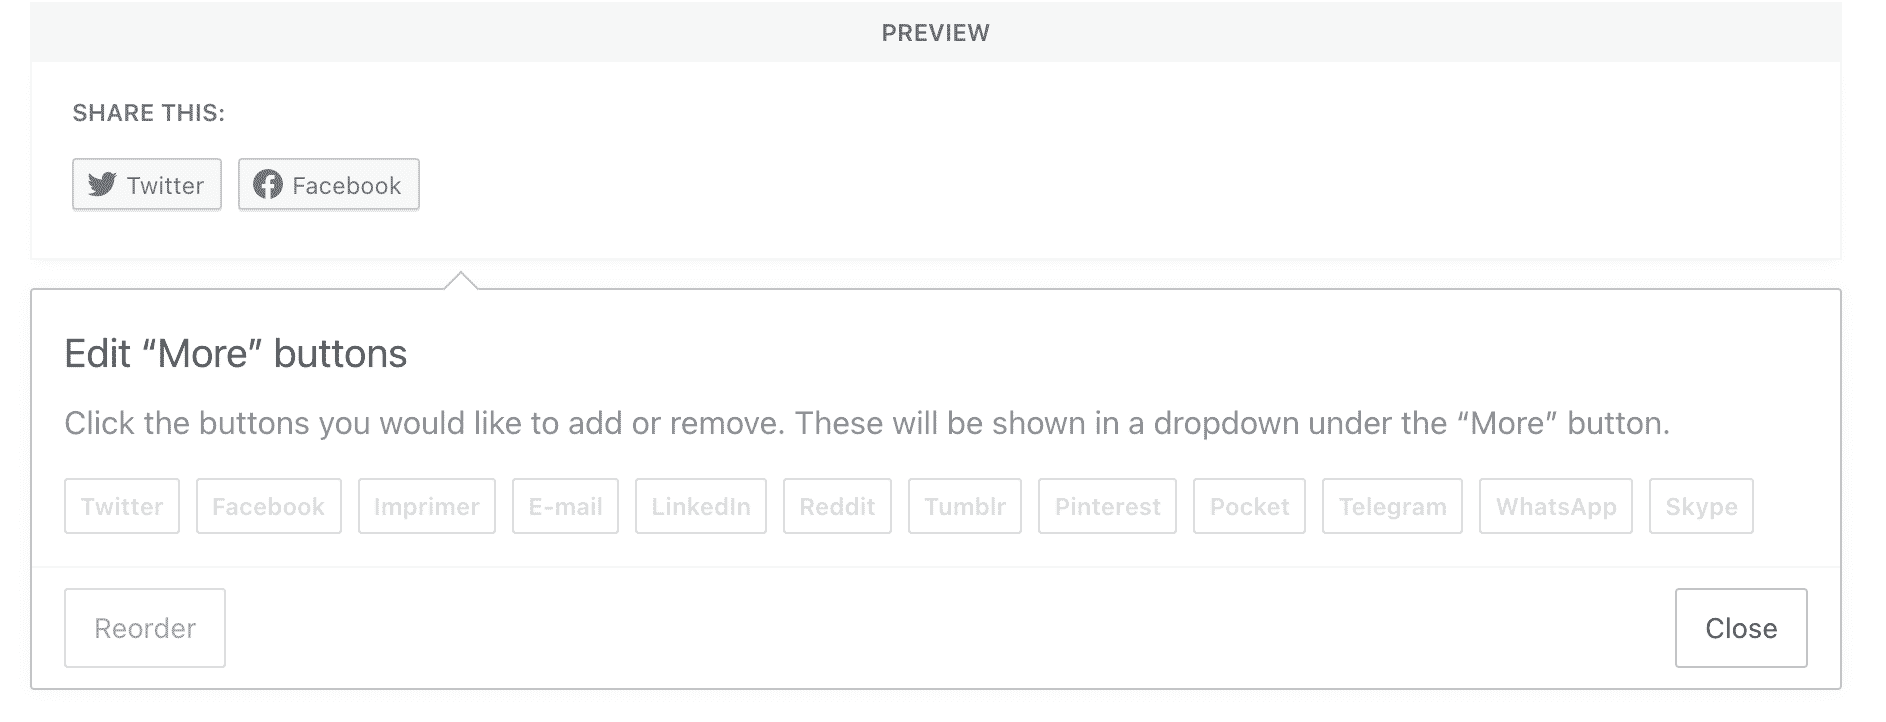
Note especially that it is possible to:
- Choose the style of your buttons (display the name of the social network only, the logo only, or both).
- Select the type of content where you want to display them (pages, articles, etc.).
However, you don’t have control over the location of your buttons. By default, they will be displayed at the bottom of your articles.
To activate this sharing feature, go to Settings > Sharing > Sharing buttons.
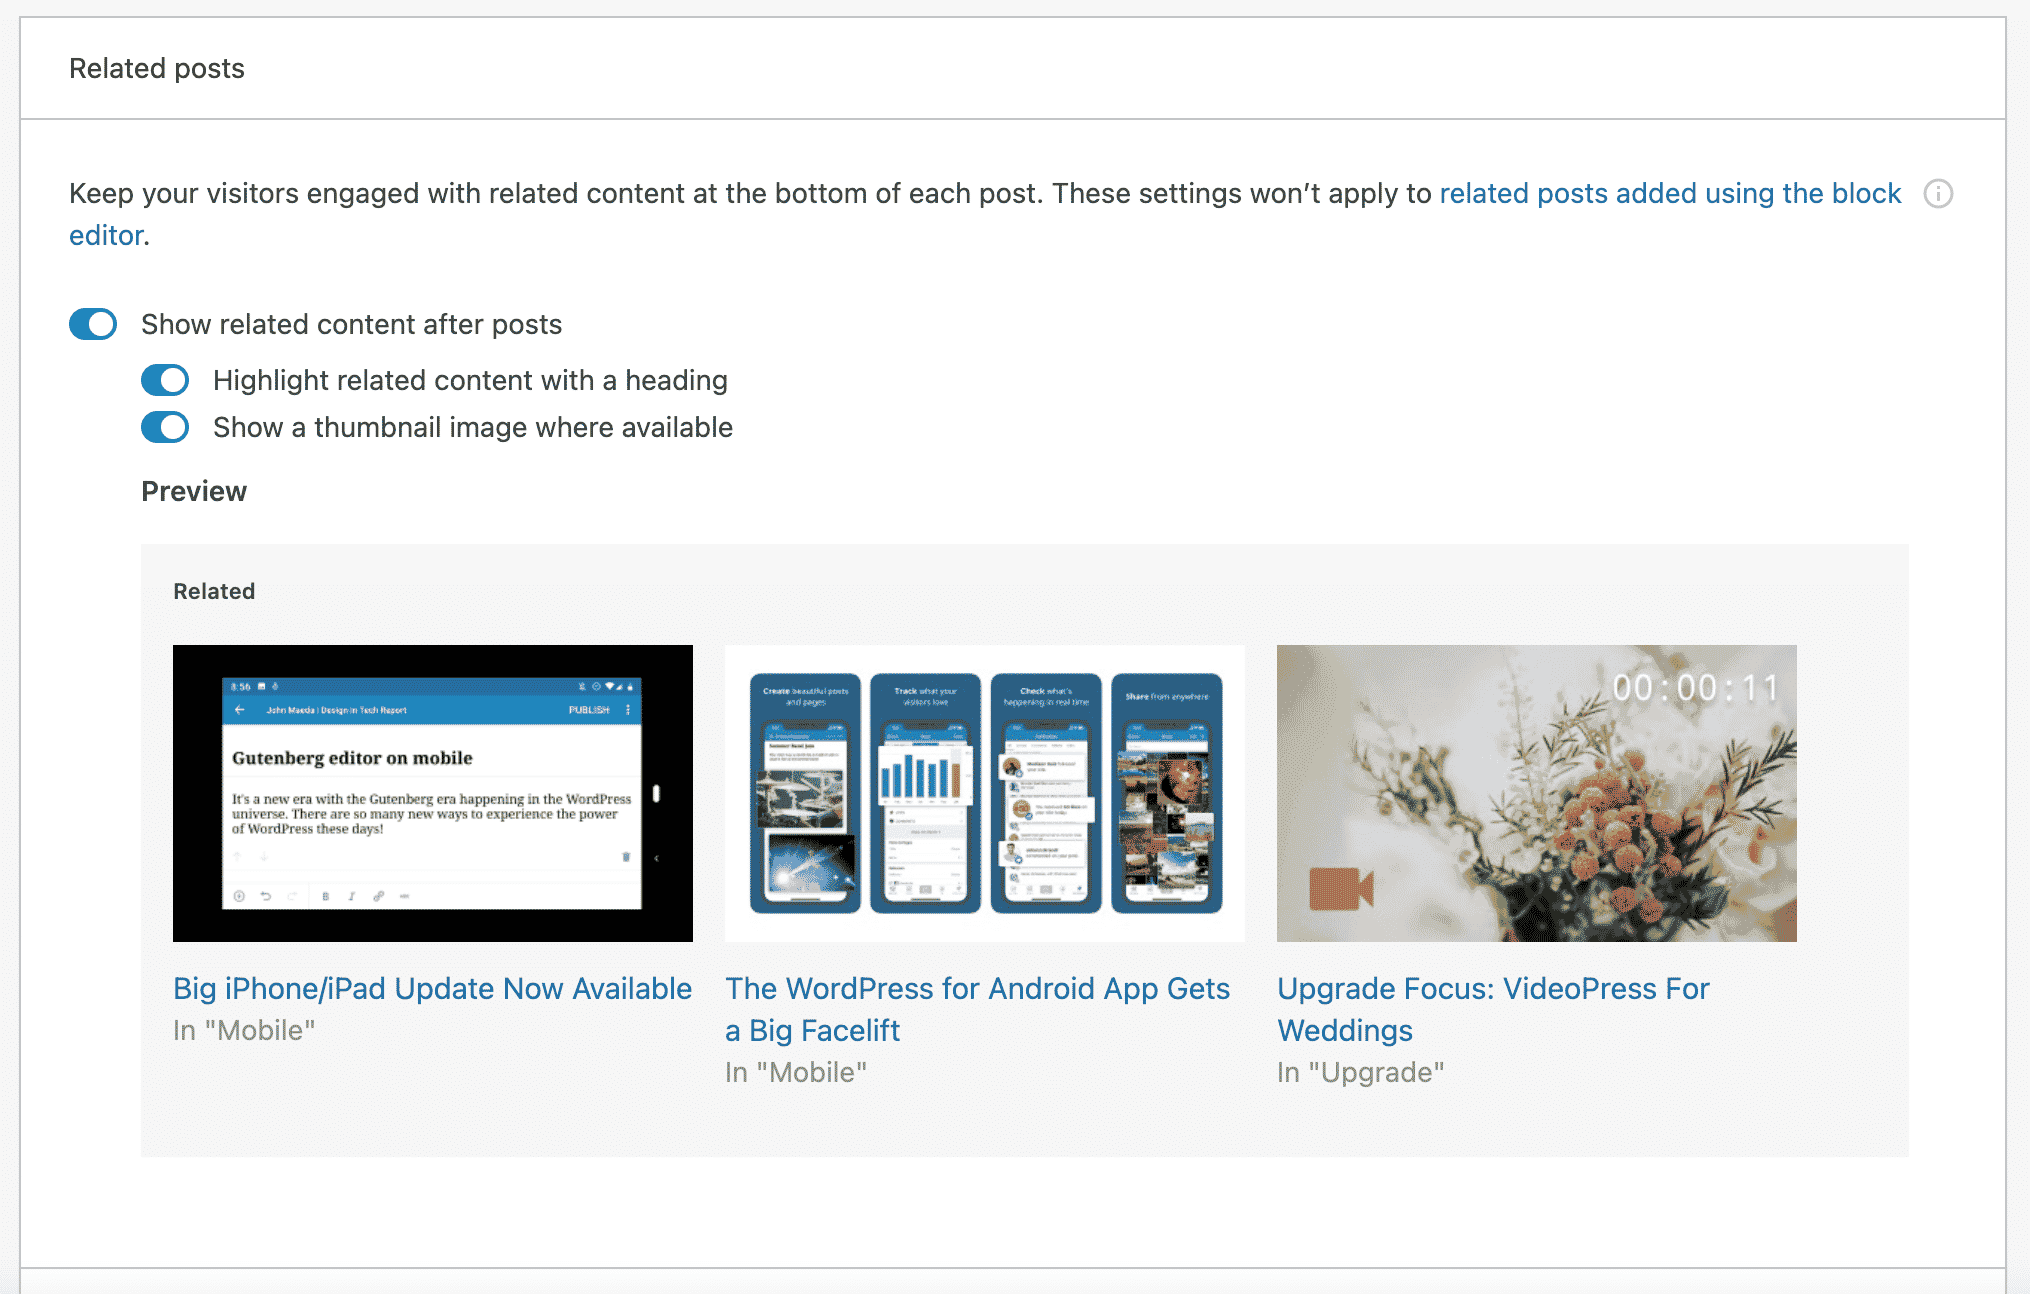
Suggesting related posts
If you want to keep your visitors on your site, it is necessary to limit the bounce rate (rate of visitors who surfed on one page of your site before leaving it). If you offer them useful content that responds to their needs, you’re on the right track.
But how about a little help to keep them with you? For that, you can use the “Related posts” system of today’s plugin.
Thanks to this feature, the latest three publications that are most pertinent will be displayed at the bottom of your articles.
Why is this interesting? It allows you to reinforce the internal linkage of your site, and boosts your pages’ positioning.
As an aside, the YARPP plugin (Yet Another Related Posts Plugin) also does it very well, but I find Jetpack even easier to use. To activate this option, go to Settings > Traffic > Related Posts:
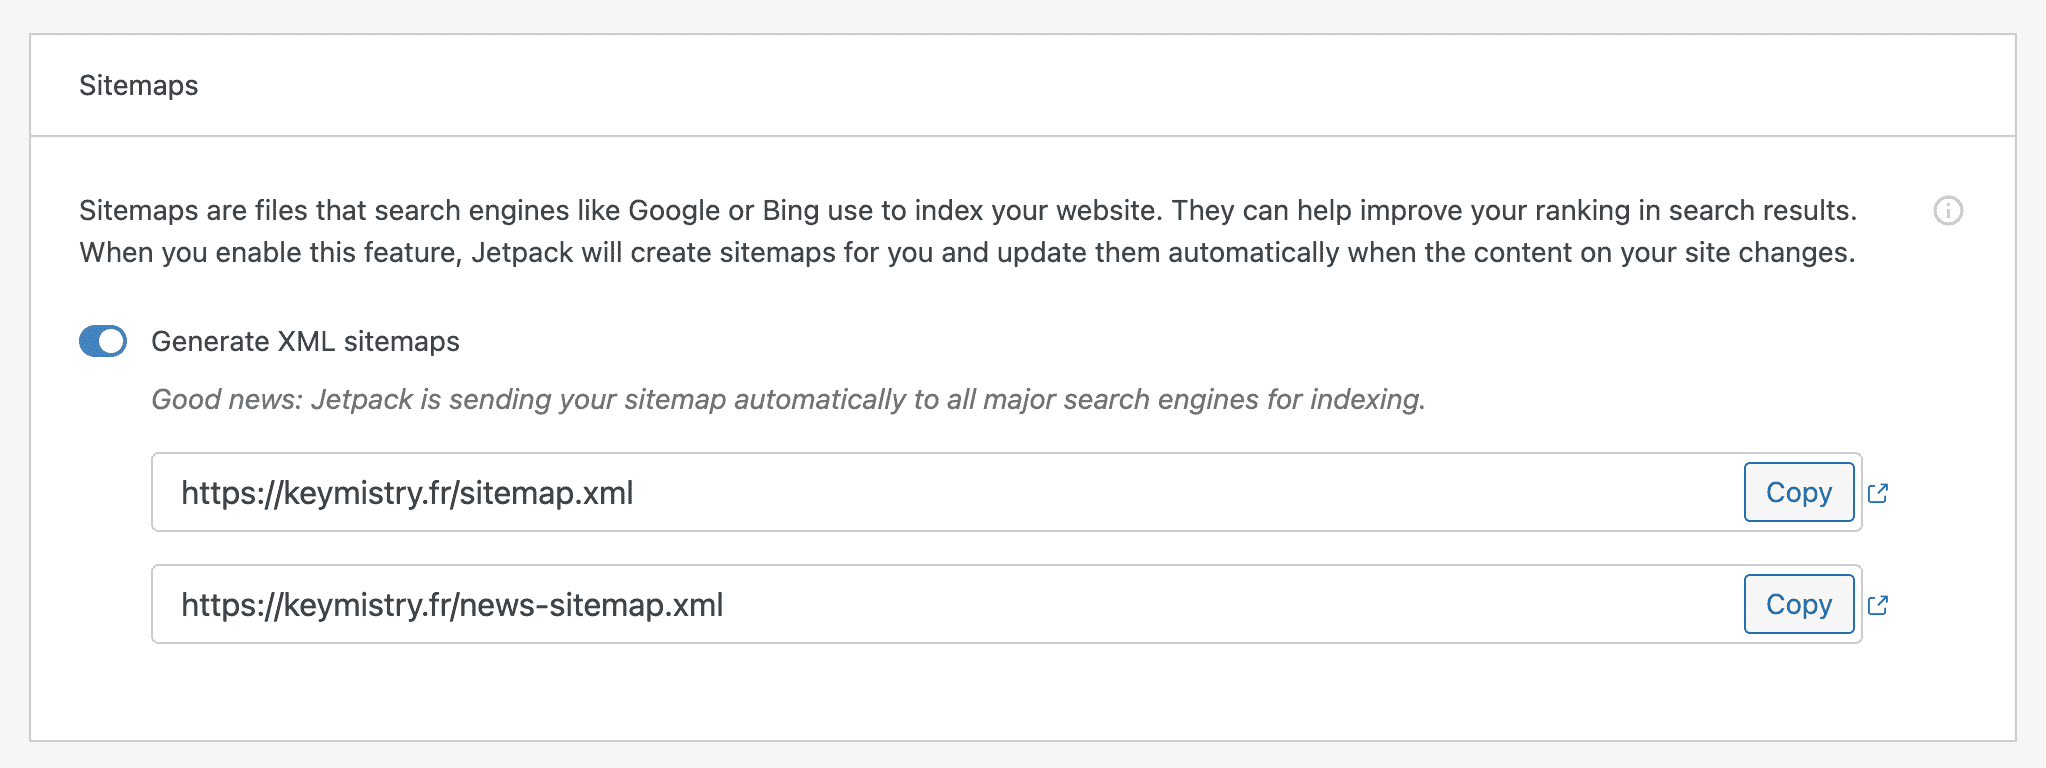
Generate XML sitemaps
If you regularly read WPMarmite, you may have already come across our post on sitemaps.
As a reminder, a sitemap is a file that lists all the URLs (addresses) of your website. It makes life easier for search engines that crawl your site, and accelerates its indexing.
Jetpack offers a feature that can create a sitemap for you and update it automatically when you revise your content.
If you aren’t using it, don’t wait to activate this feature. To do so, go to Settings > Traffic > Sitemaps.
Site statistics
This option is activated by default. It gives you interesting information that you can use to track your site’s traffic.
You will find a general overview on your Jetpack dashboard (in Settings > Site Stats), but a more detailed overview is available on your WordPress.com account.
Among the things to keep in mind, note that you can view:
- Daily, weekly, monthly, or yearly traffic statistics
- What types of content has been viewed
- The number of clicks on your outbound links
- How your visitors found you (for example, from a Google search)
Add a contact form
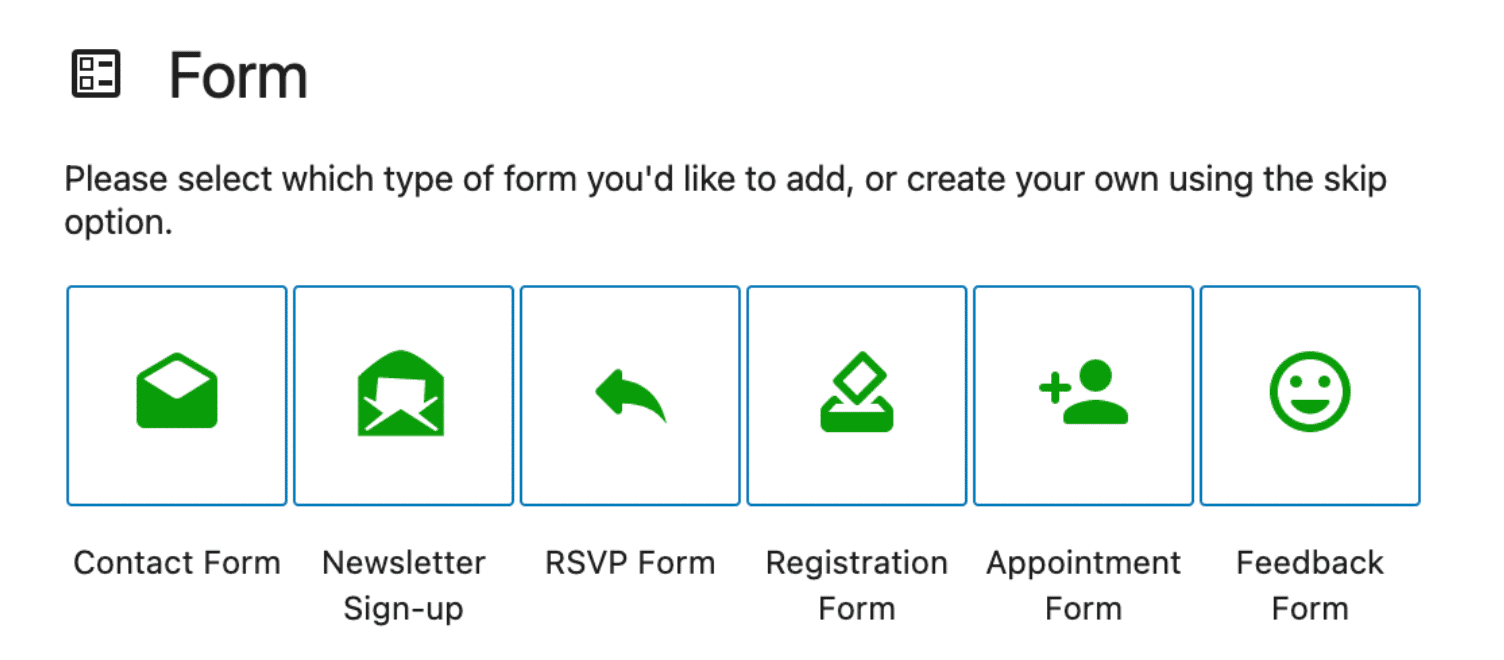
This option is also automatically activated. Thanks to it, you have a “Form” block in the WordPress content editor (Gutenberg).
This block allows you to create 6 different types of forms:
- Contact form
- Newsletter sign-up
- Reply form
- Classic event registration form
- Appointment form
- Feedback form

Whatever type of form you choose, you will be able to add fields and customize the form in terms of field parameters (required field and width) and colors (background and texts).
That’s it for this overview of the ten features that I think are essential. Of course, there are others that are not covered here but which could nevertheless be worth the detour, depending on your needs. For example:
- The “Comments” module, which replaces the standard WordPress comment form with a new comment system that includes options to connect to certain social networks like Facebook or Twitter.
- The anti-spam module, which allows you to protect your site from unwanted comments. I have not elaborated on this above, because Akismet is present by default on all new WordPress installations. Activating it is a necessity, whether you use Jetpack or not.
- Modules to add two types of custom content (custom post types): testimonials and portfolios.
- The “Like Buttons” module, to add a “Like” button to your posts and pages.
Have I forgotten THE ultimate module? Take me to task in the comments at the end of this article if so. I’m open to discussion. 😉
Besides all the free modules presented above, Jetpack also offers two free add-ons. Jetpack Boost allows you to optimize the loading speed of your WordPress site with one-click optimizations that act on CSS and JavaScript, among other things. Jetpack CRM, as its name suggests, allows you to integrate certain CRM features on your WordPress site.
What are the free alternatives to Jetpack modules?
What if you’re not excited about Jetpack, but you want to use a plugin similar to one of its modules?
Well, you’ll have to create it with your own little hands. More seriously, there is no reliable Jetpack clone yet. At least not to my knowledge.
To “replace” Jetpack modules, the solution is to use a specific plugin for each feature you want. Here are a few ideas to explore as substitutes:
- Statistics: MonsterInsights
- Share your posts on social networks: WordPress to Buffer
- Share buttons: Social Rocket
- Similar articles: YARPP
- Sitemaps: Yoast SEO
- Contact form: WPForms, Ninja Forms or Gravity Forms (affiliate link)
- Protection against brute force attacks: iThemes Security
- Downtime monitoring: ManageWP or WP Umbrella
- CDN activation: WP Rocket (affiliate link) offers its own CDN and has the advantage of being a complete and very easy to use solution to improve the loading speed of your site in general
What are the premium features of Jetpack?
While many of Jetpack’s features are free, the plugin also offers paid options that can be divided into two categories.
Licenses
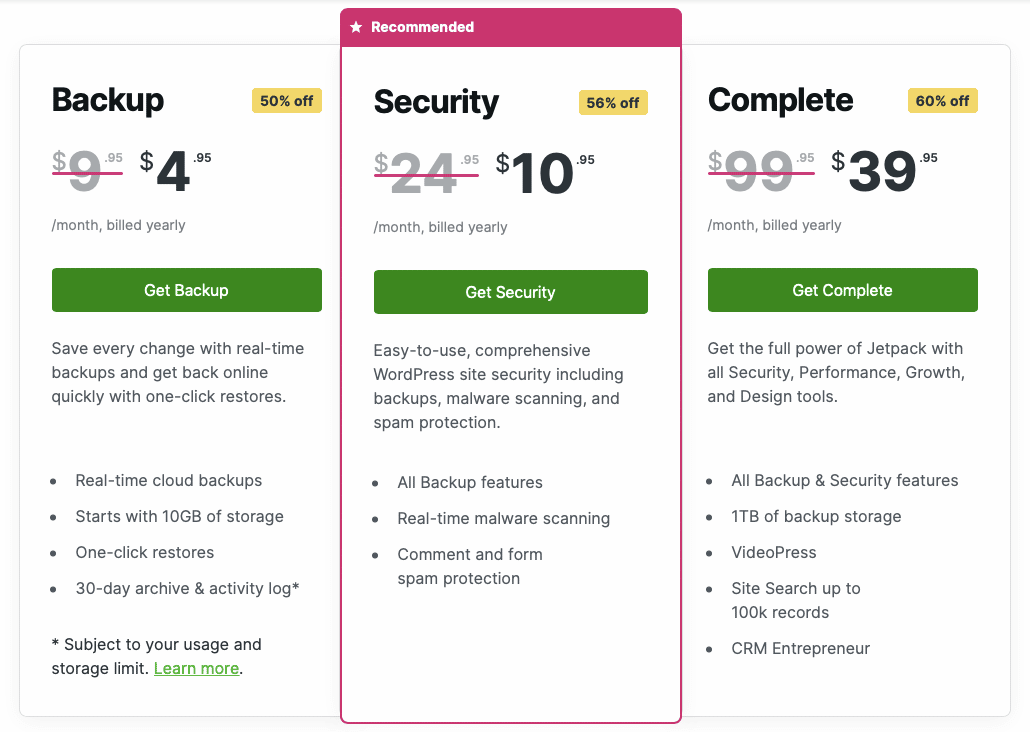
First, Jetpack offers three licenses. Compared to the free version of the plugin, they offer more advanced options in terms of security, performance, and marketing:
- The “Backup” license allows you to create real-time backups in the cloud and restore your site in one click. It’s available from $4.95 per month for the first year ($9.95 from the second year).
- The “Security” license includes backups, malware scanning, and spam protection. It costs $10.95 for the first year ($24.95 thereafter).
- The “Complete” license (at $39.95 and $99.95) offers all the options of the first two licenses. In addition, you also benefit from a hosting service for your videos (VideoPress), or an advanced search system you can integrate into your site, called Elasticsearch.

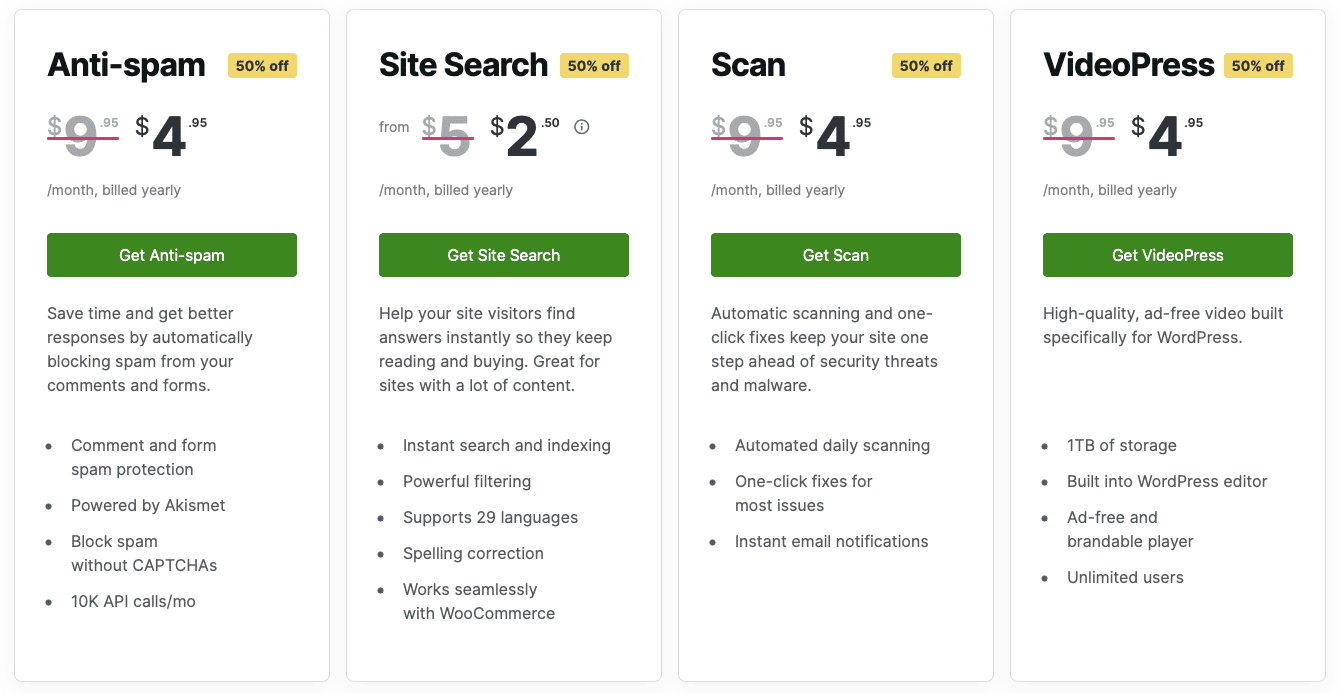
Pay-per-use features
In addition, Jetpack also sells some of the features included in its paid licenses individually:
- “Anti-spam” ($4.95/month for the first year) to give you a more advanced protection against spam than Akismet offers for free.
- “Site Search” ($2.50/month), to help “your site visitors find answers instantly so they keep reading and buying.”
- “Scan” ($4.95/month), to scan your site for malware threats on a daily basis.
- “VideoPress “($4.95/month)
What is the user experience like?
How easy is it to use?
Overall, Jetpack is relatively easy to use.
First of all, the menu is clear and uncluttered. Enabling or disabling a feature is a breeze: just check or uncheck the corresponding box.
However, I have two main criticisms. The first one concerns the automatic activation of some features.
As I explained above, six modules are automatically activated. On paper, this isn’t necessarily a bad idea. But practically, it’s not that simple, and it’s possible to miss some features.
For example, you won’t find a section to customize a contact form in Settings. For that, you’ll have to go to an article or a page. At first, without knowing better, that’s not immediately apparent.
The second criticism is the settings of some features, which will automatically redirect you to WordPress.com.
The interface looks like WordPress.org, but it takes a little time to get used to it. Plus, I find it slows down the setup process.
Speaking of slowing down, let’s talk about a controversial topic: would Jetpack ruin the performance of your site?
How does it affect the performance of a site?
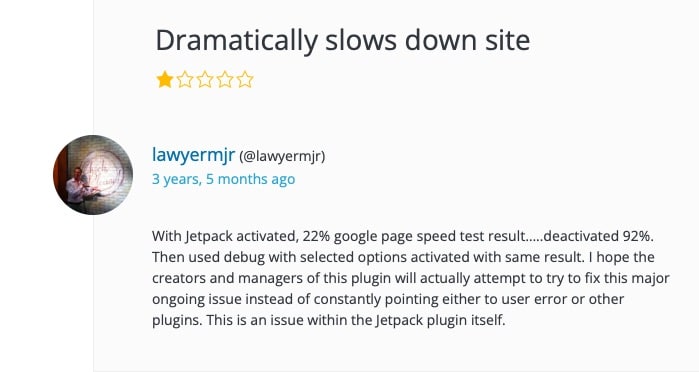
“Slow,” “bad,” “crashed my site“: while researching for this article, I realized that on the one hand, Jetpack was the focus of a lot of criticism.
One complaint that came up quite often was that our plugin of the day was responsible for slowing down the loading time of the sites on which it was installed.
Check out what this user has to say about it:

So, can Jetpack really plague your site’s page loading speed? Let’s put it to the test to be sure. For the purpose of this article, I conducted some experiments on a test site.
To gauge the performance of Jetpack, I proceeded as follows.
- Test service used: Pingdom Tools (using London as location each time)
- I didn’t activate any features, except the six that are activated by default:

Test with Jetpack enabled: 925 ms loading time


Test with Jetpack disabled: Loading time of 888 ms


As you can see, the loading time is almost the same on both tests. The page load time is slightly slower with Jetpack enabled, but nothing that would be noticeable to a visitor.
Conclusion: according to my tests, Jetpack does not slow down a site, as long as you use it wisely. Activate only the modules you need, if you plan to use them. And if you don’t use a module, disable it.
The above results are a first impression, but cannot be taken as a final judgement. You might have different data at home, depending on your hosting or even the plugins you use.
And to make it even better, take care of your site’s performance with the help of a plugin like WP Rocket.
After studying Jetpack from every angle, it’s time to give you a final review of this all-in-one plugin.
Final review of Jetpack
Strong points
- The plugin is developed and maintained by Automattic, the major contributor to WordPress.org. This represents a guarantee of quality and reliability. In principle, it shouldn’t disappear overnight.
- Jetpack is regularly updated and improved.
- Easy to use: Modules can be activated and deactivated with one click. The interface is quite nice.
- All-in-one tool: Contains a lot of “strategic” options for a website, all in one place.
- Price: The free version offers dozens of features without having to put your hand in your wallet.
- Time saving: No need to waste time searching for a plugin to meet a basic need. It’s probably already in Jetpack. Moreover, a single update of the plugin is enough to have the latest versions of each feature.
Weaknesses
- The customization options of the modules are quite limited. Take the option to share on social networks, for example. If you want to change the appearance of the buttons, you only have four choices.
As a rule, dedicated plugins will be more complete than Jetpack’s specific modules. For example, Ninja Forms and Gravity Forms offer more options for contact forms.
- Key features (security and backup) are not free.
- The usefulness of some modules is not always immediately apparent. “Beautiful Math”, for example, allows you to use a markup language (called LaTex) to compose equations and mathematical formulas. If you have a blog about math, great. If not, I don’t really see what good it does.
- You have to create an account on WordPress.com to use Jetpack.
Who is Jetpack for?
Whether you’re a beginner, intermediate, or advanced WordPress user, Jetpack can potentially work for you.
But if you already have a WordPress site running with plugins similar to those offered by Jetpack, and your site’s performance and security are satisfactory, you may not find an immediate interest in adding Jetpack.
In fact, I think it’s easier to adopt it when you’re new to WordPress, and you’re not sure which plugin to use for which purpose.
At this level, Jetpack has the advantage of grouping everything in one place, which makes the job easier.
Download Jetpack:
In the end, it all depends on what you want to do with it. If you’re only interested in a couple of features, it’s probably a good idea to use specific plugins for option.
If you’re going to use the many modules Jetpack has to offer, this plugin might be right for you (as long as you disable the options you don’t use).
In any case, and whatever situation you’re in, nothing prevents you from testing it and adapting it to your needs.
Personally, I prefer to use specific plugins to perform specific actions on my site. For example, I use iThemes Security to take care of the security of my site, or WP Rocket to manage its performance.
I find them more complete and efficient than Jetpack, which I don’t use. For you, what do you think about Jetpack? Do you use it on your site?
Feel free to share your feedback in the comments.