The Social Rocket plugin is no longer available on the official WordPress directory.
All bloggers have a common dream: to build a community of followers and attract thousands — or rather, millions — of readers to their site each month.
Chances are, you’re dreaming of that, too, aren’t you?
While there’s no magic formula for generating traffic, there are a few tips and best practices that can help you build a loyal readership, starting with consistently creating quality content!
No content, no sharing.

“But in order to encourage my readers to share the content of my site, this content still needs to be shareable…,” says Captain Obvious.
That’s where social sharing plugins come in.
On WordPress, there is a whole range of plugins dedicated to sharing buttons for social networks. We’re thinking in particular of Monarch, Sassy Social Share, Social Media Share Buttons & Social Sharing Icons, or the inescapable Social Warfare, which needs no introduction.
Alongside these “must-haves,” there are other plugins that are less popular, but equally effective. One of them is called Social Rocket.
This plugin is beginning to make a name for itself on the WP planet by offering various social sharing buttons that are 100% customizable… but that’s not all (we’ll tell you everything in the rest of the article, I promise).
Fasten your seatbelts and prepare for takeoff, as the summary launches in 3, 2, 1… Blast off!
How to install Social Rocket
Added to the official WordPress plugin directory in July 2019, Social Rocket offers a free and a paid version. We will detail the features of each in this article.
Installation and overview of the free version
Installing the free version is easy: log in to your WordPress dashboard and click on Plugins > Add New.
In the search bar at the top right, type “Social Rocket.”

Then click on the “Activate” button and you’re done. You should now see a “Social Rocket” section in your administration bar, on the left side of your screen.
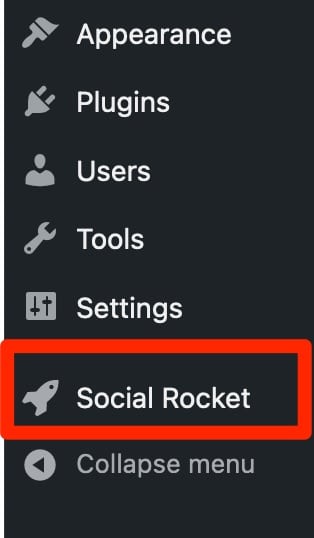
This section is composed of 6 tabs (Get Started, Inline Buttons, Floating Buttons, Click to Tweet, Settings, and License Keys).
Just for you, here is a preview of the plugin’s dashboard:

Social Rocket Pro: how to install it and at what price(s)
To install the paid version, go to the plugin’s official website.

At the top right of the screen, you have the choice between three prices:
- License for 1 site: $29/year
- 5-site license: $99/year
- Unlimited license: $249/year
Select the license that suits you and press “Purchase,” then follow the instructions until payment.
Have you got your credit card ready? You should now be able to download a zip file via the web page that summarizes your order.
Once the download is complete, go back to your WordPress administration in Plugins > Add New. Click on “Upload Plugin” at the top of your screen.

Upload your zip file and click on “Install.”
Important: make sure you have activated Social Rocket in your plugins. The pro version only works when the free version is activated!
As for the settings, Social Rocket Pro works exactly like the freemium version: just click on the plugin icon at the bottom left of the screen.
You’re ready to take off! Now let’s see what Social Rocket has to offer.
How to set up Social Rocket: overview of free features
100% customizable share buttons
Wow!
That’s the reaction I had when I discovered the high degree of customization offered by Social Rocket.
It must be said that the plugin does not skimp on the options. In its free version:
- You can add up to seven social sharing buttons (Facebook, Twitter, LinkedIn, Pinterest, Reddit, Buffer, and Mix)
- In addition, there are “Email” and “Print” buttons
To select these buttons, you have two choices: go to “Inline Buttons” (to add fixed buttons embedded in the content) and/or “Floating Buttons” (to add moving buttons that follow the scrolling text).
Then you can choose which social networks will be displayed on your site.
In the sub-heading “Choose Social Networks,” click on “Activate Networks.” After that, all you have to do is check the social networks of your choice and order them as you wish via drag and drop.
Warning: don’t forget to validate your settings by clicking on the “Apply Selection” and “Save” buttons!

How to customize your sharing buttons with Social Rocket
I can already hear some people muttering: “Nothing new under the sun…”.
But think again! With Social Rocket, the appearance of the buttons are extremely customizable (believe me, I’m not overusing the adverb of intensity).
This is evidenced by these multiple options:
- Changing the text of the buttons (“Choose Social Networks”): click on the “Advanced” button of the social network of your choice and type your text in the “Button Text” box. This is an opportunity to change the generic “Share” text to a more personal and engaging description, such as “Give me some love on Facebook!” (don’t worry, that’s just an example…). You can even customize the text color in Advanced > Color Override.

- Changing the color of the buttons (Color Scheme Settings): you have three main options. “Defaults” keeps the default button colors, “Inverted” reverses the button and text colors and, finally, “Custom” allows you to customize it 100% (background, hover, borders…).
Ideal to encourage social sharing while respecting your site’s style guide! A tip: avoid using too many colors, or otherwise your site will turn into a Christmas tree…

- Changing the shape of the buttons(Display Settings > Button Style): here again, there are multiple customization options (oval, rectangular, rounded, or square shape). You are the master of your choices, of course!

- Changing the placement of the buttons (Display Settings > Default Button Placement): you can place your “Inline Buttons” at the top, bottom, top and bottom, or anywhere in your post (using a Gutenberg block that you position manually).
For Floating Buttons, the options are even more extensive: left, right, top, bottom, or nowhere (“None”). If your floating buttons are positioned on the left or right, it is also possible to align them vertically at the top, center, or bottom of the browser window (in Display Settings > Vertical position).
- Changing the placement of the buttons from one content to another (Advanced Placement Settings): do you want your buttons to be placed differently on your pages, your posts, and your archives? You can do it. For example, in the screenshot below, my floating buttons will be displayed on the left side of my pages, and on the right side of my posts:

Child’s play, isn’t it?
You can also:
- Customize the horizontal and vertical margins to space the buttons
- Enlarge or shrink the buttons
- Display the number of shares per social network and/or the total number of shares via the “Share Count Settings” menu
- Select the minimum number of shares before displaying them to your visitors (the ideal option to incorporate social proof on your website!)
- Add a catchphrase above your fixed buttons with the “Heading Text” option, available in the Inline Buttons > Display Settings tab
- Disable the display of your buttons on mobile devices (smartphones and tablets) by choosing the breakpoint (screen size in pixels from which the buttons will be invisible)

… and all this, without a single line of code. Isn’t life great?
In short, you’ll have understood: Social Rocket’s customization options are legion — that’s what makes it different from other plugins. It would be impossible to illustrate all the customization options (text, color, shape, size…) because there are so many.
Don’t hesitate to test the different possible combinations. After all, it’s only by discovering for yourself that you’ll find your own happiness!
Optimal image sharing
Whether you’re a novice or advanced WordPress user, you probably know that every post header is usually composed of a featured image (formerly known as the “front page image”). If you prefer, this is the cover image at the beginning of the post.
Essential to illustrate your article, this featured image is also essential for social sharing. Your cover image is the visual that will be displayed when people share your article or your page.
Problem: each social network has its own image dimensions. For example, if you use a horizontal image, it may be cropped when shared on Pinterest. What a visual disaster!
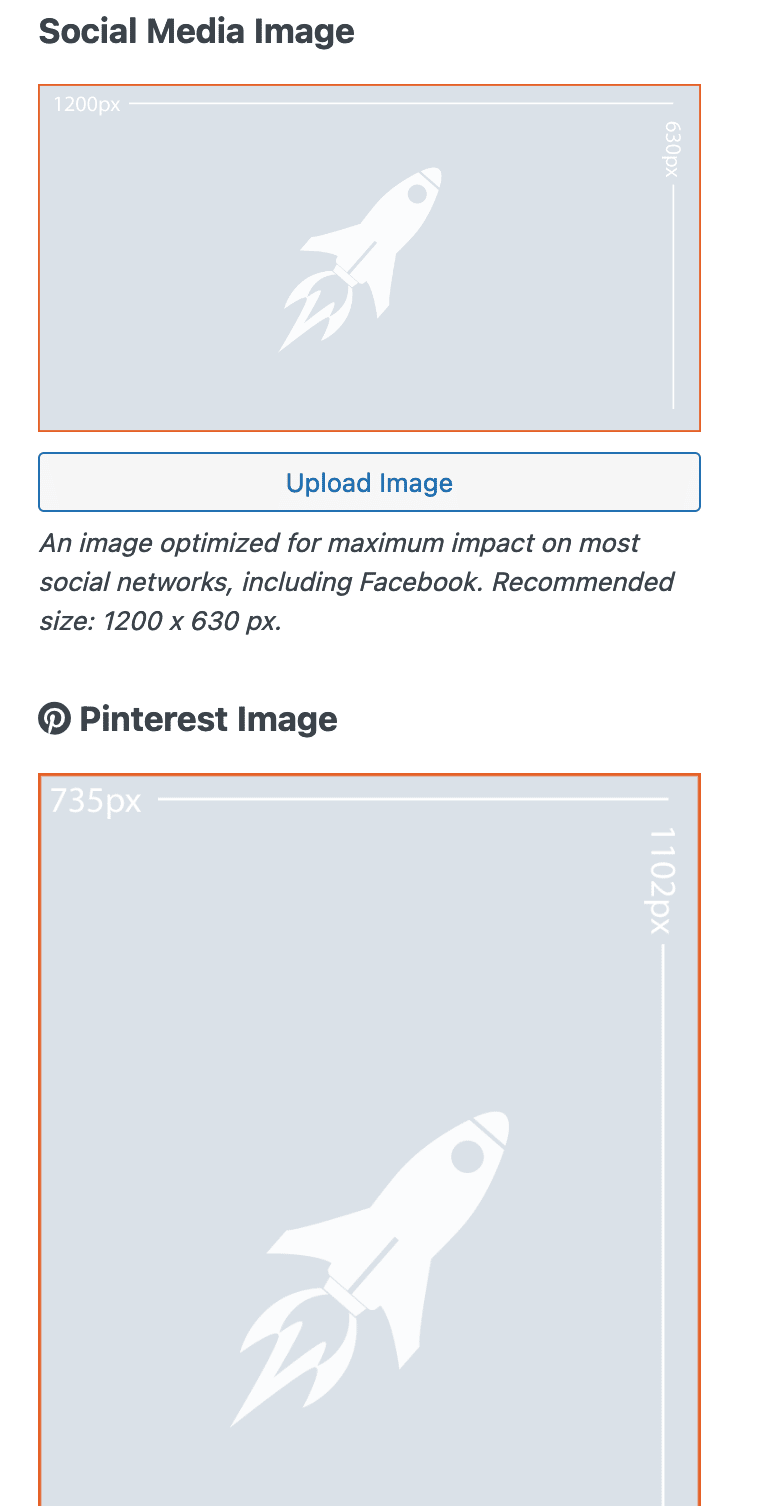
To overcome this problem, Social Rocket has developed the great “Social Rocket Settings” option — available directly on the WordPress content editor — which allows you to:
- Automatically upload your images in the right format depending on the social network. This module includes a format optimized for social networks like Facebook and LinkedIn, and a format especially optimized for Pinterest. So convenient!
- Customize the title and description that will be shared on social networks. By default, the title of your post is displayed when shared. But the description is not always adapted to the social network, especially on Twitter which limits messages to 280 characters… This also gives you the opportunity to add two or three hashtags for even more social impact. 🙃

- Bonus: choose the location of your buttons on a specific page or post. Specifically, you can change the location of your buttons under the text editor on a case by case basis. The default settings will then not be applied for the page or post in question. Here for example, I have placed my “Inline Buttons” on top and my “Floating Buttons” on the left.

A Click to Tweet à la carte
Like most social sharing plugins, Social Rocket offers a “Click to Tweet” option. If you don’t know what I’m referring to, this button allows you to share a custom tweet!
Here again, the plugin manages to stand out from the rest thanks to its multitude of customization options (choice of text, colors, borders…).
See for yourself:

At the very bottom, you may have noticed that you can generate multiple Click to Tweet styles and save them. To do this, click on “Save as a new style” at the top right. With this handy option, you’ll always have different styles on hand!
Now all you have to do is customize the message of your tweet.
To do so, leave the general settings of the plugin and go directly to the WordPress content editor.
First, add the block entitled “[Social Rocket] Click to Tweet” to your content. Then write your famous sentence in the block settings in the right column (“Quote to be displayed on your page”).

Important: remember to select the style you want to display via the “Display Style” drop-down menu at the bottom! Otherwise, the default Click to Tweet will be selected.
Looking for a free, easy-to-use plugin to add a Click to Tweet insert to your posts? Try Modern CTT, a plugin created by WPMarmite. Six different styles are available and you can customize the text to be displayed and tweeted and the call to action, as well as the colors (text + background).
Import, export
Are you managing multiple WordPress sites at the same time and looking for a quick and efficient way to apply the same settings to your multisite network?
Social Rocket provides free import and export tools for your data.
Okay, but… Is this thing useful?
Yes, it is! With this option, you don’t have to go through the tedious (and time-consuming) task of manually configuring all your sites.
To save time and avoid pulling your hair out, go to Settings > Tools and simply follow the procedure.

Your data is safe
Let me tell you about a personal misadventure.
One day, when I had just updated a social sharing plugin, I was unpleasantly surprised to find that I had lost all my settings. All of them.
It wasn’t the end of the world, of course, but it’s never pleasant to see your work go up in smoke and to waste time starting over.
Social Rocket avoids this kind of problem by offering an automatic backup of your data before each update.
And because you can never be too careful, you can create a manual backup at any time and restore it if necessary. Here too, go to Settings > Tools > Backup All Data.

That’s it, we’ve finished experimenting with the main options of the free version of Social Rocket. Now, what about the premium features?
I hope you’re following along, because we’re taking it to the next level.

What options does Social Rocket Pro offer?
More buttons, more buttons
With the premium version, there are about twenty additional buttons added to the plugin!
Among them are the giants Facebook Messenger and WhatsApp, but also Trello, Skype, and the “SMS” option.

Another interesting addition is the “More“ option, an “all in one” button that reveals several hidden sharing buttons in one click. Really great when you want to add several buttons without visually overloading your site!
To activate this option, go to the “Inline Buttons” category of the plugin and check the “Enable More button” box. You are then free to order the buttons as you wish.
Share Count Rescue: take care of your social proof
Because Rome wasn’t built in a day, it’s sometimes necessary to adjust the structure of your site, change your permalinks, or modify the URL of a page.
The problem is that when you change the structure of your URLs… all your sharing counters reset to zero. I repeat: your social proof is reduced to zero.

At times like this, you might as well know that an option to retrieve the number of shares of old URLs is a must. The developers of Social Rocket have understood this.
And “Share Count Rescue” — aka the most brilliant option in Social Rocket Pro — was born.
In the plugin’s advanced settings (Settings > Advanced), head to the Share Count Rescue tab and check the following options as desired:
- http/https when adding the SSL certificate
- www/non-www when adding or removing the “www” from the URL
- Domain/subdomain in case of domain (or subdomain) change after a migration
- Permalinks if you have a new permalink structure
And that’s not all. If you change the URL of a post (or page) individually, there is an option called Per-Post (or Per-Page) Settings.
To activate it, go to the text editor of Social Rocket Settings and enter the complete URL to retrieve previous shares.

Good news: you can add an unlimited number of old URLs! The plugin will then combine them and add up the share counters. Cool, huh?
Options galore
To close the game on Social Rocket Pro, you can also:
- Shorten your links via Bitly. This option is particularly useful for sharing on Twitter where, as you know, characters are limited.
- Differentiate the buttons of your desktop and mobile version. Ideal for optimizing your site on smartphones and tablets! For example, it may be relevant to display the “SMS” button only on the mobile version.
- Retrieve the count of shares on Twitter (disabled by the social network) via the OpenShareCount or TwitCount service.
- Display custom Pinterest images on your posts and pages.
- Bonus: install Social Rocket Migrator. This additional migration plugin allows you to apply all your settings from other social sharing plugins. Specifically, if you’re using Social Warfare and want to switch to Social Rocket while keeping your data, this tool will be a lifesaver for the low cost of $9.
A little summary: we’ve seen how to install the plugin, then reviewed the main features of the free and paid versions. Do you follow me so far?
In order to put all this in perspective, I now propose to compare (very quickly) our plugin of the day with the so-called king of social sharing plugins: Social Warfare.
Social Rocket vs Social Warfare: the comparison
If the social rocket offers more or less the same features as its elder Social Warfare, we noticed some differences that make us think that Social Rocket could have the upper hand.
The advantages of Social Rocket over Social Warfare
More customizable buttons
This is certainly the biggest strength of the plugin: its extreme customization.
From the colors to the location of buttons, the modification of titles and descriptions, the individualization of buttons post by post, and configuration of the Click to Tweet.
The plugins offers you countless possibilities to express your creativity and — above all — to adapt all buttons to your style guide.
Great news for novices allergic to computer code: with this plugin, you can easily become a customization expert without any knowledge of CSS (I promise)!
A free version with more
In its freemium version, Social Rocket has the advantage of offering nine social sharing buttons, where Social Warfare only offers five.
Of course, this comparison is relative: it all depends on how you use it (for example, you might wonder if the “Print” button is really necessary…).
But where Social Rocket really scores a point is in the display of the total number of shares via the Share Count Settings option.
Social Warfare also allows you to do this, but its free version does not allow you to choose a minimum number of shares to display your shares.
Finally, the awesome “Social Rocket Settings” option, which allows you to automatically upload your images at the optimal size, is also included in the free package. I don’t know about you, but for this reason alone, I was tempted to try (and perhaps adopt) the plugin.
Weaknesses of Social Rocket
While the new plugin has nothing to be ashamed of, it does have one main shortcoming compared to Social Warfare.
We lament the absence of a tracking option that allows you to know the traffic generated by the buttons to your website. With the competition, it’s possible to track the number of visits generated by the sharing buttons via Google Analytics.
Should you get on board the Social Rocket shuttle?
Yet another social sharing plugin?
In short, Social Rocket offers:
- 100% customizable social sharing buttons (Facebook, Twitter, LinkedIn, etc)
- A Click to Tweet on demand
- “Social Rocket Settings” option to optimize the size of your images according to the social network
- Secure, importable, and exportable data
And Social Rocket Pro offers:
- The “More” option to group several buttons into one
- “Share Count Rescue” option to recover share counts from old URLs
- bit.ly to shorten your links
- A mobile version for better responsiveness
- A share counter for Twitter and other sites
Whom is this plugin for?
Now that you have an overview of the plugin, it’s time for me to help you make your choice.
Basically, this plugin is for you if:
- You are looking to optimize sharing and traffic on your site.
- You are a beginner or an experienced WordPress user. Social Rocket is easy to use, does not require any CSS skills, and is suitable for the general public.
- You want to customize your buttons down to the smallest detail (Gutenberg blocks come to mind, which allow you to place your buttons anywhere).
- You are looking for a practical social sharing plugin. For example, Social Rocket is mobile-friendly and offers the “Preview” option.
- You have a rather limited budget. The pro version for one site is affordable ($29/year). However, for unlimited use, the budget climbs quickly ($249/year).
Download Social Rocket:
Final thoughts
Social Rocket is not necessarily a revolution in the history of social sharing plugins, in the sense that all the features already existed in the competition.
Nevertheless, the plugin is a simple and efficient way to implement on your site the features that most users are looking for in a social sharing plugin (except for Tracking Analytics, maybe).
In short, I won’t go so far as to say that you MUST replace Social Warfare with Social Rocket (the features are pretty similar), but you CAN. If you’re looking for a social sharing plugin or are no longer satisfied with your existing plugin, Social Rocket remains a very good choice, especially in its free version.
What about you? Will you try (and adopt) Social Rocket? Tell us in the comments if the free version meets your needs, or if the pro version suits you better.

Receive the next posts for free and access exclusive resources. More than 20,000 people have done it, why not you?

Continue reading
Articles posted in WordPress PluginsOur review of B2BKing: A WooCommerce plugin built for B2B commerce
“Hi, I need 200 units of this product with fast shipping please”. As an online store owner, receiving this kind of message puts a smile on your face. Answering it, on the other hand, becomes a lot less fun… Basically,…
GTranslate on WordPress: our full review of this tool for creating a multilingual site
“Hello, how are you?” “What do you think of this computer mouse?” For you, everything is easy to understand in these two sentences. For someone living deep in the Shetland Islands or Yucatán, it’s probably a bit more complicated… If…
Air WP Sync: Test and review of this plugin for integrating Airtable into WordPress
Do you use Airtable and WordPress? Then some of your days probably look something like this. In the morning, you update your Airtable database as soon as something changes. In the afternoon, you copy and paste the same data into…