It’s cropping up everywhere. You find it on almost every page of the Internet. It’s ready to answer your questions at a moment’s notice.
Does the word “chatbot” ring a bell? Yes, you know, that little dialog box that pops up on your page and requests that you chat with it.

It’s one thing to encounter it during your own web visits. But a little bird tells me that you also want to offer your visitors a chatbot on your own WordPress site.
There are quite a few advantages to adding one, provided you understand how to integrate it into your site.
By the end of this article, you’ll know exactly how to do that, step by step.
Ready to get started? Follow the guide!
Overview
Originally written in August 2019, this article was last updated in November 2023.
What is a chatbot?
Introduction to chatbots
A chatbot is an automated computer robot that uses rules and/or artificial intelligence (AI) to simulate a written human conversation with visitors to your site.
Available 24/7, chatbots most often take the form of an instant messaging system (voice chatbots are also increasingly being developed).
A chatbot can be used on any type of WordPress site: showcase site, blog, e-commerce store, etc.
Chatbots are becoming increasingly widespread in a variety of fields, including customer service, marketing, task management, etc.
What are the features of a chatbot?
Provided it’s programmed for it, a chatbot can perform a variety of functions on your WordPress site. Here’s a sample of what it can do:
- Answer questions automatically
- Provide customer support to solve problems, track orders, obtain information on products or services, etc.
- Hold a conversation
- Suggest a subscription to your newsletter
- Personalize the browsing experience
- Collect information: contact data, testimonials, personal preferences, comments on an experience, etc.
- Automate tasks (booking an appointment, submitting a customer review, ordering products, finding information, etc.)
- Send notifications and reminders to users for specific events, deadlines, or actions
- Analyze data to understand trends and improve performance
- Transfer a request to a human operator, if the chatbot is unable to provide an appropriate response to your visitor
As you can see, a chatbot is capable of fulfilling a multitude of missions. And you know what, that’s not all.
Our friend the chatbot wears many different hats. I’ll explain it all just below.

What are the different kinds of chatbots?
While the term chatbot is used generically to describe a computer robot, there are three “main” categories.
That’s why we distinguish between:
- Chatbot
- Intelligent chatbot
- Live chat
They’re all used to communicate with web users and offer them different things. Let’s take a look at each of them, to make sure everything is clear to you.
A chatbot is based on rules
A “classic” or “standard” chatbot is based on a set of programmed rules that determine how it should react according to specific keywords or expressions.
With a standard chatbot, it’s up to you to define what it can do. Roughly speaking, a standard chatbot allows your web users to express themselves, take a survey, ask questions and receive answers… as long as they keep it simple.
In fact, this computer robot has a limited understanding of natural language and cannot grasp the context or nuance of users’ questions.
Its responses are predetermined and not personalized, making it ill-suited to complex conversations.
The intelligent chatbot analyzes and learns
In contrast, an intelligent chatbot doesn’t just use keywords. It analyzes the meaning of the sentence and learns from past interactions with your visitors, in order to respond more precisely.
Its responses are more natural — in the sense of sounding less robotic — and more complex than those provided by a standard chatbot.
To achieve this, an intelligent chatbot uses artificial intelligence techniques and machine learning.
It’s able to take into account the context of the conversation and generate responses based on this context, making interactions more personalized.
It’s therefore better suited to complex conversations, and can handle more nuanced and varied questions.

Live chat: Humans to answer your questions
Finally, the last major category of chatbot is live chat. On the face of it, a live chat can look just like a classic chatbot.
What makes the difference is that you’re not talking to a robot (where you can get away without writing a complete sentence), but to a human interlocutor.
This real-time communication tool is very often used in customer service and technical support, as it offers a fast, direct response to users’ needs.
Why add a chatbot to your WordPress site?
The chatbot is a popular and fast-growing tool, appreciated by users and businesses alike.
According to this study, the chatbot market will reach $543 million by 2026. It also reveals that 62% of consumers prefer to use a chatbot online, rather than wait for human intervention.
And by the way, 70% of customers find the experience positive. You have to admit that there are many advantages to using a chatbot, though there are certain disadvantages as well.
What are the advantages of a chatbot?
Generally speaking, a chatbot offers several advantages for your WordPress site:
- Availability. Accessible 24/7, a chatbot enables you to provide an immediate response at any time of the day or night.
- Improved customer relations, since your visitor doesn’t have to wait a certain amount of time for a response.
- A reduction in the workload carried out by your customer service department (or yourself), as well as the related operating costs.
- Data collection without any intervention on your part. That means you can concentrate on your actual business.
- Improved conversion rates (more sales, more downloads, more newsletter subscriptions, etc.).
- Manage numerous conversations simultaneously, making it ideal for handling high volumes of requests.
- Increased productivity, by enabling you to automate repetitive, time-consuming tasks.
- Automate tasks such as finding information, ordering products, providing reports, etc.

What are the disadvantages of a chatbot?
If you’re considering installing a chatbot on your WordPress site, you should also bear in mind some of the disadvantages that come along with it:
- You have to configure it to answer the right questions (in the case of a chatbot), and maintain it so that it continues to provide the right answers.
- You need to assign a human to operate the live chat service, which can be time-consuming and require additional staff.
- Classic chatbots often lack empathy and personality.
- Their comprehension can be limited if the questions asked are too complex or poorly formulated.
- An intelligent chatbot can be complex to set up.
- Prices can be high, especially for intelligent robots.
Still interested in adding a chatbot to your WordPress site? To give you a clearer picture of how to go about it, we’ll now go over a selection of the top chatbot plugins.
Installing a plugin is indeed the easiest and fastest way (no coding required) to integrate a chatbot into your website.
What are the best chatbot plugins on WordPress?
If you’re looking for any kind of plugin, there’s one place to go: the official WordPress directory.
It currently lists 63,708 plugins, including several dozen dedicated to the creation of a chatbot (classic, intelligent, or live chat).
The big advantage is that all the plugins listed in the official directory have at least one free version.
So you can test them out to get a feel for their functionality, then go one step further with more options by upgrading to a paid package, if available.
To help you in your search, here are some of the most popular, with over 1,000 active installations and regular updates.
For the sake of readability, I’ll divide them into two categories (chatbot and live chat), although some are multi-taskers.
Introduction to WordPress chatbot plugins
To start with, here are a few generalist chatbot plugins that stand out from the crowd:
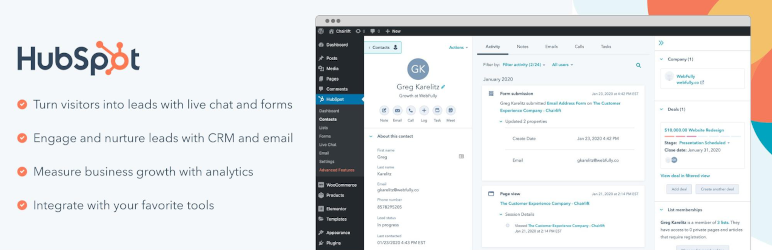
Note that you’ll also find free chatbot WordPress plugins that require integration with a CRM like Hubspot or Zoho.
Overview of WordPress live chat plugins
In addition, you’ll also come across plugins with more specific uses, for example to create live conversations. You can do this with:
In addition to WP plugins, there are also premium platforms offering highly sophisticated chatbot tools, such as Intercom, Botsify, Writesonic, Landbot, and Acobot.
Often more comprehensive than a free plugin, these platforms also require a much larger budget. They can be useful if you have a high volume of requests to process on a daily basis. Otherwise, starting with a free plugin is a good compromise.
What should I consider when choosing a chatbot plugin?
Does one option stand out to you from the selection above? Before settling on a particular plugin, consider the following points:
- Your needs. Do you need a classic chatbot plugin to answer a few questions, or a live chat? A chatbot will have the advantage of responding instantly to the surfer and all those who request it simultaneously, whereas with a live chat users will have to wait until someone is available to answer.
- The functionalities that the chatbot plugin must offer. Read its description carefully to make sure it offers the options you want.
- Your target audience: some people prefer to chat with a human rather than a robot.
- Your budget. The cost of a chatbot is nothing to that of a live chat, for example. All you pay for is the tool and the time spent configuring it. What’s more, you can adapt the chatbot’s interactions quite easily.
- Ease of use: opt for an intuitive, easy-to-configure plugin.
- The ability to translate the chatbot interface, if needed. Make sure the plugin is compatible with different languages if you have a multilingual site.
- Customization options. If you don’t know how to code, it’s essential to have options for modifying the visual appearance of your chatbot so that it fits your style guide.
- User reviews to give you an idea of its reputation.
- Integrations with other tools and services you use (CRM, messaging platforms, etc.).

How do I make a chatbot on WordPress with the AI Engine plugin?
For the purposes of this test, I’m now going to show you, step by step, how to create a chatbot on WordPress using the AI Engine plugin.

I chose AI Engine for several reasons:
- Its free version is comprehensive
- It has excellent user reviews
- It’s easy to set up and customize
- It’s regularly updated by its developer, a French guy named Jordy Meow
- It’s based on artificial intelligence (OpenAI’s ChatGPT model), which allows for an advanced degree of personalization, provided you give it the right contextual elements (I’ll come back to this later)
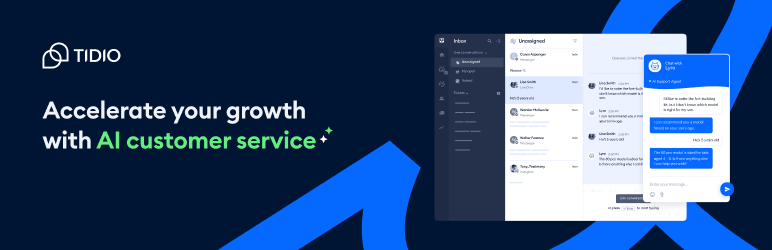
The most popular plugin for creating chatbots and live chat on WordPress is called Tidio. It’s easy to use and offers a wide range of options, as can be seen from the feedback it receives on the web.
However, it’s limited to 50 conversations per live chat in its free version, which is why I didn’t go any further with it.
The first version of this article covered the collectchat plugin. At the time of updating this article, it was impossible to download it as it was “awaiting full review” on the official directory.
By the time you read this, the situation may have changed and you may be able to activate it. Please note that this is an effective plugin (provided it hasn’t changed in the meantime) that WPMarmite used on its home page a few years ago.

Step 1: Install and activate the AI Engine plugin
To get started, install and activate the AI Engine plugin on your WordPress dashboard.
To do this, go to Plugins > Add New, then type “AI Engine” in the search bar:

Once this is done, you’ll see a new menu called “Meow Apps” appear in the left sidebar of your admin interface.
Two sub-menus are available:
- Dashboard. This is a general dashboard that brings together all the plugins created by Jordy Meow. You can activate them here, if required, while accessing general settings tabs for performance, or PHP errors.
- AI Engine. Here you can access all the tools (and their settings) offered by the AI Engine plugin. Of course, there’s the one for creating a chatbot. But the plugins has other tricks up its sleeve. You can also use the plugin and AI Engine to generate content, images, and more.

Step 2: Connect the plugin to OpenAI
The second step required to take full advantage of the plugin’s features is to connect it to an artificial intelligence service. For this, the plugin’s author recommends OpenAI, the parent company of the famous ChatGPT.
If you don’t have an OpenAI account, go to their site and sign up for free in just a few minutes. Start the process by clicking on the “Try ChatGPT” button in the top right-hand corner of the page:

Already have an OpenAI account? Retrieve your API keys from your customer area. Click on your profile, then on “View API Keys.”
Then click on “Create new secret key”:

Copy this API key. Go back to WordPress, then paste the key in the “Settings” tab, in the “API Key” field:

To be able to create and customize your first chatbot, make sure the feature below is available in the “Dashboard” tab. Tick the box if it isn’t:

Step 3: Set up the chatbot’s general settings
Start setting up your chatbot by entering some general settings in the “Default” tab. Let’s take a look at the two most important.
Main Settings
In the “Main Settings” drop-down menu, you can choose:
- A theme for your chatbot, with a choice between ChatGPT, Messages (iOS), and none. If you choose ChatGPT (selected by default), the chatbot’s appearance will match the one on ChatGPT, for example.
- The mode: Chat or Images, if you want images to be generated for your users.
- Context, a very important element that I’ll develop a little further just below.

Context feeds the beast, so to speak. This is where you need to give as much information as possible to the artificial intelligence, so that it can provide the most precise and personalized answers possible to your visitors.
Be as exhaustive as possible. For example, if you have a WooCommerce store that sells beauty products, detail what your expertise is (e.g. “You’re an expert in beauty products”).
Explain what types of products you sell, your price range, your market and values, your history, your targets, etc.
You can also tell the AI the tone you want to use in the chatbot’s responses (friendly tone, for example, use of formal or informal language, etc.).
In short: provide as much context as possible. The more context you provide, the higher the quality of your responses.
Visual Settings
In the next menu, “Visual Settings,” customize the welcome texts proposed by the chatbot. Take this opportunity to enter:
- Your name (the one used by the chatbot to interact with your visitors)
- A welcome message
- A phrase to prompt your visitor to write a message
You can see a preview of your chatbot on the right:

If you want something more discreet on your pages, click on the “Popup” box.
You’ll be able to select the icon of your choice, and choose its location from the “Popup Settings ” drop-down menu (bottom right, bottom left, top right, or top left).

So much for the basic general settings. You can also add other chatbots, for example to create one specific to a particular page, by clicking on the little “+” icon.
Each chatbot created can be duplicated or deleted in the “Actions” submenu:

Step 4: Customize the style of your WordPress chatbot
Let’s move on to customizing the visual appearance of your chatbot. To do so, toggle the “Theme Editor” button:

Two new tabs appear, corresponding to the two available modes (ChatGPT and Messages). You can customize both the chatbot itself, and the popup window associated with it.
You can modify the following elements:
- Font size
- Color of the text, background, and “Send” button
- Margins
- Spacing

Step 5: Integrate the chatbot into your site
When you’ve finished customizing the settings, there’s no need to save. The plugin automatically does that for you.
All that’s left is to select where you want to integrate your chatbot. By default, you have two options:
- Display the chatbot on all your pages.
- Display the chatbot on the page of your choice.
To integrate the chatbot on your entire site, select “Default” in the “Site-Wide Chat” option:

Prefer to integrate your chatbot on a specific page? Simply copy the generated shortcode, which takes this form: [mwai_chatbot id="default"].
Go to the page of your choice, then paste your shortcode into a “shortcode” block in the WordPress content editor.
And that’s it!
AI Engine offers a Pro version available from $49/year for use on a single site. This version addresses the limitations of ChatGPT. One interesting feature: with the premium version, the chatbot is able to recognize the content of each of your pages and analyze it, to offer even more complete answers.
As you can see, there’s nothing too complex about this operation, is there? This plugin is really simple to use and effective.
Conclusion
As you’ve seen throughout these lines, creating a chatbot on your WordPress site can enable you to automate certain tasks, while saving precious time on a daily basis.
If you have a lot of customer service questions, for example, it may be worth your while to look into this kind of tool.
On WordPress, it’s quick and easy to add a chatbot using a plugin like AI Engine.
Now you know how to set it up and configure it to your liking. Are you already using it? Or are you planning to start?
Tell us all about it in the comments.

Receive the next posts for free and access exclusive resources. More than 20,000 people have done it, why not you?

Continue reading
Articles posted in WordPress PluginsOur review of B2BKing: A WooCommerce plugin built for B2B commerce
“Hi, I need 200 units of this product with fast shipping please”. As an online store owner, receiving this kind of message puts a smile on your face. Answering it, on the other hand, becomes a lot less fun… Basically,…
GTranslate on WordPress: our full review of this tool for creating a multilingual site
“Hello, how are you?” “What do you think of this computer mouse?” For you, everything is easy to understand in these two sentences. For someone living deep in the Shetland Islands or Yucatán, it’s probably a bit more complicated… If…
Air WP Sync: Test and review of this plugin for integrating Airtable into WordPress
Do you use Airtable and WordPress? Then some of your days probably look something like this. In the morning, you update your Airtable database as soon as something changes. In the afternoon, you copy and paste the same data into…