Leaving the native WordPress interface? Never. Drowning you in a slew of widgets? He wouldn’t dream of it. With this guy, blocks are the guiding light. Create your next WordPress site without leaving the default editor (Gutenberg), without coding, and…
Do you remember the 80’s? The arrival of the new wave, the advent of mullet haircuts, the success of Cyndi Lauper, Michael Jackson, Madonna, Prince, Whitney Houston, Duran Duran and so on. In the 80’s, it’s also the explosion of the video game, and the release of a game on which we are numerous to have been close to the snap of the thumb: Tetris.
This game, with its simple principle, consisted in stacking blocks of different shapes while optimizing the available space.
The concept can be summed up in one line: “Tetris perfectly fits the definition of the best game: one minute to learn it, a lifetime to master it”, as journalist Bill Kunkel (aka The Game Doctor) said.
A statement that could be applied to many programs, like WordPress.

Speaking of WordPress, if I mention Tetris, it’s because the plugin I’m going to dissect today is called Stackable. And for good reason, this plugin adds new Gutenberg blocks to be nested in your WordPress site.
Ready for this new test? On your mark, get set, go!
Overview
Originally written in July 2021, this article was updated in November 2021 with the free and premium 3.0.5 versions of Stackable.
Use our help with our detailed guide to choose your domain name.
What is Stackable?
“Powering the next generation of web design”. This is the mission of Stackable on its official website, where the plugin defines itself as a “new page building experience for Gutenberg”. No less!
It must be said that on the WordPress directory, the block plugin has more than 40,000 active installations and a nice rating of 4.9 out of 5 stars, accompanied by a string of rave reviews.
If you’re already looking for new Gutenberg blocks, you may have already come across plugins such as Ultimate Addons for Gutenberg, Qubely, Getwid or Coblocks.
We talked about them in our article about plugins to increase Gutenberg’s powers. Their mission is simple: to diversify the range of Gutenberg blocks available in the content editor.
Stackable is also a plugin designed for Gutenberg, to which it brings a myriad of blocks, from the great classics (header, gallery, call to action) to the more exotic ones (quotes, price tables, timer, testimonials, etc.).
These blocks are ready to use and customizable.
So, you might think, what is the point of installing Stackable? They are just blocks among other blocks. Well, Gutenberg provides many useful blocks, but with Stackable, the possibilities are multiplied.
Moreover, you have access to more advanced customization features than those offered natively with Gutenberg, such as: adjusting the layout of the elements inside the blocks, spacing, changing the background, adding hover effects, etc.
There are two versions of Stackable:
- A free version is available on the WordPress directory.
- A paid version is available from the official website of the plugin, starting at $49 for use on one site.
As you can imagine, the second one gives access to more blocks and allows to customize them more finely.
For this test, we focused on the Premium version.
Stackable settings
To start configuring Stackable, install and activate the plugin. Then go to Settings > Stackable.
On its interface, you will have access to the following settings:
- Font Awesome icons Pro (premium): to integrate a Font Awesome Pro kit to Stackable.
- Editor Settings: allows you to control certain features of Stackable’s editor. For example, you can disable the Design Library, set the width of certain blocks, close editor panes that you are not using, and link columns so that they undergo the same changes.
- Role manager (premium): to give or block access to the block editor to some user roles and let them only edit the content. Note: this management works on all blocks, not just those included with Stackable.
- Custom Fields (premium): this feature allows you to create custom fields that you can dynamically add to your content from the editor. To do so, go to the Fields section of your WordPress administration, click on “Add New”, define a field type (Text, Number, Date, Time or URL) and a name.
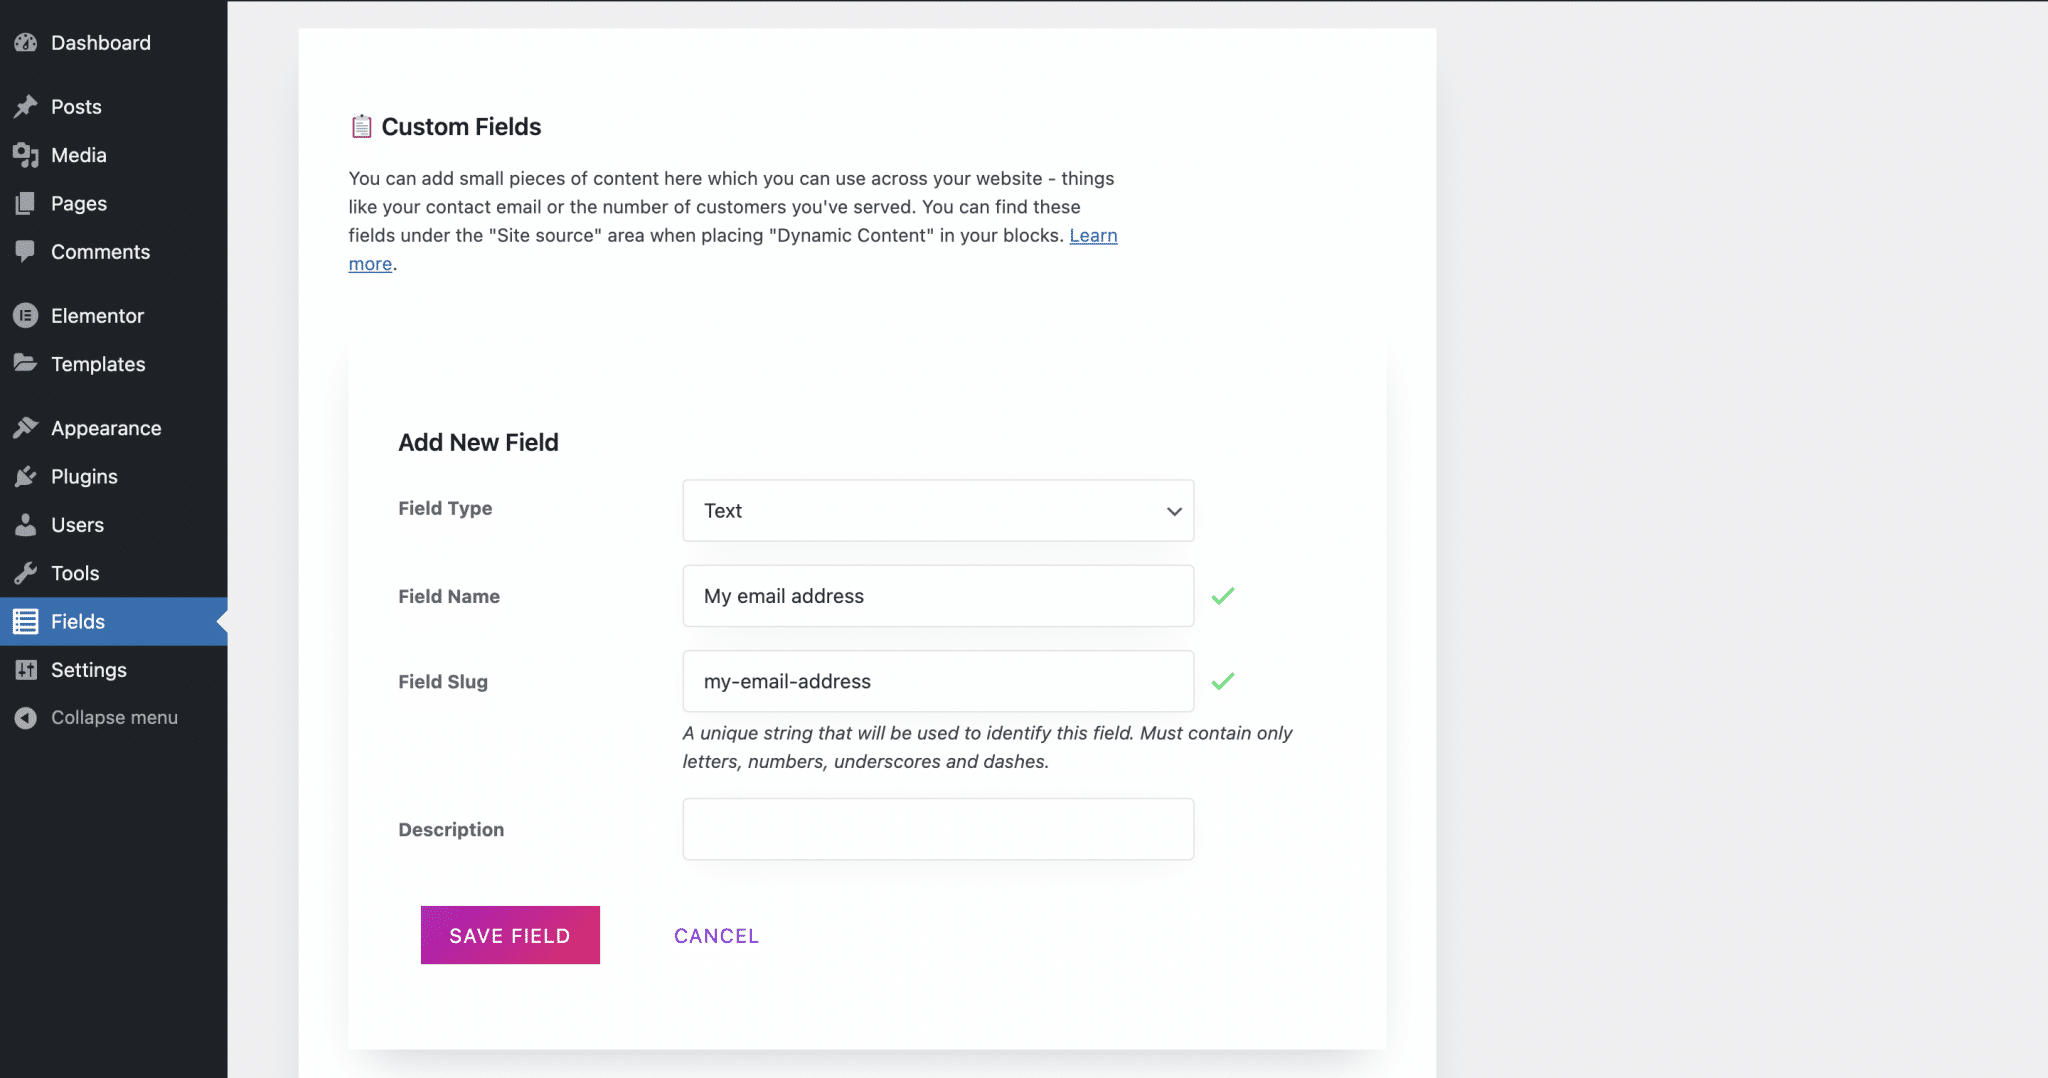
Then click on “Save Field”, enter a value for your field and click on “Save changes” to save it.
To integrate it into your content, place the cursor where you want the value of your field to appear and click on the database icon (it corresponds to Dynamic Fields).
Select “Site” as “Dynamic Source”, then your newly created field (it appears under “Stackable Custom Fields”), and finally click on “Apply”. That’s it!
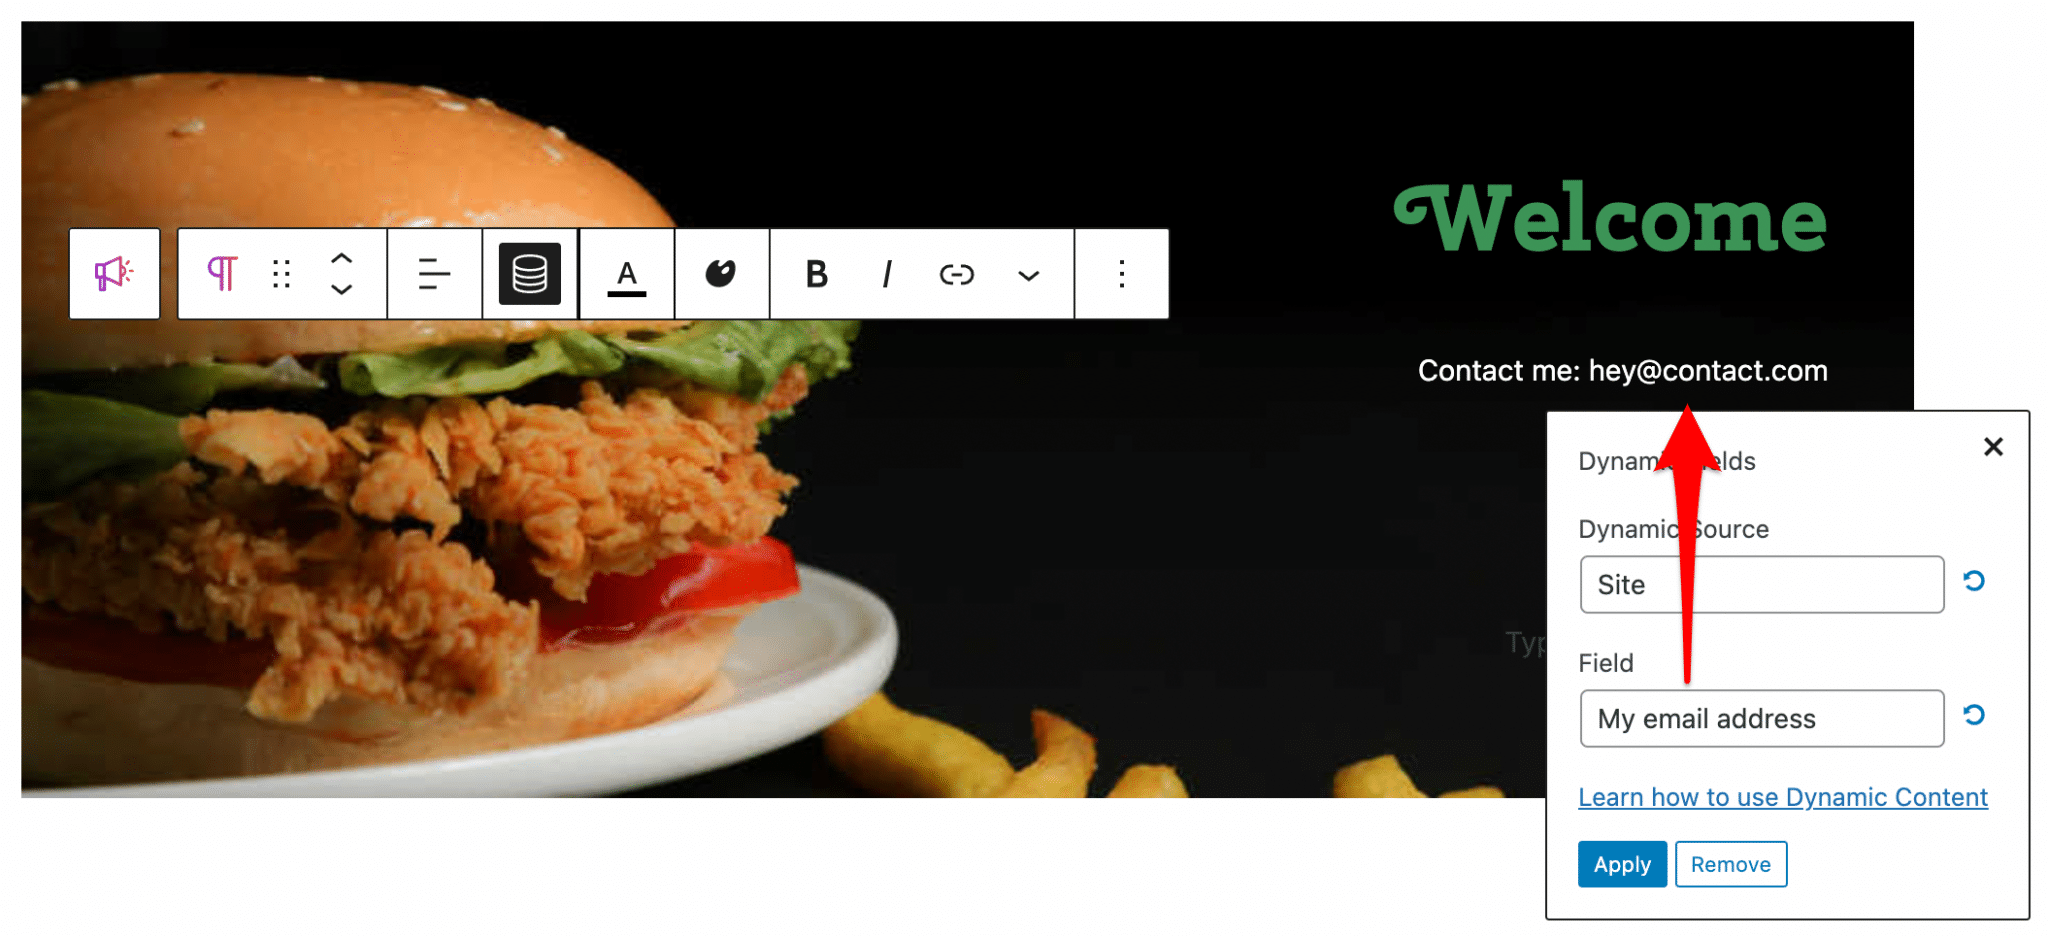
That’s all well and good, but why did we do all this? Thanks to the magic of dynamic content, as soon as I update it, my email address will be automatically updated in every place on my site where the custom field is integrated.
- Responsive breakpoints: it is possible to change the screen width from which your site will be viewed in Tablet or Mobile mode, and thus display the settings you have defined for these devices.
- Global settings: two features are available to overcome possible incompatibilities with the theme in place on your site. You can enter the selector of the content area of your theme, and force the use of Stackable’s fonts so that they take over those of your theme.
Like Elementor, Stackable has global settings: the colors and typography that apply to pages created with Elementor. But with Stackable, you have the possibility to define these settings for all the blocks that make up your site.
- Enable & Disables Block: if you don’t need some blocks, you can disable them so that they don’t appear in the list of available blocks.
- Optimization settings (premium): allows you to load JavaScript and CSS files only in posts containing Stackable blocks rather than on the entire site. The purpose of this feature is to improve the performance of your site. This feature only applies to version 2 blocks because it already applies to the most recent blocks of the plugin (from version 3).
How to use Stackable ?
Kits and blocks
Stackable is used directly from the WordPress editor. To do so, create or open a page or a post, then select Design Library at the top of your post.

The Design Library contains UI Kits and Categories. What is it?
In fact, these two sections contain the same elements, but categorized differently. The UI Kits gather the blocks available by the style guide and the Categories group them by type of block: header, testimonial, call to action, etc., which can be found in all available style guides.
Categories and UI Kits are two different ways to find the right block for you.
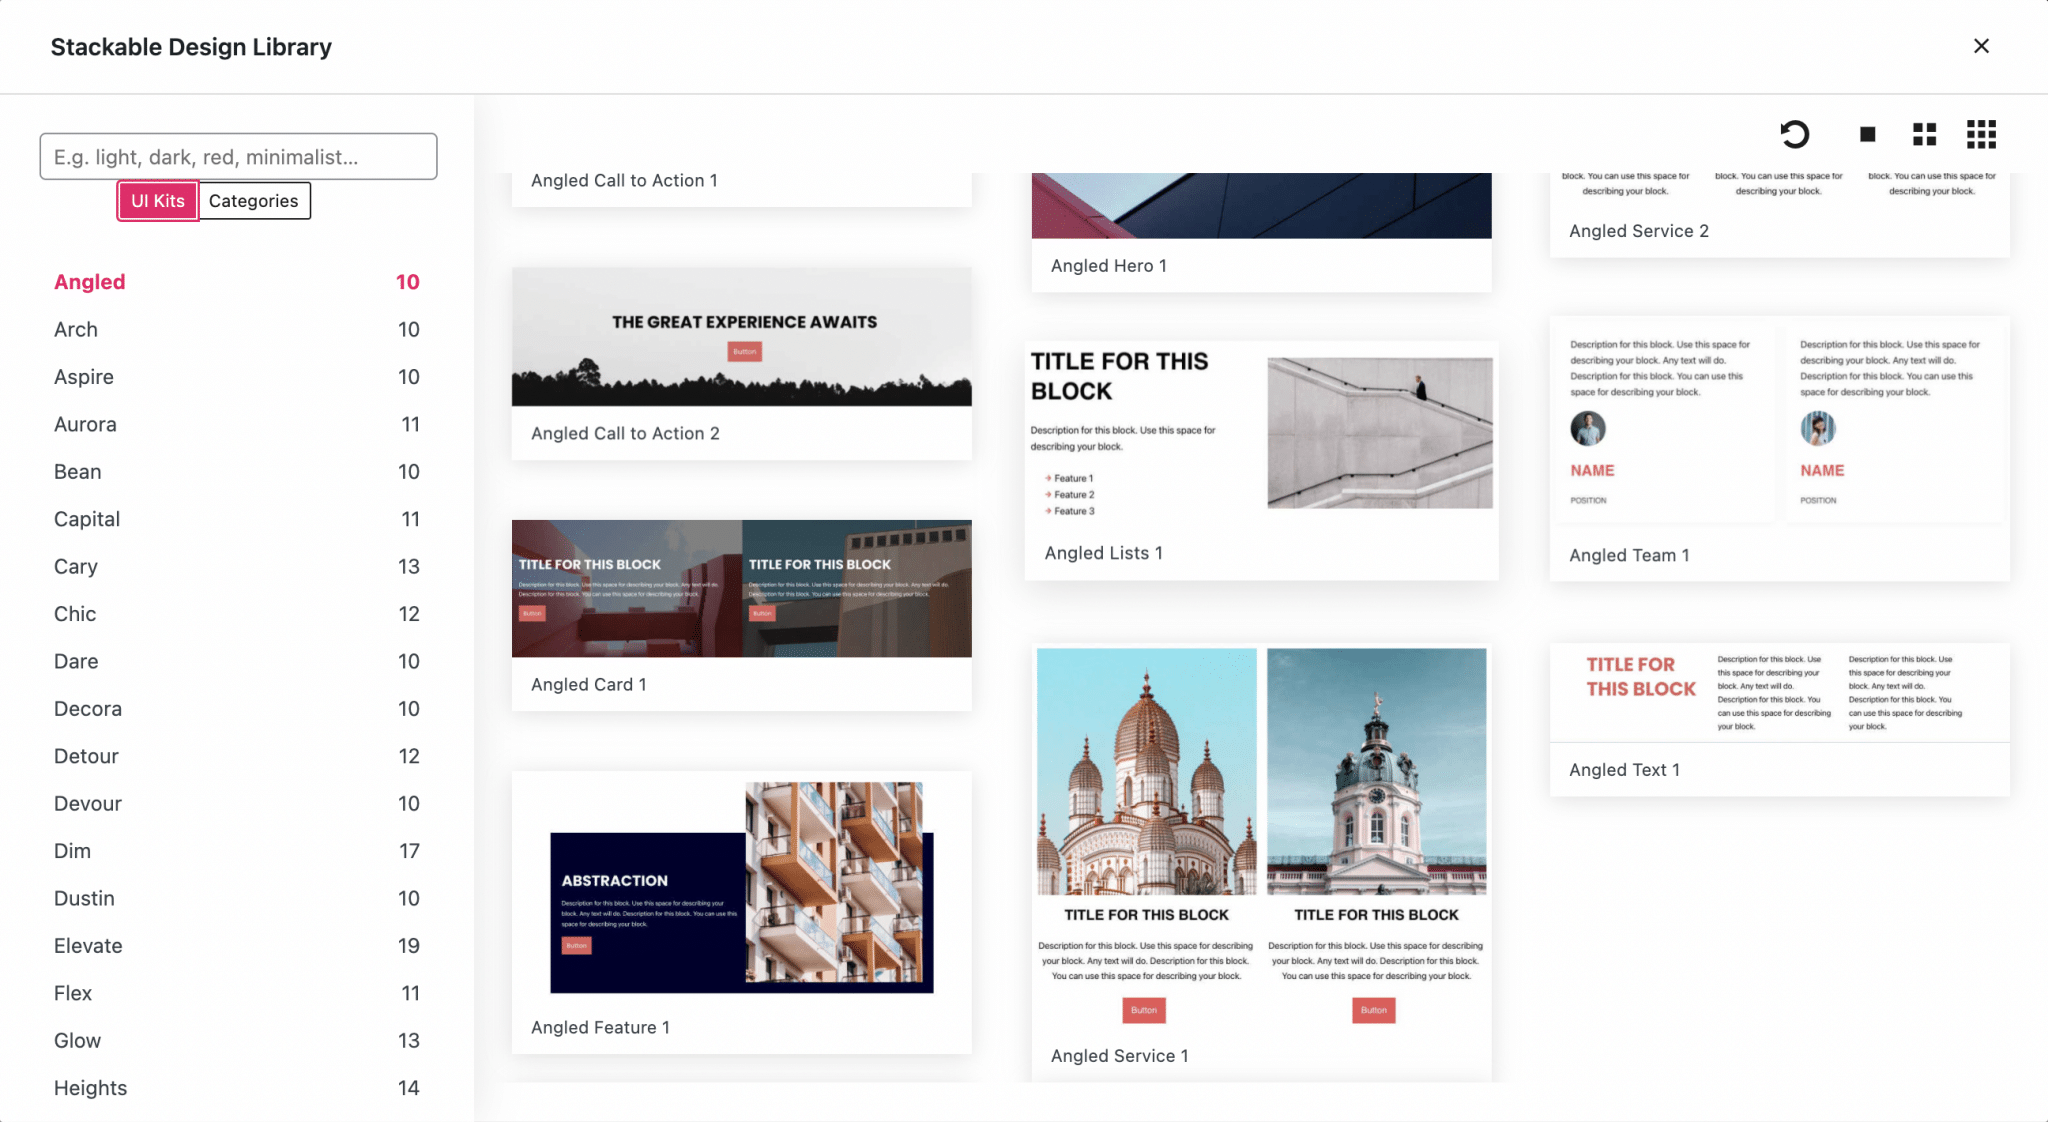
Each block comes with a ready to use and customizable design. We will see how to customize them in the next part.
To find the block you need, you can also use the search bar at your disposal. The four icons at the top right of the window allow you to refresh the search results and change the size of the thumbnails to get a more accurate or larger view of the different blocks.
How to integrate a Stackable block in a post
You can also simply click on the “+” icon as you would to add any block, and you’ll easily recognize the Stackable plugin blocks, as they are adorned with a purple-orange gradient.
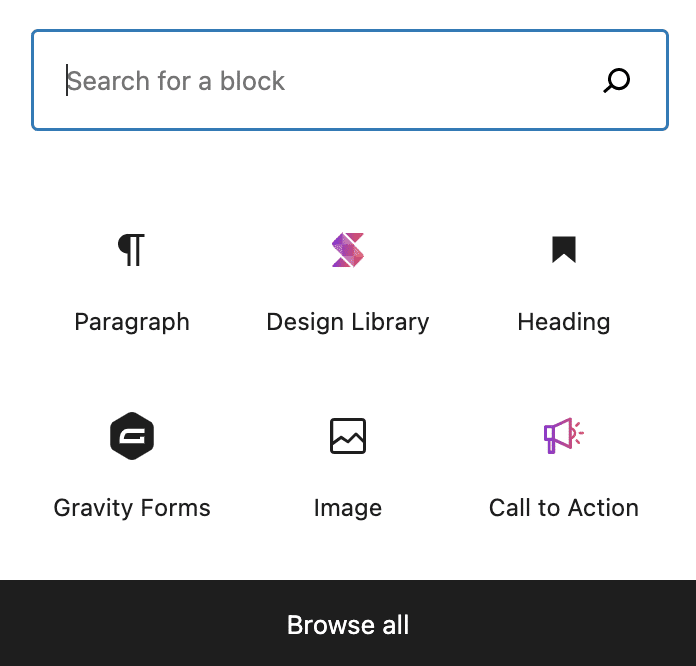
By clicking on the “Browse All” button, you can access all the Gutenberg blocks at your disposal. The Stackable blocks are present in the “Text” and “Appearance” sections, and are all grouped in the eponymous “Stackable” section, which also gives access to the Design Library.
All of these paths lead to Rome to the Stackable blocks, yes, but it’s primarily the Design Library path that gives access to the pre-built designs.
Take this Testimonial block, for example, which has minimal formatting, filler text, and no example image:
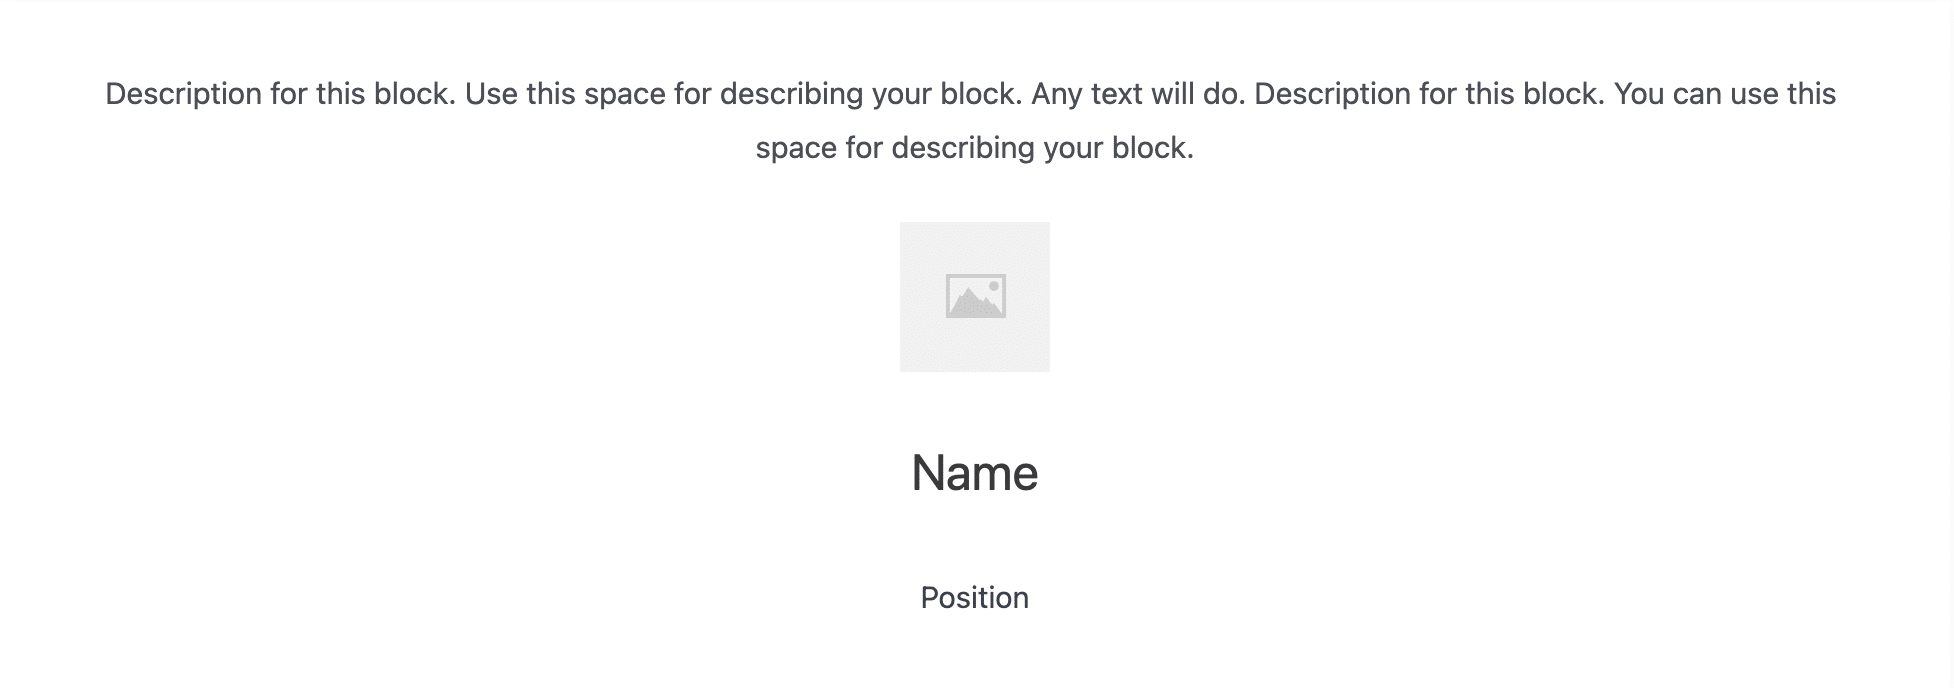
And see another Testimonial block, added from the Design Library (the Prime Testimonial 2 block):

Once you’ve found the perfect fit, click on the desired item to embed it directly into your post. You can then rearrange the element on the page, like any Gutenberg block, and customize it.
Customizing Stackable
To customize a Stackable block, go to the “block” section on the right side of your post, where you’ll find a bunch of options, classified in three categories: Block, Style and Advanced.
Finding the one you’re interested in can be tedious because there’s so much to choose from, but you can also find it by simply double-clicking on the block element you want to change. You will then be taken to the settings for that block in one click.
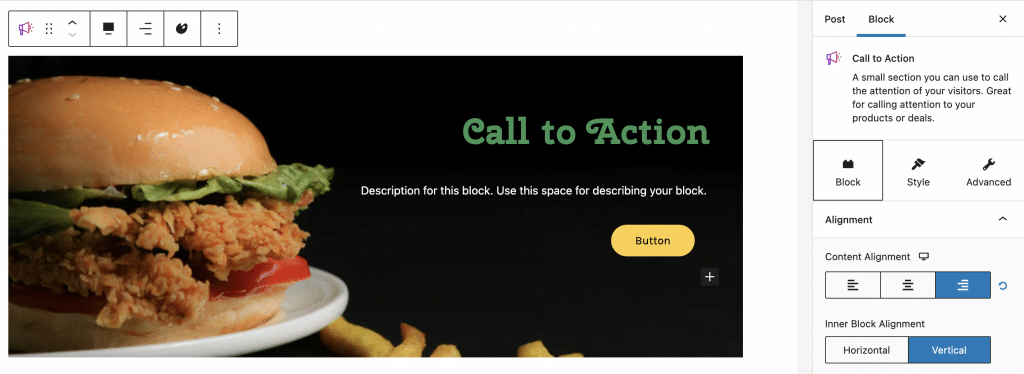
The different customization options are grouped into three tabs:
- Block: this is where you can customize the layout of the different elements that make up your block, add borders and shadows and act on the background, spacing and alignment of the text.
You can also adjust the spacing between the elements in your blocks by hovering over them and then using the handles at the bottom of the element. You can even see the number of pixels separating it from its neighbor. Very useful!
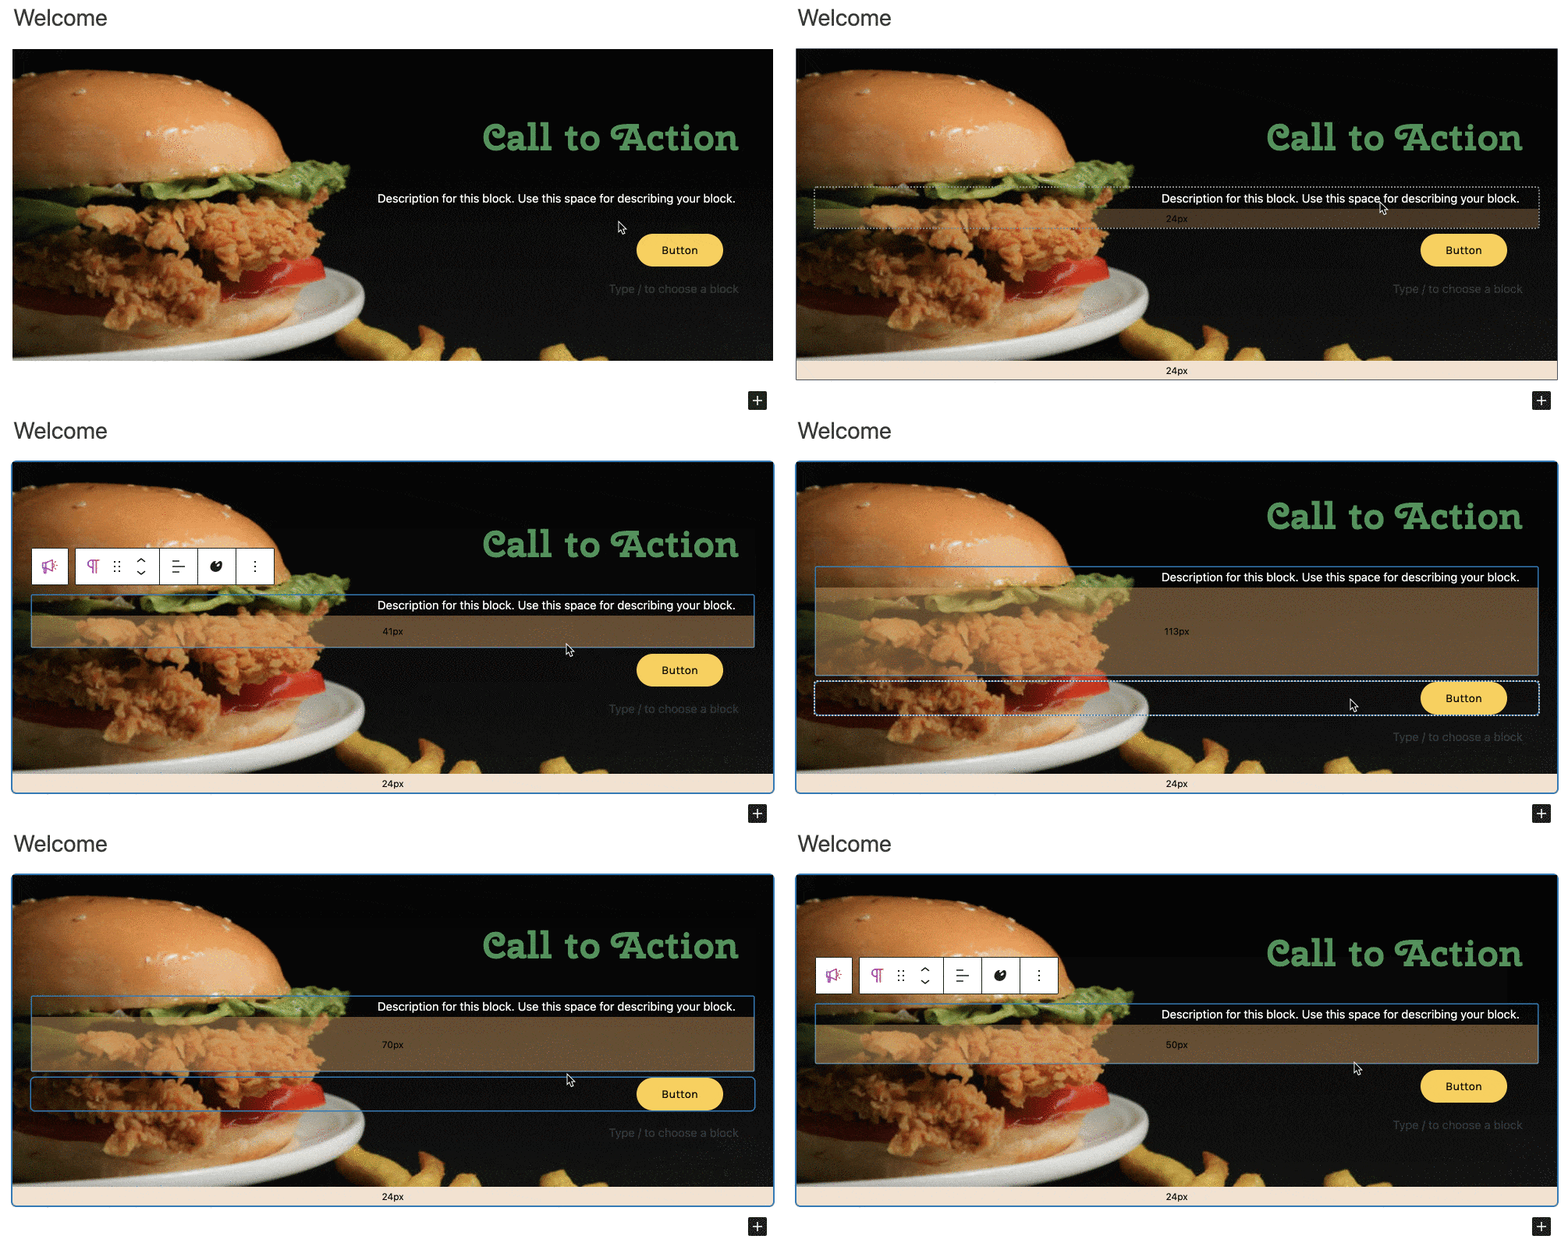
- Style: allows you to manage the columns and act on the typography, colors, buttons and separators. It is more unexpected, but you can also add a title and a description to your block.
- Advanced: here you have access to advanced features such as the HTML tag associated to the block and the management of the responsive (possibility to hide the block on computer, tablet or mobile). You can adjust the margins of the block, and the alignment of the content, but also have fun adding animation or transition effects to your elements (go easy, though).
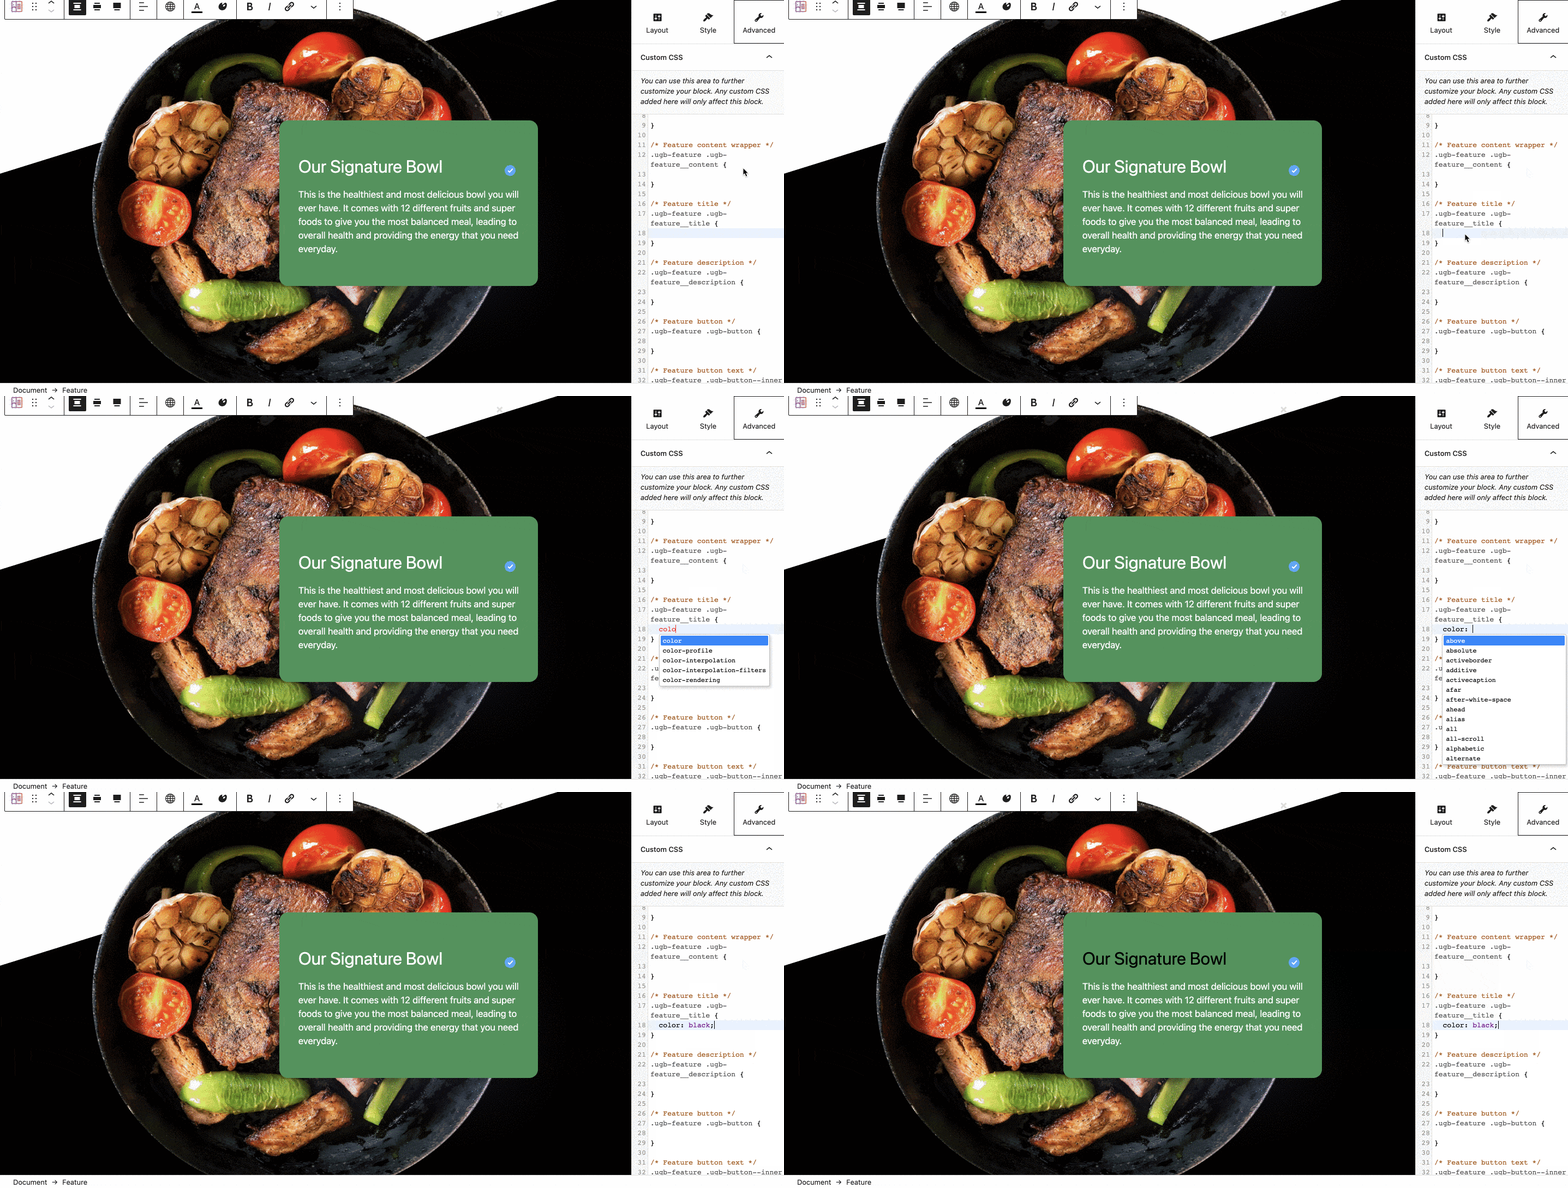
The icing on the cake for CSS aficionados is the ability to modify the CSS of the block directly in this interface, next to the block, and with a preview of the changes in real time.
Finally, the conditional display allows you to display an element only when a condition that you have previously defined is met.
If you are not completely satisfied with the design of a block, you have the possibility to modify many parameters to adjust it to your liking.
For example, I liked being able to easily add effects to the hover of the elements or the parent element (apply a background to the parent block to take advantage of this last feature), or to easily modify the margins of each element of the block.
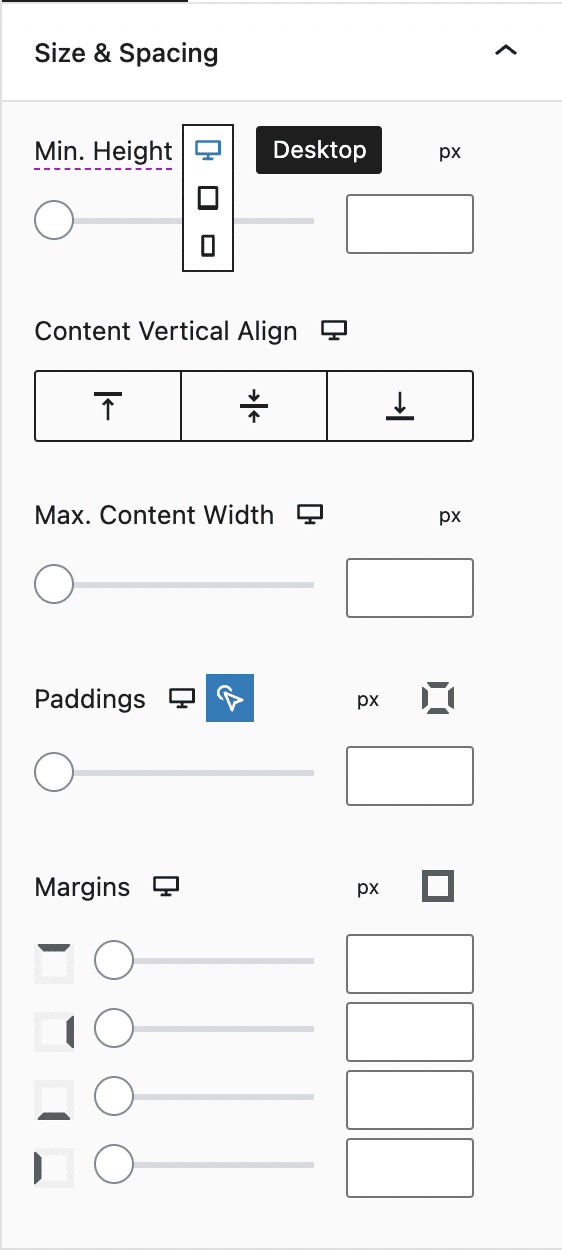
Even better: you can choose different margins on mobile and tablet! So you can easily change the responsive aspect of your site. To do this, first click on the desktop icon (computer) to display the icons of other devices.
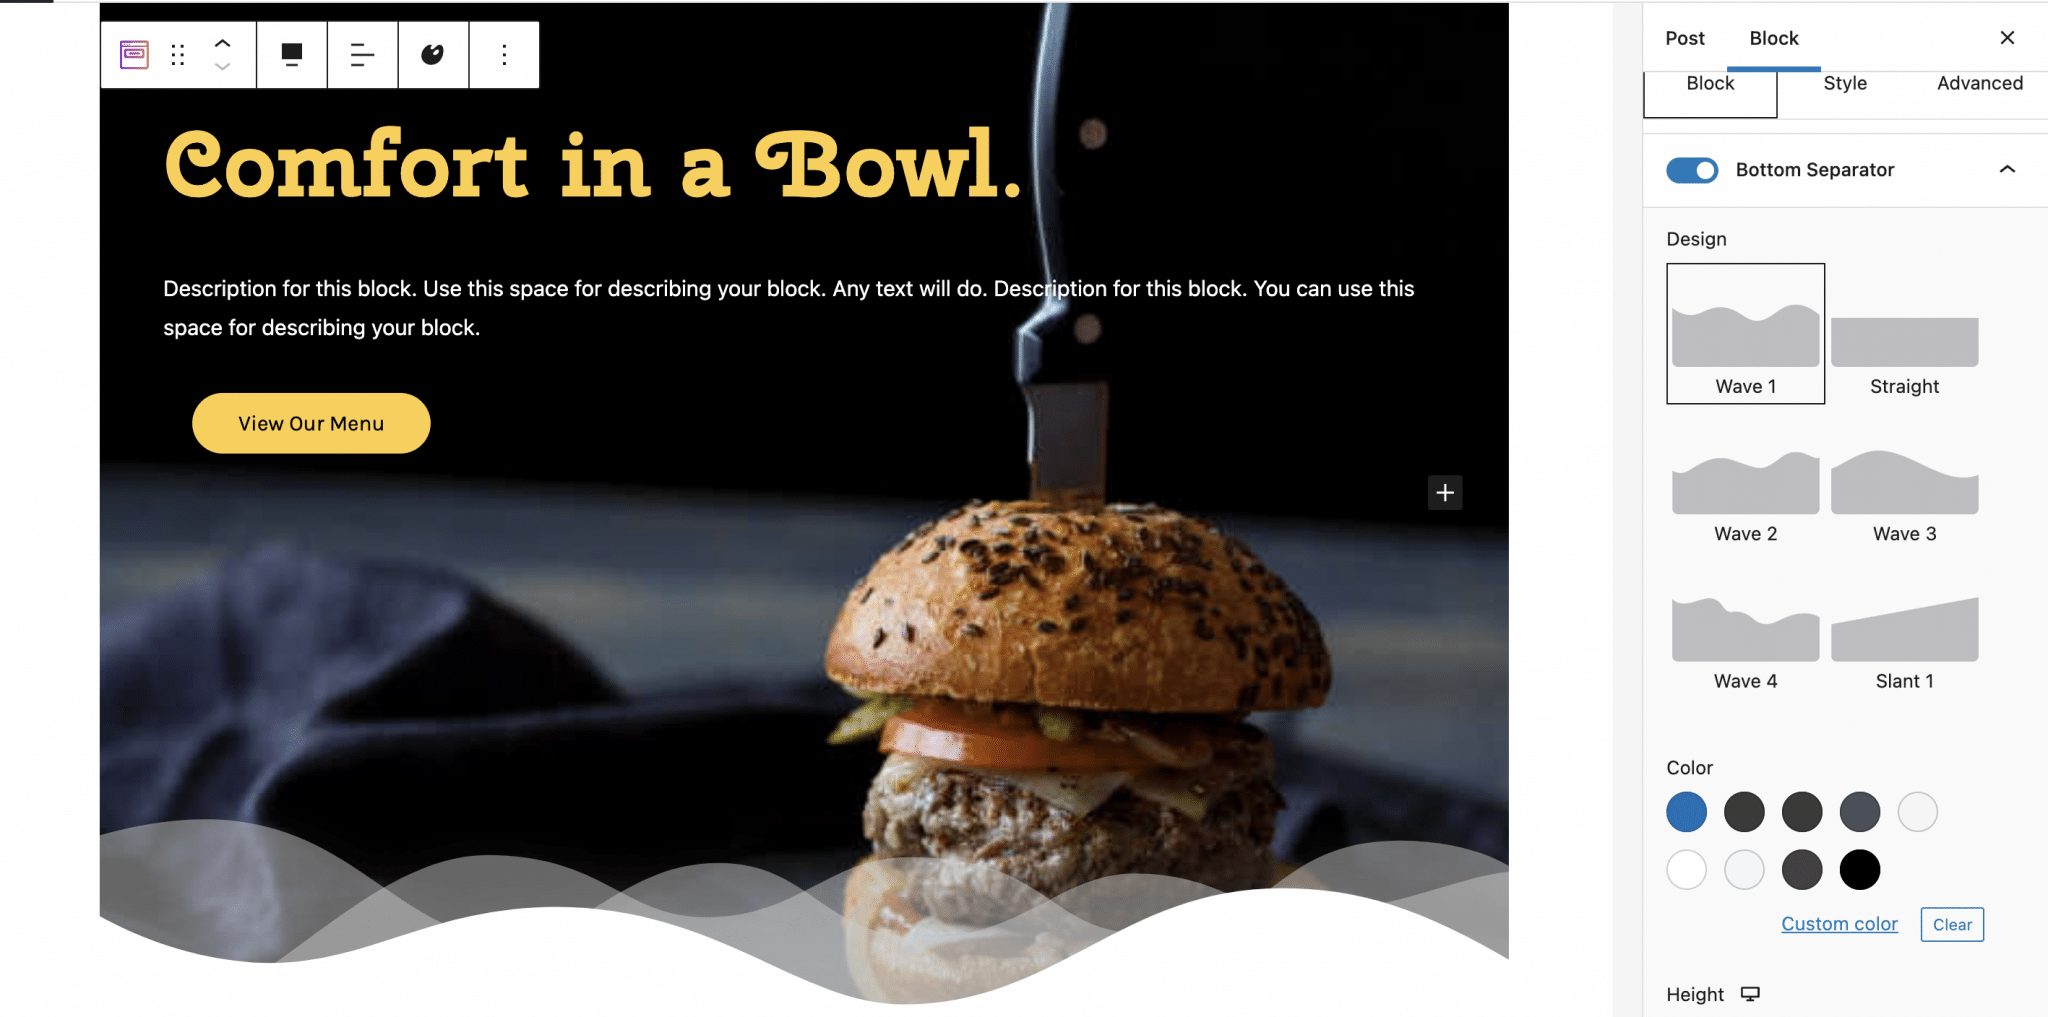
Another nice option is to add separators at the top or bottom of an element, like with Elementor. You can of course adjust the look of these separators, and even add one or two lighter layers in the Premium version.
This is what it looks like at the bottom of this appetizing burger:
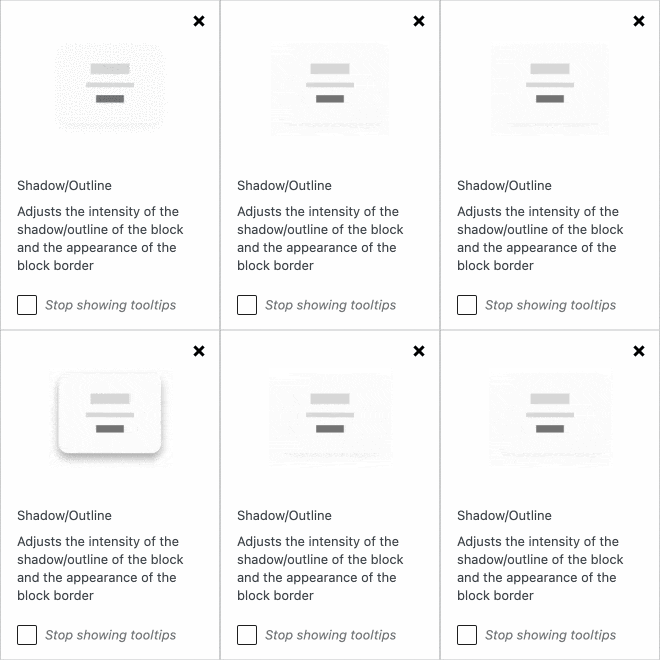
When you hover over their name, some settings turn purple and your cursor turns into a question mark. If you don’t know what they are, click to see an animation that will help you understand what they are for. Quite useful to find your way around all these options.
What adaptation to themes and plugins?
Adaptation to themes
According to the official documentation, “Stackable should work with any theme”, as long as the theme you have on your site is optimized for Gutenberg.
Take a look at the best free WordPress themes in our selection.
Speaking of themes, I mentioned it at the beginning of this post: there is an in-house theme, designed to work with the Gutenberg editor and the Stackable plugin. It is free and available on the official WordPress directory. With it, compatibility is guaranteed, in short.
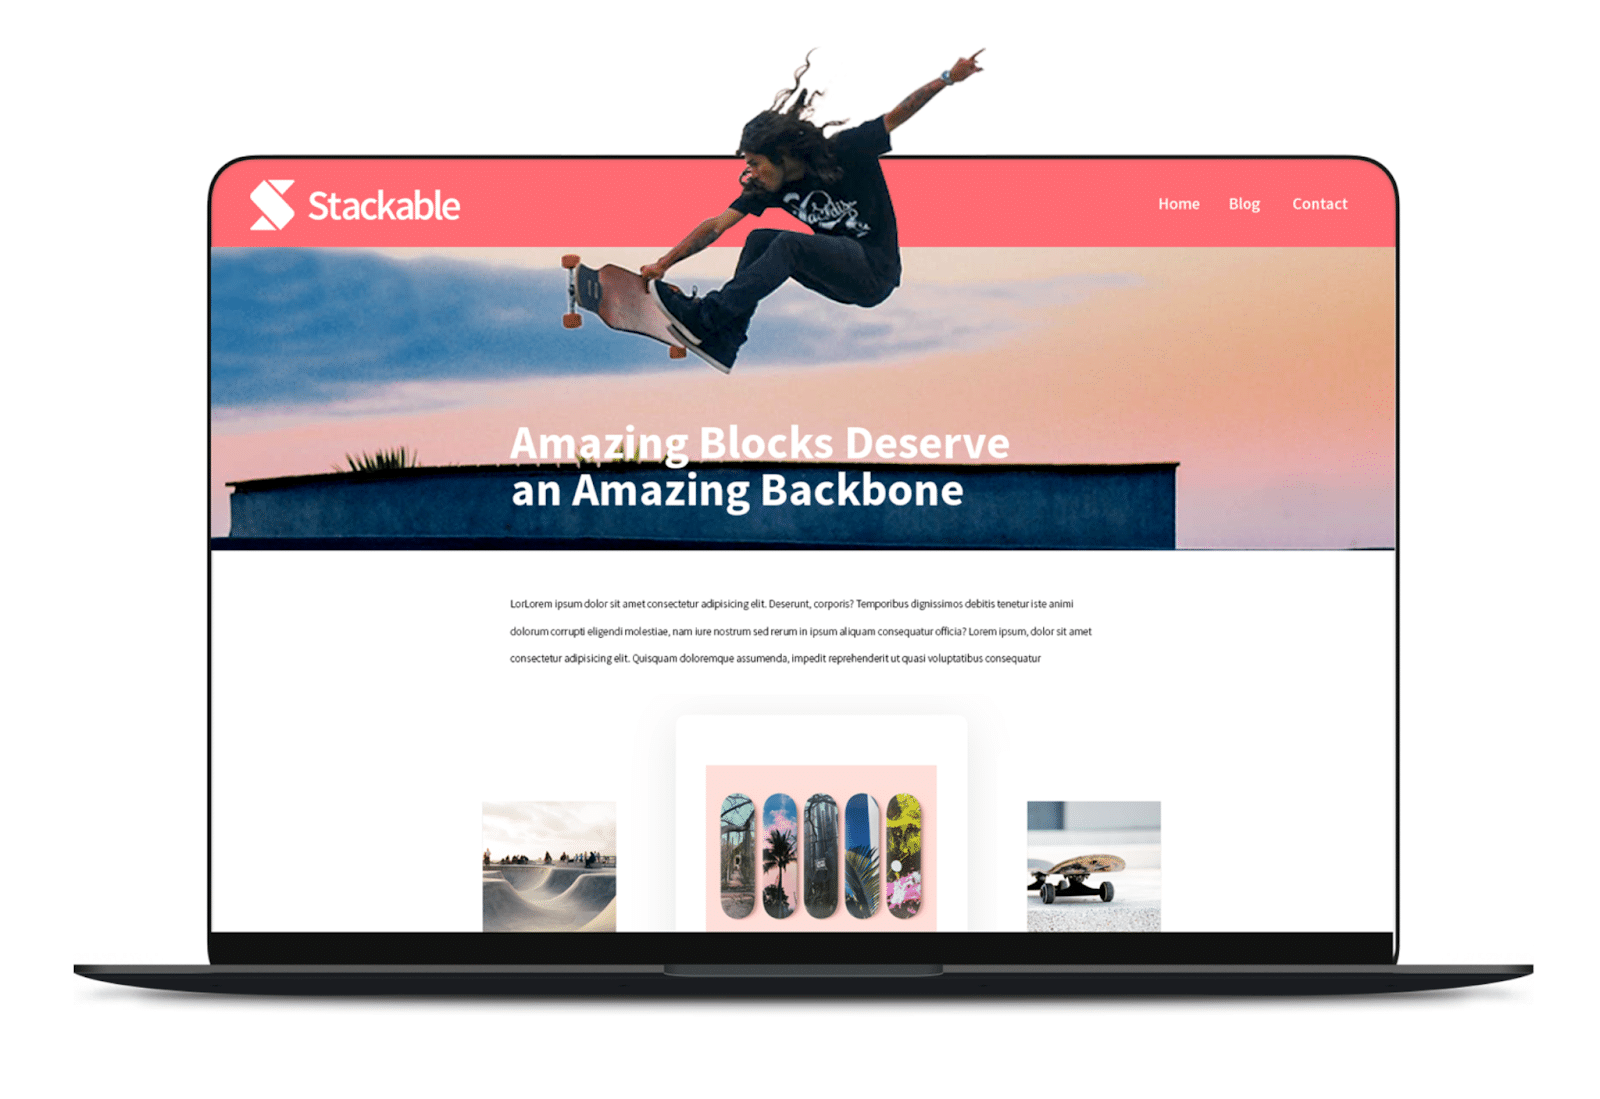
It’s in the colors of the plugin of the same name, so I hope you don’t mind the candy pink.
Download the Stackable theme:
Adaptation to plugins
The Stackable documentation ensures that it is compatible with the elementor page builder (aff link). But beware, you will not be able to use Stackable blocks in the page builder editor.
It’s actually the same way as for Gutenberg blocks, you can’t use them in the Elementor editor, you have to make a choice: build your page with Elementor or with the WordPress editor.
The official Stackable website also claims that its blocks are compatible with any plugin, so you can use them with other block libraries without any problem.
Documentation and support
In case you have any difficulties while using Stackable, you can refer to the official documentation at any time.
You will find there:
- A section dedicated to getting started with the plugin.
- A troubleshooting section.
- Pricing and licenses details.
- Targeted guides.
- A FAQ.
- And other resources.
You can also find this documentation in Settings > Stackable, Documentation tab.

In case of technical glitches, the team in charge of the plugin provides users with a list of frequently encountered problems, as well as solutions to fix them.
If you’re still stuck, you can call Stackable’s support, or join their Facebook group to get answers to your questions.
Regarding support, the Stackable team can help you if you send them your request via the contact form in the Contact Us tab in Settings > Stackable, or to the email address support@wpstackable.com.
What is the value for money?
The premium version is naturally more generous in the variety of blocks offered. The customization options are also more numerous.
For the Feature block, for example, there are 2 layout options in the free version (Basic and Plain), compared to 13 in the Premium version.
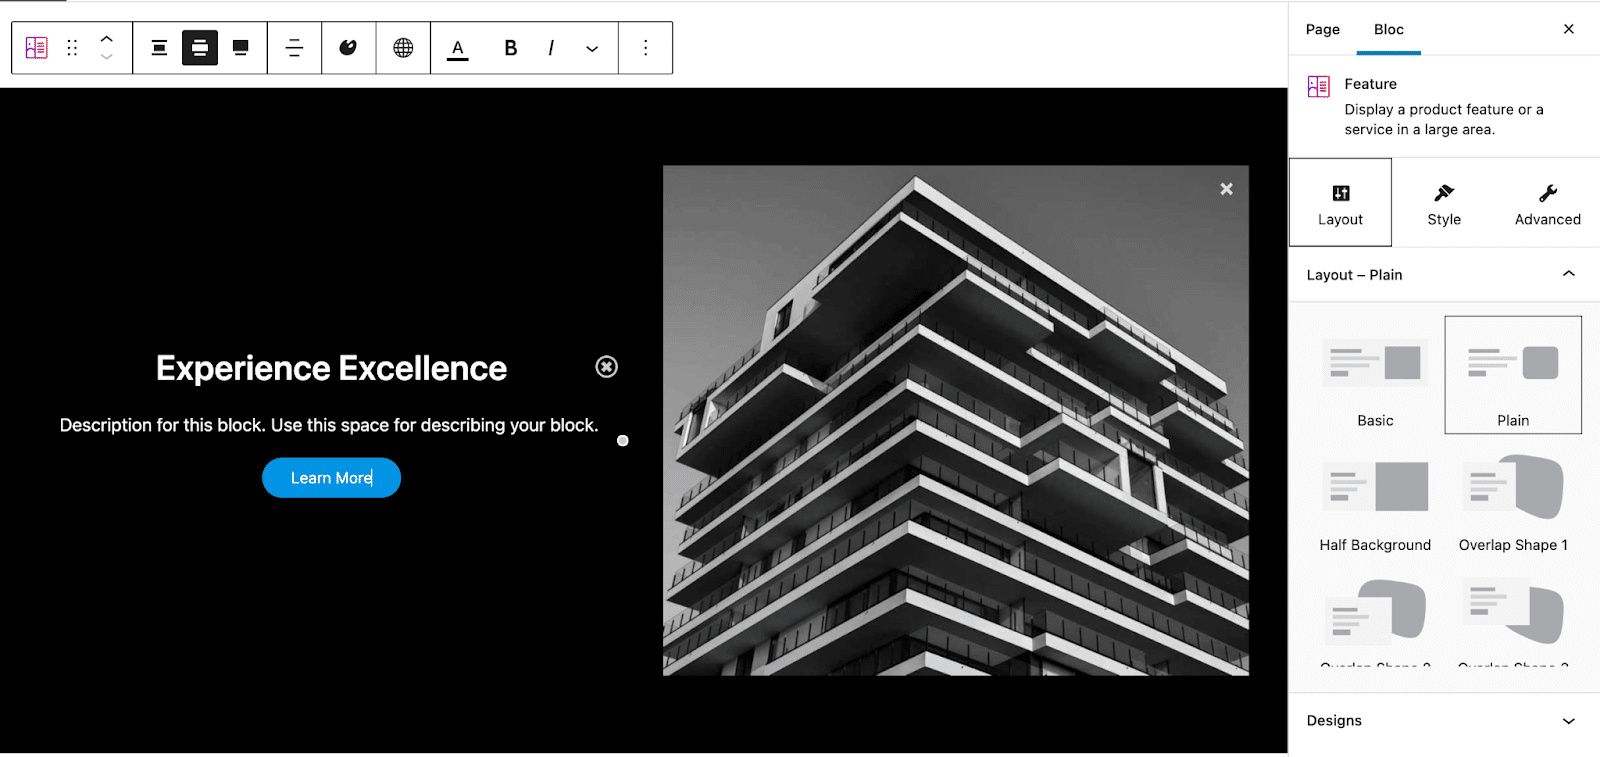
In the Premium version, there are also more or less interesting parameters, depending on your use of Stackable, such as the integration with Font Awesome Pro and the Role Manager as well as the possibility to modify any block in CSS.
To use this last feature, go to the Advanced section, then Custom CSS. Convenient: your changes are displayed in real time.
The Premium version also gives access to one year of support and updates.
Using Stackable or a page builder: that’s the question
That’s it, we’ve gone over the features and settings of Stackable together. Now you have a clearer idea of what the block plugin has in store.
If you’re a fan of page builders, or have already taken a close look at them, you might be wondering: why use Stackable instead of a page builder?
Because the options offered by Stackable and the free version of Elementor for example are comparable. And for good reason, Stackable approaches a design experience with a page builder, as claimed on its official website: “Have the confidence to easily build the fastest websites using a new page building experience for Gutenberg”.
And with the arrival of Full Site Editing, which will allow to act on all the elements of the site’s interface (and not only the content of the posts), Stackable might come even closer. That said, Stackable has the advantage of being used directly in the WordPress content editor, which simplifies the design experience compared to current page builders.
On the other hand, the pro version of Elementor offers much more advanced widgets and features. Since both plugins cost the same for a single-site use ($49), we suggest you turn to the behemoth of page builders instead.
Our final opinion on Stackable
All in all, we can say that Stackable is a rather intuitive plugin that offers modern and aesthetic designs.
Stackable is for any site creator who wants to have more advanced blocks to customize the design of their site, without needing to touch any line of code (but having the possibility, if they master the CSS, to put the blocks to their liking).
However, should you use it or go directly to a more advanced page builder like Elementor?
Indeed, with Stackable we are approaching a design experience of a page builder directly in the WordPress editor. One could say that this is the beginning of the final goal of Project Gutenberg, which is to become a real “site builder”.
However, we are not there yet. For now, Stackable will help you create posts in the same way as the free version of Elementor, without any template management (Stackable allows you to load pre-made designs, but not to save your own).
If you like working with the WordPress editor and the blocks provided by Stackable are sufficient for your project, go for it! Using Elementor will not be necessary.
However, if you need more advanced features or need to design a site from scratch (by which I mean customize all the page templates), Elementor (aff link) or one of its competitors will be indispensable.
And if you’re one of the users who’s already been seduced by Elementor, Stackable might not be a big hit. After all, you’ve got your own habits, so there’s no real reason to change them.
If you’re interested in the Pro version of Stackable, don’t hesitate to view the available demo and browse the free version, to make sure that the blocks and options are to your liking.
Download the Stackable plugin:
And you, have you already used it? Did this article make you want to use it? Share your thoughts in the comments.

Receive the next posts for free and access exclusive resources. More than 20,000 people have done it, why not you?




I absolutely love the combo of Blocksy and Stackable, I have and appreciate the advanced functionality of each. But, to be clear, the free offerings are almost too good to be true. Perhaps, if I were a diehard Elementor user, I’d hold off for a bit, maybe. As you said, old habits die hard, but if you’re new to WordPress my advice would be far more simple. Ditch the page builders and embrace Gute (of course, with a few carefully chosen plugins like Stackable and a capable theme like Blocksy.) Once you get the hang of it and reach that “ah-ha” moment, you’ll be grinning from ear to ear and be able to finally start pushing back at all those opinionated “page builder people,” lol.