In the world of SEO and web design in general, it’s a term we hear about almost all the time. Ah, the famous Core Web Vitals… That thing that’s been in fashion ever since its official release in May 2021.
So, if you’re in the loop, you probably want to know how to optimize Core Web Vitals on your WordPress site.

It would be a real shame to miss out, given the positive impact it can have on user experience and your conversions.
After reading this article, you’ll know everything there is to know on the subject. You’ll know how Core Web Vitals work and what they can do for you.
And you’ll have practical advice, including tool recommendations, for testing and improving Core Web Vitals on your WordPress site.
Overview
Originally written in July 2023, this article was most recently updated in April 2024.
What are Core Web Vitals?
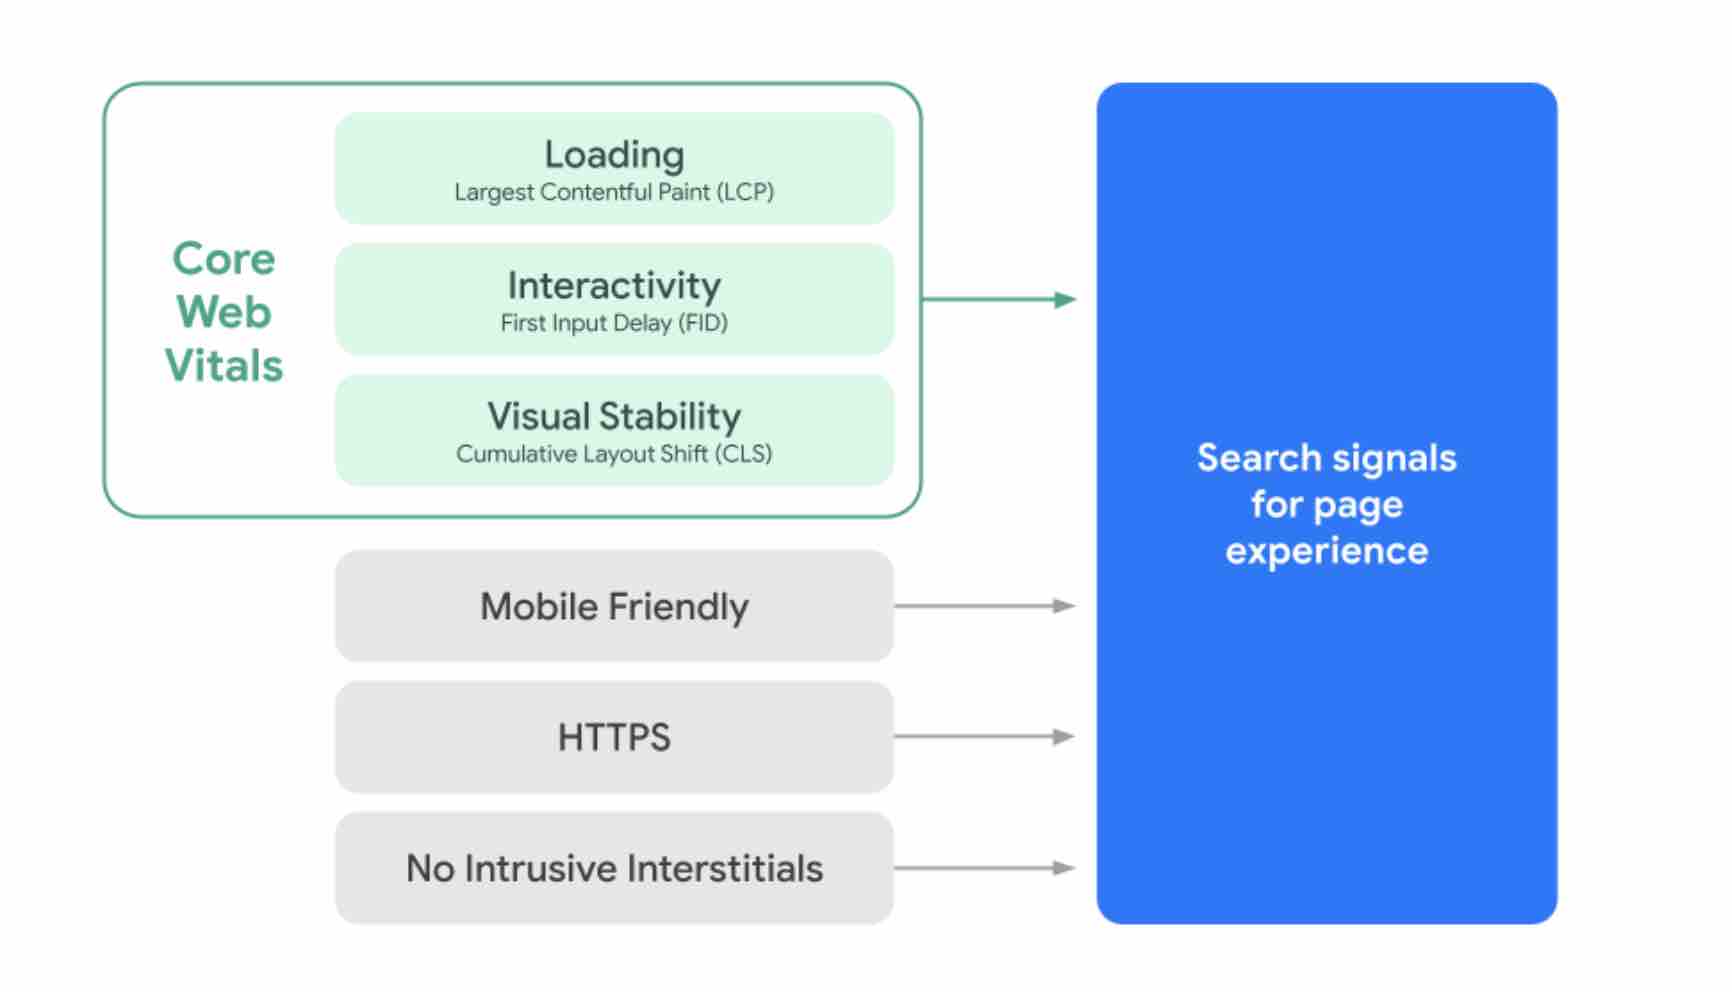
Core Web Vitals are a set of metrics created by Google, designed to evaluate the actual user experience a visitor has on a web page.
As Google explains, “These signals measure how users perceive the experience of interacting with a web page”.
To measure user experience (UX), Google looks at web page loading performance, interactivity, and visual stability.
Core Web Vitals are part of the Page Experience update rolled out within Google’s algorithm between May and August 2021.
As Google points out, Core Web Vitals are taken into account when ranking a page in search results, alongside indicators such as:
- Mobile usability (content that can be viewed easily, whatever the device used: desktop, smartphone, or tablet)
- HTTPS security (Google subsequently clarified that this indicator was no longer used as a ranking factor)
- Instructions concerning intrusive interstitials (e.g. a popup window that covers the main content of the page)
Making the experience “as useful and enjoyable as possible”
The “Page Experience” update and the Core Web Vitals are part of Google’s overall mission to offer its users “the most useful and enjoyable experience possible on the web.”
In fact, according to Google, “Optimizing for quality of user experience is key to the long-term success of any site on the web”.
The Core Web Vitals were launched to meet this challenge. To this end, Google specifies that Core Web Vitals should be measurable by any website owner, at any level, and without being a web performance expert.
As proof of the importance Google attaches to these signals, the search engine even states that it plans to “test a visual indicator highlighting the most user-friendly pages in search results.”
At the time of writing, this has not yet been put into practice. But it could happen in the coming weeks/months.
What are the Core Web Vitals metrics?
Currently, Google takes into account 3 metrics in its Core Web Vitals. These metrics are measured by real user data, and each “represents a distinct facet of the user experience,” reveals Google.
To fully understand how they work, let’s break them down one by one.
Largest Contentful Paint (LCP)
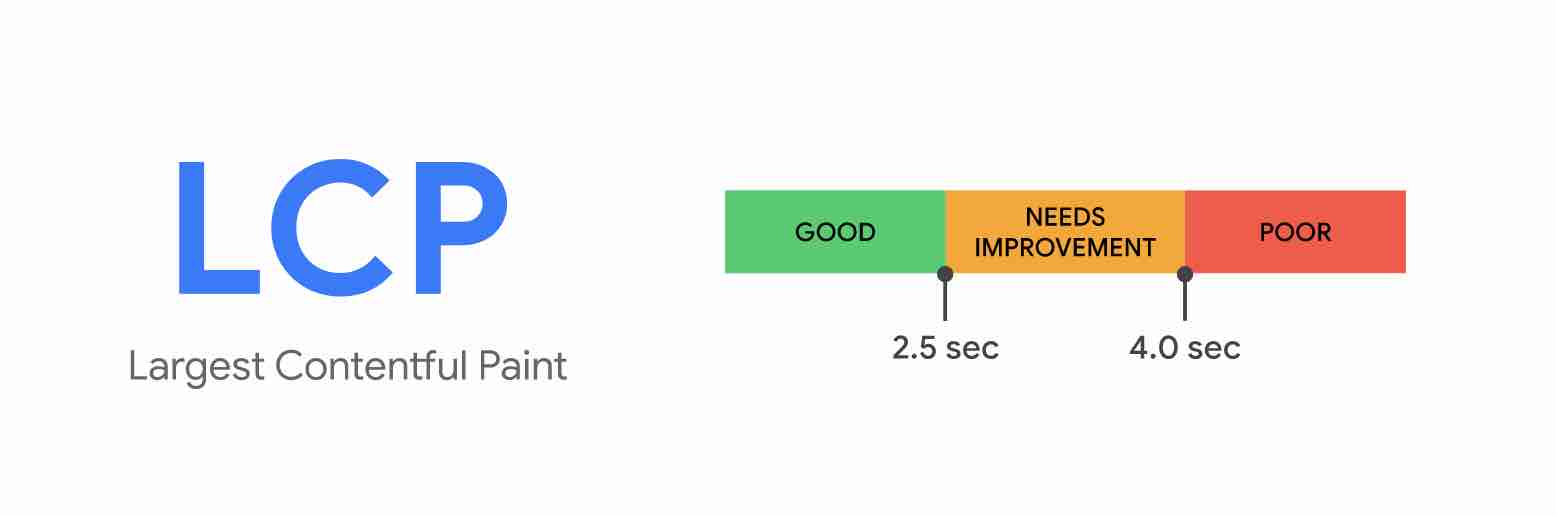
The first Core Web Vitals metric is called Largest Contentful Paint (LCP). It measures page loading performance.
More specifically, LCP evaluates the time it takes to display the largest visible element of your page in your browser window (viewport), from the moment the page begins to load.
This could be a background image, a video, or a large block of text at the top of your home page, below your navigation.
To deliver a quality user experience, Google recommends a loading time of less than 2.5 seconds.
To guide users — we’ll come back to this later — it distinguishes between 3 types of performance ranges, each with an associated color code used by its various official measurement tools:
- Good: Loading time under 2.5 seconds (green)
- Needs improvement: Loading time less than or equal to 4 seconds (orange)
- Poor: Loading time greater than 4 seconds (red)
Interaction to Next Paint (INP)
After LCP, it’s time for Interaction to Next Paint (INP). Google explains that this metric measures interactivity.
INP evaluates the overall responsiveness of a page by measuring the latency of all interactions performed by users on a page (a mouse click, touch on a device with a touch screen, or a key press on a physical keyboard or a screen). The final INP value corresponds to the longest interaction observed, ignoring anomalies.
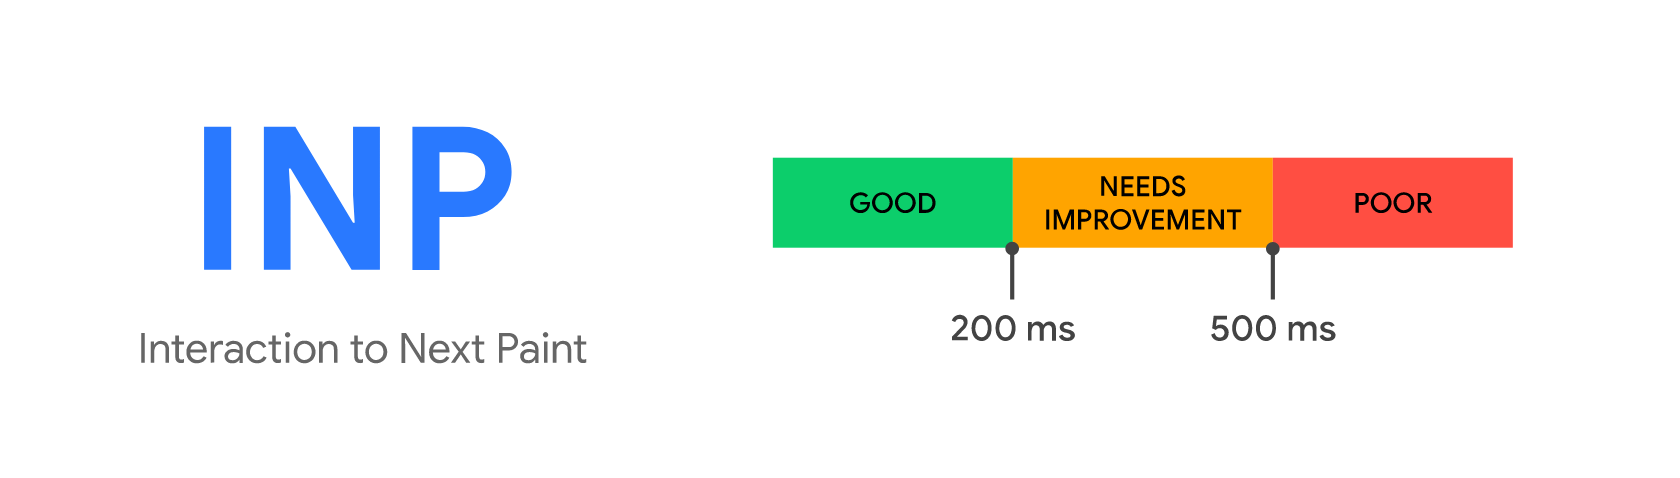
Here are the thresholds set by Google for this metric:
- Good: INP less than 200 milliseconds (ms)
- Needs improvement: INP between 200 ms and 500 ms
- Poor: INP greater than 500 ms
INP officially replaced First Input Delay (FID) as one of the Core Web Vitals in March 2024. INP improves on FID, which only took into account the delay between the moment when a web surfer first interacted with your page (when they clicked on a link, pressed a button, or whatever) and the moment when the browser responded to that interaction, regardless of which interactive element they clicked on first. As Google explains, “Where FID was a load responsiveness metric designed to assess the page’s first impression on the user, INP is a more reliable indicator of overall responsiveness, regardless of when in the life of a page interactions occur.”
Cumulative Layout Shift (CLS)
The third and final metric is the Cumulative Layout Shift (CLS), which measures visual stability.
CLS evaluates every unexpected shift in your layout, such as when a visible element suddenly changes position during page loading.
Google details the following: “The CLS metric calculates the sum total of scores for each unexpected layout shift that occurs over the lifetime of the page.”

In practice, CLS targets different types of events:
- You’re reading an article and the text suddenly changes position or disappears from the screen.
- You want to click on a link or button, and just as you’re about to take action, the link or button moves, so you click on something else.
Here are the thresholds set by Google for this metric:
- Good: CLS less than or equal to 0.1
- Needs improvement: CLS less than or equal to 0.25
- Poor: CLS greater than 0.25
The CLS score ranges from zero to a positive number. Zero means no offset, and the higher the number, the more offset the layout.
So much for the general overview of Core Web Vitals. Now let’s take a look at why you need to pay attention to Core Web Vitals on your WordPress site.
Why optimize Core Web Vitals?
Boost user experience and conversions
Overall, as you’ve read before, Core Web Vitals are all about optimizing the quality of the user experience.
Put simply, the more pleasant the user experience you offer your visitors, the more likely you are to boost engagement and conversions.
A conversion is an action you want your users to perform. This could be purchasing a product from your WooCommerce store, signing up for a newsletter, downloading a white paper, filling in a form, etc.
According to studies relayed by Google, Core Web Vitals optimization helps improve certain business metrics:
- With a site that meets Core Web Vitals thresholds (“Good” score on 3 key metrics), users are 24% less likely to abandon the page load.
- Yahoo! Japan increased its page views per session by 15% and reduced its bounce rate by 1.72%, thanks to a 0.2 reduction in Cumulative Layout Shift.
- Rakuten 24 increased its revenue per visitor by 53.4% by improving its Core Web Vitals.

Taking care of SEO
Optimizing your WordPress site’s Core Web Vitals is also important for your SEO.
In fact, Core Web Vitals are one of the many factors taken into account by Google to position a page in its search results (the search engine uses around 200 factors in its algorithm).
This was clarified by the search engine in its official documentation in March 2024.
So it’s important to have high-performance Core Web Vitals that can help you achieve “good search rankings.”
But beware: Core Web Vitals are not everything! The search engine gives several important clarifications on this point:
- Good metrics in the Core Web Vitals report “don’t guarantee good rankings”. This means that if you don’t improve other signals that coincide with the overall on-page experience (e.g. mobile usability), the impact of your efforts on Core Web Vitals optimization will have no added value.
- “Google search always seeks to show the most relevant content, even if the page experience is sub-par”.
Don’t ignore Core Web Vitals!
In other words, the Core Web Vitals are far from being the only important factor in the eyes of Google, but don’t ignore them (Google says so too!)
Firstly, for the user experience and the positive impact they can have on conversions.
Secondly, because they can also be a criterion used by Google to distinguish between pages whose content is deemed useful (in situations of “equal quality,” the search engine may better position a page optimized for Core Web Vitals).
Here’s Google’s official position on the subject: “For many queries, there is a lot of useful content. In this case, providing a good on-page experience can contribute to your success in Google search.”
In any case, when it comes to SEO, focus on the quality of your content (which must be useful to your target audience) and backlinks.
To generate search results, Google relies on the following key factors:
- The direction of the user’s query (search intent)
- The relevance of the content to the search query
- The quality of the content (expertise, reliability, official nature of the information shared, etc.)
- Ease of use (mobile ergonomics, loading speed, etc.)
Is everything making sense? Then I suggest we leave the theory behind and get down to the nitty-gritty. Is your WordPress site optimized for Core Web Vitals? To find out, read on.
How do you test and measure Core Web Vitals on WordPress?
Since Core Web Vitals is a Google-directed initiative, it’s possible to measure Core Web Vitals on WordPress thanks to various in-house tools offered by the search engine:
- PageSpeed Insights
- Chrome UX Report
- Google Search Console
- Chrome DevTools
- Lighthouse
- Chrome Web Vitals browser extension

As Google explains, you don’t need to use all these tools at once. Just use the ones you feel are most effective in optimizing your Core Web Vitals.
Depending on your technical level and needs, some may not be relevant.
For example, Lighthouse is especially useful for discovering areas for performance improvement when developing a site locally or in a staging environment.
The Chrome Dev Tools extension, on the other hand, will be too complex to use for beginners or even intermediates.
To get started, you can rely on two tools in particular:
- Google Search Console will first help you to identify pages in need of improvement.
- Once the problem pages have been identified, PageSpeed Insights will show you the technical sticking points, with an overall score on desktop and mobile. The tool will offer recommendations for improving your overall score.
Find out below how to use these two essential tools.
How to measure the Core Web Vitals of your WordPress site with Google Search Console
Google Search Console is a free tool that allows you to better manage your site and track your SEO by providing a whole host of information:
- Errors on your site
- Search engine analysis
- Links
- Indexing status
- Crawl errors
- Etc.
To take advantage of this tool, you’ll need to have a Google account and link it to your WordPress site.
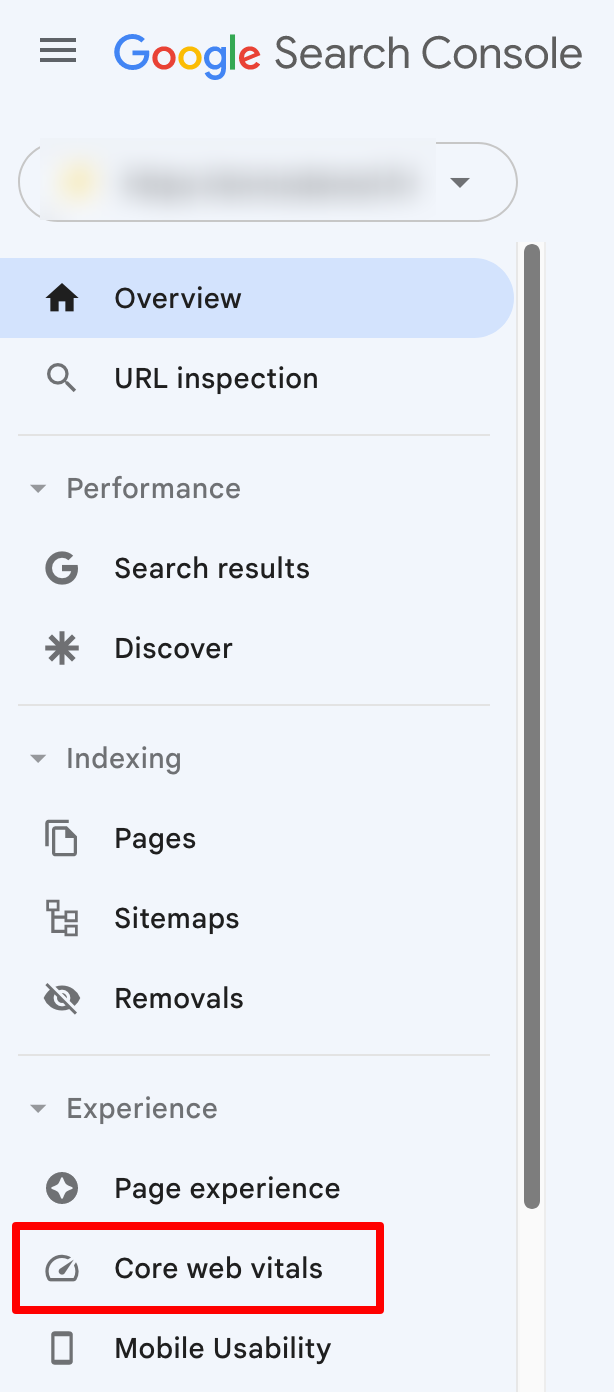
Once you’ve logged into your Search Console account, go to Experience > Core web vitals:
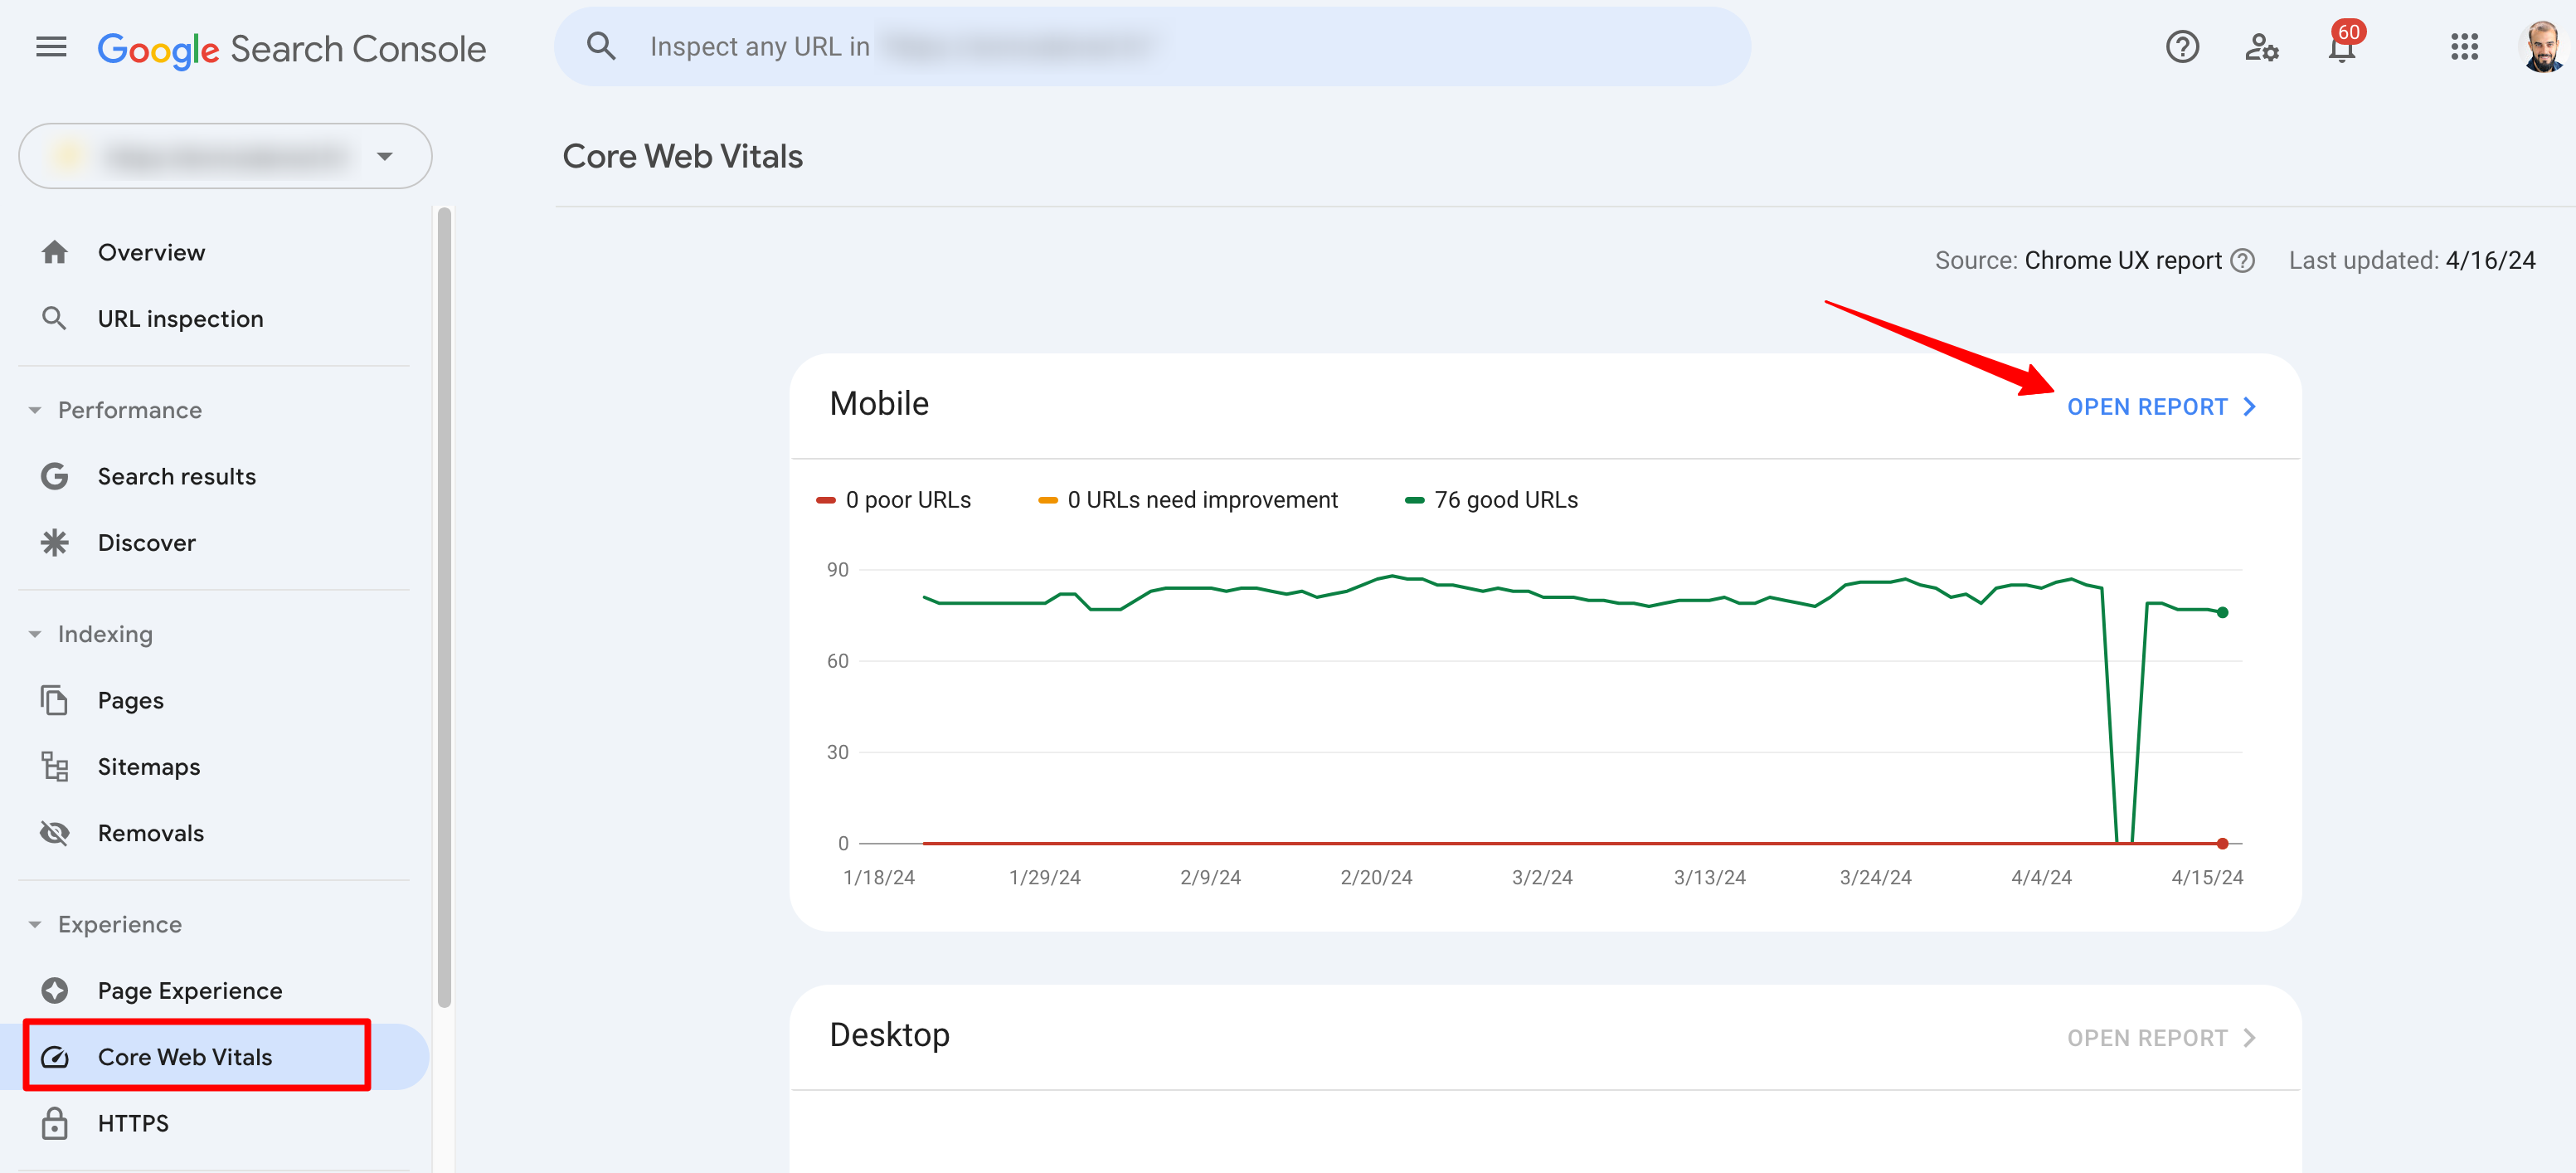
If data is available, you’ll get an overview presented in the form of a graph, for both the mobile and desktop versions of your WordPress site.
Click on the “Open Report” link to learn about the performance of your URLs:
You’ll be presented with an overview that includes groups of problematic URLs according to their status (Good, Needs Improvement, Slow), or metric type (LCP, INP, and CLS).
Clicking on the URL group you’re interested in will take you to the details of each URL concerned:
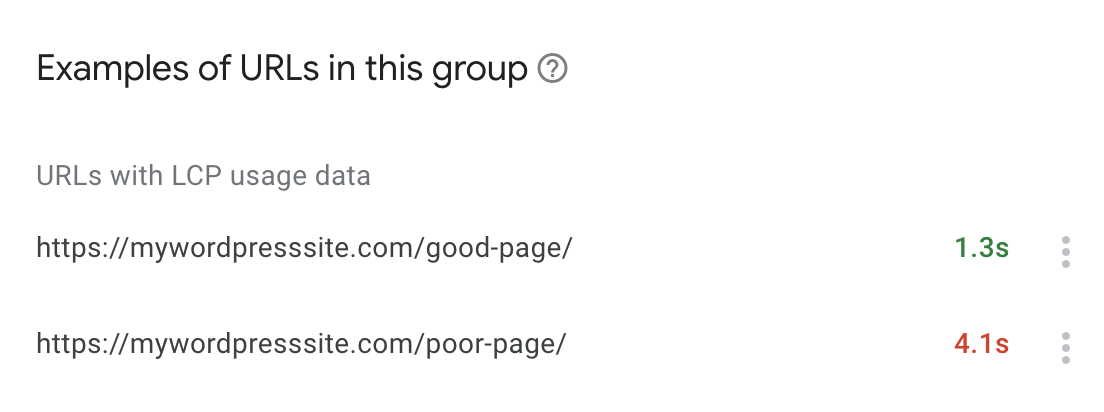
As soon as you find a problematic URL (prioritize slow pages and those most important to your business), you can get suggestions for improvement using PageSpeed Insights.
How to measure the Core Web Vitals of your WordPress site with PageSpeed Insights
PageSpeed Insights is another free tool from Google. Its purpose is to help you improve your page loading speed on all devices.
You can access it in two ways:
- Directly from your Google Search Console interface, click on the URL you’re interested in, then on “Developer Resources”:

- By visiting the official website dedicated to the tool
Once on the PageSpeed Insights interface, enter the URL of the web page of your choice in the search field, then click on the “Analyze” button:
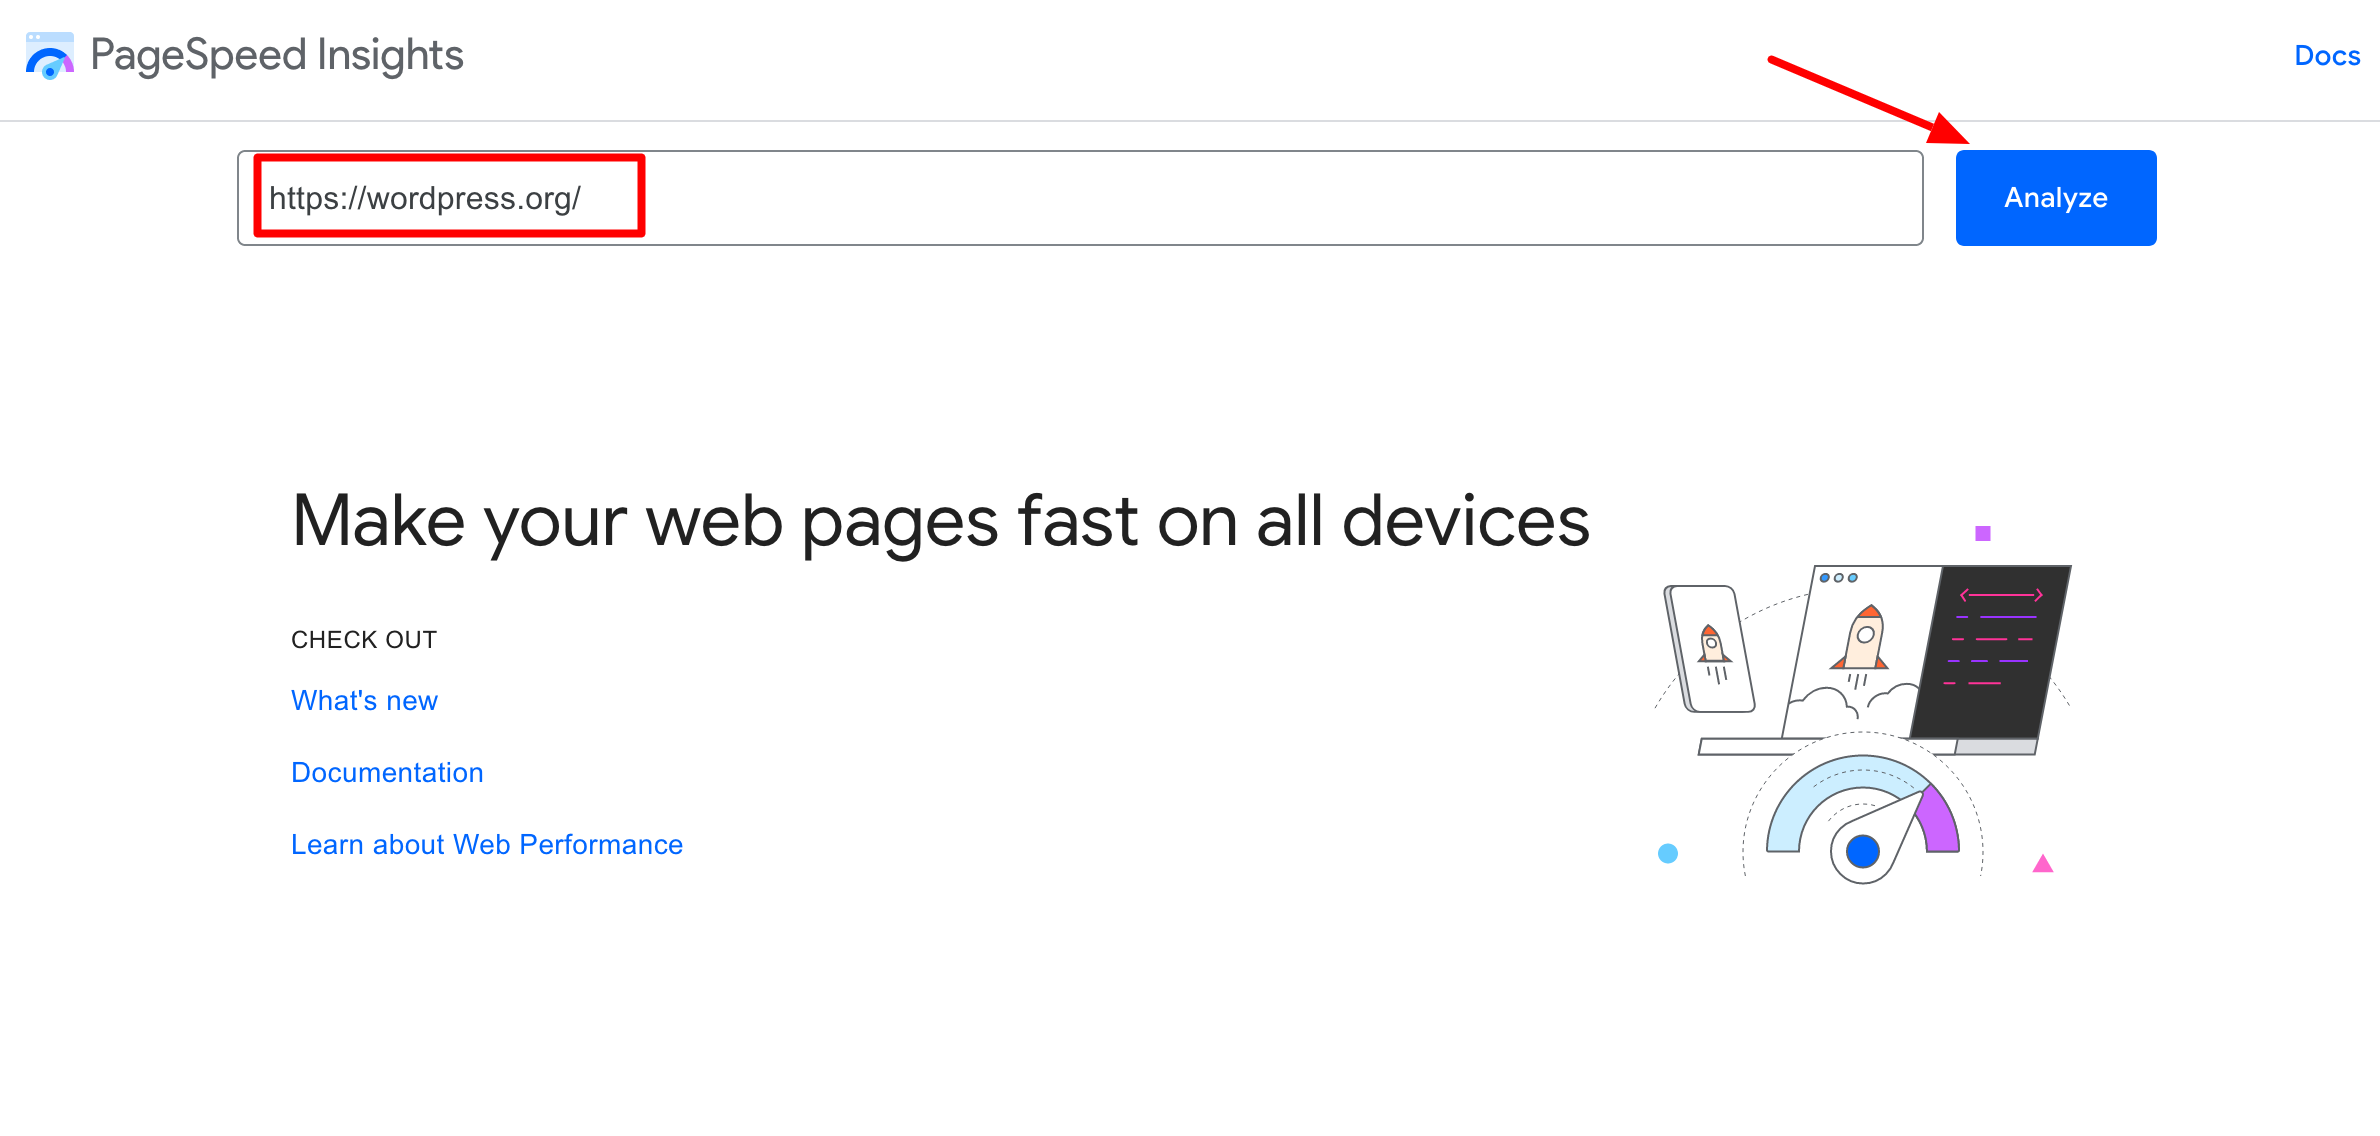
You’ll then get a report evaluating the Core Web Vitals on both mobile and desktop (results may differ depending on device):

You’ll then have an overall score out of 100 in 4 main areas:
- Performance
- Accessibility
- Best practices
- SEO
Finally, if you scroll down the page a little, you’ll find opportunities for improvement, which you can sort by type of metric (FCP, LCP, TBT, and CLS).
Note that PageSpeed Insights also suggests FCP (First Contentful Paint) improvements. These are not taken into account in Core Web Vitals, but it’s important to optimize them for your page loading speed and user experience.
Simply click on the small tab to view the problem detected by PageSpeed Insights, and above all how to solve it.

With Google Search Console and PageSpeed Insights, you can detect and correct problems related to the loading, interactivity, and visual stability of the pages on your WordPress site.
To optimize your chances of achieving a score approaching 100/100, check out our tips below for optimizing the Core Web Vitals of your WordPress installation.

5 tips for optimizing a WordPress site for Core Web Vitals
Improve your server performance
To begin with, tackle at the root — if need be — one of the major causes of a poor Largest Contentful Paint (LCP) score: a slow server.
In other words, a server that takes too long to respond to a request made by your web browser.
There are several ways to optimize this aspect of your site:
- Choose a high-performance hosting provider like bluehost (affiliate link), which WPMarmite uses and recommends.
- Cache your pages using a premium plugin like WP Rocket (affiliate link), which automatically takes care of this for you. By the way, WP Rocket will also optimize your browser’s cache all by itself, which is pretty handy.
- Activate GZIP compression (or Brotli compression). Your hosting provider may have already activated this for you. Contact them to find out more. If not, WP Rocket takes care of this automatically, too.
If you’re looking for a free equivalent to WP Rocket, take a look at WP Fastest Cache.
Learn how to clear the WordPress cache in our tutorial.
In parallel, a slow network can also have a negative impact on your LCP score, even if your server is already properly optimized.
This may be the case if you have an international audience. If your hosting server is based in the United States, but the majority of your visitors consult your site from Australia, page load times could slow down.
One solution is to use a Content Delivery Network (CDN). However, you should only go for this option if you have a large site with a lot of content and your target audience is international. If you’re just starting out, don’t bother.
Optimize your images
Let’s continue talking about LCP with another element that can have a (very) negative impact on its score: your images.
In fact, it’s often an image that constitutes the largest visible element of a web page at the start of its loading (particularly on a home page).
A single image can account for up to 50% of a page’s loading time! That’s why you need to optimize your images.
Compress your images
You can start by compressing your images using a freemium plugin like Imagify (affiliate link).
This will help you reduce their weight without any loss of quality. Imagify also has an option for automating the compression of your images in bulk, which is handy if you have a lot of media.
Discover our practical guide to setting up and using Imagify like a pro.
You can also use an online tool such as:
However, with these tools, you’ll have to proceed on a case-by-case basis and won’t be able to make adjustments from the WordPress interface.

Adopt the WebP format
WebP is a raster image format proposed by Google that allows you to compress images even further than JPG or PNG, with no loss of quality.
According to Google, WebP images are 25% to 34% lighter than JPG images, which is no mean feat when it comes to optimizing your Core Web Vitals on WordPress.
Since the release of version 5.8 in July 2021, WordPress supports the WebP format, but you must first download and upload your images in this format.
Thanks to a dedicated plugin, you can convert all the images in your Media Library to WebP format. To do this, use either Imagify or Converter for Media.

Optimize your WordPress site code
Thirdly, you need to “clean up” the code that will be displayed on the front-end (the interface visible to your visitors), as it may tend to be overloaded with elements that slow down loading speed.
For example, a poor INP score may be caused by a JavaScript file that your browser has difficulty executing.
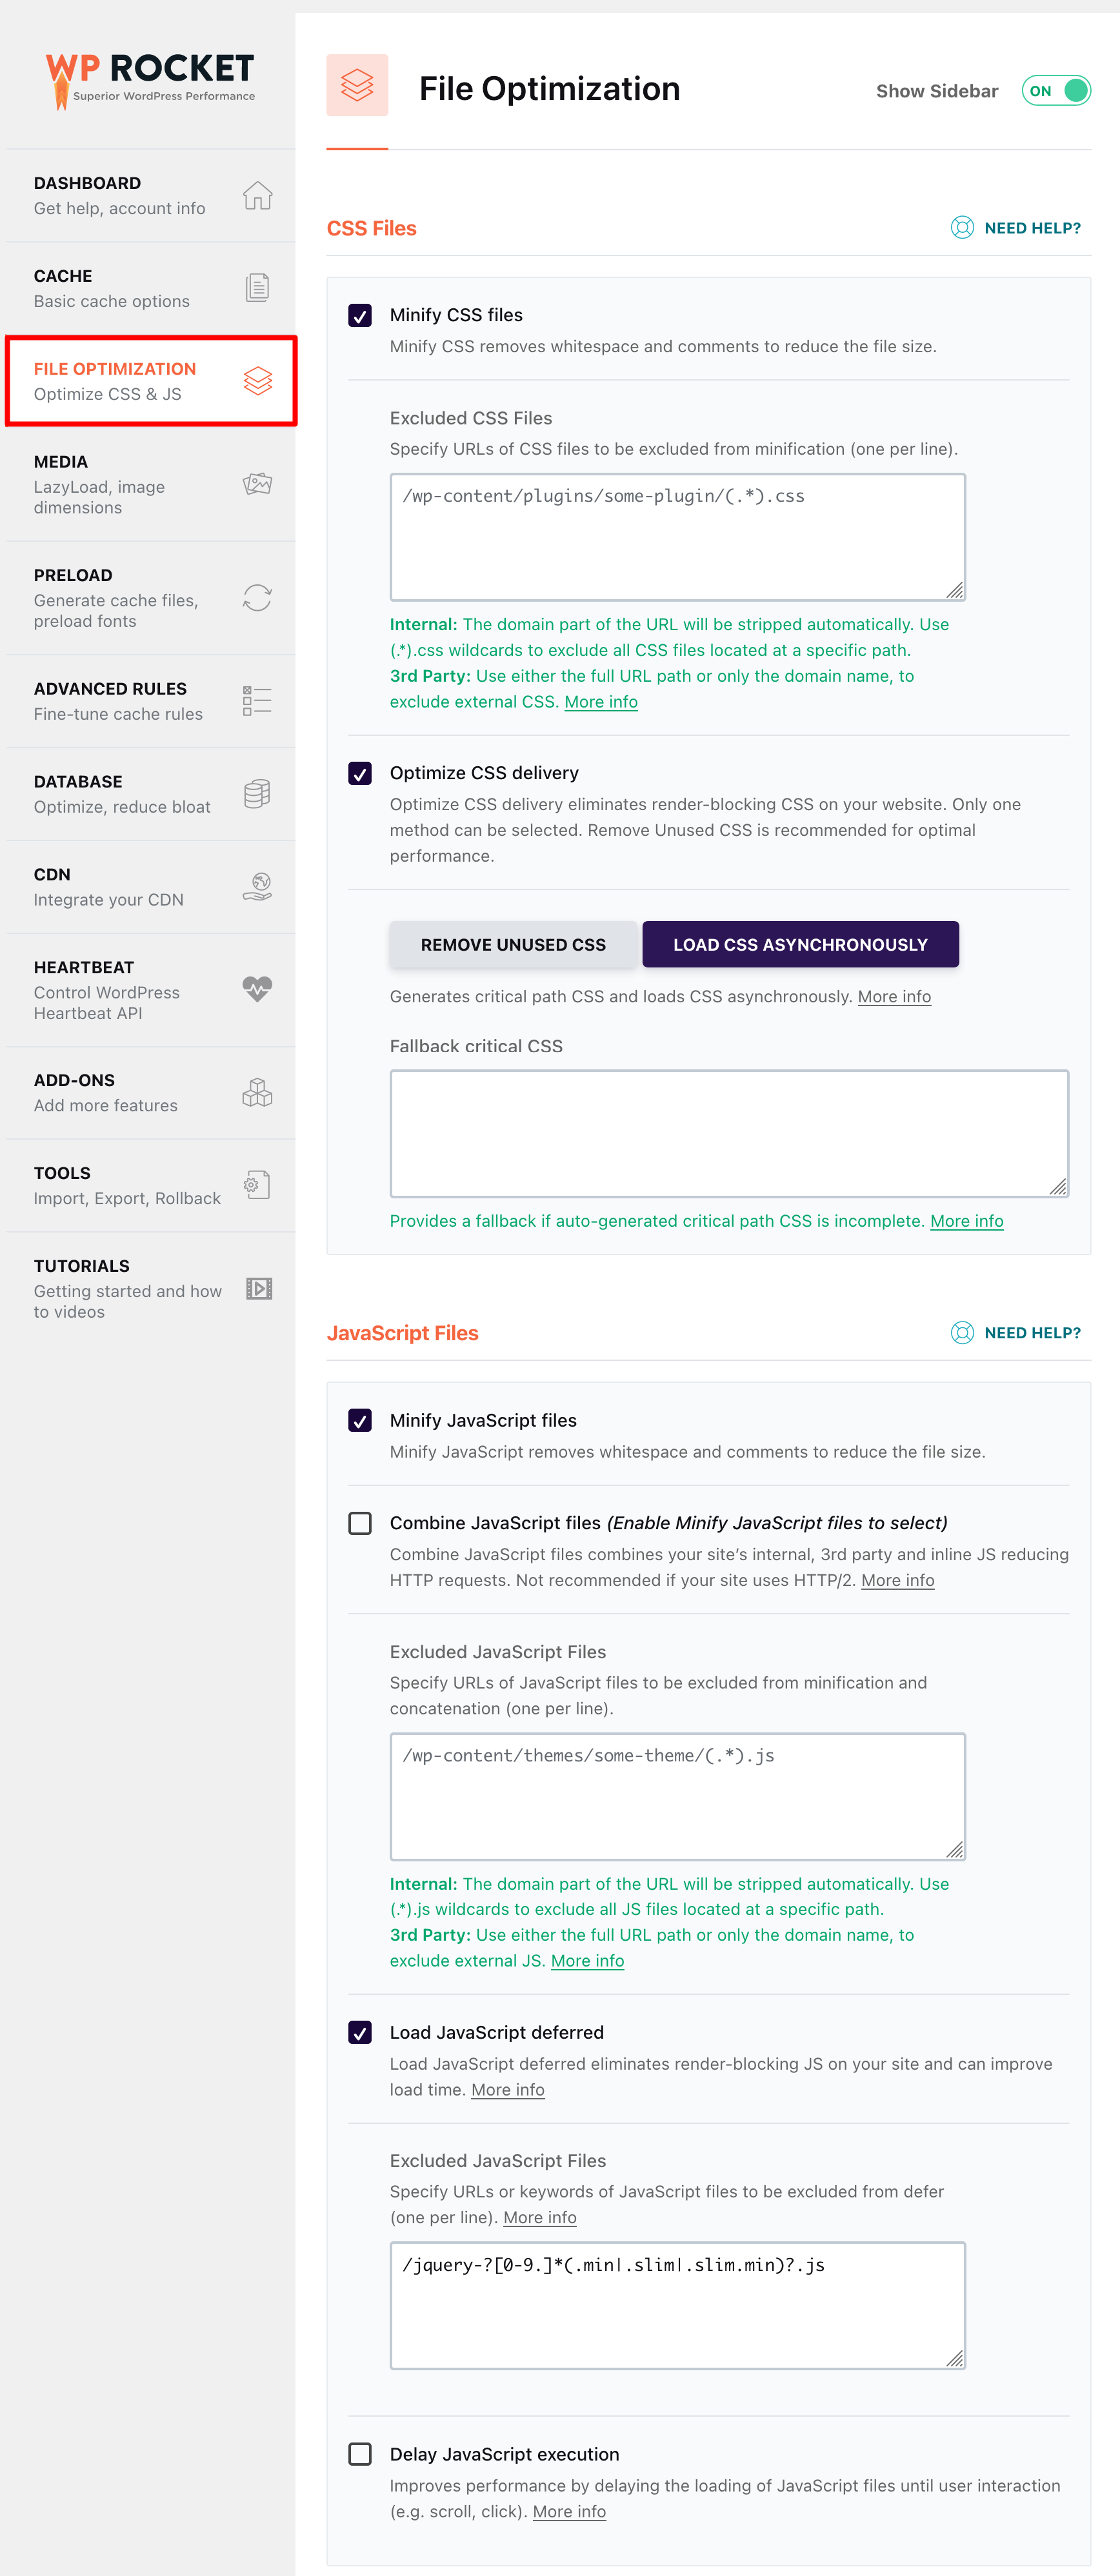
Overall, it’s important to optimize your code (HTML, CSS, and JavaScript). You can do this by:
- Minify CSS and JavaScript files.
- Remove unused CSS resources.
- Delay JavaScript loading, to eliminate resources that block page rendering.
- Defer JavaScript execution by delaying the loading of JavaScript files until user interaction.
These settings can be made directly via WP Rocket’s “File Optimization” menu:
If you prefer a free tool, here are a few options to consider:
- To minimize your CSS and JavaScript code, you can use Toptal or a plugin such as Autoptimize or Asset CleanUp.
- To defer JavaScript execution, use Flying Scripts.
- For an all-in-one solution that helps with many factors involved in Core Web Vitals, take a look at Core Web Vitals & PageSpeed Booster.
Improve your site’s overall performance
By applying the tips above, you should already be improving your WordPress site’s Core Web Vitals.
At the same time, remember to apply the following best practices to improve your page loading speed and user experience:
- Activate a light, well-coded theme. Among the fastest available in the official directory are Astra, GeneratePress, Kadence, and Blocksy. Consult our page dedicated to WordPress themes to find the one that’s right for you.
- Remove plugins you no longer use and activate only those you need. For a first selection, have a look at our list of the best WordPress plugins.
- Activate a recent version of PHP on your site (at least PHP 8.1 if you’re using the latest major version of WordPress at the time of writing).
- Optimize your database (WP Rocket allows you to schedule an automatic database cleaning, for example).
Regularly test your WordPress site’s Core Web Vitals
Finally, remember to regularly test your WordPress site’s Core Web Vitals.
Even if your score is good at any given time, it may change over time as new plugins or features are added to your site.
Schedule check points as soon as you make one or more major changes to your pages. That way, you’ll be able to rectify any major bottlenecks as quickly as possible.
It would be a shame to negatively impact the user experience and your SEO actions after so much good work, wouldn’t it?
And if you’d like to dig deeper into the subject of Core Web Vitals on WordPress and discover additional tips, check out WP Rocket’s excellent free ebook on the subject.
Thanks to the WP Umbrella maintenance tool (affiliate link), you can also get a real-time overview of your WordPress site’s Core Web Vitals metrics. In particular, note that from the tool’s interface, you can perform updates and backups for your various sites from a single dashboard.

Conclusion
Optimizing your WordPress site for Core Web Vitals is essential for taking care of your visitors’ user experience.
With a good score from the Core Web Vitals metrics, you boost your chances of improving conversions and limit the negative impact that a slow-loading site can have (increased bounce rate, lower traffic, etc.).
Thanks to our advice (image optimization, code optimization, server optimization, etc.), you now know a number of ways to improve your Core Web Vitals score at home.
Is this something you’ve already started working on? If so, do you have any additional tips to share with us and WPMarmite readers?
Share your feedback with us in the comments area just below.

Receive the next posts for free and access exclusive resources. More than 20,000 people have done it, why not you?

Continue reading
Articles posted in WordPress TutorialsHow to update the PHP version of your WordPress site
What comes to mind when you think of WordPress speed and security? Your favorite plugins, perhaps? You should also think about… PHP! If you’re looking for a site that loads fast, while offering a solid shield against hacker attacks, there’s a…
How to create an effective HubSpot conversion funnel on WordPress (complete guide)
In the drawers of a kitchen, there are often two very useful utensils lying around. The first is the colander. And to illustrate, some WordPress sites unfortunately resemble it. Why? Well, because visitors arrive on the site in question… then…
How to fix the ERR_CONNECTION_REFUSED error: A complete guide
Does your browser display the ERR_CONNECTION_REFUSED message when you try to access a website? This error means that the target server – or your own configuration – is actively rejecting the connection request, leaving you at a dead end. But…