Let me guess. You have a form created with Gravity Forms and you want to change its appearance.
Despite the many features offered by this excellent plugin, it’s not so easy to customize the look of your forms.

You will probably tell me that these are not the most important elements in the design of a website. But still. They shouldn’t become the wart that ruins everything.
So if you want to harmonize your forms with your style guide, this article is for you.
But you can also go further. I sometimes use Gravity Forms as an email opt-in form to encourage people to subscribe to a newsletter.
Placed in the sidebar, the form must be visible. That it attracts the eye. And that’s why a particular formatting is necessary.
You will discover how to proceed, and I will present you several solutions that exist around Gravity Forms, to make your forms even more attractive.
Overview
This post contains some affiliate links. This means that if you buy one of the products via these specific links, WPMarmite will receive a commission. What is the purpose of this income? To provide you with quality resources.
Originally published in July 2015, this article was updated in June 2021.
The default styles of Gravity Forms
Let’s start by talking about the styles offered in the plugin or theme you are using.
First of all, you should know that Gravity Forms embeds its own CSS files.
This means that there is already a basic style applied. You can also deactivate it if you want to start from scratch and if you know how to handle CSS.
But we see it regularly: many themes – especially Premium – offer compatibility with Gravity Forms.
This means that they will have provided CSS files so that your forms fit even better in the appearance of your site.
Again, it will be basic most of the time. It will just be about fonts, margins, colors… But it can help to have a better consistency in your design.

That being said, if you really want to customize the look of your forms, there is no “easy” solution, putting aside the form widgets offered by page builders (Elementor, Divi, Beaver Builder), of course.
You won’t find an editor designed for beginners to make a custom design, you’ll have to go through CSS very quickly.
This is where, for example, the Formidable Forms Pro plugin stands out: it allows you to easily create “styles” that you can then apply to the forms you select. Unfortunately, as you will have understood, it won’t be as easy with Gravity Forms.
That’s why I’m going to show you how to do it with CSS first, then using a free plugin.
I’ll also tell you about a very useful little plugin to play with the “structural” formatting of your form fields.

Styling forms with CSS
If you want to change the look of your forms, you’ll need to add some custom CSS code. And we advise you to add it in the style.css file of your child theme.
I will explain here the basic functioning of the modifications you can make to your forms.
However, I don’t pretend to explain you the basics of CSS.
Anyway, we are not left in the wild either. The Gravity Forms team has prepared a documentation about the CSS classes used by their plugin.
There is a rather large list that allows us to understand which classes to use to modify the elements of our forms.
For example, if I want to change the color of the Send button, I’ll use the corresponding class (found in the documentation I mentioned above) and do like this:
This way I have my button change from blue (default color on Astra, the theme I used for my tests) to black.

From the default blue color, I’ve changed it to black as you can see below:

But by doing this, I apply this change to all my forms. In this case, it’s still pretty appropriate: I’m making all the form buttons on my site the main color of my style guide.
But let’s imagine that I only want to make a change to one of my forms. For a particular layout or for an email opt-in form in my sidebar for example.
Well, all I have to do is add the ID of the form in question just before the classes I want to modify. My code will look like this:
For the example, I changed the color of the “Submit” button on the form I called Contact Form on my site, which has ID #4.
Online, it looks like this:
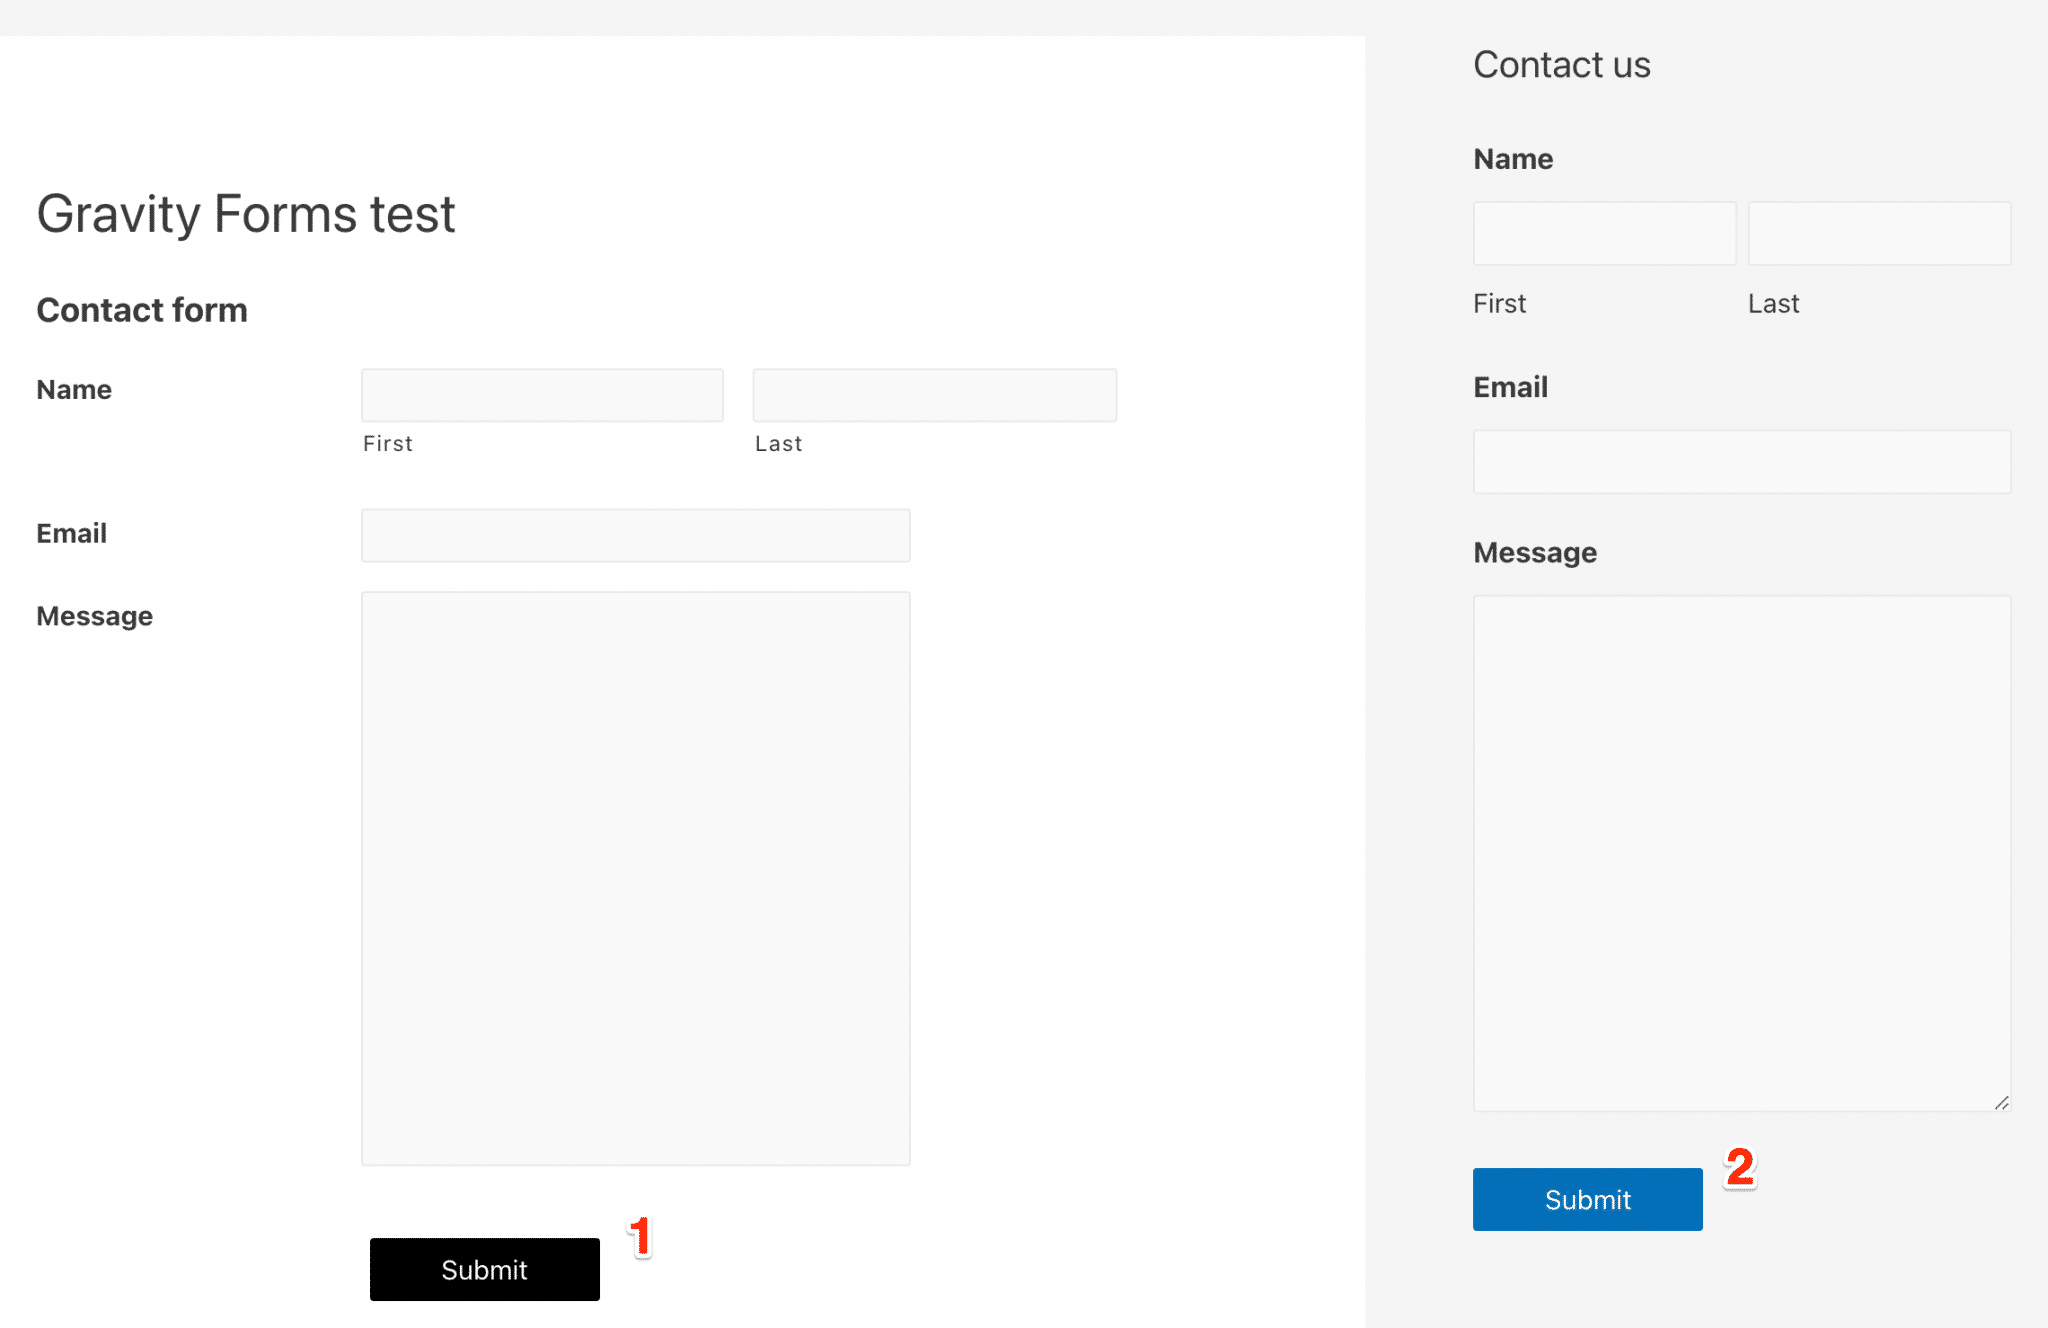
The black color only applies to the form button that has ID #4 (number 1 on the screenshot). The rest of the form buttons on the site have the default color blue applied to them (number 2 on the screenshot).
To find the ID of the form in question, you can go to your forms dashboard.

You can also use the code inspector in Chrome or Firefox to see it at a glance.

Using the Styles & Layouts for Gravity Forms plugin
However, if you don’t want to get your hands dirty, there is a freemium plugin that will allow you to achieve the same result: Styles & Layouts for Gravity Forms.

It is the most popular plugin in the official WordPress directory for styling your forms. It has more than 40,000 active installations and very positive user reviews (4.6/5 stars at the time of writing).
Once the plugin is activated, you can find all the settings directly in the Customizer, in the settings of your theme.
To do this, go to the menu Appearance > Customize. There you will find a menu Styles & Layouts Gravity Forms.

Once you have selected the form you want to style, you will find yourself with about fifteen menus to customize your form (more than 150 options in total).
You will be able to change the colors, the font and its size, the alignment, the background, the borders, or the margins of many elements like the:
- Form title
- Fields and sub-fields
- Description of the fields
- “Send” button
- Radio buttons
- Confirmation and error messages after a form has been sent

The changes are visible in real time and we also appreciate the possibility of modifying the width of the form in responsive, in order to adapt it to different devices (computer, smartphone and tablet).
For those of you who want even more, there are two premium options with this plugin:
- Get yourself a pack containing 7 addons (starting at $69.99 for use on 1 site). The Theme Pack addon offers for example about 30 ready-to-use form templates allowing you to redesign your forms in one click.
- Buy one of the 7 addons individually ($29.99 for 1 site).
Download the Styles & Layouts for Gravity Forms plugin:
Playing with the layout of your fields with CSS Ready Classes for Gravity Forms
We have seen how to modify the appearance of forms to have a unique look.
Since version 2.5 of Gravity Forms, it is possible to arrange form fields in columns, 4 maximum, without using any plugin or CSS classes.

But thanks to the latter, we can organize the elements of our list in columns and modify their height.

The Gravity Forms team makes the CSS classes available to everyone in its documentation.
All you have to do is to add these classes in the “Custom CSS class” setting which is located in the “Appearance” tab of your fields.

But if you don’t want to go back to the documentation every time, I invite you to install the free plugin CSS Ready Classes for Gravity Forms.

For the record, this is a modified version of the Gravity Forms CSS Ready Class Selector plugin. I was recommending it before the update of this article
It still works very well but it has not been updated for 7 years and has not been tested with the last 3 major versions of WordPress. So you might as well get a plugin that is up to date. 😉
CSS Ready Classes for Gravity Forms, since it’s the one we’re interested in today, will add a small CSS link next to the Custom CSS Class field in the Appearance menu.

When you click on the link, a window will be highlighted.

All you have to do is select the class you want to apply. This saves a lot of time if you have to make many forms. Unless you prefer to learn the CSS classes by heart!
Download the CSS Ready Classes for Gravity Forms plugin:
To summarize
The look of your forms is important: it contributes to the professional look of your site, or it can help your forms to catch the eye.
If you want to customize the look of Gravity Forms you can:
- Do it with custom CSS.
- Or use the Styles & Layouts for Gravity Forms plugin.
And if you want to play with the layout of your fields, the plugin CSS Ready Classes for Gravity Forms will make it easier.
And if you’re looking for other solutions, I invite you to have a look at the comparison of WordPress contact form plugins.
What about you, do you have any tips for styling your forms? Any best practices to share?
Let’s talk about it in the comments!

Receive the next posts for free and access exclusive resources. More than 20,000 people have done it, why not you?

Continue reading
Articles posted in WordPress PluginsOur review of B2BKing: A WooCommerce plugin built for B2B commerce
“Hi, I need 200 units of this product with fast shipping please”. As an online store owner, receiving this kind of message puts a smile on your face. Answering it, on the other hand, becomes a lot less fun… Basically,…
GTranslate on WordPress: our full review of this tool for creating a multilingual site
“Hello, how are you?” “What do you think of this computer mouse?” For you, everything is easy to understand in these two sentences. For someone living deep in the Shetland Islands or Yucatán, it’s probably a bit more complicated… If…
Air WP Sync: Test and review of this plugin for integrating Airtable into WordPress
Do you use Airtable and WordPress? Then some of your days probably look something like this. In the morning, you update your Airtable database as soon as something changes. In the afternoon, you copy and paste the same data into…