

What if your favorite page builder could start from scratch (or almost) to fix all its weaknesses? That’s the bold move behind Divi 5. After more than three years in development, this historic – and eagerly-awaited – new version promises…
You have your feet firmly planted on the ground? Then how about embarking on a trip to Jupiter?
For fans of the Solar System and Antiquity, sorry in advance: we’re not going to talk about the huge planet or the Roman God of heaven and earth (among others).

We’re here to chat about WordPress. The Jupiter we’re interested in designates a successful premium WordPress theme, the subject of our test of the day.
Hold on tight, it’s going to blow your mind. You’re going to discover it from every angle by delving into its ease of use, customization, and user experience.
Are you ready to reach for the moon? Follow the guide!
Overview
- What is the Jupiter theme?
- Getting started with the Jupiter theme
- How to customize Jupiter on WordPress?
- Integration with plugins
- Jupiter X2: a dedicated companion to WooCommerce
- Performance, SEO, responsive: zoom on 3 major aspects
- Documentation and support
- How much does the Jupiter X2 theme cost?
- So, Jupiter theme, a good deal?
Originally written in August 2016 by Nicolas, this article was last updated in October 2022, using Jupiter X2.
Part of the links in this article are affiliate links. What does that mean? Easy: if you buy a product/service via one of these links, WPMarmite will receive a commission. It doesn’t cost you more and it helps us to finance our research work! So, thanks in advance for your support.
What is the Jupiter theme?
Jupiter is a premium multi-purpose theme created in July 2013. Designed to work with the page builder Elementor, it has many customization options to help you create a site without any technical knowledge.
This means that you can use it to design any type of site (showcase site, portfolio, blog, online store, etc.) in any domain.
To help you do this, Jupiter offers for example more than 450 ready-to-use site templates that can be activated in just a few clicks.
One of the best selling themes of all time
With around 170,000 sales at the time of writing, it ranks 8th among the best-selling themes of all time on the ThemeForest platform behind competitors such as Avada, Enfold and The7, to name but a few.
Even if its rating is very honorable (4.72 stars out of 5), there is one interesting detail to note: it remains the least rated theme by its users, among the 10 most popular themes on ThemeForest.
But as you’ll see, that doesn’t make it a bad theme. On the contrary, I would say that it pleasantly surprised me.
Behind this well-oiled machine, we find the digital agency Artbees, specialized in the creation of WordPress themes, which develops and maintains Jupiter.
The latter is its main product, but Artbees also markets another more confidential theme on ThemeForest: The Ken (6,600 sales).
Jupiter, Jupiter X and Jupiter X2
Before going on to discover the interface of the theme and how to use it, let’s specify that the Jupiter theme has undergone a major overhaul.
In 2018, Jupiter X adopts Elementor
At the end of 2018, the theme has been completely redesigned using the Elementor Page Builder, instead of WPBakery Page Builder.
But don’t worry, we will come back in more details about the adaptation to Elementor in a dedicated part, a little later.
In 2022, Jupiter X2 goes all out on WooCommerce
The second major overhaul of the Jupiter theme was in February 2022. This time, to summarize, the main focus was on the following areas:
- The addition of a huge number of WooCommerce features such as advanced product filters, a funnel builder, dynamic discounts etc.
- The introduction of a “Layout builder”, i.e. a site builder based on the principle of Full Site Editing offered by WordPress. With this “Layout Builder” you can edit ALL parts of your site (header, footer, widgets, custom pages etc.) by applying logical conditions.
- Reducing dependency on third-party plugins.
As Artbees explains in one of their blog posts, their goal with Jupiter X2 is to offer “a theme with the utmost customizability” without the need for additional tools such as Elementor Pro and WooCommerce plugins.
Please note that there is a free version of the theme on the official WordPress directory called JupiterX Lite. By its very nature, it is very limited in terms of features, but it may allow you to get a first impression of the theme, which is not insignificant.

Getting started with the Jupiter theme
How to install the theme?
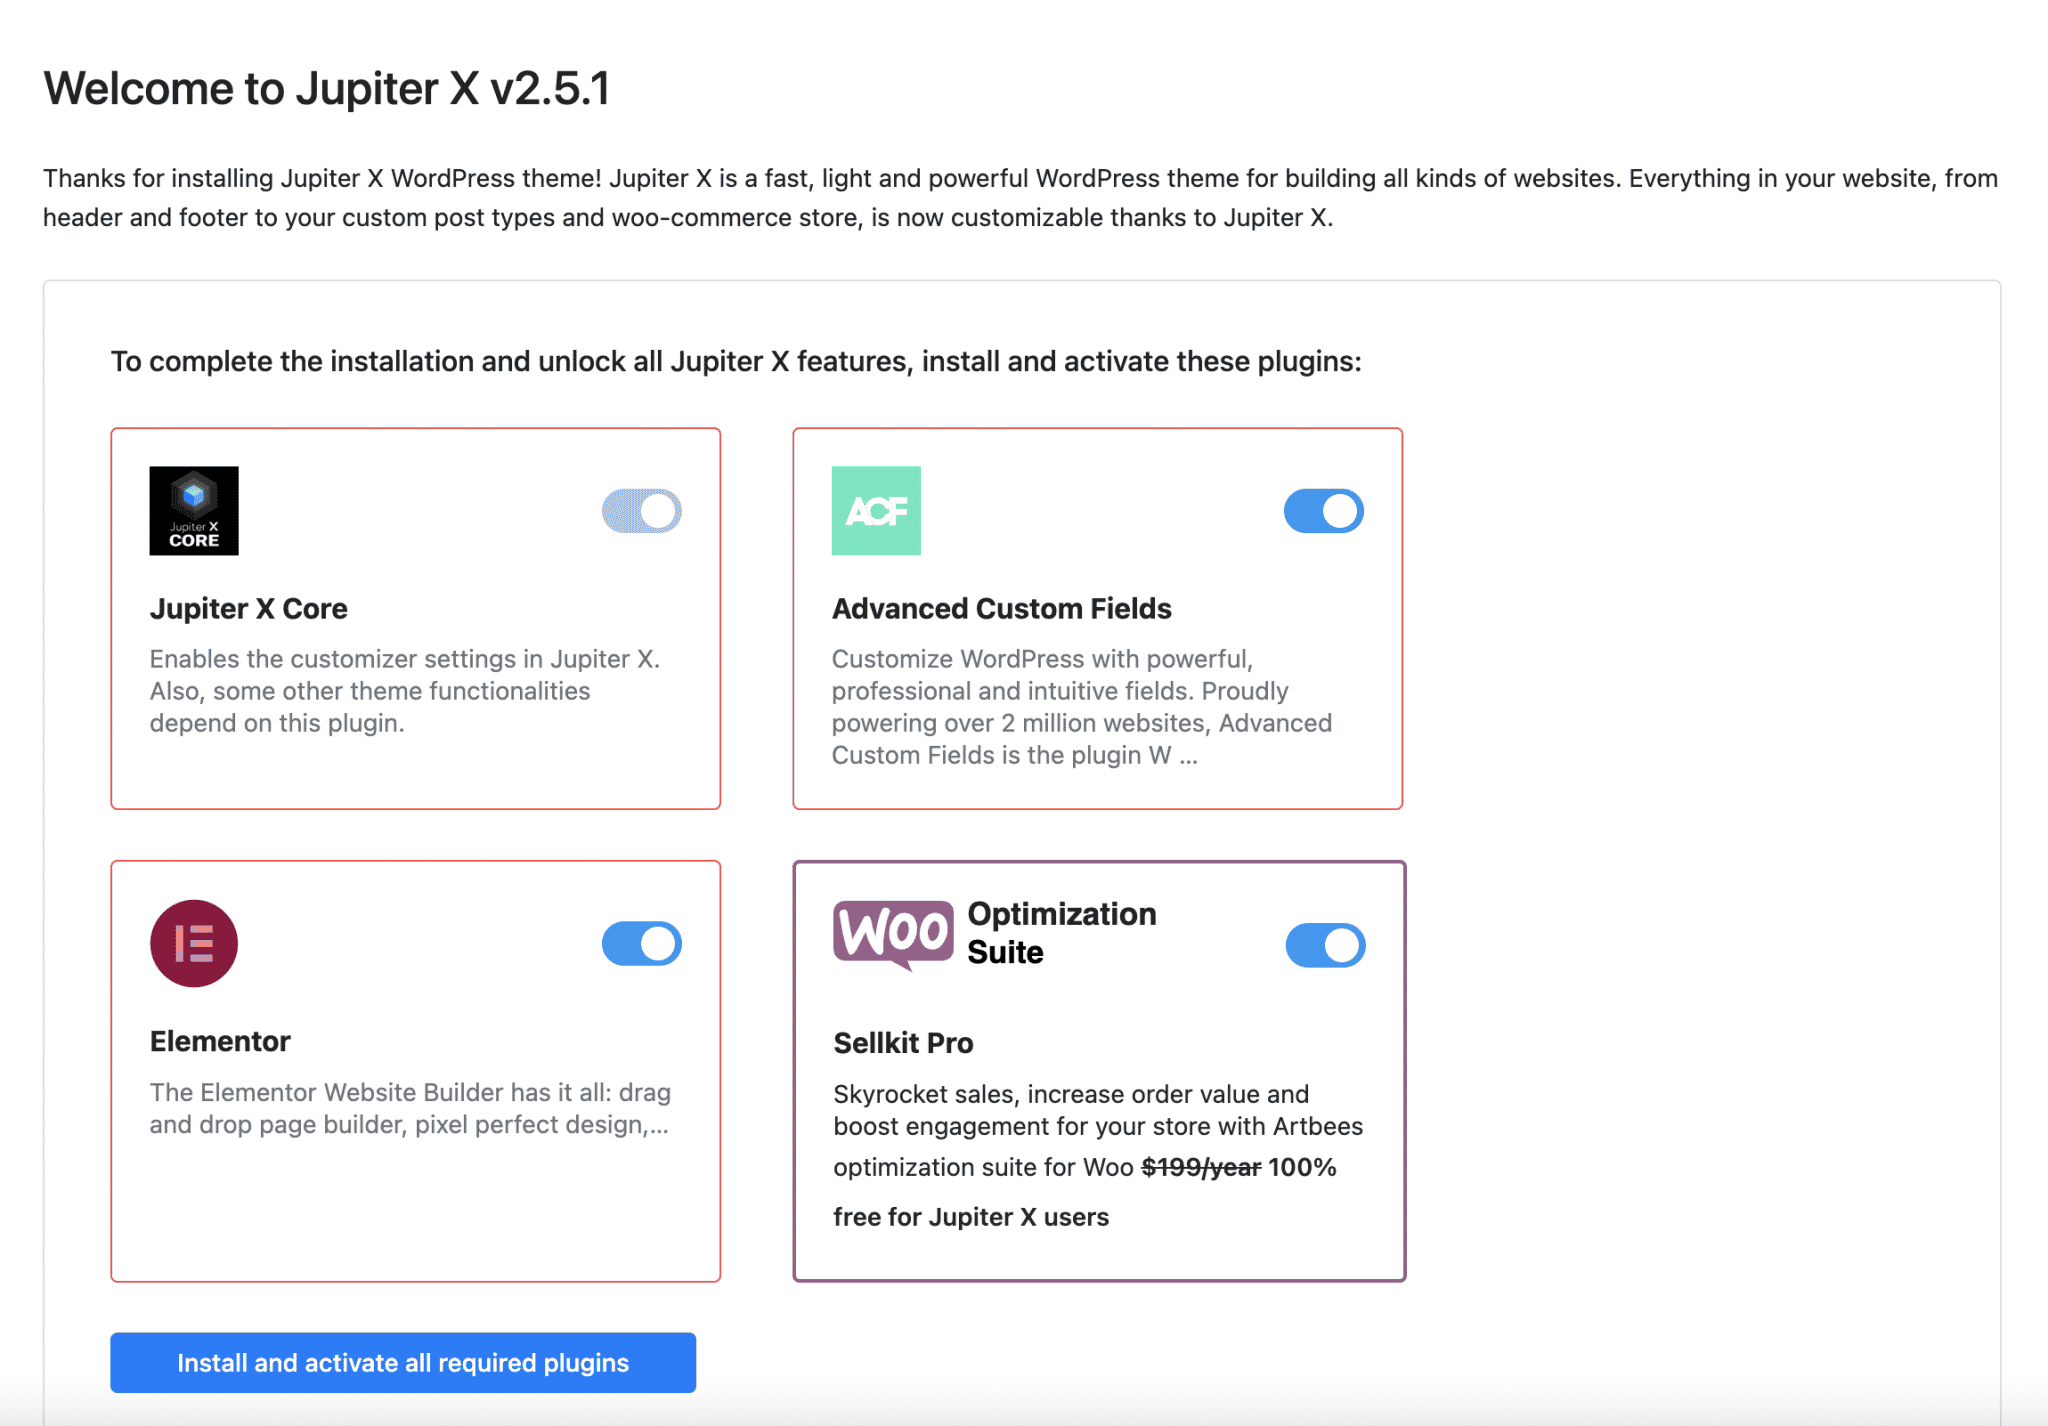
To begin, install and activate the Jupiter theme. Once this is done, you will find that the theme requires you to activate several plugins to complete the installation:
- Jupiter X Core, which allows you to use all the features offered by the theme and customize them via the WordPress Customization Tool. This plugin is activated by default.
- Advanced Custom Fields, to create and display custom fields.
- Elementor, the most popular page builder in the WordPress ecosystem.
- SellKit Pro, a plugin dedicated to WooCommerce. It allows you to create a conversion funnel, an optimized payment page, or to add coupons and other order bumps.
For the purposes of this test, I’m going to follow all these recommendations to the letter, to see what it all comes down to.
To avoid any problems (e.g. incompatibility with a plugin), Artbees recommends two things:
1. Install your theme on a fresh installation of WordPress.
2. Activate the JupiterX child theme, available on this page, if you want to modify and edit the theme files. However, if you are just starting out, it is unlikely that you will need a child theme, as explained in this blog post.
First impressions of the interface
When you’re done with the Jupiter X2 prerequisites, you’ll be pleasantly surprised to come across a simple, and above all, not too overloaded dashboard. Personally, I couldn’t believe my eyes.
After having tested several competing themes also present on ThemeForest (Avada, Bridge etc.), I had gotten pretty used to getting lost in the middle of Rube Goldberg machines.
Here, none of that. It becomes almost disconcerting. The Jupiter X2 theme has just a handful of self-explanatory settings submenus:
- Dashboard: your dashboard has several sections that allow you to activate your license, access documentation, contact support, or check that your site is running a supported version of PHP.
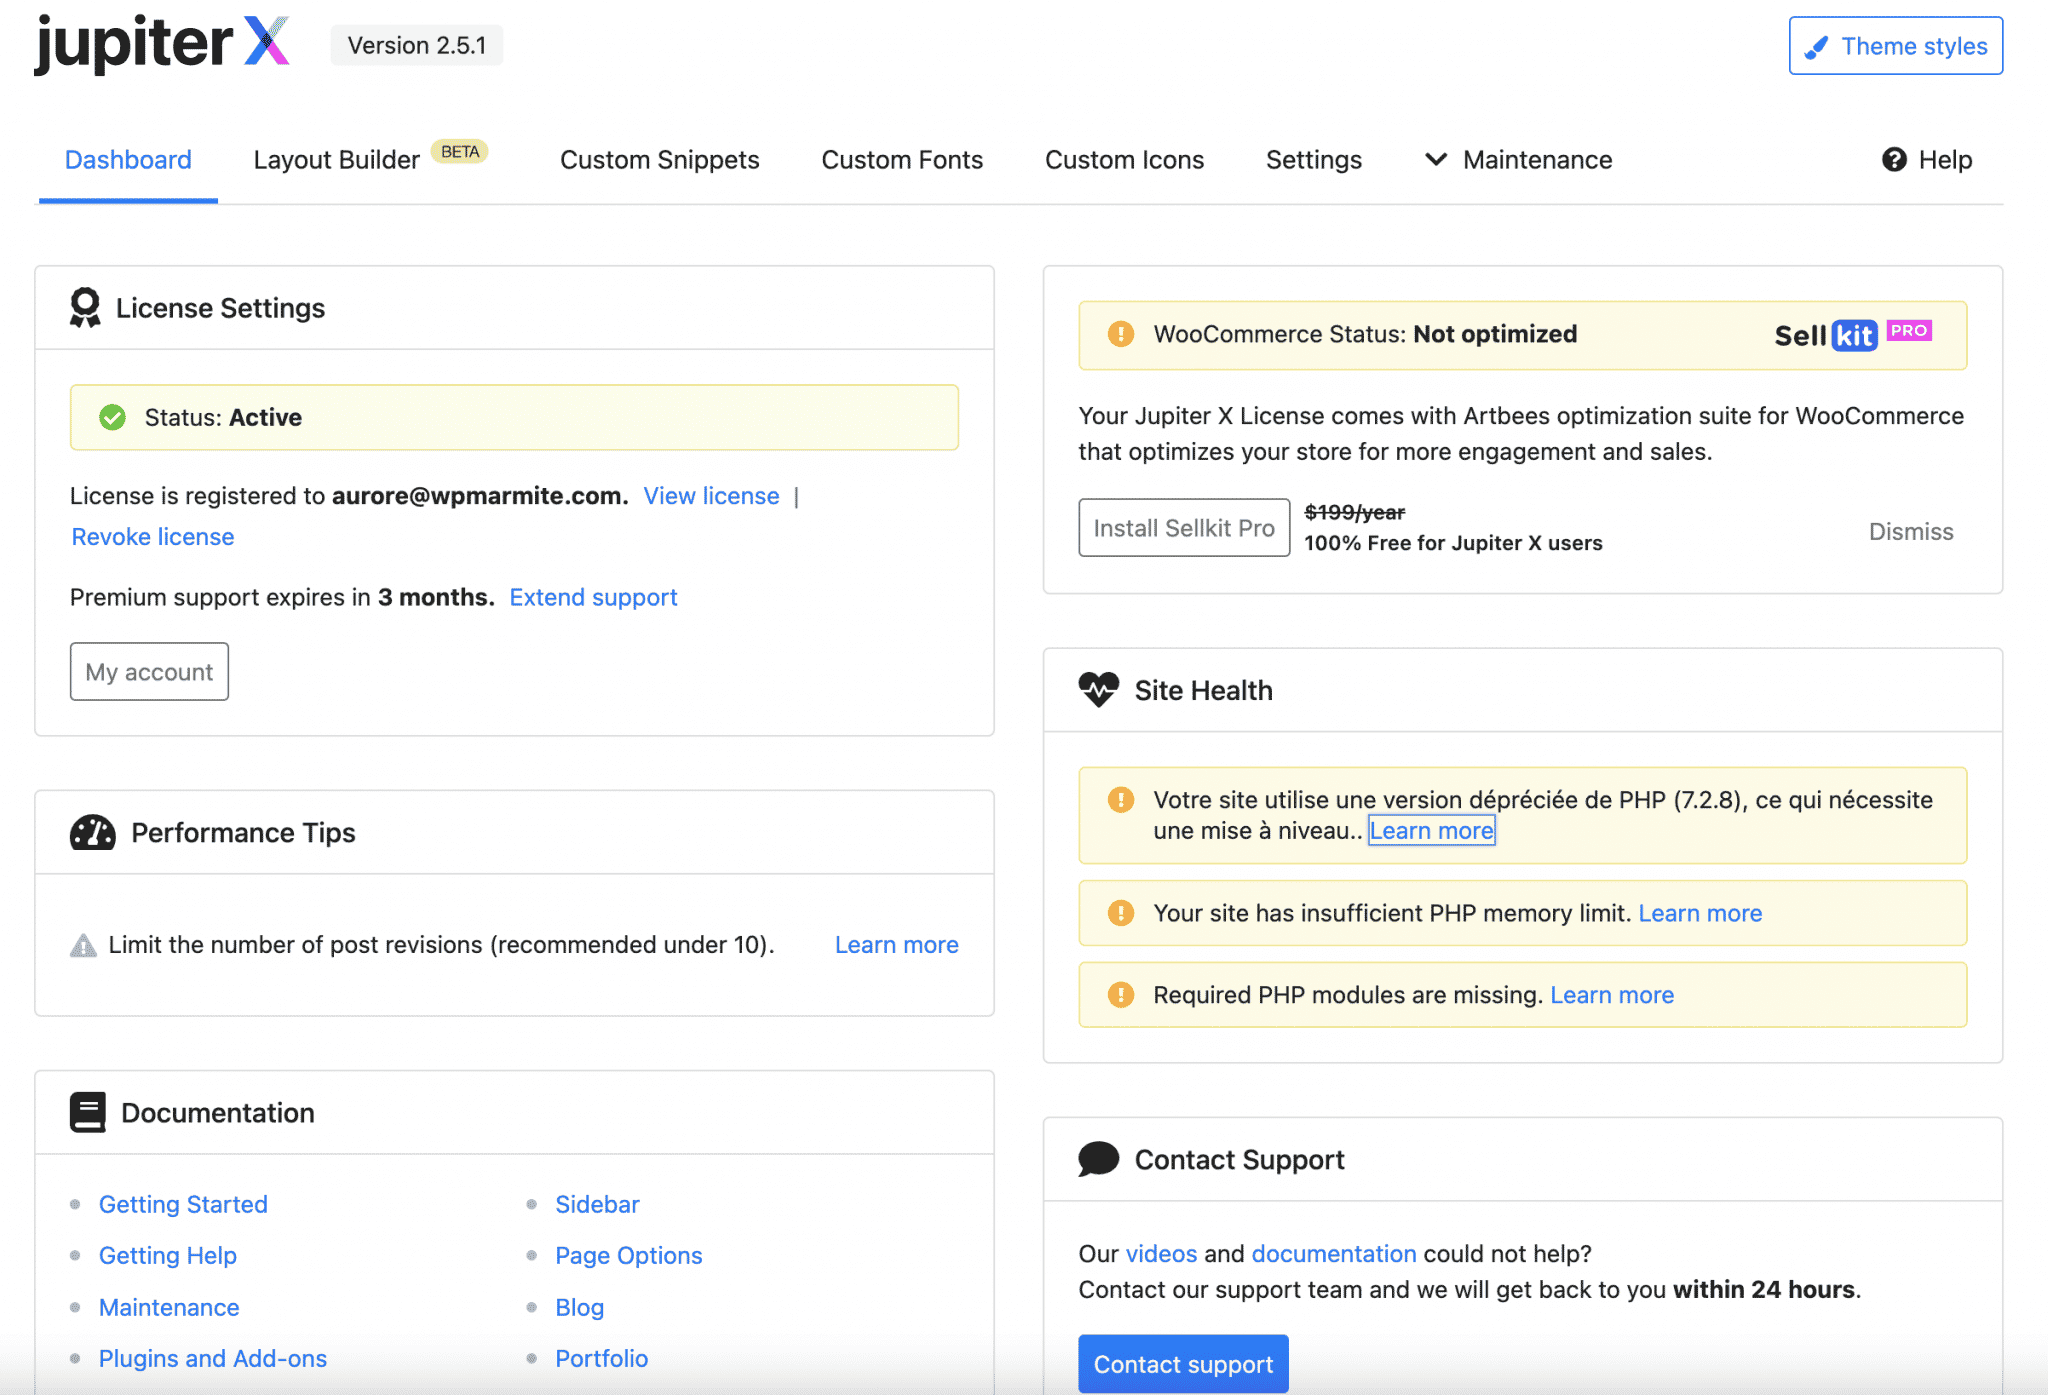
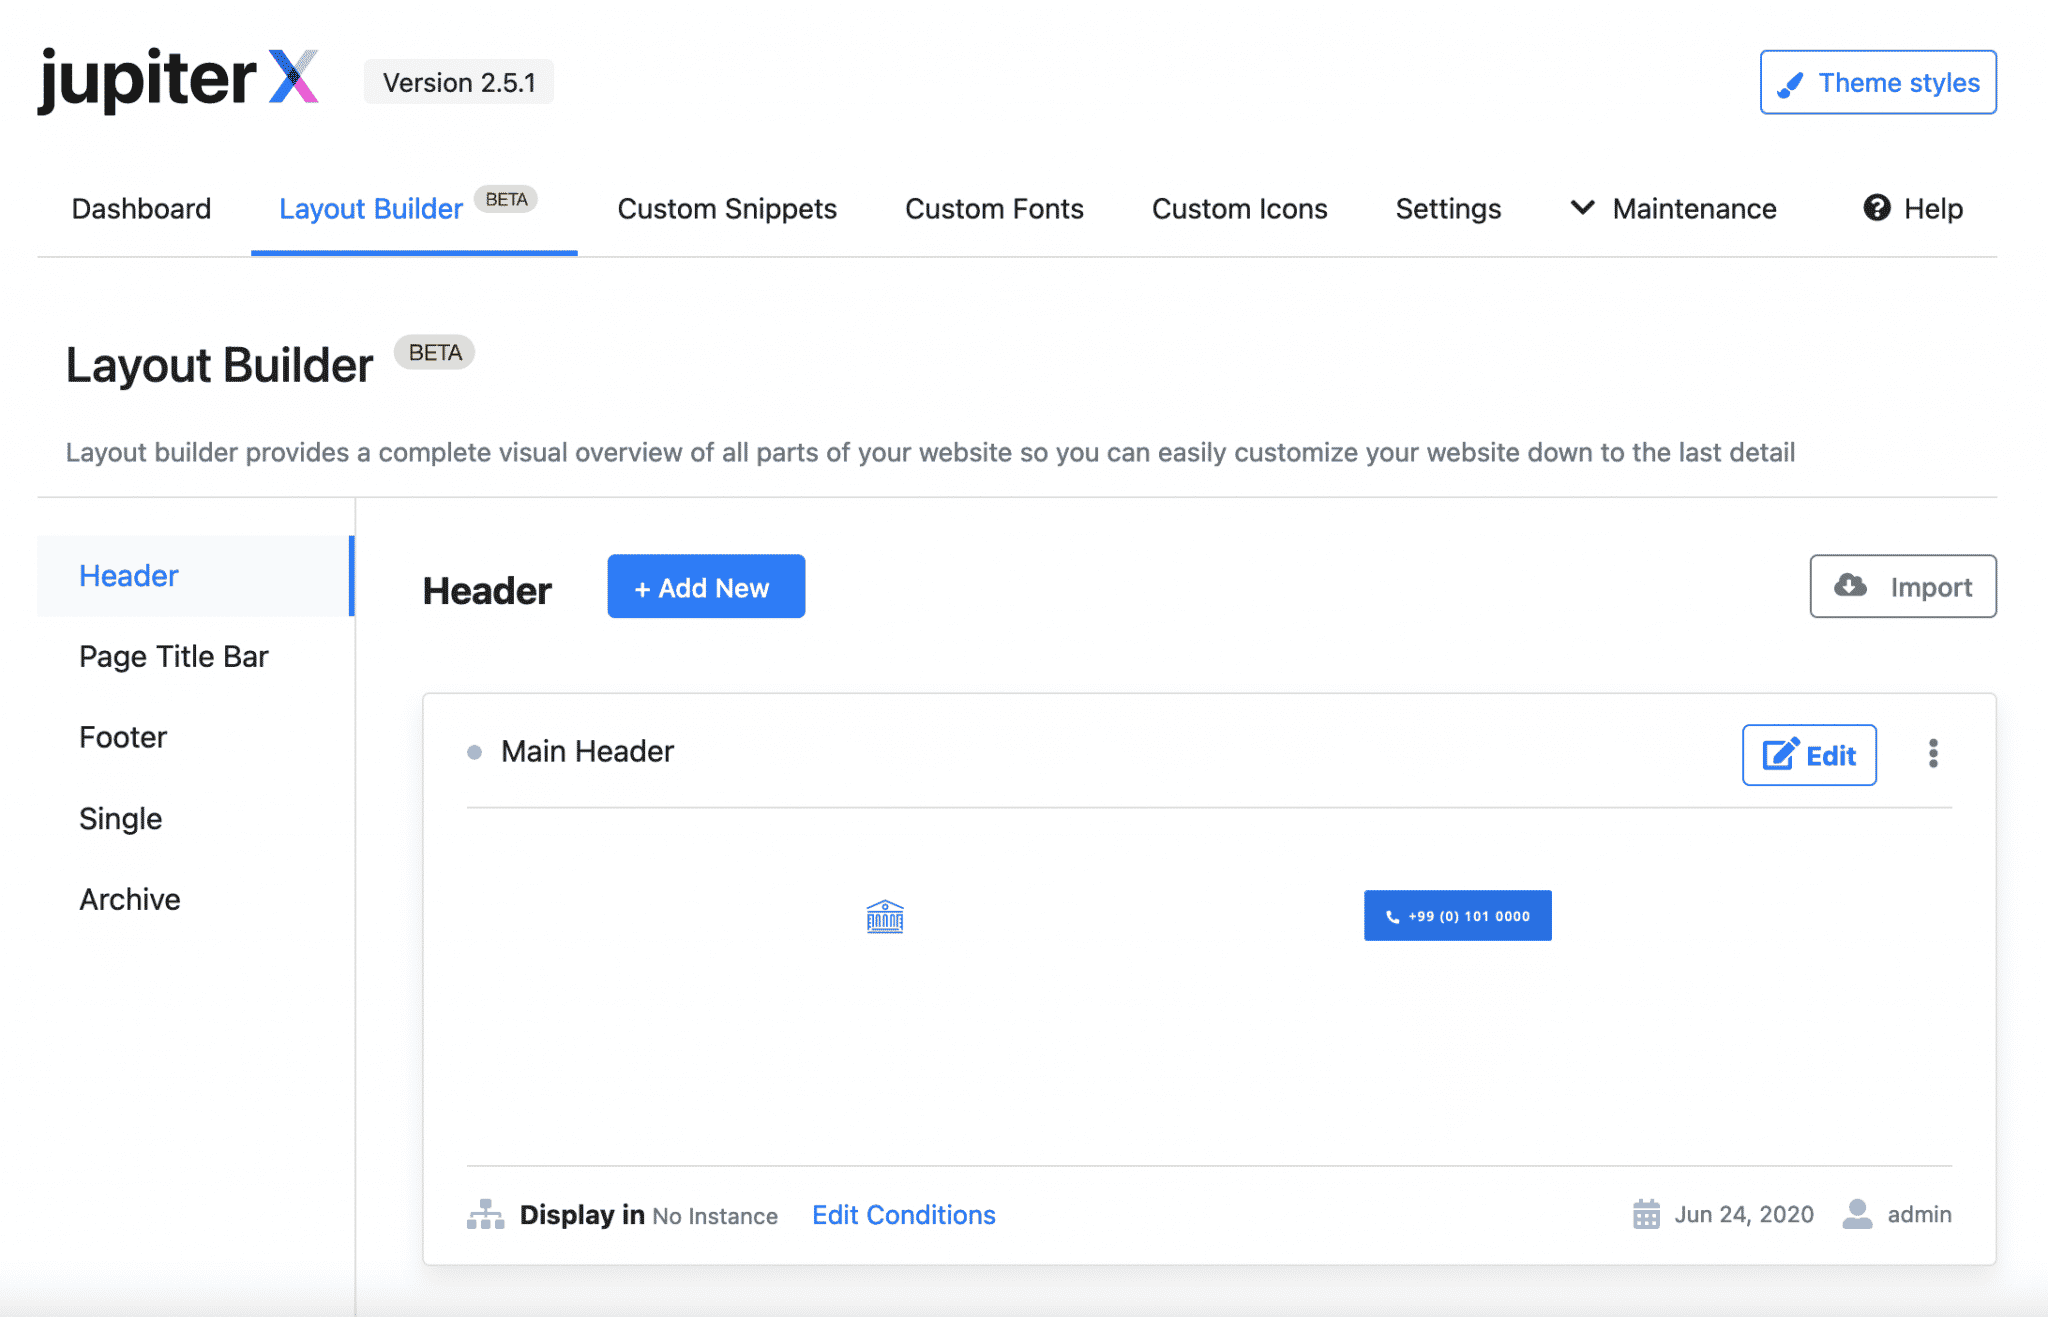
- Layout Builder visually presents all parts of your site, and allows you to create.
- Custom Snippets, to add custom code snippets.
- Custom Fonts, to integrate the font of your choice.
- Custom Icons, to do the same with custom icons.
- Settings gives access to settings such as activating a cache, anonymizing your IP address if you use Google Analytics etc.
- Maintenance presents, among others, the templates proposed by Jupiter X2. It is also here that you can revert to a previous version of the theme or plugins in case of a bug (rollback versions) etc.
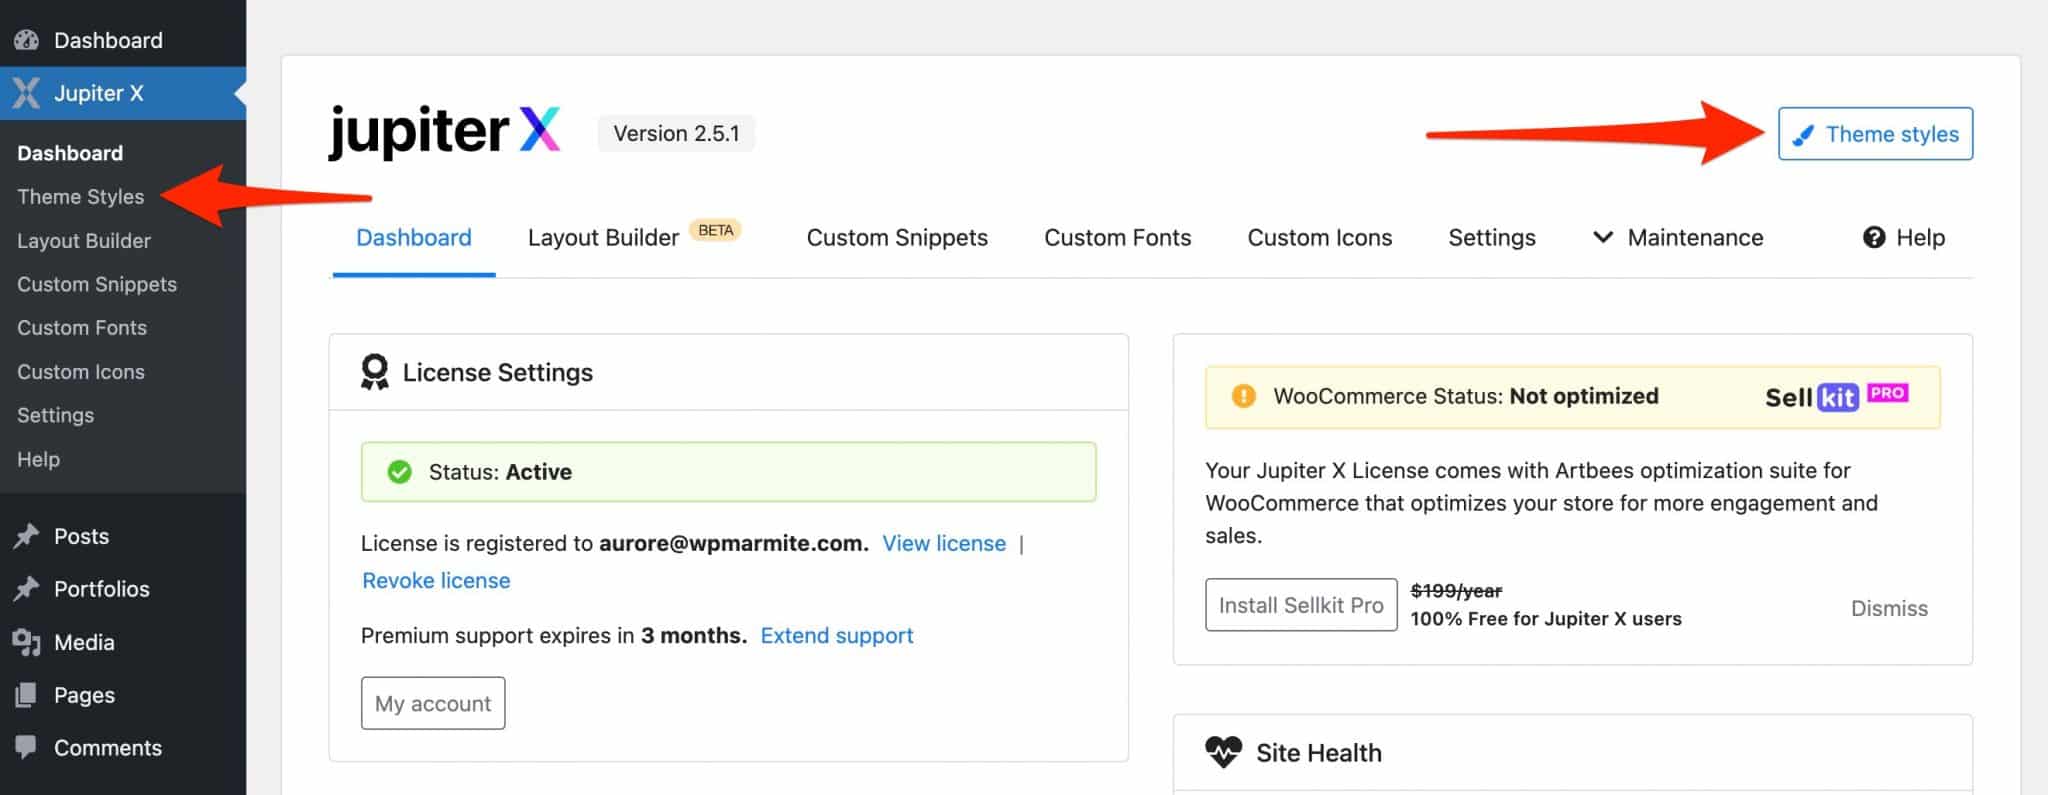
Finally, the blue “Theme Styles” button, located at the top right of your dashboard, redirects you to the WordPress Customizer.
Here you can customize the style of each of your site’s pages (we’ll come back to this).
To summarize our first steps, we can say that the developers have made sure that we don’t get lost among the menus and submenus, and it’s rather successful: we are quickly getting our bearings.
You should also know that the WordPress side menu has been lightened. Nicolas, who wrote the initial version of this article in 2016, explained at the time that 13 types of custom content were added during installation!
During my test, I just came across the Elementor and ACF settings menus. The theme has been on a good diet in the meantime!
All good for you with the theme so far? Now it’s time to customize it.
From now on, you will really start building a site that looks like you.

How to customize Jupiter on WordPress?
How to add site demos (Jupiter templates)?
To customize your content on Jupiter X2 (the theme, not the planet), you first have over 450 templates created with the Elementor page builder.
They are classified into 16 categories covering several areas: corporate, blog/magazine, food and beverage, sports, travel, retail, fashion, beauty, events, and more.
In short, there’s something for everyone, which ensures that you can create a site that fits the vast majority of niche markets.

Of course, you will have to make modifications to meet your expectations, but starting from a pre-designed base will save you a lot of time.
Visually, we can say that the demos are beautiful and successful. Artbees lists them on this page, and I’ve put 3 examples below, to give you a first idea:


As you can see, these demos showcase the possibilities of the theme. Moreover, it is then very easy to import them in their entirety, or partially (two clicks are enough).
To do this, go to the Jupiter X2 dashboard, in the “Maintenance” tab. Click on “Readymade websites” to land on the demo websites presentation page:

I particularly liked the following elements:
- The search bar and search filters to help you get your hands on a specific template. I remind you that there are more than 450 of them, it can be useful.
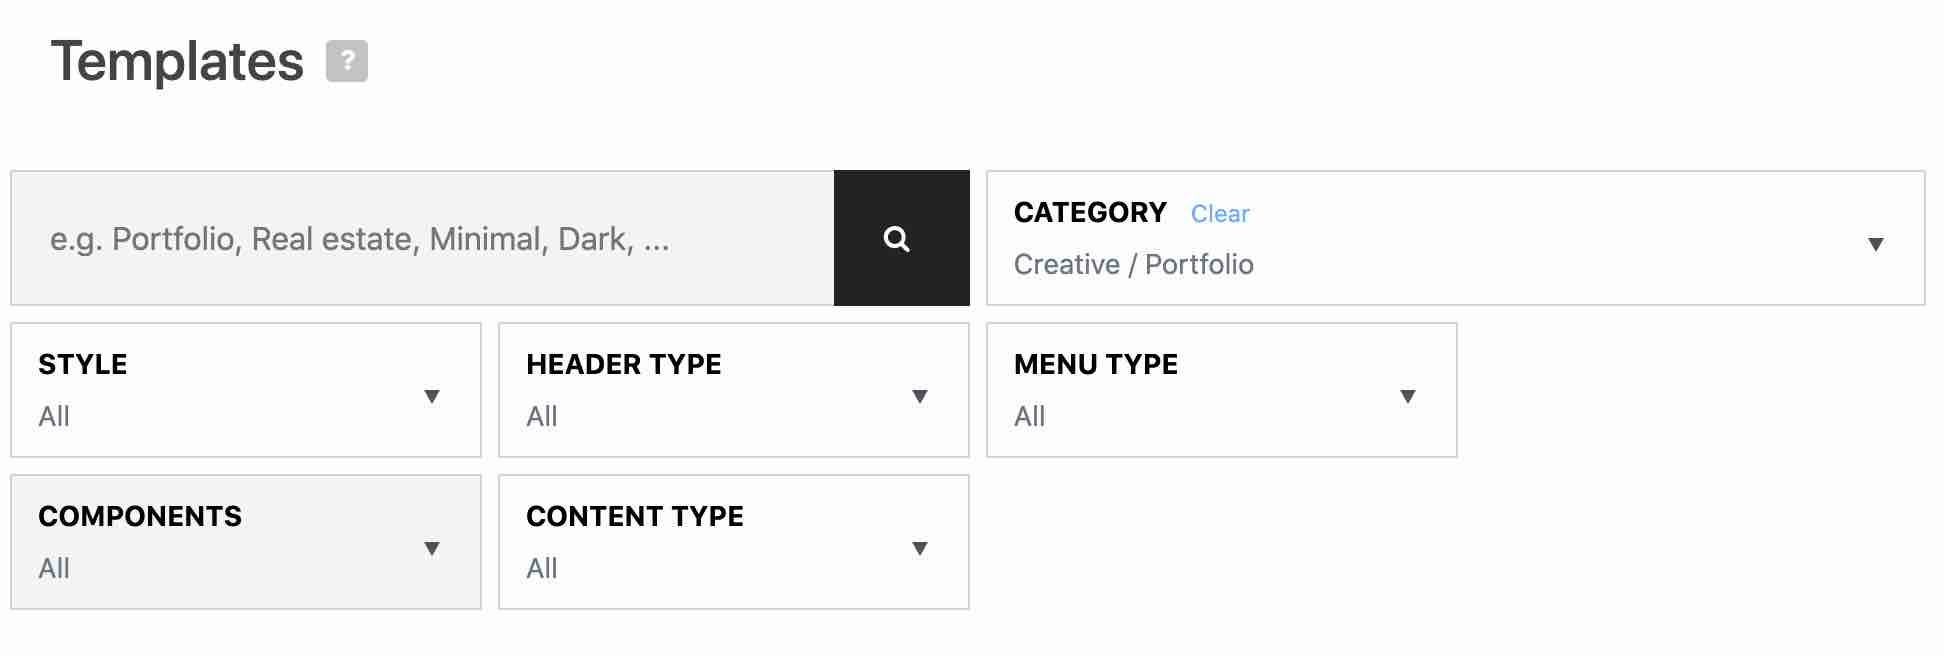
- The presence of a PSD file for each template, which you can use if you want to modify certain graphic elements on PhotoShop.
- The possibility to preview a template before installing it.
- The fact that the installed template is visible at the top of the dashboard. Convenient to avoid us looking for it for ages, if we want to replace or delete it.

In the end, the import process went perfectly on my local test site. For your information, it took about 2 minutes for the whole Accountant demo to be imported.
I noticed no bugs and no loading problems. As for the online page, there were no problems (no absence of images, text, misalignment etc.). And of course, it looked exactly like the demo previewed just before. 😉
Now your site and all its pages are active. Next step: the global settings for the appearance of your WordPress site.
Browse examples of websites built with the JupiterX WordPress theme on BeautifulPress.
How to customize the overall style of your website with Jupiter X2?
An Elementor-style customization tool
Jupiter uses the WordPress Customizer to allow you to customize the overall look of your website.
The following elements can be modified, among others:
- Logo and favicon
- Typography
- Colors
- Header, footer and sidebar
- Comments
- Custom pages: blog, 404, maintenance, search, portfolio etc.
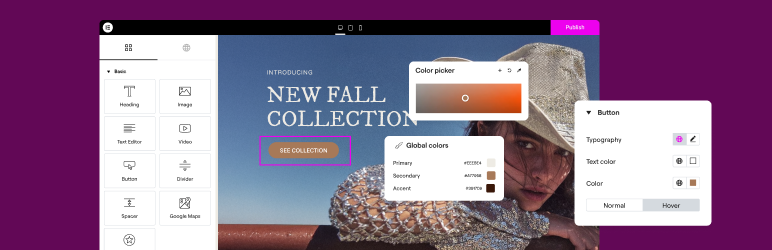
In fact, take a look. The designers of Jupiter X2 have even gone into great detail and used the same design as the Elementor editor:

It is important to know that the Customizer is very useful to configure general settings applicable to your entire site (menus, colors, logo etc.), especially because you can have a real time overview of the changes made.
Not all themes use it. Personally, I like it when they do.
It allows the user to land in an environment they already know, so they don’t have to get their bearings again.
How to use the Jupiter X2 Customization Tool?
To see what it looks like with Jupiter, go through the Jupiter X > Theme Styles menu, or through Appearance > Customize.
If you’re familiar with the visual appearance of the Customization Tool, you won’t be too surprised at this point.
Beyond the native settings offered by WordPress (Site Identity, Home Page Settings, Menus, Additional CSS etc.), you will still come across a dozen additional submenus.
Page-by-page settings also possible
Apart from the Customization Tool, it is also possible to fine-tune some settings individually, for each page or article.
Once in the WordPress content editor, you will see a dedicated box at the bottom of your page:

You can act on the following elements:
- The header, with the possibility to activate/deactivate it, or to assign a custom header to your page/post. Disabling your header can be useful if you want to create a landing page, for example.
- The body of your page (Main), with for example the possibility to display your content in full width, to assign or not a sidebar, to set the inner and outer margins (padding) etc.
- The Title Bar: you can display it or not, add a subtitle and a breadcrumb trail.
- The footer, with roughly the same options as for the header.
If you have a sharp eye, you may have noticed the following message on the animated image above: “It is recommended to use the new Layout Builder feature” (meaning: rather than going through the per page options).
So let’s find out what’s behind the Layout Builder right away.
How to use the Jupiter X2 Layout Builder?
The Layout Builder is a new option that appeared with the release of Jupiter X2.
It is a sort of Jupiter adaptation of the WordPress website Editor.
Thanks to the Layout Builder (accessible from Jupiter X > Layout Builder), you have direct visual access to certain parts of your site (header, footer, custom pages, etc.) and can directly modify them.
For example, you can create and edit:
- Archive pages
- 404 page
- Maintenance page
- Labels page
- Categories page
- Search page
- WooCommerce pages: checkout page, cart page, thank you page, product page, login page etc.
Customize your layouts with advanced conditions
The Layout Builder also allows you to apply advanced conditions to your different layouts.
This means that you can, for example, use a different header or footer on a particular page. Another option is to display two different pages depending on the type of user (if they are logged in or not, for example).
To customize the page, click on Edit Conditions and add one of the proposed conditions:

Going even further with Elementor
You’ll see it in use: as soon as you want to add a new part to your site (e.g. a new header) from the Layout Builder, you’ll be redirected to the Elementor interface.
The same is true if you want to edit a particular page from the demo site you have installed.
If you go to your Pages > All Pages menu on the WordPress dashboard, you will see that they were all created with Elementor.
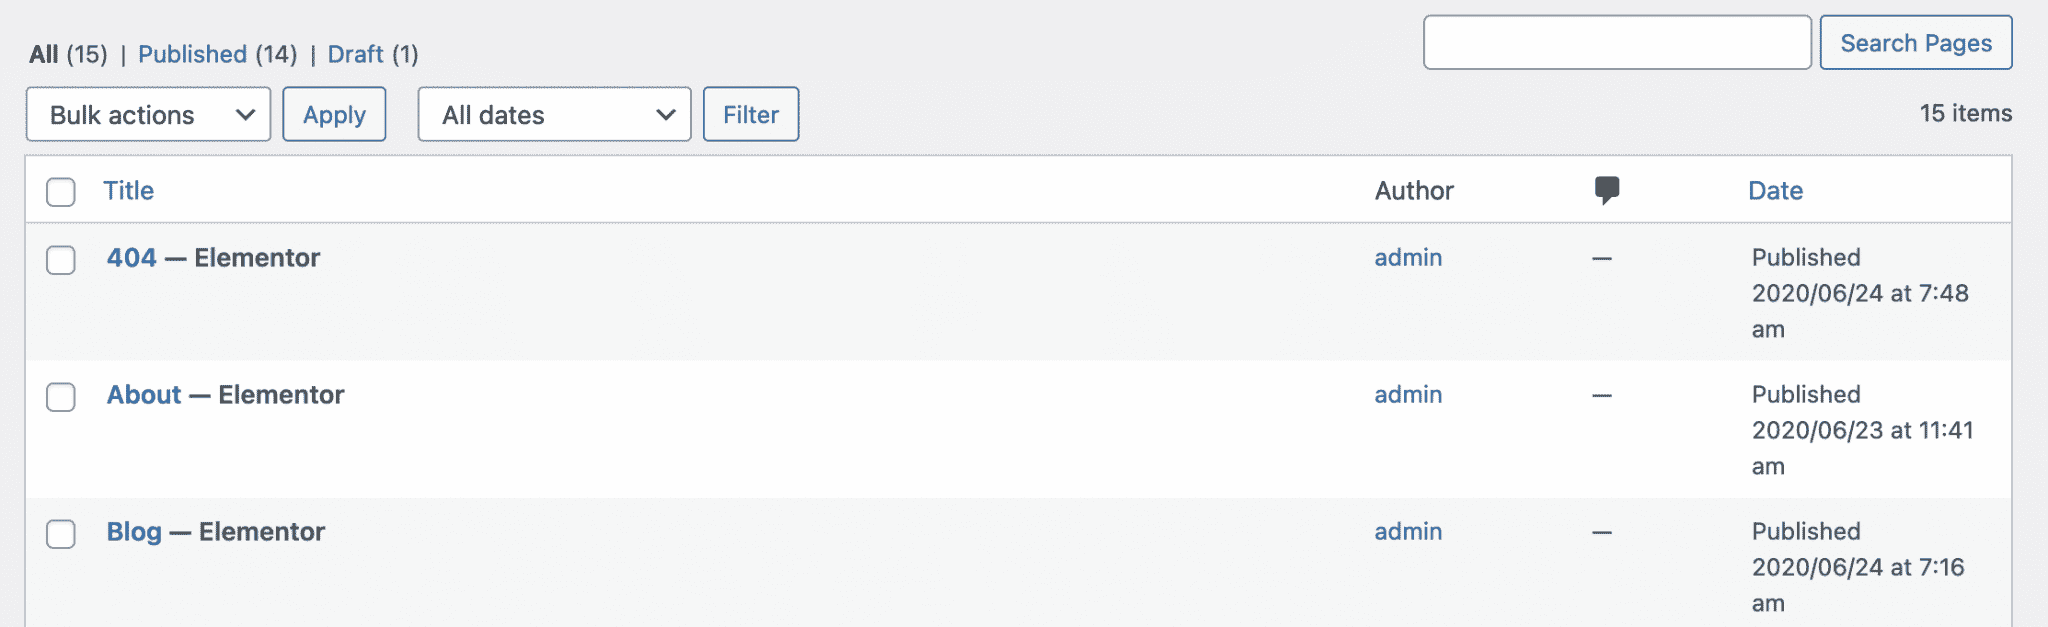
Logically, you will be able to modify and customize them using… Elementor.
When WPBakery had the wind in its sails
If Elementor and Jupiter X2 are now working hand in hand, it was not always the case.
From its launch in July 2013, until the end of 2018, the Jupiter theme first embarked the page builder WPBakery.
Specifically, the developers had preferred to include a modified version of WPBakery, which contained all of Jupiter’s exclusive modules (more than 80 in total).
The formatting possibilities were then correct, explained Nicolas, in the first draft of this article.
On the other hand, the developers had deactivated the site building as “public interface” (front-end). This was a serious hindrance to use, since everything was happening on the administration (back office, without the possibility of viewing the changes made).
But that was before. At the end of 2018, Artbees launched Jupiter X with a major evolution: the replacement of WPBakery by Elementor. Since then, Elementor is still there, and well there on Jupiter X2.
Elementor is the flagship page builder of the moment. It has more than 5 million active installations on the official directory and its users praise its flexibility, ergonomics and intuitiveness.
It’s really a very powerful and user-friendly tool. Moreover, Alex has been using it since 2016 to build some pages on WPMarmite… and he can’t do without it anymore!
How does Elementor work?
If you recall the beginning of this article, you remember that the Jupiter theme requires the installation of Elementor (its free version, not the Pro).
On top of that, the theme comes with two plugins that offer their own widgets (ready-to-use modules to add Titles, buttons, text, images etc.).
- Raven: Jupiter’s in-house plugin adds about 50 new widgets. It is integrated in the Jupiter Core, so you don’t have to install anything on your side.
- The Jet Plugins: presented in our post about Crocoblock right here.

In the end, you end up with nearly 90 more widgets than the free version of Elementor.
Few of them are redundant and will help you set up testimonials, price tables, forms, portfolios and more.
Another interesting fact: Jupiter X2 also adds its own ready-made page sections, divided into 18 categories:

You will find, among other things, templates for price tables, testimonials, About sections. But also headers and footers. That’s pretty handy, since the free version of Elementor does not allow you to customize them.
On the other hand, you can also access other features normally only available in Elementor Pro:
- JetPopup will help you design your popup windows. By the way, ArtBees is planning to offer in a future version of its theme a feature to create your popup windows natively, without having to depend on Elementor Pro or JetPopup.
- The “Form” widget of Jupiter X2 will help you create a contact form, or a login form.
- The JetMenu plugin will help you create a mega menu.
Finally, to use a particular widget, everything happens on the front-end (what your visitors see) of your site.
Like most page builders, Elementor is drag-and-drop and allows you to manually resize the content of your page.
To learn more about how to use it, I refer you to the guide we dedicated to it on the WPMarmite blog.
Integration with plugins
To customize your site without coding, WordPress also has its secret move: its famous plugins.
The official directory lists more than 64,317 of them and some of them are required to work with the Jupiter theme.
Among them, remember, there are already Elementor and ACF:
Find in this article our Top 25 plugins to be installed now on your site.
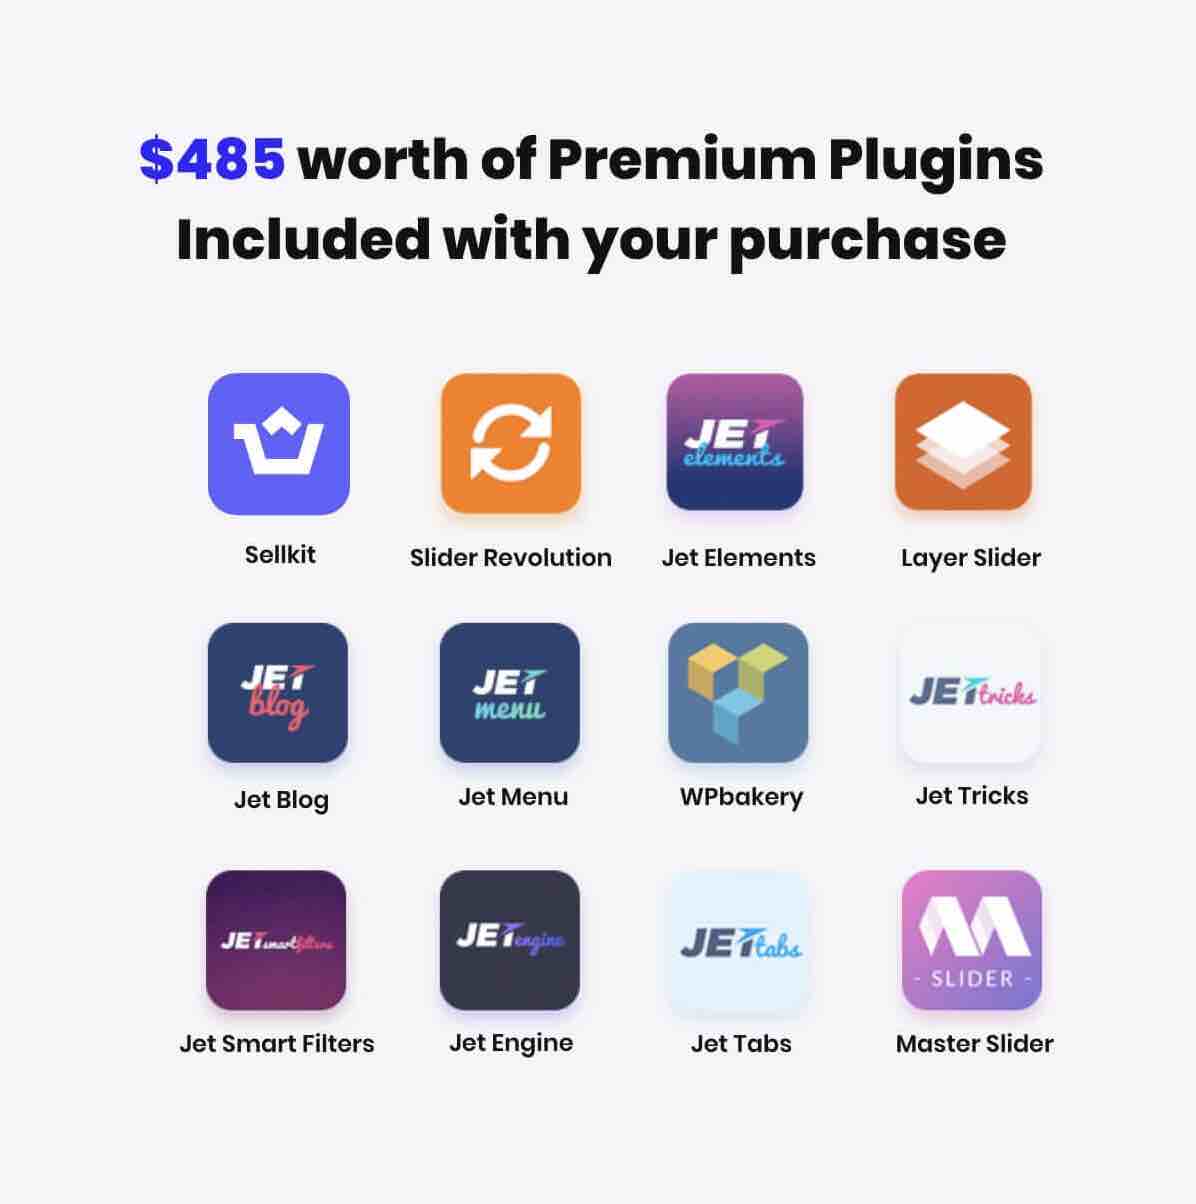
In addition, Jupiter X2 also offers you a selection of 15 optional plugins, to be installed only if you need them.
As the theme states, if you enable many plugins, you are more likely to alter the loading speed of your site and, therefore, provide a less pleasant user experience for your visitors. Think carefully before you act. 😉
Some of these optional plugins include for example:
- Premium slider plugins like Slider Revolution.
- Plugins from the Jet suite (e.g. Jet SmartFilters, JetMenu, JetTabs etc.) mentioned earlier in this article.
- Plugins with a more “marketing” focus such as SellKit Pro or GrowMatik.
You will find each of them in the following menu: Jupiter X > Dashboard > Maintenance > Bundled Plugins:
Note that Jupiter X2 also offers its own version of WPBakery Page Builder, if you don’t want to use Elementor. The theme also includes the Pro version of ACF.
In total, with this flurry of premium plugins, the Jupiter X2 theme claims to offer plugins worth a total of $485.
Finally, Jupiter X on WordPress is compatible with many classic plugins such as WPML, bbPress, Yoast SEO, Gravity Forms, Contact Form 7 etc.
Finally, the most recent version of the theme (Jupiter X2) puts special emphasis on one of the most famous plugins in the WordPress ecosystem: WooCommerce.
Find out more about this in a dedicated section, just below.
Jupiter X2: a dedicated companion to WooCommerce
One of the goals of Jupiter X2 is to reduce dependencies on third-party plugins by offering its own native features.
You could have a first practical insight of this will when I presented you the Layout Builder. Remember: it allows you to customize every corner of your WordPress site (from header to footer), without having to use Elementor Pro’s Theme Builder (if you want, of course).
The creators of Jupiter follow the same roadmap when it comes to ecommerce. Jupiter X2 has been delivered with a lot of features dedicated to WooCommerce, with the aim of offering you options normally only available through third-party plugins.
For example, Jupiter X2 includes a feature to create advanced filters on your products, or the ability to display different variations of your products based on the criteria of your choice (e.g. size, color etc.).

But that’s not all. Jupiter X2 goes even further in other fundamental aspects that are very important when you want to customize a WooCommerce store… and make sales.
A supercharged checkout page builder
One of the major takeaways is the ability to customize your checkout page with a drag and drop editor.
You can organize and move the fields of your choice (address, email, name, first name etc.).
The designers of Jupiter X2 have also taken care to provide the most complete user experience possible, with options to improve conversions (a specific action you want your visitor to perform):
- Customer form fields can be pre-filled automatically, to avoid cart abandonment.
- You can set up an express checkout, like the one offered by Amazon. Most payment gateways are offered by Jupiter X2 (Stripe, PayPal, Amazon Pay).
- You can increase the average basket by integrating an order bump (an offer for a product on the payment page), but also make upsells (offer a product more expensive than the one about to be purchased) and downsells (product less expensive than the one your customer was interested in at the beginning).
- It is possible to create personalized offers and coupons based on certain conditions (products purchased by the customer, date of the last purchase, products viewed, etc.).
- You can automatically apply coupons according to the type of customer who wants to buy from your online store (new customer, loyal customer, inactive customer etc.).
Furthermore, you can also customize a Thank You page, which will be displayed immediately after a payment is made by a customer.
Use it to summarize the order placed, add testimonials or propose products related to the last cart paid by the buyer.
In the end, you can design a sales funnel from A to Z, by customizing the entire customer journey, from the discovery of your WooCommerce store to the purchase.
To do this, activate the SellKit Pro plugin, available in Jupiter X > Dashboard > Maintenance > Bundled Plugins. To learn more, watch this video presentation:
Various ecommerce templates
In order to provide a great customer experience, the first step is to have a WooCommerce store worthy of the name.
To avoid starting from scratch, Jupiter X2 offers more than 60 ecommerce templates dedicated to many niches (jewelry, butchery, pastry, decoration, bookstore, sports etc.).
You can find all these templates in Jupiter X > Dashboard > Maintenance > Readymade Websites.

That’s it, you’re done with this broad overview of Artbees theme customization. Now, let’s move on to another major area: the user experience.
In the next part, we’ll focus on 3 key themes: theme loading speed, SEO and responsive.
Performance, SEO, responsive: zoom on 3 major aspects
Performance
The loading time of the pages of your theme has an impact on two main aspects:
- SEO (Search Engine Optimization): Google, the most used search engine in the world, supports this criterion to rank a page in its search results. However, don’t panic: this criterion is unlikely to have a negative impact on your ranking in the search results pages (unless your site is ultra-slow). It is better to focus on producing high-quality content and getting backlinks.
- And above all, the user experience, i.e. the quality of the experience lived by Internet users on a website. If a page loads very slowly – for your information, Google recommends a loading time of less than 3 seconds on smartphones – you risk scaring your visitors away and increasing your bounce rate. At the same time, you risk sending a very bad signal to Google, which doesn’t like it.
Initially criticized for its heaviness, as Nicolas detailed in the initial version of this article, Jupiter X has since improved, fortunately.
Today, performance has even become one of its key arguments. On its ThemeForest presentation page, the designers of the theme specify that it is “extremely light” and that “each line of code is optimized”.
In its settings, Jupiter X even goes so far as to offer really advanced options, such as cache functions.
To give you a first idea, I had fun testing the loading speed of one of the templates (the one called Church) of Jupiter X, using the Pingdom Tools tool. And the result was quite conclusive:

However, I would like to point out: don’t take this data for granted. If you’re experimenting at home, you might have completely different data (e.g. poorer performance) depending on your hosting, or the plugins you use with the theme.
Remember: the more you tend to overload it, the more likely it is that the page loading time will slow down.
SEO
Let’s move on to SEO (Search Engine Optimization).
SEO is a broad term that refers to the techniques that will allow you to try to rank the pages of your site as high as possible on a search engine (Google, Bing, Yahoo etc.).
I’m talking about “ranking pages” on purpose because a search engine does not rank a whole site, but pages.
So here, no surprises or breaking news to reveal. Like all its competitors, Jupiter X2 is a classic. It claims to be “optimized for SEO” (all the themes hammer that). That is to say that it claims to follow best practices in this area, especially in the code.
It’s difficult to check everything point by point, but what we can already see is that it uses a correct structure of title tags (the hn titles).
While inspecting the code of two demos, I noticed that it only used one h1 title per page (this is a very good SEO practice, bravo!) and that the hierarchy of titles (h2, h3, h4) was respected behind.
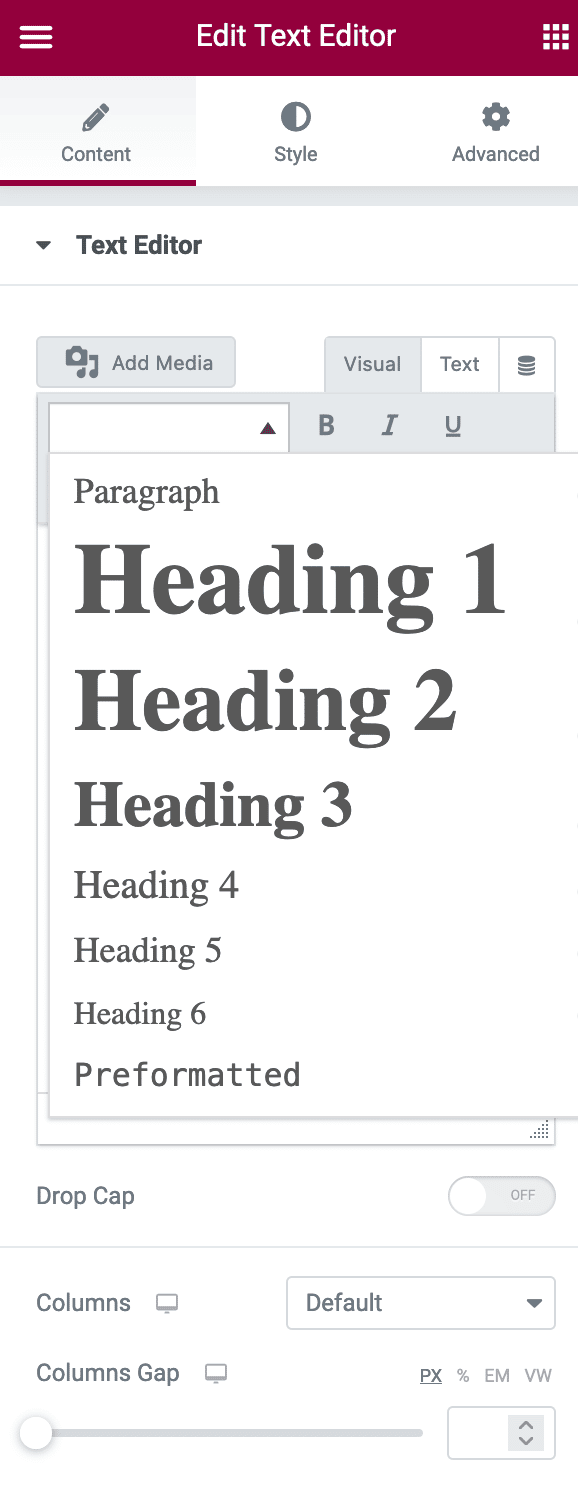
Now, for SEO, most of the work is in your hands. You can already act on some elements using Elementor, for example on those famous title tags within your content:
Then, nothing prevents you from activating an SEO plugin to help you optimize your content. We’ve tested a few of them on the blog, if you feel like checking them out:
- Yoast SEO: the one used on WPMarmite.
- Rank Math: one of Yoast’s main challengers.
- SEOPress: a 100% French quality plugin, cock-a-doodle-doo! (Remember, WPMarmite is from France… ;-))
Responsive
Responsive is a technique that consists in making your site readable on any type of device used by your visitors (computer, smartphone and tablet).
Like SEO, it is a strong argument for theme developers, who do not hesitate to mention that their favorite theme is responsive.
Given the stakes, they are understandable as more and more Internet users now use their smartphone to access the Internet.
So you might as well tell yourself that your site has to perfectly fit a smartphone screen!
If you’re planning to get the Jupiter X2 theme, you shouldn’t have any worries about that. The theme’s templates fit perfectly on all screens.
To make sure they do, you can first check them out with Google’s Mobile Optimization Test. I have no obstacles to report:

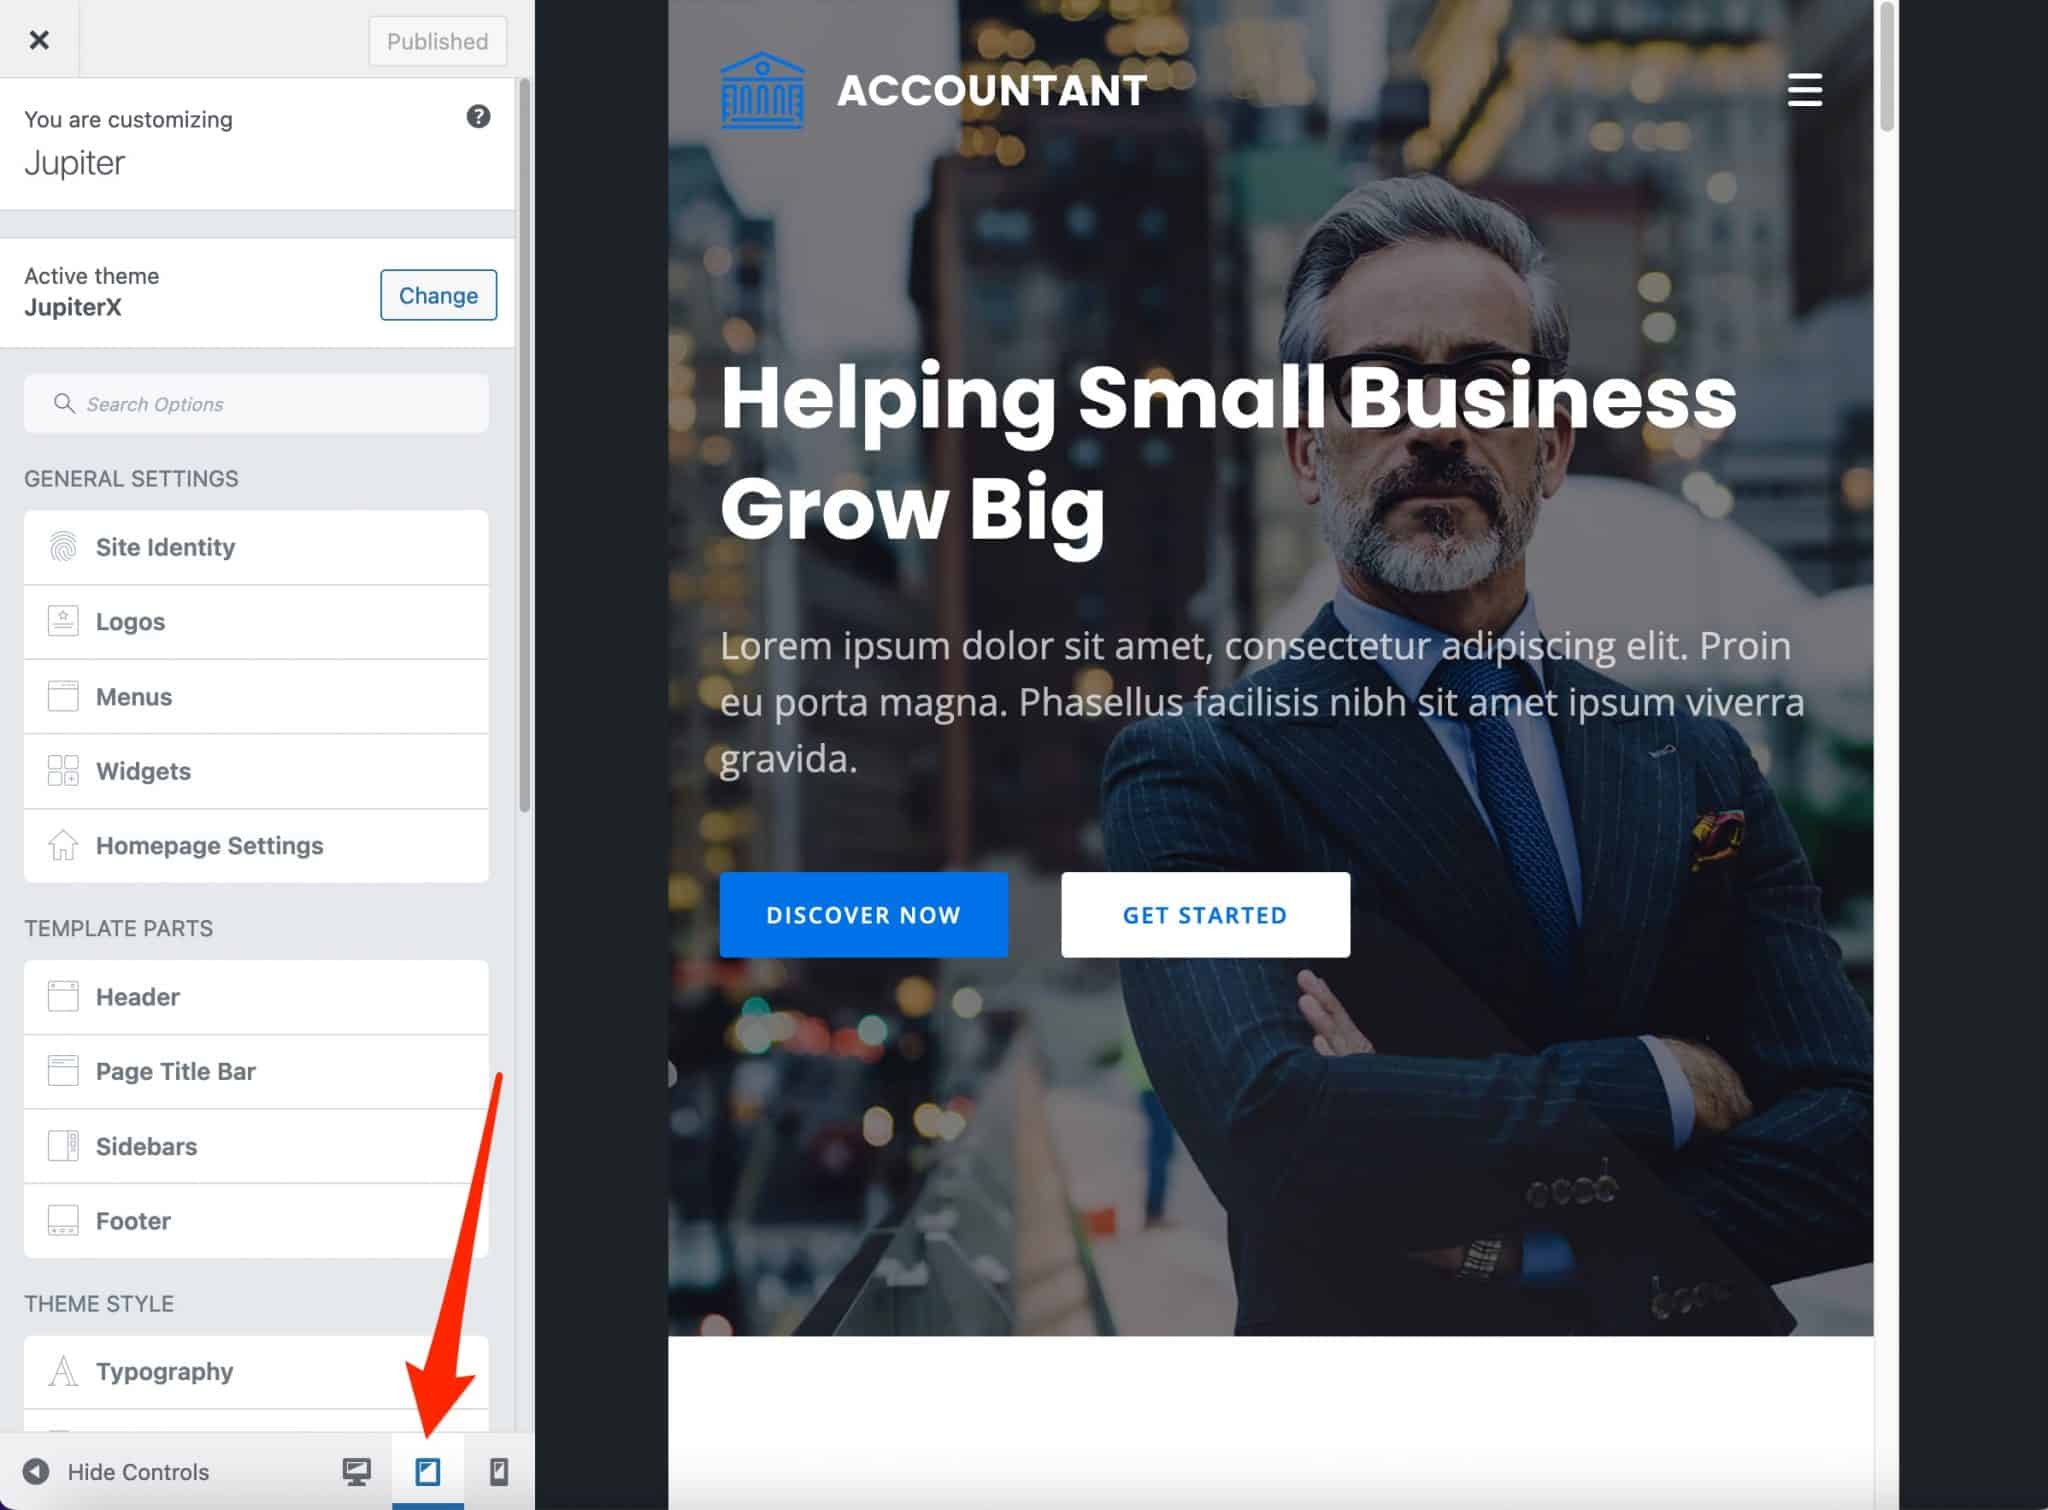
Next, you can use the display control icons at the bottom of the Customization Tool to check the correct appearance of your pages, depending on the device used:
Finally, you can of course make even finer adjustments using the page builder you are about to use.
Elementor, for example, allows you to manage many responsive aspects ranging from font size, to the display of certain elements depending on the type of device used, to the management of internal and external margins.
Documentation and support
When you get started with and discover a theme, it can happen that you struggle at certain times. How does this or that option work? Where is this setting hiding?
In these moments of loneliness, we appreciate to have a well-documented and well-done documentation.
This is the case for Jupiter X2, which first offers detailed written tutorials, supported by screenshots.
To help you, you can also use the videos from the Youtube channel of Artbees Themes.
Even if there are very few videos related to the X2 version of Jupiter for the moment, you can still find short and instructive tutorials that can help you, like this one:
Wait, it’s not finished. 😉 A forum is also available, as well as a private Facebook group with around 1,500 members.
Finally, if you still feel stuck, you can always ask for support directly, either by using a chat or by sending a direct message.
A Contact Support button on your dashboard is provided for this purpose.
How much does the Jupiter X2 theme cost?

The Jupiter X WordPress theme is sold for $59 on the ThemeForest platform. There is no free version.
This price is valid for 1 site only. It includes 6 months of support and future updates of the theme.
This selling price is in the average range practiced by its premium competitors, that you will find generally sold at $59 or $60.
So, Jupiter theme, a good deal?
In the first version of this test, Nicolas concluded like this:
It’s still a crazy good thing to be finally surprised by a premium theme!
Six years later, I share his opinion. The Jupiter X2 WordPress theme has seduced me.
The switch to Elementor, made at the end of 2018, was clearly a good decision from the theme’s designers. Compared to WPBakery, users now have a flexible, intuitive and practical page builder. And that changes a lot.
Compared to the competition on ThemeForest, I found this theme much more pleasant to use than most of its “opponents”, such as Avada and Bridge.
Overall, this is a great find, especially if you have a WooCommerce store. In this case, you will enjoy very advanced and creative features. Frankly, few themes go that far.
On the other hand, keep in mind that in order to really take advantage of Jupiter X2 without tearing your hair out, you’ll need to plan for a steep learning curve.
The numerous options offered can be a strength – with so many choices, you should find what interests you – but also a weakness (beware of the risk of getting lost).
If you are a neophyte, this is a criterion to keep in mind. Even if the dashboard is clear and concise, you will need to familiarize yourself with all the settings. And don’t forget that Elementor is not something you can learn overnight.
If you’re ready to stick with it, you can give Jupiter a chance!
And you, have you tried this theme? What is your feeling? Share it in a comment!

Receive the next posts for free and access exclusive resources. More than 20,000 people have done it, why not you?
Register


Hello from Artbees team and thank you for your thorough and unbiased review of Jupiter X on wpmarmite.com
Hello, you’re welcome 😉